

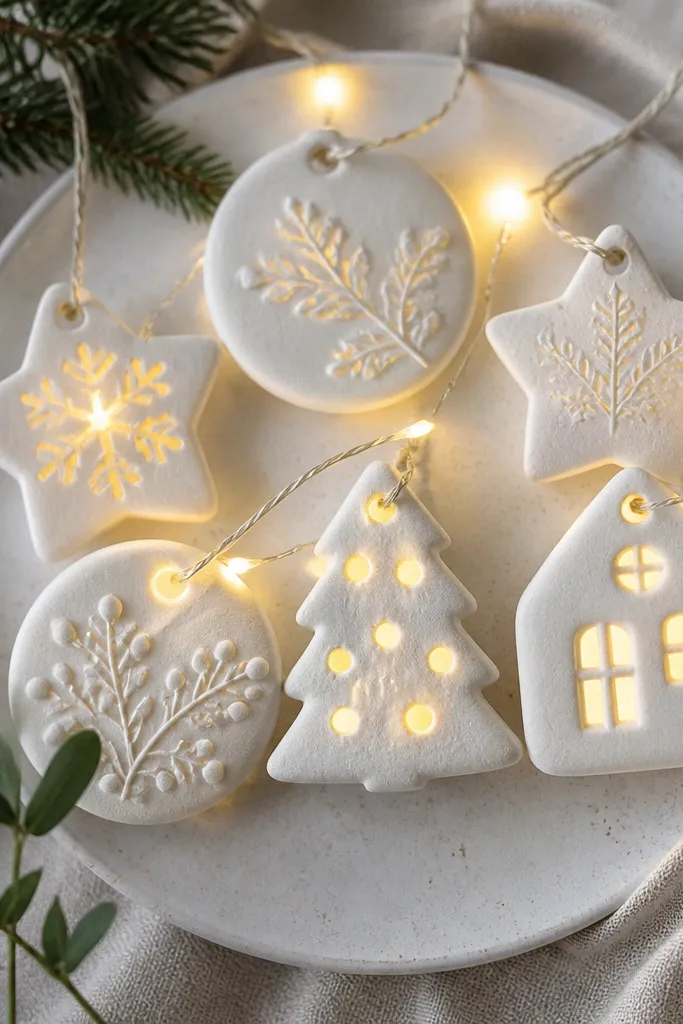
1. Classic Warm Muzzle Reindeer
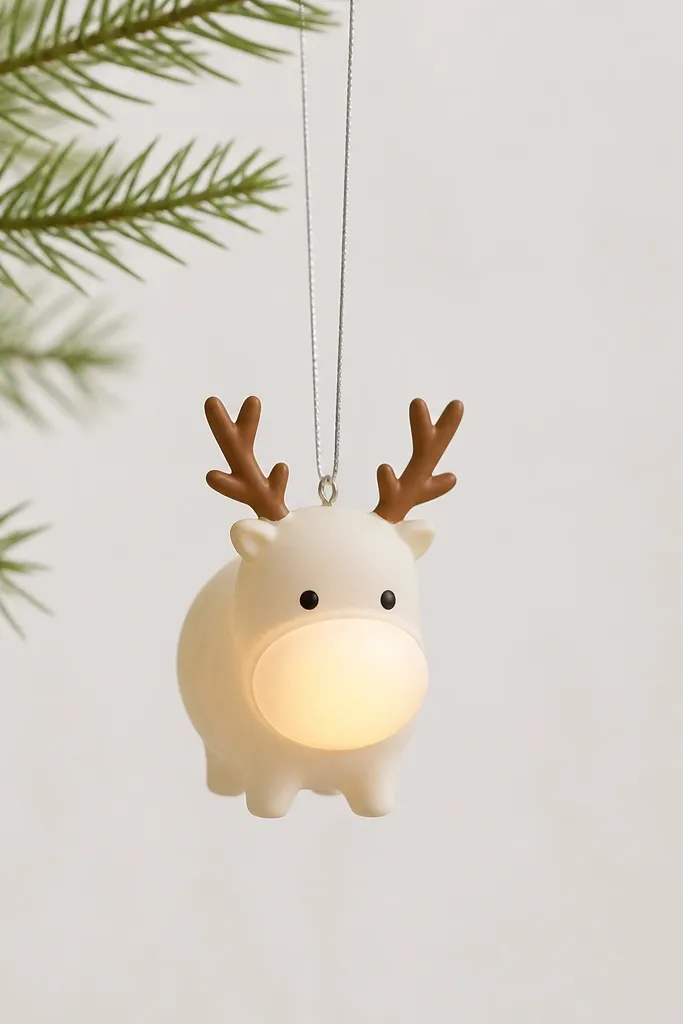
This one looks best when you keep the face simple and let the light do the magic. The body is painted a creamy off-white, then the muzzle area is either left lighter or painted a translucent warm tone so the glow reads like a soft nose. Brown antlers and tiny black eyes give contrast, which keeps it from looking flat on a busy tree. It suits kids' rooms and front porch displays because it reads cozy even in daylight. The glow also forgives small uneven spots on the dough because the brightest area is the muzzle, not the edges.
Pro tipPaint the muzzle slightly lighter than you think; the light will deepen it once the LEDs are on.
Roll your dough to about 1/4 inch thick and cut a reindeer shape with a separate small circle for the muzzle. Use a straw or end of a piping tip to press a shallow cavity on the back where the light wire will tuck, about the size of a quarter. Bake until fully hard, then cool completely. Paint the body cream, paint antlers medium brown, and paint the muzzle area a light warm beige — then apply a tiny dot of black paint for the eyes. Thread warm white mini LED lights through the back cavity, tuck the wire along the cavity wall, and hot glue the wire down so it doesn’t show through the front.
AvoidDon’t paint the whole front dark and then add lights — the glow will look dim and muddy.
2. Snowy Speckle Reindeer With Hidden Wire
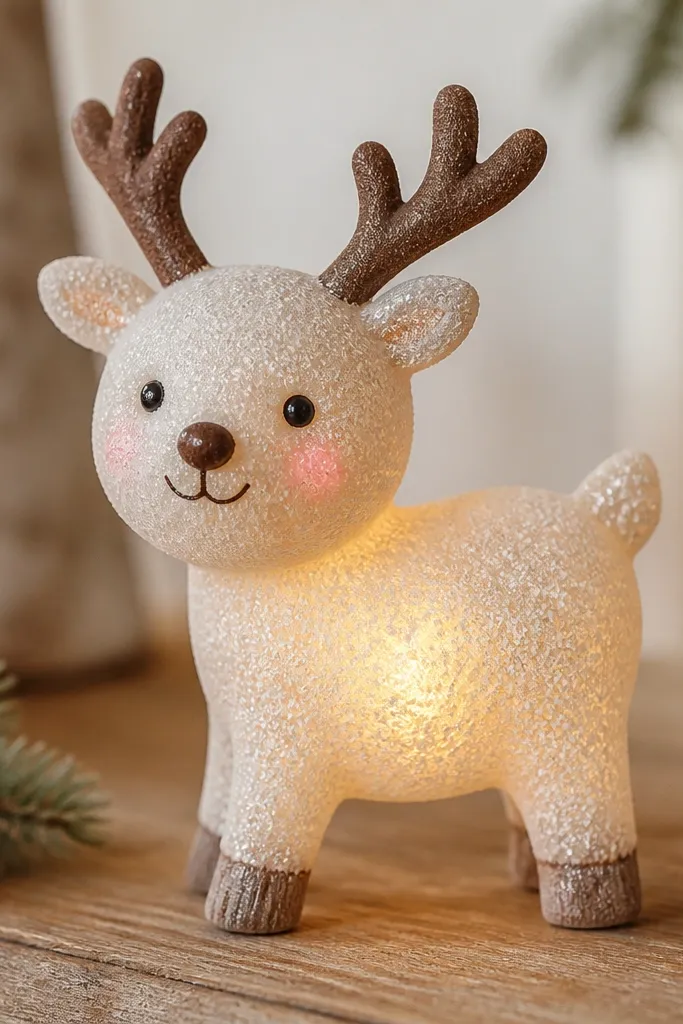
Speckle textures look expensive because they catch light in tiny bursts. I make the reindeer body mostly white, then add a thin wash of gray speckles so the glow feels like winter air, not just a lit blob. Warm LED light placed behind the belly makes the speckles look like they’re sparkling. This style looks great for kids because the face is forgiving — blush dots and simple eyes still read cute. It also hides minor cracks since the speckle pattern breaks up the surface lines.
Roll dough to 1/4 inch and cut the reindeer, then press a shallow oval cavity on the back centered on the belly. Bake fully hard, then paint the base a chalky white. Mix a gray paint with water until it looks like tinted milk, then flick it with an old toothbrush for speckles. Add blush with a tiny dab of light pink at the cheeks and keep the eyes as small black dots. Place warm white LEDs so the brightest spot sits behind the belly cavity, then hot glue the wire inside and cover any glue seams with a thin dough patch on the back.
Use a toothbrush you don’t care about — the bristles will bend, and you’ll get better speckle control.
Skip thick glitter right on the face — it turns the glow grainy and can look messy.
3. Gold Antler Reindeer With Sparkle Halo
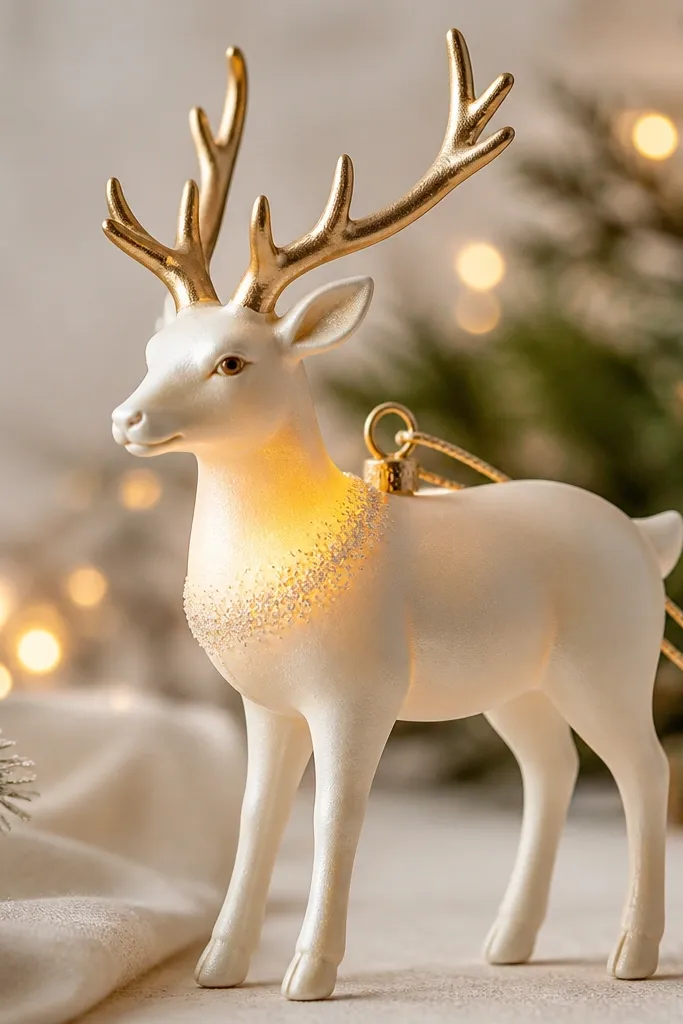
If you want these to look like they came from a boutique store, add metallic antlers and keep the light placement tight. The glow goes behind the chest so it creates a halo effect without lighting up the whole body. Fine glitter in a small ring above the chest reads like a decorative collar when the LEDs are on. This style looks sharp on dark trees and also works for a holiday entryway garland where you see the front from standing height. It flatters the reindeer shape because it draws the eye upward toward the antlers.
Pro tipGold paint looks better when it’s applied in two thin coats instead of one thick coat.
Cut your reindeer and bake at least until it’s rock hard to the touch. Paint the body cream and let it dry fully. Use metallic acrylic gold for the antlers and add a second quick coat only where the antlers curve — that’s where it catches light best. For the halo, press a shallow cavity on the back behind the neck/chest and tuck warm white LED wire there. Before the clear coat, apply a thin line of fine glitter in a ring on the front chest area, centered where the glow will hit. Finish by sealing with a matte or satin clear so the glitter doesn’t clump.
AvoidDon’t use chunky craft glitter — it blocks the light and kills the halo effect.
4. Red Scarf Reindeer With Warm Nose Glow

This is the reindeer my kids pick because it looks like a character. The scarf gives you a bold color block, and the warm nose glow keeps it from feeling like a flat craft. I paint the body white, then wrap a raised dough scarf strip around the neck so it has real texture. The red scarf reads cheerful against the soft glow, and it looks great with ornaments in red, green, and gold. It also photographs really well because the scarf texture catches light even when the LEDs are off.
Pro tipCrimp the scarf ends before baking — it holds texture better than trying after the dough hardens.
Roll dough and cut the reindeer body, then cut two long thin strips for the scarf, about 1/8 inch thick. Press the scarf strips onto the neck area and crimp the ends with a fork so it looks like knit. Press a small back cavity behind the nose for LED placement, and bake until hard. Paint the body white, paint the scarf a medium Christmas red, and outline the face with black paint for a crisp look. Hot glue warm white LEDs into the back cavity so the light shows through the nose area only. Seal everything with a thin clear coat, then add tiny white highlights on the scarf folds.
AvoidDon’t make the scarf too thick or it will cast a shadow over the nose glow.
5. Green Pine Reindeer With LED Belly Bulb
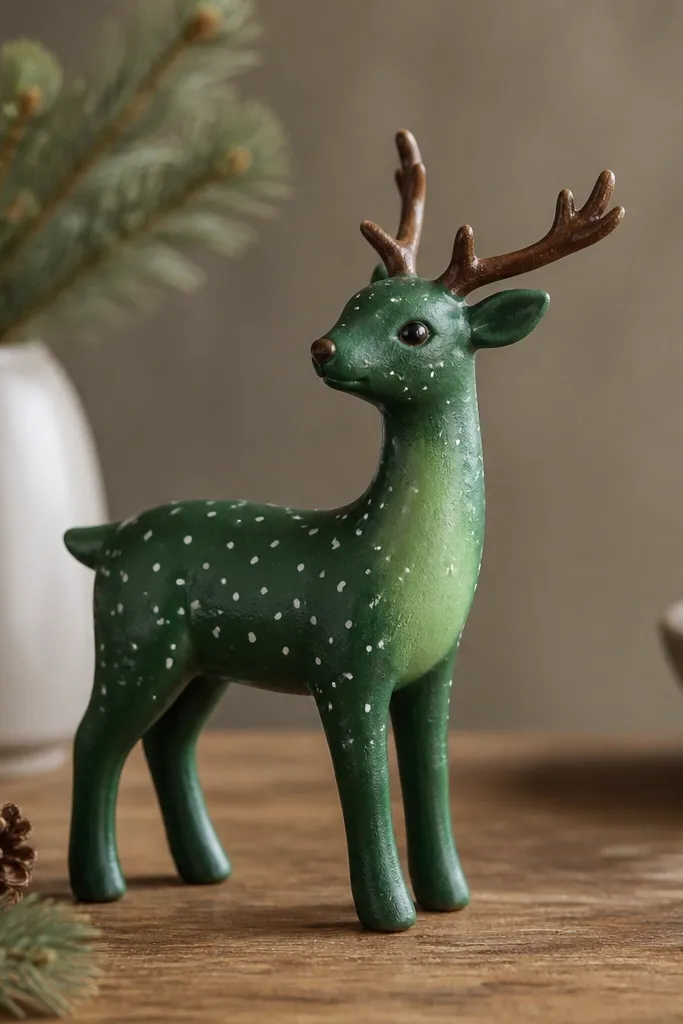
Green looks amazing when the light is placed behind the belly. I paint the body a pine green, then leave the belly slightly lighter so the warm LEDs turn it into a soft “lit” patch. Add small white dots for snow — they look like tiny stars when lit. This style looks best when your tree has lots of ornaments in warm tones because the pine green gives a grounded color. It’s also great for older kids because the face details can be a little more stylized without looking childish.
Pro tipMask the belly with tape edges that are slightly uneven; it looks more like natural light spill.
Cut and bake your reindeer until hard, then paint the whole body pine green. Leave the belly area lighter by either masking it with painter’s tape before painting or painting it later after the base coat dries. Press a rounded back cavity behind the belly and tuck warm white LED wire inside. Add white dot snow with a small brush or a paint pen — keep the dots irregular so it looks natural. Paint antlers brown and add simple eyes. Seal with a clear coat so the green doesn’t rub off when kids handle it.
AvoidSkip neon green — warm LEDs make it look sickly.
6. Black and Tan Reindeer With Subtle Glow
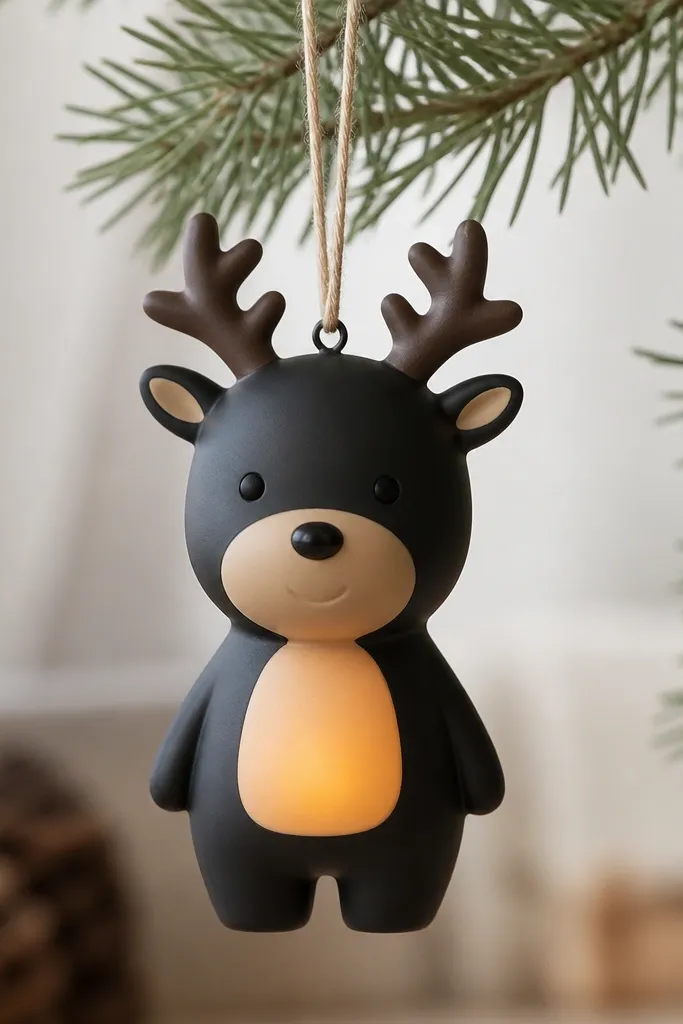
This one looks modern and calm, and it’s a nice change from the usual all-white dough reindeer. The trick is to keep the glow subtle by placing LEDs behind the tan belly only. Matte black absorbs light, so your warm LEDs will look like a gentle lantern rather than a bright spotlight. Tan muzzle and belly add warmth, and it reads classy even for grown-up decor. Kids still love it because the face is clear and the belly “lights up” when the tree lights are on.
Pro tipIf your tan paint looks chalky, add a tiny drop of brown to warm it up before applying the second coat.
Bake hard, then paint the body matte black and let it dry completely. Paint muzzle and belly tan, keeping the edges clean. Press a small back cavity behind the belly and tuck warm white LED wire into that cavity. Hot glue the wire so it stays flat against the back. Use a fine brush to paint eyes and a tiny nose — I keep the nose small so it doesn’t overpower the glow. Seal with matte clear to keep the black from turning glossy.
AvoidDon’t use glossy black paint — it reflects tree lights and makes the ornament look shiny and cheap.
7. Checked Scarf Reindeer With Light Through Window
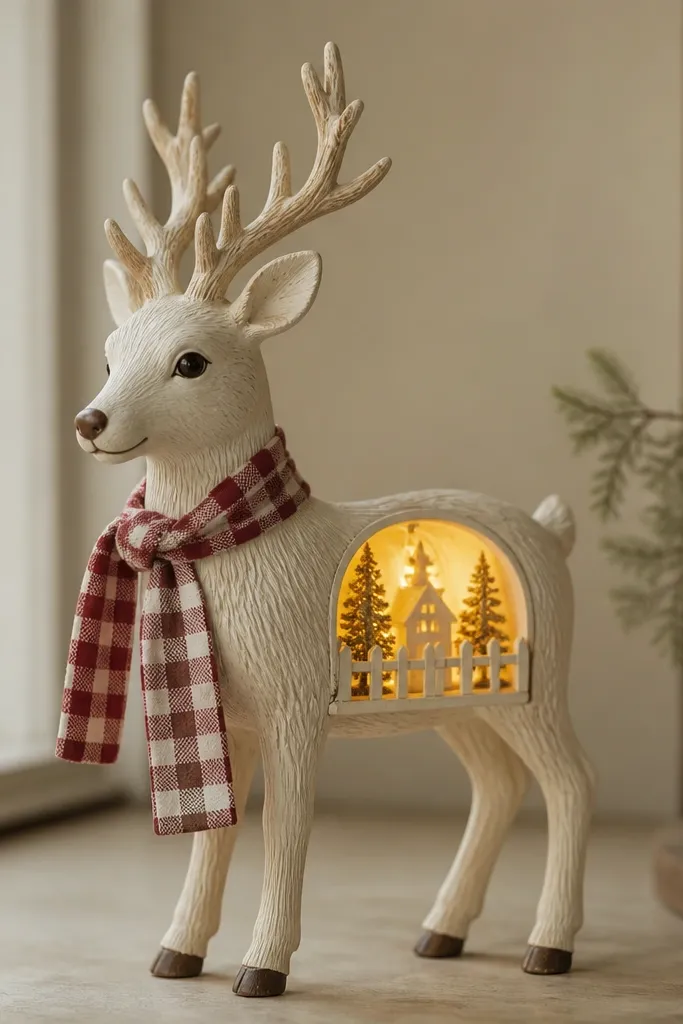
This style gives you a built-in surprise. You still get a front that looks like a regular holiday reindeer, but the light escapes through a small back opening like a tiny lantern. The checked scarf adds pattern without needing a bunch of tiny details on the face. I like this when you’re making a set for a hallway tree because the light reads from the side too. It also works for kids who want “interactive” ornaments since the glow changes how the scarf looks when lit.
Pro tipUse a slightly raised scarf so the checks show texture, not just flat paint.
Cut your reindeer and press a cavity on the back, then cut a small rectangular opening inside the cavity area while the dough is still soft. Bake until hard, then paint the body cream. Paint the scarf raised strip red-and-white checks using a ruler lightly as a guide for straight lines. Paint antlers brown and add black dot eyes. Place warm white LED wire so it points toward the back opening, then hot glue the wire in place and seal the opening edges with a thin dough patch so the light stays contained. Add clear coat to protect the paint and checks.
AvoidDon’t make the back opening too big — the front will look washed out.
8. Mocha Cocoa Reindeer With Cocoa-Dust Finish
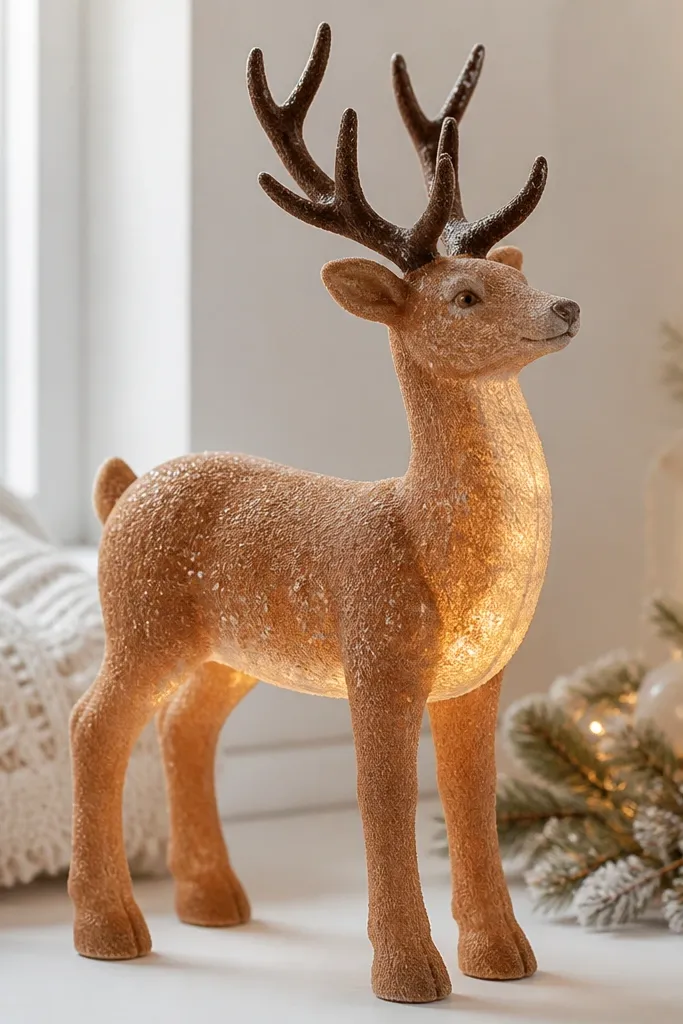
I made these for a winter bake-sale fundraiser, and people kept asking what “cocoa dust” was. The glow works because the lighter belly acts like a lantern, and the mocha body hides small imperfections. The antlers give contrast without making the ornament look too harsh. This style looks good in settings with wood tones and kraft paper because it matches that cozy, edible color palette. Kids also like it because it looks like a treat, even though it’s just paint and clear coat.
Pro tipSponge-tap in two directions (up-down, then left-right) for a natural speckled finish.
Bake hard, then paint the body mocha brown (a medium warm brown, not gray). Paint the belly a lighter caramel shade so the LEDs brighten that area. Press a back cavity behind the belly and tuck warm white LED wire inside. For the “cocoa dust,” mix brown craft paint with a little water and tap it lightly with a sponge in thin patches, then let it dry. Add antlers dark brown and paint the eyes as tiny black dots. Seal with satin clear so the surface stays soft-looking but doesn’t rub off.
AvoidSkip heavy paint over the LED cavity area — thick paint blocks the glow.
9. Rose Blush Reindeer With Warm Cheeks
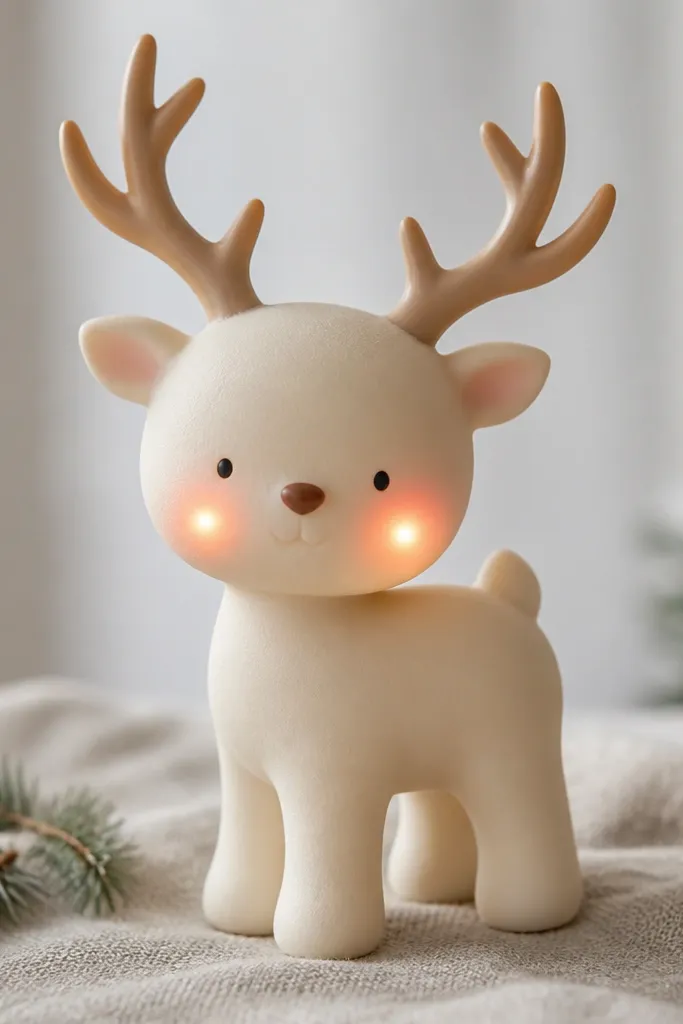
This is the cutest “girly” reindeer style and it photographs like a pastel ornament without looking childish. The glow is placed behind the cheeks, and the cheeks are painted a translucent rose so the LEDs make them look like they’re glowing from inside. Keep the antlers light brown and the nose a warm peach to avoid a harsh contrast. I use this for kid birthday photo backdrops because the face looks sweet even with simple details. It also flatters kids' rooms with soft colors — it doesn’t fight the bedding or wall art.
Pro tipUse thin rose paint coats — three light layers look better than one thick layer.
Cut and bake your reindeer, then paint the body pale cream. Paint cheeks with a light rose — thin coats matter because you want the LEDs to show through. Press two small shallow cavities on the back, one behind each cheek area, and tuck warm white LED wire into those spots. Hot glue the wire so it stays centered behind the cheeks and doesn’t peek at the edges. Paint antlers light brown and add tiny black eyes and a small peach nose. Seal lightly with satin clear so the rose stays soft, not shiny.
AvoidDon’t put the glow behind the whole face — it makes the cheeks look flat and the eyes lose definition.
10. Antler-Candy Cane Reindeer
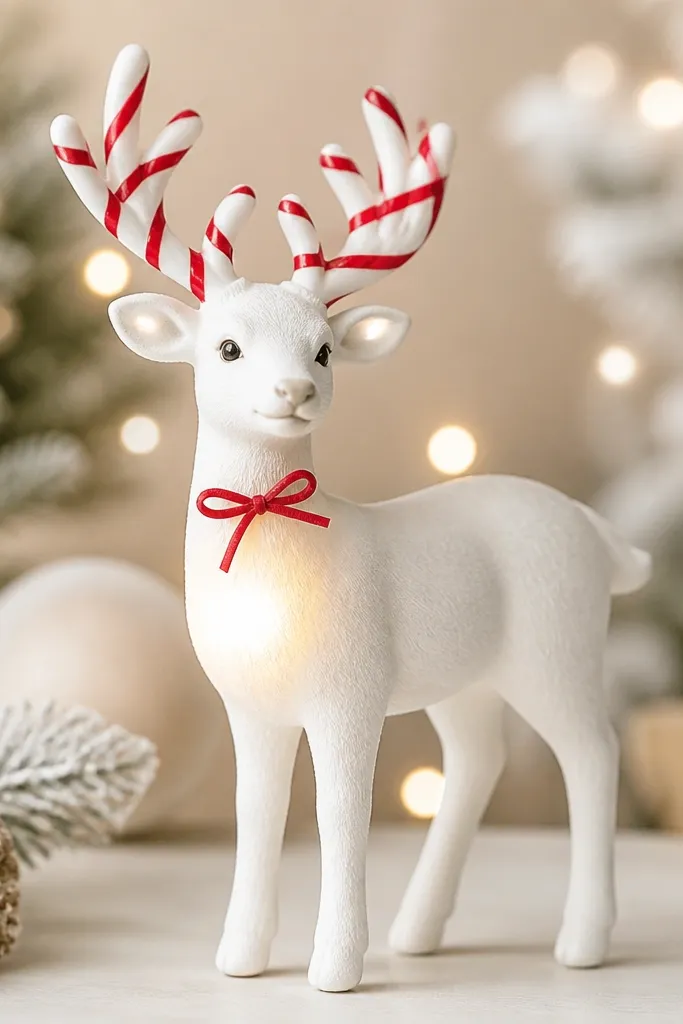
Red-and-white antlers look playful, and the warm chest glow keeps it from looking like a party craft. I paint the antlers in alternating thin red stripes over a white base, then I add a tiny red bow at the neck so the ornament has a focal point. The chest cavity keeps the light concentrated and makes the bow look like it’s lit from the inside. This style is great for kids because it’s easy to recognize and fun to hang. It also looks good on trees with red ornaments because it repeats the color story.
Bake hard and paint the body white. Paint antlers white first, then use a thin brush to add alternating red stripes, keeping each stripe about 1/8 inch wide. Press a back cavity behind the chest and tuck warm white LED wire there so the glow hits the center of the body. Add a small dough bow on the neck, bake it with the ornament, then paint it red. Seal everything with a satin clear coat. Hang with a thin ribbon so the ornament doesn’t cover the bow.
If your stripes wobble, paint them after you finish the antlers — don’t try to stripe while the paint is still tacky.
Skip thick ribbon bows — they cover the glow and make the front look crowded.
11. Red Nosed Reindeer With Glossy Nose Light
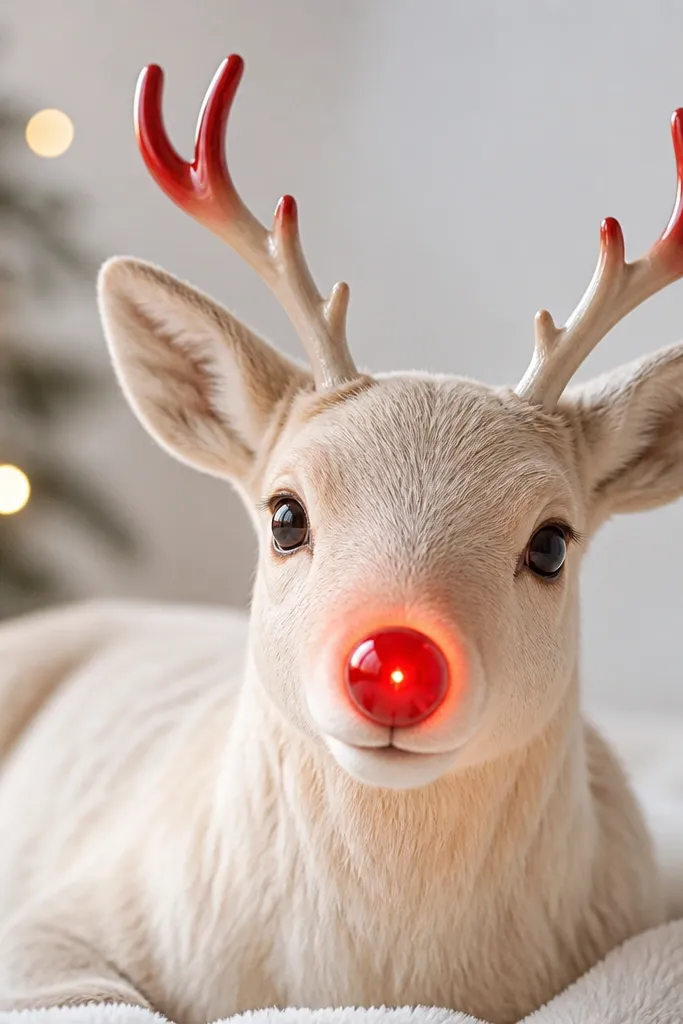
This one is pure “kid magic.” A glossy red nose looks like a stoplight when the LEDs are on, and it’s the easiest detail to get right. I keep the body creamy and matte so the nose stands out, then I place the light behind the nose cavity. The glossy nose also reflects tree lights, which makes the ornament look higher-end even with simple paint. It’s ideal for a mixed-age craft night because kids can handle the nose detail without needing steady brushwork. The warm glow makes the red feel deeper instead of flat.
Bake hard and paint the body creamy off-white with matte paint. Press a small back cavity directly behind where the nose will sit, then tuck warm white LED wire in that spot. Hot glue wire in place and cover any glue edges on the back with a thin dough patch. Paint the nose red and let it dry, then add a clear glossy top coat only on the nose area (not the whole ornament). Add two tiny black eyes and a small line for the mouth if you want. Seal the rest of the ornament with a light matte clear so it doesn’t turn shiny everywhere.
Use a separate glossy top coat for the nose so it stays the only shiny spot.
Don’t paint the whole face glossy — it turns the ornament into a toy-like shine.
12. Plaid Bow Reindeer With Side Glow
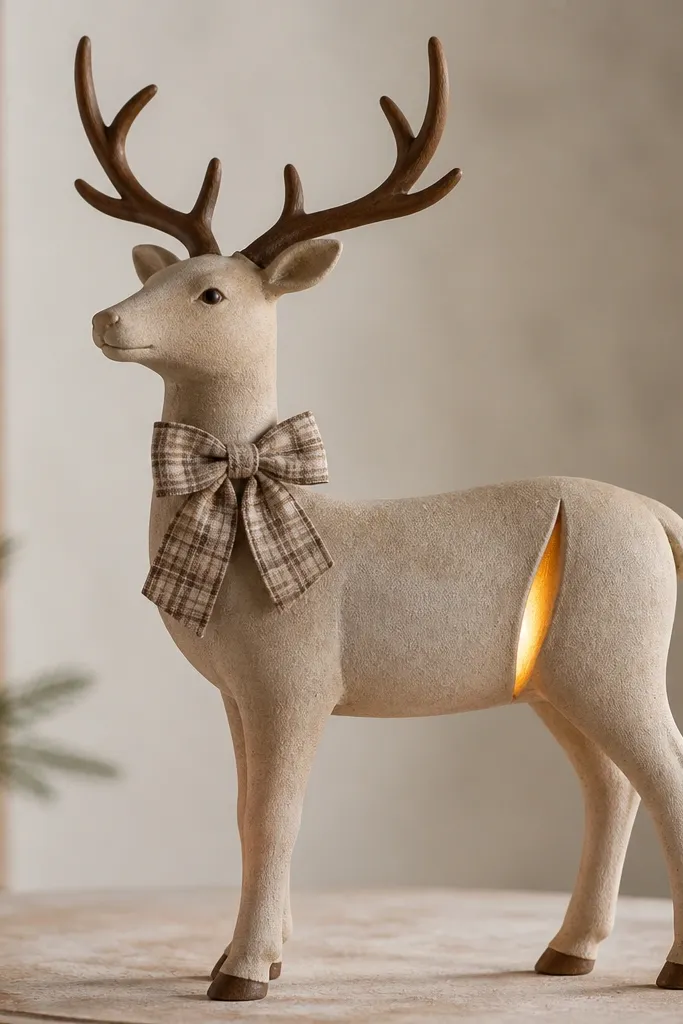
Side glow looks different from the usual front-facing glow, and it makes the ornament feel more “designed.” The plaid bow gives pattern and gives kids something fun to point at. I use a tan body because it makes the warm LEDs look like honey light, not harsh white. This style is great for garlands draped along shelves where you see the ornament at an angle. It also hides small imperfections because the glow is partially blocked by the body shape.
Pro tipMake the slit cavity on the back — it keeps the front face crisp and stops light from washing the eyes.
Cut and bake your reindeer, then paint the body tan and antlers brown. Create a small dough bow on the neck and bake it with the ornament. Paint the bow with simple plaid: light red lines cross over a cream base, then add thin green lines. Press a back slit cavity slightly off-center so the light escapes toward one side of the ornament. Place warm white LED wire so it sits in the slit cavity and hot glue it down. Seal the ornament with clear coat, leaving the side opening clean so the glow shows.
AvoidDon’t put the opening directly behind the eyes — the face loses definition.
13. Teal Winter Reindeer With White Lip Glow
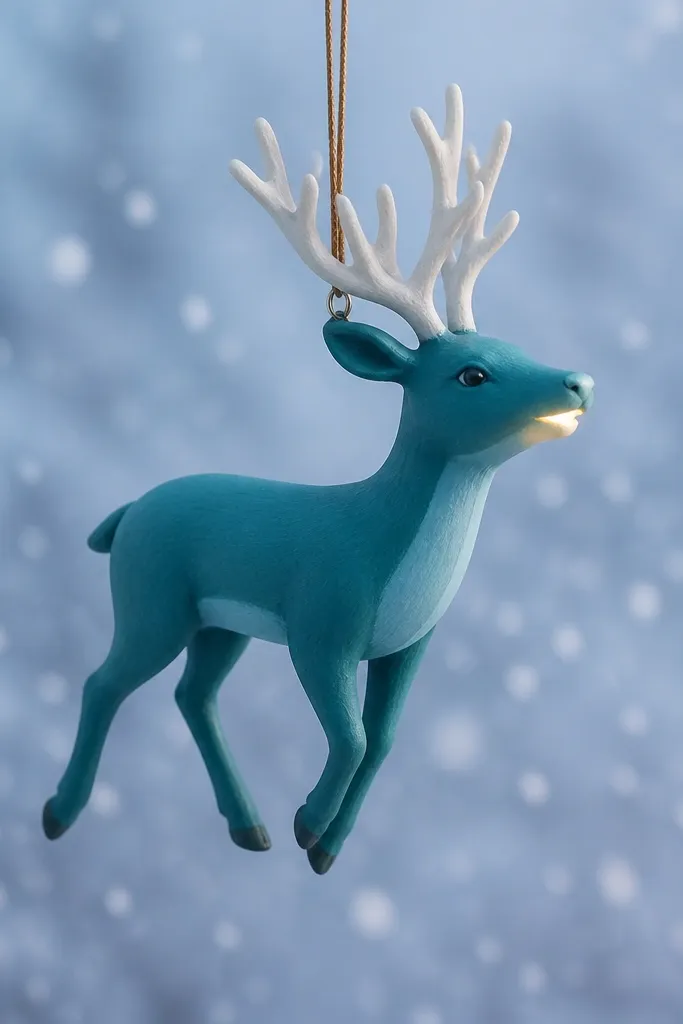
Teal reindeer look bold, but the glow keeps them from feeling too modern. I paint the body teal, then lighten the belly and mouth area so the warm LEDs create a soft glow near the face. A pale antler color keeps the look airy, and it helps the reindeer read as winter, not ocean. Kids love the mouth glow because it looks like the reindeer is “smiling” from inside. This one looks best on trees with white lights and silver ornaments because the teal repeats that cool winter palette.
Pro tipThin the teal paint slightly with water so it doesn’t form a thick layer that blocks the light.
Bake hard, then paint the body teal with a matte acrylic. Paint the belly and the area around the mouth a lighter mint-teal or creamy white so the glow shows. Press a cavity on the back behind the mouth area and tuck warm white LED wire inside. Hot glue the wire so it sits flat and aimed at the mouth glow area. Add simple eyes and a tiny nose, then paint pale antlers. Seal with satin clear so the teal stays smooth and the glow remains bright through the painted mouth area.
AvoidAvoid dark green-teal — it makes warm LEDs look muddy.
14. Two-Tone Ombre Belly Reindeer
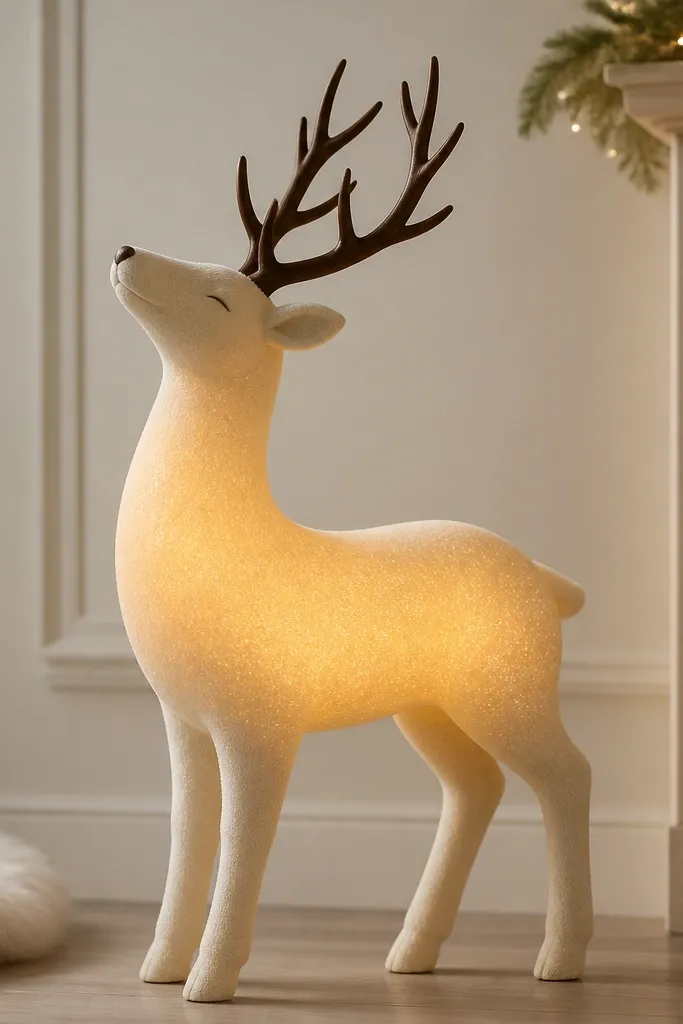
Ombre looks fancy because it creates depth without needing tons of tiny details. The belly ombre works with lights because the brightest part sits in the center, then fades outward. I paint the belly from light cream at the top to warm beige at the edges so the glow feels like it’s spreading. This style reads balanced on a tree because the gradient softens the reindeer shape. It also hides minor tool marks from pressing the dough because the paint transition covers them.
Pro tipBlend with a dry sponge — it avoids harsh lines and keeps the gradient soft.
Bake hard and paint the body cream. Paint the belly with two to three thin layers: start with light cream near the top of the belly, then blend into warm beige using a dry sponge. Press a cavity on the back behind the center of the belly and tuck warm white LED wire there. Hot glue the wire in place and make sure it points toward the center. Paint antlers brown and add a tiny nose and eyes. Seal with clear coat so the ombre doesn’t streak when it catches tree moisture.
AvoidDon’t overwork the ombre with a wet brush — it turns into a stripe.
15. Rainbow Antler Detail Reindeer
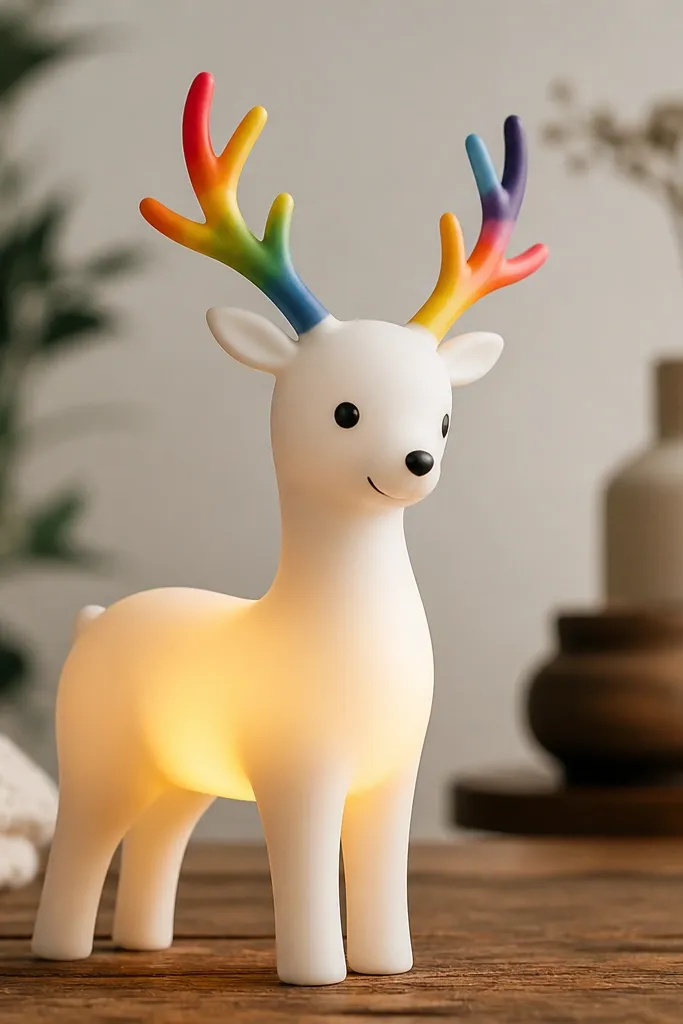
Rainbow antlers are a fun twist that still looks tidy when you keep everything else calm. The base body stays white and matte, then the antlers get small color segments that read like stained glass when the lights are on. I place the LEDs behind the belly so the glow doesn’t overpower the antler colors. This style works for kids because it feels playful, and it works for adults because the face stays clean and the colors are contained. It also looks great on a tree with multicolor ornaments where you want one “star” piece that doesn’t rely on glitter.
Pro tipLet each antler color dry for 10 minutes before the next stripe so the colors don’t bleed.
Bake hard and paint the body matte white. Press a back cavity behind the belly and tuck warm white LED wire inside. Hot glue the wire so it doesn’t shift when the ornament is hung. Paint antlers with a white base, then add small rainbow segments in thin bands: red, orange, yellow, green, and blue, each about 1/6 inch wide. Add black dot eyes and a small nose. Seal with satin clear so the antlers stay bright and the body doesn’t scuff.
AvoidSkip glitter here — it competes with the rainbow and makes the ornament feel messy.



