
1. Cranberry Candy Cane with Speckled White Lines

Start by rolling dough to about 1/4 inch and cutting a candy cane using a cookie cutter or a drawn template. Punch a small hole near the top before baking, then bake until the edges are a shade darker than the center. After cooling, paint the whole cane cranberry red in two thin coats, letting each coat dry 20 to 30 minutes. Then load a stiff brush with white paint and tap lightly to create tiny speckles along the curve. Finish with a clear satin acrylic sealer and thread a red ribbon through the hole.
This one looks best when you keep the candy cane shape slim. Paint the base cranberry red (I use a mid-tone, not neon) and then add speckled white lines using the tip of a stiff round brush. The white specks make it look like hard candy without adding raised texture that can chip. It flatters a small tree because the shape reads clearly from a distance, even if you only have a few ornaments on each branch. I like it on warm-toned spaces — think beige walls, wood shelves, and soft lamps — because the red feels intentional instead of loud.
AvoidSkipping a sealer makes the white speckles get dull and smudgy after handling.
Pro tipUse a stiff brush for speckles — a soft one smears and turns into a stripe.
2. Mini Pine Tree with Dry-Brush Snow Tips
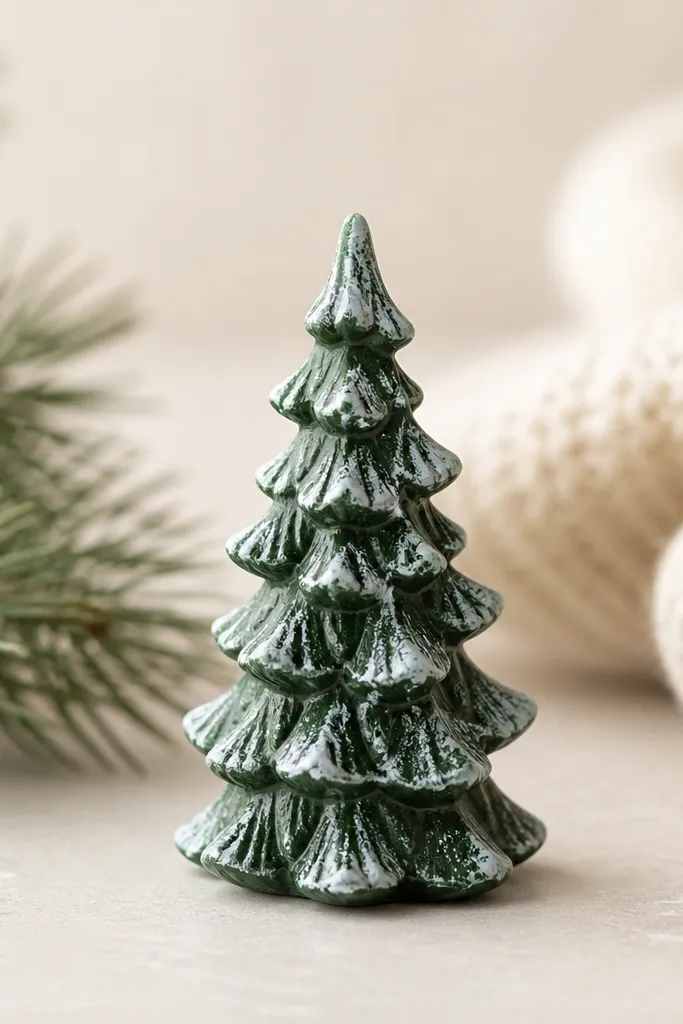
This style makes small space salt dough ornaments look like they belong on a real winter tree. Paint the pine deep forest green, then dry-brush a slightly cool white on the high points — the branch tips and the top knob. Dry-brushing keeps the texture from looking flat, which matters when your ornament is only 2 inches tall. It looks great on people with warm undertones because the green has a cozy feel, not icy blue. If your decor leans farmhouse or cabin, this tree reads right away without needing extra glitter.
Roll dough thin, cut a pine tree shape, and keep the branch details shallow so they don’t crack. Bake until fully hard, then cool completely. Paint the tree in one even coat of forest green, and let it dry before you touch the tips. Dip a dry brush in cool white, wipe most paint off on a paper towel, then brush lightly only on the raised edges. Seal with a thin clear coat, and hang it with twine or a narrow green ribbon.
Dry-brush in one direction across the branches so the snow looks like it’s falling off the tips.
Overloading the white brush makes the tree look chalky instead of snowy.
3. Gold Star with Transparent Red Glow Center

Cut a star ornament and, if you want the window effect, use a smaller star or circle cutter to remove a center shape while the dough is raw. Bake as usual and paint the outer star gold first, then let it dry fully. For the red center, paint the window with translucent red in 2 to 3 thin layers until you get a glow-like depth. You want the edges crisp, so tape off the border with painter’s tape after the gold dries. Seal over the whole star with a clear gloss so the red reads brighter.
This is the ornament I hang closest to a lamp because it catches light without taking up visual space. Paint the star points metallic gold and leave a small inner window for the red glow. For that glow, mix a tiny amount of red acrylic with clear medium (or thin red paint with a clear gloss) so it stays translucent. The result looks like stained glass but still dries flat enough to hang on a crowded tree. It flatters nearly every color palette — gold pairs with warm neutrals, and the red center adds a controlled pop.
AvoidPutting thick red paint in the center window can pool and crack after drying.
Pro tipThin your red with clear medium rather than water; it keeps the color looking “lit” instead of streaky.
4. Santa Hat with Faux Fur Trim

Roll dough to 1/4 inch, cut a Santa hat shape, and punch a hole near the top of the hat. Bake until hard and let cool fully. Paint the hat red in two thin coats, then paint the brim and pom white. To fake fur, load a small stiff brush with white paint, wipe most off, and dab irregularly along the brim edge and pom. Seal with a satin clear coat so the fur texture stays visible.
Santa hats look cute even when you only have a few ornaments, because the silhouette is instantly recognizable. For the faux fur effect, you paint the brim and pom white with a slightly textured brush technique so it doesn’t look like a flat sticker. Use a warm red (brick red, not pink) for the main hat so it reads rich under indoor lighting. This works especially well if your tree lights are warm white, because the white fur pops without turning icy. I also like how it looks on dark green branches — it frames the needles instead of blending in.
AvoidPaint the fur too thick and it turns into a heavy ridge that can chip when you hang it.
Pro tipUse a short dabbing motion for fur; dragging the brush flattens the texture.
5. Snowflake with Etched Lines and Clear Glaze
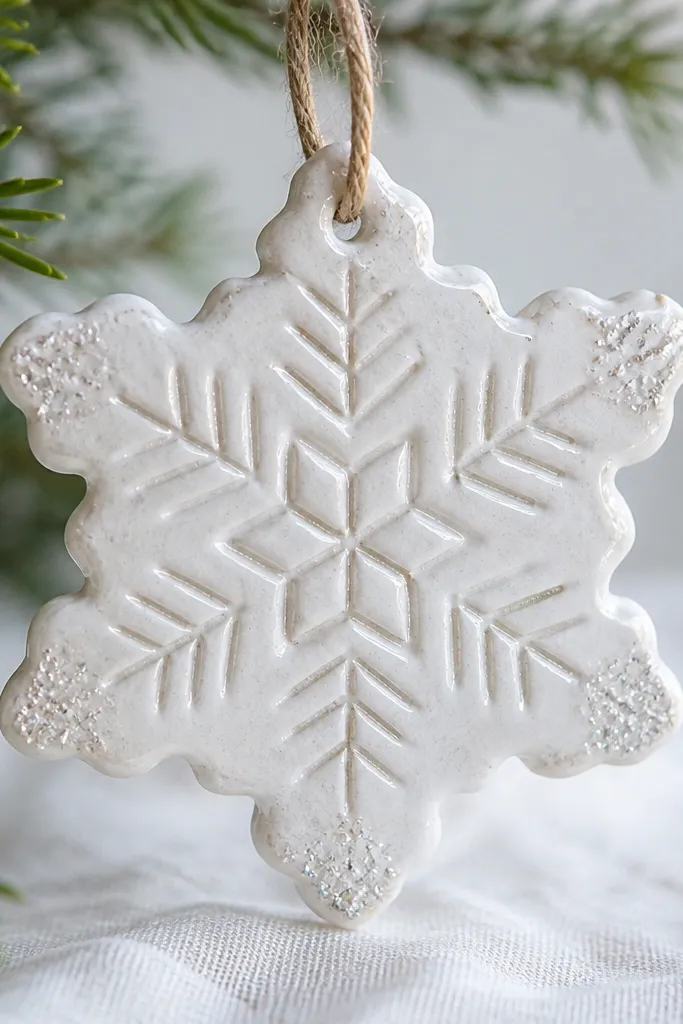
Etched-line snowflakes look expensive, and they don’t need heavy color. Start with a solid white base, then highlight the etched grooves with a slightly darker white or light gray so the pattern reads. After that, add a clear glossy glaze to make it shine under string lights, even on a small tree. This style is flattering in cool-toned rooms too, because the white stays crisp. If your decor is silver and white, this snowflake fits without fighting other ornaments.
Press a snowflake cutter into rolled dough and use a ball tool or toothpick to deepen the etched lines so they survive baking. Bake until firm, then paint the whole snowflake white. While the paint is dry, mix a tiny bit of gray with white and brush it lightly into the grooves. Wipe the surface gently so the gray stays in the etched lines. Finally, brush on clear gloss glaze and sprinkle a pinch of fine glitter only at the tips before it dries.
Double-check the groove depth before baking; shallow etching disappears after paint.
Use chunky glitter and it sinks into the dough surface and looks messy.
6. Sage Green Bauble with Tiny Gold Dots
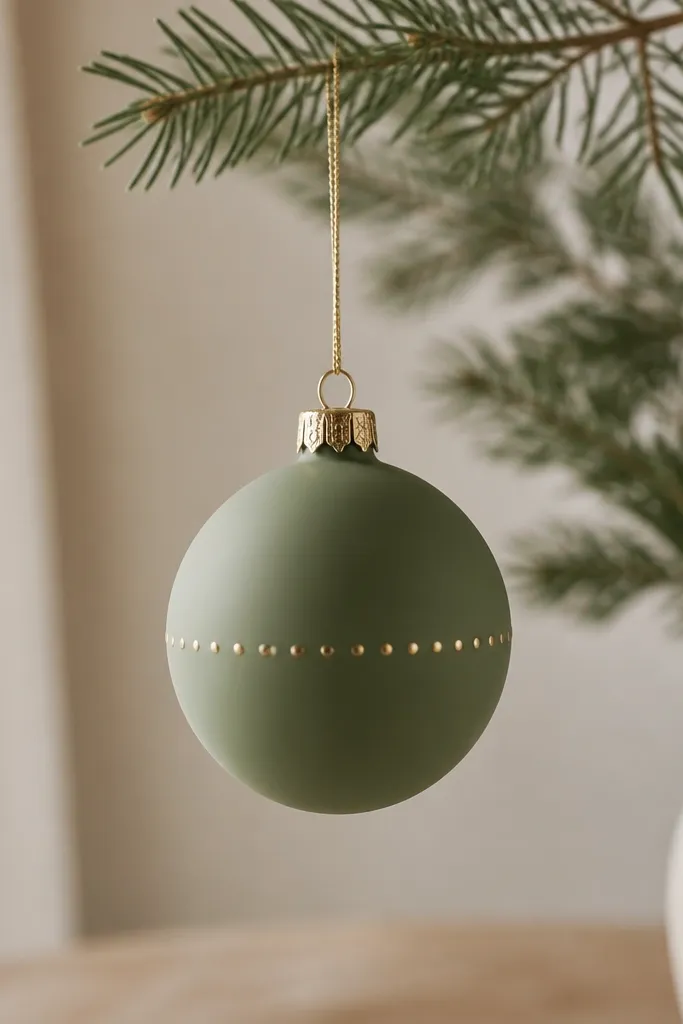
Roll dough and cut a circle, then use a smaller round to lightly score a band around the center (don’t cut all the way through). Bake fully, then paint the whole bauble sage green in two thin coats. Let it dry, then paint tiny gold dots along the scored band using a dotting tool or the tip of a toothpick. Add a second tiny ring of dots only if the spacing looks uneven. Seal with satin clear so the surface stays smooth and easy to wipe.
This is the ornament I make when I want small space salt dough ornaments to look calm and designer-ish. The sage green is soft against warm wood and neutral walls, and the gold dots add just enough sparkle without taking over. I like the dot placement around the middle because it gives the bauble a “label” area that reads clearly from a distance. It also works well if you have kids or pets — smooth, round shapes are less fragile than detailed figures. The gold dots look best in metallic paint with a fine tip brush.
AvoidSkipping the scored guide makes the dots wander and look amateur on a small ornament.
Pro tipScore the band lightly so you get dot placement without a visible trench after painting.
7. Cinnamon Stick Ornament with Wrapped Twine Bow

This one looks like it came from a holiday market stall, and it’s perfect for small spaces because it’s long and thin. Paint the dough warm cinnamon brown, then add lighter streaks so it looks like the ridges of a real stick. The twine bow adds dimension without needing glitter or big shapes. It flatters farmhouse decor and also looks good if your wardrobe palette is tan, cream, and rust. I hang these near the front of the tree because the texture reads well when you’re close.
Roll dough and cut a long rectangle or use a cinnamon stick template, then round the edges slightly with your fingers. Bake until hard, then paint a base coat of cinnamon brown. When dry, dry-brush lighter beige-brown streaks along the length. Tie a small bow from natural twine and glue it at one end using a tiny dot of craft glue (keep glue away from the hole). Seal with a matte or satin clear coat so the twine doesn’t get shiny.
Paint before you add twine; sealing after glue dries keeps the ornament clean.
Using glossy sealer on twine makes it look plastic and catches dust.
8. Peppermint Stripe Bell with Red Rim

Cut a bell ornament shape, punch the hanging hole near the top, and bake until fully firm. Paint the bell white in two thin coats. After drying, use painter’s tape to mask diagonal stripes, pressing the tape edges down gently. Paint the exposed areas red, remove tape while paint is still slightly tacky, then let everything dry. Add a thin red rim around the top opening with a small brush, then seal with glossy clear for a peppermint shine.
A bell shape is a smart pick when space is tight because it reads clearly even if you cluster ornaments. The peppermint stripes create motion and visual interest without needing size. For the best look, keep the stripes bold and clean — this is where a small liner brush matters. The red rim frames the bell opening so it looks finished, not like a painted blob. It flatters warm lighting and looks great with silver ribbon or red ribbon.
AvoidFreehand stripes on a small bell usually turn into uneven bands.
Pro tipStriping looks sharper when tape edges are pressed with the back of a spoon.
9. Tiny Gingerbread House with Window Cutouts

Use a gingerbread house cutter or template, then cut out two small window shapes while the dough is raw. Bake until hard and cool completely. Paint the walls ginger brown and the roof slightly darker brown for depth. Paint the window cutouts pale blue in 2 thin layers. Add white icing lines by outlining the roof edge, door frame, and window frames, then seal with satin clear so the lines stay crisp.
If you like cozy holiday decor, this is the ornament that makes people lean in. The window cutouts give you a little stained-glass moment without needing real glass, and it still fits on a small tree. Paint the house a warm ginger brown, then add white “icing” lines with a small brush to outline edges and roof details. Tint the windows a pale blue so the cutouts look like evening light. It flatters cabin-style interiors and also looks good against neutral walls because the house has clear edges.
AvoidSkipping window cutouts makes the ornament look flat and less “special” at small sizes.
Pro tipTint the windows first, then paint icing lines after — it keeps the white from turning blue-gray.
10. Red-and-White Wreath Circle with Bow Center
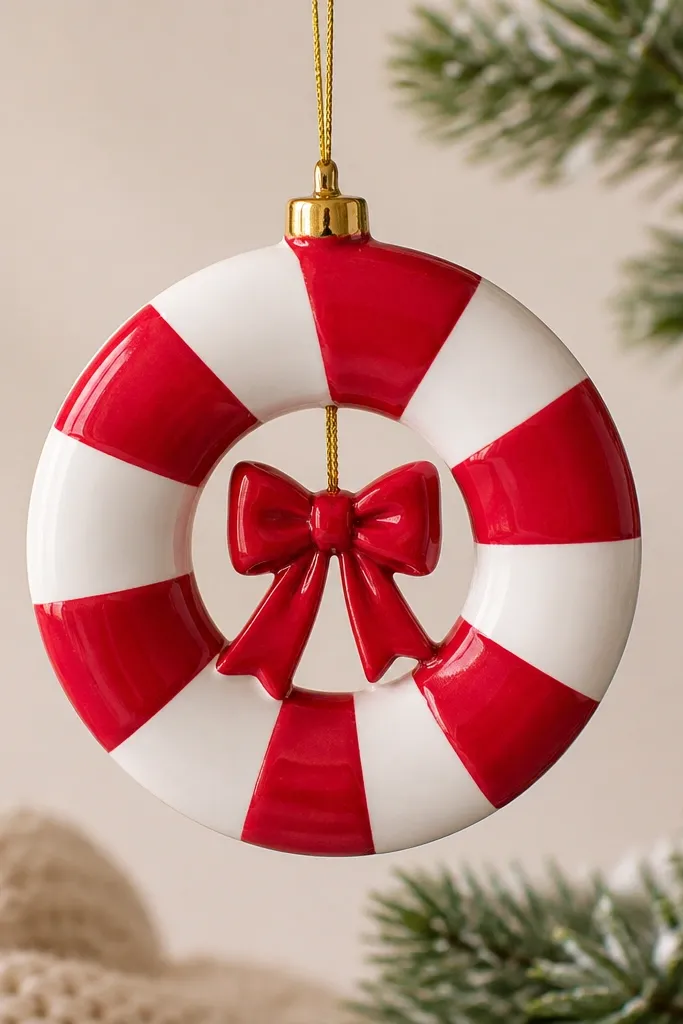
Wreath circles look great when you want a cohesive look across a small tree. Alternate red and white segments so the wreath reads like a pattern instead of a single blob of color. Put a small bow in the center — tiny, simple, and symmetrical — and it instantly feels “holiday,” even if you only hang a handful of ornaments. This design flatters both classic and modern decor because the palette is straightforward. It also works well for color-blind friendly contrast since red and white separate cleanly.
Roll dough, cut a wreath ring using two circle cutters, and punch a hole near the top. Bake until firm. Paint the ring alternating red and white using a small sponge brush for clean edges. While dry, paint a tiny bow: two loops and a center knot in red or deep cranberry. Seal with clear satin, and hang with a matching red ribbon.
Use a sponge brush for the alternating segments; it keeps the edges crisp on small surfaces.
Trying to paint segments with a wide brush usually creates muddy edges.
11. Matte Black Ornament with White Script Transfer
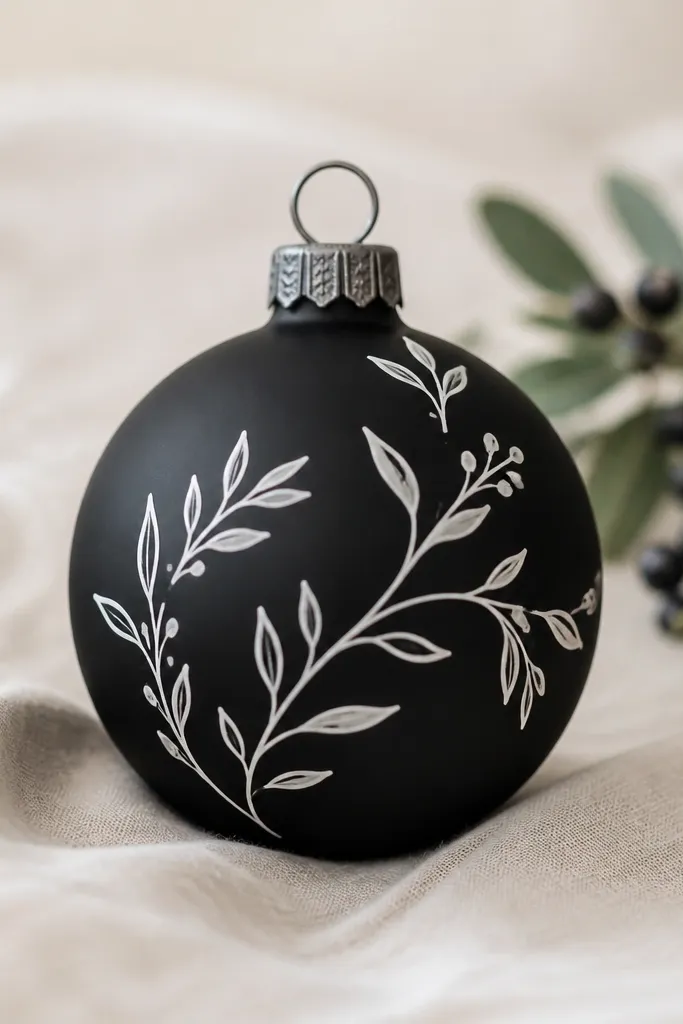
Cut round ornaments from rolled dough and bake until fully hard. Paint the entire ornament matte black in two thin coats. Let it dry overnight if you can. Apply a printed transfer using transfer medium or a water-slide transfer method, depending on your materials, then burnish gently with a cotton swab. Seal with a satin clear coat so the black stays matte but the lettering stays protected from fingerprints.
This is my pick for people who want holiday decor that doesn’t scream “kids craft.” A matte black base makes white lettering pop, and it looks sharp on trees with warm white lights. Use a script style transfer (holiday words, dates, or a single name) so the ornament looks like a label. It flatters modern apartments, black-and-white rooms, and anyone who likes minimal color. Keep the design centered so the text doesn’t feel accidental.
AvoidUsing glossy clear on a matte base makes the whole ornament look like plastic.
Pro tipBurnish transfers with the side of a spoon instead of pressing hard with fingertips.
12. Lavender Snowman Face with Scarf Shadow

Roll dough to 1/4 inch and shape a snowman: two stacked circles with small arms pressed in (lightly, so they don’t break). Bake until hard and cool completely. Paint the whole snowman lavender-gray and let it dry. Add a scarf by painting a darker purple band around the neck, then paint a slightly lighter purple fold across it. Finish with a simple face: two dots for eyes, a small line smile, and a tiny nose triangle in warm orange-brown. Seal with satin clear so the colors stay soft.
Snowmen don’t have to be only white and orange. Lavender-gray gives you a softer holiday palette that looks good in small spaces because it’s not visually heavy. Paint a simple face with charcoal or deep gray and add a scarf that wraps with a darker purple shadow under it. That shadow trick makes the scarf look like fabric folds instead of a flat stripe. This style flatters anyone decorating in lilac, mauve, or cool neutrals. It also looks cute on a small tree because the face stays readable.
AvoidOver-detailing arms and buttons on tiny snowmen leads to fragile bits that chip.
Pro tipFor scarf folds, paint the lighter fold after the darker band dries so it doesn’t bleed.
13. Gold Foil Snowflake with White Wash
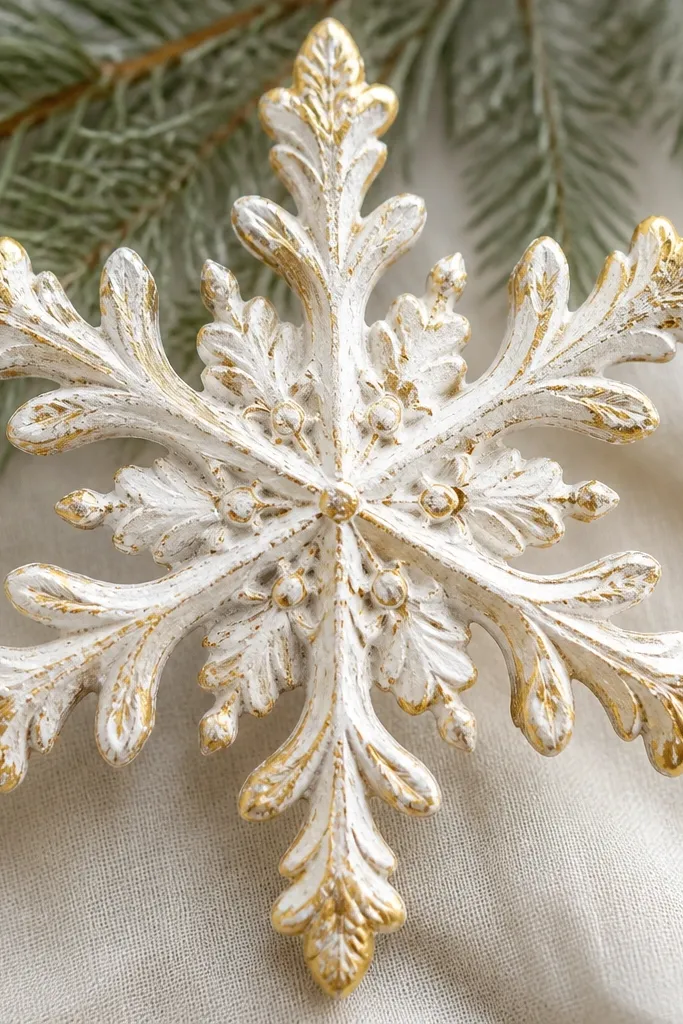
Cut a snowflake with a cutter that has defined points, then bake and cool. Paint the snowflake with a watered-down white wash so it looks translucent in grooves. Apply foil adhesive or a foil-ready medium only where you want gold, usually the outer edges and tips. Press gold leaf/foil gently and burnish with a soft cloth. Seal with a clear satin top coat, but keep it thin so you don’t dull the foil.
Gold foil makes salt dough look like it belongs in a grown-up holiday palette. The trick is to apply foil only to raised or cut-out areas so it doesn’t cover everything. Start with a white wash base so the snowflake still reads as “snow,” then press gold foil on the raised edges for sparkle. It flatters rooms with warm wood and cream walls, because gold looks natural next to them. This ornament also looks good in small spaces because it has high contrast — white background, gold highlights.
AvoidSealing too thick can blur the gold leaf edges and make it look flat.
Pro tipDo the foil over a tray; foil scraps stick everywhere and you’ll thank yourself later.
14. Bright Orange Pumpkin with Green Stem
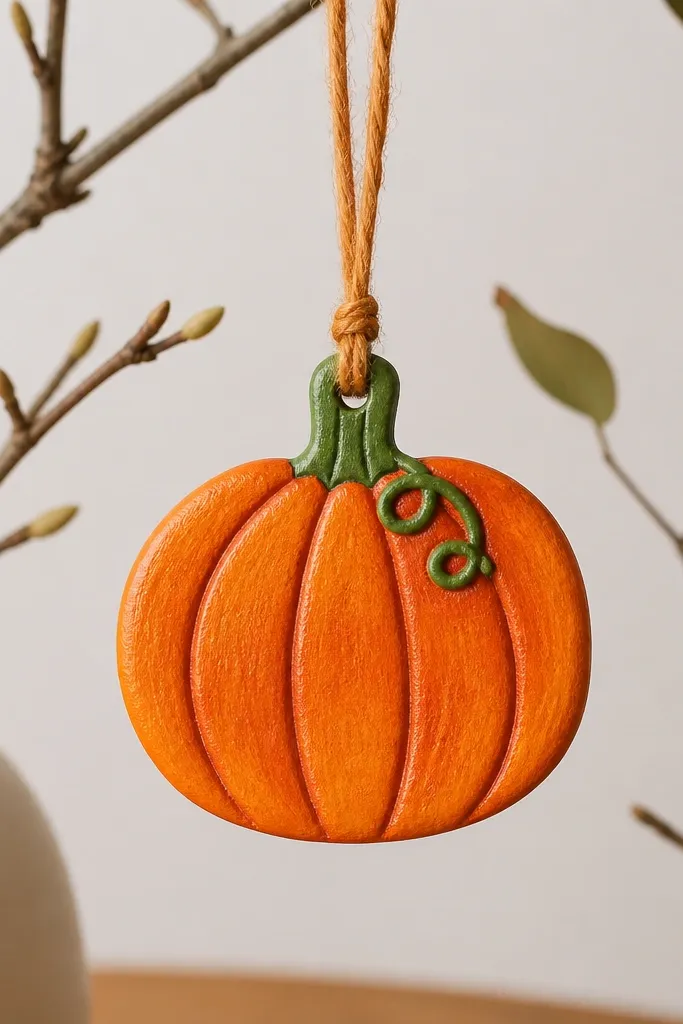
Even though it’s a Christmas tree, pumpkins are a fun way to make your ornaments feel personal. A bright orange pumpkin looks cheerful without requiring a big shape, and the rib lines give it texture so it doesn’t look like a flat circle. Paint the stem deep green and add a tiny vine curl so it looks alive. This style flatters warm skin tones and kitchens with orange-brown decor, and it works well if you mix fall and winter ornaments. Hang it near the top or front so the pumpkin reads quickly.
Roll dough and cut a pumpkin shape, then use a fork or ribbing tool to press shallow vertical lines. Bake until firm and cool. Paint the base bright orange in two coats, then add slightly darker orange ribs for depth. Paint the stem deep green and add a tiny curl at the end with a fine brush. Seal with satin clear, and thread orange twine through the hole.
Use a fine liner brush for ribs so the lines stay crisp on small surfaces.
Making ribs too deep causes cracks after baking.
15. Winter Scene Mini Frame Ornament with Blue Sky Wash
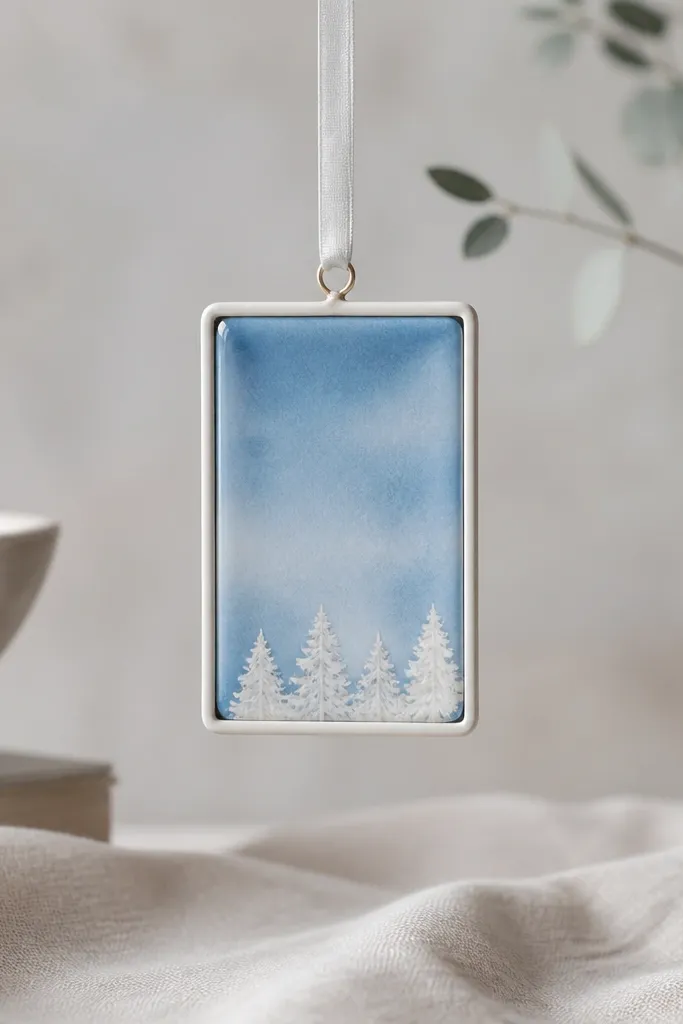
Roll dough to 1/4 inch, cut a rectangle frame, and cut out the center window while raw. Bake until hard. Paint the outer border a creamy white and let it dry. For the inside, paint a light blue wash from top to bottom, then add a darker blue strip near the bottom. Dot tiny white tree shapes along the base edge. Seal with a clear satin top coat and hang with thin white ribbon.
This is a smart option if you like ornament sets that look coordinated. A small frame gives you a built-in “composition,” so even simple painting looks intentional. Use a blue sky wash inside, then add tiny white trees or hills at the bottom so it reads like a winter postcard. The thin border makes the piece feel finished and keeps it from looking like a blob of color. It flatters small spaces because the ornament has a clear focal area and doesn’t need a lot of sparkle. It also looks great with blue-and-white lights.
AvoidPainting the frame border after the sky makes edges bleed and look messy.
Pro tipUse a sponge or wide brush for the sky wash so it blends softly instead of streaking.



