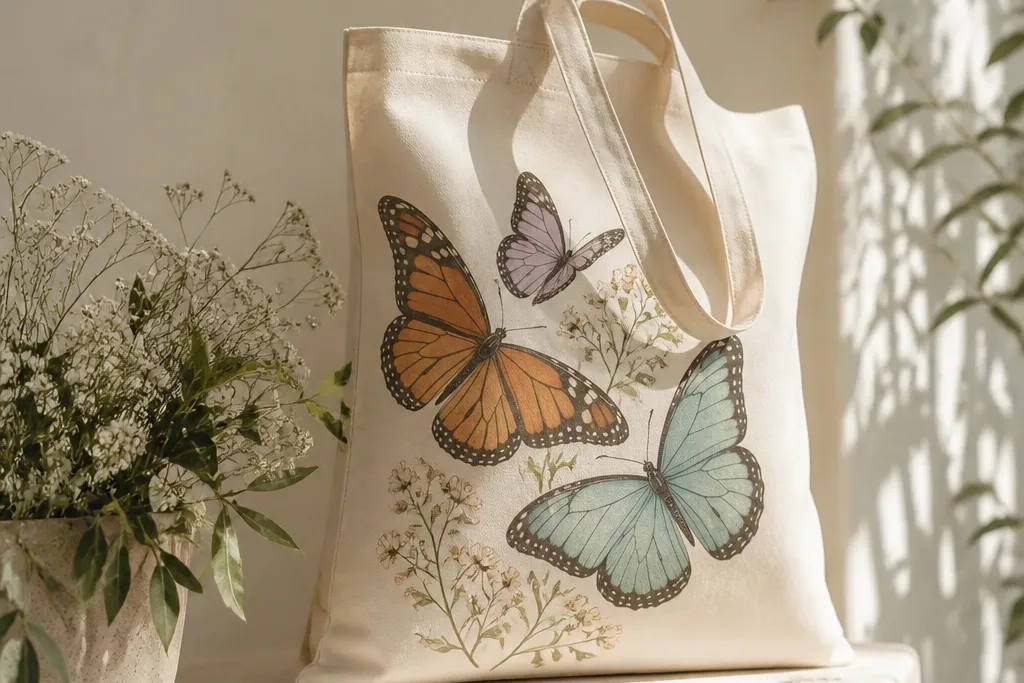
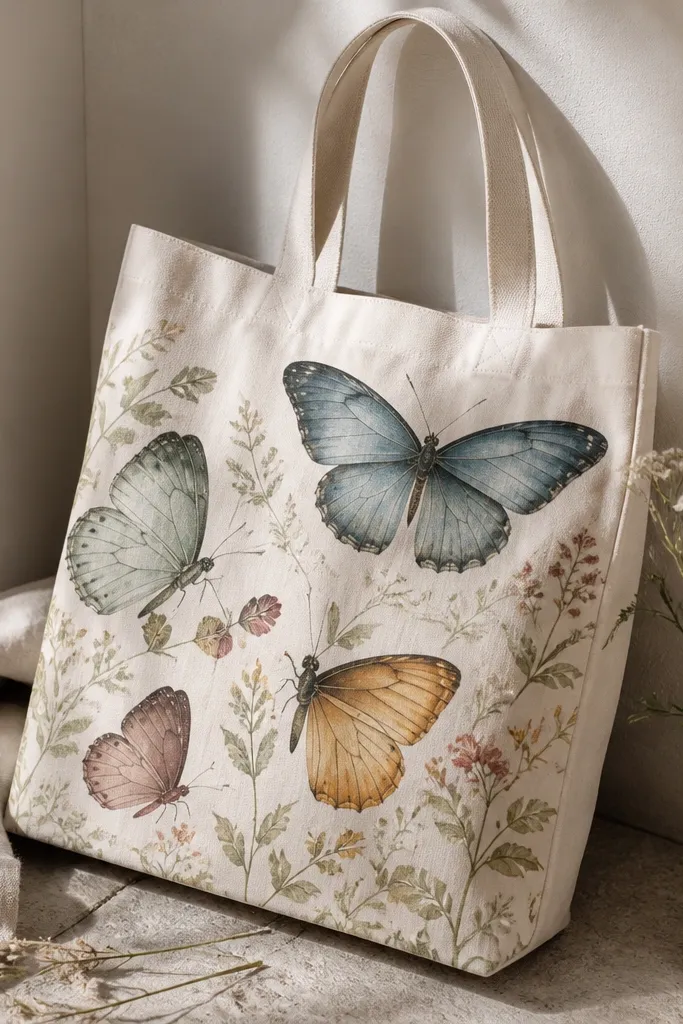
1. Three-Tone Monarch Wings with Dark Edge Fade
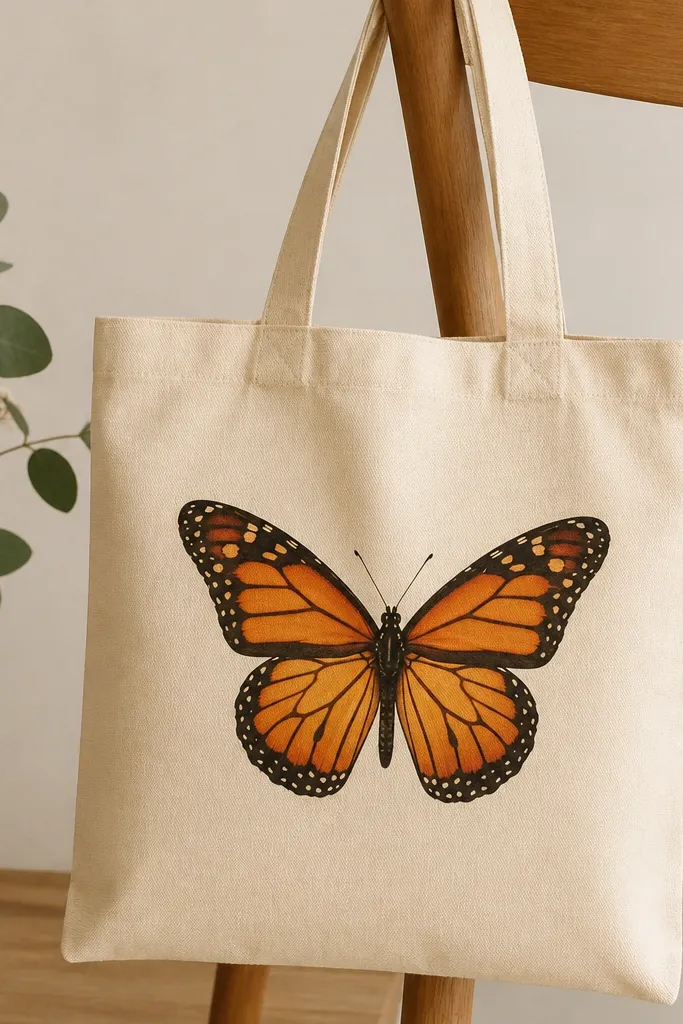
Paint this if you want a butterfly that looks “finished” even from across a room. I do it on natural canvas because the warm orange pops without looking neon. Use burnt orange for the light areas, tangerine orange for mid sections, and a deep cocoa brown mixed with black for the outer edge. The fade inward makes the wings look curved instead of flat. It flatters most skin tones because the palette sits in the warm spectrum and reads like classic nature art.
Start by tracing the butterfly body and wing outline lightly with a pencil, then paint the body first using dark brown. Next, block in the wings with burnt orange as your light base, leaving small gaps where your mid tone will go. Blend tangerine orange into the center of each wing and let the edges stay slightly darker. Finally, load a small round brush with cocoa-brown-black and drag it along the outer rim, then soften toward the center with a barely damp brush. Heat-set or let dry fully before you add antennae and tiny wing dots.
Pro tipFor a smoother fade, rinse your brush, wipe it on a paper towel, then lightly pull the darker edge toward the middle.
AvoidDon’t outline the entire wing in thick black — it makes the wings look like a coloring page.
2. Watercolor Wash Butterfly with Bleed-Resistant Edges
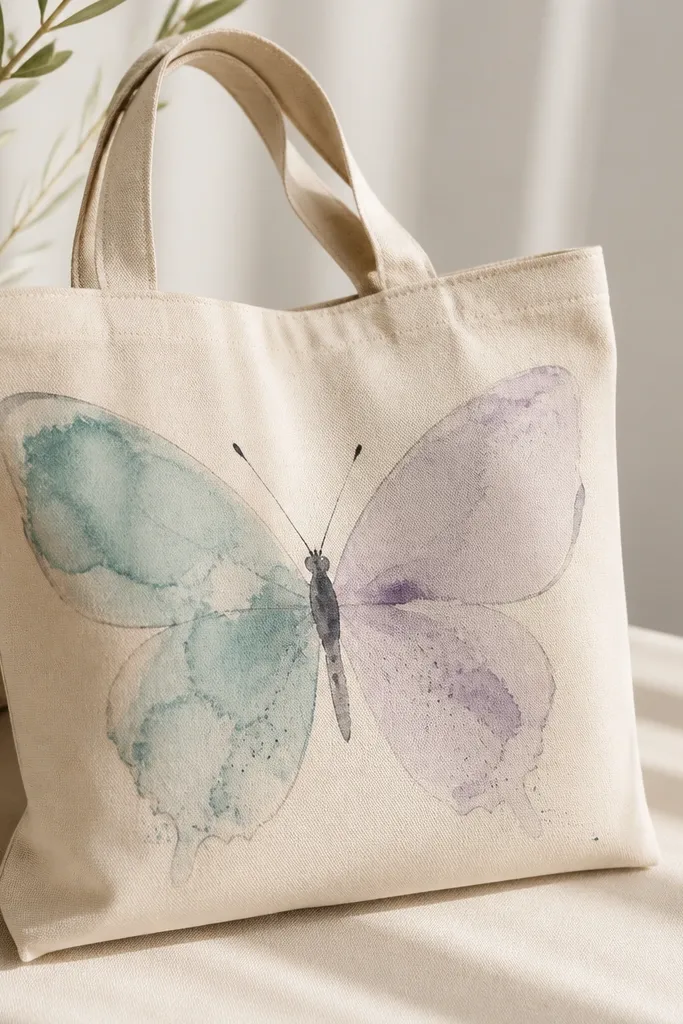
This one looks best when you want the butterfly to feel airy instead of bold. I use it on light totes because the wash needs contrast to show the gradients. Pick two cool colors (teal and lavender are my go-to) plus a neutral gray for the body so it doesn’t fight your outfit. The edges stay clean because you build a thin “guard” line before the wash. It’s flattering for anyone who likes subtle color — it won’t overpower a patterned shirt.
Start by sketching the butterfly and painting a thin border line along the wing outlines with fabric-safe acrylic gray. Then mix your watercolor-style paints by thinning acrylic with fabric medium and a little water until it looks like milk. Load a flat brush with teal, paint one wing area, and immediately add lavender near the center so the colors meet while wet. After that, dab a paper towel at the wing edge to create soft feathering. Let it dry, then add tiny speckles with a toothbrush and diluted paint.
Use a damp palette and work one wing at a time so the blend happens before the paint skins over.
Skip heavy black outlines — they kill the watercolor effect and make it look stamped.
3. Neon Night Butterfly on Black Tote
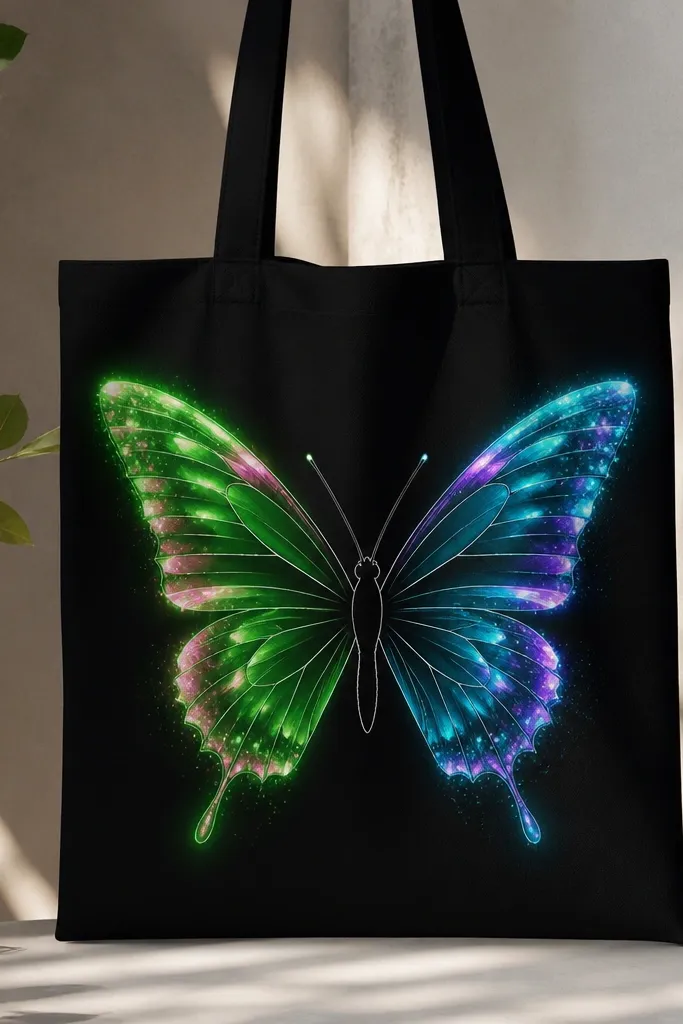
If you want something that looks like it belongs in a concert photo, do this on black canvas. The neon colors pop hard against the dark base and look crisp without needing thick lines. I paint the wings with bright green and cyan first, then add hot pink and purple in small streaks to suggest veins. A thin white line around each wing section makes the whole thing glow. It flatters deeper skin tones and also looks great with white tees because the bag becomes the color anchor.
Start by marking the butterfly centerline and body with chalk or pencil. Paint the body with dark charcoal, then outline the wing sections lightly. Apply neon green to the left wing and neon cyan to the right wing, using a flat brush for solid coverage. While still a bit tacky, add hot pink along the inner curve and purple near the outer edge with a small liner brush. Finish by dotting tiny highlights in white around the wings and along the antennae.
Let the first neon layer dry 10-15 minutes, then go over it with a second thin coat so it stays opaque on black.
Don’t mix neon colors together on the palette — they turn muddy fast.
4. Stenciled Butterfly with Foil-Gold Veins
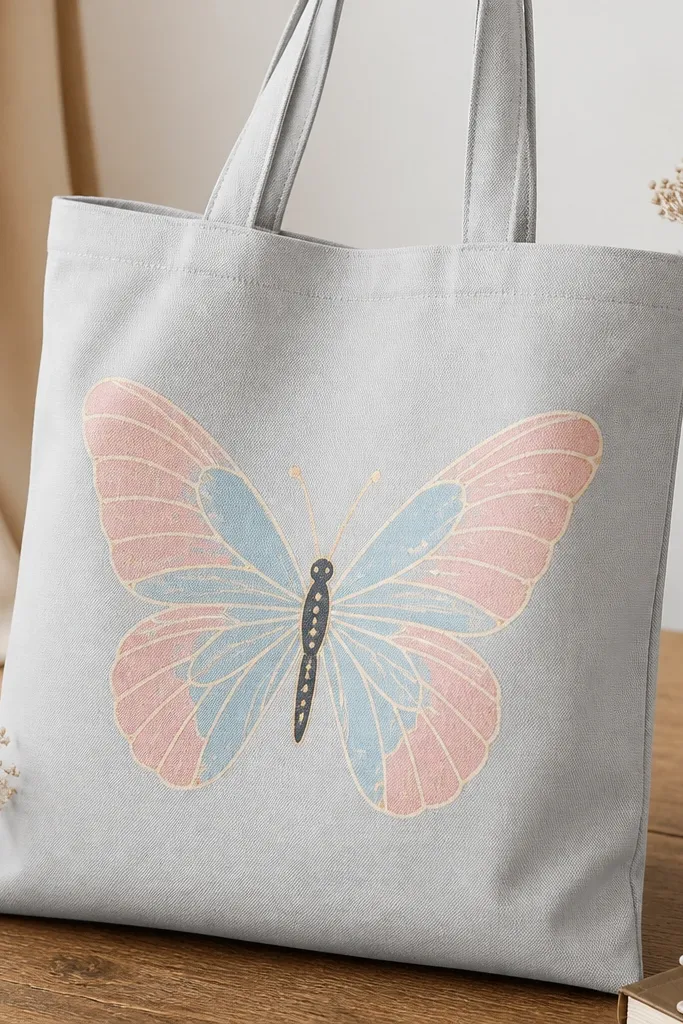
This is my go-to when I want clean geometry without spending hours. Stencil wings look sharp on totes because the shape reads instantly, and the gold veins add that “expensive” finish. Use matte pastel colors for the wing fields so the gold doesn’t look harsh. For the gold, I use metallic acrylic or thin craft gold paint, plus a steady liner brush. It’s flattering for everyday outfits because it sits in soft colors and doesn’t demand neon-level attention.
Tape your butterfly stencil in the exact center of the bag, then dab pastel pink and pale blue with a foam brush so you don’t smear under the stencil. Remove the stencil while the paint is still slightly wet for the cleanest edges. Let dry completely, then outline the wing seams with a thin liner brush dipped in metallic gold paint. Add short gold strokes from the wing base toward the outer edge like veins. Finish the body with dark brown and add a tiny gold dot on the thorax.
Pro tipUse painter’s tape on the tote seams so the stencil doesn’t shift when you press with the foam brush.
AvoidDon’t use a regular brush on stencil fills — it will push paint under the stencil.
5. Sponge Bloom Butterfly with Soft Ombre Wings
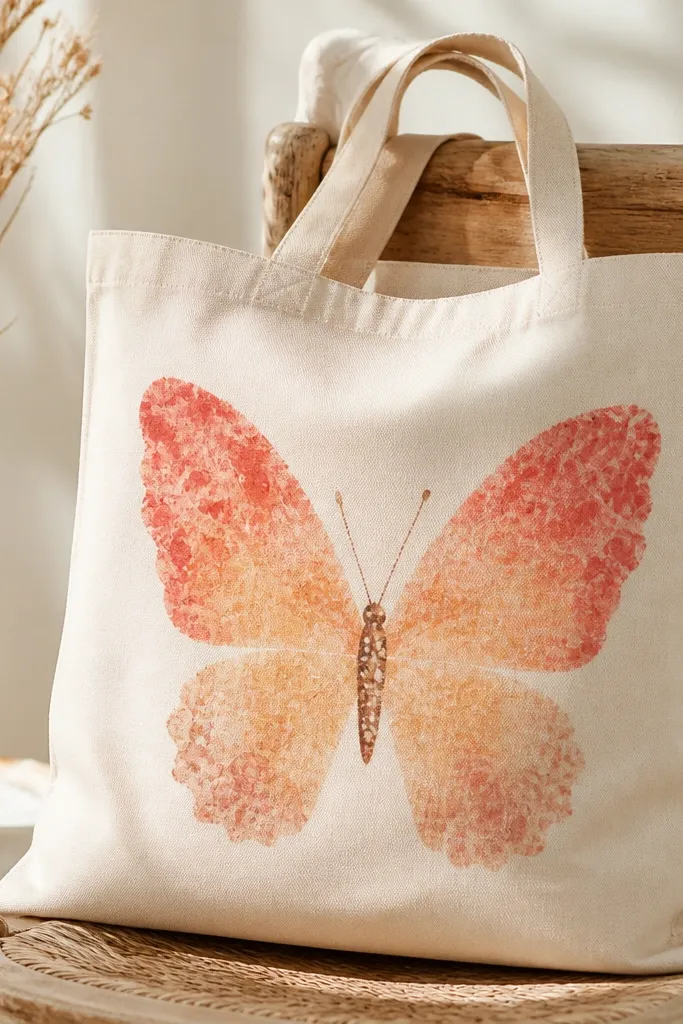
Sponge technique is forgiving, and it gives butterfly wings a “fabric art” texture that looks great up close. I use it when I’m making a set for gifts and want consistent results without perfect brush control. Coral-to-peach ombre looks flattering on most people because it’s warm and soft. The sponge texture also hides small mistakes, especially around wing edges. It looks especially good on cream or off-white totes.
Start by lightly sketching the wing shapes and painting the body first with warm brown. Mix a mid-tone peach and a darker coral, then dip a sea sponge into the coral and dab along the outer wing rim. Clean the sponge in water, blot dry, then load peach and dab toward the center. Keep dabbing until you get a smooth gradient, then add a final tiny pass of coral in the darkest edge. Let it dry, then paint small dot clusters along the inner wing like stylized patterns.
Pro tipUse a torn sponge edge for wing corners; it creates more natural irregularity than a perfectly cut sponge.
AvoidDon’t swirl the sponge — dragging makes hard streaks.
6. Dotwork Butterfly with Ink-Like Spots
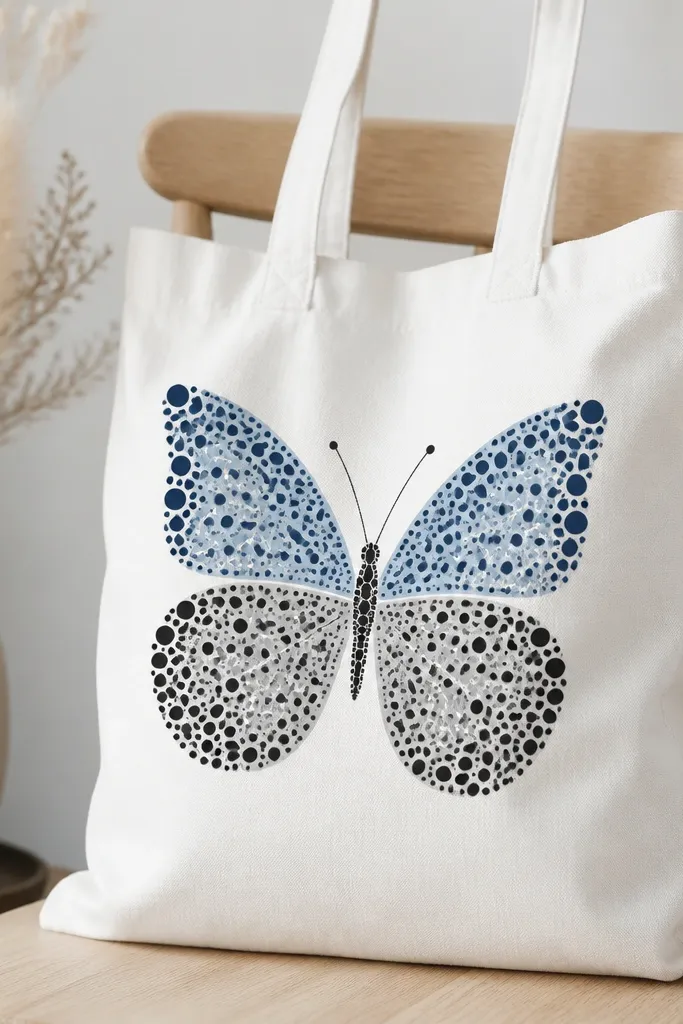
Dotwork looks sharp and graphic, and it’s how I get butterflies to look like modern illustration instead of paint-by-number. It’s also great for people who want control but don’t want to blend gradients. Navy and black dot clusters create a strong contrast on white totes without needing thick outlines. The body reads as dimensional because the dot density changes across the wings. It flatters minimal outfits because the bag becomes the clean focal point.
Start with a light base on the wings: light blue on the top and pale gray on the bottom. Then use a small round brush or stylus to place dots in navy and black, starting lightly near the center and getting denser toward the edges. Leave tiny gaps so the base shows through and the wing doesn’t look like a solid blob. Add a few larger dots near the wing tip for a focal highlight. Finally, dot the body in a tight spiral pattern and paint antennae with a liner brush.
Pro tipPractice dot size on paper first; a consistent dot diameter makes the butterfly look intentional.
AvoidDon’t connect dots into lines — it turns into messy stippling.
7. Fabric-Puffy Outline Butterfly with Stitched-Look Wings
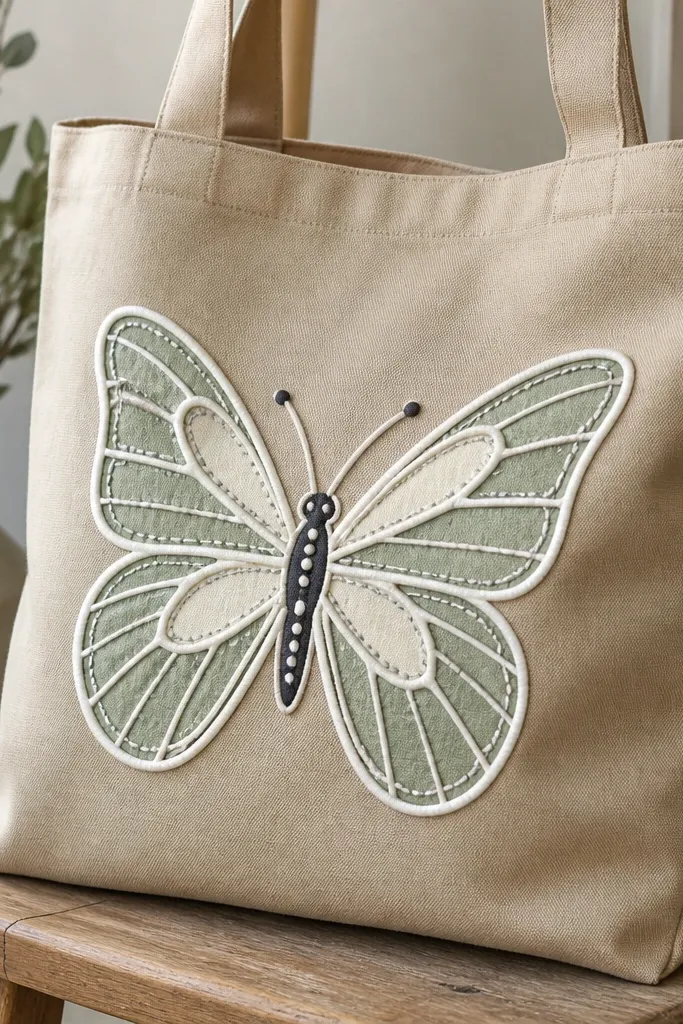
Raised outlines make a butterfly look like it’s stitched into the fabric. I like this when I’m painting totes that get handled a lot because the texture catches light and holds up visually even if the tote gets scuffed. It also looks good for gifts because it feels handmade. The sage and cream palette keeps it soft and wearable, while the raised white lines add crisp definition. It flatters neutral outfits and works well with denim or linen.
Start by sketching the butterfly lightly, then pipe the outer wing outlines with puffy fabric paint in white. Let it dry until it’s no longer tacky. Fill the wing sections with thin coats of sage and warm cream acrylic mixed with fabric medium, using a small flat brush. Once those fills dry, add stitched-look lines inside by piping thin gray lines along the wing veins. Add a raised dot pattern to the body and let everything cure fully before washing.
Pro tipIf the puffy paint spreads, squeeze slower and keep the nozzle 2-3 mm above the fabric.
AvoidDon’t rush the fill before the outline dries — the paint can bleed into the raised edges.
8. Tropical Blue Morpho Butterfly with Iridescent Shimmer
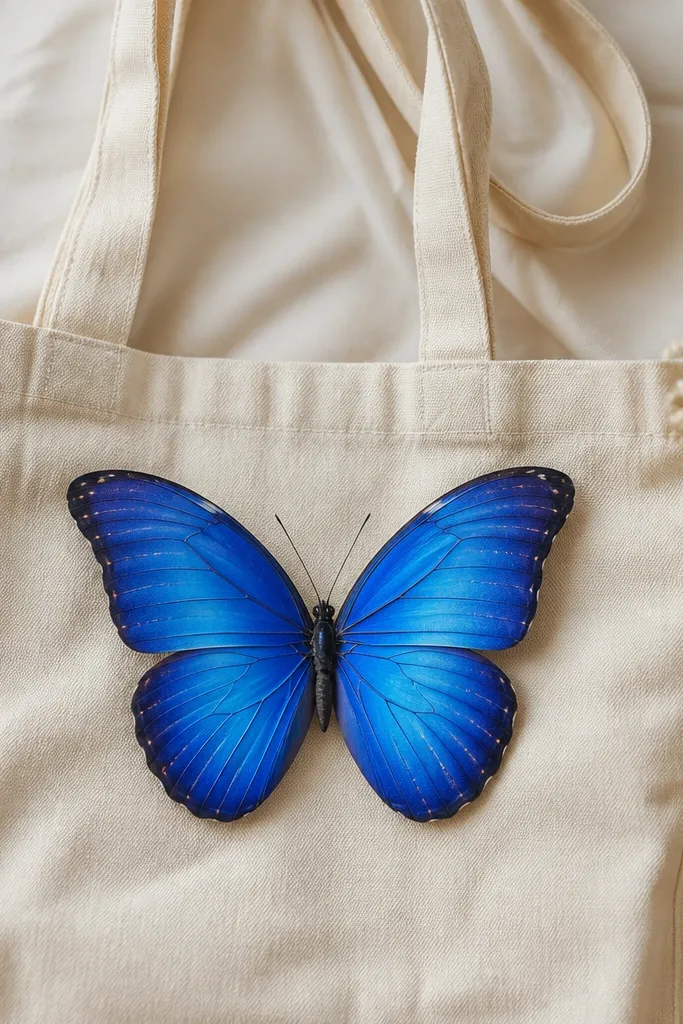
This one looks like real butterfly wings because you’re painting reflections, not just color. I do it on light canvas so the blues stay bright and the shimmer shows. Use cobalt and electric blue for the main values, then add silver shimmer paint in angled streaks to mimic how light hits the wing surfaces. The body stays dark so it doesn’t compete with the wings. It flatters outfits with blue tones and also looks striking with black, because the bag feels like a wearable accent.
Start with a base coat of electric blue on both wings, leaving a narrow unpainted edge for the darker rim. Paint cobalt along the outer rim and blend inward with a damp brush so the transition looks smooth. When dry, use a liner brush to paint angled shimmer streaks from the wing base to the tip, spacing them about 5-8 mm apart. Add a small silver line down the body thorax and finish with charcoal for the rest of the body. Let shimmer set before you handle the tote.
Pro tipUse a cheap makeup sponge to apply silver shimmer lightly — it gives more realistic reflective texture than a solid brush stroke.
AvoidDon’t overdo the silver streaks — too many makes the wings look metallic-plastic.
9. Pastel Pressed-Flower Butterfly Collage with Paint Accents
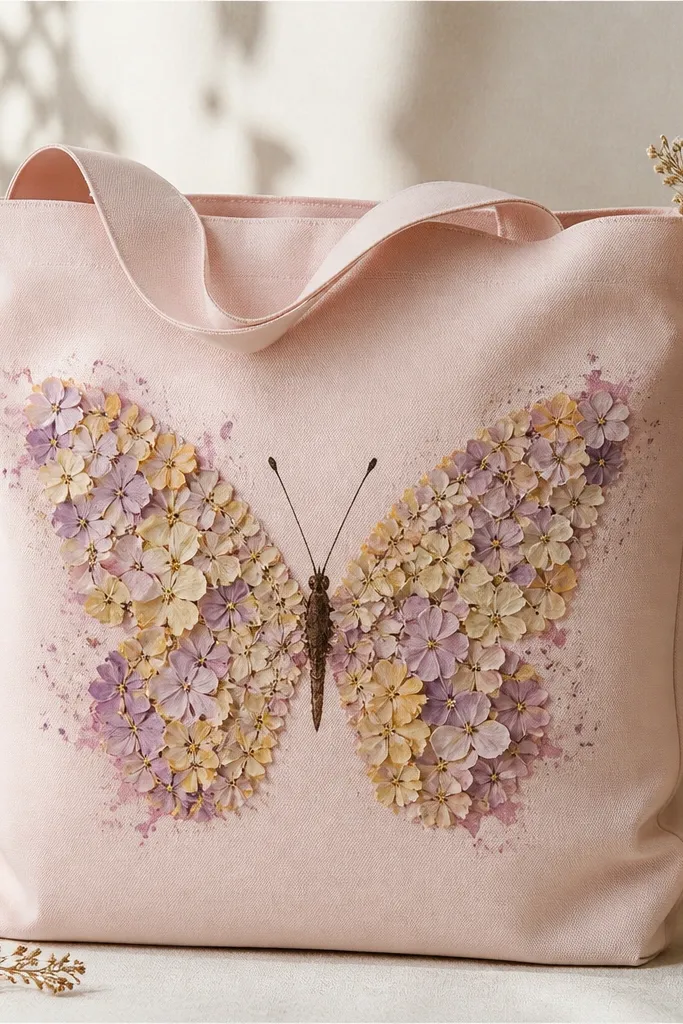
This is for when you want the butterfly to feel handmade and slightly imperfect in a good way. I’ve done it with pressed flowers from small craft purchases because they keep their color better than random garden petals. The key is to seal the petals so they don’t lift or crumble when the tote flexes. Paint accents around the wings make the butterfly read clearly from a distance. It works well for spring outfits and looks soft on warm skin tones because the palette is light and airy.
Sketch the butterfly shape on the tote, then lightly glue the pressed petals inside each wing using fabric-safe matte glue. Leave a small border gap so you can paint crisp edges afterward. Paint the wing outlines in pale lilac and butter-yellow so the collage doesn’t look patchy. Add a thin dot pattern on the body with dark brown acrylic. Seal the whole butterfly with a clear fabric sealant in thin coats, letting each coat dry before adding the next.
Press flowers flat for at least a week; thick petals make lumps under the sealant.
Don’t use glossy glue — it can leave shiny spots that look wet.
10. Monochrome Black-and-White Butterfly with Graphic Halftone
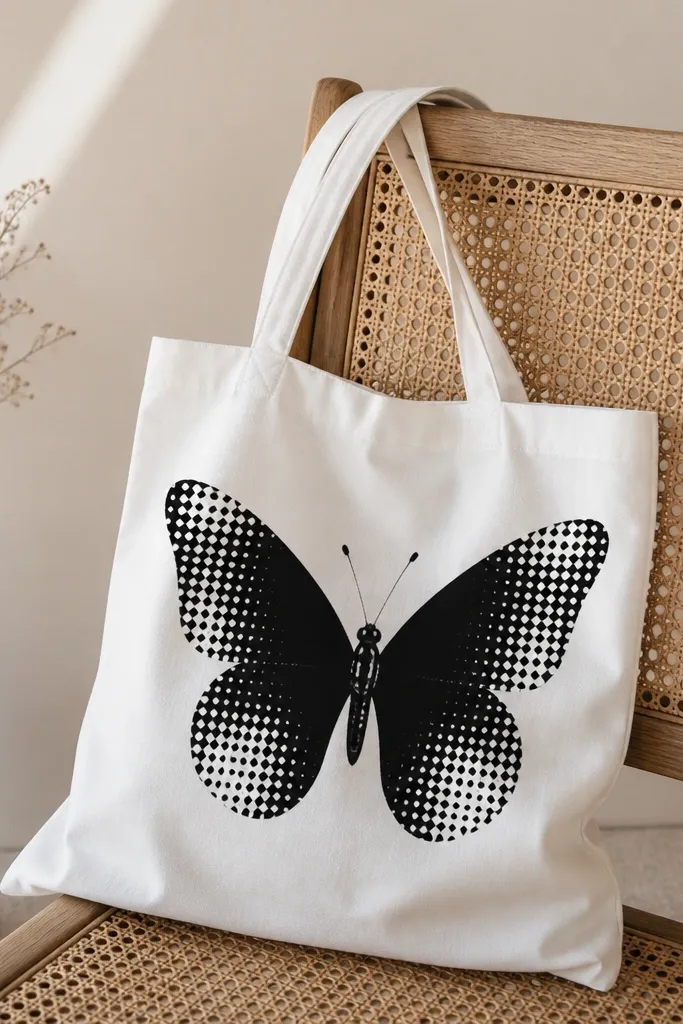
This style looks modern and clean, and it’s the one I reach for when the tote is going to be used daily. Monochrome butterflies don’t fight your clothes because they sit in the same color family as most outfits. Halftone dots add depth without needing gradients. I like placing the densest dot areas near the wing edges so the wings look like they’re catching light. It flatters everyone because it’s simple, high-contrast, and easy to pair.
Start by painting a solid black butterfly silhouette across the tote center, including the wings and body. Once it dries, use a stencil or a homemade dot pattern (spaced with a round sponge or end of a brush) to add halftone dots in white. Focus dots on wing tips and along the upper wing edge so the silhouette stays bold at a distance. Add a few small white highlights near the body and paint antennae with a thin brush. Let dry for a full hour before you flex the tote.
Pro tipIf your halftone looks too gray, dry the tote under a fan and add a second coat of white dots only where you need contrast.
AvoidDon’t use watered-down white — it turns into dusty gray dots.
11. Butterfly Wing Water-Swipe Technique with Marbling Effect
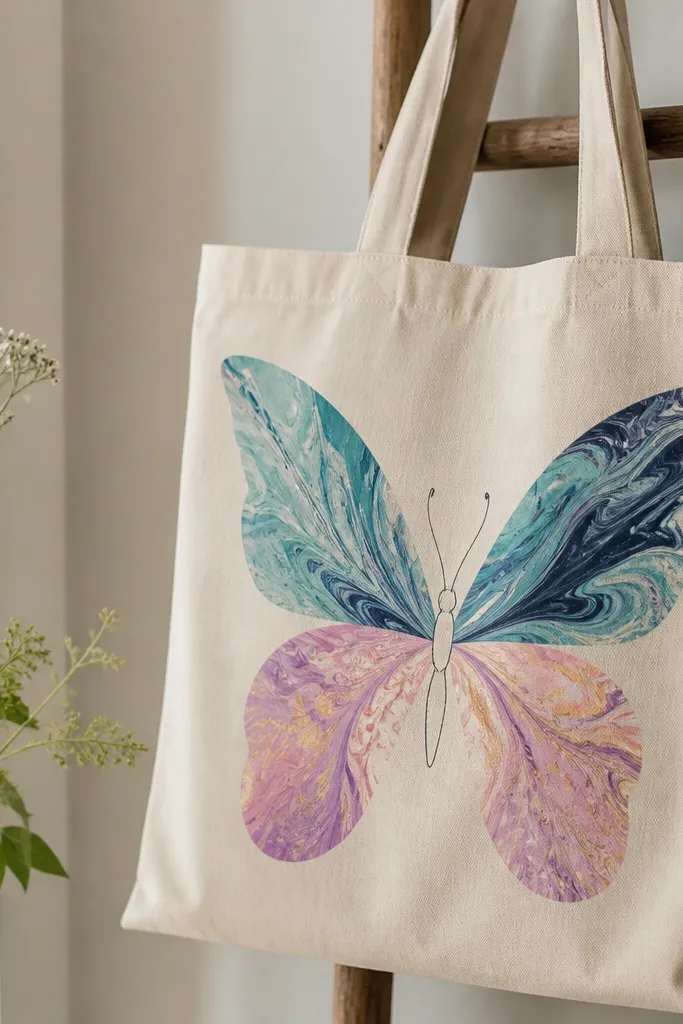
Marbling makes butterflies look like they belong in abstract art, and it’s surprisingly easy once you control the moisture. I do this when I want fast wing texture without painstaking detail. Use a limited palette so the marbling looks intentional: two main colors plus one accent. The body stays simple so the wing texture is the focus. It looks great on people who like artsy outfits because the tote adds movement and color without being overly literal.
Sketch the butterfly and paint the body first with dark brown or charcoal. Mix your wing colors with fabric medium to keep them flexible, then thin slightly so they spread when they hit moisture. Lightly mist the wing area with water using a spray bottle, then swipe one color across the wing using a flat brush, immediately dragging another color into it. Use a paper towel to pull thin streaks at the wing edges. Let it dry, then add a thin outline around the wing shapes with a liner brush.
Pro tipDo one wing at a time so the marbling stays fluid and doesn’t dry into hard edges.
AvoidDon’t over-mist — puddles cause colors to pool and you lose the wing shape.
12. Fall Spice Butterfly with Copper Leaf Accent
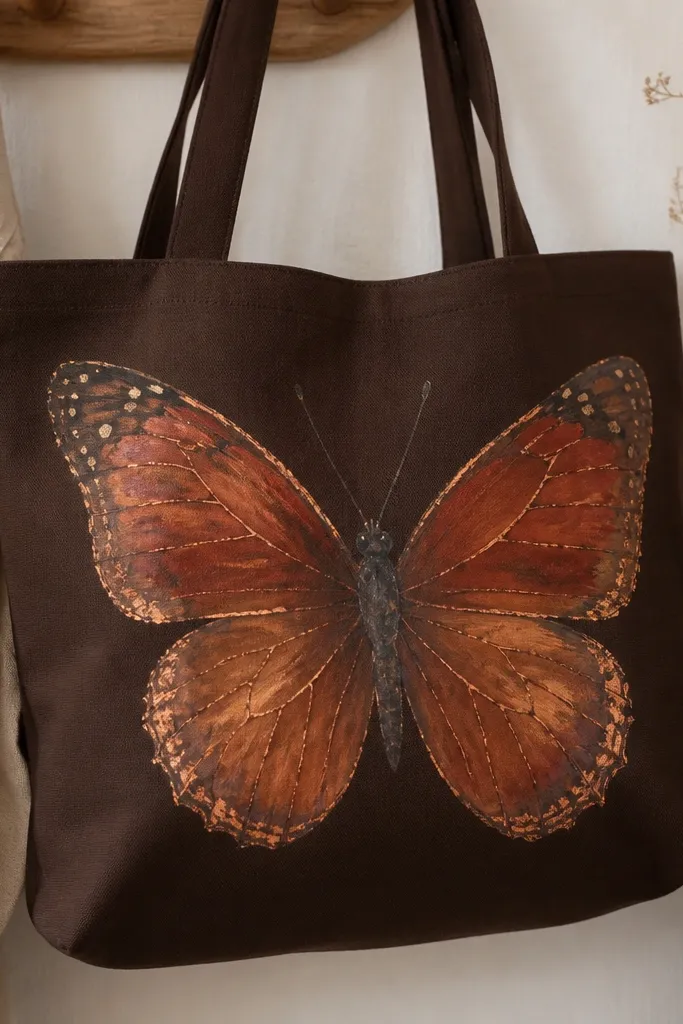
This one is made for autumn totes and cozy outfits. The warm wing colors look rich on darker bags, and copper leaf adds that metallic sparkle without needing neon paint. I’ve used copper leaf with acrylic sealer on canvas and it holds up better than loose leaf flakes. Keep the body dark so the wings feel dramatic. It flatters warm undertones and looks especially good with cream knits and olive jackets.
Paint the wings first in burnt orange and rust, using a sponge or flat brush to create a light-to-dark gradient. Add a darker brown-black rim on the outer edge for shape. Apply a thin layer of tacky adhesive medium on the wing veins only, then press copper leaf lightly so it sticks just on the lines. Seal over the leaf with a clear acrylic sealer mixed with fabric medium so it stays flexible. Finish with cream dot clusters and a charcoal body.
Cut copper leaf into skinny strips so you place it like veins instead of covering the whole wing.
Don’t seal copper leaf too thickly — it can dull the shine and look chalky.
13. Botanical Butterfly with Tiny Script-Style Wing Lines
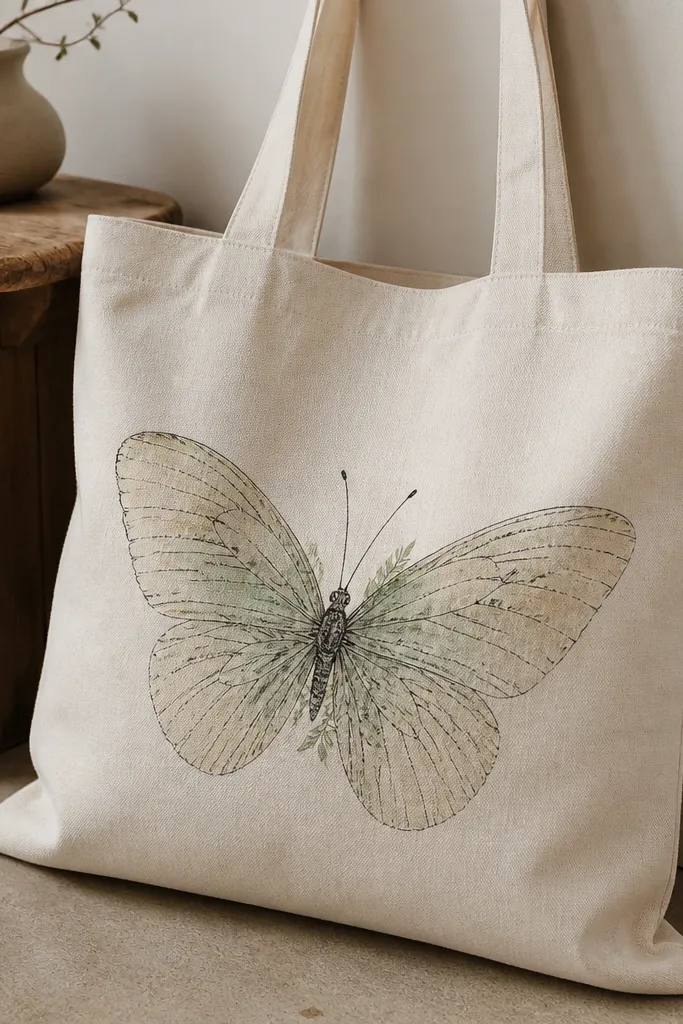
This style looks like a nature journal page turned into a wearable piece. It’s not loud, but it has detail that makes people lean in. I use pale green and beige because they mimic plant tones without going too bright. The thin black “script” veins add a scientific feel and keep the wings from looking plain. It flatters minimal wardrobes because the colors stay soft and the linework does the work.
Sketch the butterfly lightly and paint the wing washes with pale green and beige, keeping them thin so the canvas texture shows through. Let dry, then use a fine liner brush to draw vein lines that curve like handwriting strokes. Add a few tiny leaf shapes near the wing base with the same liner brush. Paint the body in dark brown and add a few small dot accents on the thorax. Finish by lightly speckling the background with diluted green for a botanical feel.
Pro tipUse a liner brush with a 10/0 or 1-size tip so your lines stay crisp on fabric.
AvoidDon’t flood the veins with paint — heavy lines make the journal style look cartoonish.
14. Galaxy Butterfly with Starry Speckle and Deep Purple Wings
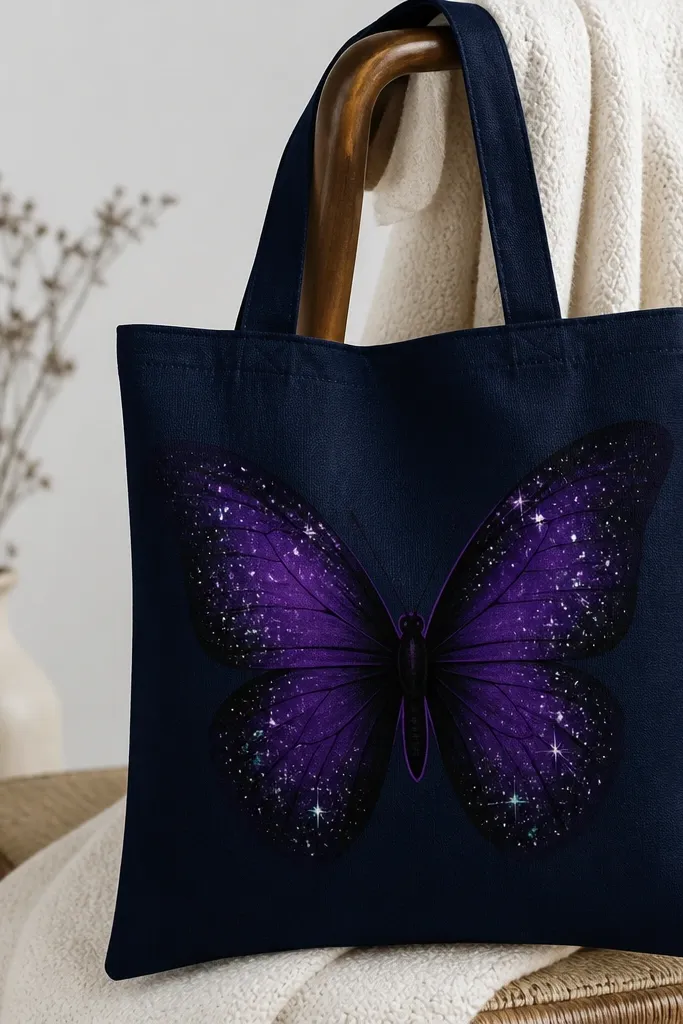
Galaxy wings look dramatic on dark totes and they photograph well under low light. I use deep purple with black blending so the wings look like depth instead of flat color blocks. Add white speckles and a few silver dots for stars, plus tiny teal accents near the inner wing for contrast. The body stays dark so it doesn’t compete with the star field. This is a great option for night events, music festivals, and anyone who likes a moody color palette.
Start by painting the wing areas in deep purple, then blend toward black at the outer edges with a damp brush. Once that dries, mix white acrylic with fabric medium and splatter it with a toothbrush for star speckles. Add a second pass with silver paint for larger star points. Use a thin brush to add a faint purple outline around the wing shapes so the butterfly reads cleanly. Paint the antennae and body in near-black, then add two small teal highlights near the inner wing.
Cover the tote handles with paper so splatter doesn’t hit places you’ll touch all day.
Don’t use thick paint for splatter — it makes big blobs instead of tiny stars.
15. Pink Peony Butterfly with Soft Petal Edges
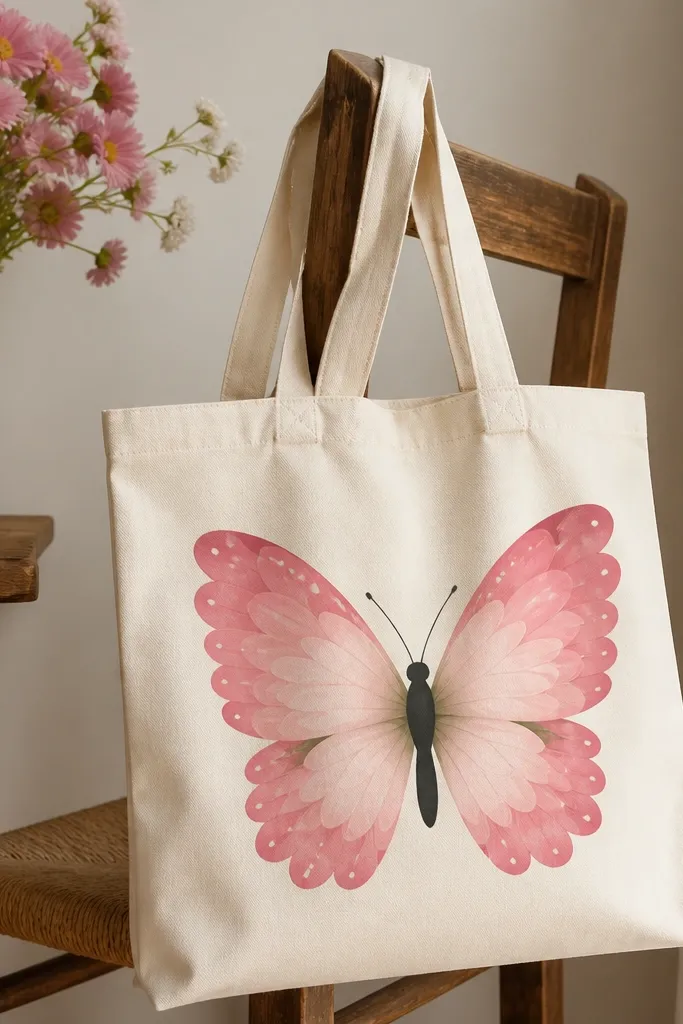
This style is for a sweet, feminine vibe without looking childish. I like it on cream totes because blush pink reads delicate and not muddy. The scalloped edges are what make it feel like peony petals instead of plain butterfly wings. Use a blush pink light tone and a deeper rose for the scallop rims, then add tiny white dots for lift. It flatters fair to medium skin tones and looks especially good with denim, white dresses, and soft knitwear.
Sketch the butterfly and lightly mark scallop points along each wing edge. Paint the whole wing base in blush pink, then add deeper rose along the scallop rims with a small round brush. Use a slightly damp brush to soften the boundary between light and dark so it looks like petals. Add tiny white dots near the wing tip and a few light green shadows at the wing base for depth. Finish with a charcoal body and thin black antennae.
Mark scallops with 1 cm intervals so both wings match even if you’re working fast.
Don’t make scallops too uniform — uneven edges look more natural.
16. Sea Glass Butterfly with Turquoise Layers
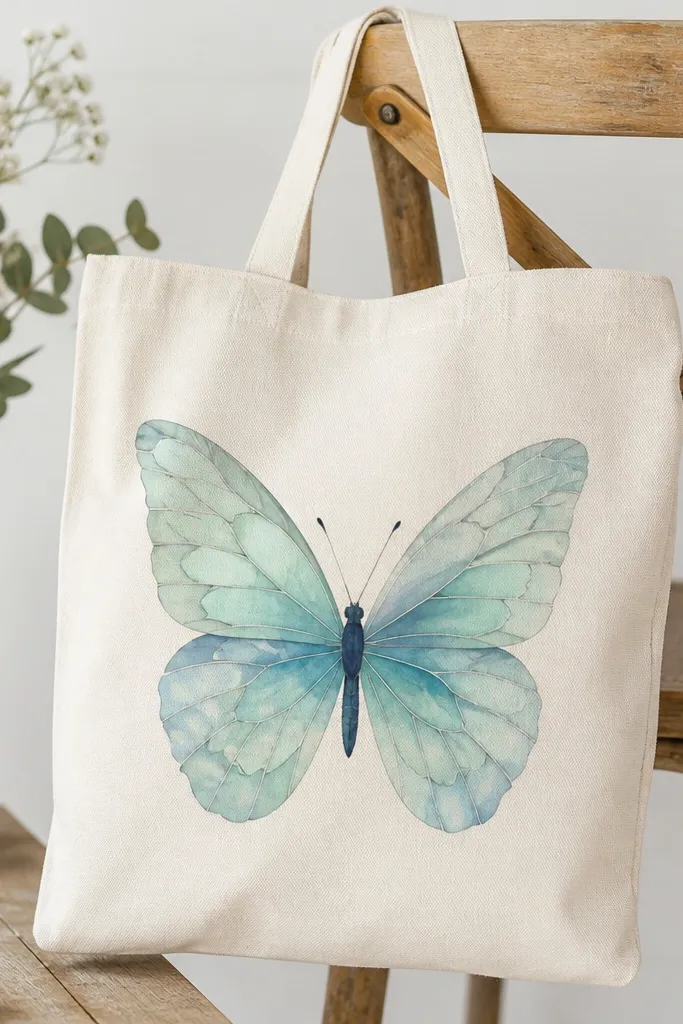
Sea-glass colors look clean and calming, and they look expensive because of the translucent feel. I use this on off-white totes because the frosted layers catch light without screaming. Paint is thinned and layered so you get a glassy look instead of opaque blobs. Add soft gray vein lines to keep the wing shape readable. It flatters cool undertones and pairs well with silver jewelry and denim.
Start by mixing turquoise acrylic with fabric medium and a small amount of water until it spreads like tinted cream. Paint the wing areas with one thin translucent coat and let it dry. Add a second layer in aqua, focusing on the center of each wing, then a third layer in pale mint near the inner edge. Outline veins with soft gray using a fine liner brush, then paint the body in dark blue-gray. Finish with a few tiny “frost” specks using diluted white.
Pro tipDo 3 thin layers instead of 1 thick layer — you get that frosted sea-glass effect.
AvoidDon’t skip fabric medium — plain watered acrylic stays stiff and can crack.
17. Black Ink Butterfly with White Gelly Dot Highlights
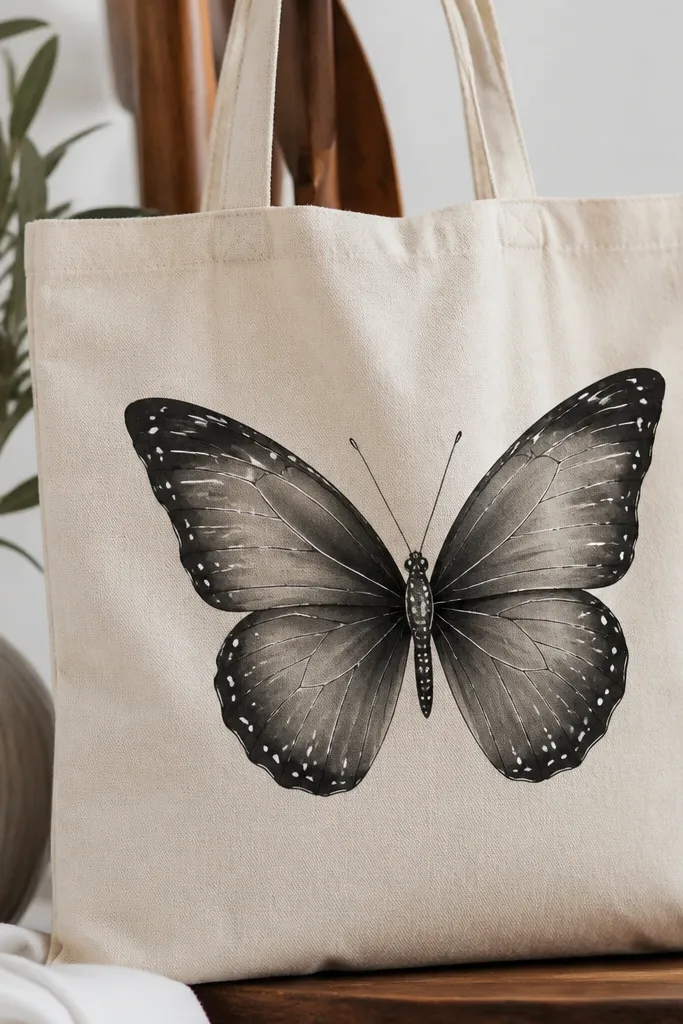
This is the style I use when I want a crisp illustration look and I don’t want to blend much. Black wash gives depth, and white gel highlights make the butterfly look like it’s catching light. It works on light canvas and on totes that already have a little texture. The body stays line-based, so the wings can be dramatic without getting messy. It flatters almost any outfit because it’s mostly black and white with controlled highlights.
Sketch the butterfly and paint a black wash across the wings using acrylic thinned with water and fabric medium. Add a gray mid tone by mixing black with a bit of white and brushing it into the wing center. Let it dry, then add white gel pen dots and short streak highlights along the wing curves. Use a thin liner brush to reinforce wing outlines if the wash got too soft. Finally, paint antennae and a small thorax highlight dot in white for a clean finish.
Pro tipTest your gel pen on scrap fabric first — some brands skip on canvas.
AvoidDon’t add gel highlights while the wash is still wet — you’ll smear the ink.
18. Butterfly Border Corner Repeat with Center Anchor
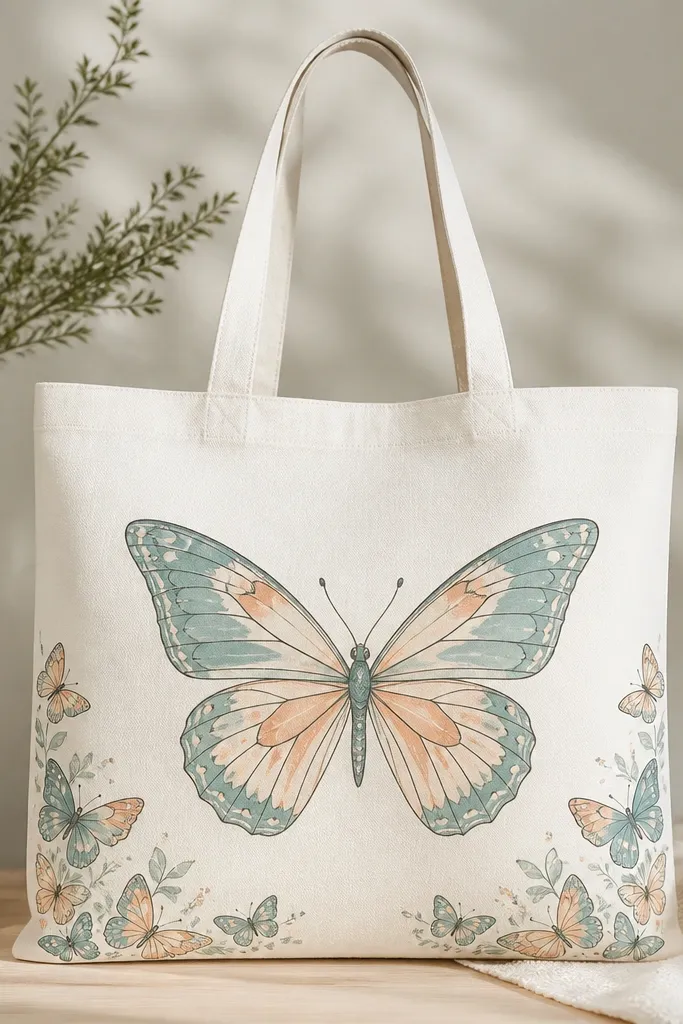
This layout makes the tote feel styled even when you’re not looking at it straight on. I do it when I’m painting for work days because the center anchor reads clearly, and the corner repeats make it feel intentional from any angle. Use one main color pairing so the small butterflies don’t look like random stickers. Teal and peach are my favorite because they balance cool and warm and look good with lots of clothing colors. It flatters most body types because tote design is about visual balance, not fit — and this layout keeps the eye centered.
Paint the center butterfly first, using a simple wing style like sponge ombre or stencil fill so it matches the rest of the design. Then create a smaller version by resizing your stencil to about 3.5-4 inches wide. Outline the smaller butterflies in gray and fill them with the same teal-peach palette. Place one small butterfly in each bottom corner, angled slightly toward the center. Add tiny dot accents near each corner butterfly so the repetition feels cohesive, then finish with a thin gray border line around the bottom edge if you want extra structure.
Pro tipKeep the corner butterflies at the same height from the bottom seam so the repeat looks clean.
AvoidDon’t vary the palette on the small ones — it makes the front look cluttered.
19. Resist-Line Stained Glass Butterfly with Color Blocks
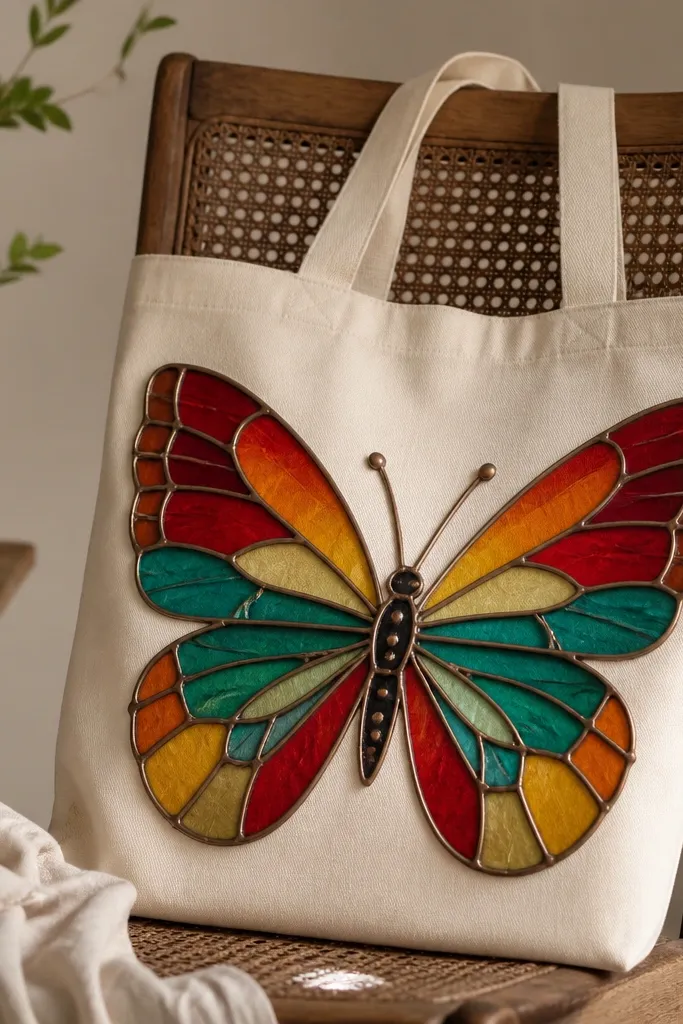
Stained-glass butterflies look like real stained windows once you get the resist lines right. I use this when I want bold color without muddying, because the resist keeps everything separated. The translucent effect comes from thin paint layers — not from special pigments. Choose 4 colors max so the wing panels read clearly. It’s flattering for almost anyone because strong color blocks look good against neutral totes and look crisp in photos.
Sketch the butterfly and use puffy fabric paint or a fabric glue resist to pipe all the wing cell borders. Let the resist dry fully until it feels firm. Mix your colors with fabric medium so they stay flexible and spread smoothly. Fill each stained-glass panel with a small flat brush, working panel by panel so colors don’t run into each other. Once everything dries, add a dark outline around the outer wing shape and paint the body in charcoal.
Pro tipUse a toothpick to drag paint into tiny panels without overloading the border.
AvoidDon’t skip drying time for the resist — wet lines cause colors to bleed and ruin the panel look.
20. Butterfly Silhouette with Brushstroke Wings and Dry-Brush Texture
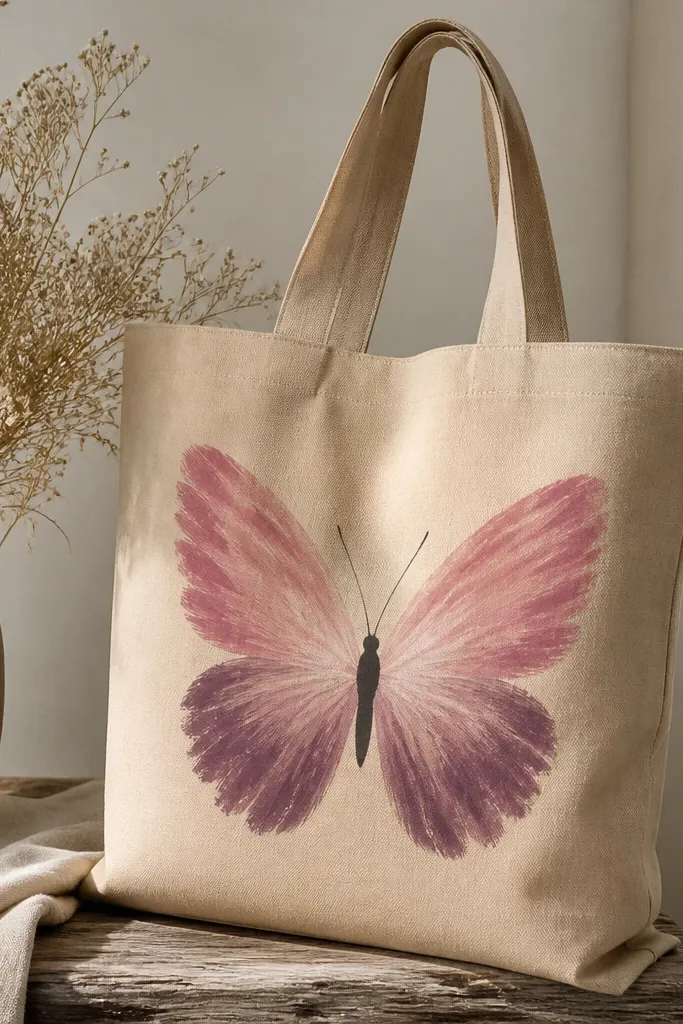
This style gives you that art-school texture without looking messy. It’s perfect for totes that will be handled a lot because the dry-brush texture hides tiny scuffs. I use dusty rose and dusty plum for a muted look that still reads clearly. The silhouette keeps the design clean, while the brushstroke fill adds movement. It flatters people who like neutral wardrobes but still want the tote to feel artsy.
Start by painting a solid butterfly silhouette in a mid-dark base color like plum-brown. Let it set, then load a flat brush with dusty rose and wipe most paint off on a paper towel. Dry-brush across the wing area so you get broken, textured strokes. Add dusty plum near the outer edges with the same dry-brush method, then use a tiny liner brush to add a few vein hints. Finish by painting the antennae and a small highlight on the body with a lighter mix.
Pro tipDry-brush from the wing base outward — it makes the texture match the shape.
AvoidDon’t use too much paint for dry-brush — it turns into streaky wet coverage.