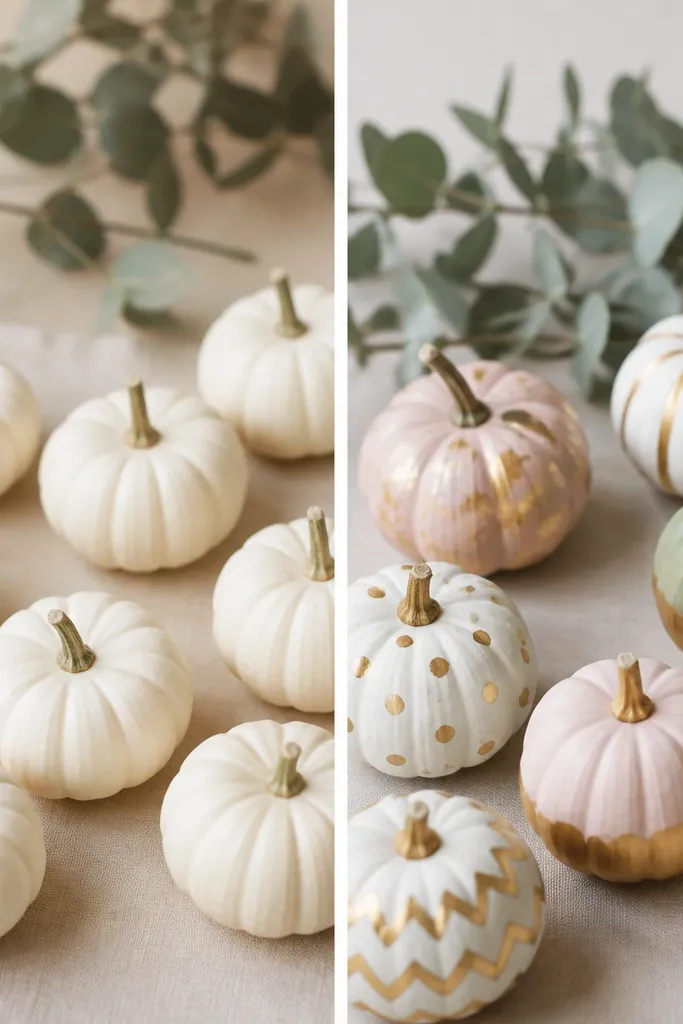
1. Matte Black Mini Pumpkins on a Cream Tray
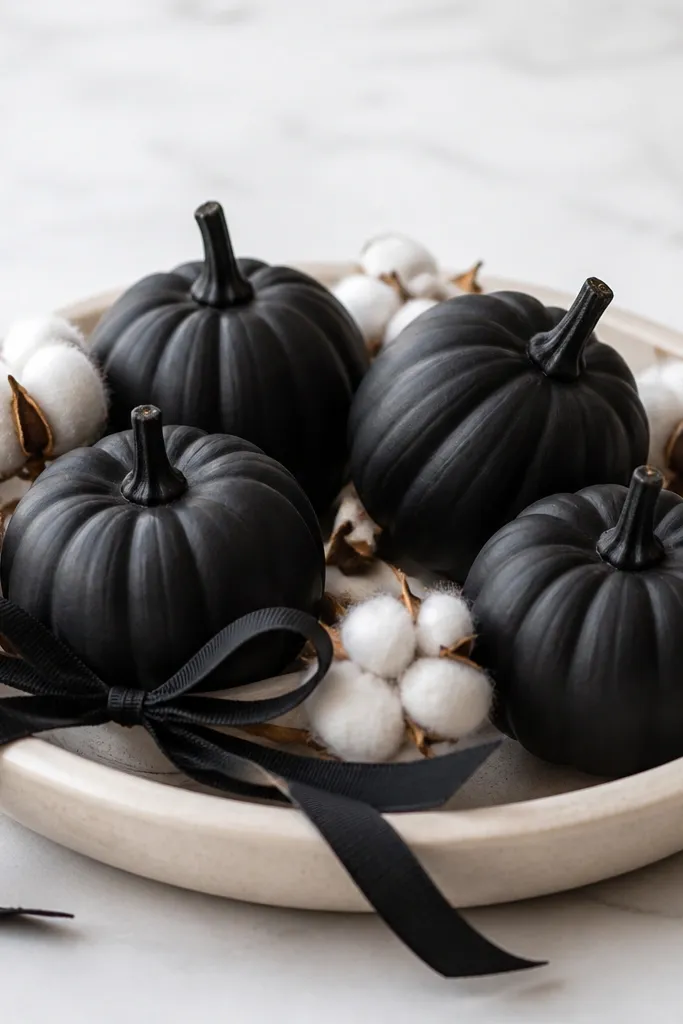
I did this one when my porch table looked too orange-heavy. I painted minis with matte black acrylic and left the stem areas clean so the shape still reads clearly. The contrast between black and cream makes the pumpkins look sharper, like they belong in a modern fall setup. It also flatters warmer skin tones in photos because the surrounding cream softens the shadows. Keep the cluster tight — the tray is only about 12 inches wide, so you get that styled density.
Start by wiping 5 mini pumpkins and letting them dry completely. Paint two thin coats of matte black acrylic, waiting 20-30 minutes between coats, then add a clear matte sealer once dry. Set the pumpkins in a triangle pattern on a cream tray, with the tallest one near the back. Tuck in 3-5 cotton stems or faux wheat picks between pumpkins so you see texture without clutter. Tie a 10-inch piece of black ribbon into a loose bow and place it near the front edge of the tray.
Pro tipIf your black looks patchy, do a quick primer coat first — matte black hides better over primer than over bare orange.
AvoidDon’t use glossy black — it shows brush marks and looks cheap fast on small pumpkins.
2. Speckled Pumpkin Trio with Gold Dots
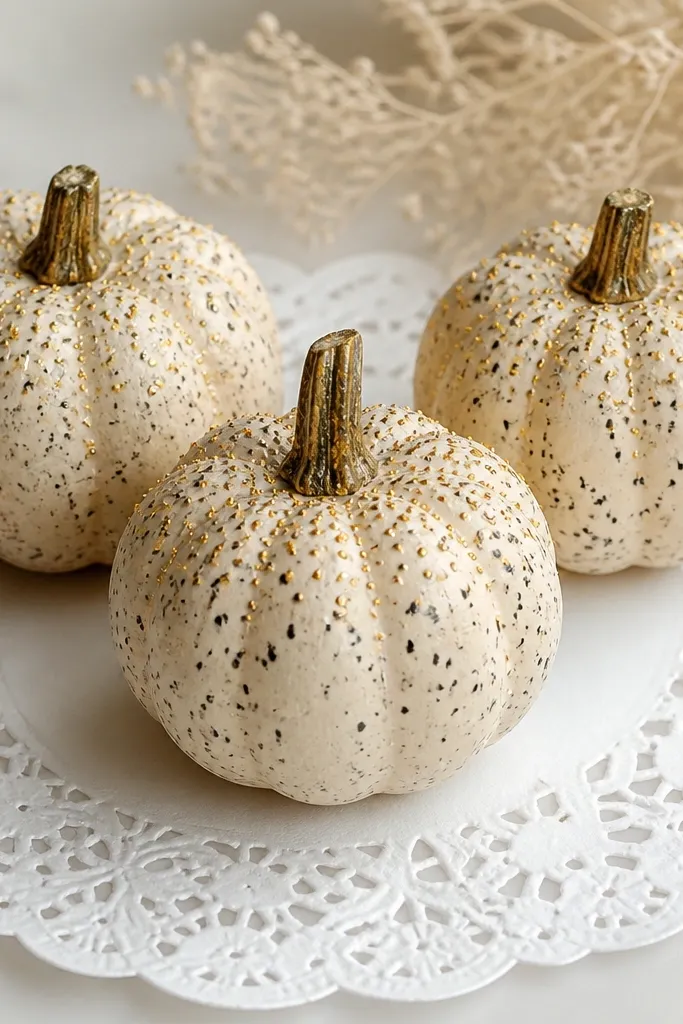
This is the “cute but not childish” setup I keep coming back to. I base-coat minis in a warm cream, then use a toothbrush to flick paint for speckles. On top of that, I add small gold dots using a paint pen so the look feels intentional. The cream base makes the pumpkins look softer and more flattering than bright orange, especially in daylight. This style looks great for photos because the gold catches light without looking glittery everywhere.
Start by painting 3 mini pumpkins with warm cream acrylic in two thin coats. For the speckle, load a toothbrush with a slightly darker cream-brown and flick over the pumpkin from 8-10 inches away. Let it dry, then use a gold paint pen to add 8-12 tiny dots on each pumpkin, mostly near the shoulder area. Place the trio on a white doily or parchment sheet to keep the background bright. Finally, add a clear acrylic sealer so the speckles don’t smear when you handle them.
Pro tipPractice flicking on a scrap paper first so you get the dot size you like before you hit the pumpkins.
AvoidDon’t splash gold all over — keep it to dots or you’ll lose the speckle pattern.
3. Velvet Ribbon Wrapped Minis with Tiny Bow Ties
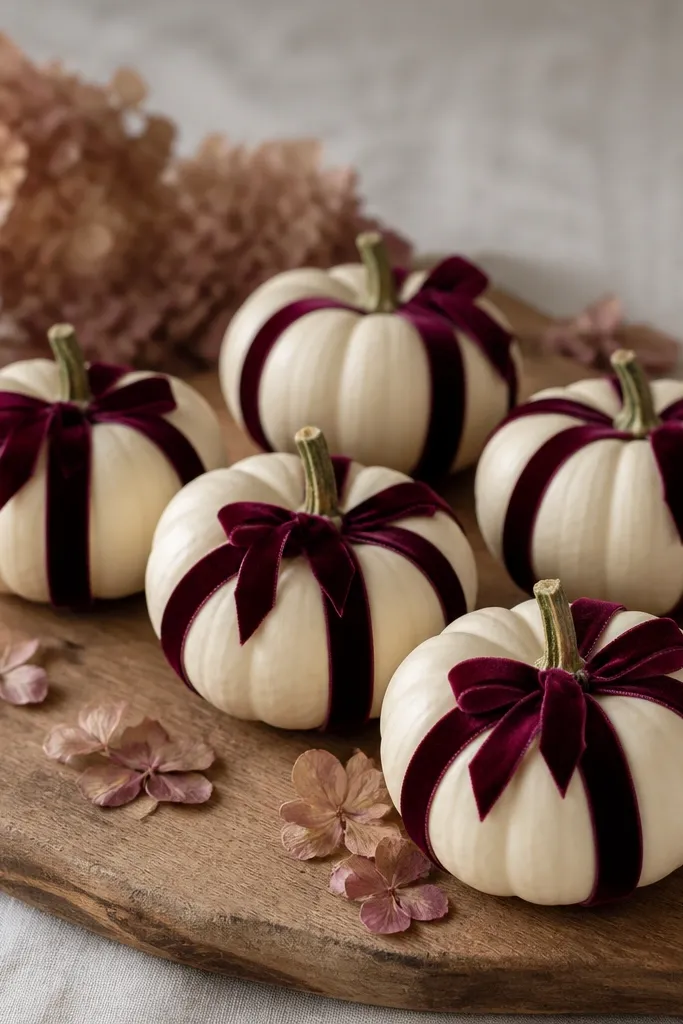
I made this when I wanted fall decor that still feels like holiday gift wrapping. Velvet ribbon creates that soft, dimensional look, even when the pumpkin is small. I wrap the ribbon around the middle so it visually “frames” the pumpkin and makes it look fuller. The dark burgundy is flattering because it reads warm and rich without needing glitter. It also photographs well because velvet texture shows up clearly in close shots.
Start by cutting 5 ribbon strips about 22 inches long each, depending on your pumpkin diameter. Wrap one strip around the pumpkin’s widest point and overlap the ends at the back, then hot glue to hold. Add a tiny bow using 3-inch loops and glue it slightly above the wrap seam. Place the pumpkins on a wood board and scatter a few dried petals for a natural accent. If you’re using real dried flowers, keep them away from direct rain and mist.
Use a thin hot glue layer — too much glue makes a shiny lump under velvet.
Don’t wrap too high — if the ribbon sits near the stem, the pumpkin looks crowded and top-heavy.
4. Washed Denim Pumpkins with Stitch-Style Paint Lines
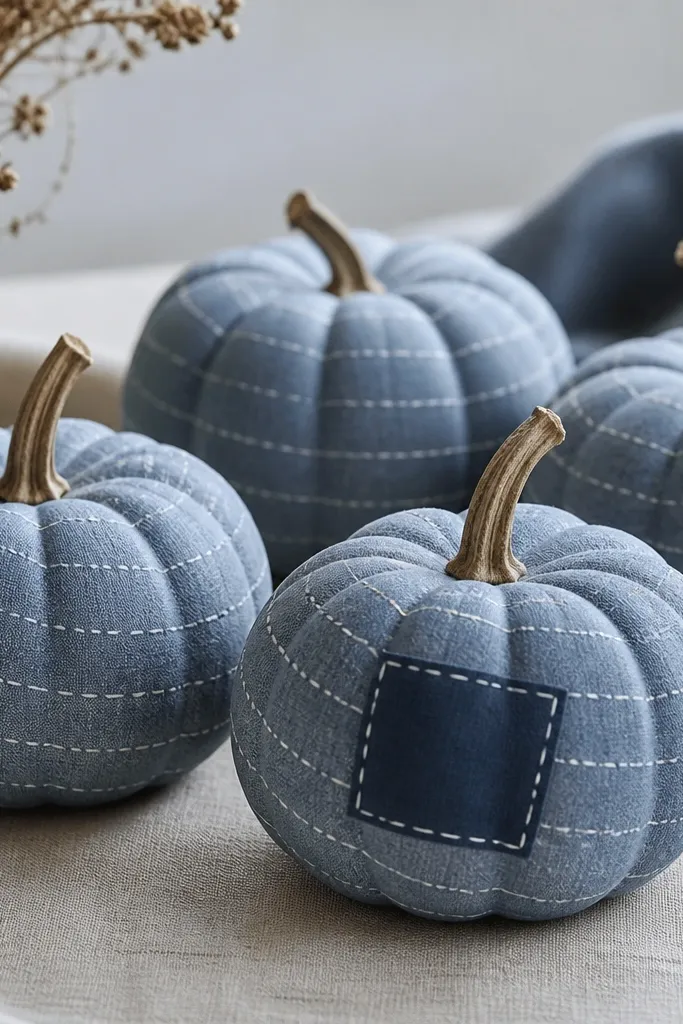
This one is weird in the best way. I paint minis in a washed denim blue-gray, then add thin white paint lines like stitching. It gives a handmade, fabric-like vibe without needing actual fabric. Denim colors look great against tan wood and cream textiles, so it’s perfect for farmhouse-style porches. In photos, the stitch lines create movement — your eye travels around the pumpkin instead of landing on one flat color.
Start by painting 4 mini pumpkins with a base coat of blue-gray craft paint, two coats for coverage. Mix a lighter shade by adding white and do a quick dry-brush over the top half for a washed effect. Use a fine liner brush to paint 6-8 thin stitch lines around the pumpkin, slightly offset like real seams. Add one small “patch” by painting a 1.5-inch rectangle in darker denim blue and dotting a few stitch marks around it. Let everything cure overnight, then seal with matte clear so it doesn’t scuff.
Pro tipIf your stitch lines wobble, use painter’s tape as a guide for the first line, then remove it before the paint fully dries.
AvoidDon’t use thick paint for the stitches — it looks like blobs instead of seam lines.
5. Cinnamon Stick Frame with Three Minis
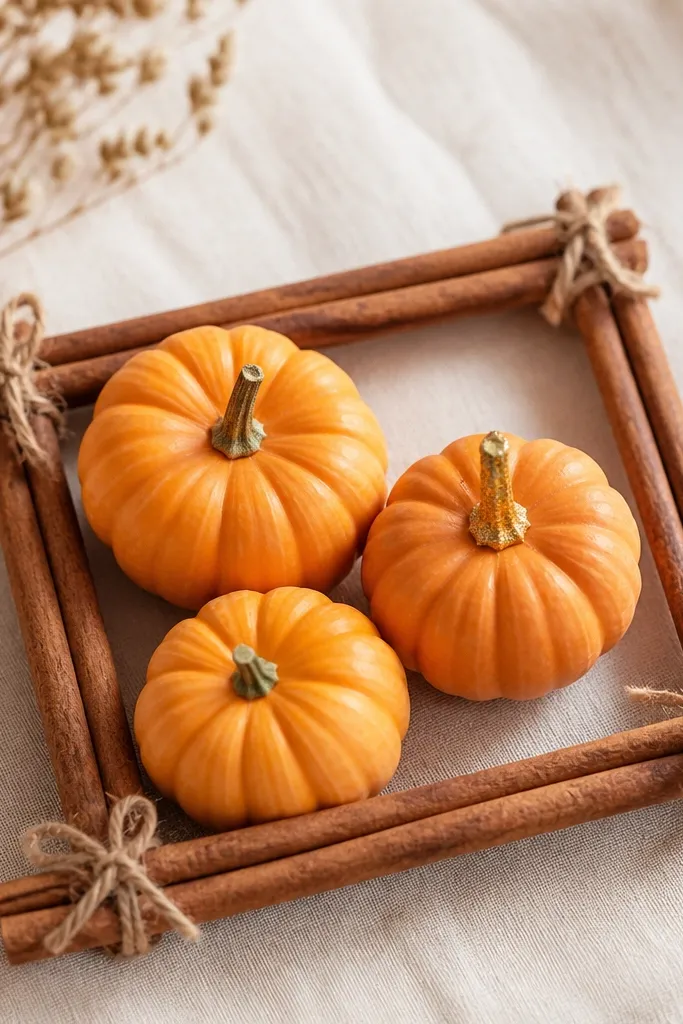
This is the only mini pumpkin setup I’ve done that makes my entryway smell like fall even after the decor is up. I keep the pumpkins natural and just dress the scene with a cinnamon stick frame and a couple of twine details. Natural orange plus cinnamon brown looks warm, and it hides imperfections in the pumpkin skin because you’re not relying on paint for perfection. It also gives you a clear “container” so the minis look like they belong together. If you’re hosting, people notice the smell before they notice the craft.
Start by arranging 3 mini pumpkins in a triangle on a small board or tray. Build a square frame using 12-16 cinnamon sticks — I hot glue mine in place, then tie twine around the outside for strength. Add one mini with a tiny gold paint dab on the stem top and let it dry. Wrap a 6-inch twine loop around the frame corner and tuck the ends under the cinnamon sticks. Place the whole thing near your door, not in direct rain.
If you want the cinnamon to last, swap to dried cinnamon sticks from craft stores that are meant for projects, not grocery packs.
Don’t seal cinnamon sticks with clear coat — they lose scent.
6. Marbled Clay-Effect Pumpkins with White Swirls
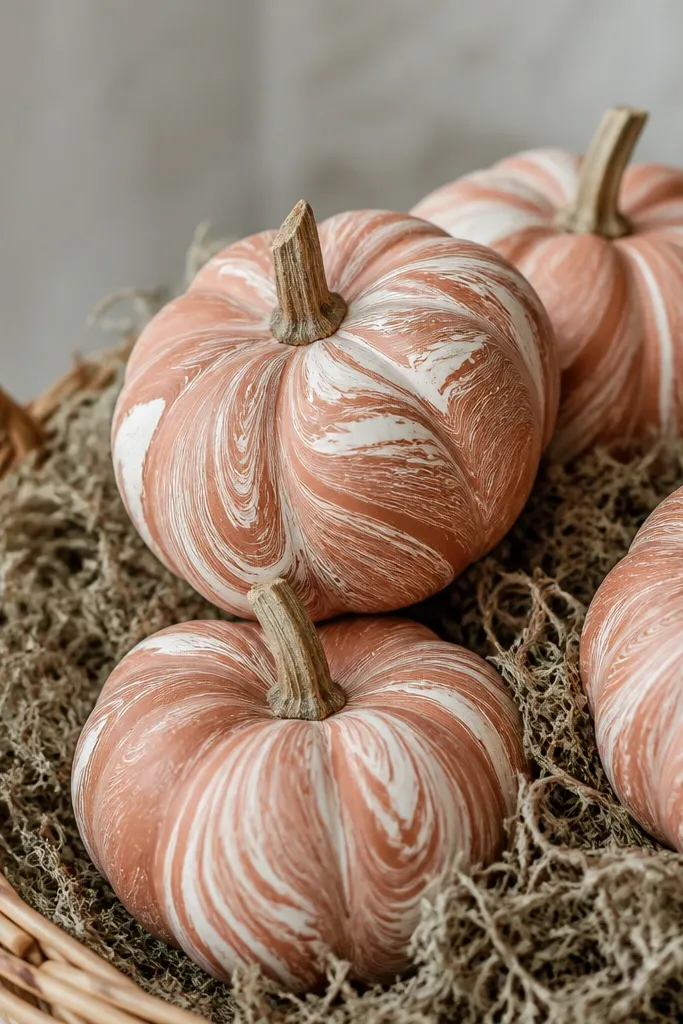
I tried this when I wanted earthy pumpkins that didn’t scream “Halloween.” The terracotta base reads calm, and the marbled white swirls make each pumpkin look custom without needing hand-drawn faces. I use a sponge to blend the marbling so it stays organic — no harsh lines. This style looks best with neutral props like moss, burlap, and natural wood. It also flatters warm undertones in photos because terracotta and white create soft contrast.
Start by painting 6 minis with a terracotta acrylic base in two coats. For the marbling, dab white paint with a sea sponge in irregular patches, then lightly drag the sponge outward to blend. Add a second pass of white on select areas so the swirls look layered. Place the minis in a shallow basket lined with dried moss or paper shred. Arrange so the most marbled pumpkin sits front and center.
Use a sponge that’s slightly rough — smooth sponges make the marbling look streaky instead of cloudy.
Don’t over-blend the swirls — if you erase the edges, it turns into one flat beige.
7. Black-and-White Check Mini Pumpkins
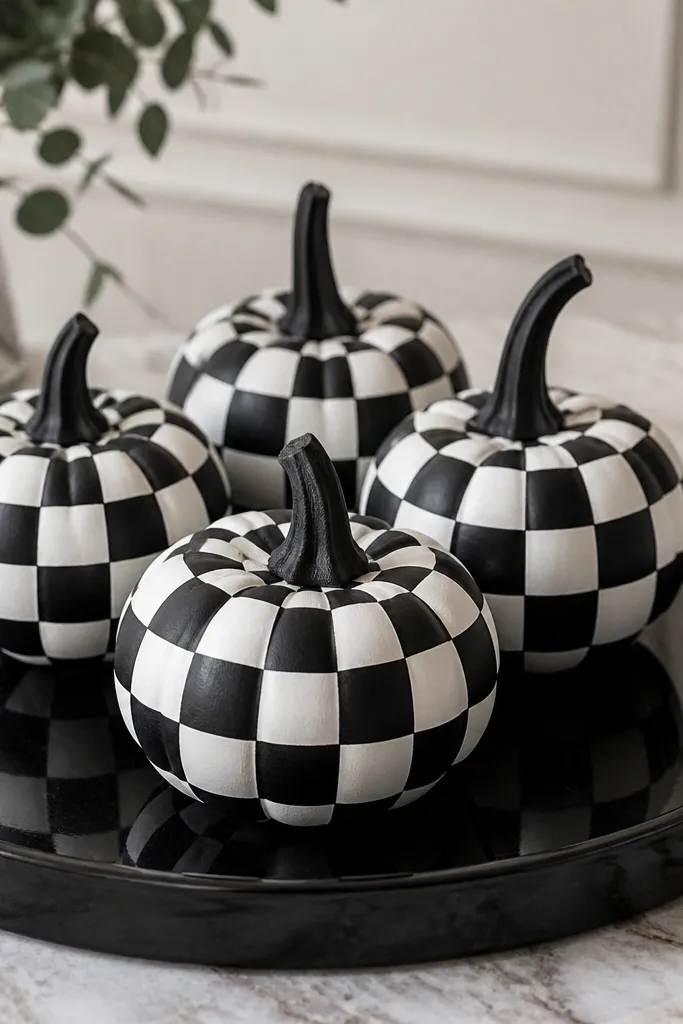
This is my “party table” idea. The check pattern looks bold at small scale, and it reads clean from across the room. I keep it tight and geometric so it doesn’t turn messy, which means you need good tape discipline. Black-and-white props also make other fall colors pop, like orange candle flames or green eucalyptus. It’s the kind of setup that makes people ask where you got them because it looks designed, not just decorated.
Start by priming minis with white acrylic primer if the orange shows through. Paint alternating black and white check squares using painter’s tape strips around the pumpkin’s curve. Work in sections: tape a vertical strip, paint, dry, remove tape, then repeat for horizontal rows. Paint the stem matte black at the end. Arrange 5 pumpkins on a glossy black tray and add a single black votive candle in the center.
Pro tipUse small tape widths (about 1/4 inch) so the checks follow the curve without gaps.
AvoidDon’t rush tape removal while paint is wet — it smears the edges and kills the crisp check look.
8. Gold Leaf Stem Accent with Clear Glue Sparkle
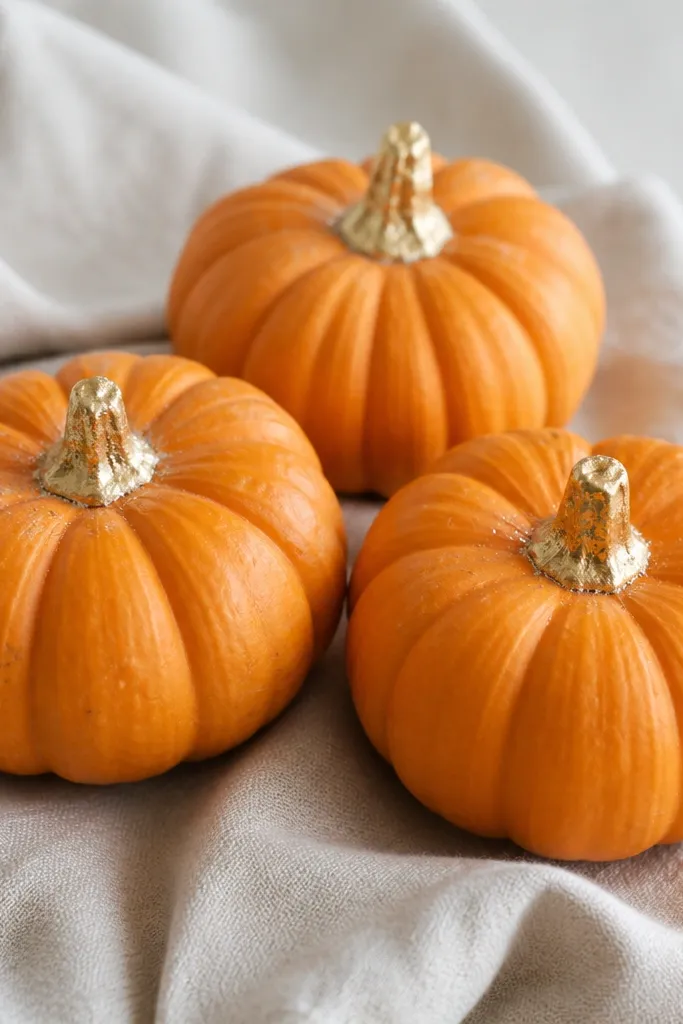
If you don’t want to repaint pumpkins, this is the quickest upgrade with the biggest payoff. Gold leaf on the stem area makes the minis look like they’re wearing jewelry. I add a few tiny clear glue sparkles around the stem so it feels intentional, not random. Natural orange keeps it warm, and the gold adds that “holiday” signal without turning everything into glitter. It also photographs well because the gold leaf catches light even in low sun.
Start by cleaning the stem area with a dry cloth so glue sticks. Brush a thin layer of craft adhesive or decoupage glue just on the top of the stem and a small ring around it. Press gold leaf pieces gently, then tap off excess after it dries. For the clear sparkle, dab tiny dots of clear glue around the gold area and sprinkle a pinch of micro glitter on top. Place the three minis on a linen napkin and keep the rest of the table decor minimal.
Pro tipGold leaf looks best when you leave some stem showing — full coverage can look like a sticker if you pile it on.
AvoidDon’t use chunky glitter — it competes with gold leaf and looks messy on small stems.
9. Burlap Band with Twine and a Button Center
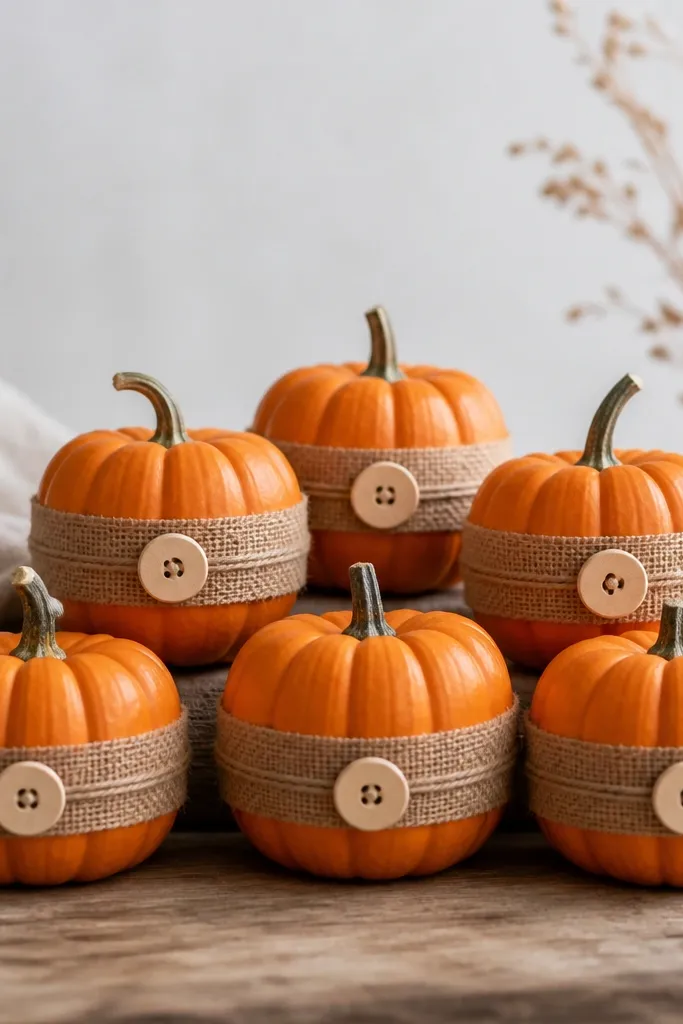
This is my go-to for anyone who wants “fall” without painting. Burlap banding makes the pumpkins look dressed like little gifts, and the twine adds that farmhouse texture. Wooden buttons make it feel handmade, and the neutral tones work with porch wood, wicker, and cream candles. In close shots, the button center gives your eye a stopping point. It’s also forgiving — even if your pumpkins have small blemishes, burlap hides them.
Start by cutting burlap strips about 1.5 inches wide and long enough to wrap once around your pumpkin with a 1-inch overlap. Hot glue the overlap at the back, then wrap a thin twine loop around the band once and tie a tight knot. Glue a 3/4-inch wooden button at the front where the twine crosses. Repeat on 6 minis, then place them in a cluster on a tray lined with kraft paper. Add one extra piece of twine across the tray corner for a finished look.
Pro tipIf burlap frays, singe the cut edge quickly with a lighter held at a distance.
AvoidDon’t use stretchy burlap — it warps the band and makes the pumpkin look uneven.
10. Terracotta Paint with Lemon Yellow Tips
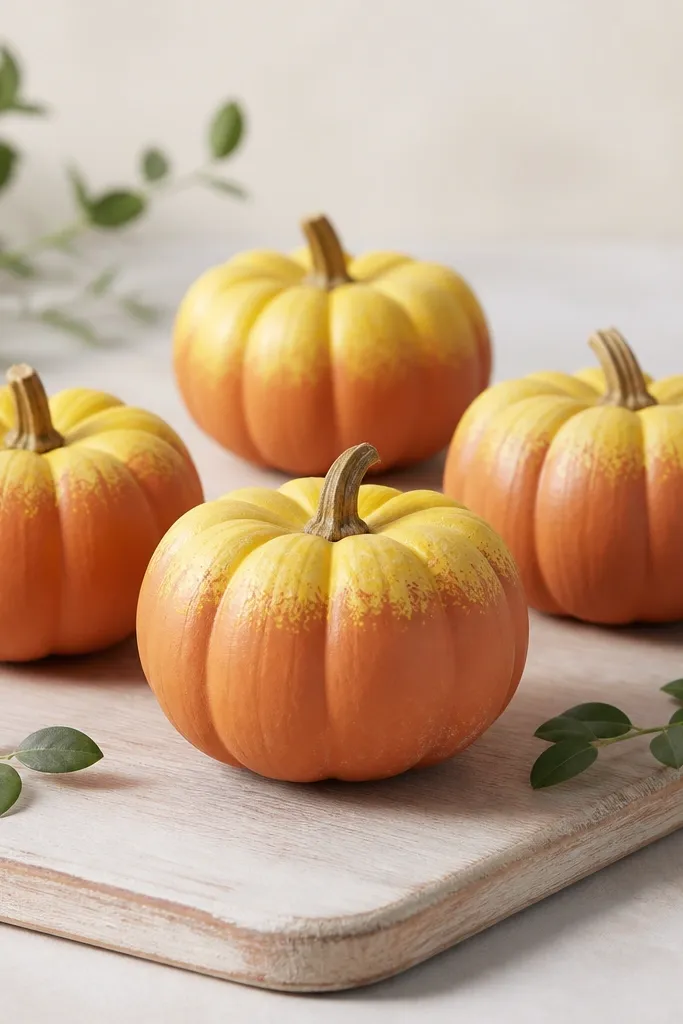
I did this for one dinner party when I wanted fall decor that still felt bright. Terracotta gives you the classic warm base, and lemon yellow on the tips makes the minis look lively instead of heavy. The fade is what makes it feel designed — it looks like a glaze, not like two separate colors. This combo also flatters people with olive or warm skin tones in photos because it adds a sunny highlight without going neon. It works especially well with green accents like eucalyptus or tiny faux leaves.
Start by painting 5 minis terracotta in two coats. Once dry, dry-brush lemon yellow only on the top 1/3 of each pumpkin, then blend downward with a barely damp sponge for a soft fade. Leave the stem area natural so the pumpkin still looks real. Add 2-3 small green leaves or faux eucalyptus sprigs around the cluster. Place everything on a pale wood board so the colors stand out.
Blend with a sponge, not a brush — sponges create the soft glaze effect faster.
Don’t paint a hard line between colors — it reads like craft paint slapped on.
11. Porcelain Look with White Chalk Paint and Gold Rim
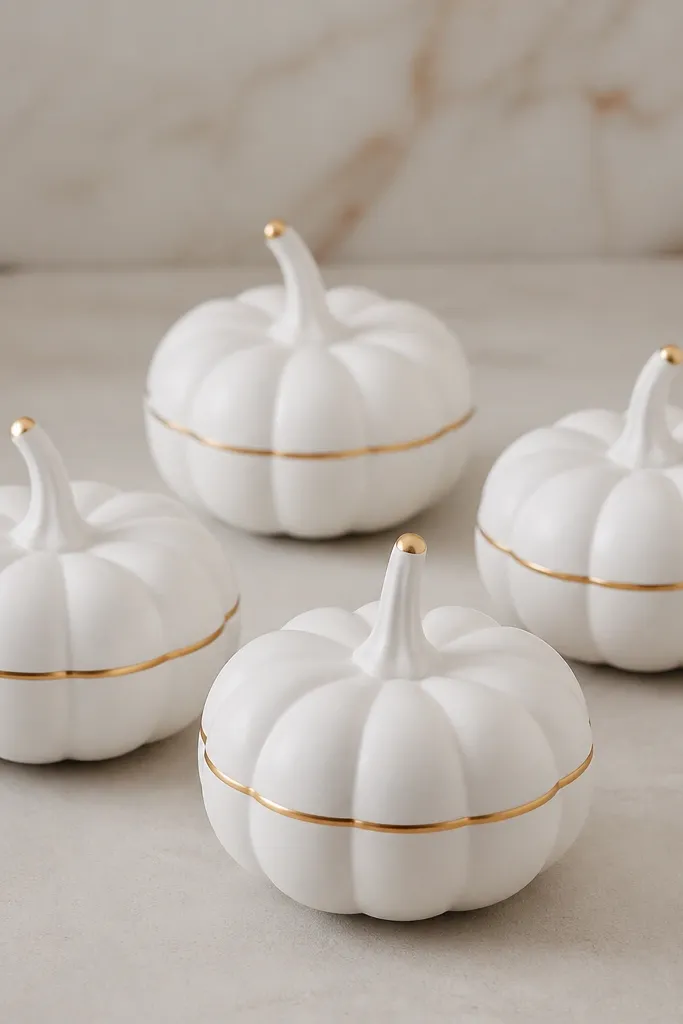
This one looks like it belongs on a styled shelf, not a craft table. Chalk paint gives a soft matte finish that reads like ceramics, and the gold rim makes it feel dressed up. I like it for people who want mini pumpkins to blend with neutral decor. The gold line also makes the pumpkin shape look more sculpted in photos. It’s a great choice if your home has black, cream, and warm wood — it won’t fight your existing palette.
Start by sanding your minis lightly and wiping dust off. Paint 4 pumpkins with white chalk paint in two coats, letting the first coat dry fully. For the gold rim, mark a pencil line around the widest part, then paint a thin line using gold acrylic paint or metallic pen. Add a tiny gold dot on each stem tip. Seal with a matte clear sealer if you’re putting them on a porch.
Pro tipUse a pencil guide line — it’s the difference between a smooth rim and a wobbly one.
AvoidDon’t skip sealing — chalk paint scuffs easily when you move the pumpkins.
12. Green Moss Top with Mini Pumpkin Caps
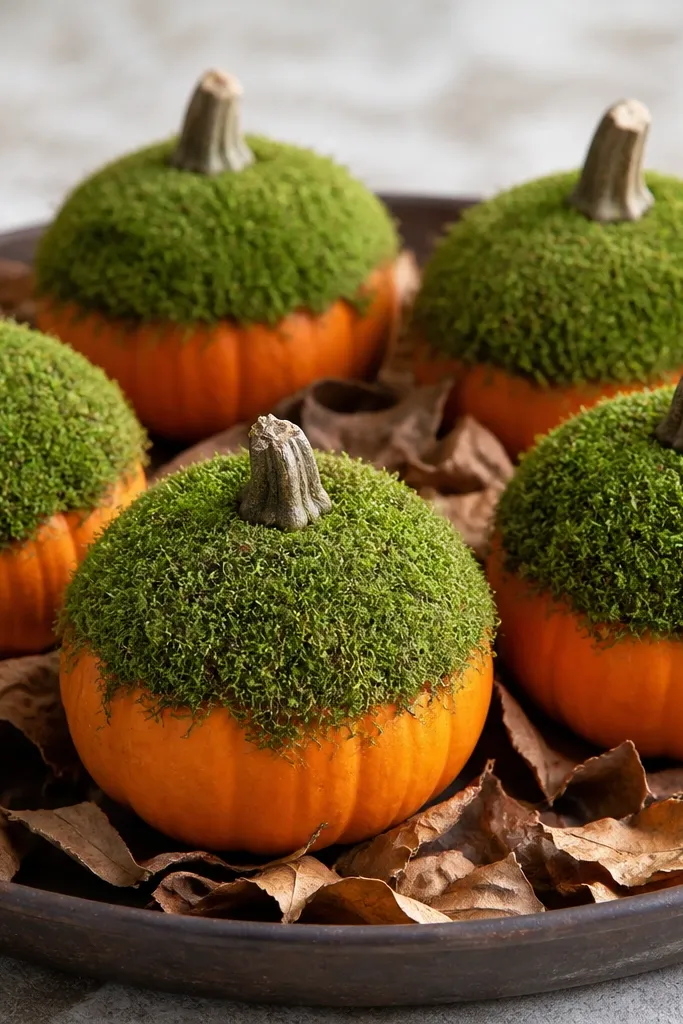
This is the “forest witch” look I actually wear to fall parties. Moss on the top makes the pumpkin look grown, not painted, and it adds color that isn’t orange. I keep the sides natural so the moss stays the focal point. It also looks great with woodsy props like pinecones, acorns, and dried leaves. In photos, moss gives you a soft, fuzzy texture that makes the minis look expensive. It flatters cooler color palettes too because green balances warm skin tones.
Start by gluing moss only to the top third of the pumpkin using hot glue in small dots. Press moss into the glue and hold for 10-15 seconds so it grips. Leave the stem mostly uncovered or just lightly moss around it so it still reads as a pumpkin. Arrange 6 moss-topped minis in a tray with dried leaves as a base layer. Add a few pinecones in the corners to frame the cluster.
Pro tipIf moss sheds, spray it lightly with craft adhesive mist before gluing so it stays put.
AvoidDon’t glue moss all the way down the sides — it hides the pumpkin shape and turns it into a moss ball.
13. Glitter Gradient Pumpkins with Transparent Sealer
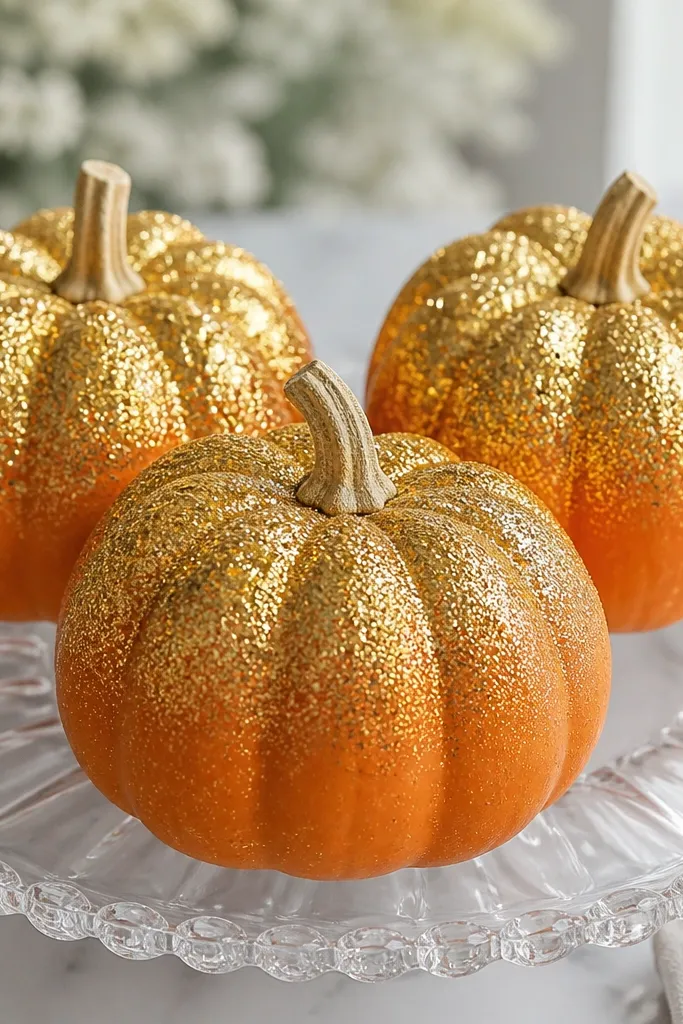
I like glitter when it’s controlled. A gradient — more glitter near the top — keeps the pumpkins from looking like they were rolled in craft confetti. I use transparent sealer between layers so glitter doesn’t shed everywhere. This look is extra good for evening photos because the top sparkles catch candlelight. It also feels more grown-up than full glitter coating, especially on minis. If you want holiday energy without mess, this is the route.
Start by sealing 3 clean minis with a clear craft sealer so glitter sticks. Pour a small amount of fine gold glitter into a cup and paint the top third with a thin layer of clear gel medium. Sprinkle glitter onto the top third and let it set, then repeat for a second layer slightly lower to create the gradient. Tap off excess and seal again with a final clear coat. Place on a clear glass plate so the glitter shows through.
Pro tipWear gloves and do this over a tray — you’ll reuse the glitter you tap off.
AvoidDon’t skip the final sealer — glitter will shed when you touch or carry the pumpkins.
14. Mini Pumpkin Faces with Paint Pen Expressions
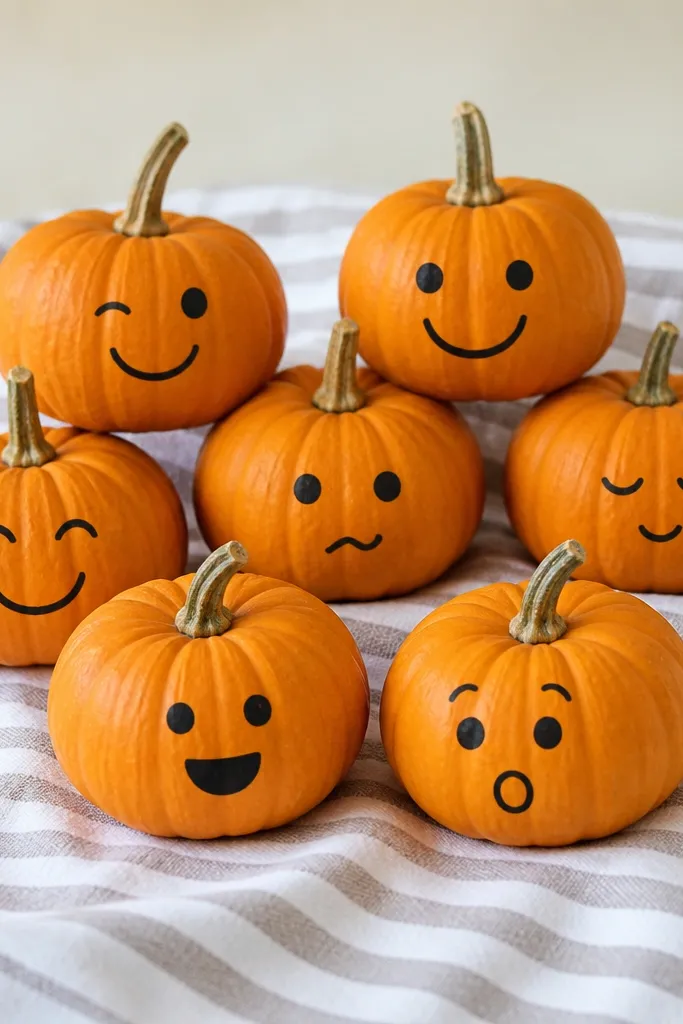
Cute faces are fun, but the best ones look consistent. I use a paint pen so the lines are thin and the faces stay crisp at mini scale. I keep expressions minimal — a single eyebrow shape, two dots for eyes, and a small curved mouth — so they don’t look cartoonish. This works for any skin tone in photos because the focus stays on the pumpkin, not messy paint blobs. It also helps if you have kids, since the end result is clear even from across the table.
Start by wiping minis and letting them dry so the pen lines don’t skip. Use a paint pen to draw eyes first — two dots or small circles — then add eyebrows. Draw the mouth last using a single curved line, then add tiny cheek marks if you want. Keep the faces facing one direction so the cluster reads as a set. Place 7 pumpkins on a cloth-covered tray and add one small orange candle or tea light in the center.
Pro tipTest your pen on a scrap pumpkin first — some tips need a few strokes to start flowing.
AvoidDon’t use thick marker lines — they bleed on curved surfaces and look messy.
15. Paper Leaf Cutouts with Mod Podge Sheen
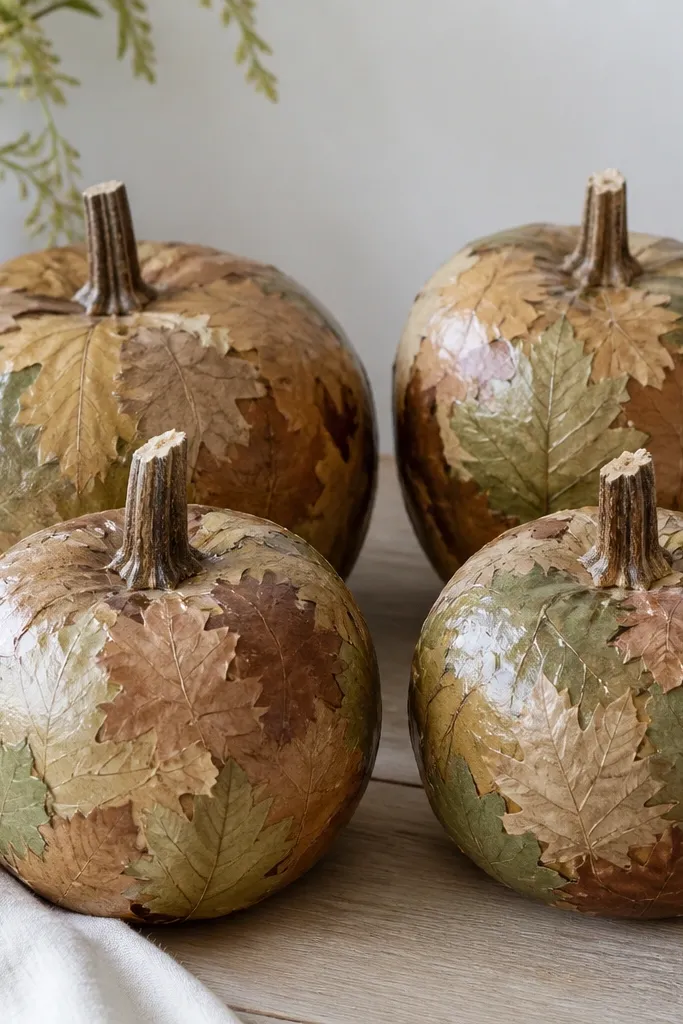
This one turns mini pumpkins into little stained-glass vibes, but made from paper. Overlapping leaf cutouts create depth, and Mod Podge gives a glassy sheen that makes the paper look layered. I choose leaf shapes in two tones — olive green and cocoa brown — so the pumpkin doesn’t look flat. It’s also a good option if your pumpkins are scuffed; paper covers the skin texture. This look flatters neutral interiors because it doesn’t add loud color — it adds pattern.
Start by painting nothing — wipe the pumpkins clean and let dry. Cut small leaf shapes from craft paper or scrapbook paper, about 1.25 to 2 inches wide. Brush Mod Podge on a section of the pumpkin, press leaf cutouts down, then brush a thin top coat over the leaves. Work in small sections so the Mod Podge doesn’t dry before you place the pieces. Leave the stem area mostly uncovered so it still looks like a real pumpkin.
Pro tipUse a craft knife and a metal ruler for clean leaf edges — the overlap looks better.
AvoidDon’t soak the paper — too much Mod Podge makes it buckle and lift.
16. Orange + White Striped Candy Pumpkins
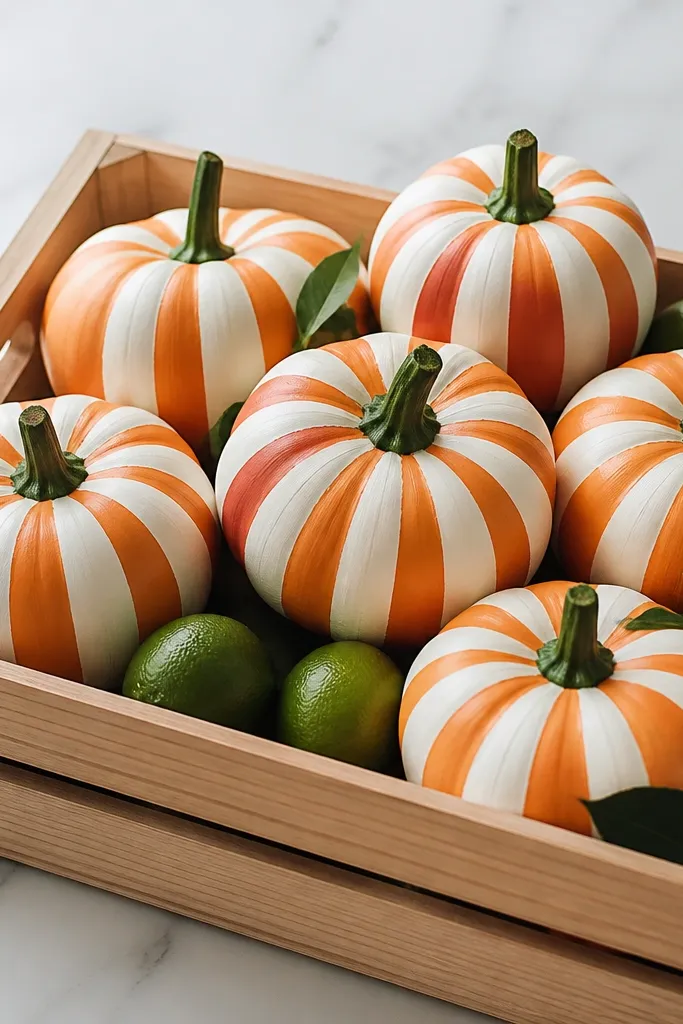
This is the “sweet shop” mini look that still feels fall because the base is orange. The trick is keeping stripes even so the pumpkins look like candy, not like a DIY accident. I paint thin white lines and keep the spacing consistent around the curve. It’s also a great party idea because the setup looks festive without needing faces. The green stems add a pop that keeps it from looking too monochrome. In photos, the stripes create a graphic pattern that reads well even at a distance.
Start by painting minis with a light coat of orange acrylic if yours are faded. Use painter’s tape to create stripe guides — I place tape bands around the pumpkin at equal spacing, then remove it after painting. Paint white stripes over the tape, let dry, then repeat for the next band until you cover the pumpkin. Paint stems green with a tiny brush and seal everything with a matte clear coat. Arrange 6 minis in a crate lined with kraft paper and add 2-3 faux citrus pieces for color balance.
Pro tipMeasure spacing with a tape measure once, then wrap the tape bands consistently for the rest.
AvoidDon’t use thick paint for stripes — it pools at the pumpkin curve and looks uneven.
17. Monochrome Dusty Rose Pumpkins with Mini Garland
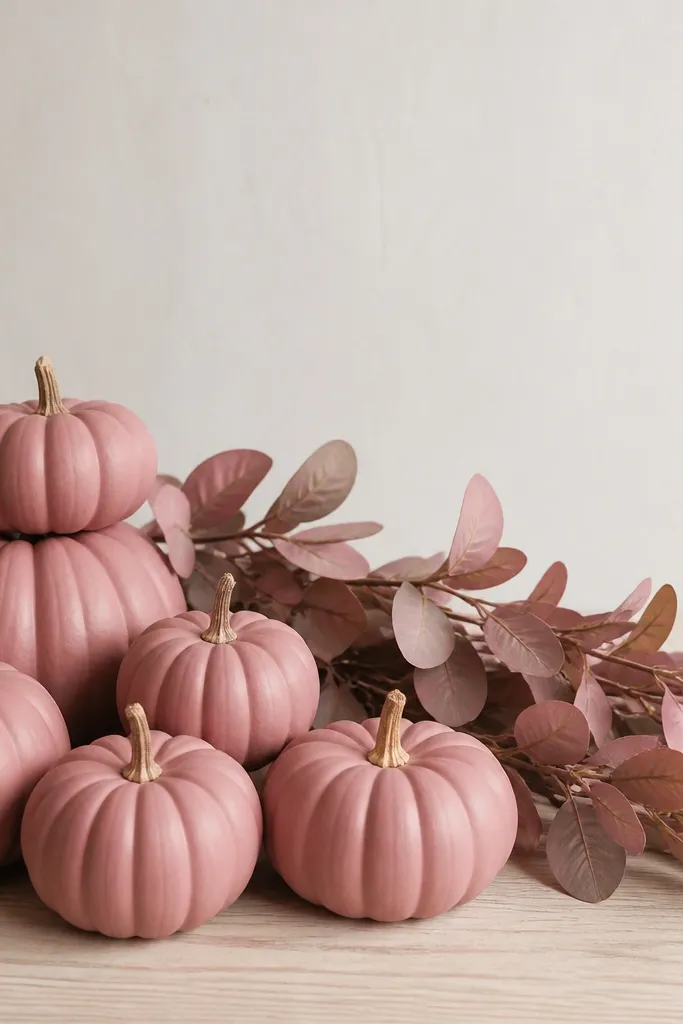
I made this when I wanted fall decor that didn’t look like it came straight from a Halloween aisle. Dusty rose feels softer, and when everything is the same tone, the minis look intentional. Matte paint keeps it from looking shiny or cheap. I also use a mini garland in the same color family so the cluster feels like one composition. This looks great with warm neutrals and cream candles and it flatters people with pink undertones in photos because the color harmonizes. It’s also a nice option if you’re decorating for a bridal shower or fall dinner.
Start by priming and painting 6 minis dusty rose acrylic in two coats. Once dry, lightly sand any rough spots and wipe clean, then add one more thin coat for smoothness. Arrange the pumpkins in a half-moon on a small tray and tuck the garland behind them so it forms a backdrop. Add two tiny rose-toned ribbon loops at the ends of the garland. Keep the rest of the props neutral — no extra bright colors.
Use matte sealer, not gloss — gloss makes dusty colors look dirty.
Don’t mix dusty rose with bright orange — it turns into a color clash fast.
18. Mini Pumpkin Topiary in a Cut-Down Jar
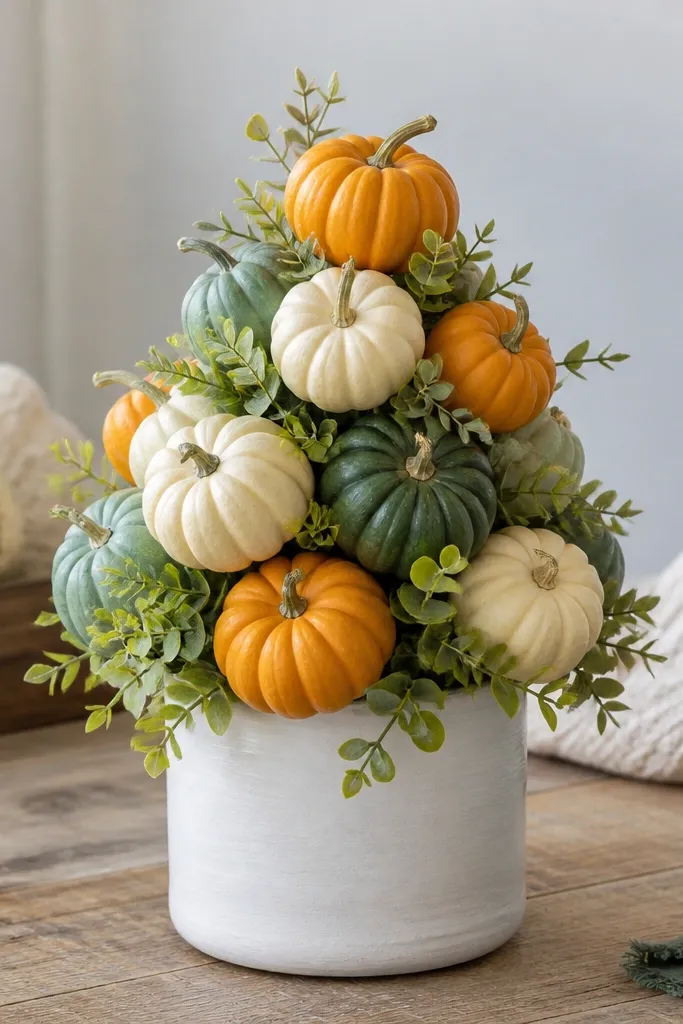
This is the setup that makes minis look tall and dramatic without using a tall stand. I build a mini topiary by stacking pumpkins in floral foam inside a jar, so you get height and a clean silhouette. The jar makes it feel like a centerpiece instead of a pile. I keep the pumpkin surfaces consistent — either natural with a single ribbon wrap, or all painted white — so the stack doesn’t look random. In photos, the stacked shape reads clearly and makes the background less important. It also works for both warm and cool interiors depending on your paint choice.
Start with a jar and cut it down if you’re comfortable, or use a short jar base. Fill the jar with floral foam and secure it so it doesn’t shift. Push pumpkin stems into the foam to create a staggered stack — 1 pumpkin at the top, 3 around the middle, 2-3 at the base. Wrap a thin ribbon around 2-3 pumpkins as visual tie-ins. Tuck tiny faux leaves around the foam so you don’t see the foam edges, then mist lightly with a matte finish spray if you used paint.
If you don’t want to cut glass, use a small planter pot and line the inside with foam instead.
Don’t leave foam exposed — the whole topiary looks unfinished once you see the texture.
19. Monogram Vinyl Initials on Painted Cream Minis
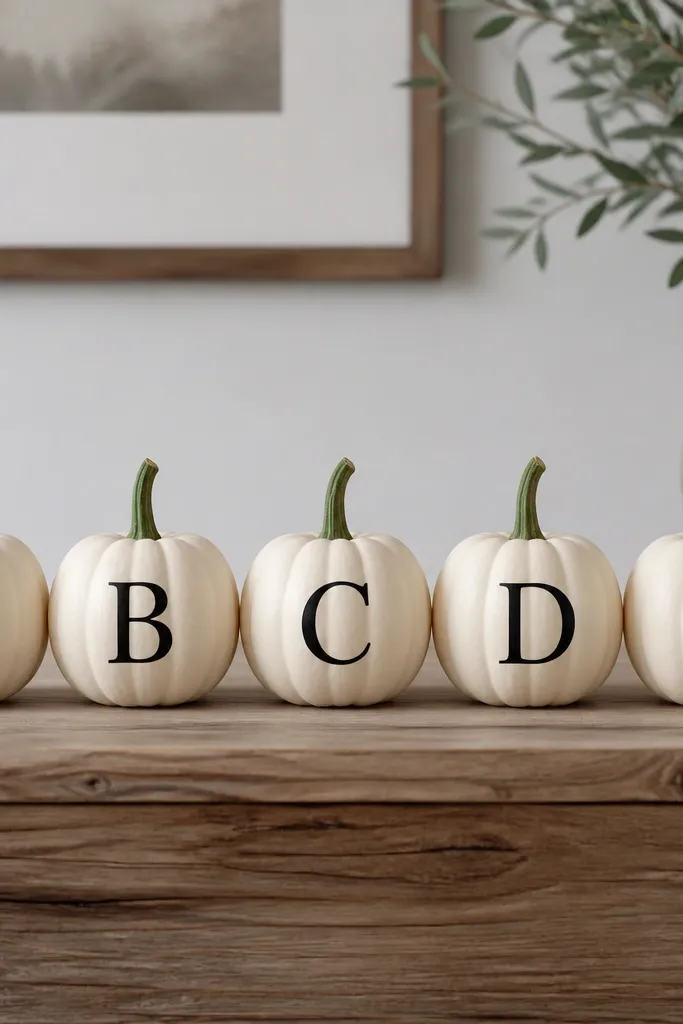
This is the “host who labels everything” look, and it’s so clean. Vinyl initials look sharp on minis because the surface is small enough that the letters stay readable. I paint pumpkins cream first so the black vinyl doesn’t look dull. Then I add a soft green on the stem tip to keep it from feeling flat. It’s great for parties because you can assign seats or table numbers without making it complicated. In photos, the letters make the setup look intentional even if the background is messy.
Start by painting 5 minis cream acrylic in two coats and let dry fully. Clean the pumpkin surface with a dry cloth so vinyl sticks well. Cut vinyl letters (about 1 inch tall for mini pumpkins) and apply them centered on each pumpkin front, smoothing from the middle outward. Paint stem tips with a soft green craft paint and let cure. Place the pumpkins in a row on a wooden table and add a single black ribbon strip under the group.
Pro tipWarm the vinyl with a hair dryer for 10-15 seconds before applying — it conforms better to curves.
AvoidDon’t apply vinyl onto dusty paint — the edges lift and you’ll see it immediately.
20. Single-Color Confetti Pumpkins with Hand-Torn Paper
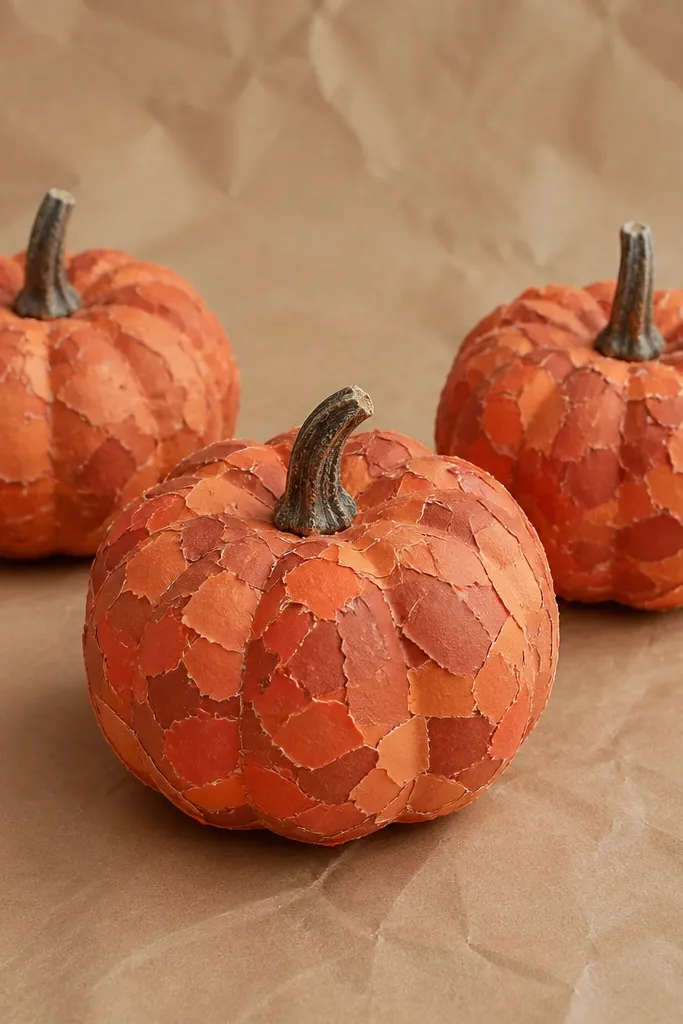
Confetti pumpkins look fun, but I only like them when it’s one color family. If you mix too many colors, the minis look chaotic at small scale. I use hand-torn paper pieces instead of cut shapes so the edges blend and the texture looks soft. The result looks like a custom print, and it stays interesting up close. This works for warm-toned interiors and it looks great next to wood, burlap, and neutral table linens. It also hides small dents because the paper covers texture.
Start by wiping 3 minis and painting a base coat in a matching orange-terracotta if needed. Tear small paper pieces about the size of a fingernail, using 3-4 tones from the same family. Brush Mod Podge on a small area, press paper pieces down, and overlap them slightly. Keep the top third a little lighter so the stems feel airy and not buried. Let dry, then add one more thin Mod Podge coat over everything for a uniform finish.
Pro tipUse paper that’s matte, not glossy — glossy paper shows bumps and looks shiny in an unflattering way.
AvoidDon’t leave big gaps between pieces — the pumpkin skin shows through and makes it look patchy.