1. Foam Dot Polka Face
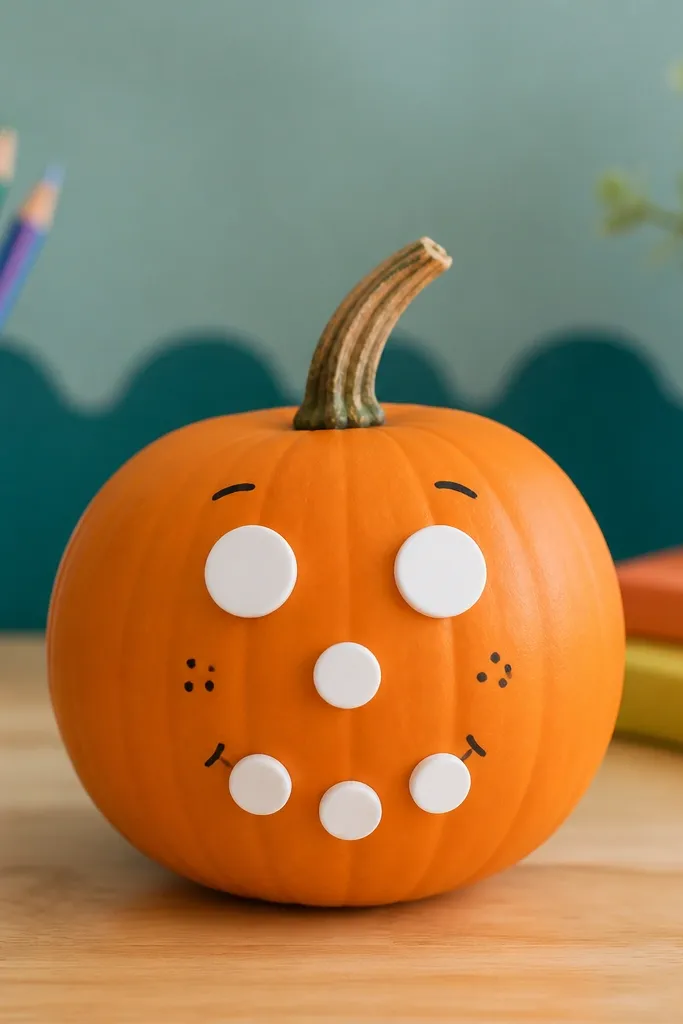
This one looks cute because the foam dots give you a soft, “candy” texture that still reads from across the room. Start with white foam dots for the eyes and nose, then use a fine black marker for lashes and a mouth line. The raised dots catch light from overhead fixtures, so the face looks lively even when the pumpkin sits in a busy corner. It flatters any pumpkin size because you’re not relying on perfect carve lines. I also like it for younger kids because it’s hard to mess up — you’re placing shapes, not drawing detailed features.
Step 1: Place two white foam dots where you want the eyes. Add one smaller foam dot for the nose, then draw a simple curved smile with a black paint pen. Step 2: Add three small foam dots in a row on each cheek for a polka blush effect, then tap the foam down firmly with your fingertip for 10 seconds. Finally, add two short black lines under each eye to mimic lashes and make the face look more awake.
If your pumpkin surface is dusty, wipe it with a dry cloth first so the foam dots stick without lifting.
Don’t press the foam down while your glue is still wet — it smears and makes the dots look cloudy.
2. Painter's Tape Chevron Border
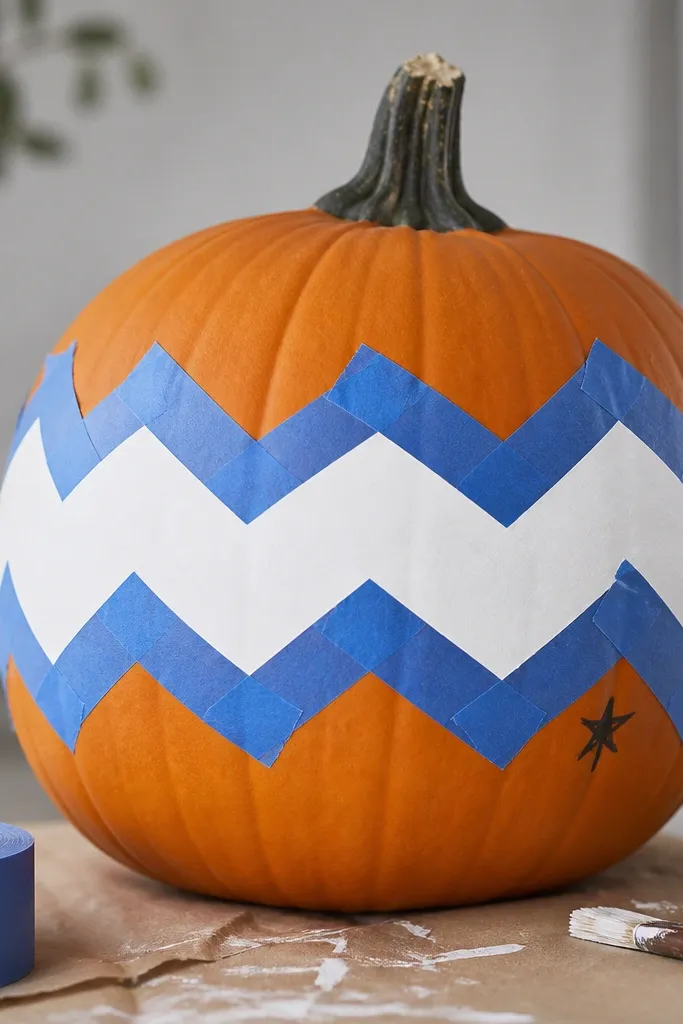
A chevron border looks “classroom-professional” because tape gives you sharp geometry without needing stencils. White paint pen or craft paint over tape reads cleanly against orange and creates a strong horizontal anchor. I’ve used this for teacher door displays because it matches almost any theme — you can swap the star for a school mascot later. It works best on pumpkins with a flatter midsection where the tape can sit evenly. For skin-tone analogs: it’s flattering for the whole room because it creates high contrast and doesn’t depend on delicate details.
Pro tipUse a sponge brush instead of a flat brush so the paint fills grooves without leaving brush streaks.
Step 1: Wrap painter’s tape around the pumpkin at the widest point to form a straight band. Then add angled tape strips across the band to create a chevron pattern, leaving small gaps for paint. Step 2: Paint the gaps with white acrylic craft paint using a small sponge brush, then remove the tape while the paint is still slightly tacky. Finally, add a small black star on the lower right side with a paint pen for a quick focal point.
AvoidDon’t let paint fully dry before pulling tape — you’ll peel edges and get a ragged border.
3. Black Sharpie Ghost Face
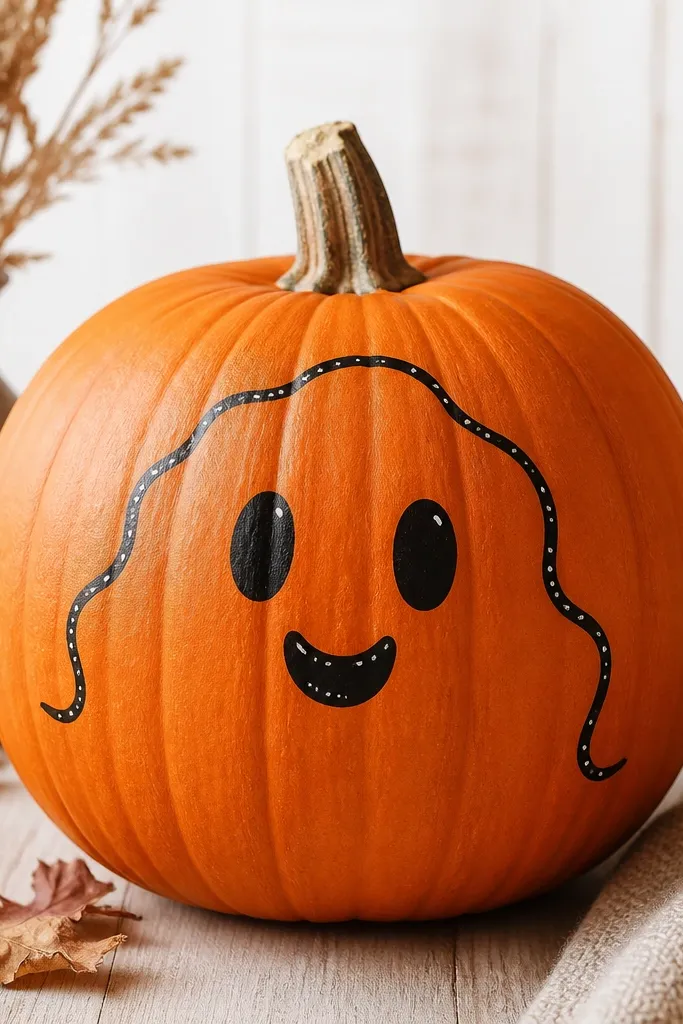
This is the fastest route to a spooky-but-friendly look that still feels polished. Black sharpie lines look bold and graphic, especially under fluorescent classroom light. The white gel pen dots add a “sparkle” that makes the face more playful than scary. This works on any pumpkin because it relies on line work, not surface coverage. It’s also forgiving for teachers who don’t want to deal with paint drying times.
Step 1: Draw a simple ghost outline at the top of the pumpkin using a wavy line, then place two oval eyes inside. Step 2: Add a curved mouth under the eyes, then fill the ghost outline with thicker marker strokes for weight. Finally, add two tiny white gel pen dots in the eyes and one short highlight line on the cheek.
If your sharpie skips on the ridges, go over the line once more with a paint pen so it looks solid.
Don’t shade the whole ghost — it makes the pumpkin look smudged instead of crisp.
4. Gold Leaf Sticker Cluster
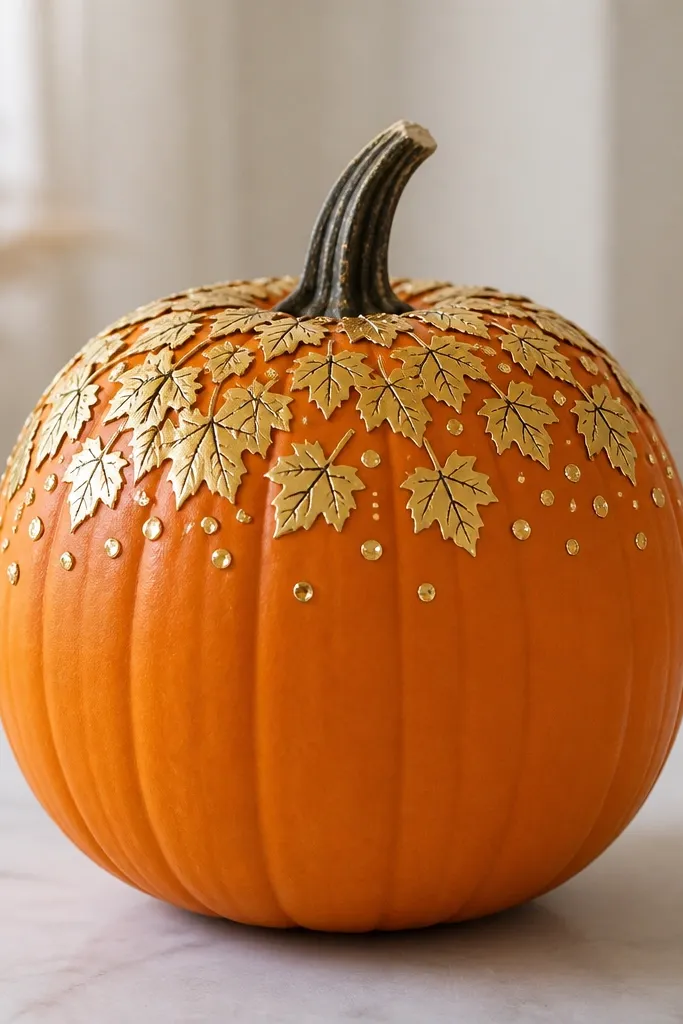
Gold leaf stickers look expensive because they create a metallic shimmer without paint cleanup. I like keeping the rest of the pumpkin plain so the cluster becomes the focal point. When you add a few drawn veins, the stickers stop looking like flat decals and start looking like real leaves. This is great for desks because it reads as autumn even if you only have one minute to set it out. It also looks good on both small and large pumpkins because the cluster scales easily.
Pro tipWarm the stickers with your hand for 20 seconds before pressing — they adhere better to ridges.
Step 1: Place 5 to 8 gold leaf stickers near the top center, slightly overlapping like a bouquet. Step 2: Use a fine black paint pen to draw 2-3 vein lines on two of the leaves only, leaving the rest as-is. Finally, add 6 tiny gold dot stickers around the cluster to fill gaps and keep the top from looking sparse.
AvoidDon’t cover the whole pumpkin — full coverage makes stickers look cheap and hides the pumpkin’s natural shape.
5. White Paint Pen Drip Rim
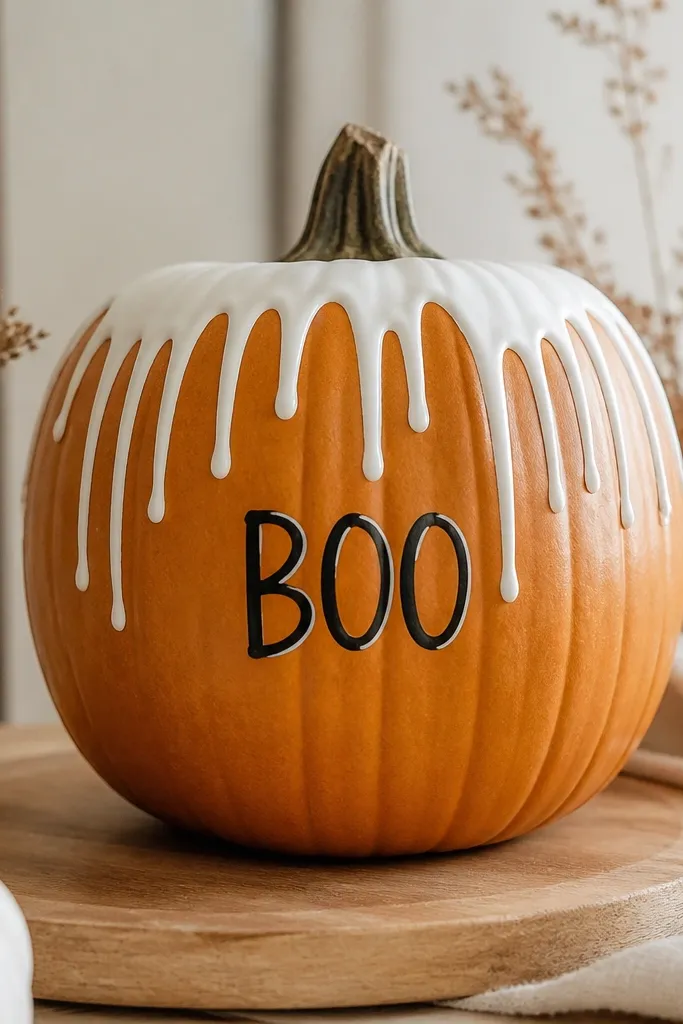
A drip rim looks trendy without needing a stencil. The trick is keeping the drips only on the top edge so the pumpkin still reads as a pumpkin, not a painted ball. White paint pen gives you control on the ridges, and it photographs well because the drips create highlight and shadow. I use this for quick teacher giveaways because it’s fast, fun, and each pumpkin can have a different word. It flatters anyone’s style because you can keep the rest minimal.
Pro tipDo the rim first, then write after — letters look cleaner when the drip line is already dry.
Step 1: Outline a thin white line around the top edge of the pumpkin, then add short drips downward with the same paint pen. Step 2: Let it sit for 2 minutes so it doesn’t smear, then write a single-word message like “Boo,” “Class,” or “Pumpkin” in black sharpie on the front. Finally, add a small white gel pen highlight line on the letter edges for a clean finish.
AvoidDon’t flood the drip with too much paint — it turns into blobs on textured skin.
6. Tissue Paper Fall Flag Banner
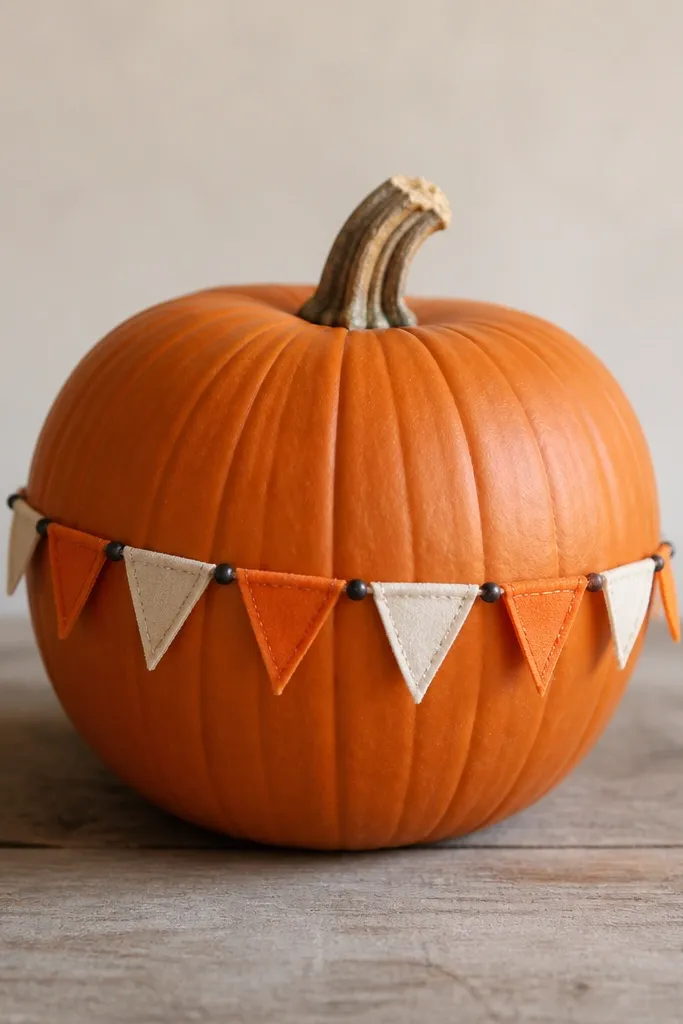
This looks like a mini classroom party because tissue flags add movement and softness. Even from a distance, the triangle shapes read clearly and give the pumpkin a “decorated” vibe without full coverage. I pair cream tissue with orange tissue so the pumpkin looks intentional rather than chaotic. The banner also hides small dents or uneven spots on the pumpkin. It’s a good option for teachers who want a softer look that still feels holiday.
Pro tipUse double-sided tape, not hot glue, so the tissue doesn’t wrinkle from heat.
Step 1: Cut tissue paper into 1.5-inch triangles and stack them into small flag pairs (orange with cream). Step 2: Wrap a thin strip of double-sided tape around the middle of the pumpkin, then press flags onto the tape with points facing up. Finally, add three black dot stickers or painted dots between flag rows to create spacing and rhythm.
AvoidDon’t make flags too wide — they sag and look messy against the pumpkin curve.
7. Cheeky Cardstock Face with Wobble Eyes
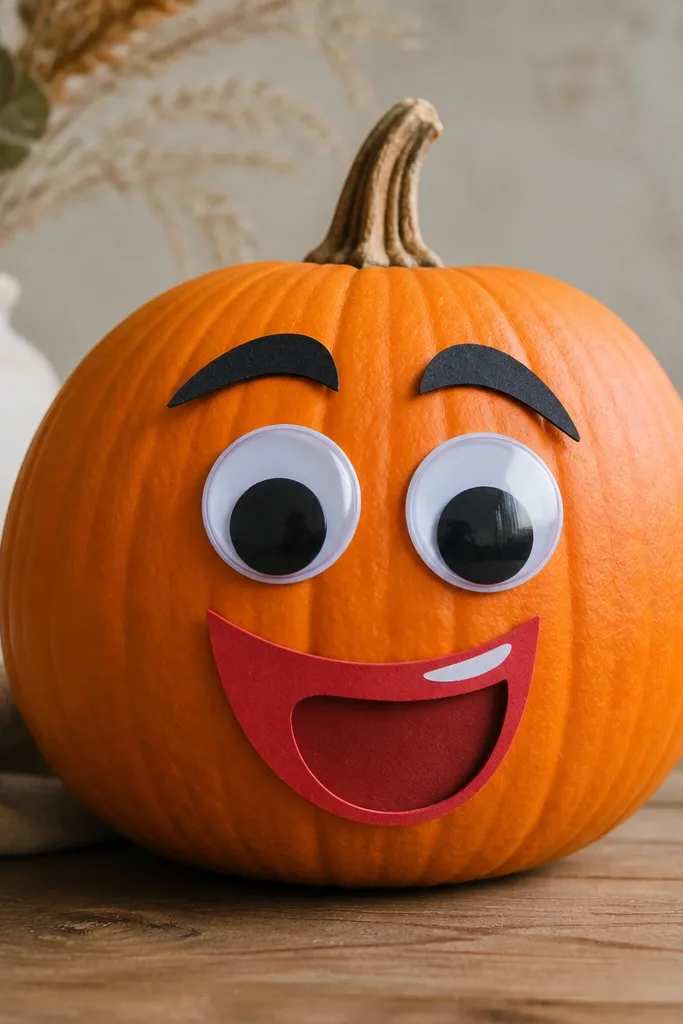
Cardstock faces look crisp because the edges are straight, and wobble eyes bring the personality. I’ve used this during substitute-teacher weeks when I needed something that looks fun even if it’s handled a lot. The matte black eyebrows anchor the face, while the red mouth adds a strong accent that pops against orange. This also works for different “personalities” — you can make the mouth grin, frown, or tongue-out. It flatters the room because the eyes sit high and catch light quickly.
Step 1: Cut a simple mouth shape from red cardstock and eyebrows from black cardstock, then glue them in place with craft glue. Step 2: Hot glue or strong craft glue the wobble eyes above the mouth, leaving a little space between the eyes and eyebrows. Finally, add a tiny white gel pen highlight on the mouth to make it look glossy.
If wobble eyes feel heavy, use two glue dots per eye instead of a big smear so they stay centered.
Don’t place eyes too low — the face looks droopy and reads as sad from the back row.
8. Vinyl Letter Name Pumpkin
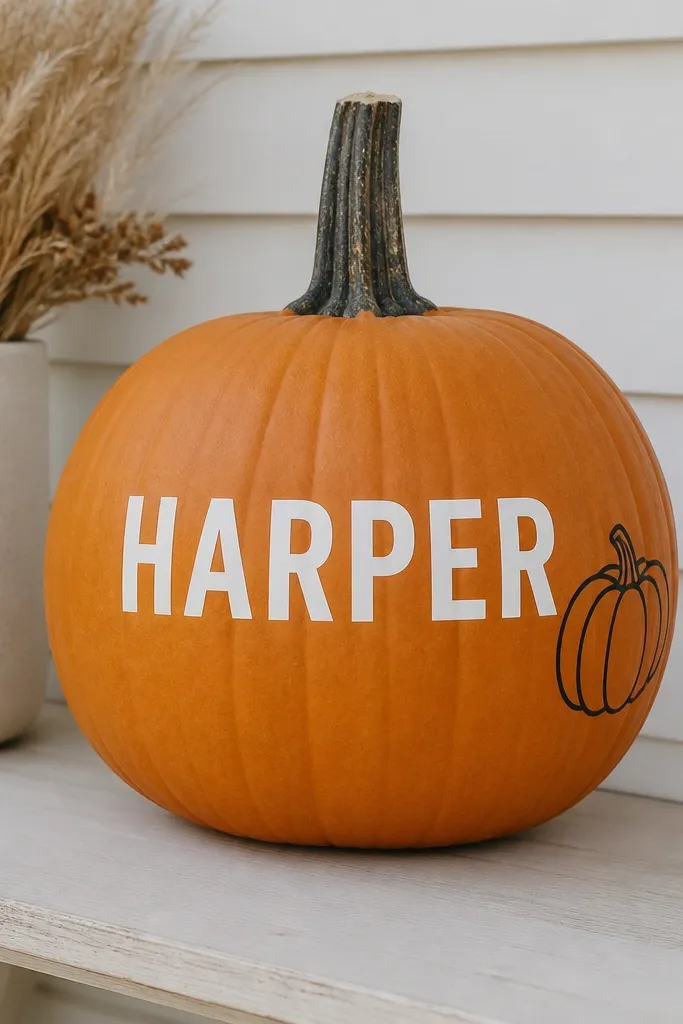
Vinyl lettering is the “clean teacher hack” for classroom pumpkins because it looks neat even when you do it fast. White vinyl on orange reads clearly at a distance, and you can swap names for each student’s desk. I like adding a tiny icon because it makes the pumpkin feel like part of a set, not a random label. This works best on pumpkins with minimal scarring so the vinyl lays flat on ridges. It’s also forgiving for handwriting anxiety — you’re not trying to make letters perfectly consistent.
Step 1: Clean the pumpkin with a dry cloth, then lightly mark the center with a pencil dot. Step 2: Apply vinyl letters in a straight line across the front, pressing from center outward so it doesn’t trap air. Finally, add a small black vinyl pumpkin icon on the side and press it firmly for 10 seconds.
Use a credit card or plastic scraper to burnish vinyl — it makes edges stick to textured surfaces.
Don’t use thick transfer tape with tiny letters — it lifts the vinyl when you peel.
9. Black-and-White Striped Sock Wrap
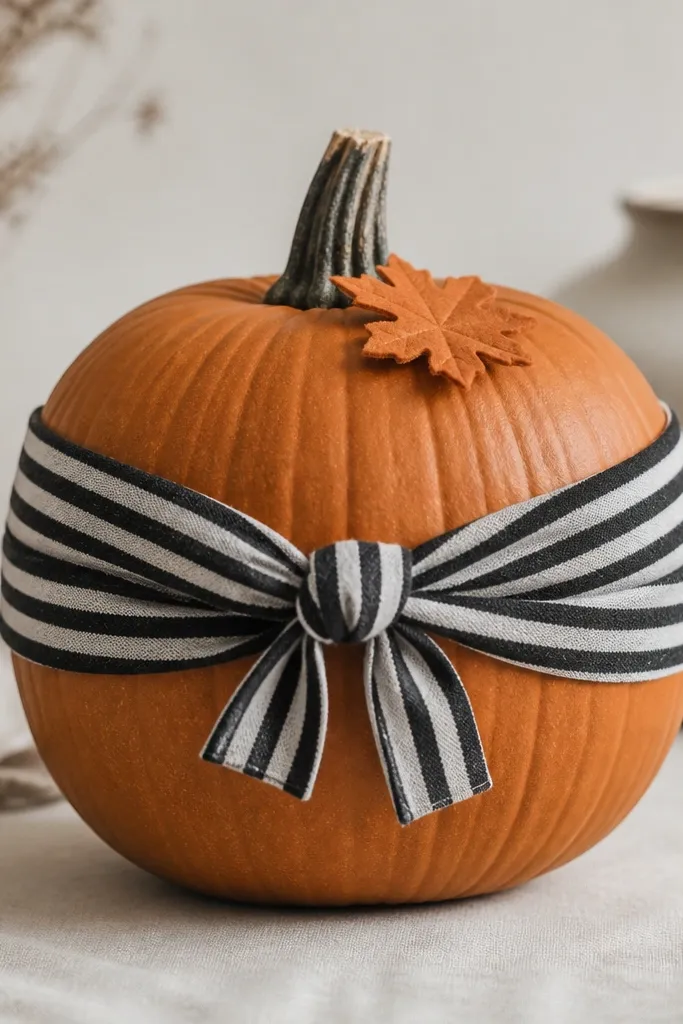
A fabric wrap makes the pumpkin look like decor, not craft. Stripes give you a graphic look, and tying the fabric creates a focal point that reads fast in photos. I use black-and-white because it works with every classroom theme and keeps the pumpkin from competing with bulletin boards. A felt leaf adds a touch of softness without taking time. This is flattering for any pumpkin shape since the wrap covers uneven ridges and gives a smooth visual line.
Step 1: Cut a fabric strip about 3 inches wide and long enough to wrap around the pumpkin with a 2-inch overlap. Step 2: Tie it into a simple knot on the front, then secure the overlap with hot glue at the back seam. Finally, glue a small orange felt leaf on top of the knot and add a short vein line with black marker.
If your fabric frays, run a quick line of fabric glue along the cut edge before wrapping.
Don’t tie the knot too tight — it puckers and makes the wrap look uneven.
10. Mini Pom-Pom Scarecrow Hat
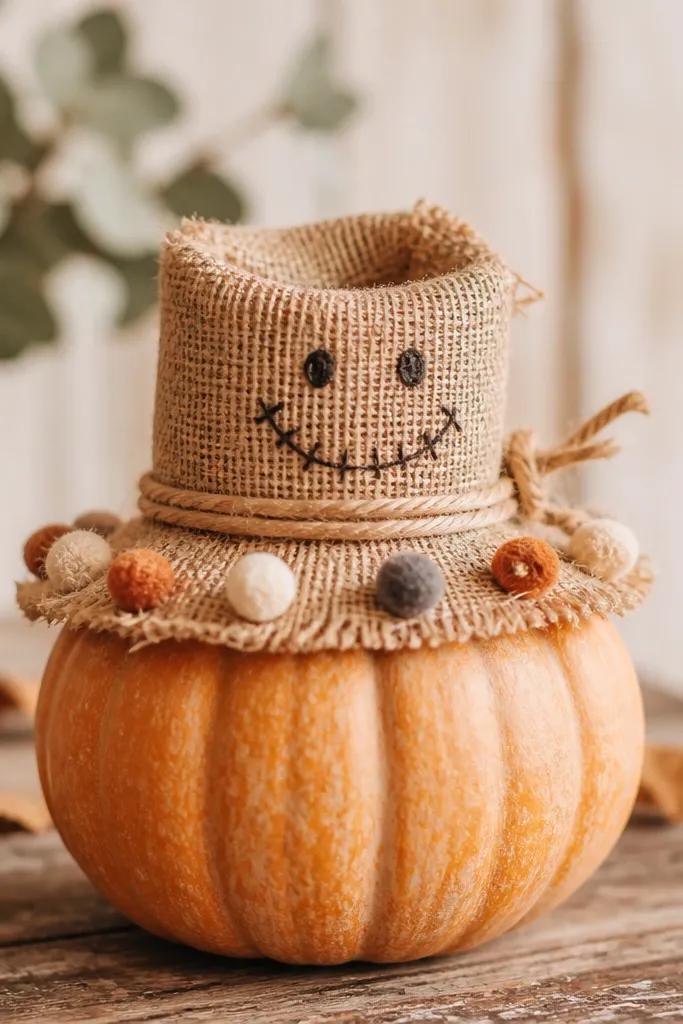
This one looks adorable because it adds a “character” piece on top. Burlap feels fall without needing paint, and twine gives you that rustic classroom vibe. The pom-poms add texture and make the hat look handmade. It flatters pumpkins that have a slightly lumpy top because the hat covers the unevenness. I’ve used this on a teacher desk display where everything else was paper-based — the burlap texture makes the set feel grounded.
Pro tipUse mini pom-poms (under 1 inch) so the hat looks proportional on a small pumpkin.
Step 1: Cut a small circle of burlap (about 4 inches wide) and gather it at the center with hot glue to form a hat bump. Step 2: Wrap a thin strip of twine around the base of the hat and glue it in place, then add 3 small pom-poms on the brim. Finally, draw a simple stitched smile and two dot eyes on the front using a black paint pen.
AvoidDon’t make the hat too tall — it blocks the face and makes the pumpkin look top-heavy.
11. Rhinestone Dot Starry Eyes
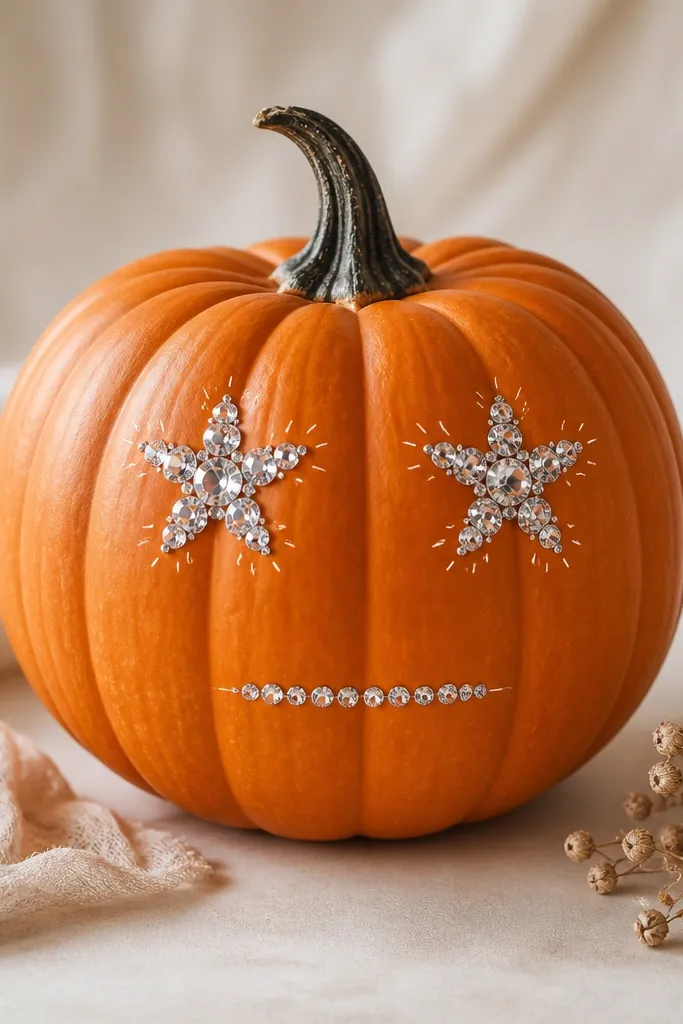
Rhinestones make a pumpkin look like it belongs in a school spirit hallway. The key is using them sparingly: two small clusters for eyes is enough. The sparkle catches overhead light and gives a “starry” expression without turning the whole pumpkin into a craft-glitter mess. This works on pumpkins that have a bit of texture because the rhinestones sit in ridges and still look secure. It’s a flattering look for bright rooms because the shine doesn’t get lost.
Pro tipUse a toothpick to move rhinestones into place — your fingers leave oils on shiny pieces.
Step 1: Plan eye placement by holding the rhinestone cluster against the pumpkin where the face should go. Step 2: Dab hot glue at the center points (not around the whole cluster), press rhinestones in place, then hold each cluster for 10 seconds. Finally, draw a simple mouth line with a black paint pen and add two tiny white gel pen dots on the rhinestones to mimic sparkle.
AvoidDon’t glue rhinestones over deep dents — the stones pop loose and leave gaps.
12. Metallic Marker Leaf Vein Face
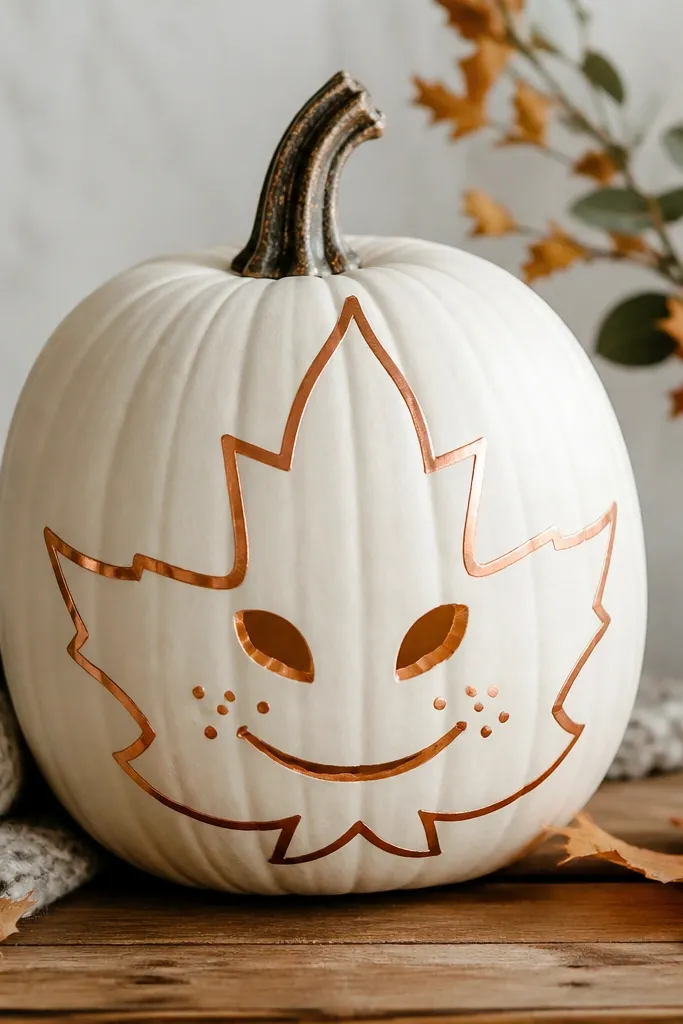
Metallic leaf lines look classy without being fussy. Copper marker on orange creates a warm autumn tone, and the leaf shape gives your face a soft, nature vibe. I’ve found this style reads well from 6 feet because metallic lines have high contrast when they catch light. It also works if you hate painting — marker control is quick and you can fix mistakes with a damp paper towel before it dries. This is a good pick for teachers who want a more “adult” look on their classroom display.
Pro tipTest your marker on paper first so you know how dark it lays down — metallics can vary.
Step 1: Draw a leaf outline around where the face will go using metallic copper marker, with the leaf tip pointing upward. Step 2: Add two teardrop eye shapes inside and a curved smile line below, keeping lines thin for a clean look. Finally, dot 5 small freckles on each cheek with a silver gel pen and add one tiny leaf vein line under each eye.
AvoidDon’t go heavy on the copper — thick metallic strokes look streaky on ridged pumpkins.
13. Orange-White Paper Flower Crown
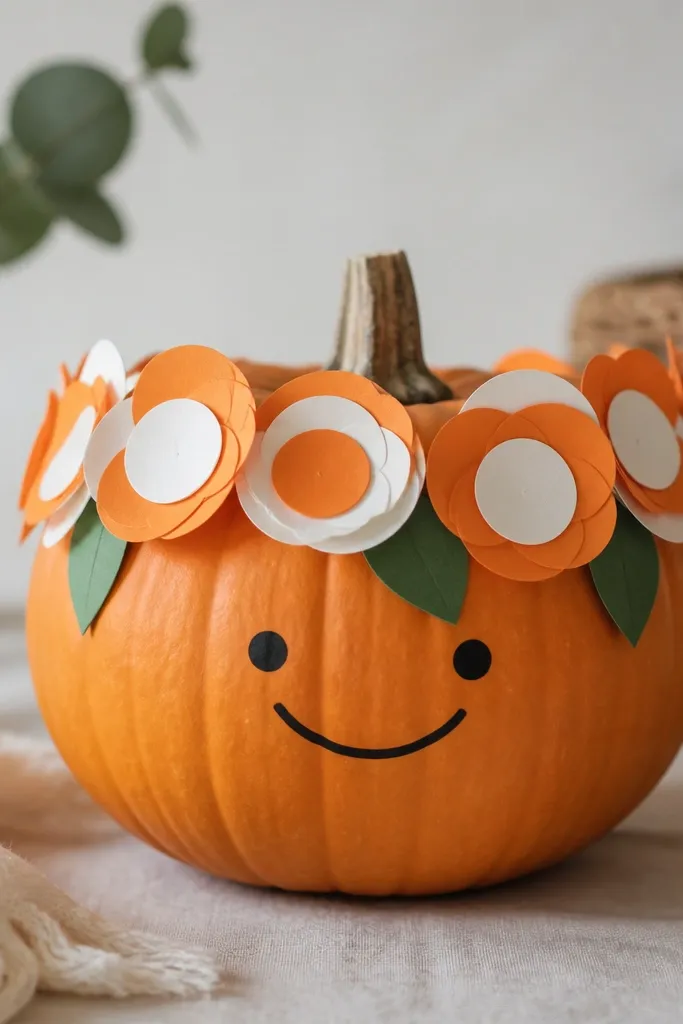
A paper flower crown feels like a headband for your pumpkin, and it instantly makes the whole piece look “finished.” The layered circles create depth, and the green felt leaves add a realistic touch. I like orange and white because they match fall without getting too dark for school hallways. This is especially flattering on small pumpkins because the crown makes them look taller and more intentional. It’s also easy to repeat across a set — same flower template, different facial expressions.
Pro tipPress each flower for 15 seconds so the layered paper doesn’t lift at the edges.
Step 1: Cut 10 circles from orange cardstock and 10 smaller circles from white cardstock, then stack and glue each pair so you get a layered flower. Step 2: Glue the flowers around the top edge of the pumpkin like a crown, spacing them evenly. Finally, add 4 small green felt leaf pieces between flowers and draw a simple black smile with two dot eyes.
AvoidDon’t glue flowers directly at the very bottom of the crown — it looks heavy and slides visually down.
14. Mini Chalkboard Label Pumpkin
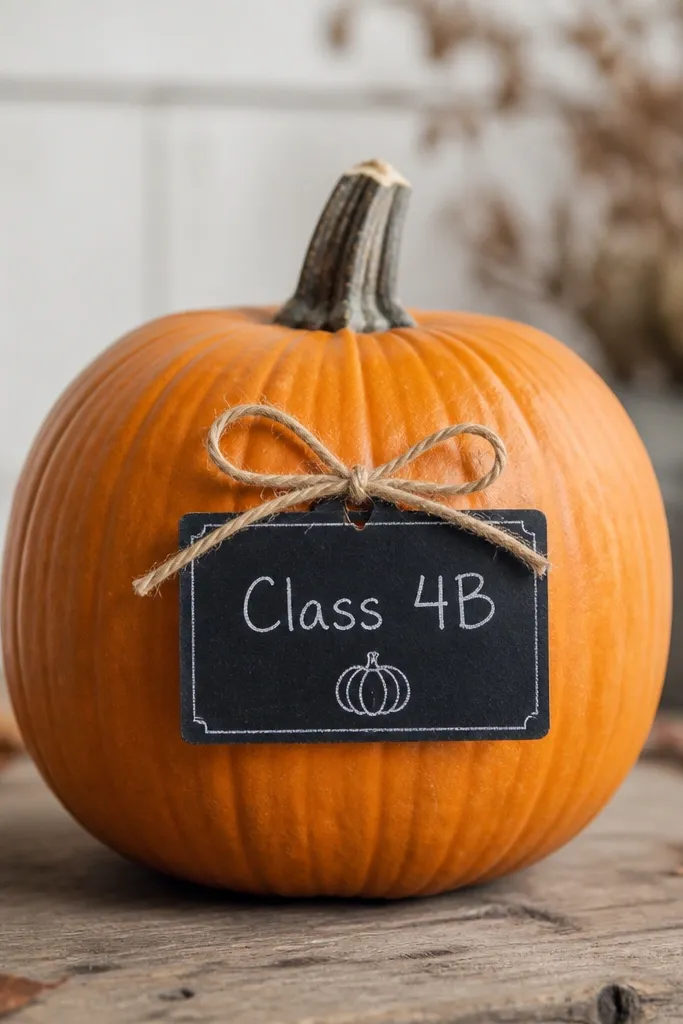
A chalkboard label makes the pumpkin feel like a classroom sign, not a one-off decoration. The black rectangle gives you a clean surface for writing, and white chalk or chalk marker reads sharply on orange. I’ve used this for “desk pumpkins” where kids can bring them home — the label is easy to change each year. This also works for teachers who want to avoid drawing faces. It’s flattering for any pumpkin because the label sits flat while the pumpkin’s texture stays in the background.
Step 1: Cut a rectangle from black cardstock or use a small chalkboard adhesive label, then glue it centered on the pumpkin’s front. Step 2: Tie a thin twine bow and hot glue it above the label, then write text on the label with white chalk marker. Finally, add a tiny chalk pumpkin icon in the bottom corner of the label and let it set for 1 minute.
Use chalk marker instead of chalk if you want it to last through handling without smudging.
Don’t place the label too high — text gets lost when the pumpkin sits on a desk.
15. Rope Twine Vertical Fringe
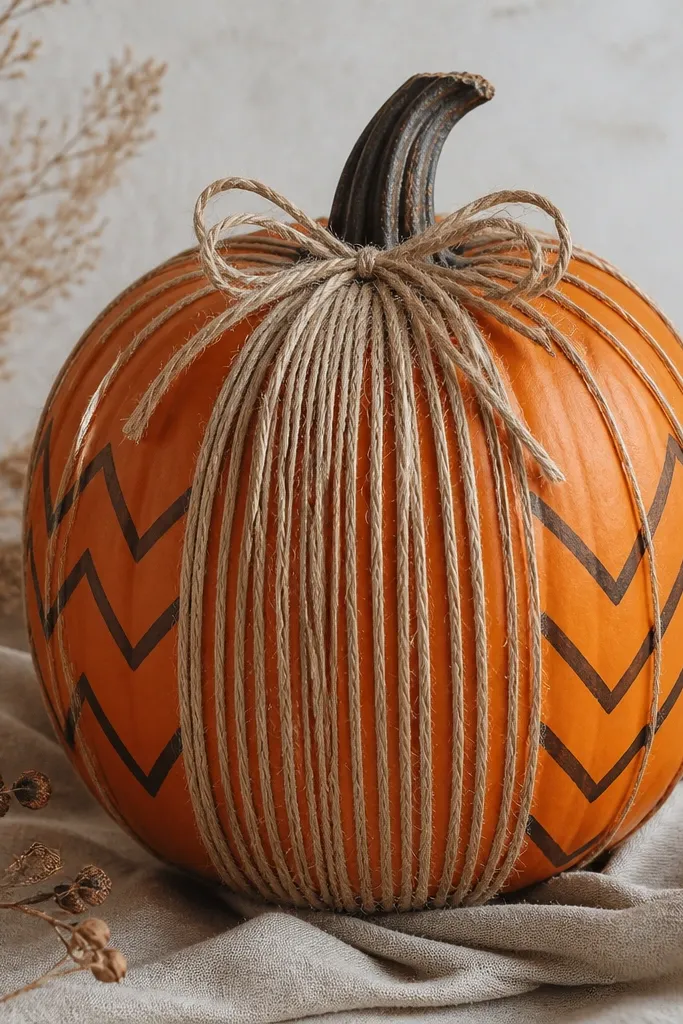
Twine fringe looks warm and tactile, and it hides small imperfections in the pumpkin skin. When you glue strands vertically, the lines make the pumpkin look taller and more structured. I like leaving a little orange showing so it doesn’t look like a full craft project. This is a great option for teachers who want a rustic look that still reads clean. It also photographs well because the shadows between strands create depth.
Pro tipTrim strand ends with scissors after the glue sets so the fringe looks even.
Step 1: Wrap a thin strip of hot glue around the front area in a vertical line and press twine strands down, working from top to bottom. Step 2: Space strands about half an inch apart so the orange peeks through between them. Finally, add a small twine bow at the top and draw a simple black chevron on the uncovered side for extra contrast.
AvoidDon’t overload glue — it creates shiny bumps that catch light and look messy.
16. White Gel Pen Scales Pattern
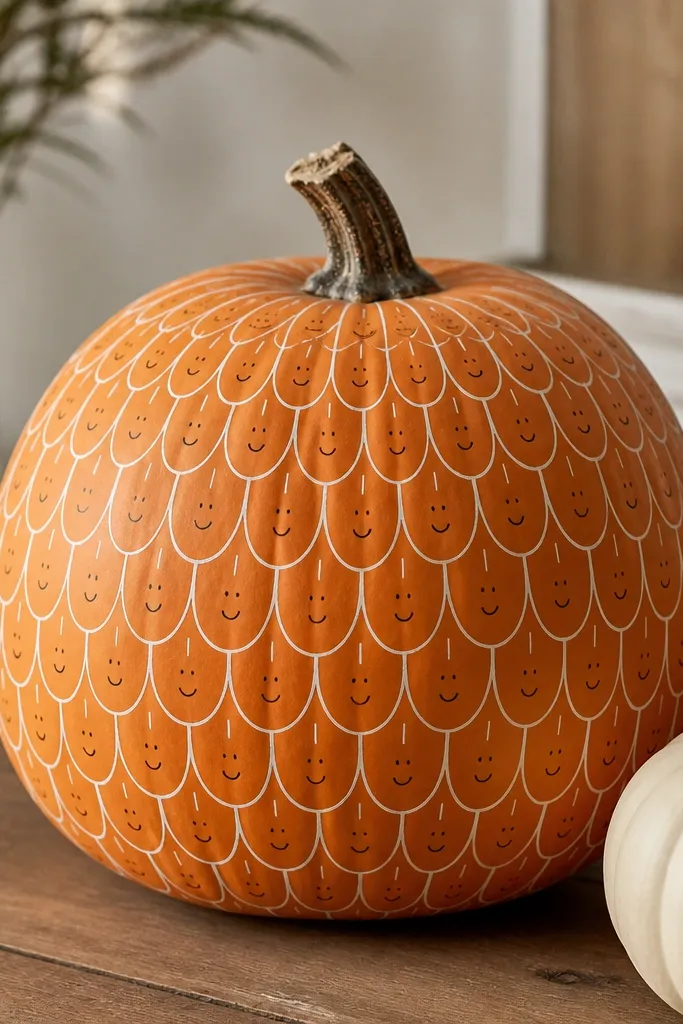
A scale pattern looks like cozy armor, and it’s surprisingly fast when you use gel pen dots and ovals. White gel pen is perfect because it gives you consistent line thickness even on ridges. The pattern covers the pumpkin without feeling like you painted over everything, and it looks good in close-ups and in classroom photos. I like adding a tiny face in the center to give the pattern a focal point. This works on any pumpkin size, but it’s especially satisfying on medium pumpkins where the pattern has enough space.
Pro tipUse a ruler edge as a guide for row spacing on the first two rows, then freehand the rest.
Step 1: Start at the bottom row and draw small ovals with gel pen, then add a short line down the center of each oval to mimic a scale. Step 2: Move up in rows, overlapping each row slightly so it looks layered. Finally, stop when you reach the top, then add two dot eyes and a small curved mouth in black paint pen at the center of the last row.
AvoidDon’t skip overlaps — gaps make the pattern look patchy and uneven.
17. Candy Corn Ribbon Wrap
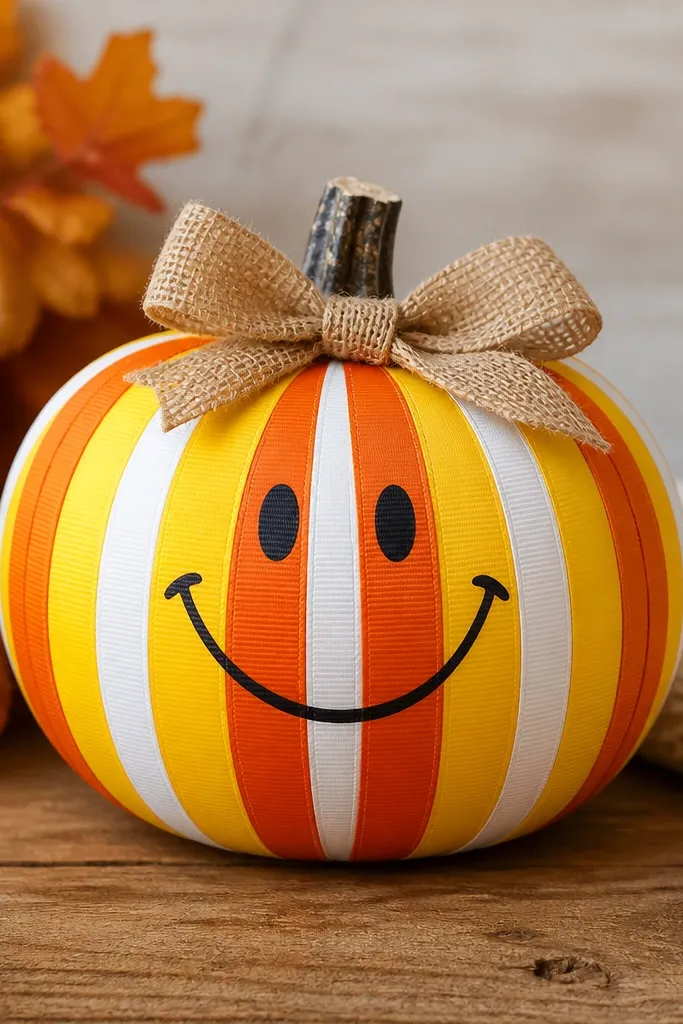
Candy corn colors are basically classroom shorthand for fall. A ribbon wrap is fast because it covers the pumpkin in one move and gives you clean, straight color bands. I like adding a burlap bow at the top because it softens the graphic ribbon and makes the whole thing feel handmade. This look flatters the pumpkin shape because the ribbon smooths the ridges visually. It’s also great for teachers who want something that looks cheerful, not spooky.
Pro tipChoose a ribbon width around 2.5 to 3 inches so the stripes read clearly in photos.
Step 1: Wrap the candy corn striped ribbon around the pumpkin’s widest point and overlap the ends at the back, securing with hot glue. Step 2: Tie a small burlap bow and glue it on top where the ribbon seam meets the pumpkin. Finally, draw a simple smile and two dot eyes with black paint pen on the front, centered between the ribbon stripes.
AvoidDon’t wrap too tight — the ribbon twists and the stripes look crooked.
18. Paper Leaf Nameplate + String Loop
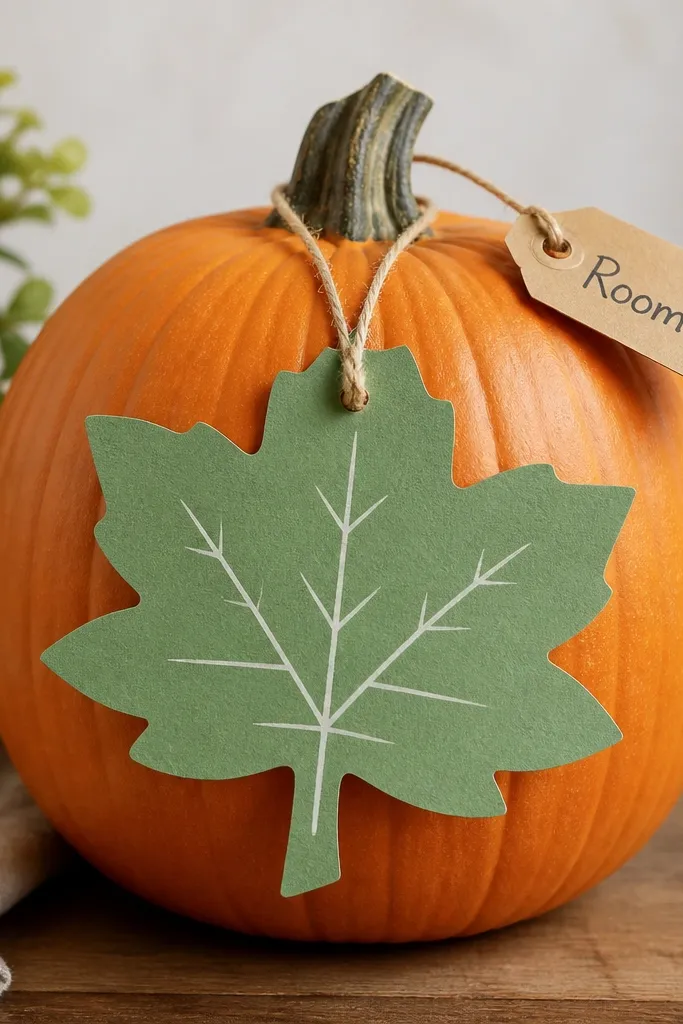
A leaf nameplate is my go-to for classroom pumpkin displays because it looks like a sign kids can read quickly. The leaf shape frames the writing and keeps it from looking like a random sticker. Adding a string loop creates a little “hanging” detail even when the pumpkin stays on a desk. This works well for teachers because you can label each pumpkin by class, group, or student name without repainting. It also flatters the pumpkin because the leaf covers the most visible front area while the rest stays orange and clean.
Pro tipUse a thicker cardstock for the leaf so it doesn’t curl when it meets humidity in the classroom.
Step 1: Cut a large green leaf shape from cardstock, then draw a white vein line down the center with a gel pen. Step 2: Glue the leaf to the front of the pumpkin and write text on it with a white paint pen or chalk marker. Finally, glue a small loop of twine or string on top and add a tiny tag below the loop to finish the look.
AvoidDon’t use thin paper — leaf edges curl and the label looks unfinished.
19. Mini Washi Tape Border + Polka Cheeks
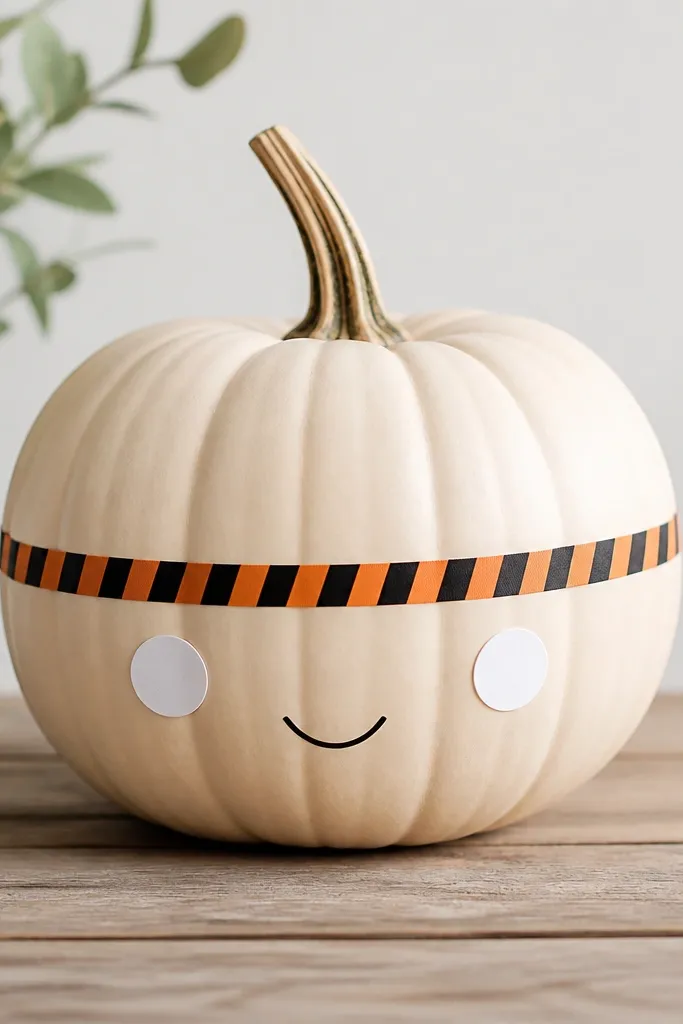
Washi tape borders are the fastest way I know to make a pumpkin look intentionally decorated. The tape pattern brings fall color without paint, and it sits neatly on ridges when you press it firmly. I pair a thin border with two polka cheeks because it keeps the design playful and balanced. This look works for any pumpkin because you’re using small placements, not covering the whole surface. It also photographs well because tape gives crisp edges and strong contrast.
Step 1: Wrap washi tape around the middle of the pumpkin in a straight line, then press along the edges with your fingernail. Step 2: Cut two small white paper circles and glue them as cheeks on the front, then add a simple black curved mouth below. Finally, add three small black dot accents between the cheeks and the mouth for extra symmetry.
Press the tape twice — once right after you place it, and again 30 seconds later — it grips ridges better.
Don’t stack multiple tape layers — it makes the border look bulky and uneven.
20. Gold Paint Pen Initial + Sparkle Dots
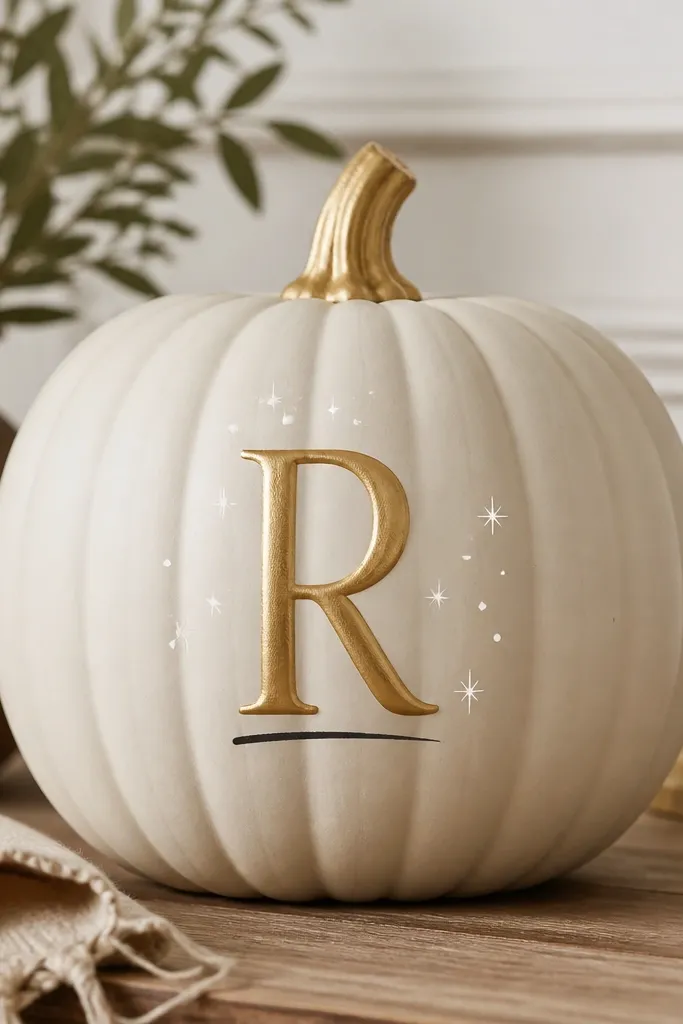
One bold initial makes a pumpkin look like a labeled classroom item instead of a random decoration. Gold paint pen adds warmth and looks great against orange, and sparkle dots make it feel festive without covering everything. I like keeping the design to the center because the ridges can distort letter shapes; a larger initial stays readable. This is a strong pick for teachers who want names or class initials but don’t want to paint faces. It also looks good on small pumpkins because the design stays compact.
Step 1: Decide your center point and write one large initial in gold paint pen, filling the letter shape solid. Step 2: Add 8 to 12 small white gel pen dots around the initial like starbursts, keeping them mostly in the upper half. Finally, draw a short black underline under the letter to ground it and make it pop.
Use a paint pen with a fine tip for the letter edges so the initial looks sharp on the pumpkin texture.
Don’t use a glitter pen for the whole letter — glitter can look gritty and uneven.