
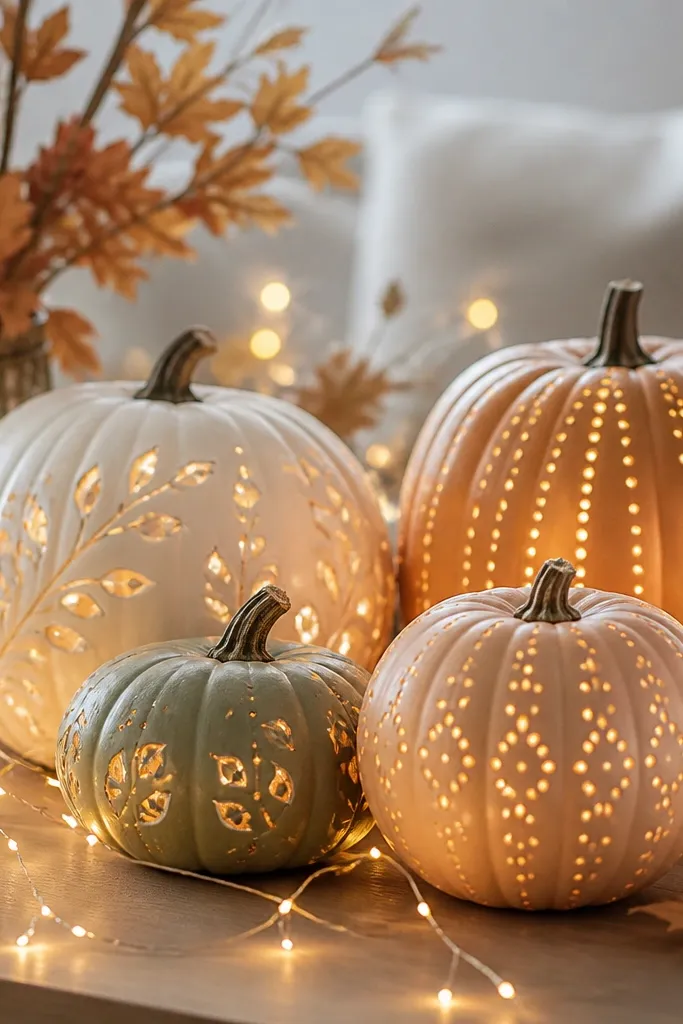
1. Lace-Backlit Pumpkin With Warm White Micro LEDs
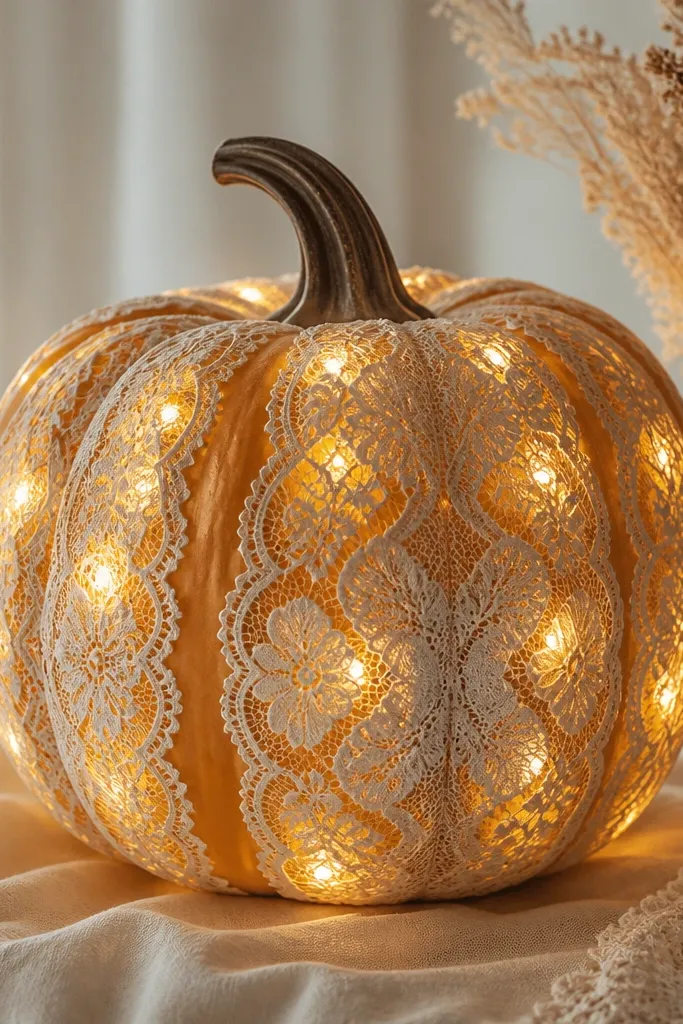
I love this one because the lace turns point light into a gentle, candle-like wash. Use warm white micro LEDs (not cool white) and drape cream lace so it touches the pumpkin lightly, with a little air between lace and rind. The glow looks flattering on both pale and deeper orange pumpkins because the lace reflects warm tones instead of washing everything out. It also works well for anyone who wants a “fancy but easy” look for a mantel or dining table. The design principle is diffusion: the lace spreads the light and makes the pumpkin look lit from within.
Start by cutting 2 lace strips about 10-12 inches long each, enough to wrap the pumpkin with overlap. Then press micro LED strips lightly against the pumpkin under the lace — I tuck the wire seam toward the back so it stays hidden. Tie lace ends with thin twine or cream ribbon at the top and base. Finally, add a small bow at the stem and set the LEDs to steady warm mode, not blinking. Keep the lace snug but not stretched — stretched lace shows uneven hotspots.
If your lace is too see-through, add a second layer of thin tulle behind it for smoother glow.
Avoid cool white LEDs; they make lace look icy and cheap.
2. Carved Pumpkin Outline Lights in a Simple Star Pattern

This looks cozy because the light hugs the carving edges instead of blasting outward. Carve shallow channels that follow the star lines, then let the lights sit inside those grooves. I’ve found this flatters most pumpkin sizes — you can do it on a small 6-7 inch pumpkin or a big one, as long as the channels are even. The star pattern also reads sweet instead of spooky, which is why it’s great for family dinners. The styling principle is controlled glow: you’re outlining shapes so the light feels intentional.
Start by drawing 3-5 stars with a pencil on the pumpkin, then carve shallow V-grooves about 1/8 inch deep. Thread warm white mini LED lights into the grooves, using a dot of hot glue at 3-4 points to hold the wire. Leave a little slack so the wire doesn’t pop out when the pumpkin shifts. Then plug in and check from 6 feet away; if you see hotspots, press the lights slightly deeper into the grooves. Finish by painting the inside ridges with a thin layer of matte white acrylic so the glow diffuses.
Pro tipUse matte white acrylic inside the grooves — it makes the light look softer without adding extra lights.
AvoidDon’t carve deep holes; deep carving makes the light look like it’s coming from the back wall.
3. Rust Ribbon Lantern Pumpkin With Tea Light in a Mesh Cage
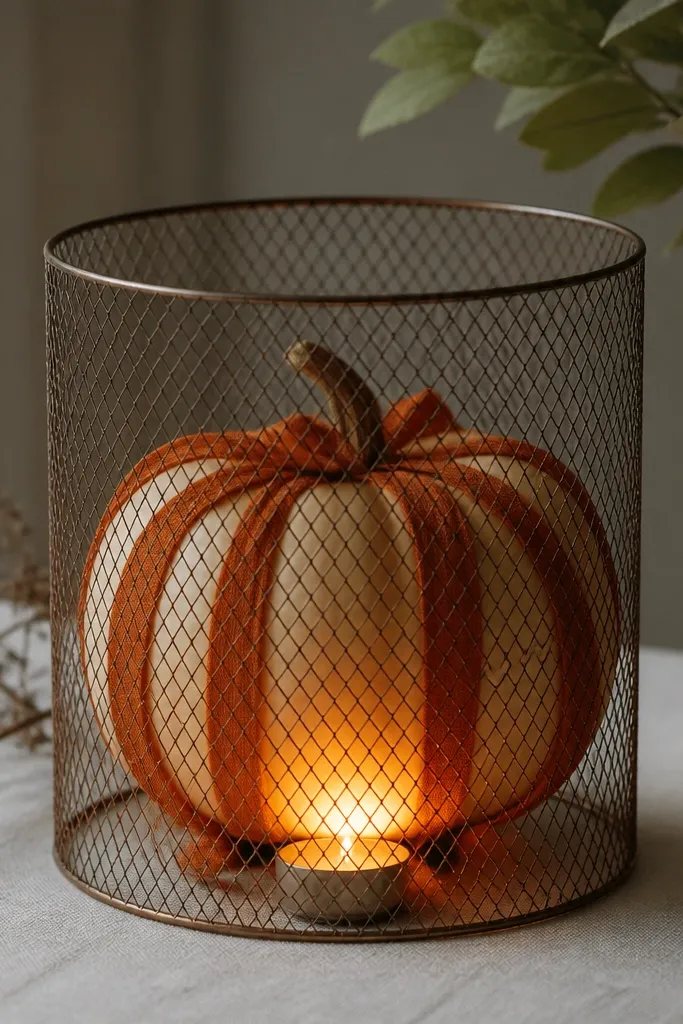
This one is for that “lantern on the porch” look without buying a lantern. The mesh spreads the tea light warmth into a soft ring, and the rust ribbon adds cozy texture. It works great if your pumpkins are slightly scuffed or uneven — the ribbon bands hide imperfections while the mesh still shows a warm glow. I’ve used this with medium pumpkins on a front step, and it reads warm even in daylight because the mesh catches light. The principle is framing: the mesh creates a glow boundary so the pumpkin feels like a lantern.
Start by cutting 3-4 ribbon lengths in rust that wrap around the pumpkin horizontally, about 1 inch wide each. Then measure a piece of thin metal mesh (hardware cloth works) to form a cylinder that sits 1-2 inches away from the pumpkin. Place the tea light in a small tin or heat-safe cup inside the mesh, and secure the cylinder with wire. Wrap the ribbon bands over the mesh so they look integrated, not pasted on. Finish by tying a bow at the top and hiding the wire tie behind the stem.
Use a heat-safe tin under the tea light; it keeps wax mess off the mesh.
Avoid stretchy ribbon that sags — it makes the lantern look sloppy.
4. Parchment Shade Pumpkin With One LED Candle Inside
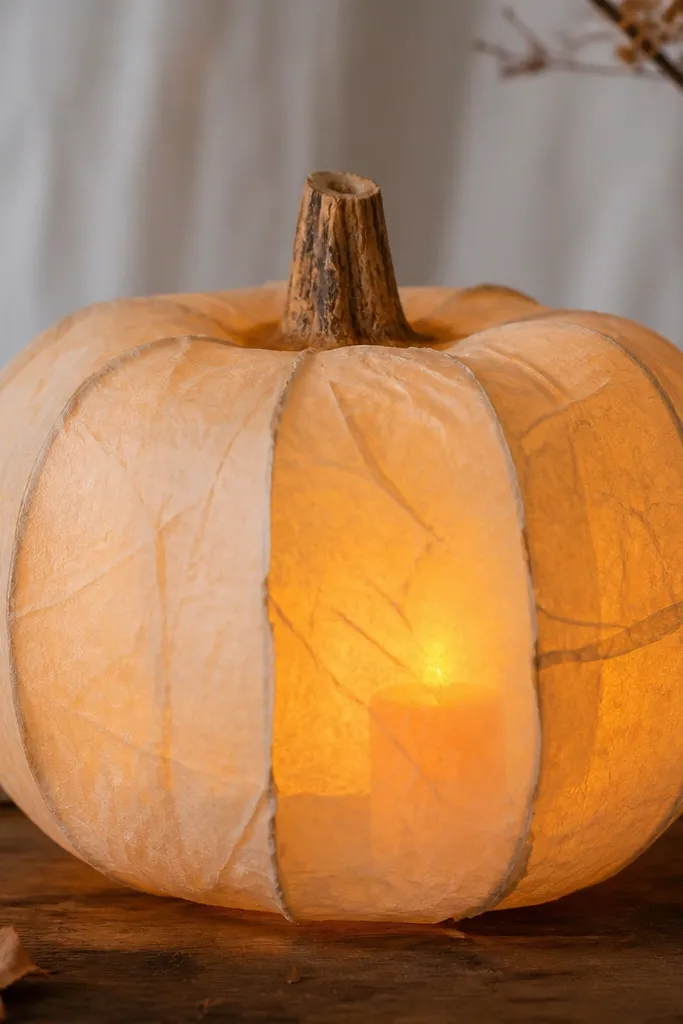
Parchment looks cozy because it scatters light like a mini lamp shade. Crinkle the parchment so it creates tiny light variations, which keeps the glow from looking flat. This is especially flattering on tall pumpkins because the vertical folds make them look sculpted. If you want a calm, homey vibe for a kitchen counter, this is the one. The principle is diffusion through an uneven surface, so the light feels warm and organic.
Start by cutting parchment into 6-8 panels, each about 8-10 inches tall and 6-7 inches wide. Lightly crumple each panel, then wrap around the pumpkin with painter’s tape at the seams. Place a single LED candle inside a small opening at the top (lift the stem area and tuck it under the parchment). Then wrap a thin strip of twine around the base to keep the parchment snug. Finally, add a small strip of burlap around the middle if you want extra texture without changing the color palette.
Pro tipIf the glow looks too dim, add a second LED candle lower in the pumpkin for a bottom-up effect.
AvoidDon’t use glossy wrapping paper; it creates shiny hotspots instead of soft light.
5. Cinnamon Stick Border With Fairy Lights Around the Base
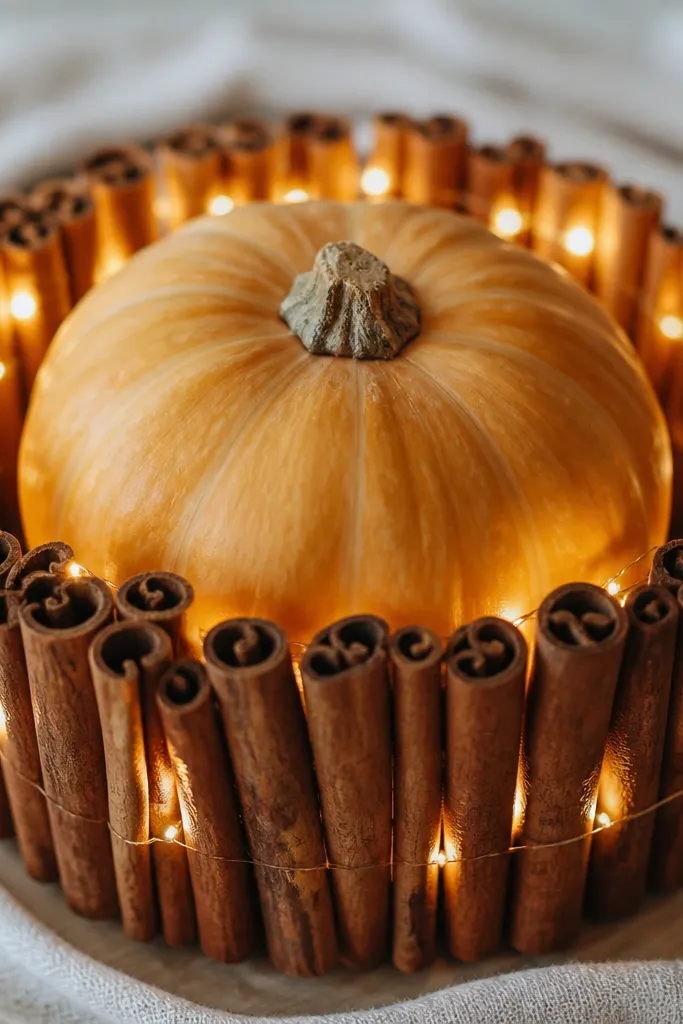
This is cozy because it adds warm scent and a physical frame for the light. The cinnamon sticks block some of the direct LED glare, so the glow looks filtered and gentle. It also looks good on small pumpkins because the ring takes up visual space and makes even a 5-inch pumpkin feel styled. I’ve used this on a coffee table with a fabric runner, and it reads like fall decor, not just Halloween. The principle is layering: lights sit behind a textured barrier so they look softer.
Start by measuring a circle around your pumpkin’s widest point, then lay cinnamon sticks end-to-end on a piece of cardboard to get the ring shape. Cut a ring of thin floral wire or use hot glue to create a base ring, then secure the cinnamon sticks to it. Tuck warm white fairy lights behind the cinnamon ring so the bulbs sit between sticks, not in front. Wrap the ring around the pumpkin and tie with twine at two points. Turn on the lights and adjust bulb spacing until the ring looks even.
Pro tipUse cinnamon sticks that are dry and straight; bent ones make the light gaps look messy.
AvoidAvoid bright multi-color bulbs — the cinnamon looks best with warm white only.
6. Greenery + Lights Pumpkin Topper With a Hidden Battery Pack

If you like a more “garden fall” vibe, this one looks classy and cozy at the same time. The greenery spreads light in multiple directions, which makes the pumpkin glow from the top down. It flatters warm skin tones on photos because the green makes the orange pop without looking loud. I’ve done it for Thanksgiving tables where people want decor that feels fresh, not cartoonish. The principle is a light canopy: leaves act like a diffuser and keep bulbs from showing directly.
Start by wiring a small faux greenery crown that fits the pumpkin top like a headband. Then tuck warm white string lights into the greenery — I weave the wire between leaf stems so no bulbs face outward. Cut a small slit at the base of the crown and slide the battery pack inside a clear zip bag. Hide that bag under the greenery so it doesn’t show, and secure with floral tape. Finish by adding 2-3 mini pinecones or dried orange slices at the front where the glow is strongest.
Add a tiny dab of hot glue to the battery pack bag corners so it stays put when you move the pumpkin.
Avoid sparse greenery; if you can see bulbs clearly, the glow will look harsh.
7. Twine Wrapped Pumpkin With LED String Spaced Under the Loops
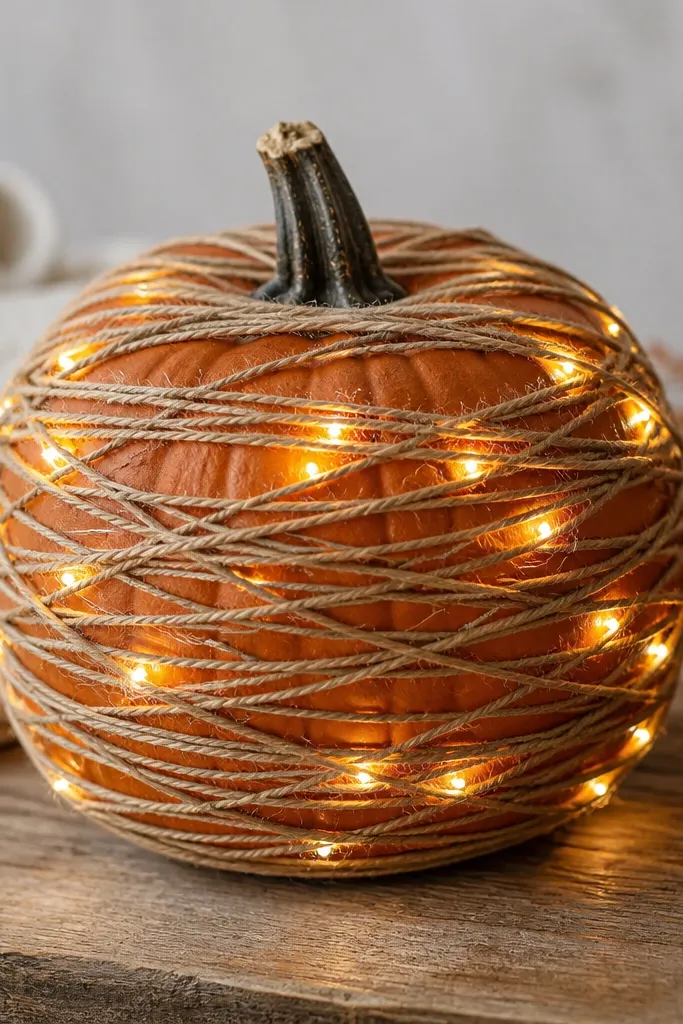
Twine makes the light look cozy because it’s textured and slightly porous. When the LEDs sit under the loops, you get little amber-like pinpoints instead of one bright line. This is great for people who like neutral decor and want pumpkins that match farmhouse touches. It also holds up well on medium and large pumpkins because the twine coverage hides any uneven carving or scuffs. The principle is indirect lighting: the twine breaks up the light into small, warm specks.
Start by wrapping twine around the pumpkin horizontally with hot glue dots every 2-3 inches. Before you finish each band, tuck warm white micro LEDs under the twine so they sit flat against the pumpkin. Keep bulb spacing about 1 inch apart for a steady, even glow. Continue wrapping until the LEDs are completely covered by the twine layer. Leave the battery pack access point at the back — I hide it under the last loop with a small pull tab of ribbon. Turn on and walk past it once; if you see direct bulbs, add another twine layer over that spot.
Use matte tan twine instead of shiny craft cord; shiny cord reflects light as glare.
Avoid over-tight twine that warps the pumpkin surface and makes gaps uneven.
8. Fabric Rosette Pumpkin With Lights Behind a Tulle Veil

This is the prettiest option if you want “cozy” to feel romantic. The rosettes add dimension, and the tulle veil diffuses the glow so it looks like it’s coming through fabric, not from a device. It flatters lighter color palettes — cream, blush, and soft gold look especially good against orange. I’ve used this style for a fall dinner when people take photos at the table. The principle is layered translucency: lights are behind a soft veil, while rosettes create texture on top.
Start by cutting a circle of tulle large enough to cover the pumpkin front and overlap the sides. Secure it with a few hot glue dots at the top and bottom only, so it stays airy. Then make 10-12 fabric rosettes from scrap ribbon or felt strips, about 3-4 inches wide each, and pin or glue them in a loose grid. Add warm white fairy lights behind the tulle — tuck them between tulle and pumpkin and adjust so bulbs sit under the rosette gaps. Finally, cover the battery pack with a small felt patch so it disappears into the rosette base. Set lights to steady warm mode for a calm glow.
If the tulle is too transparent, switch to soft organza; it glows smoother than stiff tulle.
Avoid thick, heavy fabric directly over LEDs; it blocks the light and makes it look dim.
9. Matte Black Pumpkin With Gold LED Accents
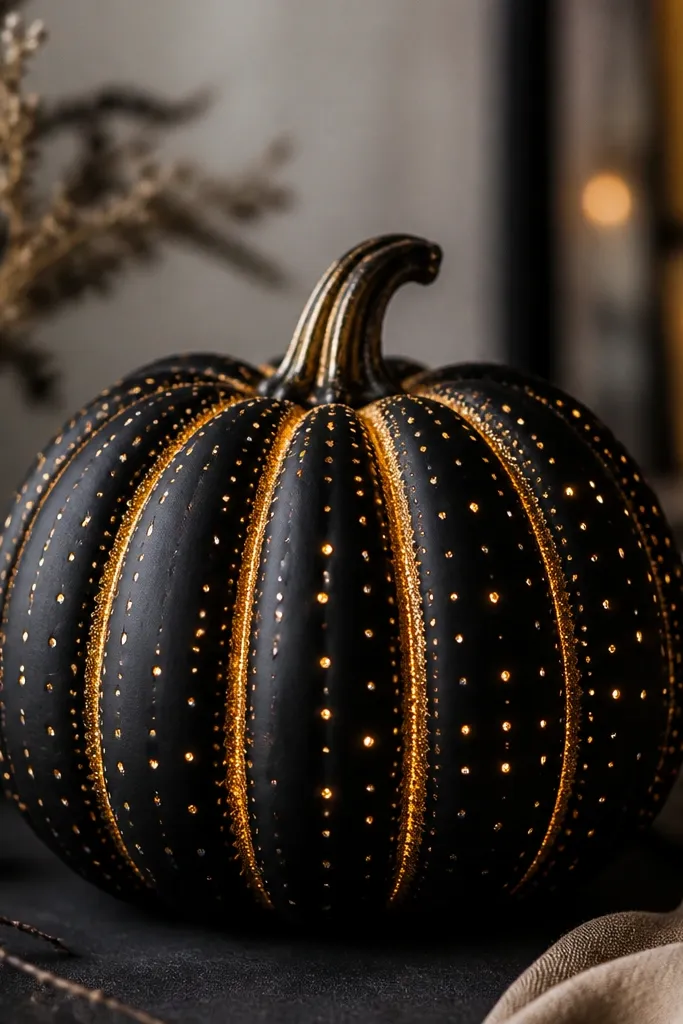
This one turns cozy into modern. Matte black absorbs stray light, so the warm gold accents look like they’re floating. It flatters deep skin tones in photos because the contrast is strong, and it fits a minimalist mantel without screaming Halloween. I’ve used it on a shelf with neutral candles where color variety matters. The principle is color temperature control: warm LEDs against a dark matte surface look intimate and not harsh.
Start by painting your pumpkin with matte black spray paint and let it cure fully. Then draw 2-3 curved lines or small leaf shapes where you want the glow. Carve shallow channels along the lines and thread warm white micro LEDs or warm gold LED dots into the grooves. Secure with tiny hot glue points, then cover the wire with a thin dusting of matte black acrylic so it blends. Finish by adding a gold ribbon at the stem and keep the rest of the decor simple so the pumpkin becomes the glow center.
Pro tipTest the LED color before gluing — warm gold often looks nicer than yellow-white for this look.
AvoidAvoid glossy black paint; it reflects LED bulbs and looks spotty.
10. White Pumpkin With Burnt Orange Ribbon and Candle Lights

White pumpkins look cozy because they turn warm light into a soft, creamy glow. Burnt orange ribbon adds warmth without overpowering the shape, and you can reuse the ribbon year after year. This design is great for people who want a “winter-spring neutral” palette with fall vibes. It also photographs well because the white surface shows smooth gradients instead of flat brightness. The principle is contrast control: warm light plus a warm ribbon on a light base.
Start by using a white foam pumpkin or a painted real pumpkin and let paint dry completely. Wrap 3-4 horizontal ribbon bands around it, spacing about 2 inches apart, and tie a bow at the top. Tuck warm white LED candle lights inside a hollow pumpkin or behind a removable top — I slide the candle unit behind the ribbon line so it’s not visible. If it’s a real pumpkin, cut a small opening under the stem and place the LED candle inside a small cup. Turn on and adjust ribbon placement so the glow shows through the gaps between bands.
Pro tipUse wider ribbon (about 1.5 inches) so the glow looks like a band of warmth, not scattered dots.
AvoidAvoid thin ribbon; narrow bands hide the light and make the glow look weak.
11. Mini Pumpkin Trio With One Light Color and Different Textures
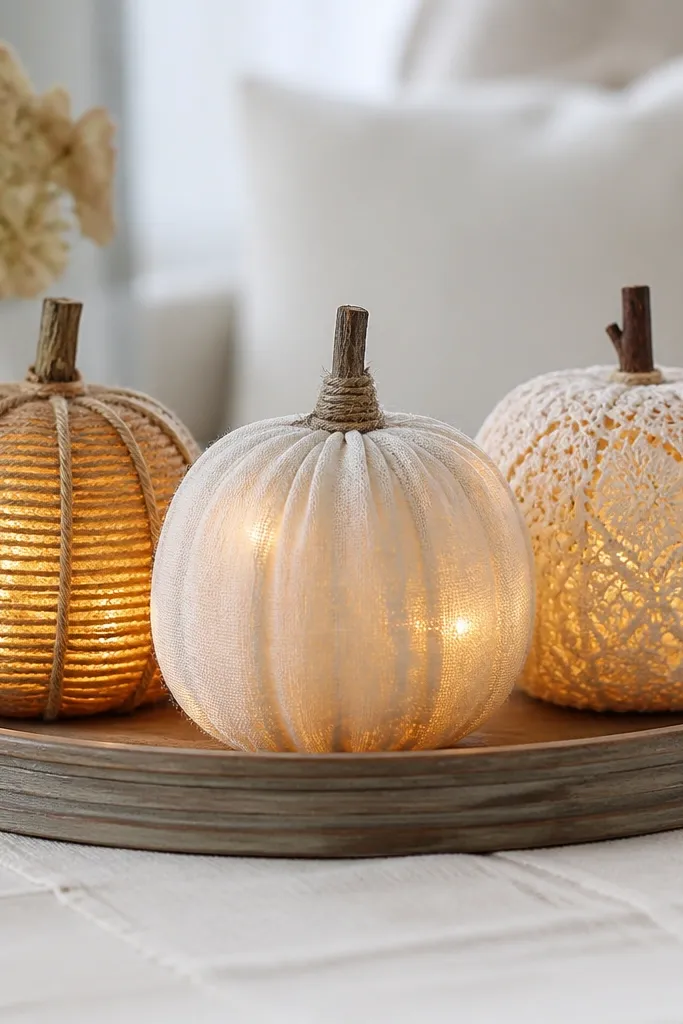
A trio looks cozy because your eyes read it as a set, and the varied textures keep it from looking like a craft pile. Use the same light color across all three — warm white — so the glow feels consistent. This works especially well if you’re decorating a coffee table or entryway where you want height without a big centerpiece. I’ve done this for friends who hate clutter; the tray keeps everything contained. The principle is unity through one lighting element, plus variety through surface texture.
Start by choosing three pumpkins in the same size range, about 5-7 inches tall. Treat each one differently: one with twine, one with lace, one with parchment or tulle. Install warm white micro LEDs under the material layer on each pumpkin, keeping bulb spacing similar so the glow level matches. Place all three on a shallow tray lined with burlap or a cream runner. Tuck a single plug-in transformer or battery pack under the tray edge and hide it with a ribbon strip. Turn on and check from the doorway — the glow should feel even across all three pumpkins.
Pro tipUse a tray with raised edges; it keeps the pumpkins from sliding and keeps wires hidden.
AvoidAvoid mixing warm and cool LED colors; it makes the set look random.
12. Glow Through Carved Leaf Veins With Warm LEDs
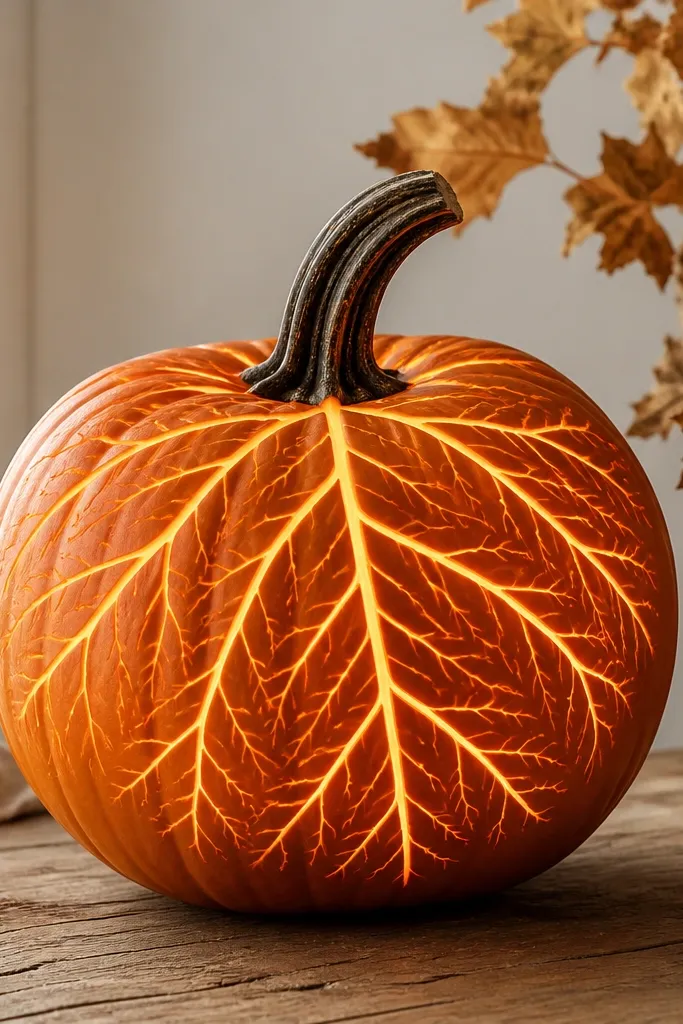
Leaf-vein carving feels cozy because it’s delicate and reads like nature instead of a face. The warm LEDs behind thin carved lines make the pumpkin look like it’s softly backlit. This style flatters medium pumpkins because the leaf lines can radiate in a clean pattern. It also looks great for indoor corners where you want a soft statement piece without darkness. The principle is backlighting: lights sit behind thin channels, so the glow spreads through the carved structure.
Start by sketching 5-7 leaf veins that start near the stem and fan outward. Carve shallow lines with a craft knife, staying light so the pumpkin doesn’t collapse. Insert warm white LED mini lights behind the carved channels, using hot glue at the top of each vein to hold them. For a smoother glow, paint the carved interior with a thin layer of translucent brown acrylic mixed with a little matte medium. Place the battery pack inside the pumpkin base area and secure with a small zip bag. Turn on and adjust so the brightest glow sits near the stem, not the bottom.
Add a tiny amount of brown acrylic inside the channels; it makes the glow feel like fall leaves instead of pure light.
Avoid thick carved cuts; thick cuts create dark voids around the lights.
13. Candy Corn Style Pumpkin With Split-Color LED Effects
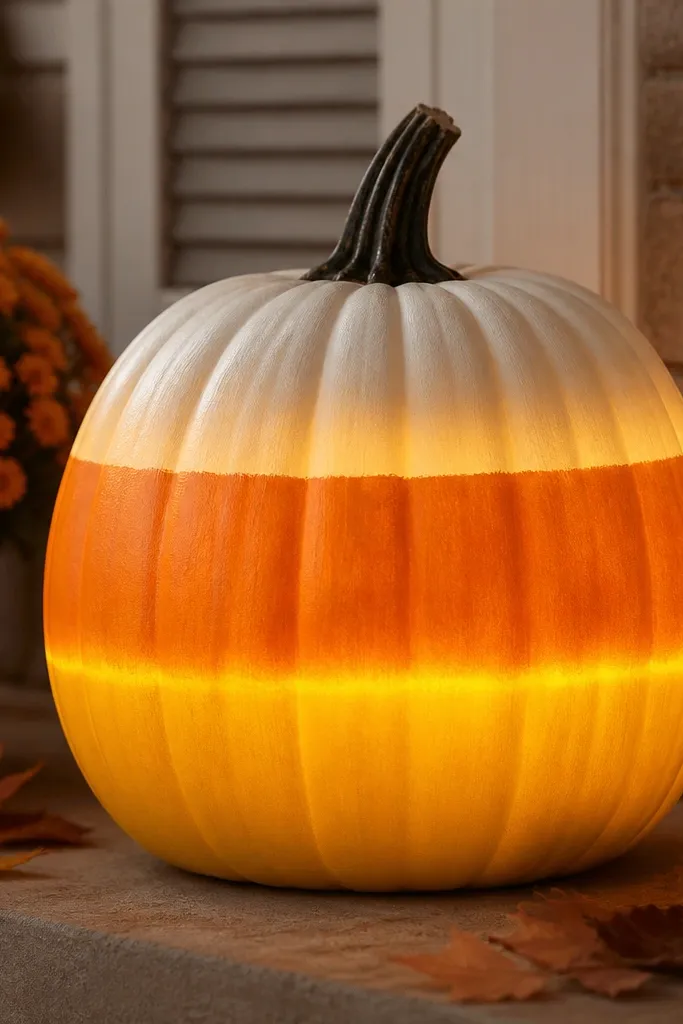
This one is fun but still cozy because you control the LED colors and keep them warm. Paint the pumpkin in soft candy-corn bands: cream top, honey yellow middle, burnt orange bottom. Then use warm white LEDs for the base glow and a warm yellow strip for the middle band to create a gentle gradient. It looks great on dining tables and for porch displays where kids will notice it. The principle is gradient lighting: color transitions on the pumpkin match the light sources.
Start by painting horizontal bands on a pumpkin: cream (top), honey yellow (middle), and burnt orange (bottom). Let paint dry fully, then mark where the middle band sits. Place warm white LEDs inside the pumpkin and position them so the light mainly hits the bottom half. Add a warm yellow LED strip or a second set of micro LEDs aimed toward the middle band, and secure it with hot glue. Keep the battery pack at the back and route wires through a small slit under the stem. Turn on and adjust angle by rotating the pumpkin slightly until the gradient looks even.
Use matte paint for the bands; glossy paint makes LED colors look harsh.
Avoid bright orange LEDs; they overpower the candy-corn colors and look cheap.
14. Burlap Bow Pumpkin With Warm String Lights Tucked Into Seams

Burlap makes everything feel cozy because it’s rough and matte, so the light looks warm instead of shiny. The big bow gives you that gift-like vibe, and the tucked lights create a glow that feels like it’s coming from underneath fabric. This works on medium to large pumpkins because burlap needs surface to drape and hide seams. I’ve placed this style on a porch next to planters, and it blends with natural textures. The principle is fabric staging: lights go behind burlap folds so the glow spreads through the weave.
Start by cutting a burlap piece large enough to wrap the pumpkin with overlap, then secure with hot glue at the back. Leave the front seam slightly open so you can tuck lights into it. Wrap warm white mini string lights along the seam under the burlap edge, then fold the burlap over to hide the bulbs. Add a large burlap bow made from 6-8 inch wide strips, and attach it over the seam. Hide the battery pack under a small burlap flap at the bottom and tie it down with twine. Turn on and check that the glow shows through the weave, not just from one spot.
Pro tipSteam or mist burlap lightly before wrapping; it lays flatter and hides the glue lines better.
AvoidAvoid tight plastic-looking burlap; it reflects and kills the cozy effect.
15. Sunflower Accent Pumpkin With Lights Behind Faux Petals
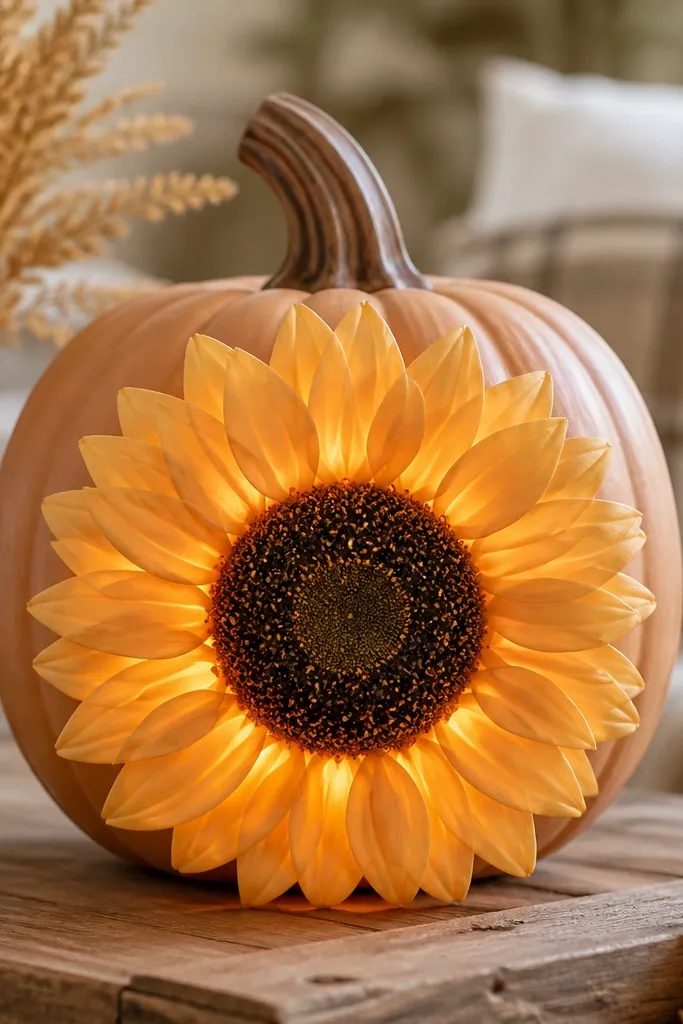
Sunflowers make pumpkins feel cheerful, and adding light behind the petals makes the center look like a warm spotlight. This is a great choice for a front porch because the bright flower draws attention even from the driveway. It flatters warm-toned decor palettes — mustard, rust, and deep green. I’ve used this for early-fall displays where you still want a pop of color without going full Halloween. The principle is spotlighting: you light the focal decoration, not the whole pumpkin.
Start by attaching a faux sunflower (with sturdy petals) to the pumpkin front using hot glue or zip ties around the base. Then tuck warm white micro LEDs behind the sunflower petals, aiming them toward the petal edges. Use a few hot glue dots to hold the wire where it won’t show. If your sunflower is thick, add a small foam spacer so the LEDs sit closer to the petal backs. Place the battery pack inside the pumpkin and run the wire back under the sunflower stem. Turn on and adjust the sunflower angle so the glow reads even across the petals.
Choose a sunflower with slightly translucent petals; it makes the glow look softer.
Avoid thin paper flowers; they tear when you push wires behind them.
16. Metallic Leaf Confetti Pumpkin With LED String Inside the Cracks
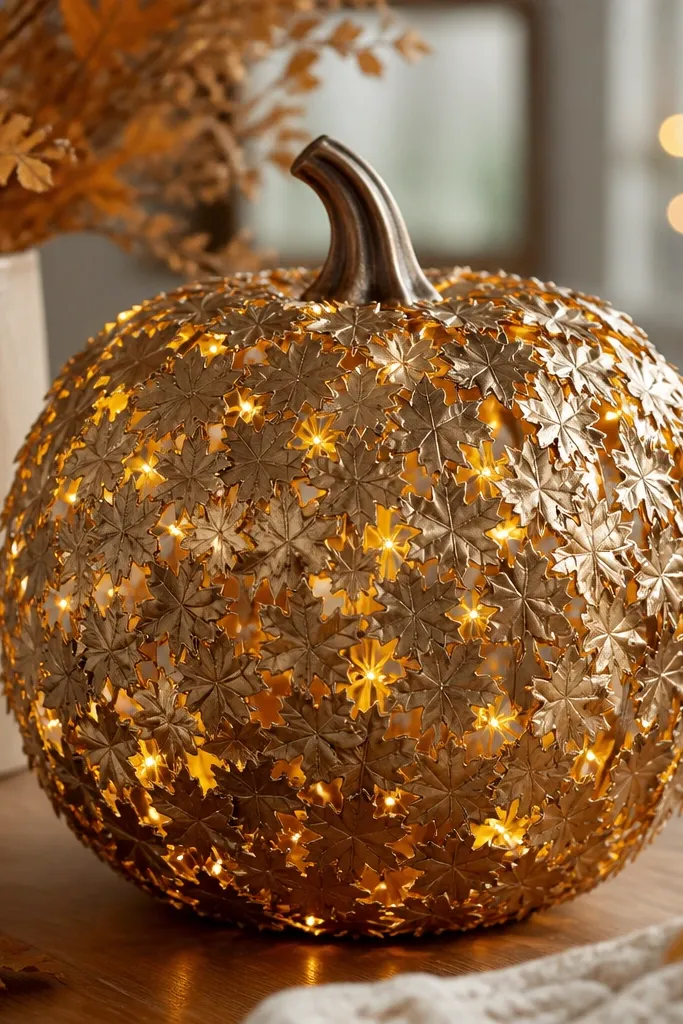
This looks cozy because the metallic leaf pieces act like tiny reflectors, giving a warm sparkle without looking like party lights. It flatters neutral rooms because gold and copper tones blend with wood and cream textiles. I’ve used it on a side table next to candles; it looks good from a few feet away, not just up close. The principle is reflective diffusion: you’re using small surface pieces to scatter light in multiple directions.
Start by painting the pumpkin with a warm base color like matte cream or soft tan. Then cut or buy small leaf confetti pieces in gold and copper, and glue them across the pumpkin in a loose pattern, leaving small gaps for glow. Thread warm white mini LEDs under the leaf layer — I push the wire under the bottom edge first, then work around the pumpkin. Secure with tiny glue dots so the wire doesn’t float. Add a small ribbon at the stem and tuck the battery pack under the leaf area at the back. Turn on and rotate the pumpkin until the brightest reflections face the room, not the floor.
Pro tipUse tiny glue dots, not thick ones; thick glue blocks light and makes shiny patches.
AvoidAvoid covering every inch solid; full coverage makes it look like a craft glitter bomb.
17. Herringbone Ribbon Pumpkin With LEDs in the Vertical Lines
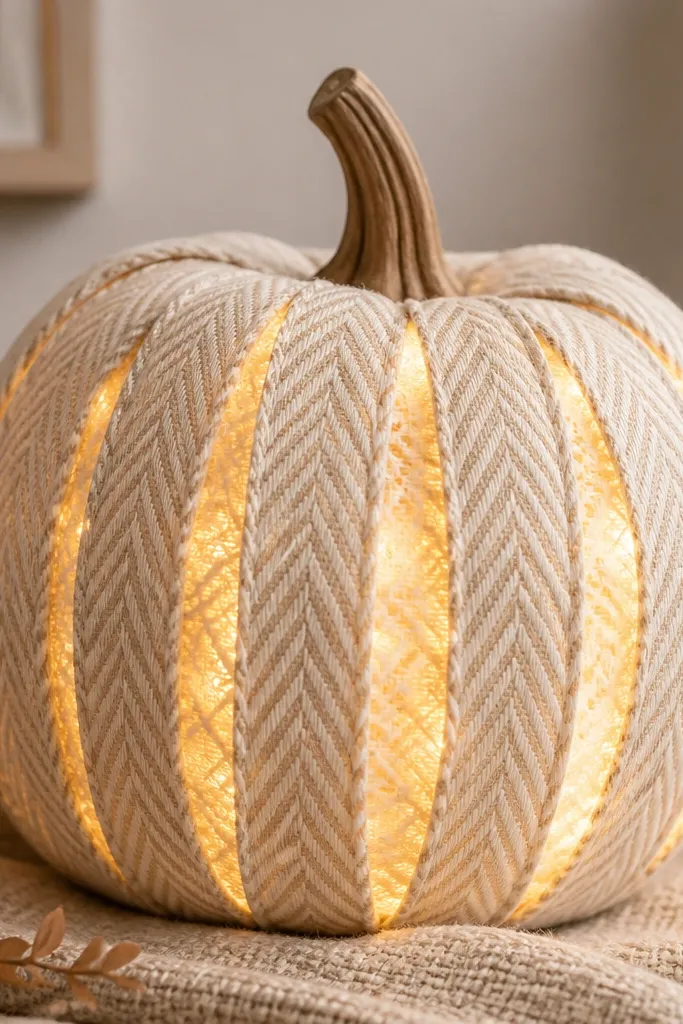
Herringbone looks cozy because it adds structure, like a knitted scarf. When LEDs sit behind the vertical ribbon lines, you get a warm, directional glow that makes the pumpkin look taller and more tailored. This is flattering for small pumpkins because the pattern gives visual height. I used this style on a bookshelf display and it matched plaid blankets without looking like a Halloween toy. The principle is line lighting: the glow follows the pattern, so it looks designed.
Start by wrapping the pumpkin with a base layer of thin fabric or paper so ribbon glue has something to grip. Then apply herringbone ribbon strips: one vertical column at a time, alternating angles so the pattern locks. Before you seal each column, tuck warm white micro LEDs behind the ribbon edge along the vertical line. Secure with hot glue at ribbon corners only, leaving the middle flexible so it can diffuse light. Add a small bow at the stem and hide the battery pack under the ribbon at the base. Turn on and check for even vertical glow; add a few extra bulbs where the pattern gaps too much.
Pro tipUse ribbon with a matte finish so the light doesn’t glare off glossy fibers.
AvoidAvoid wide ribbon that covers the LEDs; you want light to peek through the weave gaps.
18. Mini Chalkboard Tag Pumpkin With Lighted Twine Lettering
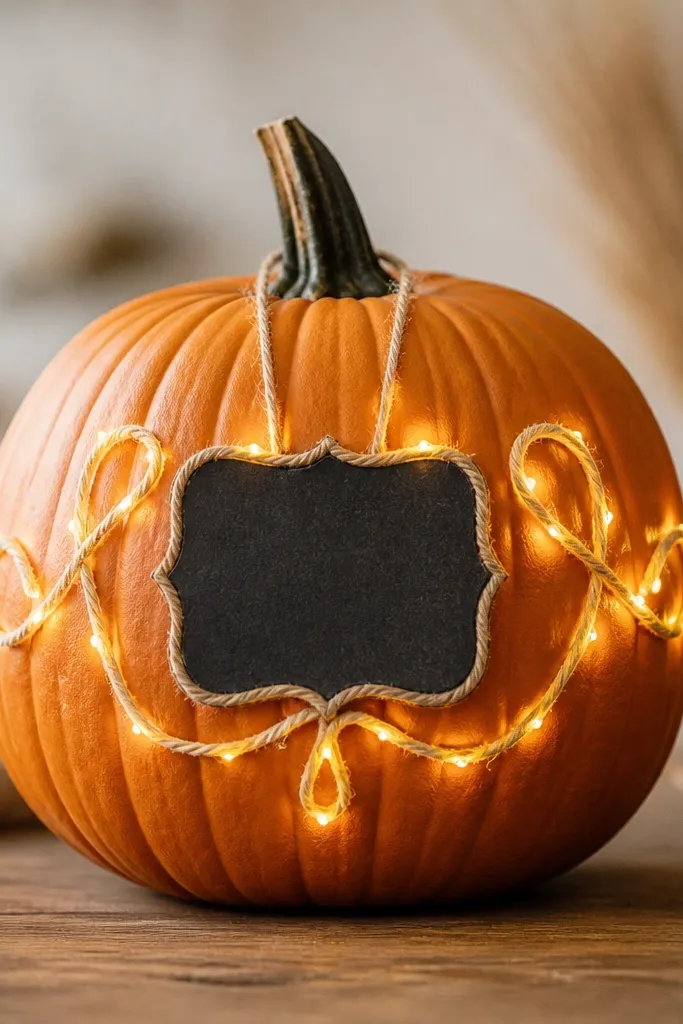
This one is cozy because it feels personal, like a handwritten note. The warm glow in twine lettering looks handmade and soft, especially against a matte pumpkin finish. It works best for people who like decor that changes by season but stays consistent in style. I’ve used it on a front step where visitors stop to read the tag. The principle is accent lighting: you light the message so the rest stays calm.
Start by painting or using a matte pumpkin surface, then attach a small chalkboard tag with twine or a mini clothespin. Next, write a simple word like “gather” on a piece of thin cardstock, then trace it onto twine using hot glue to make a twine outline. Thread warm white micro LEDs behind the twine outline so the glow shows through the twine gaps. Secure the twine lettering around the chalkboard tag, and hide the battery pack behind the tag using a small zip bag. Turn on and make sure the lights face outward toward the viewer, not straight into the pumpkin.
Use warm white micro LEDs and keep the word small; too large makes it look like signage.
Avoid shiny chalkboard frames; they reflect the bulbs and look plastic.
19. Stacked Pumpkin Glow With a Light-Filled Base Tier
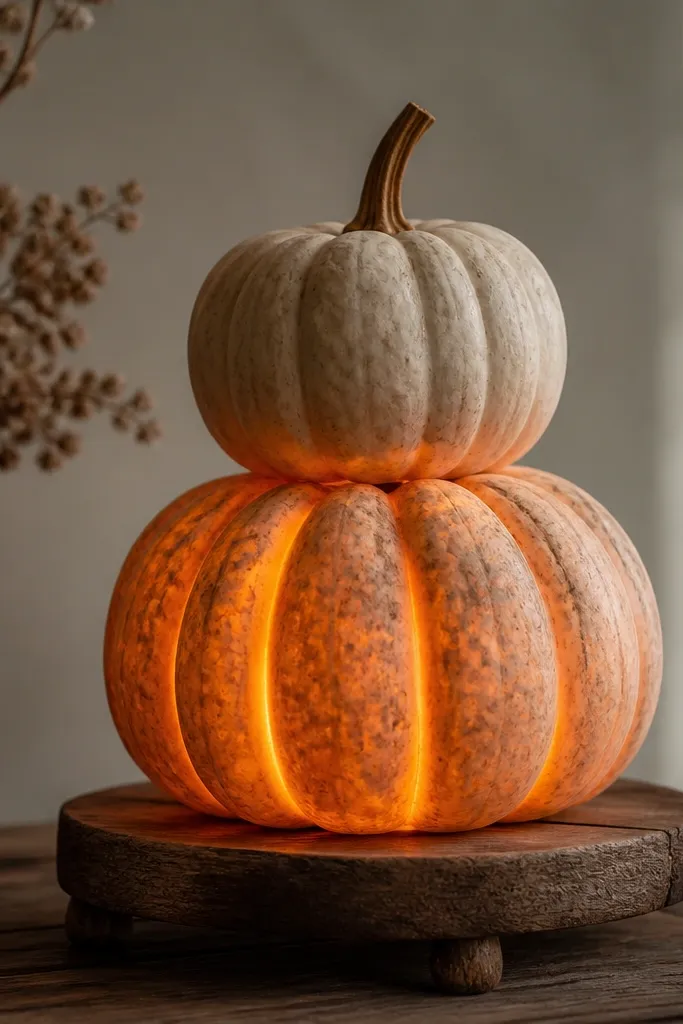
A stacked setup looks cozy because you get a built-in shadow and height, like a little sculpture. The lower pumpkin being the light source makes the glow spread upward naturally. This flatters corners and shelves because stacked decor takes up less horizontal space. I’ve done this for a small apartment entryway and it instantly made the spot feel decorated. The principle is vertical glow: light starts low and rises, which looks warmer than side lighting.
Start by placing a small wooden riser or thick book stack under the bottom pumpkin so it sits stable. Cut a small opening in the lower pumpkin and place warm white LED candle lights inside, then seal the opening with a removable foam plug. Stack a second pumpkin on top and secure with a hidden dowel skewer if you’re using real pumpkins. Wrap the top pumpkin with a thin tulle strip so it doesn’t block the upward glow. Route the wire from the lower pumpkin toward the back and hide it under the riser. Turn on and adjust by rotating the stack slightly until the glow spills toward the room.
Pro tipUse a flat riser with texture, like wood, so the glow looks grounded instead of floating.
AvoidAvoid stacking without securing; wobble ruins the look fast.
20. Beaded Garland Pumpkin With LED Points Behind Seed Beads
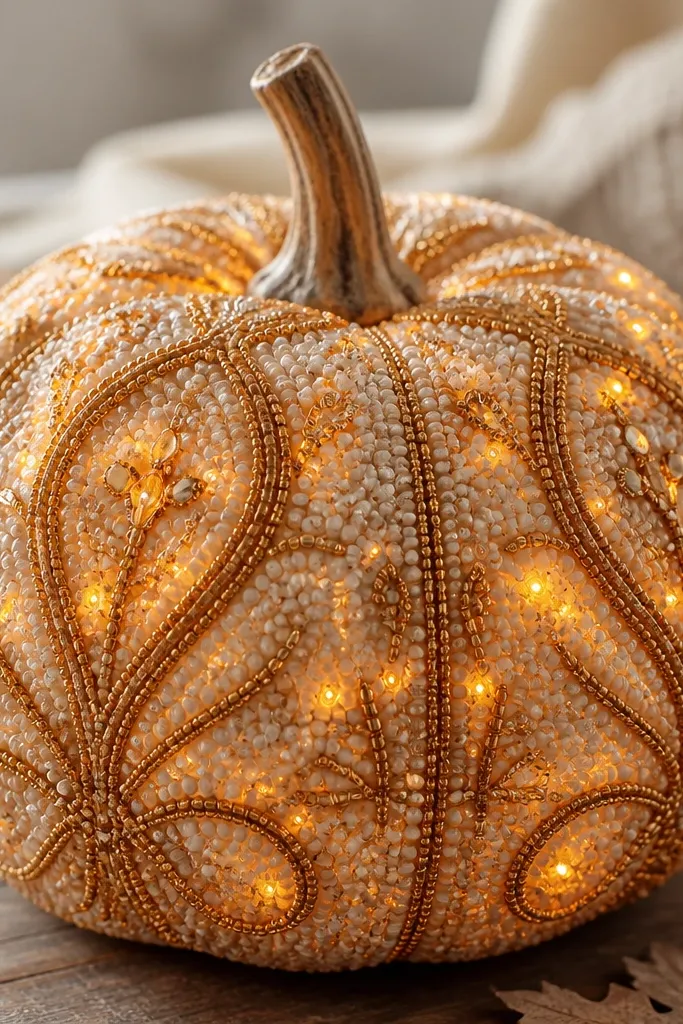
Beads make the light feel cozy because they scatter it like tiny warm raindrops. This looks great when you want a more decorative, party-adjacent fall look without going full bling. It flatters neutral outfits and warm wood tones, and it photographs beautifully because beads catch light even when you’re not close. I did this for a dinner table and it felt festive in a calm way. The principle is sparkle control: you want scattered points, not a single bright LED line.
Start by sketching a simple grid or diagonal pattern on the pumpkin with pencil. Glue seed beads or small bead garlands along the pattern using a thin hot glue line. Before you close a section, tuck warm white micro LEDs behind the bead layer so the bulbs sit under the beads, not exposed. Space bulbs about 2-3 inches apart so the sparkle feels intentional. Hide the battery pack under the bead layer at the back — secure with a small piece of felt over it. Turn on and check that the brightest points are centered on the front third of the pumpkin.
Pro tipUse warm white LEDs with a dim setting if you have one; dim makes beads look like candlelight.
AvoidAvoid cheap plastic beads that look flat; they don’t diffuse light well.
21. Wood Slice Pumpkin With LED Trail Through the Ring
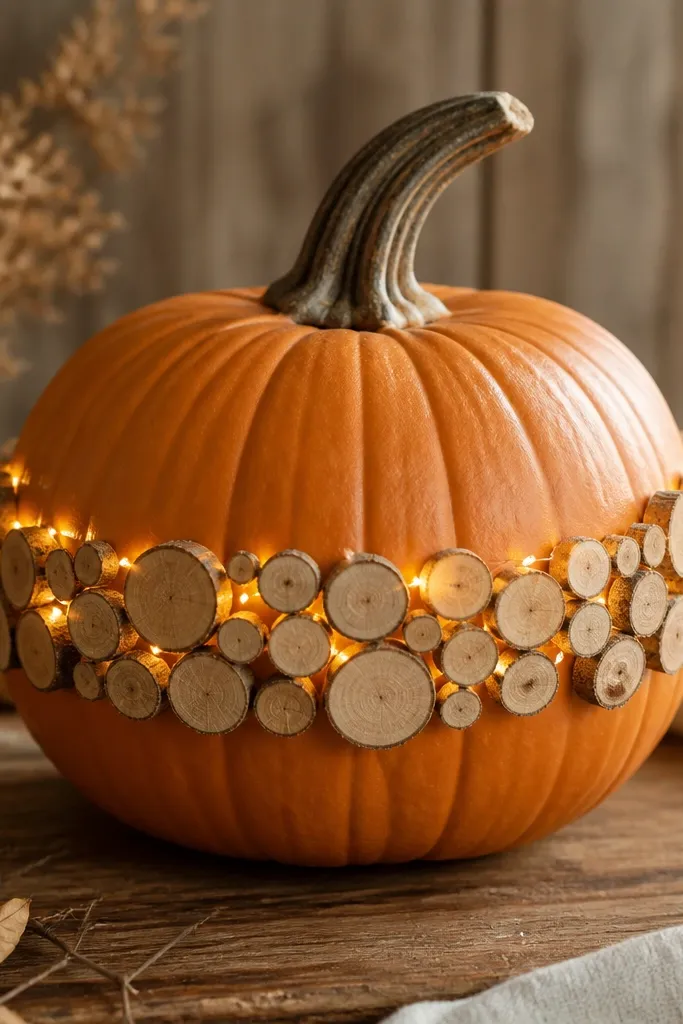
Wood slice accents make the glow feel grounded. The slices block direct glare and create a warm, natural halo around the pumpkin’s widest point. This looks especially good on pumpkins with a slightly uneven shape because the slices add structure. I’ve used this for outdoor displays where you want decor that matches wood planters and porch railings. The principle is barrier lighting: bulbs sit behind natural pieces that diffuse the light.
Start by gluing a ring of wood slices around the pumpkin at the widest point, leaving small gaps between slices. Then thread warm white micro LEDs behind that ring so the bulbs sit inside the gaps. Secure wire with a dab of hot glue at two points, then cover the wire ends with a small slice so they disappear. If the pumpkin is smooth, roughen it lightly with sandpaper so glue holds. Place the battery pack under the slices at the back and hide it with a small extra slice. Turn on and check the ring glow from waist height, not from above.
Pro tipUse slices with a lightly porous surface; they soften the glow more than smooth, sealed wood.
AvoidAvoid painting the wood slices bright white; it makes the light look clinical.
22. Clear Acrylic Pumpkin With Warm Lights Behind Frosted Vinyl
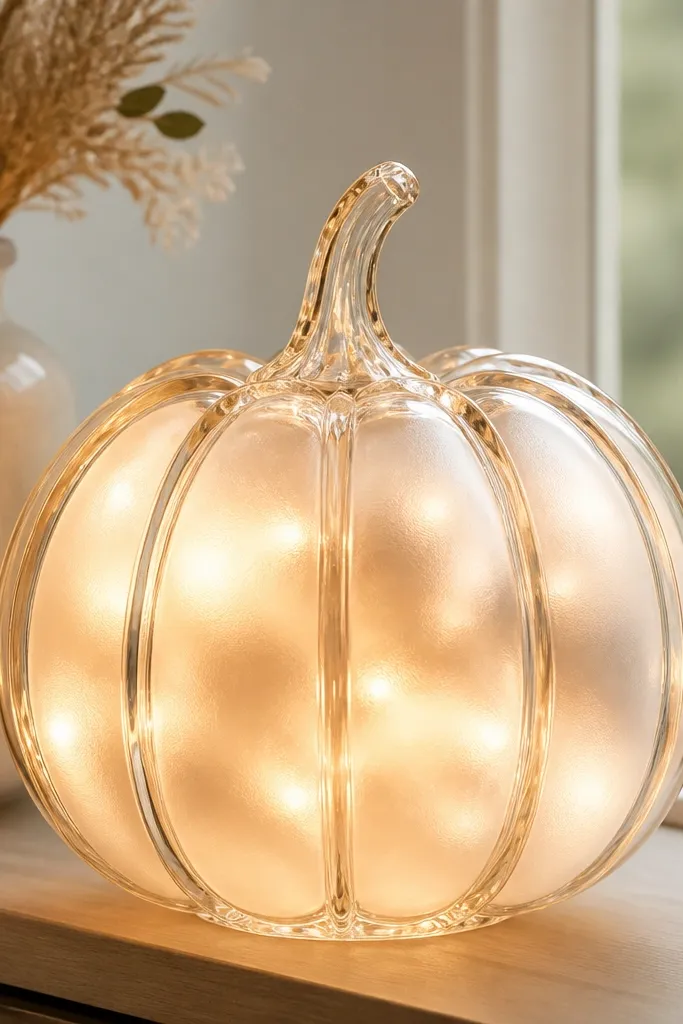
This one looks like a modern window display. The clear base lets you place lights where you want them, and frosted vinyl spreads the glow so it feels like warm glass. It’s flattering for anyone who wants a clean look on a porch or indoors without messy fabric. I used it on a narrow entry console, and it looked expensive even though it wasn’t. The principle is controlled diffusion with a smooth frosted layer.
Start by using a clear pumpkin-shaped container or a clear plastic pumpkin form. Cut frosted vinyl sheets into curved panels that cover most of the front, leaving a small opening at the top for the LED string. Place warm white LED string lights inside and position the bulbs closer to the vinyl so you get even glow. Seal the vinyl panels with a thin layer of clear craft glue or vinyl transfer tape. Add a small bow at the stem and route the cord or battery pack to the back. Turn on and adjust the light position by moving the bulb string until the glow looks uniform.
Pro tipFrosted vinyl over direct bulbs looks smoother than paper because it doesn’t wrinkle or sag.
AvoidAvoid using clear tape directly over vinyl; it creates shiny edges that show the seams.
23. Pinecone Cluster Pumpkin With Warm LEDs in the Gaps
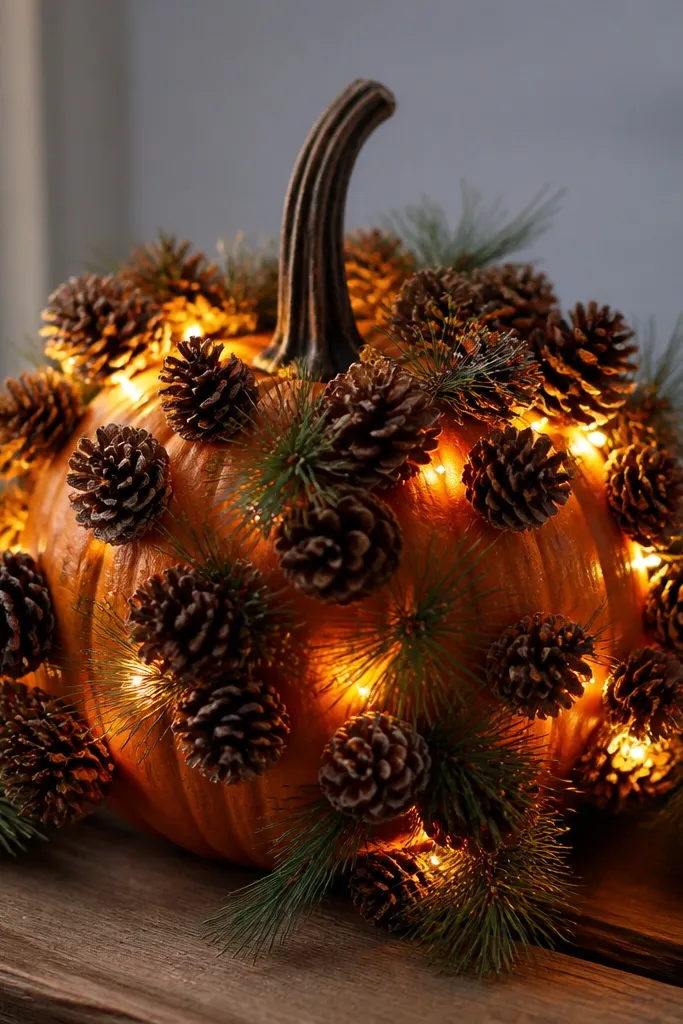
Pinecones are cozy because they’re matte and textured, and they break up light naturally. When the LEDs sit in the gaps between pinecones, the glow looks like it’s caught in the forest floor. This is great for deep fall decor since it pairs well with dark green and brown tones. I’ve done this in winter too, because it still looks right after the first frost. The principle is natural diffusion: textures block direct glare and scatter light softly.
Start by gluing pinecones to the pumpkin in a loose cluster pattern, leaving consistent gaps for light. Then thread warm white micro LEDs behind the pinecone areas so bulbs sit inside the gaps. Use hot glue sparingly — you want airflow and light penetration. Place the battery pack at the base and cover it with one larger pinecone so it disappears. Add a few faux pine needles around the front and tuck the light wire under them. Turn on and rotate the pumpkin to find the angle where the pinecone gaps glow evenly.
Choose pinecones with lighter brown tones; they reflect warm light more than very dark ones.
Avoid packing pinecones so tightly that no light can escape.
24. Paper Doily Pumpkin With LED Candle in the Center
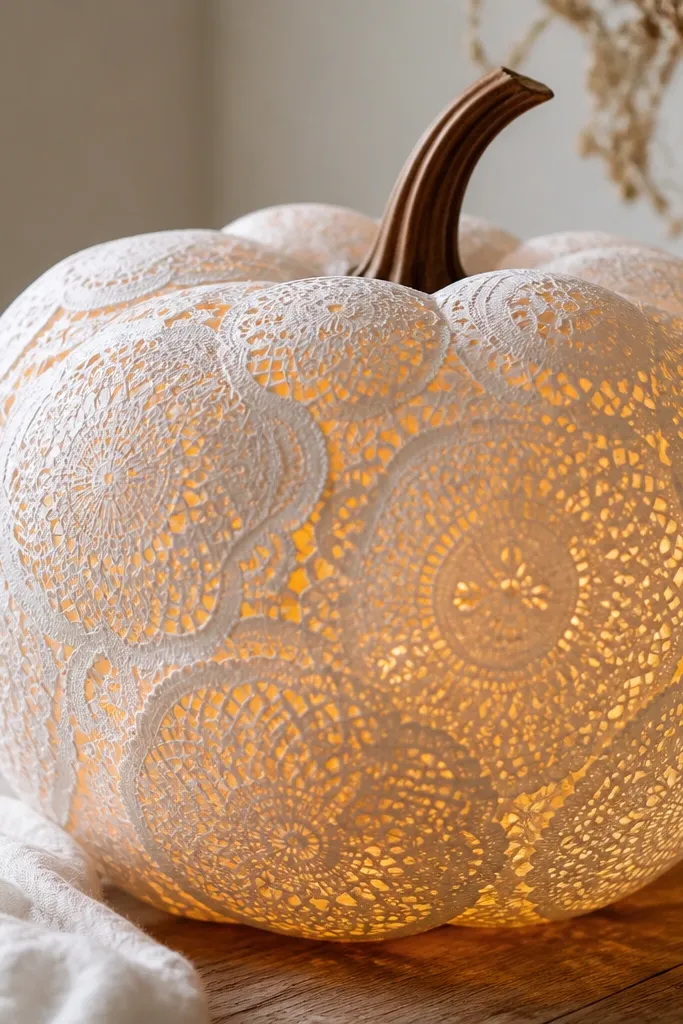
Paper doilies give you that lace look without needing real lace fabric. The pattern spreads light into soft concentric circles, which reads cozy on tabletops and window sills. It’s flattering for small pumpkins because doilies take up visual space and make the whole piece look larger. I’ve used this for holiday dinners when I want something pretty but fast. The principle is layered pattern diffusion: repeated doily circles create a gentle light texture.
Start by cutting 3-4 doilies in half so you can wrap them around the pumpkin. Overlap the halves like shingles, securing with small dots of clear glue or Mod Podge. Place a warm LED candle in the center under the doily layer — I cut a small opening at the top and keep the candle under the first doily layer. Seal the doilies at the edges with a light Mod Podge coat so they don’t peel. Hide the battery pack behind the top overlap where the doily seam sits. Turn on and adjust the seam overlap so the brightest glow hits the front.
Use thick paper doilies, not flimsy ones; thin doilies tear when you glue them over curves.
Avoid heavy glue soaking; soaked doilies look translucent and uneven in light.
25. Glowing Pumpkin Face Made of Ribbon Tubes (No Carving)
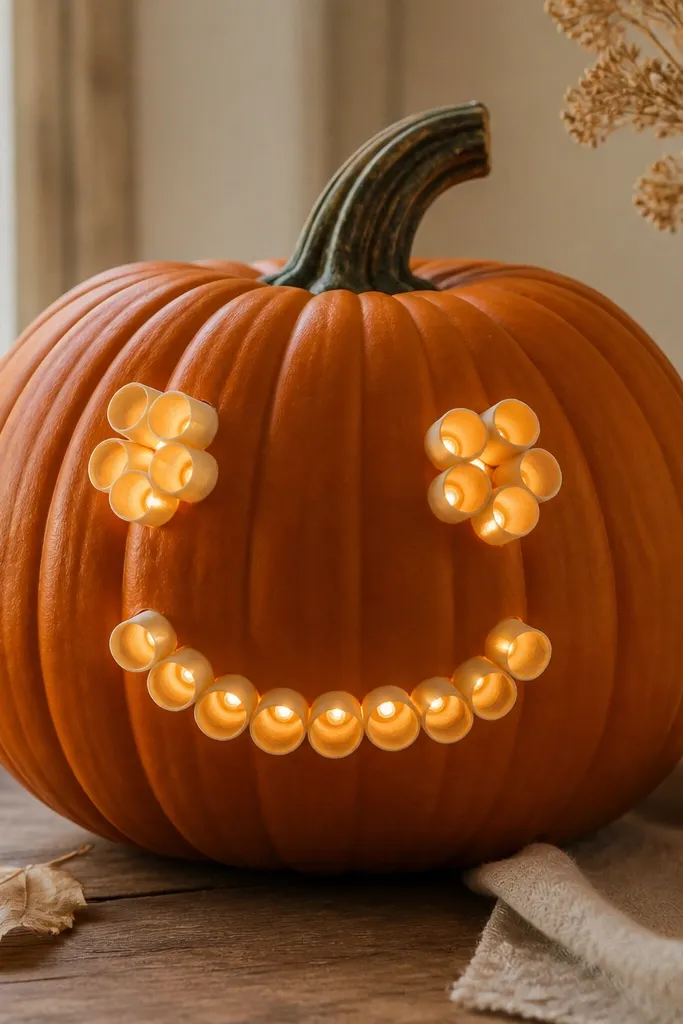
This is a cozy, kid-friendly approach because it doesn’t require carving. Ribbon tubes create a tunnel-like effect that hides the LED points and makes the face look softly lit. It flatters smaller pumpkins and looks great on porch steps where you want something playful without scary shadows. I’ve used this for early October when kids still want cheerful decor. The principle is light hiding: LEDs sit behind channels so you see glow, not bulbs.
Start by cutting thin strips of fabric or ribbon and rolling each strip into a small tube, then glue the tube ends so they stay closed. Arrange tubes for eyes and a smile on the pumpkin front and glue them down. Place warm white micro LEDs behind the tube openings so the light shines through the tube face. For the nose and cheeks, use fewer tubes and let the glow soften more. Add a small ribbon bow at the top and tuck the battery pack under the ribbon base at the back. Turn on and adjust tube spacing until the face looks balanced from standing height.
Use satin ribbon with a matte finish, not glossy; matte ribbon spreads glow better.
Avoid carving holes for wiring; ribbon tubing keeps the look clean.