
1. Two-Tone Granny Stripe Washcloth
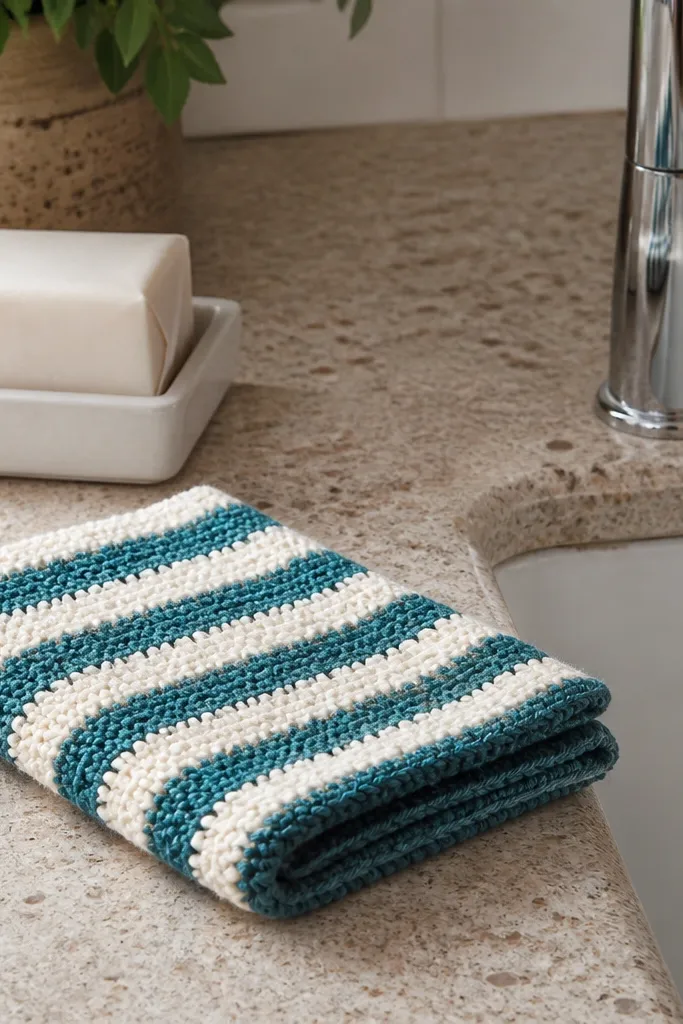
This one is repeatable because the granny stripe pattern gives you a bold, graphic look without complicated shaping. Use a cotton yarn so it lays flat and dries fast, which also makes it look crisp in photos. The contrast between the main stripe color and the accent stripe makes the stitches pop even if your tension is still learning. It’s small enough to finish in a weekend and useful enough that you’ll actually keep using it. Great for bathrooms, kitchens, and gift baskets where everything needs to look coordinated.
Start with worsted-weight cotton and make a foundation chain long enough for a washcloth width about 9 inches. Work rows using granny clusters in a consistent grid, alternating colors every 2 rows so stripes stay clean. When you reach your target height around 9 inches, fasten off and weave ends. Add a simple single crochet border around the edges to square it up and hide any uneven corners.
Before you border, lightly steam or wet-block the cloth so the stripes line up for a sharper look.
Don’t switch stitch types mid-row; keep the granny clusters consistent so the stripes stay even.
2. Chunky Ribbed Hot Pad with Button Edge
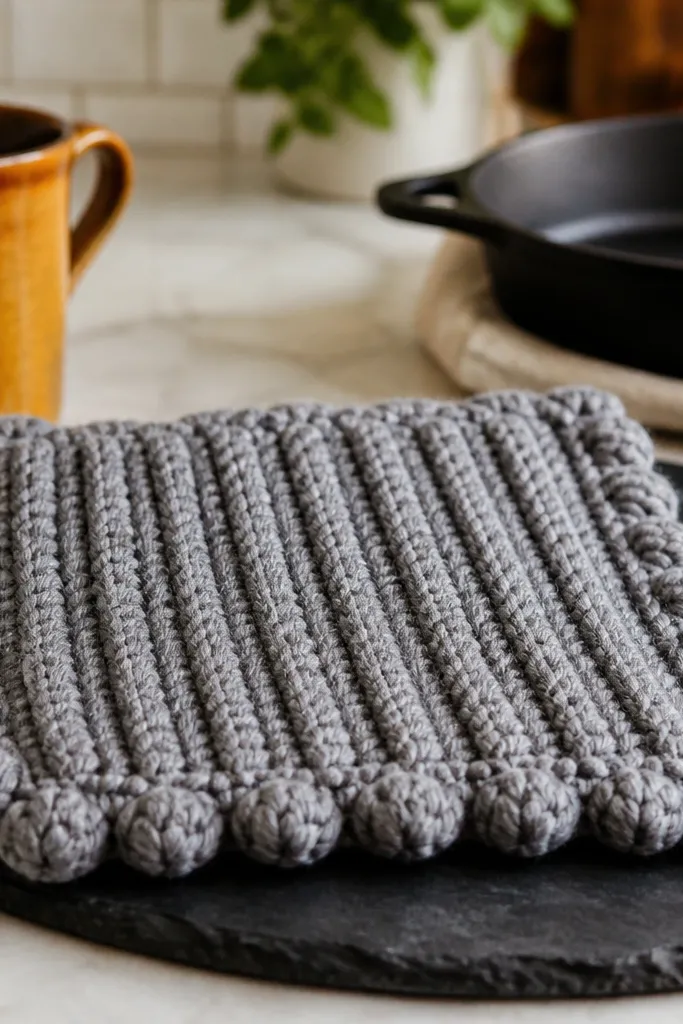
Hot pads look good because they have a thick, structured face. A ribbed stitch pattern creates vertical texture that photographs well and also helps the piece hold its shape on your counter. Add a button-like edge (small bobble or puff clusters at the border) so it looks intentional instead of plain. Use cotton or a cotton-linen blend for heat resistance and a smoother finish. This is beginner-friendly because ribs are repetitive and you’re not doing tricky shaping.
Chain to start a square about 8 inches wide, then work rows of front-post/back-post half double crochet for a thick rib. Continue until you have a square around 8x8 inches. For the edge, add a border row of single crochet, then place small puff or bobble clusters at even intervals. Weave ends tight and trim any long yarn tails.
Pro tipMake the rib a little tighter than your instinct — go down one hook size for cleaner ribs.
AvoidDon’t use acrylic alone for heat-contact pieces; it can soften under high temperatures.
3. Scallop Edge Coasters Set of 4
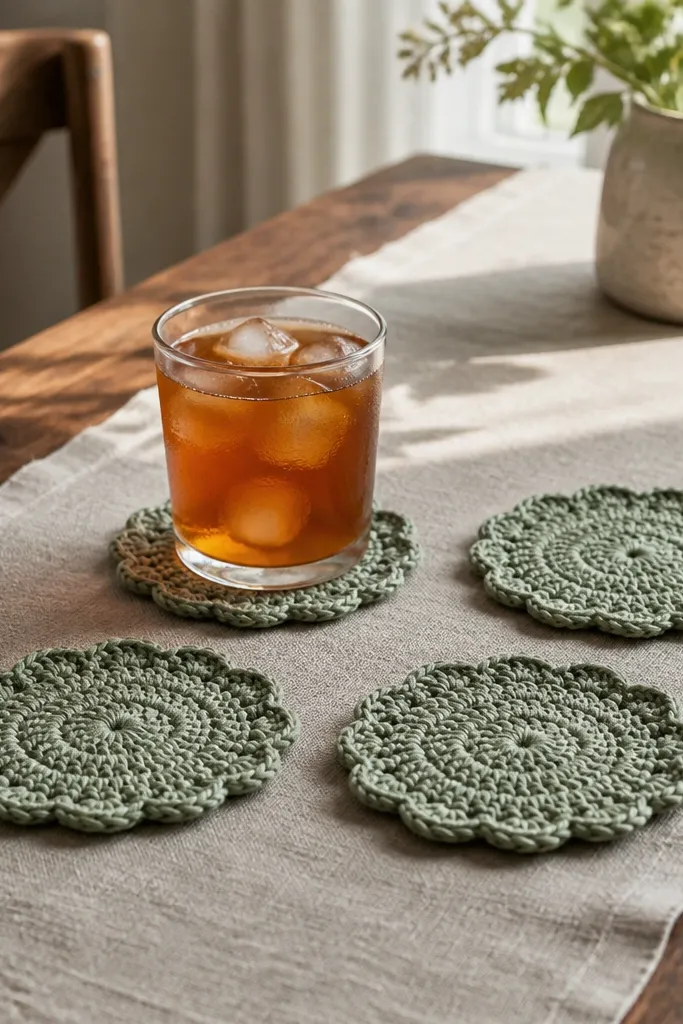
Coasters are the fastest way to look “curated” because you can match colors and repeat the same shape four times. Scalloped edges catch light and make even simple stitches look styled. This pattern works as a set because each coaster is small, so you get quick feedback on your tension and yarn choice. Use a cotton yarn for a firm drape and a smooth surface for cups. It’s perfect for desks, side tables, and holiday gift packs.
Make a magic ring and work rounds of single crochet or half double crochet until the circle reaches about 4 inches. Keep the stitch count increasing evenly so the disc stays flat. Switch to scallops by adding a border round: single crochet into each stitch, then create scallops using a set number of double crochets in the next space. Repeat for four coasters, keeping color placement identical on each one.
Pro tipWeigh your yarn ball so each coaster uses the same amount; exact color match matters most in a set.
AvoidDon’t over-increase; if your circle grows too fast, the scallops flare instead of framing the coaster.
4. Minimalist Crochet Bookmark with Textured Spine
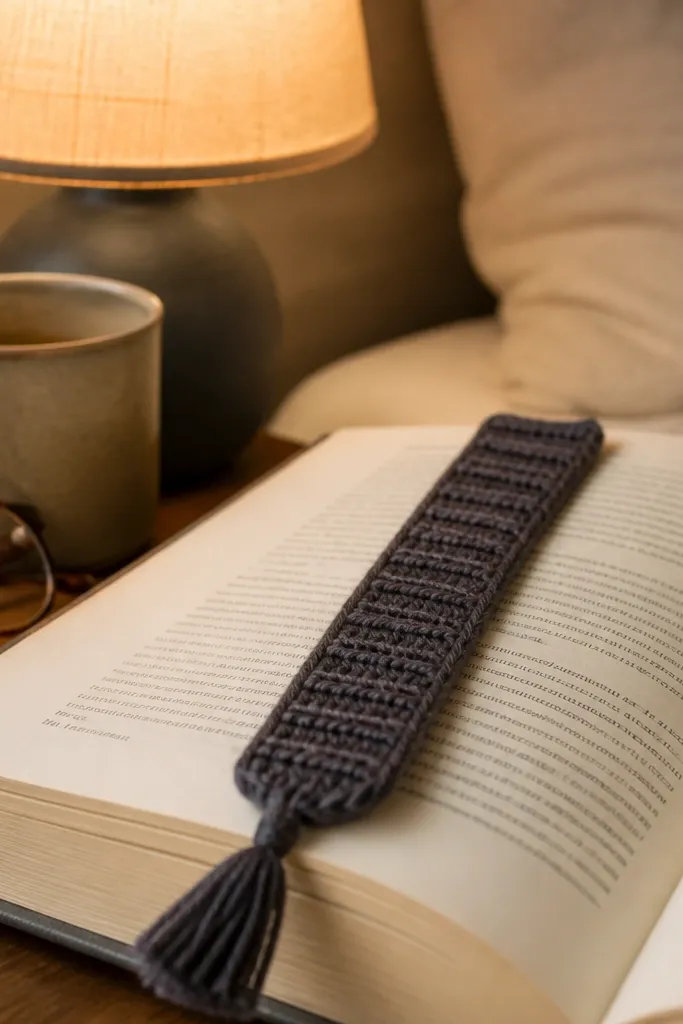
A bookmark is small, but it looks stylish because it’s long and narrow. A textured spine — like alternating rows of half double crochet and front-post stitches — creates a raised stripe that looks intentional in close-up photos. Add a short tassel for movement and a clean finish at the top. This is a great beginner project because you can stop whenever you hit your desired length, and your skill improves with every repetition. It’s perfect for bookshelves, gift add-ons, and craft fairs where small items sell.
Chain about 12-14 stitches and work rows using half double crochet until it reaches around 6-7 inches. Create the textured spine by swapping one column to front-post half double crochet for the middle stripe. When the rectangle is done, fold the top end and crochet a small edging row to close it. Attach a tassel made from 6-8 strands and weave it through the top.
Pro tipUse a single color for the base and a contrasting color only for the spine so it reads as design, not randomness.
AvoidDon’t make the bookmark too wide — if it’s broader than a thumb, it stops looking sleek.
5. Seed Stitch Pencil Case with Zipper Finish
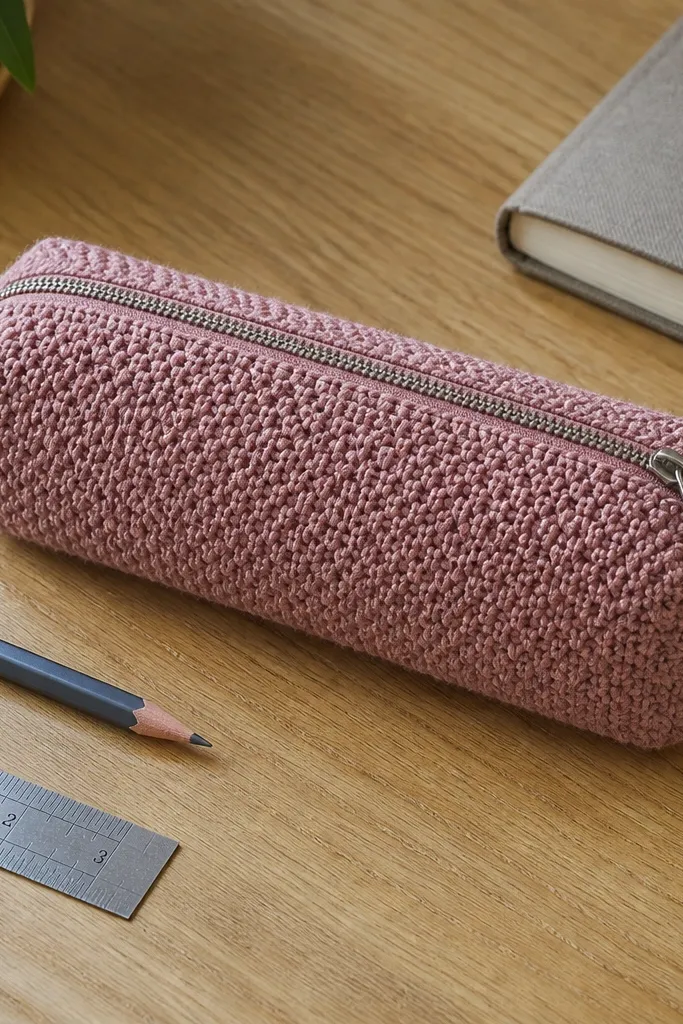
This looks polished because the seed stitch gives a dense, even surface that hides uneven tension. A pencil case is also a practical way to learn finishing skills like aligning a zipper. The texture reads as “high effort” without needing advanced stitches. Use medium-weight acrylic or cotton-acrylic blend so it holds shape when you close it. It’s ideal for desks, classrooms, and anyone who wants handmade items that look like they belong in a store.
Chain a width that matches your zipper — for a 7-inch zipper, aim for about 10 inches when stretched flat. Work seed stitch in rows until the fabric is tall enough to wrap around your zipper end-to-end. Lay the zipper on top of the crocheted panel and pin through the edge stitches (or mark with stitch markers) so the zipper teeth sit inside. Sew zipper in place with matching thread, then crochet a short border around the top to cover seam gaps.
Pro tipBlock the panel lightly before sewing the zipper; seed stitch looks best when it’s flat and even.
AvoidDon’t crochet too loose at the zipper edge or the fabric will gap when the zipper closes.
6. Fast Infinity Scarf in One Color
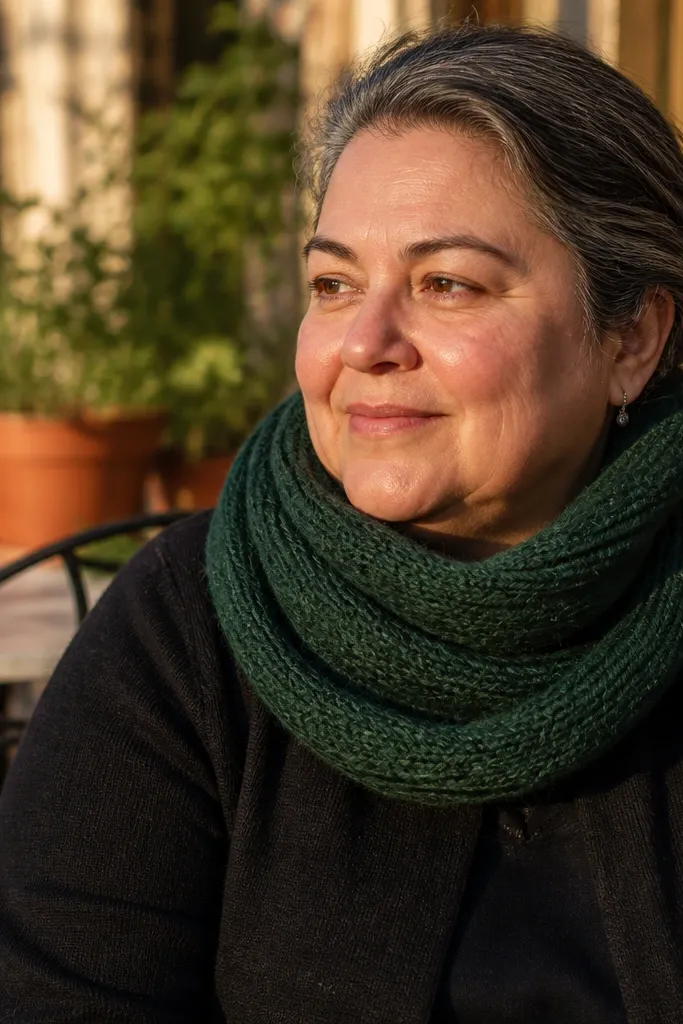
An infinity scarf photographs well because it has big, continuous curves and it looks clean even when stitches are simple. Keeping it one color makes the texture do the work, so you don’t need perfect color planning. Use a yarn with a nice halo or twist so the surface catches light. This is beginner-friendly because you repeat the same stitch pattern across every row and you don’t need complicated shaping. It’s a go-to project for colder months and for gifts that always look useful.
Chain until it fits around your neck comfortably — start around 60-70 chains for an average adult. Work in rows of half double crochet or a simple moss stitch until you have a tube length about 12-14 inches. Join the ends by slip stitching across the chain edges to form the loop. Add a single crochet row at the join to smooth the seam.
Pro tipUse a stitch marker at the join point so the loop doesn’t twist while you stitch it closed.
AvoidDon’t forget to count stitches at the join; a sloppy seam can twist the scarf visually.
7. Crochet Ear Warmer with Braided-Look Rows
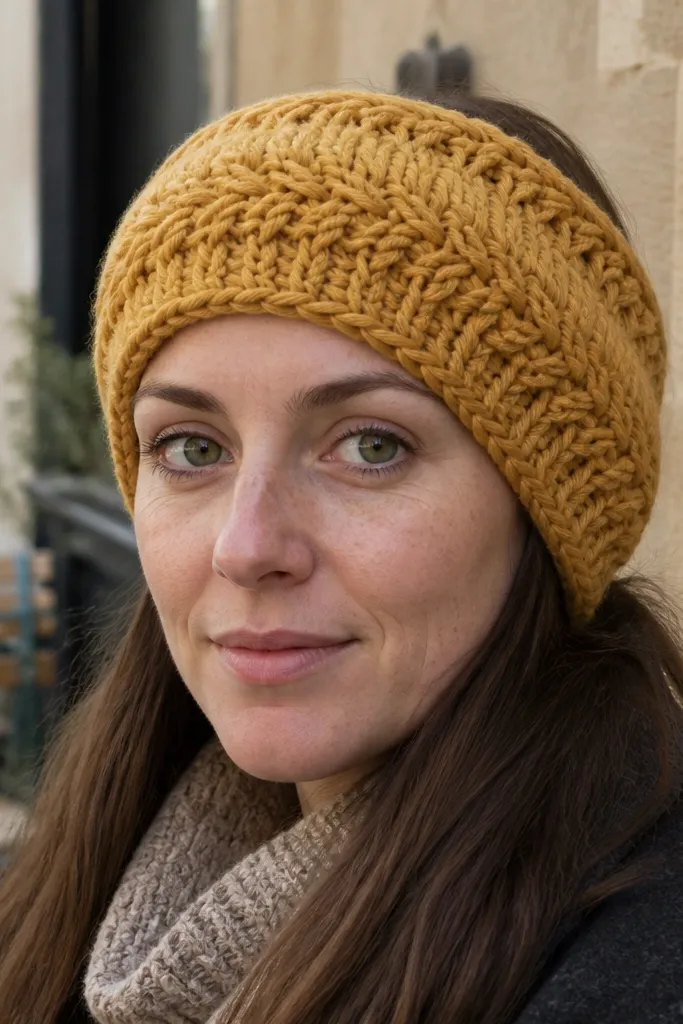
Ear warmers look cute because they frame the face, and texture makes them feel handmade in a good way. Braided-look rows are beginner-friendly because you’re still working basic stitches — you just alternate front-post directions to simulate a braid. This piece is fast, wearable, and it teaches you how to manage tension in a narrower width. Use a soft yarn that drapes, like a superwash wool blend or acrylic with a twist. It’s a practical project for fall and winter photo outfits.
Chain to fit your head — measure from temple to temple and subtract about 1 inch for stretch. Work a row of half double crochet to set the foundation, then create braid texture with front-post/back-post half double crochet in a repeating 2-stitch pattern. Continue rows until it covers the ears, around 6-7 inches tall. Join the ends with slip stitches and add a single crochet border to keep the edge from curling.
If your band curls, add an extra border row; it fixes the look quickly.
Avoid overly slippery yarn; braid texture gets harder to see on slick fibers.
8. Oversized Granny Square Cushion Cover Panel
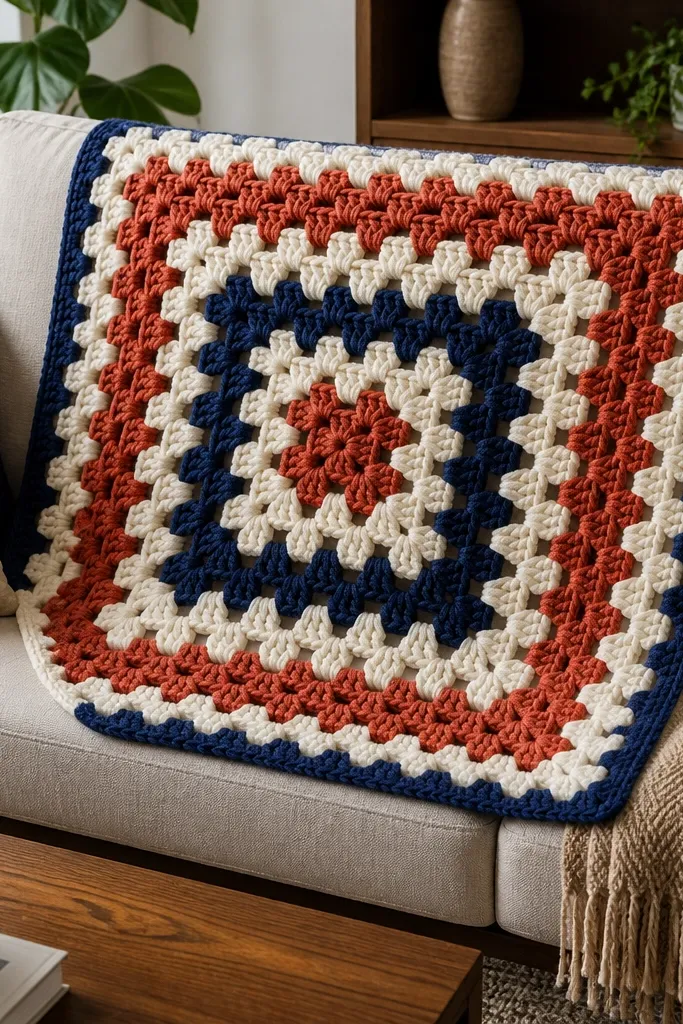
Cushion covers are instant room upgrades because they’re big and they photograph well on sofas. A granny square panel gives you a strong graphic center and lets beginners practice consistent patterning. Use thick yarn so the square looks substantial, not airy. This is beginner-friendly because you’re repeating the same cluster and chain spaces without complicated shaping. The payoff is a cover that looks intentional even if your corners aren’t perfect — as long as your square size is right.
Make a foundation chain that supports your granny square size, or start with a magic ring and build rounds. Work granny clusters in rounds, increasing at the corners so your square stays flat. Stop when the square matches your cushion insert size — for a 16-inch insert, aim for about 18 inches to allow slight stretch. For a clean finish, add a border round of single crochet and slip stitch, then sew on a back closure using a simple flap or zipper.
Pro tipCheck your square size after round 3 and 5; early correction saves you from rebuilding the whole panel.
AvoidDon’t skip measuring; granny squares look right until they don’t fit the insert.
9. Chevron Throw Pillow with Two-Color Zigzags
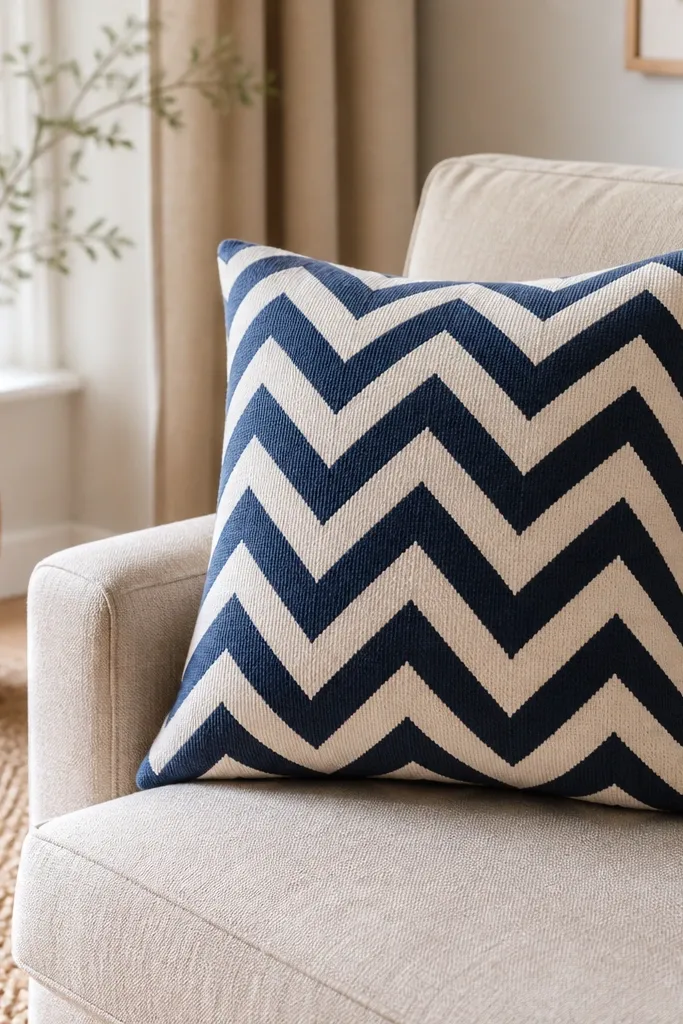
Chevron is one of the most photogenic beginner patterns because it creates bold movement across the surface. Two colors make the zigzags look graphic, like modern home decor. This is doable for beginners because chevrons are repeatable — you just work increases and decreases in a steady rhythm. Use a medium-thick yarn so the zigzags hold their points and don’t collapse. It’s a great project if you want your crochet to look like it belongs on a styled couch.
Choose worsted weight yarn and decide your stripe colors. Start with a chain count that supports your chevron width, then work rows with a consistent V-shape pattern using double crochet and chains. Alternate colors at the row level so each zigzag band is one color. When the panel reaches your pillow size (about 18 inches for a 16-inch insert), sew into a cover and add a back closure flap.
Block the panel flat before sewing; chevrons look sharper when the V points sit straight.
Don’t ignore row gauge; if your row height is off, the zigzags won’t line up.
10. Mini Amigurumi Plant Pot with Textured Leaves
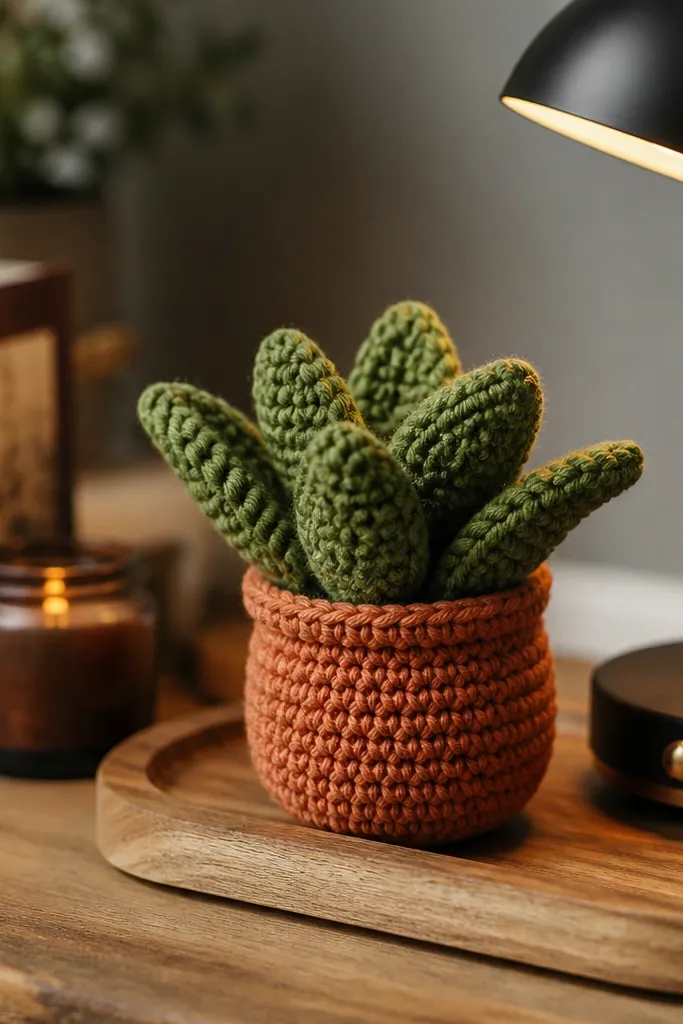
Mini amigurumi looks adorable and photogenic because it has a clear center of attention — the pot and leaf top. Beginners can handle this by focusing on basic rounds and simple shaping, then letting textured leaves add the “wow.” Use cotton or acrylic with a tight weave so the stuffing doesn’t show through. This project is small, so you can finish quickly and adjust the look as you go. Great for desks, shelves, and giftable decor that doesn’t need complicated finishing.
Crochet a round pot using single crochet in the round, increasing early then working straight until it reaches the pot height about 2.5-3 inches. Stuff lightly and close the top with a tight round. For texture, add a band around the pot using slip stitches or surface crochet in a contrasting color. Make 4-6 leaf pieces with a simple oval shape, then sew them into a cluster at the top.
Pro tipUse a smaller hook for amigurumi rounds so stitches close up and the stuffing stays hidden.
AvoidDon’t overstuff; it distorts the pot shape and makes the leaf base uneven.
11. Openwork Market Bag with Solid Bottom
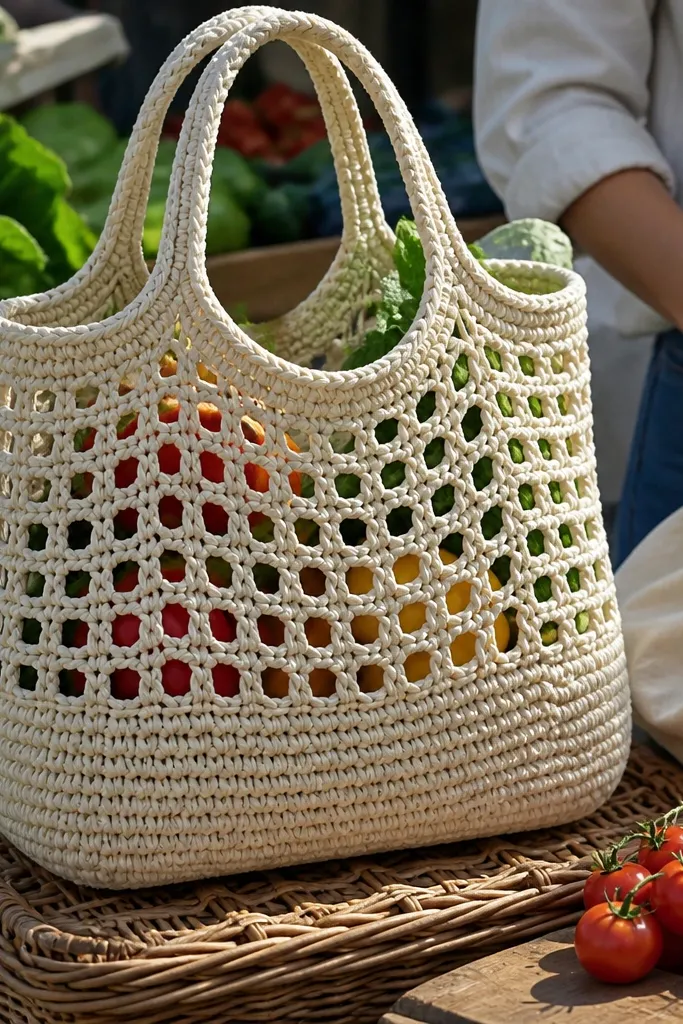
A market bag looks good because it’s functional and it shows stitch pattern through the sides. The openwork sections look airy in photos, while a solid base keeps it from sagging. Choose a cotton rope yarn or sturdy cotton blend so the bag stands up when you set it on a table. This is beginner-friendly if you keep the shape simple: straight sides and one consistent stitch pattern. It’s perfect for groceries, beach days, and styling with a cute scarf tucked into the handle.
Make a solid base circle using rounds of single crochet until it reaches about 10-11 inches wide. Transition to openwork by switching to a repeat of chain spaces and double crochet rows for the sides, keeping the same pattern each row. Continue until the bag height is around 12-14 inches. Add straps by crocheting long chains and working single crochet across for a firm handle, then reinforce strap attachment points with extra stitches.
Make the base slightly larger than you think; openwork stretches less than solid fabric.
Don’t use a soft yarn that collapses; openwork bags need structure at the bottom.
12. Beginner Cable-Look Beanie
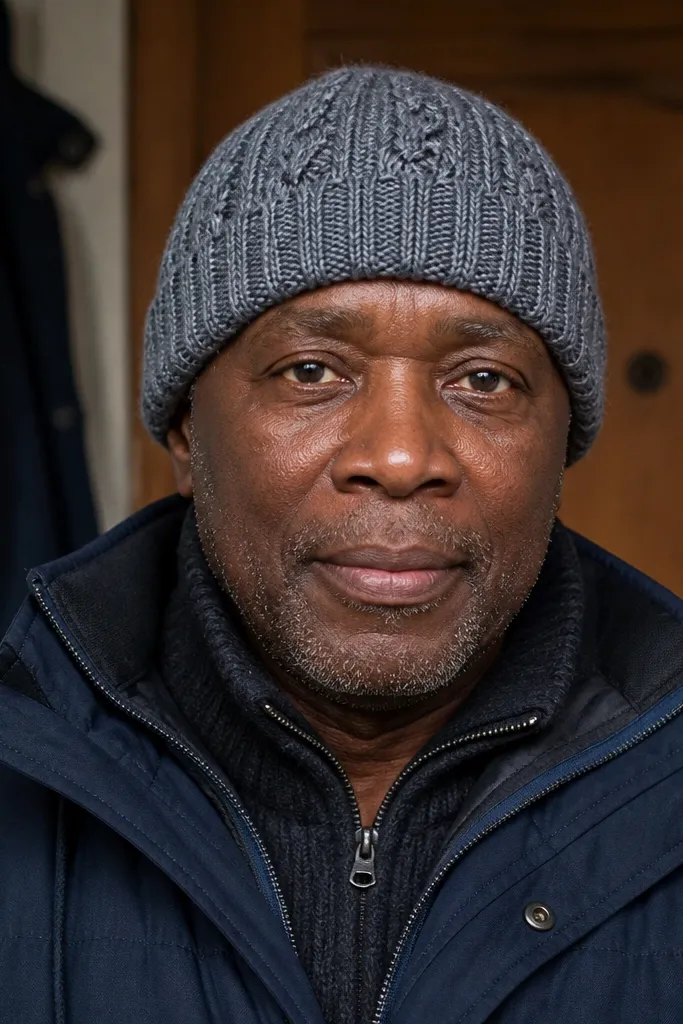
Cables look advanced, but you can fake the look with front-post stitch repeats. A beanie is also a quick win because it’s a single project with clear finishing: brim, body, and top closure. The ribbed brim helps the fit and gives a neat edge in photos. Use worsted yarn for speed and structure, and pick a color that shows texture, like cream, teal, or deep charcoal. It’s a wearable piece that looks designed, not beginner-made.
Start with a ribbed brim using back-post/front-post half double crochet in rows until it wraps around your head snugly. Then switch to a textured body using a repeating front-post sequence that creates a cable illusion across 3-4 panels. Continue until the beanie reaches about 7-8 inches tall. Close the top by decreasing stitches evenly each round, then pull the remaining loop tight and weave in securely.
Pro tipCount your panel repeats before you start decreasing; uneven panel counts show at the top.
AvoidAvoid mixing stitch types in the cable section; keep the front-post pattern consistent.
13. Color-Block Crochet Coaster with Fringe Dot
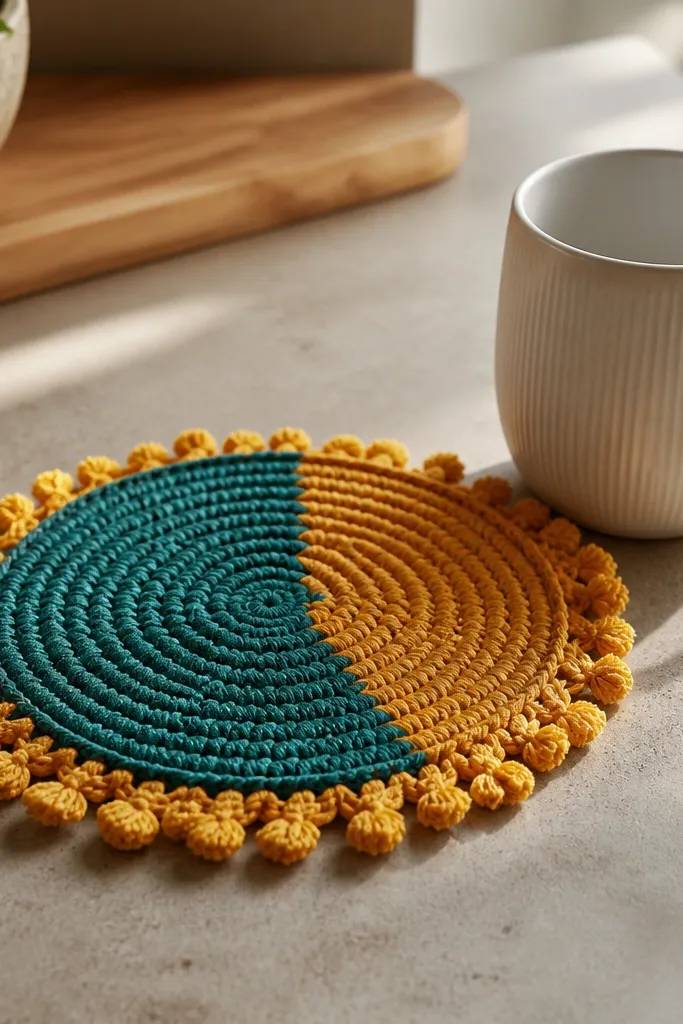
This coaster is built for photos because it has a graphic color-block center plus a playful fringe detail that catches light. Beginners get a clear win: color changes are easy to track, and the fringe adds personality without complex stitches. Use cotton yarn so it holds shape under cups. It’s a small project, but the design feels intentional enough for a set on a tray. Great for spring and summer tables where you want color pops.
Make a round coaster base with a simple single crochet spiral until it reaches 4 inches. Divide the circle into two or three color blocks by switching yarn at round boundaries, keeping stitch counts the same. Add a tiny accent fringe by crocheting a short chain loop and cutting short strands, then attaching them at evenly spaced points on one edge. Finish with a border round of slip stitches for a smooth rim.
Keep fringe short — about 0.5 inch — so it doesn’t tangle in use or look messy in close-ups.
Don’t place fringe on the top edge where cups sit; it will get crushed and look worn.
14. Crochet Basket for Shelf Styling
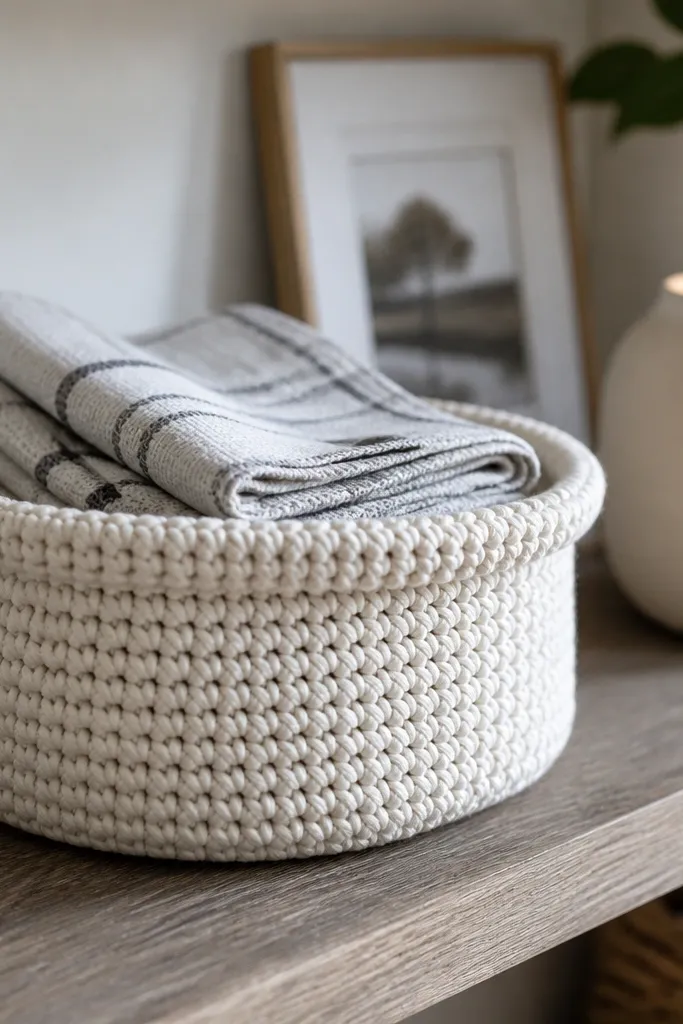
A basket looks good even when it’s empty because the shape is structured. For beginners, the key is using thick yarn and working in rounds to build walls that don’t flop. A rolled rim creates a clean, finished top edge that photographs better than a flat, raw border. Use cotton rope or chunky cotton for stability and pair it with a neutral color for a modern look. This is a practical home project that also trains you on consistent round counts.
Start with a flat base circle using single crochet in rounds, increasing until the diameter is about 8-9 inches. Work side walls straight up with single crochet, keeping the round count consistent. Add a rolled rim by folding the top edge and crocheting into the folded layer, creating a thicker edge. Make handles with chain loops reinforced by single crochet, then sew handles onto opposite sides and secure with a few extra stitches.
If your basket leans, add stitch markers every 20 stitches to keep rounds aligned while you work.
Don’t use thin yarn; baskets need thickness or they look saggy instead of styled.
15. Simple Crochet Headband with Bow Tie
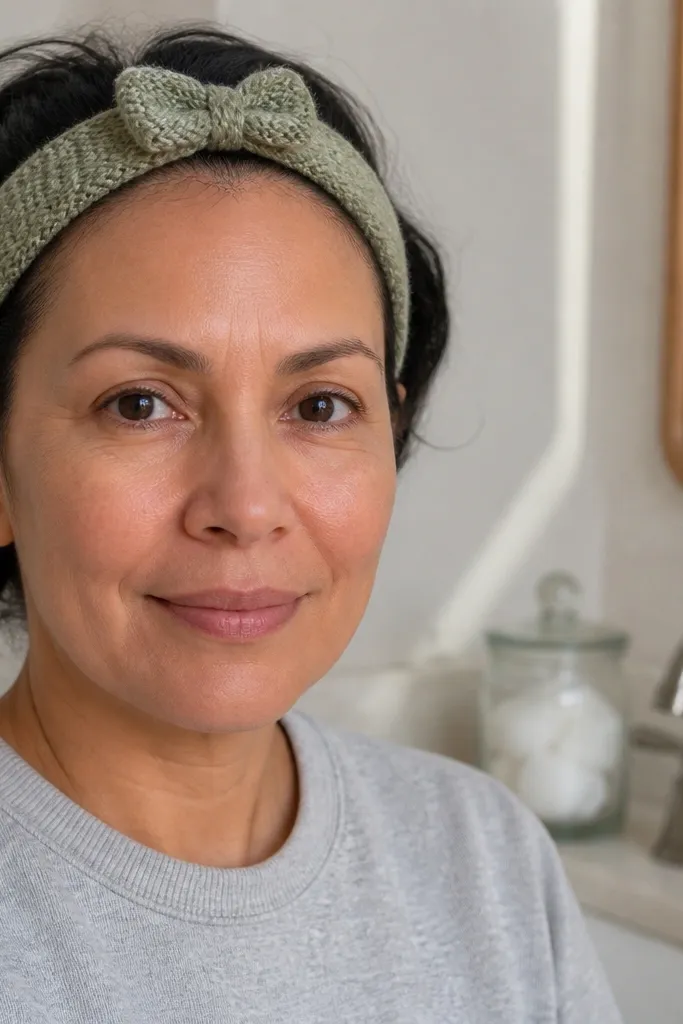
Headbands are photogenic because they sit near the face and they’re easy to style with hair clips or a casual outfit. A bow tie detail makes it look cute and intentional, even though the base is just a smooth strip with a bit of texture. This is beginner-friendly because you can make the band first, then attach the bow separately. Use a soft yarn that doesn’t feel scratchy near the forehead. Great for kids, gift sets, and quick wardrobe refreshes.
Chain to fit the head with a slight snug feel, then work short rows of half double crochet to create a band about 2 inches wide. Join the ends and add a single crochet edge to stop curling. Make a bow by crocheting two small rectangles, folding each into a loop, then sewing them together at the center. Attach the bow on the top center and reinforce with a few tight stitches.
Pro tipUse stitch markers on the band edges so the width stays even across rows.
AvoidDon’t make the bow too big; large bows can look bulky and drag the headband out of place.
16. Raised Puff Stitch Wall Hanging Mini Panel
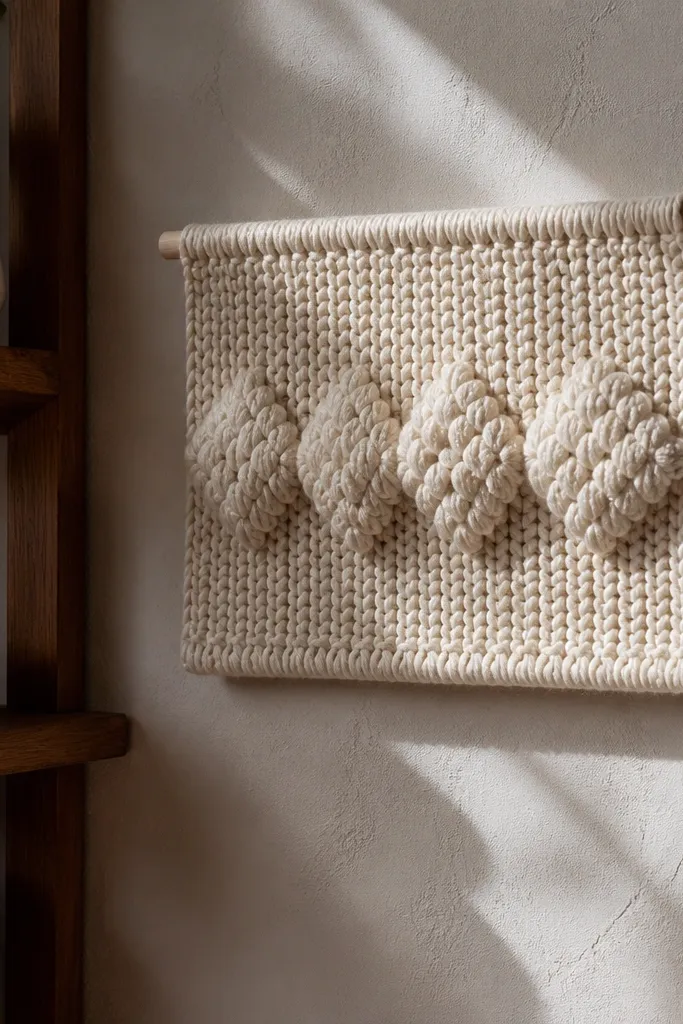
Wall hangings look expensive when the texture is dimensional. Puff stitches create a raised pattern that reads clearly in photos, even under mixed lighting. This is beginner-friendly if you keep the size small and the background simple — one repeating puff motif row on a plain base. Use a thick cotton or cotton-blend yarn so the puffs hold their shape. Hang it in a nursery, entryway, or above a desk for an instant handmade focal point.
Work a rectangle base in single crochet or half double crochet until it’s about 10 inches wide and 12 inches tall. Create the puff pattern by working puff stitches in a regular grid row-by-row, spacing them with chain spaces or by skipping stitches consistently. Add a top border of single crochet rows and sew on a hanging loop or attach a wooden dowel by crocheting around it. Weave ends tightly and block lightly to flatten the rectangle.
Pro tipMake your puff stitches uniform by counting the yarn-over pulls — keep it the same number across the row.
AvoidDon’t stretch the fabric while blocking; puffs can distort if you pull too hard.
17. Crochet Soap Saver with Hanging Loop
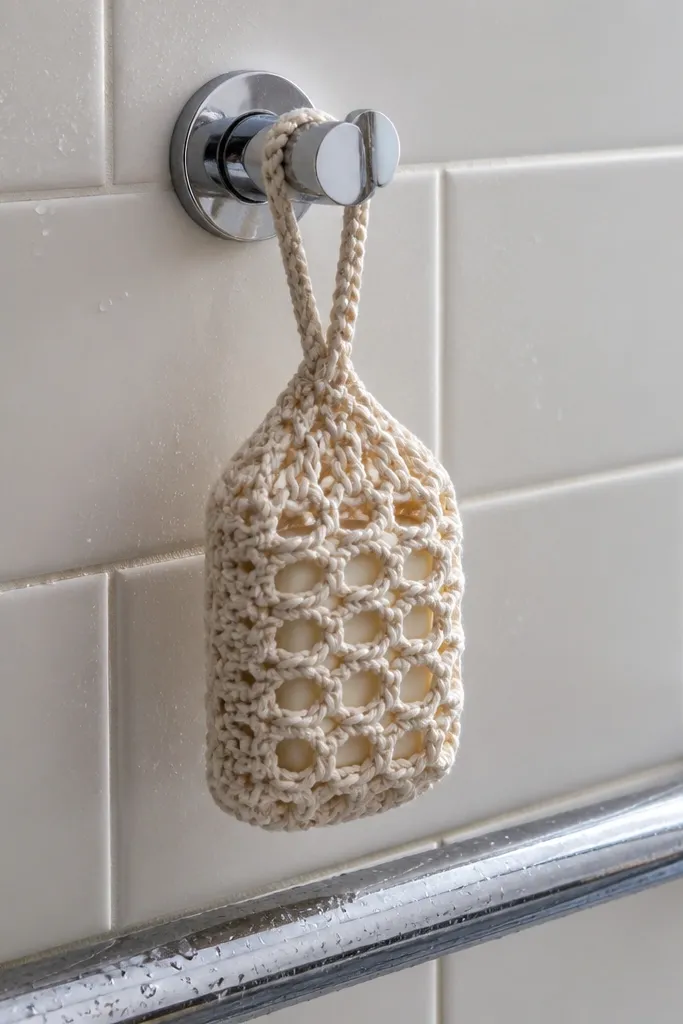
Soap savers look clean and intentional because you can design the texture to be airy while still holding the soap. A simple mesh stitch makes it dry fast, and the hanging loop keeps it photo-ready in the shower area. Beginners can do this because mesh uses repeatable chain and double crochet patterns. Use cotton yarn for absorbency and a soft handle that doesn’t scratch. It’s a practical home project that also makes your bathroom look cared for.
Create a small mesh pouch by chaining a base width that fits around your soap bar, then work rows in a mesh pattern using chain spaces and double crochet. Continue until the pouch is about 1 inch longer than the soap. Crochet a border around the edges to square it up and add a hanging loop at the top by chaining and slip stitching back into the border. Close the sides with a simple seam and weave ends.
Use a slightly tighter hook for mesh so it holds soap edges instead of sagging.
Don’t use acrylic for bathroom wet projects; it can feel slick and hold odors.
18. Crochet Mobile Phone Stand with Basket Weave Look
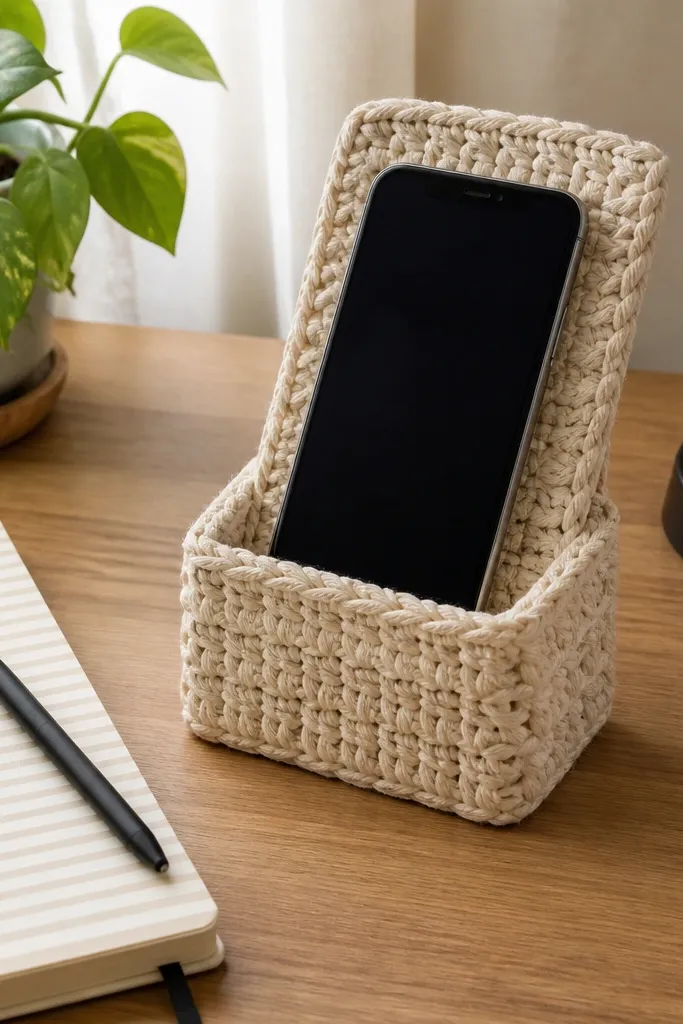
A phone stand is one of those projects that looks more complex than it is because it has a functional fold. A basket-weave look — made from front-post/back-post combinations — creates a woven texture that photographs well on desks. This beginner-friendly idea teaches you how to work basic stitches and then shape with simple, even decreases. Use sturdy yarn so the stand stays upright, like cotton-acrylic or thick acrylic. It’s perfect for home offices, bedside tables, and desk styling.
Make a rectangle base about 4 inches wide and 6 inches tall using front-post/back-post half double crochet for the basket-weave texture. Create the stand shape by working a fold line: after you hit the midpoint height, decrease across a few stitches for the back edge and continue until the top is narrower. Stop when the stand can prop a phone at a comfortable angle. Add a simple border around the top edge with single crochet to clean the look.
Test the angle with your phone before finishing the border; adjust decreases by 2-3 stitches if needed.
Don’t skip a structured yarn; a soft yarn will collapse and ruin the stand’s silhouette.
19. Crochet Keychain with Mini Granny Heart Charm
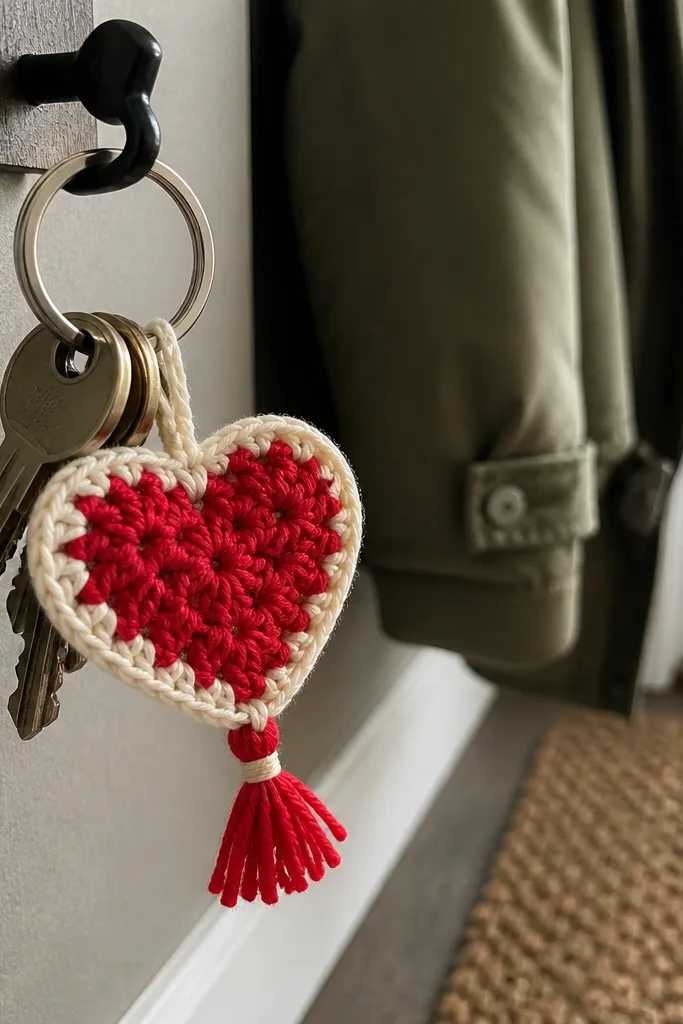
Keychains are small, but they’re extremely photogenic because you can see the shape clearly and they look cute attached to a bag. A mini granny heart charm is beginner-friendly if you use a simple heart outline built from basic clusters. Add a tiny tassel or loop for motion and color pop. Use cotton or acrylic yarn with a tight stitch so the heart holds its edges. This makes a great set of gifts and it’s easy to repeat the same design until your tension is consistent.
Start with a small granny heart by working clusters in a heart layout: create two top bumps, then taper down to a point using decreases in cluster placement. Keep the heart size around 2 inches tall. Crochet a keychain loop from chain stitches and single crochet around the loop base for strength. Attach a short tassel made from 4-6 strands, then sew the heart to the loop with a few tight stitches.
Pro tipUse a smaller hook for the charm than you use for the loop; it keeps the heart edges crisp.
AvoidDon’t rely on loose chains for the key loop — it will stretch and twist.
20. Lemon Peel Crochet Dish Towel with Hanging Ring
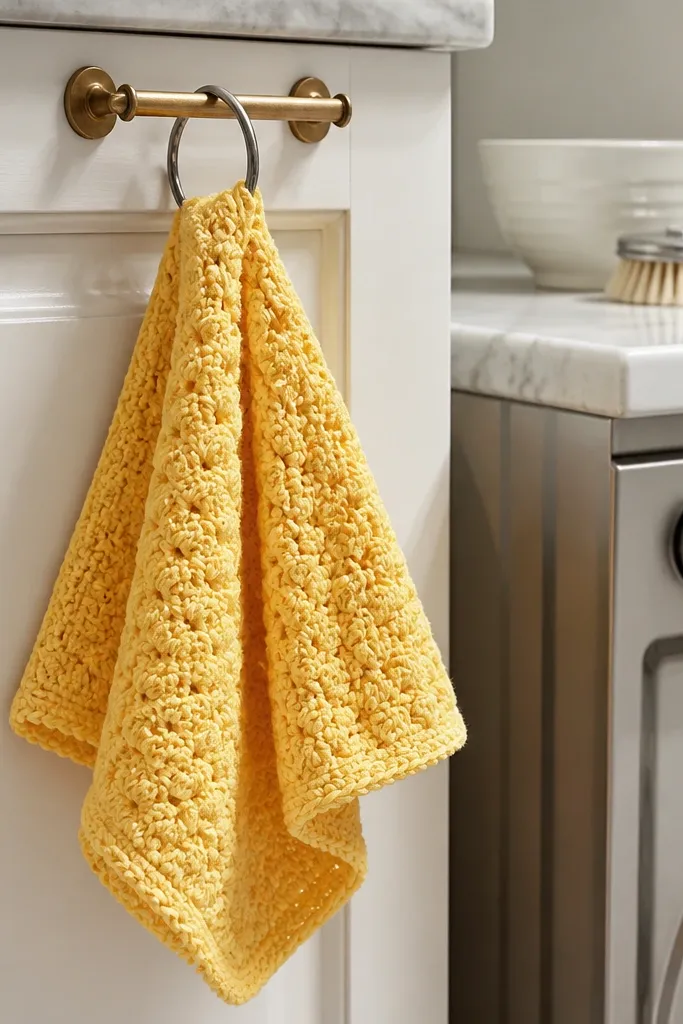
Dish towels are a home project that looks great because the texture shows up in everyday lighting. Lemon peel stitch creates a bubbly, dimensional fabric that hides minor tension issues and looks clean even when you’re still learning. A hanging ring makes the towel look styled, not like a random panel. Use cotton yarn so it can handle washing and drying without turning limp. This is beginner-friendly because lemon peel is a repeat — once your pattern rhythm clicks, you keep going without thinking too hard.
Chain a width around 11 inches and work lemon peel stitch in rows using alternating double crochet and single crochet combinations. Continue until the towel is about 17-18 inches long. Add a simple border row of single crochet to square the edges. For the hanging ring, crochet a short chain loop and anchor it into the top border with slip stitches, then weave ends tightly.
Pro tipWash and block the towel before using; lemon peel relaxes and looks smoother after the first wash.
AvoidDon’t make the towel too narrow; lemon peel texture needs width to look full.
21. Crochet Scrunchie with Ribbed Band and Bow Center
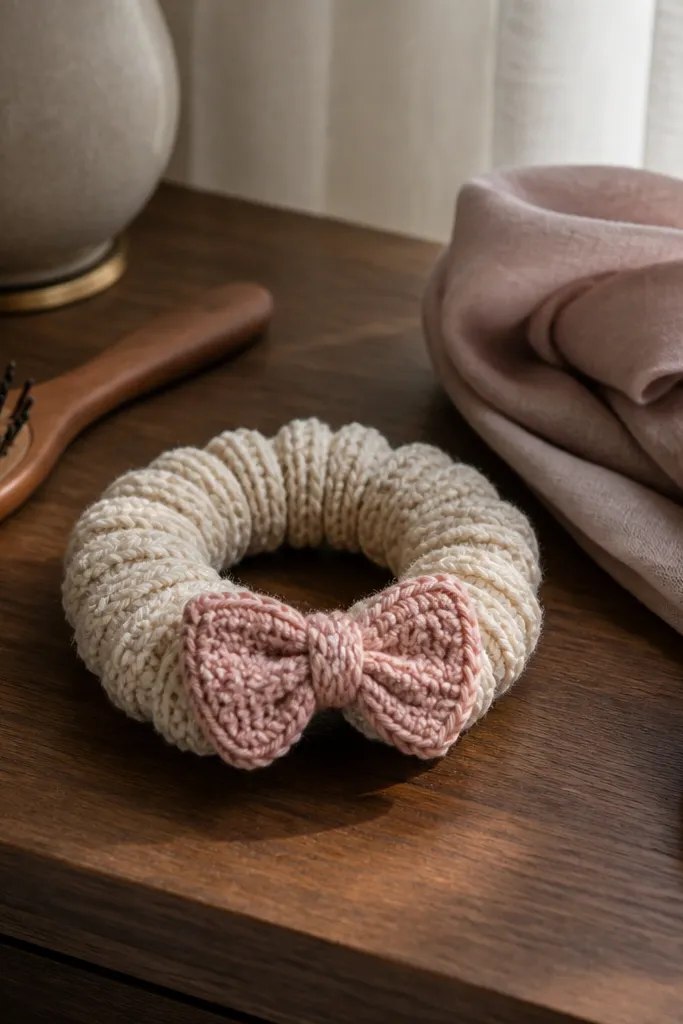
Scrunchies look cute because they’re round, soft, and easy to style, and the ribbed band makes them look designed. A bow center gives it a sweet focal point without complicated construction. Beginners can do this because you’re mostly repeating ribs and then sewing a small bow. Use cotton-acrylic blend so it stretches gently and holds its shape after washing. This project is great for hair, gifts, and matching sets with headbands.
Chain to fit around your hair tie circumference, then work ribbed rows using front-post/back-post half double crochet until the band wraps snugly. Sew the ends together to form a tube and stitch it around the elastic hair tie. Make a small bow by crocheting two short strips, folding and sewing into loops, then attaching the bow to the center of the scrunchie. Weave ends and trim for a clean finish.
Pro tipStitch the elastic attachment in a cross pattern so the band doesn’t twist.
AvoidDon’t use super bulky yarn; it makes the scrunchie feel stiff and looks bulky on hair.
22. Crochet Table Runner with Simple Eyelet Rows
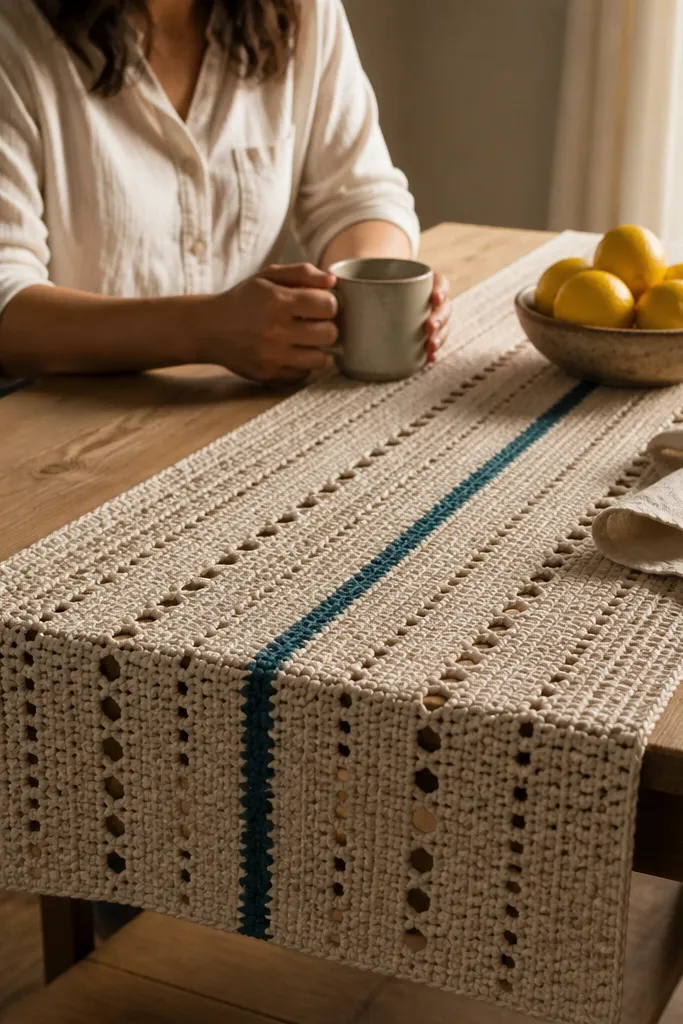
A table runner looks styled because it stretches across a surface and creates a clear pattern line. Eyelet rows are beginner-friendly because you repeat the same yarn-over chain spaces in a steady rhythm. Choose a neutral yarn and add one thin accent stripe so the runner looks intentional on different tables. This project is good for beginners who want a bigger piece without complex shaping. It’s also easy to photograph because the pattern shows clearly from above.
Chain a runner width around 12-14 inches and work a foundation row of double crochet. Repeat eyelet rows using a set pattern of double crochet and chain spaces, keeping the stitch count consistent across rows. Continue until the runner length is 40-50 inches, then finish with a border row of single crochet around all edges. Block flat so the eyelets open up and the border looks crisp.
Pro tipCount your chain spaces every row — eyelets only look neat when the gaps match.
AvoidAvoid skipping blocking; eyelets look flat and dull if the fabric stays uneven.
23. Crochet Tea Cozy with Vertical Slits
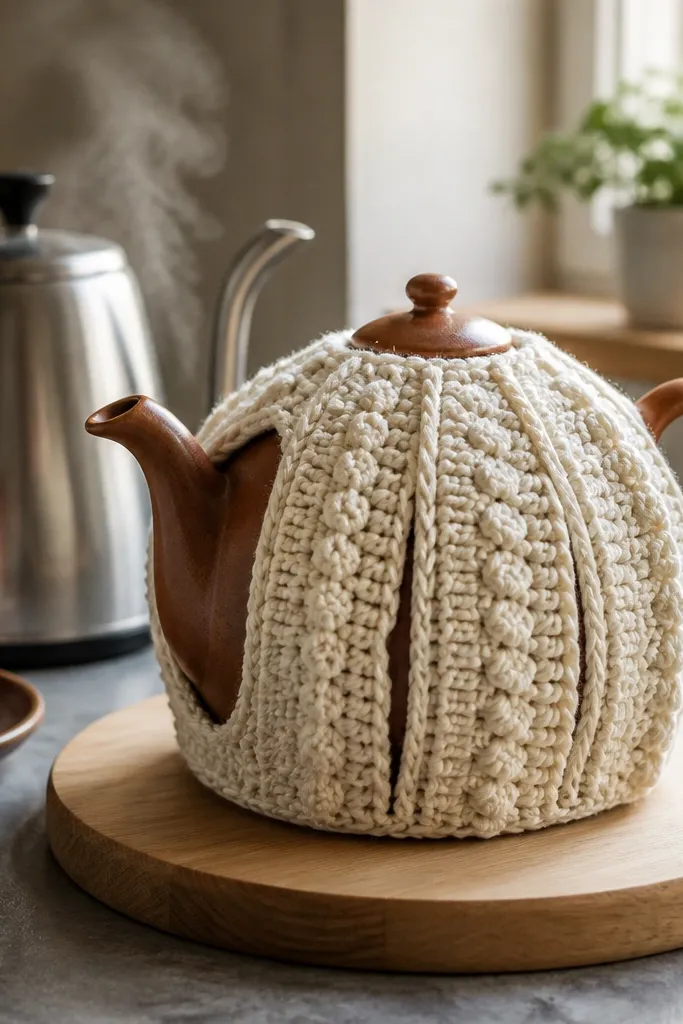
A tea cozy is photogenic because it wraps a familiar object and adds clear texture around the curves. Vertical slits or paneling keeps the cozy flexible enough to fit different teapot shapes while still looking structured. Beginners can handle it because you can work in panels and then seam them, rather than doing complex shaping in one piece. Use worsted yarn so the cozy holds its form and doesn’t collapse on the pot. Great for kitchen shelves and seasonal table settings.
Measure around your teapot at the widest point and add about 1-2 inches for stretch. Crochet a rectangle or two panels in single crochet or half double crochet, then add vertical texture strips using front-post/back-post stitches. Seam panels together and leave openings for the handle and spout by skipping a few stitches at the appropriate height. Finish the top edge with a single crochet border and tighten it with a drawstring if you want a snug, gathered look.
Pro tipMark handle and spout positions with stitch markers before you seam so the openings land cleanly.
AvoidDon’t make it too tight at the handle area; the yarn will stretch more than you expect once it’s on the pot.
24. Crochet Star Garland with Hanging Loops
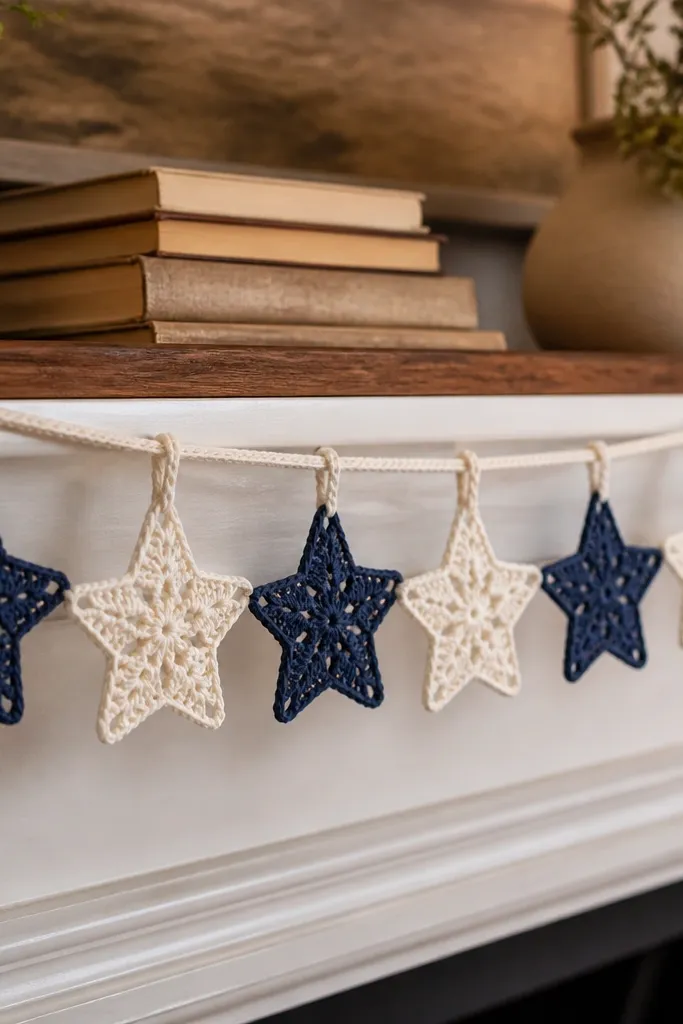
Garlands look good because they repeat and create a pattern line across a wall or shelf. Crocheted stars are beginner-friendly when you use a simple outline made from clusters and chain spaces, then attach a loop at the top point. Keep the yarn colors limited so the garland looks like a set, not a pile of scraps. This is fast for small stars and it’s easy to make extra if you misjudge the spacing. Perfect for parties, dorm rooms, and seasonal decor.
Make one star using a magic ring and work rounds of clusters, increasing to create points and decreasing to close. Add a small hanging loop by chaining 10-12 and slip stitching back into the top point. Make 12-20 stars depending on your garland length, spacing them evenly. Thread a length of yarn or twine through the loops and knot between stars so they hang at consistent heights.
Block one star and use it as your size reference; star size differences show up immediately in a garland.
Don’t use very thick yarn; it makes star points bulky and less crisp for a garland.
25. Crochet Market Pouch with Drawstring Cord
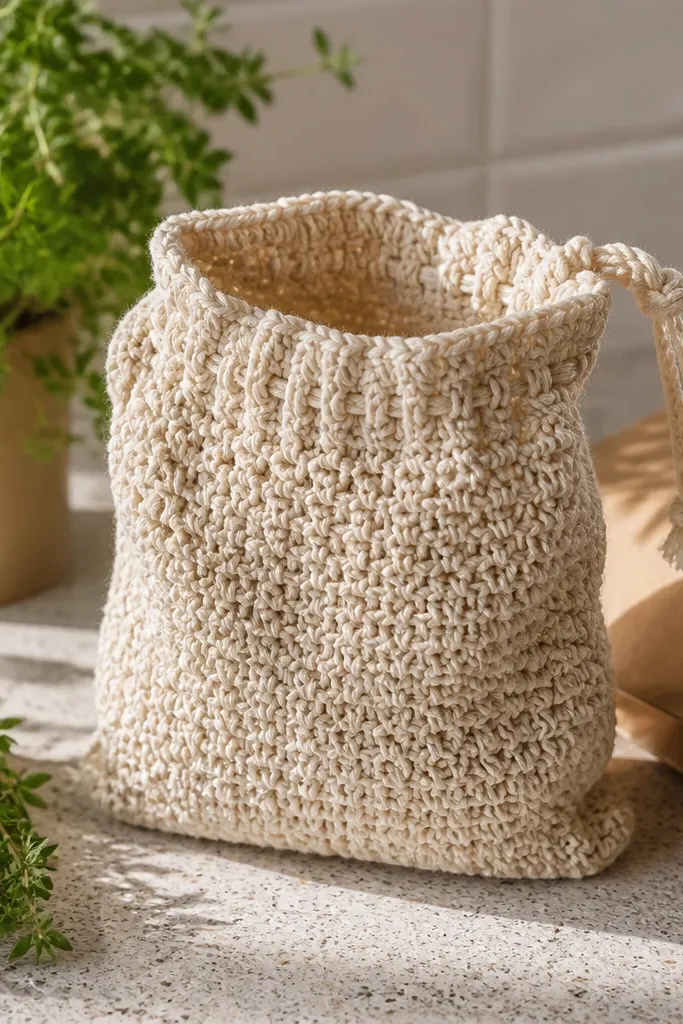
A drawstring pouch looks clean and intentional because the top closure is a clear design element. Beginners can nail the look using a simple textured stitch — like moss stitch or half double crochet with consistent rows — then adding a cord channel. Use cotton or sturdy acrylic so it holds its shape and doesn’t sag on the counter. This project is small enough to finish quickly and useful enough to become a daily carry. Great for snacks, toiletries, and gift bags that don’t look like generic packaging.
Chain and work a rectangular pouch around 8-9 inches tall, using a simple repeat stitch for texture. For the drawstring channel, work one row with chain spaces (or skip stitches) to create holes, then continue a row above to lock the channel. Add a border row of single crochet to stabilize the top edge. Thread a drawstring cord through the channel using a yarn needle, then tie knots at the ends to stop slipping.
Pro tipUse a smooth cord like cotton braid or satin cord; it slides through the channel without snagging.
AvoidDon’t skip the stabilizing border; the top edge needs reinforcement for a crisp look.