
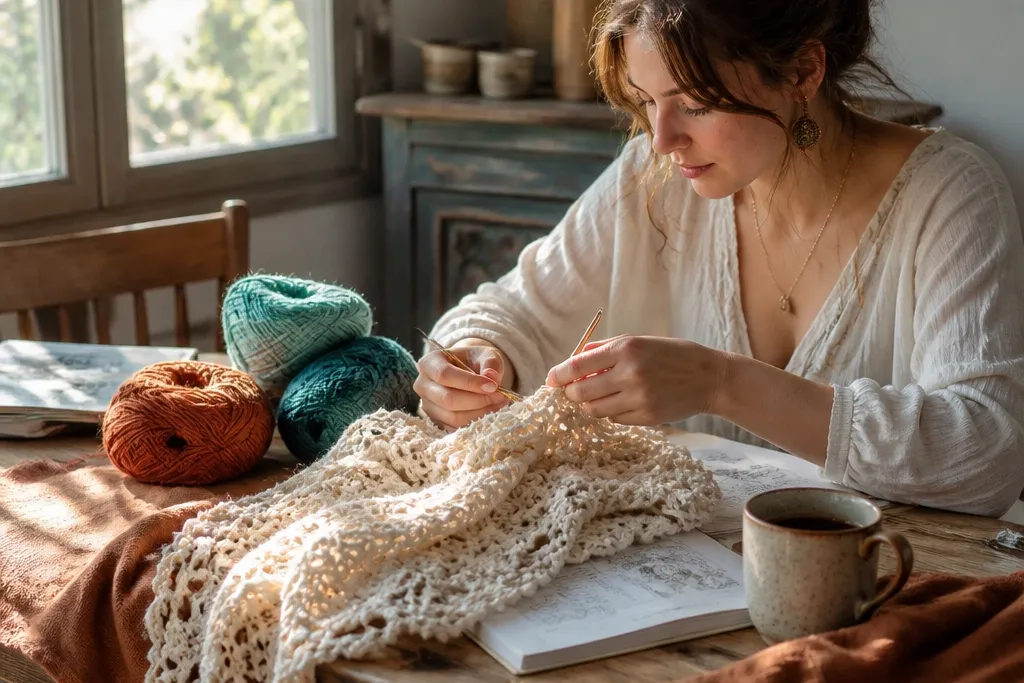
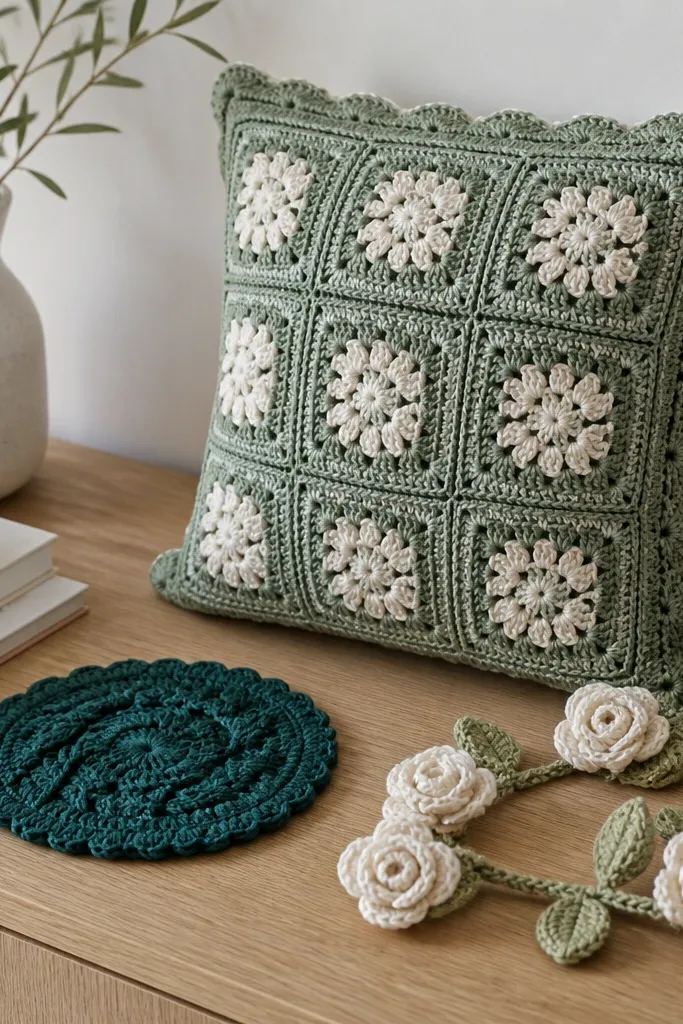
1. Cream Lace Halo Shawl with Petal Eyelets
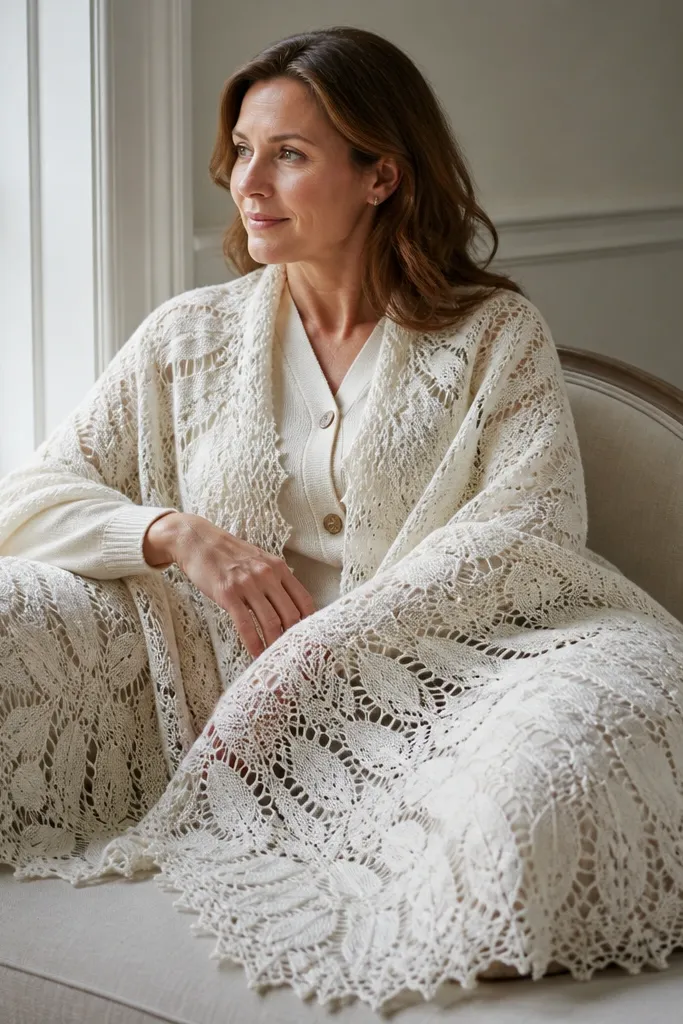
This shawl is dreamy because the eyelet pattern creates a soft halo effect when it drapes, especially in window light. The petal-style openings make the fabric look airy without turning see-through in a bad way. Choose a cream yarn with a smooth twist so the eyelets stay crisp and don’t blur. It’s a great first “aesthetic” lace project if you stick to a repeat that has clear visual markers. Expect about 2-4 evenings depending on your tension and how wide you make the wingspan.
Pro tipMark the start of each repeat with a stitch marker; lace repeats hide errors until they’re hard to fix.
Start by using a lace or fingering yarn in cream and a hook sized for even tension (usually 2.5-3.5 mm). Work the main body in a repeat that alternates solid rows with eyelet rows, keeping the number of stitches consistent across each repeat. When you reach the desired length, finish with a scalloped border using a simple picot or shell edge so the shawl frames the face. Block with steam and light pinning to open the eyelets and smooth the scallops.
AvoidDon’t skip blocking — unblocked lace looks flat and uneven in photos.
2. Terracotta Puff-Stitch Throw Blanket
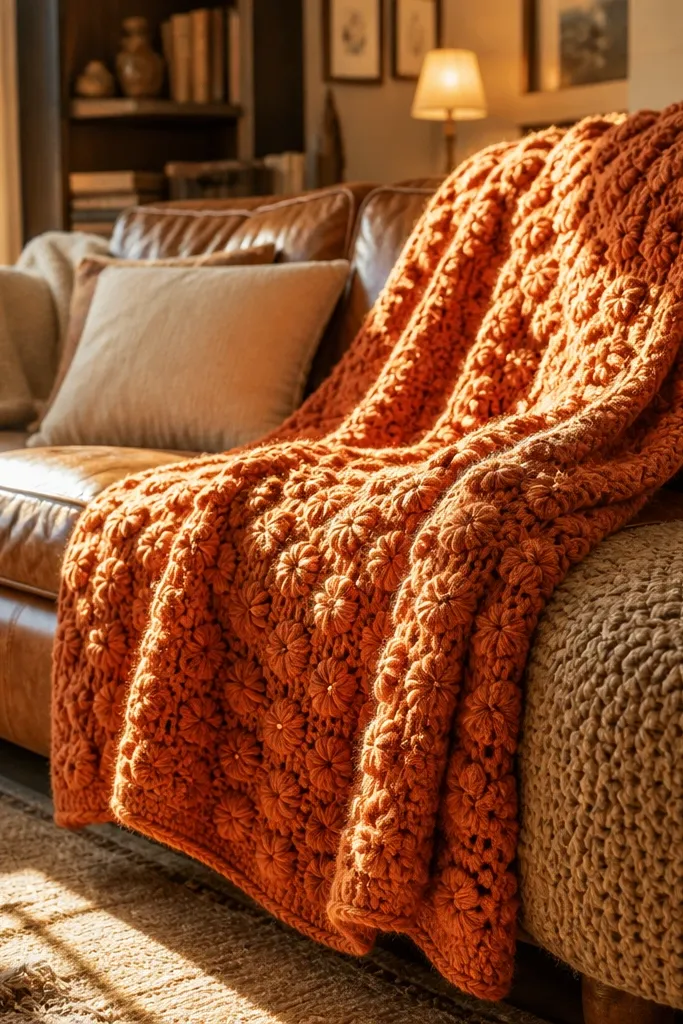
If you want crochet that reads “cozy but styled,” this throw does it with raised puff stitches that catch light like fabric texture. Terracotta looks warm and editorial, and puff clusters create depth even from a few feet away. Use worsted weight yarn for a plush drape that still holds shape. The project is medium difficulty because puff stitches need consistent height, but the pattern is forgiving since the texture hides tiny tension differences. It’s perfect for a couch throw, bed accent, or a chair you want to style with one hero piece.
Pro tipCount puff stitches by rows, not by eyeballing; consistent cluster spacing makes the grid look intentional.
Choose worsted yarn in terracotta and a hook one size smaller than recommended if your stitches look loose. Build the blanket in rows or blocks where puff stitch clusters repeat in a grid; keep the surrounding stitches simple so the puffs stay the star. After you reach your width, finish edges with a sturdy border like single crochet followed by a shell or reverse-shell trim. Weave in ends tightly, then block by steam pressing lightly across the surface without flattening the puffs.
AvoidDon’t use a fuzzy yarn — it softens the puff definition and makes the blanket look blurry.
3. Oat Waffle Stitch Hot Pad Set
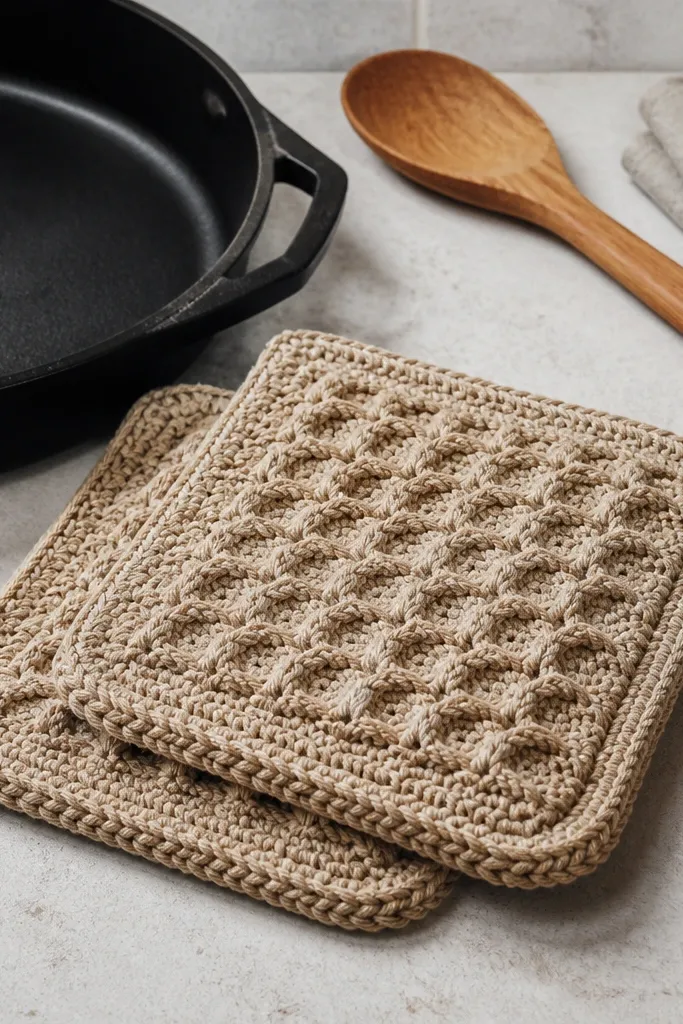
Hot pads are underrated for “aesthetic crochet ideas” because they’re quick, practical, and photogenic when they look sculpted. Waffle stitch gives you those honeycomb ridges that look expensive and cozy, especially in oat or sand tones. This set also teaches you a texture technique that transfers to bigger projects later. Make them thick enough to feel substantial, not thin like a coaster. You’ll finish two in a weekend if you use medium weight yarn and keep your tension steady.
Pro tipAfter stitching, press with a cool iron through a cloth to flatten the edges before final photos.
Use cotton yarn in oat or sand and a hook that gives you tight ridges (often 4.0-5.0 mm depending on your yarn). Work waffle stitch in squares until you hit the size you want, like 8x8 inches or 10x10 inches. Add a border in single crochet or crab stitch so edges don’t curl. For heat safety, soak and dry completely to set the stitch tension, and avoid acrylic for items that contact hot cookware.
AvoidAvoid super-slick yarn; waffle ridges need grip so the pad doesn’t look flat.
4. Rosewood Ruffle Edge Market Bag
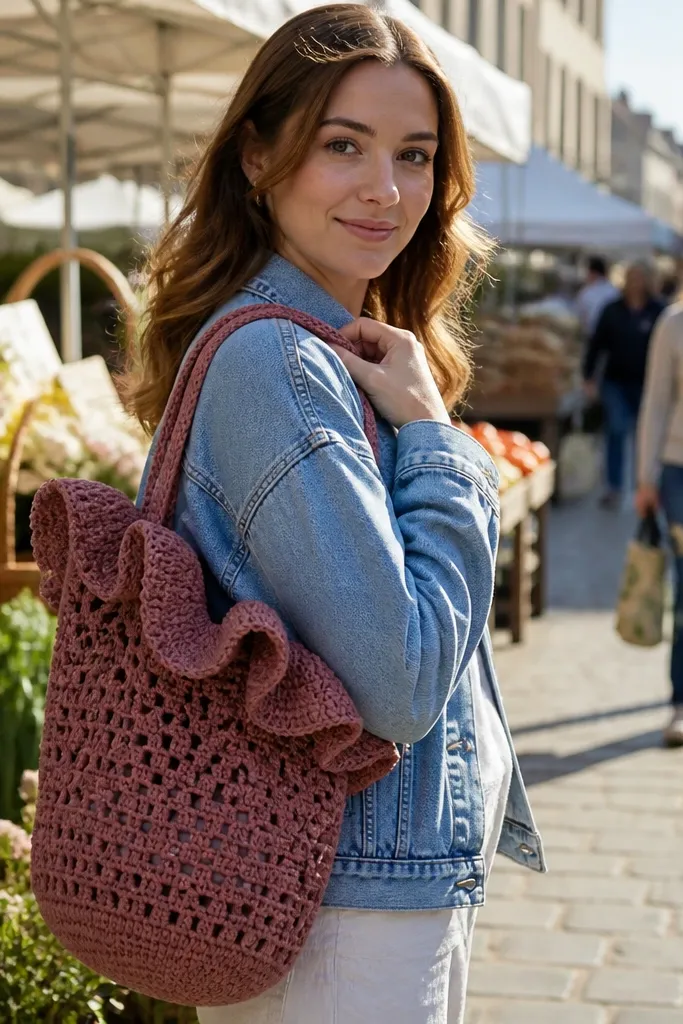
This bag looks dreamy because the ruffle top creates movement and frames the face and outfit in photos. The openwork sides keep it light and breathable, while the dense base keeps it sturdy. Rosewood (a muted pink-brown) photographs beautifully against denim and linen. It’s a beginner-friendly build if you start with a simple base and add the ruffle as a separate step. Use cotton or a cotton-blend yarn so the bag holds its shape and doesn’t stretch out.
Pro tipUse stitch markers every 10 stitches on the body so the bag stays even around the circle.
Start with a solid base using rounds of single crochet or half double crochet until you reach your bag diameter. Switch to an openwork stitch pattern for the body, keeping your stitch count stable so it stays round. When you reach the top, add a ruffle edge by working increased stitches into one round and then finishing with a row of shell or picot. Reinforce handles by crocheting a thicker handle band or double-stranding the yarn for the top sections.
AvoidDon’t make the body too lacy — flimsy sides look cheap in photos and collapse when you set it down.
5. Deep Teal Cable-Inspired Coaster Set
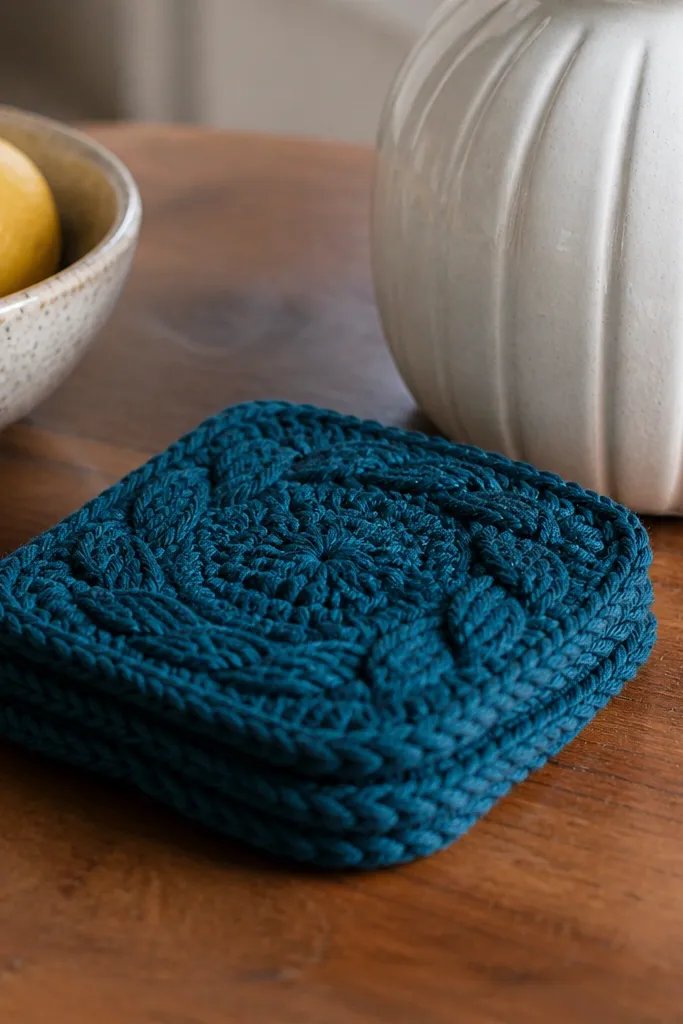
Cable-inspired crochet looks high-end because it mimics knit structure, and coasters make it easy to see the pattern clearly. Deep teal gives contrast against light wood tables and white ceramics, which makes the texture pop. These are small but satisfying projects that teach you how to work front-post/back-post stitches or simple twist methods. They’re also a good way to practice clean edging so the final piece looks intentional. You can make a set of four in a single evening if you’re consistent with your stitch count.
Use cotton yarn in deep teal and a hook that keeps the stitches firm (often 3.5-4.5 mm). Work a round coaster base with a neat stitch pattern that creates “cable” twists using front-post/back-post or crossed stitches over a fixed repeat. Keep your diameter consistent by adding increases only at the start and then maintaining the stitch count. Finish with a tight border row and weave ends on the underside. Block lightly so the twists look defined but don’t stretch.
Do a quick wet block for 10-15 minutes, then pin only at the edges so the center stays flat.
Skip loose borders; wavy edges ruin the tidy, dreamy look.
6. Ivory Crochet Rose Appliqué Garland
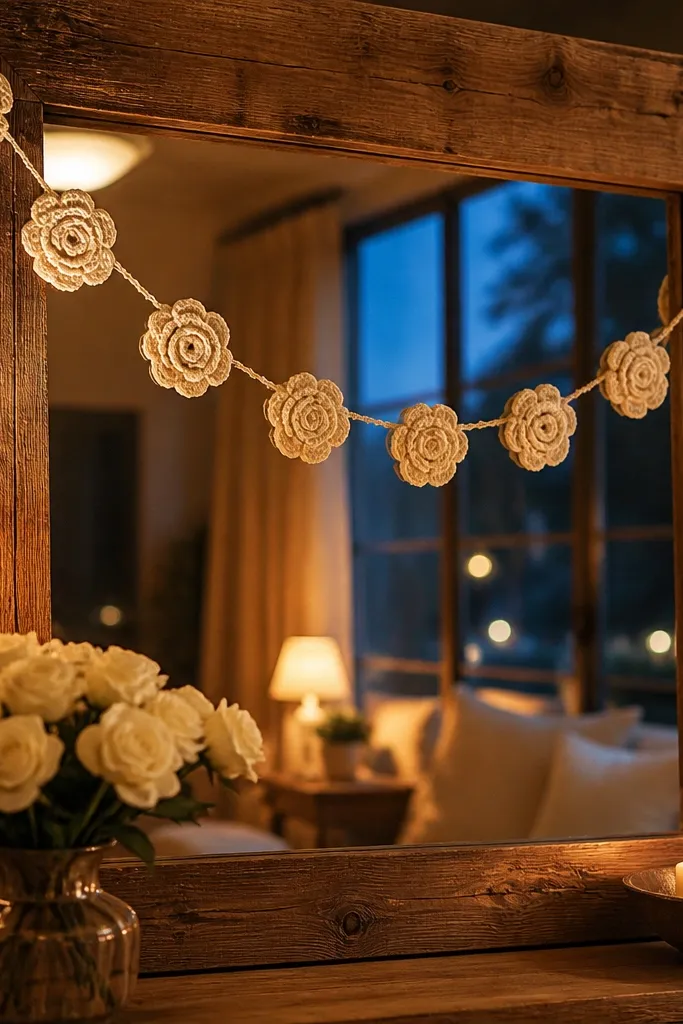
Garlands are photo-friendly because they create a “scene” around your crochet, and roses add that soft, romantic vibe people associate with dreamy decor. This one uses individual rose appliqués attached to a thin chain so you can space them tightly or let them hang with breathing room. Ivory looks clean and expensive in pictures, especially against warm wood or dark walls. It’s quick, too — you can make a small run of roses and assemble them as you go. Best for shelves, headboards, or draped over a curtain rod.
Choose a smooth cotton or cotton-linen blend in ivory and a small hook (2.25-3.25 mm). Crochet small rose appliqués using layered petals worked in rounds; stop each petal layer at the same count so they match. Attach each rose to a simple chain garland or a narrow strip by stitching through the base loops. Space roses evenly and secure the back ends so they don’t snag. Lightly steam block the petals so they curl and sit naturally.
Use a darker stitch marker color than your yarn so you can keep petal layer counts identical.
Don’t overstuff the roses; too much bulk makes petals stand out unevenly.
7. Sage Cloud Granny Square Pillow Cover
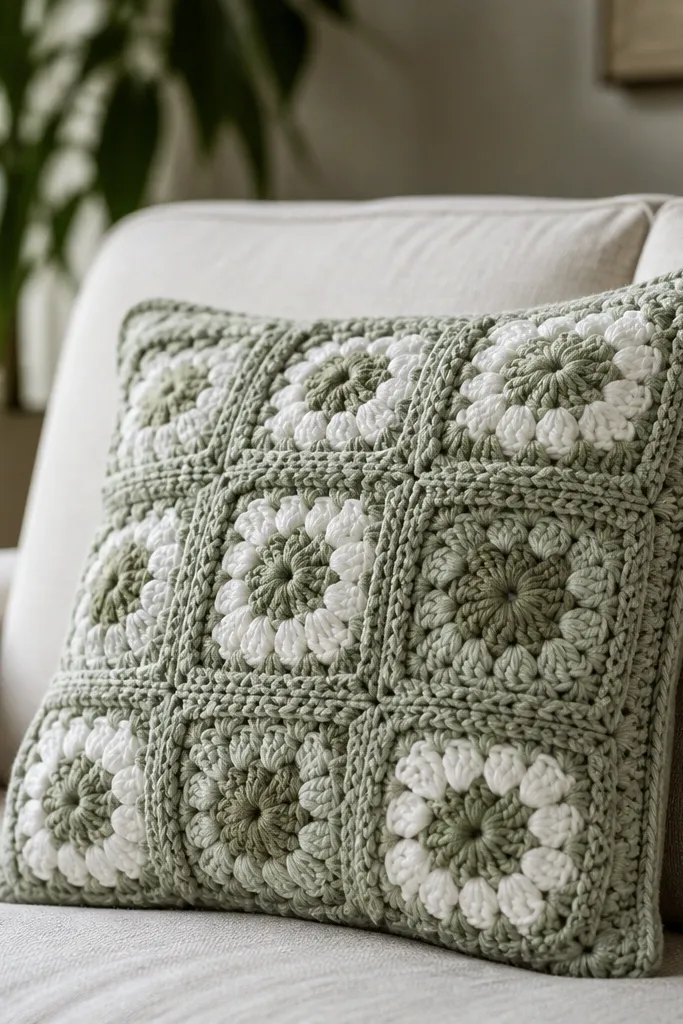
Granny squares can look fresh instead of dated when you pick modern colors and add a texture finish at the edges. This pillow cover uses sage tones and a “cloud” feel from slightly raised stitch texture, making it look plush on a couch. Granny squares also photograph well because each square reads as a pattern block, and the repetition looks intentional. It’s an intermediate project only because assembly has to be neat — you want straight seams and even tension. Great for adding color without committing to a full blanket.
Pro tipBlock squares before joining; it’s the difference between “messy collage” and “clean aesthetic grid.”
Pick worsted yarn in sage shades and a hook that gives you firm squares (often 4.0-5.0 mm). Make a set of granny squares with consistent stitch counts; choose a pattern where corners are pronounced for that scalloped look. Lay squares out and join them with a flat method like slip-stitch join or whip stitch so the seams stay tidy. Crochet a border around the whole cover if you want crisp edges, then sew in a pillow insert that matches the size you blocked to.
AvoidDon’t join with a stretchy method — the cover will ripple after you put the pillow in.
8. Black and Oat Stripe Amigurumi Mini Cat Planter
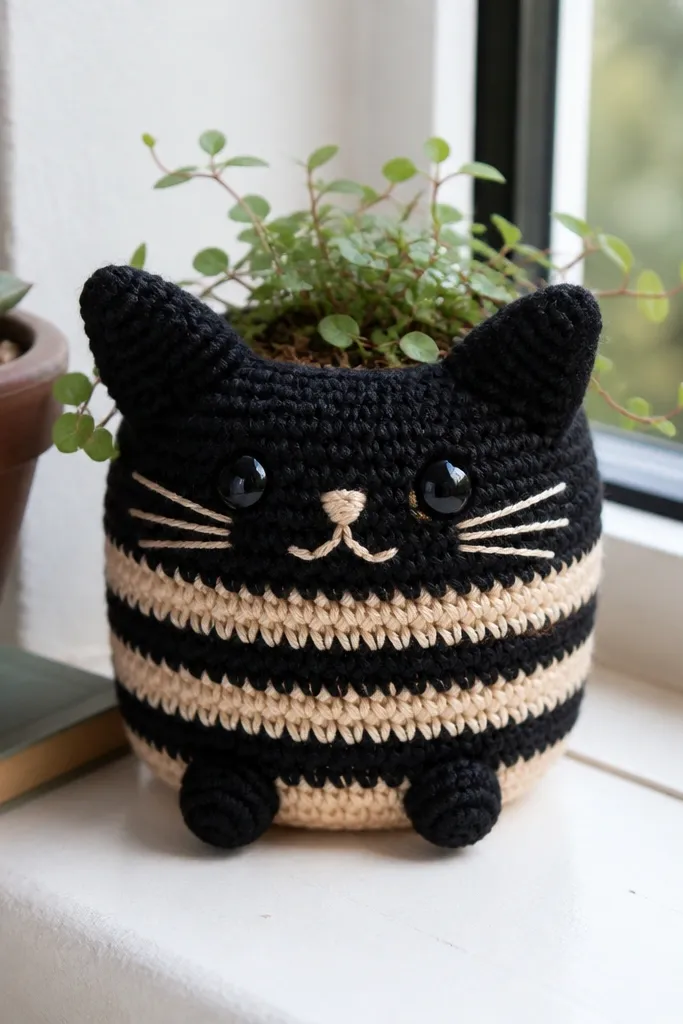
Small amigurumi looks dreamy when it has clear silhouette and color contrast, and this one does both. The black-and-oat stripes make it stand out on shelves, desks, and windowsills. It also works as decor because the planter base gives it a practical job, not just cuteness. Use a tighter stitch for a smooth surface so the stripes don’t look patchy. This is beginner-friendly if you can handle basic rounds, but you’ll get better results with consistent counts.
Pro tipUse stitch markers every round for the first few rounds — stripe alignment gets hard fast.
Use cotton or acrylic yarn in black and oat and a hook that keeps stitches tight (about 2.5-3.5 mm). Work the body in continuous rounds, switching colors at the same stitch line each round so stripes stay even. Create the ears separately and attach them with secure stitches through the base loops. Line the inside with a small plastic pot or use a plant-safe liner, then finish the top with a snug opening. Weave in ends inside the body so they don’t show through stripes.
AvoidAvoid thin stuffing; it makes the silhouette sag and the stripes look uneven.
9. Lilac Puff-Sleeve Crop Sweater Vest
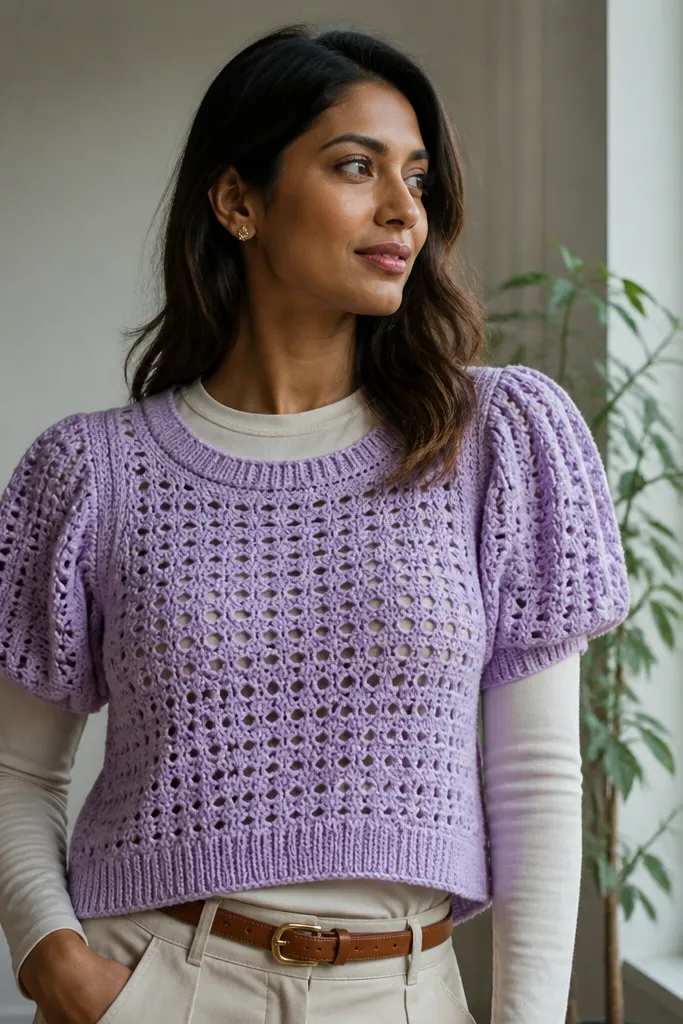
This is “dreamy” because the puff sleeves add shape at the shoulders while the body stays lighter with an open panel structure. Lilac reads soft and romantic, and the contrast between puff texture and airy panels gives that styled, layered look. It’s more than a beginner crochet project because you need to plan measurements — armhole placement, body length, and sleeve width. If you want garments that photograph well, crop lengths and defined shoulder texture are a strong combo.
Pro tipBlock each panel before assembly — garment shape depends on it more than you think.
Choose DK yarn in lilac and a hook that matches your gauge for a structured fabric (often 4.0-5.0 mm). Make a front and back panel with an open stitch pattern, then crochet sleeve sections using puff stitches or clusters along the sleeve edges. Assemble by joining at shoulder seams first, then work armhole edges with a firm border so they don’t stretch out. Finish the hem and neckline with ribbing-style rows like alternating front-post/back-post stitches.
AvoidDon’t skip gauge swatches; puff stitches change your fabric density quickly.
10. Sandstone Crochet Basket with Macramé-Style Edge
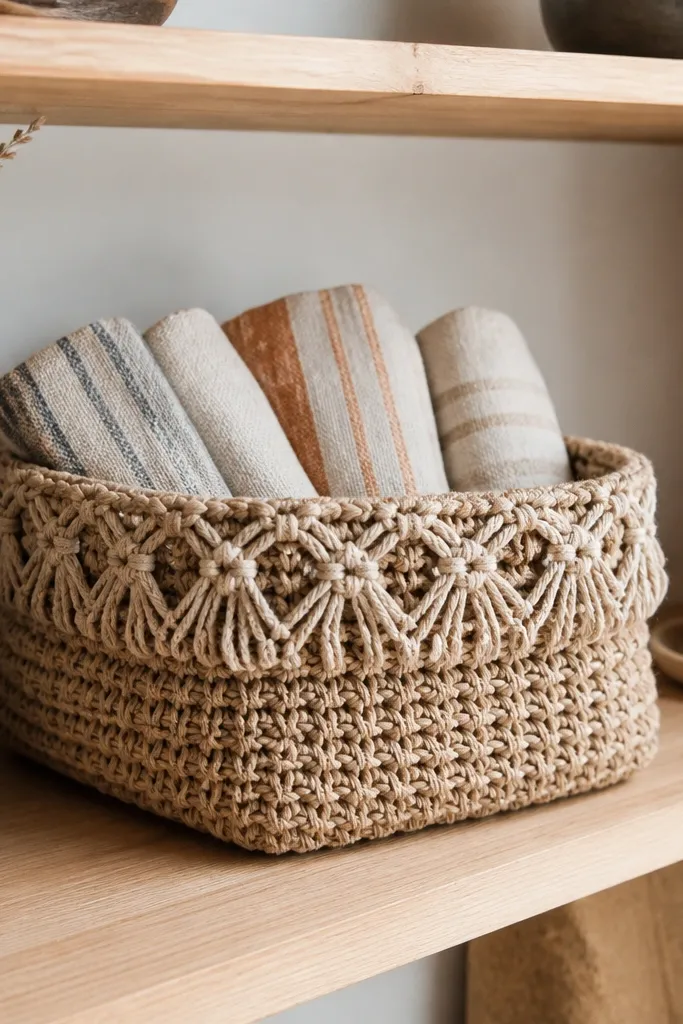
A basket looks aesthetic because it’s sculptural, and a macramé-style rim gives it that designer finish. Sandstone neutrals look warm and calm, and the structured shape keeps it looking neat on shelves. This project also helps you learn how to crochet with stability — you’ll choose thicker yarn or add a stiffening method. It’s great for organizing yarn, bathroom items, or a tidy entryway tray. The time is moderate because you’re building height and then finishing the rim carefully.
Pro tipTest the basket height against your shelf — 8-10 inches looks best for decor photos.
Use chunky cotton or jute-blend yarn in sandstone with a larger hook for a rigid weave (often 6.0-8.0 mm). Start with a flat base worked in rounds, increasing until you hit the diameter you want, then continue in rounds without increases for the walls. Add a stiffening technique by lining with a fabric liner and adding a thin plastic canvas strip along the rim. Finish the top edge with a braided-looking crochet border using slip stitches and chain loops to mimic macramé. Trim the liner neatly and secure it with stitches.
AvoidDon’t use super-soft yarn; it collapses and ruins the clean basket silhouette.
11. White Crochet Starburst Blanket Squares
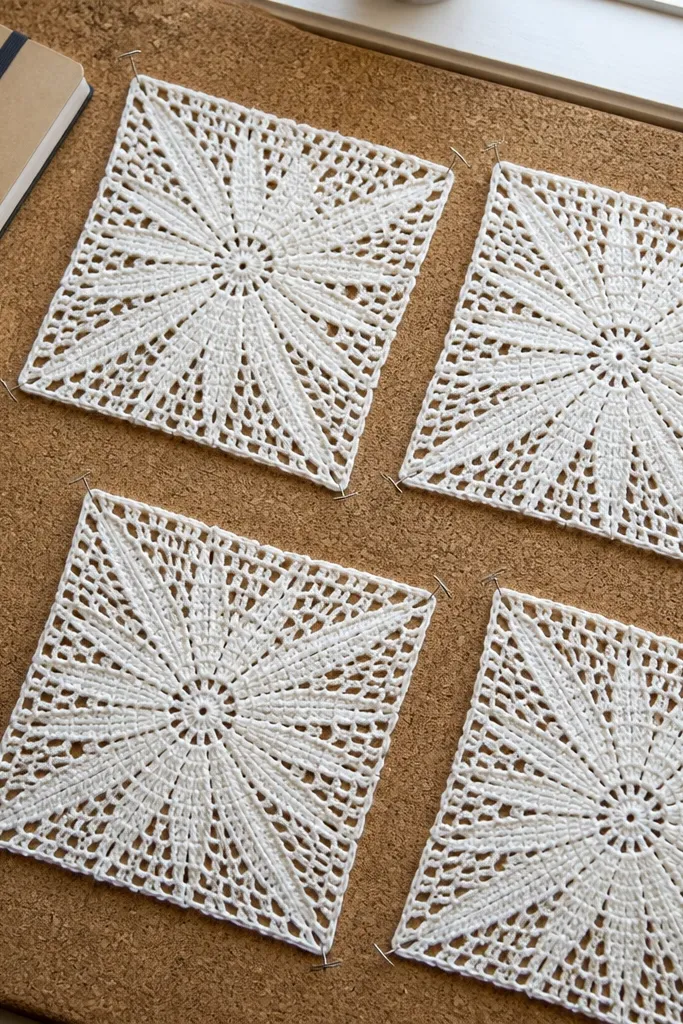
Starburst squares are dreamy because the pointed rays create instant visual energy. White yarn makes the texture read clearly and gives that airy, cloud-like feel in photos. This project is also flexible — you can make a mini throw, a baby blanket, or a wall hanging. The skill level is medium since you need consistent corner shaping and joining, but it’s worth it for the photogenic geometry. Use a yarn that holds definition so the points don’t blur.
Pro tipPin squares on a flat board in a grid before you join; adjust spacing while it’s still on the pins.
Pick DK or worsted white yarn and a hook that creates firm stitches (often 4.0-5.0 mm). Work each square starting from the center, increasing into rays that form star points; keep your point count consistent. Create a joining method while building rows, like slip-stitch join with a final border row that ties everything together. When you finish the last square, add a simple edge border so the blanket looks finished, not like a pile of motifs. Block each square before joining for crisp points.
AvoidDon’t rush motif assembly — crooked joins make the whole blanket look off.
12. Mocha Chunky Crochet Wrap with Rolled Fringe
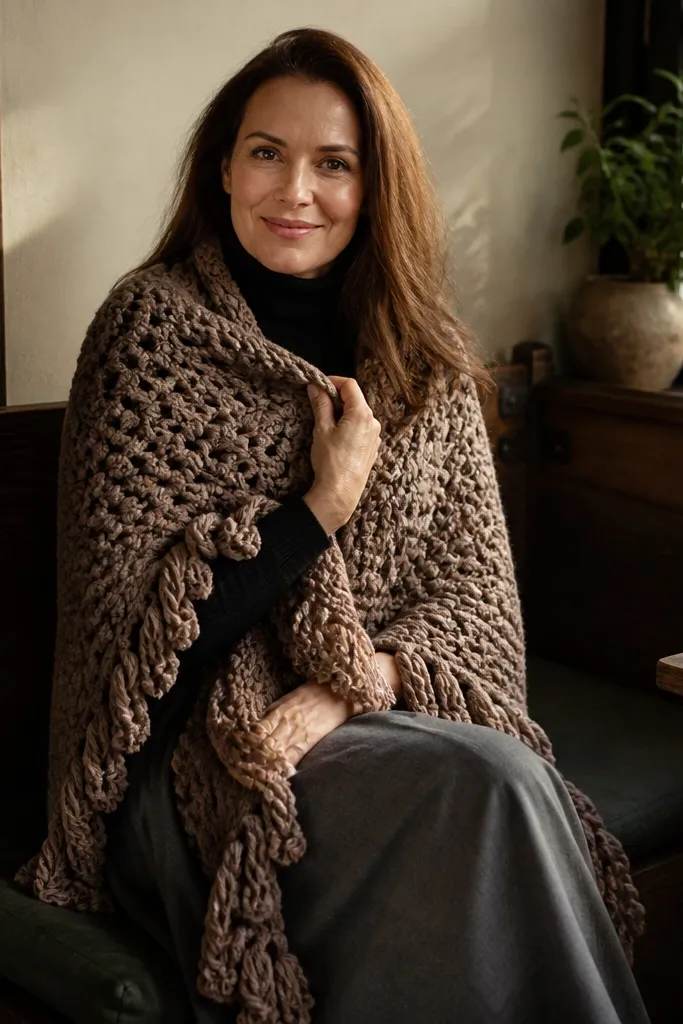
Chunky wraps photograph well because they look plush and drape thickly without needing complicated shaping. Mocha color hides minor stitch variation while still showing texture, which keeps it looking polished. Rolled fringe adds a soft, styled edge instead of random tassels. This is a satisfying project for intermediate beginners who can handle basic stitch repeats and fringe assembly. It looks great over a turtleneck or with a simple dress.
Pro tipCut fringe strands in one batch and label the yarn length; uneven fringe looks messy in close photos.
Use super bulky or bulky yarn in mocha and a large hook (often 9.0-12.0 mm). Crochet a long rectangle in a simple textured stitch like half double crochet rows or a basketweave-style pattern for body. For rolled fringe, cut yarn strands longer than you think, then roll each strand slightly and stitch it into the end edge so it curls. Add fringe in evenly spaced groups, then weave ends and steam lightly to set the roll. Measure the wrap width so it lays flat — about 18-26 inches wide looks best for drape.
AvoidAvoid thin fringe yarn — it won’t roll and will hang flat.
13. Cream and Gold Thread-Accent Crochet Bookmark Set
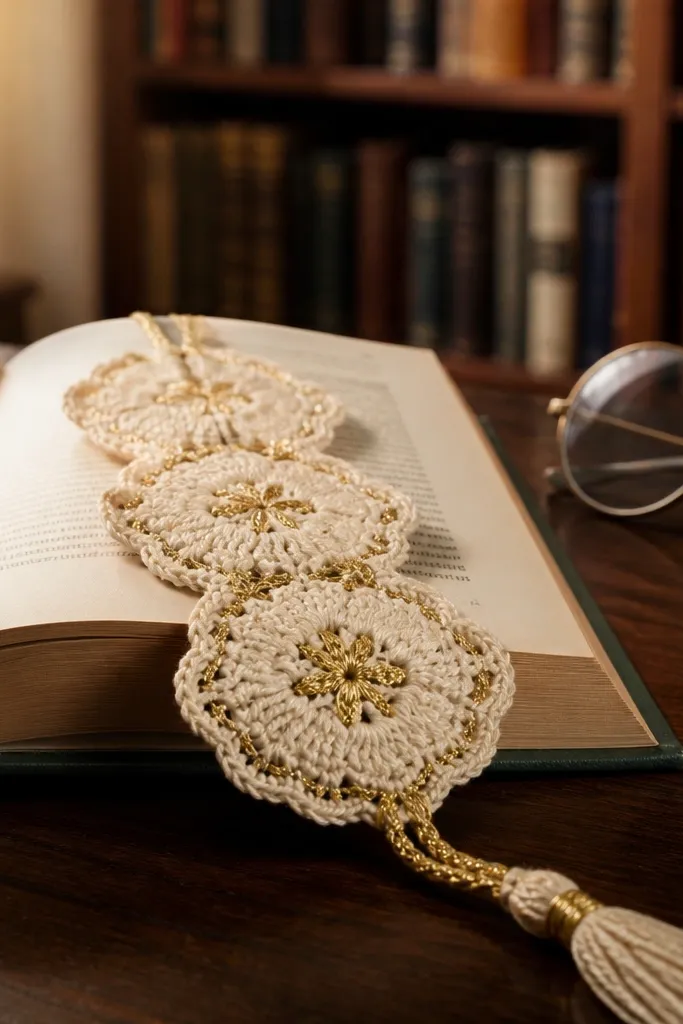
Bookmarks are small, but they’re perfect for aesthetic crochet ideas because they’re easy to finish and they photograph well against books. The trick is using a higher-contrast thread accent so the texture looks intentional. Cream base yarn keeps it soft and clean, while gold thread adds a subtle glow that shows up in daylight. These also make great gifts without needing a big commitment. Skill-wise, it’s beginner-friendly, and you can make a set of four in a couple hours.
Pro tipSteam block with a light touch; too much heat can warp the thread accent.
Use cotton yarn in cream with a small hook (2.0-3.0 mm). Crochet a slim rectangle or a simple lace strip, then finish the top with a loop so it sits on the page. Add gold thread by working small chain bows or a tiny picot border along one side using a thinner hook. Finish with tassels: wrap thread around a fork, cut, and attach to the bottom edge. Block flat so the bookmark edges stop curling.
AvoidDon’t make the lace too wide; bookmarks need a narrow silhouette to look neat.
14. Sage Botanical Coaster with Leaf Stitch Border
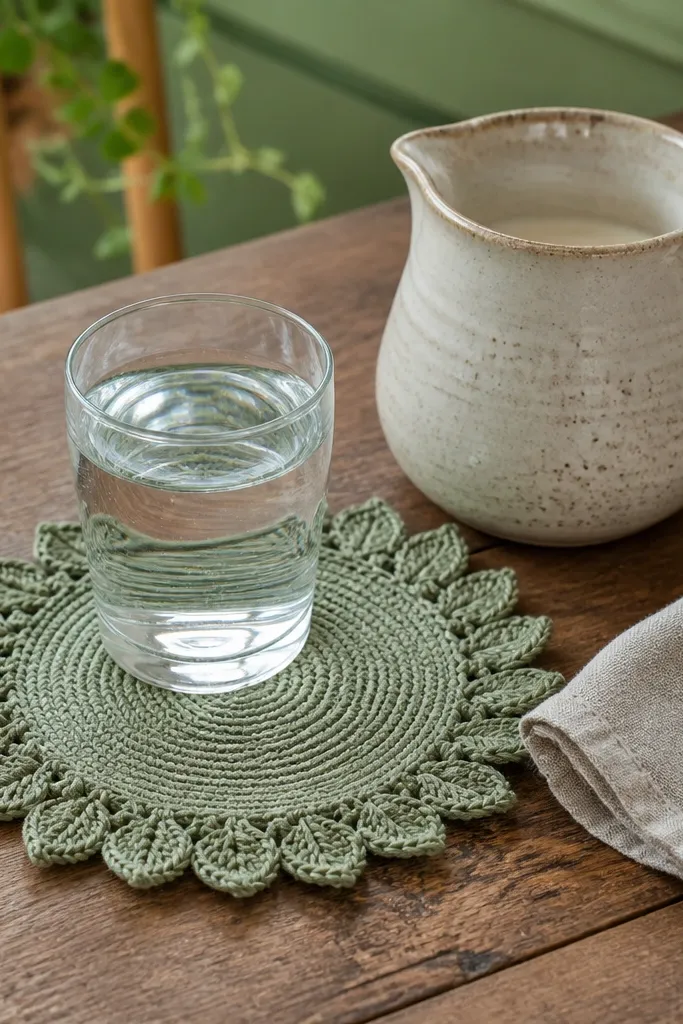
This coaster looks dreamy because the center stays calm while a leaf stitch border gives it a delicate, botanical frame. Sage yarn feels fresh in photos, and the leaf edge reads as intentional detail instead of random texture. It’s a great project if you want to practice stitch variety without committing to a full blanket. The size is small, so you can experiment with border patterns and then repeat the winner. Make a set to match your decor and keep them on display.
Pro tipIf your leaf tips curl, lightly dampen and pin only the leaf ends during blocking.
Start with cotton yarn in sage and crochet a solid round center using single crochet for a flat base. At the edge, switch to a leaf border pattern: work small leaf-shaped clusters that repeat around the circle. Keep the leaf height consistent by counting stitches inside each leaf repeat. Finish with a neat outer round and weave in ends. Block lightly so the leaf points sit open and don’t curl inward.
AvoidAvoid fuzzy yarn for the border; leaf stitches need clean edges to look sharp.
15. Cloud-Gray Crochet Scrunchie with Double-Layer Ridges
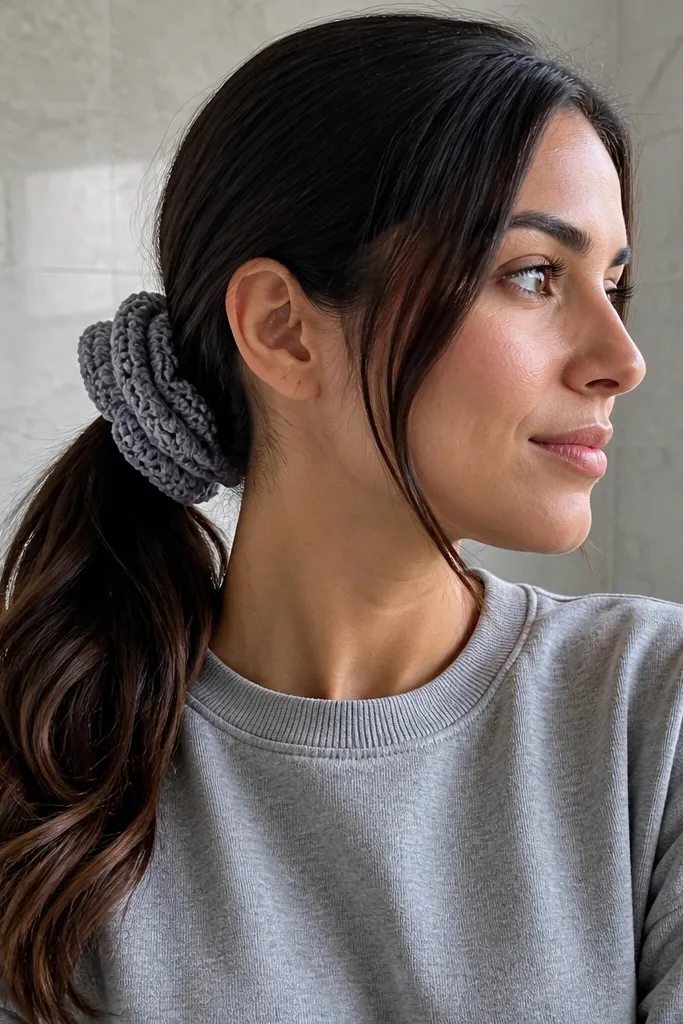
Hair accessories are photogenic because they’re small and have a clear silhouette, and scrunchies look extra dreamy when the texture is visible. Double-layer ridges create a plush, structured look that reads well even in close-up photos. Cloud-gray is forgiving and matches everything, so your scrunchie looks styled rather than random. This project also uses a narrow width, which makes it fast to adjust if your gauge is off. It’s beginner-friendly and a great way to try new stitches.
Pro tipMeasure the elastic first; a scrunchie that’s too tight will stretch the crochet and distort the ridges.
Pick a soft yarn in cloud-gray and a hook that gives you firm fabric (often 3.0-4.0 mm). Crochet two narrow bands using a ridge stitch pattern like alternating front-post/back-post rows, then join them along the long edge to form a tube. Thread a hair elastic through the tube and secure ends with a few tight stitches. Add a decorative edge by working a thin border row or small picot trim. Weave in ends and steam lightly to set the shape.
AvoidDon’t use slippery yarn — it makes the elastic shift and the ridges lose their even look.
16. Butter Yellow Granny Square Bag Charm with Mini Tassels
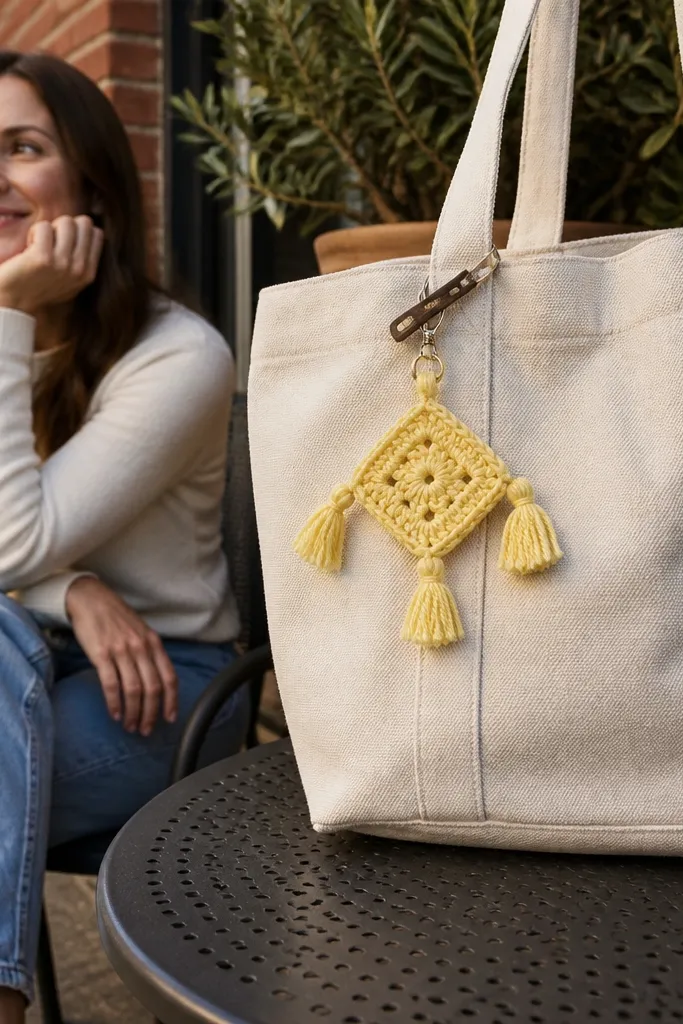
Bag charms are one of the easiest ways to add “dreamy crochet ideas” to your everyday look. This butter yellow granny square charm is bright without being harsh, and the tiny tassels add motion in photos. The square motif keeps it graphic and clean, while the tassels make it feel handmade. It’s quick enough to make a matching set for keys, a purse, or a backpack. Skill-wise, it’s beginner-friendly with a little assembly.
Pro tipUse the same tassel length for every charm; tiny differences show up immediately in photos.
Use cotton yarn in butter yellow and a hook around 2.75-3.75 mm. Crochet a small granny square with clear corner spaces so the motif looks balanced. Attach a loop at the top edge using a chain and slip-stitch so it can hang from a clip or ring. Add mini tassels by wrapping yarn around a small card, cutting, and stitching into the bottom corners. Block flat so the square stays crisp and the tassels hang evenly.
AvoidDon’t make the square too large — charms look best when they’re small and graphic.
17. Dusty Pink Crochet Bow Headband with Center Knot
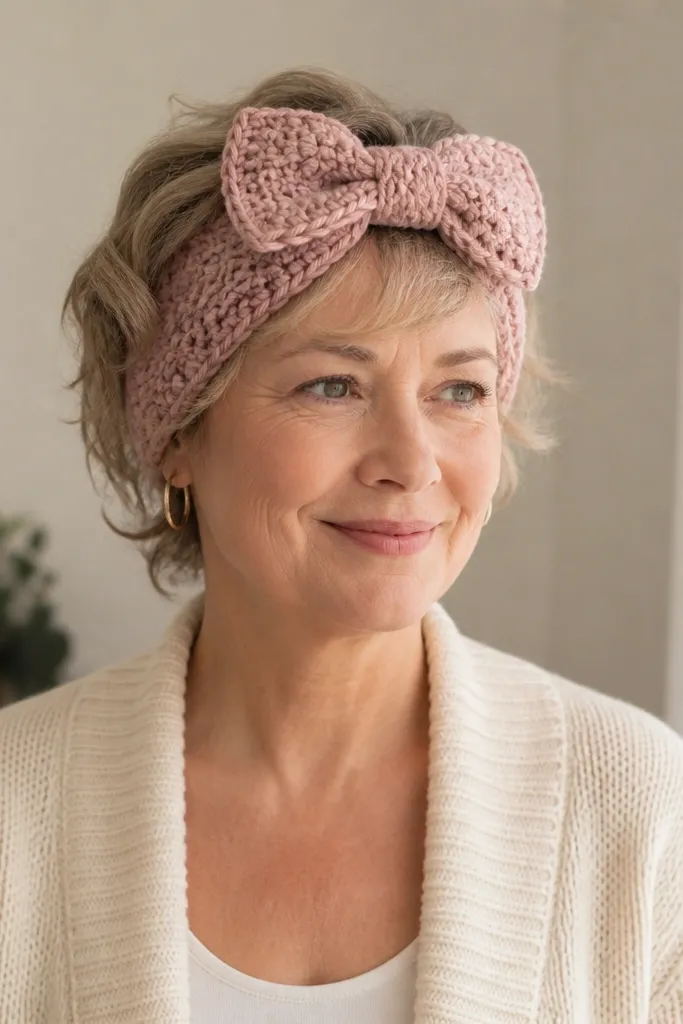
A bow headband looks dreamy because it frames your face and adds a soft focal point without needing a whole outfit. Dusty pink is flattering and photographs well against both dark and light hair colors. The center knot gives the bow shape and keeps it from looking like two flat loops. This is a small project with big visual payoff, and it’s easy to adjust for comfort. It’s also a good place to use a stitch pattern that creates texture, like popcorn stitches along the bow edges.
Choose a DK yarn in dusty pink and a hook sized for a firm headband (about 3.5-4.5 mm). Crochet a narrow headband strip in a rib-like stitch using alternating front-post/back-post for stretch. Make two bow panels separately in rows, then shape them by decreasing at the center. Stitch the panels to the headband and add a small crocheted knot at the center for structure. Steam block lightly so the bow holds its curves.
Test fit before you finish — the headband should sit flat without twisting.
Avoid stiff yarn — it makes the bow sit oddly and can scratch the forehead.
18. Seafoam Shell Stitch Beach Tote with Scallop Border
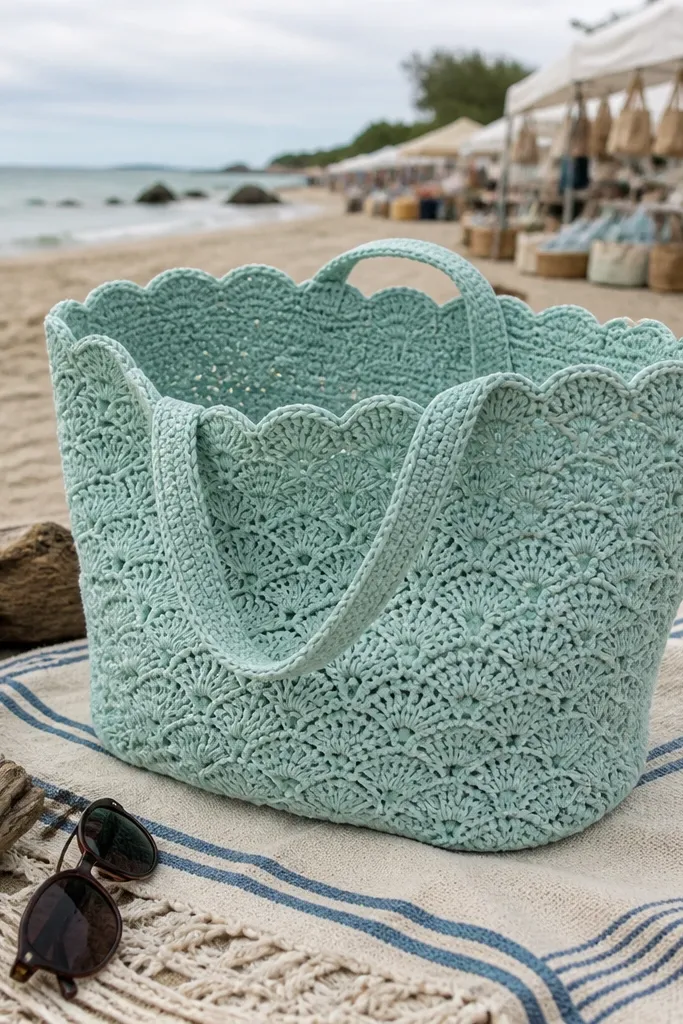
This tote looks dreamy because the shell stitch creates repeating texture that catches light in a soft, wave-like pattern. The scallop border frames the opening so the top edge looks intentional in photos, not like a flat rectangle. Use seafoam yarn in a matte finish so the stitch definition shows without looking shiny. It works for beach days, farmers markets, or as a pool-to-picnic bag where you want something photogenic and practical. Skill level is beginner-to-intermediate: you repeat one stitch pattern and you just need to keep your tension even. Time is about a weekend depending on how wide you make the base and how many shell repeats you choose.
1) Pick yarn and hook first: seafoam worsted weight cotton or cotton-blend (about 4-5 skeins), and a 4.0 mm hook for neat shells. Make a foundation chain that fits your base width, then work the shell stitch pattern for the body until the tote reaches about 12-13 in tall. Add the scallop border by working a row of (single crochet, then a fan of 5 double crochets in the next stitch, then single crochet) across the top edge; keep the border row slightly tighter than the body. 2) Build handles that sit flat: crochet two handle strips about 22 in long, each about 1.5 in wide, then sew them to the inside of the tote opening 3 in apart. Reinforce the handle attachment by stitching through the last row of the scallop border and weaving a short thread tail back through nearby stitches. 3) Finish clean: weave in ends tightly and steam-block lightly from the wrong side, especially along the scallops, so the edge holds its shape.
Use matte cotton and block the top edge before sewing handles — it stops the scallops from curling.
Don’t make the shell row too loose or the tote will flare and look messy at the top.
19. Rose Quartz Floating Petal Coaster Set with Picot Edges
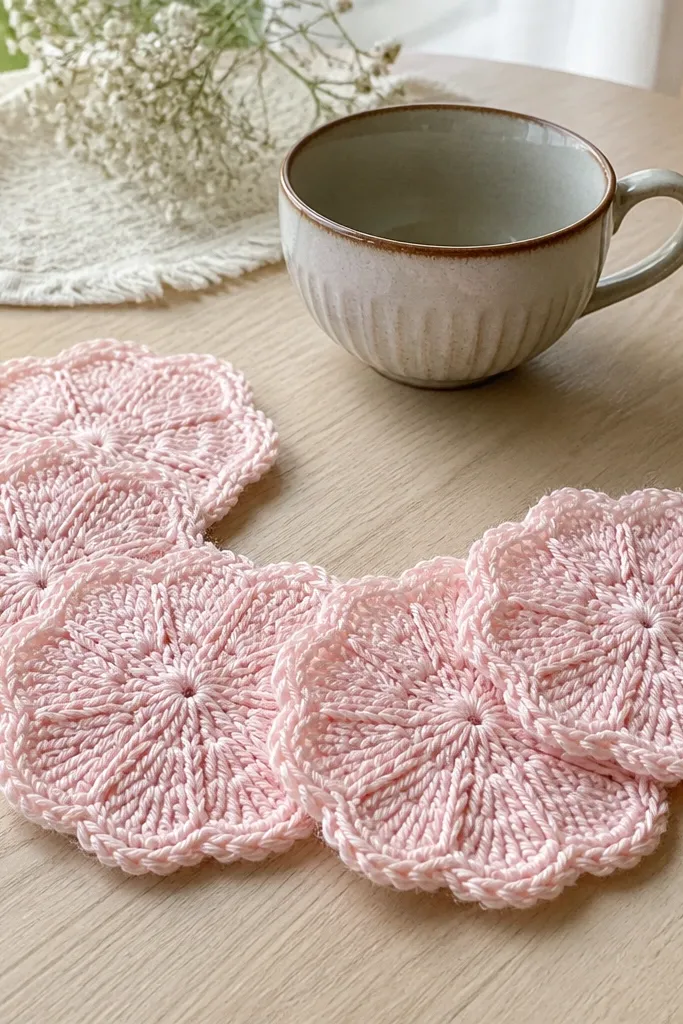
These coasters look dreamy because they stack petal shapes like little floating flowers, and the picot edges give a delicate, lacy rim. The effect is airy without being flimsy, so the coaster looks pretty even when it’s empty on a table. Rose quartz pink yarn makes the whole set feel soft and romantic in photos, especially against wood or cream linens. They’re also practical: the dense center holds heat better than open lace, and the finished edge keeps the coaster from stretching out. Skill level is intermediate for the pattern only, but the construction is straightforward — you’re repeating a ring system. Time is 2-3 evenings for a set of four if you keep your tension consistent.
Pro tipCount your petals every round. If one petal is taller, the whole coaster ring looks uneven in photos.
1) Choose materials that behave: DK cotton yarn in rose quartz (about 1 skein total) and a 3.5 mm hook. Start with a magic ring, then crochet a dense base using single crochet rounds until the coaster center is about 3 in wide. For the petal effect, work a round of petal clusters: (ch 2, 1 double crochet into the ring, skip a stitch, then 1 double crochet into the next stitch) repeated to form 8 petals, making sure each petal reaches the same height. 2) Add the floating look by layering: work another petal round outward using slip stitches to connect under the petal bases, then close each petal with a small edge stitch so the outer petals sit slightly above the inner ones. 3) Finish with picots: around the outer edge, do (single crochet, picot of ch 3 and slip stitch back into the first chain) repeating evenly. Block flat from the wrong side and let fully dry before use.
AvoidSkip super-loose tension; picots will look sloppy and won’t hold their little points.
20. Cream Honeycomb Lace Wall Hanging with Hanging Loop and Fringe
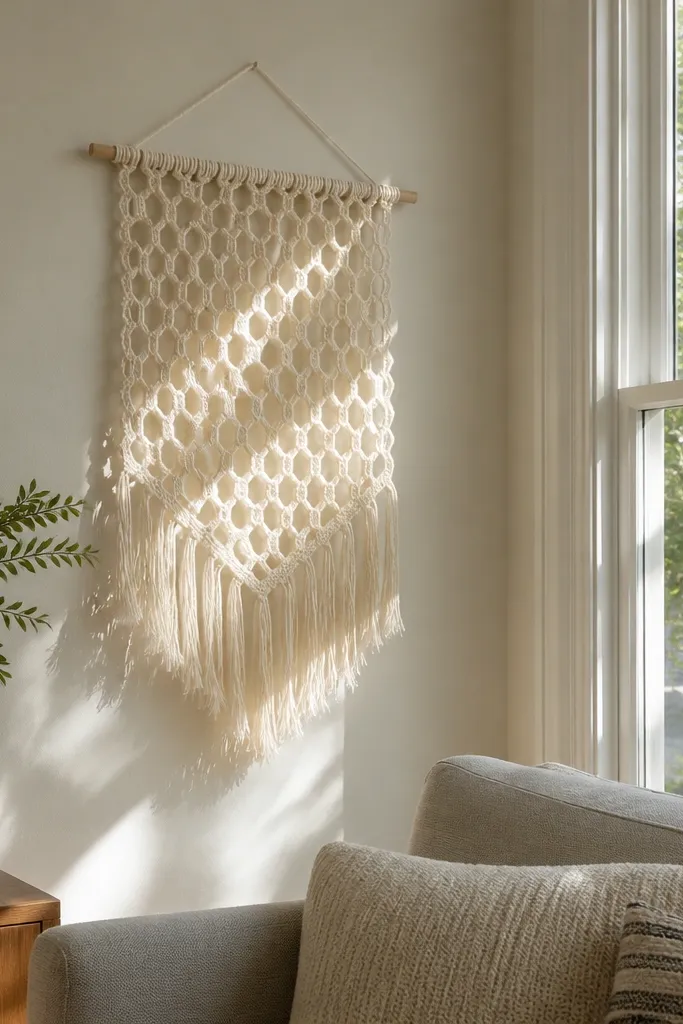
This wall hanging looks dreamy because the honeycomb lace pattern is structured but still see-through, so it creates a soft glow effect when light hits it. The fringe makes it look styled, not handmade-in-a-hurry, and it moves slightly when the room air shifts. Cream yarn keeps it bright and calm, which photographs well on neutral walls and shelves. It’s also a smart DIY project if you want a crochet piece that looks “decor” without needing sewing skills. Skill level is intermediate: you’ll repeat a lace panel pattern and keep your stitch counts steady. Expect 6-10 hours total depending on how wide you make the honeycomb section.
1) Build the panel grid: use a fingering or sport weight cotton in cream with a 3.0 mm hook. Chain a width that supports an even number of honeycomb repeats, then work the honeycomb lace row pattern until the panel is about 18 in long. Create two identical panels if you want more body — otherwise one panel is fine for a lighter look. 2) Add a top hanging loop: crochet a short strip about 6 in long, fold it into a loop, and sew it to the back of the top edge so the hanging point sits centered. Add a thin border row around the edges using single crochet, then a second border row with picot or tiny scallops to frame the lace. 3) Add fringe: cut fringe strands twice the length you want (for example 10 in fringe gives about 5 in finished), then attach them evenly along the bottom edge through the border row. Trim fringe to an even line after it dries if you steam-block first.
If you want it to hang perfectly flat, block the finished panel before sewing the loop and adding fringe.
Don’t add fringe before blocking — the lace pattern will stretch and your fringe length will end up uneven.



