
1. Color-Block Cropped Cardigan with Waistcoat Stitch Edges
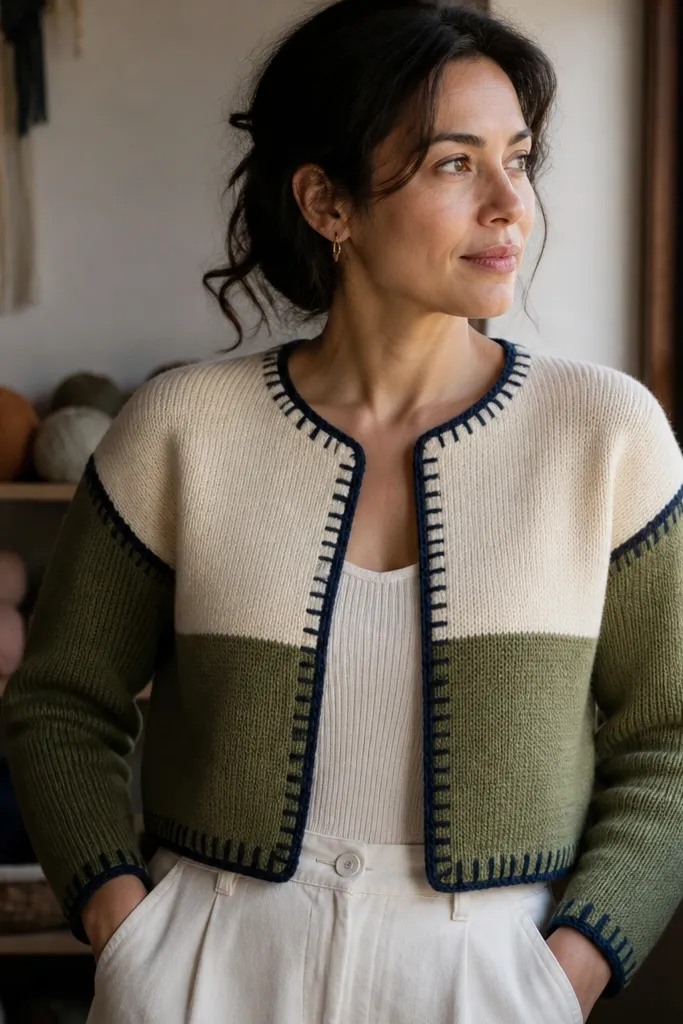
This cardigan looks modern because the body is simple and the edges do the styling. The waistcoat stitch border gives you a crisp, knit-like line that frames the color blocks instead of letting everything blur together. Use medium weight yarn (worsted, about 4) so the fabric holds its shape when you layer it. The cropped length also reads current — it hits the waist and shows a clean neckline rather than pooling fabric.
Start by crocheting a rectangle front and back for the body in two colors, using a simple stitch pattern like half double crochet for even height. Sew the side seams, then crochet a waistcoat-stitch border around the front openings, hem, and neckline. Finish with a short band for the button placket and add 2-3 buttons spaced evenly so the cardigan lays flat.
Pro tipBlock the panels before you seam them; it makes the color-block lines line up perfectly.
AvoidSkip loose, drapey stitches here — they make the color blocks look messy instead of graphic.
2. Geometric Granny Square Throw with Sharp Border Grid
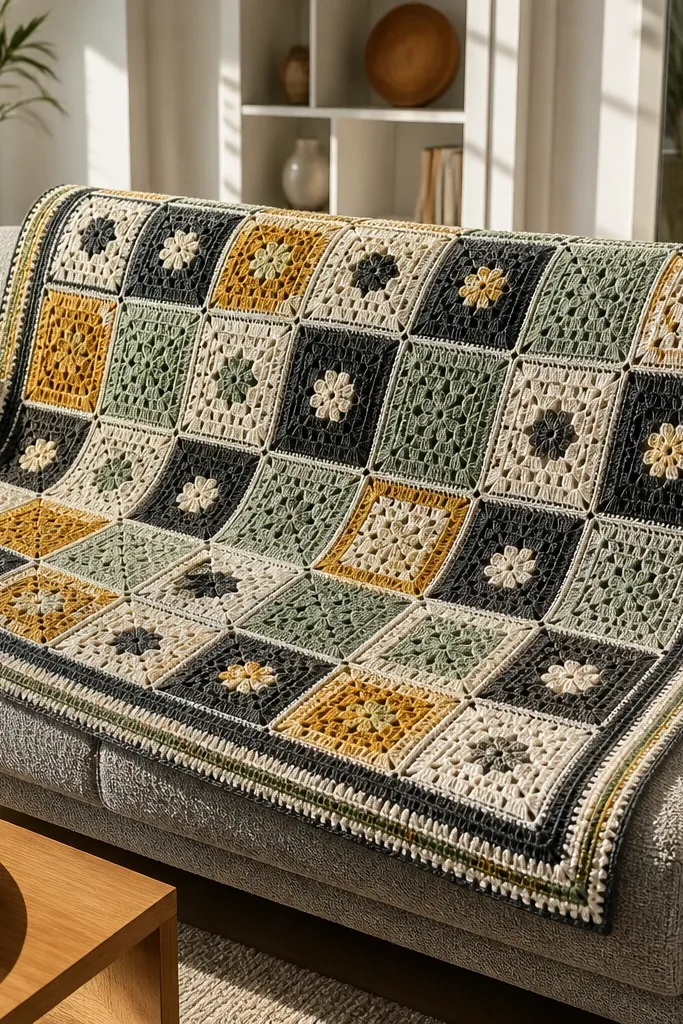
A granny square throw looks modern when the squares are consistent and the border is structured. This design uses tight squares with a limited palette so the overall surface feels like a graphic quilt, not a vintage blanket. Choose a yarn with good stitch definition (cotton blend or wool-mix) so the corners stay crisp in photos. The border grid is what makes it look intentional; it locks the squares into a straight, flat plane.
Make a set of identical granny squares using 4-5 rounds, keeping the same tension each time. Join with a flat method like slip-stitch join so there are no bulky ridges. Then crochet a narrow border around the entire blanket and add a second border row that creates a visible grid line across every square edge.
Pro tipMeasure one finished square and match it — don’t trust the pattern yardage for throw-scale consistency.
AvoidDon’t mix square sizes — even a 1/4 inch difference shows up fast on a large throw.
3. Broomstick Lace Table Runner with Pin-Flat Edges
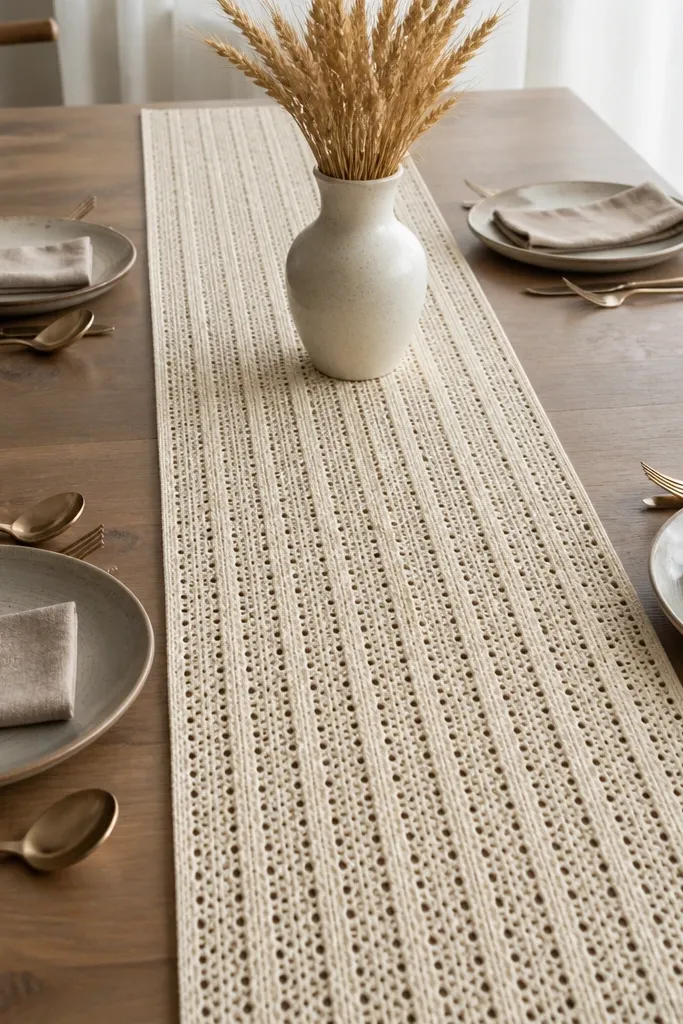
Broomstick lace looks fancy but still reads modern when you keep it in a long, narrow runner format. The lace texture gives visual interest without needing a complex color story, and the straight edges make it feel designed for a table, not a doily. Use a smooth yarn like cotton or linen blend so the texture forms clean “bars.” This is a great project for intermediate crocheters because the stitch pattern is distinct and repeatable.
Start with a foundation chain sized for your table length, then work the base rows in a simple stitch pattern that holds width. For the broomstick lace section, insert your needle or dowel through the assigned stitches and work over the loops in the pattern repeat. After finishing, block aggressively by pinning to exact measurements so the lace bars line up and the runner stays straight.
Pro tipA wooden dowel or a smooth crochet hook shank works better than a too-thick tool; it keeps the bars evenly sized.
AvoidDon’t skip blocking — broomstick lace collapses if you just let it dry.
4. Textured Beanie with 1x1 Rib Look (Front Post Detail)
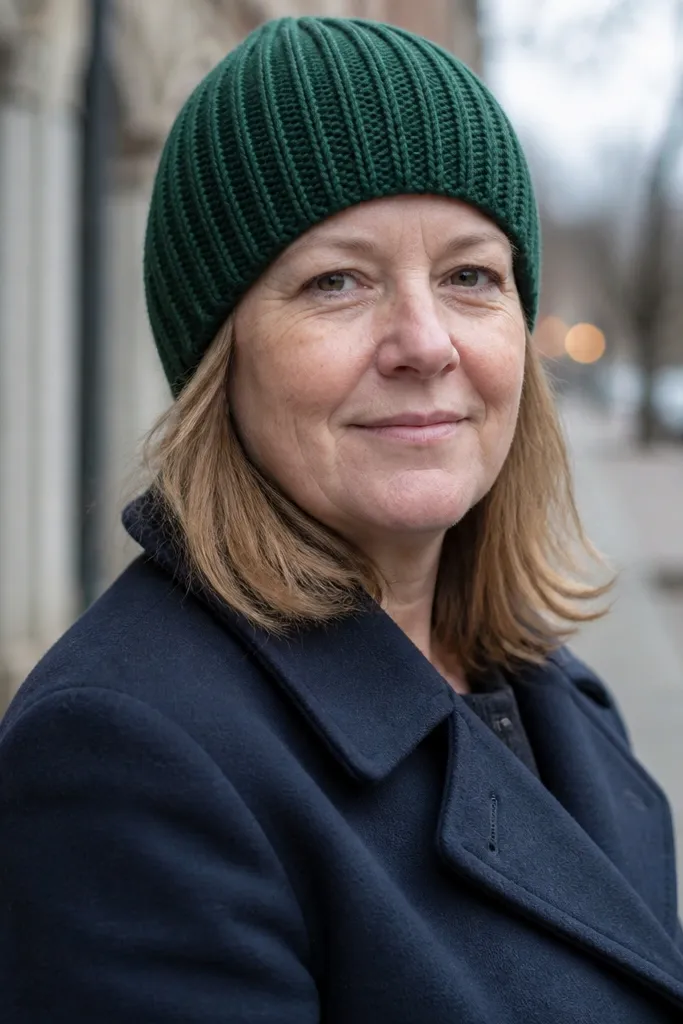
This beanie is modern because it looks like knit ribbing, but it’s crochet. The front post/back post pattern creates vertical ridges that catch light and look clean in winter photos. Keep the yarn smooth and plied tightly so the ribs don’t look fuzzy. A fitted beanie also photographs well because the shape is simple and centered.
Work a stretchy rib section using alternating front post and back post stitches in the round, matching your gauge so the rib doesn’t flare. Continue the main body in the same post stitch pattern until you reach the desired height. Finish by decreasing evenly at the crown, then weave the tail through the last loops and tighten firmly.
Pro tipUse a stitch marker every round so you don’t drift off the post pattern and end up with a twist.
AvoidAvoid bulky novelty yarns here — they hide the rib definition that makes this look modern.
5. Minimalist Crochet Plant Hanger with Twisted Slip-Stitch Rope
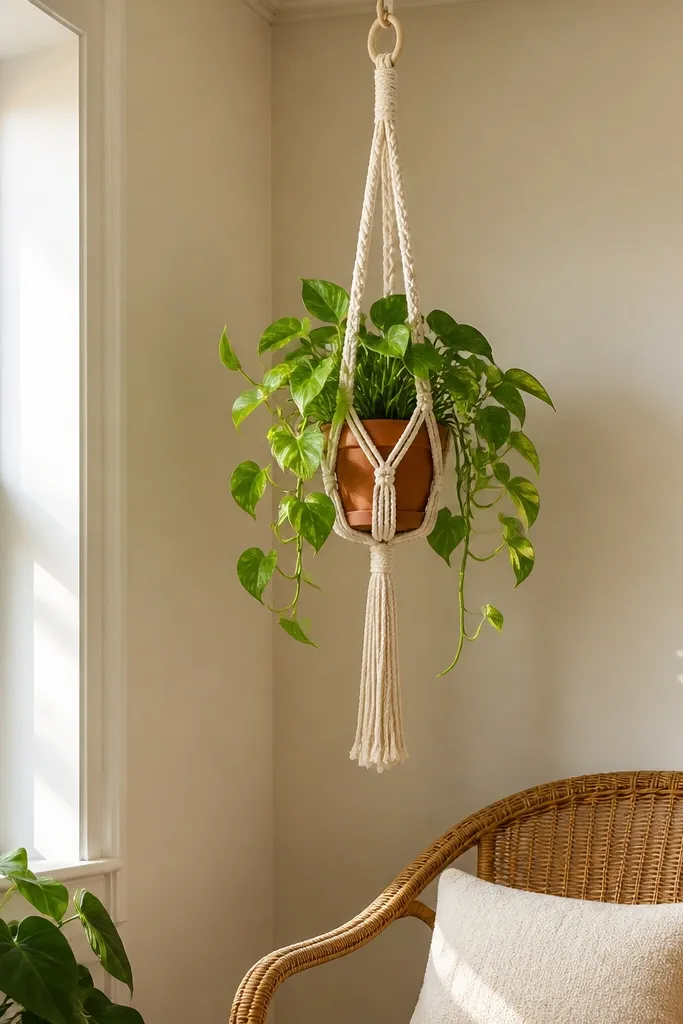
If you want modern crochet that still feels handmade, a plant hanger is the move. This one uses a twisted slip-stitch rope look so it mimics rope macrame without the messy knot bulk. It’s photogenic because the lines are vertical and the basket opening stays centered. Use a sturdy cotton or cotton-linen blend so it doesn’t stretch and slump over time.
Start by crocheting a long slip-stitch rope in a narrow width, keeping tension firm so it stays rope-like. Create a top loop or ring, then divide the rope into equal lengths for the hanger and braid or twist them into the vertical lines. Finish by adding a simple base or small pouch to hold the pot, then reinforce the bottom with a few extra rounds of single crochet.
Pro tipHang it on a scale while you work and check length — hanger proportions look wrong fast if one strand is shorter.
AvoidDon’t use a very stretchy yarn — it makes the hanger look uneven and droopy.
6. Crochet Market Tote with Wide Straps and Firm Stitch Body
Market totes look modern when the straps are wide and the base is flat. This tote uses a firmer stitch foundation so it stands without a liner, which is what makes it look intentional in photos. Keep the body simple and let the stitch texture do the visual work. Add a clean handle attachment so the straps don’t twist or sag.
Build the bottom first using a flat circle or rectangle that matches your tote size, then expand into a square body by increasing evenly. Work straight sides in a firm stitch like single crochet or thermal stitch for texture without stretch. Sew or crochet the wide straps by making long strap panels, then attach them with reinforcement stitches where the tote meets the handle.
Interline the strap area with a strip of fusible interfacing if you want the handles to stay crisp.
Avoid airy mesh bodies — they look casual and floppy, not modern.
7. Square Coasters with Contrast Edge and Tight Border
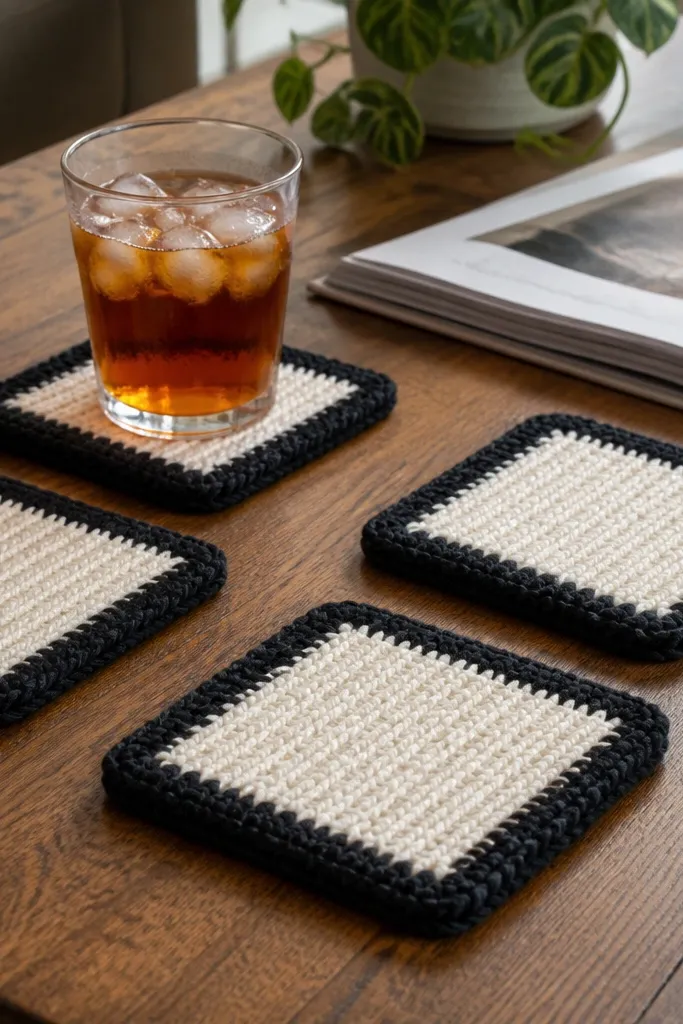
Coasters are the best “modern crochet ideas” because they’re small, fast, and they show off finishing skills. A tight border with a contrasting color makes the crochet look like a graphic tile. Use cotton yarn so the coasters handle heat and wipe clean. The square shape also reads modern compared to round doily styles.
Start with a small square base in a solid color, using increases to reach your target size (for example 4 inches square). Build up rounds in a consistent stitch and keep corners sharp. Finish each coaster with a contrast single crochet border, then add a final slip-stitch row to lock the edge flat.
Weave the ends as you go; coaster edges show every loose tail in close-up photos.
Don’t go too loose on the first round — it creates wavy edges that ruin the clean look.
8. Oversized Crochet Granny Halo Pillow Cover
This pillow cover looks modern because it’s graphic and big. Instead of many small squares, it uses a centered granny circle style with bold contrast rounds, so the pattern reads from across the room. Choose a pillow cover size like 18x18 inches so the crochet surface stays taut and doesn’t sag. It’s also an easy way to make your couch look “styled” without buying new decor.
Work a large granny circle until it reaches your pillow cover diameter, then stop and plan for overlap or a back panel. Add a thick border ring in a contrasting color so the circle has a finished frame. Sew the front to a simple back panel, leaving an opening or using a zipper line, and block the cover flat before assembly.
Test the fit with the pillow form before you sew — crochet stretches differently depending on yarn.
Avoid thin yarn — it makes the pillow cover look see-through and uneven.
9. Ripple Wall Hanging with Color Bands and Single-Row Fringe
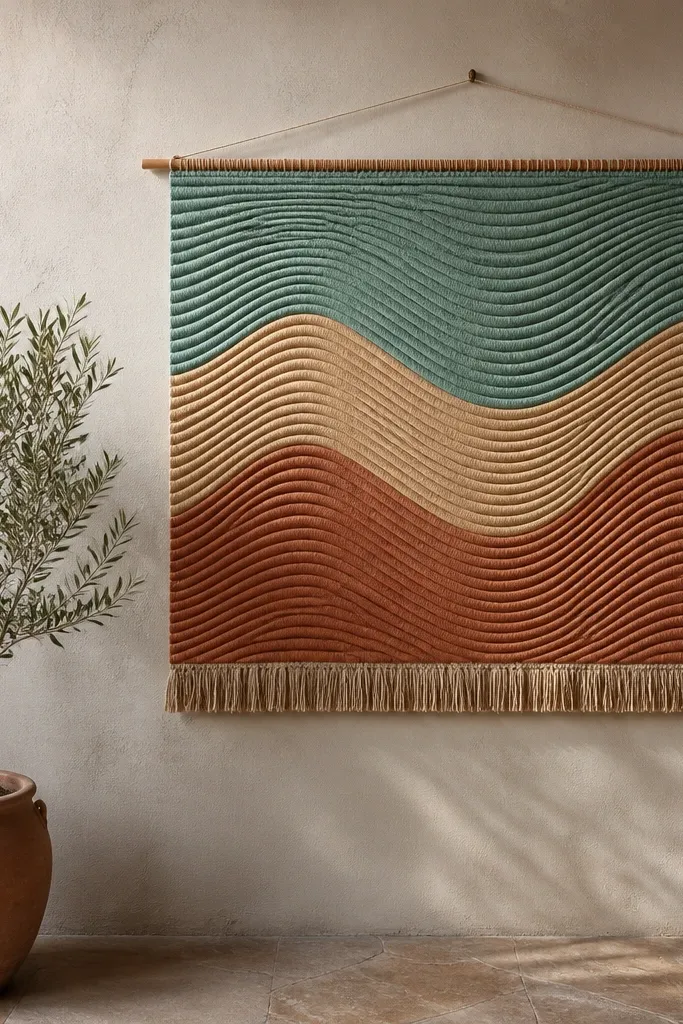
Ripple wall hangings look modern when they use clean horizontal color bands and minimal fringe. The wave shape adds movement, but the straight banding makes it feel graphic rather than boho. Keep fringe short and uniform so it doesn’t look messy on camera. This is a good project if you want something decorative but not complicated — the repeat is easy, and the look is bold.
Choose yarn weights that create visible ridges, then crochet the ripple pattern across a foundation chain that matches your desired width. Work stripes by switching colors at the same ripple row height each time for consistent band thickness. Finish with a single-row fringe by cutting equal lengths and attaching them only at the bottom edge, then block the hanging so waves lie flat.
Pin the top edge straight first; if the top wave creeps, the whole hanging looks crooked.
Don’t use long, thin fringe — it tangles and looks uneven fast.
10. Cropped Halter Top with Solid Panels and V-Neck Border
A halter top is the fastest way to make crochet look current and photo-ready. The trick is keeping the panels solid and adding a crisp V-neck border so it doesn’t look like swimwear cover-up crochet. Use a cotton or cotton-blend yarn and a tight stitch so it doesn’t stretch out when you move. This is a confidence piece — it shows shape, and that’s exactly what makes it aesthetic.
Start by crocheting two front solid panels and a back panel, using a foundation row that matches your bust and desired coverage. Add a V-neck border by working decreases and then tightening the edge with single crochet for a clean line. Build the straps separately and attach them with reinforced seams, then finish the neckline and armholes with a narrow border to prevent curling.
Try it on as you go by laying it flat and checking where the V hits — adjust before you finish the borders.
Avoid loose chain spaces at the neckline — they flare and make the V look sloppy.
11. Modern Crochet Earrings with Geometric Drop Motifs
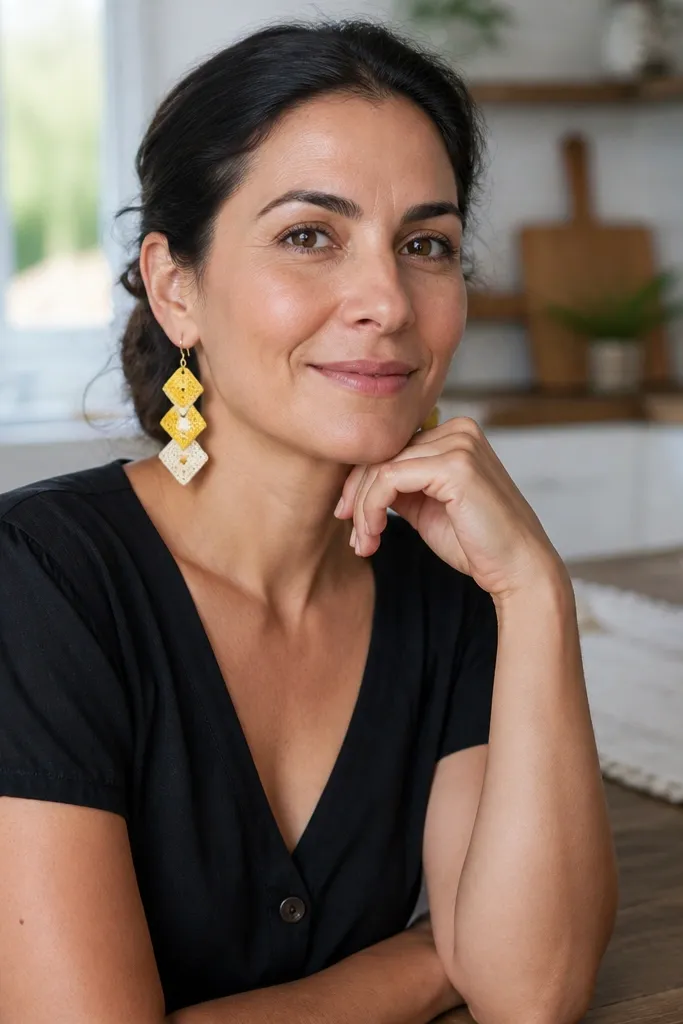
Earrings are small, but they’re one of the most photogenic crochet projects because every detail shows. This design uses geometric drop motifs with clean edges and a short length so the shape reads instantly. Use a fine cotton thread and a small hook for crisp lines. If you like modern jewelry looks, this gives you that graphic, minimal vibe without the weight of chunky yarn.
Crochet two identical motifs with a simple repeating shape, like a stacked diamond or fan block, in a contrasting thread color. Join the motif edges with a tight slip-stitch so there are no gaps. Attach to earring hooks using a jump ring and add a small stabilizer stitch at the top of the motif so it hangs straight.
Block the finished earrings gently so the shape stays symmetrical — don’t soak them.
Skip thick yarn and large hooks — they make earrings bulky and they lose the geometric look.
12. Square Bucket Bag with Stiff Base and Leather-Look Handles
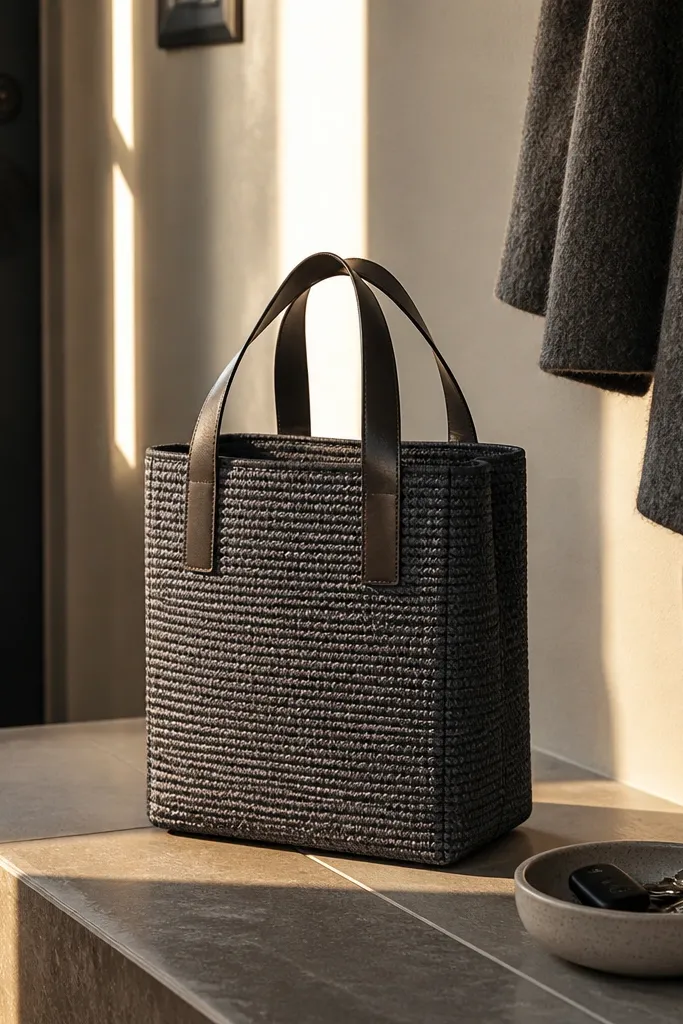
A square bucket bag looks modern because it has architecture. The stiff base keeps the form, and the simple body lets the stitch texture read like fabric. You’ll get better photos when the bag stands on its own and the opening stays even. Use a yarn that holds tension and consider adding a base insert so it doesn’t collapse.
Make a flat base (square or slightly rounded) by crocheting tight increases until it matches your bag footprint. Build the side walls up in straight rounds without big flare, then create a drawstring top by working a row that forms channels. Add a stiff base insert (like a cut plastic canvas or fabric interfacing panel), then attach handles with reinforced stitches and sew ends securely.
Pro tipUse plastic canvas under the base and sew through it — it keeps the bag shape for years.
AvoidDon’t rely on crochet alone for a bucket bag base — it will sag and look homemade.
13. Thermal Stitch Dishcloths in Solid Color Blocks
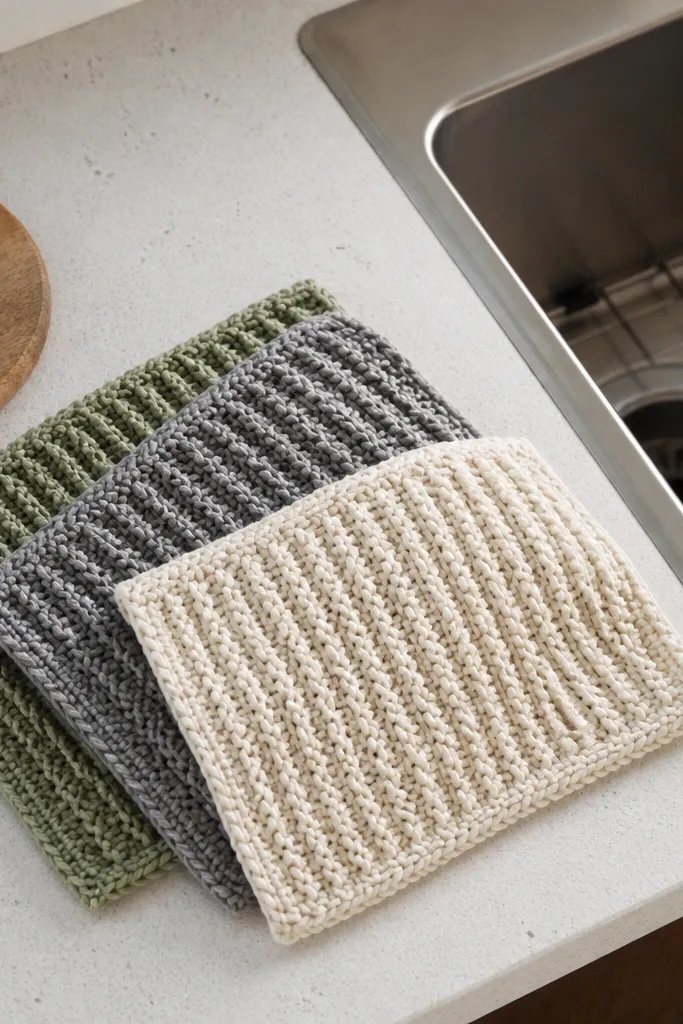
Dishcloths are practical, but the aesthetic part comes from texture and clean color blocking. Thermal stitch creates raised ridges that show up clearly on camera, and it dries well between uses. Use cotton yarn so the fabric stays functional and doesn’t stretch. Make a set in two colors and keep every piece the same size for a cohesive look on your sink.
Crochet a square starting with a small foundation chain, then work thermal stitch rows until you reach your target size (for example 10x10 inches). Switch colors at row boundaries to create solid blocks instead of speckled gradients. Finish with a single crochet border and block flat so the ridges line up.
Weigh your yarn skeins and plan the color switches; running out mid-block is what ruins the set look.
Avoid fuzzy yarn — it hides the thermal texture that makes these look modern.
14. Crescent Market Scarf with Ribbed Half-Half Stitch
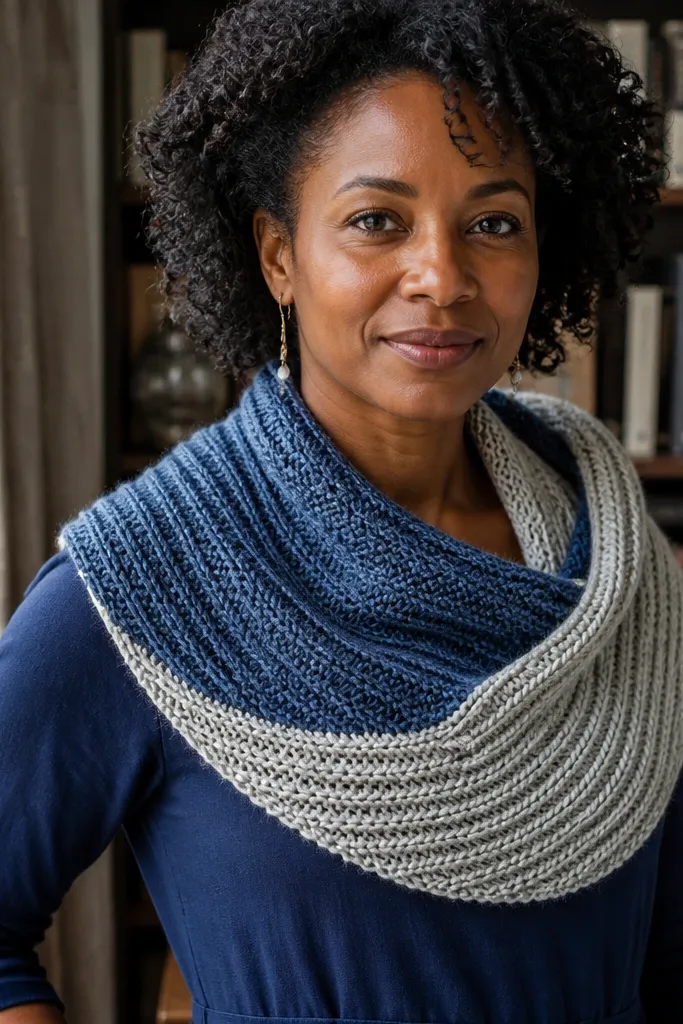
A crescent scarf looks modern because it’s shaped, not a long rectangle. The ribbed texture keeps it visually interesting without needing complicated patterns. Choose a yarn with good drape but enough body so the scarf holds its curve. This project also photographs well because it looks intentional when draped over a chair or styled on a hanger.
Start with a short chain and work increases on one side and decreases on the other to create the crescent curve. Use a rib-like stitch combo such as half double crochet with front post variation or a half-half look to create vertical texture. Continue until you hit the desired length, then finish with a narrow border and block to set the curve.
Block on a curved surface like a rolled towel to keep the crescent shape from flattening.
Don’t skip edge finishing — unworked edges curl and kill the clean modern look.
15. Mod Crochet Coaster Hexagon Set with Matte Borders
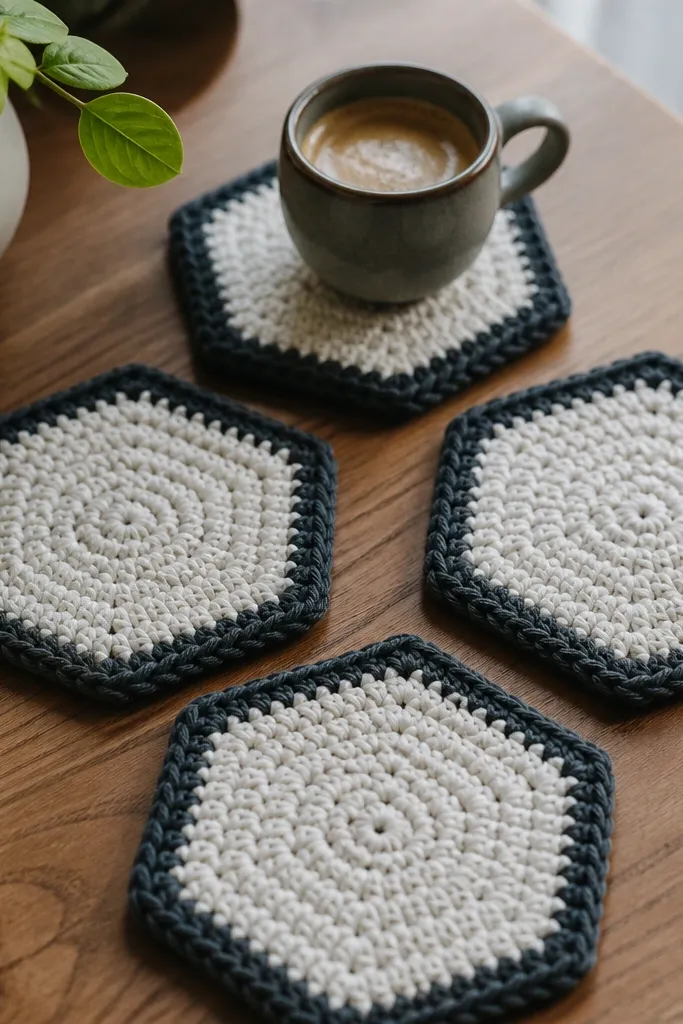
Hexagon coasters look modern because they break the round/square boredom without going full doily. This set uses a tight stitch so the hex edges are sharp, and it finishes with a matte dark border that frames the shape. Use a medium cotton yarn so the coasters feel substantial rather than flimsy. Photograph them as a set on a light tray for that clean, design-y vibe.
Start with a magic ring and crochet rounds of hexagon increases until each coaster reaches your size (around 4.5 inches across). Keep the stitch count consistent each round so corners stay equal. Add a border row in a darker color using single crochet, then finish with a slip-stitch edge to lock everything in.
Use the same hook for all coasters and don’t stretch them while measuring; size drift makes sets look random.
Don’t use a highly variegated yarn — it fights the crisp hex geometry.
16. Crochet Bucket Hat with Minimal Eyelet Bands
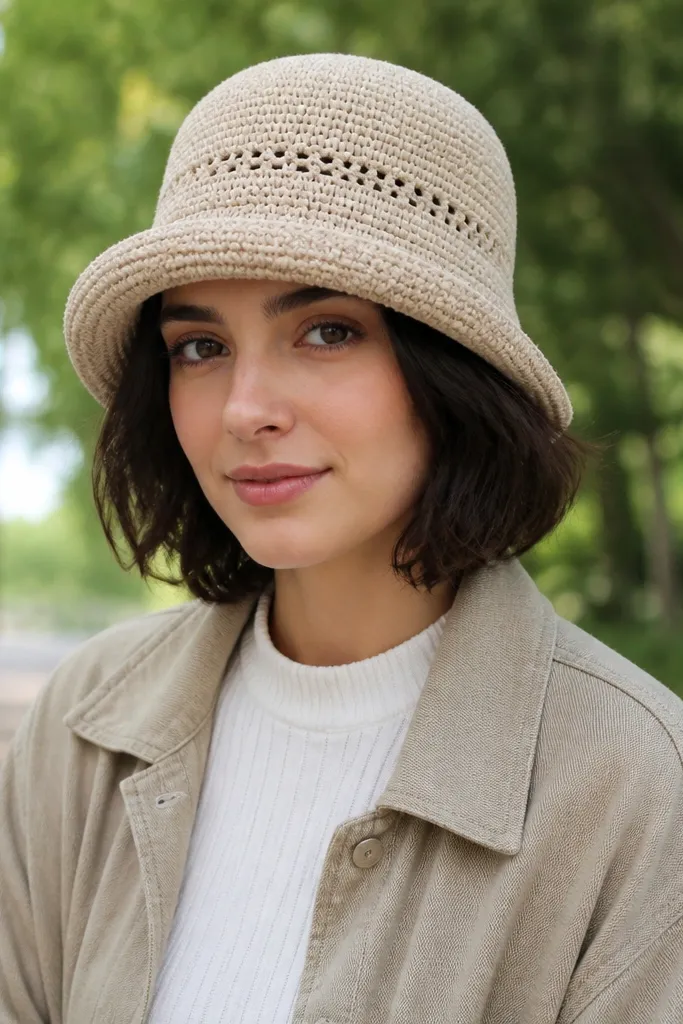
Bucket hats read modern when the brim is structured and the pattern stays minimal. A single eyelet band adds interest without turning it into a novelty piece. Use cotton or cotton-blend yarn so the brim holds shape and doesn’t collapse. This is a beginner-to-intermediate project because it builds in rounds and the finishing is the main work.
Work the crown in increasing rounds until you reach the correct diameter, then switch to a pattern that creates the eyelet band at a specific height. Continue straight to form the sides, then crochet the brim by increasing outward evenly. Block the brim flat and add a final border row for a clean edge.
If your brim curls up, add a second brim border row — it stiffens the edge.
Avoid too-thin yarn — wide brim shapes need body to look crisp.
17. Mandala-Style Wall Pocket with Two-Tone Panels
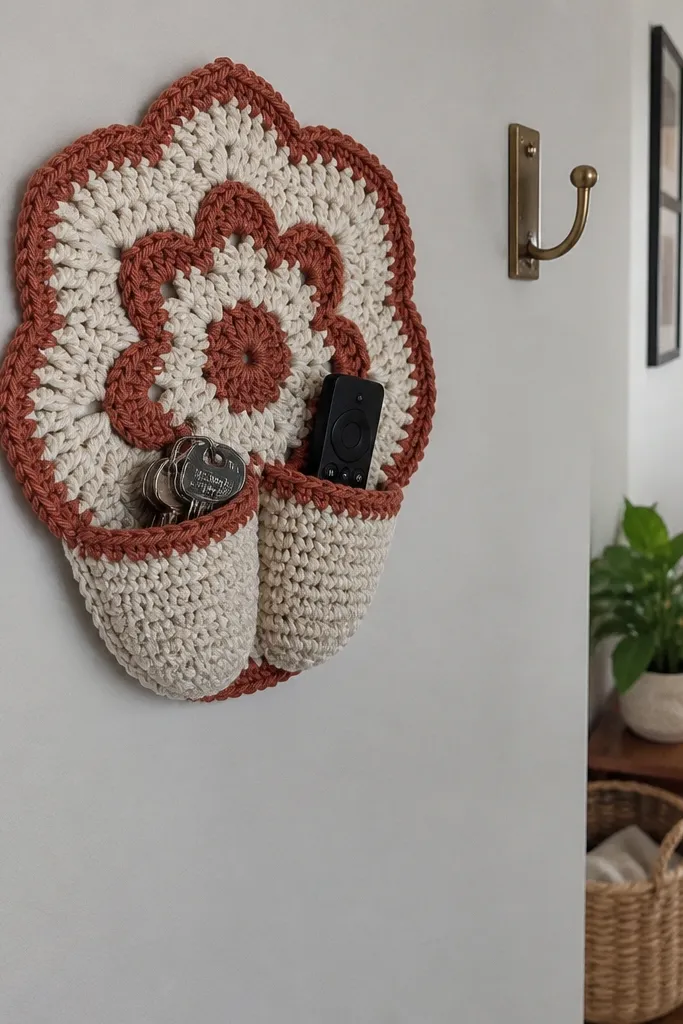
This wall pocket looks modern because it’s a mandala shape without the busy colors. Two-tone panels keep it graphic, and flat pockets give it function — you can hold remotes, keys, or small plants. The circular structure reads well in photos from a slight angle. Use a medium cotton yarn so it lays flat instead of puffing.
Crochet a circular base using a controlled increase pattern, then build the pocket compartments by shaping with short rows or by stitching panel edges into sections. Add a contrasting outline around the circle and around each pocket opening with single crochet. Sew a small hanging loop to the back, then block flat so the circle stays centered.
Mark pocket dividers with stitch markers and measure from the center; symmetry matters a lot here.
Don’t use three colors inside the mandala — it turns into visual noise fast.
18. Oversized Crochet Scrunchie with Braided Cable Look
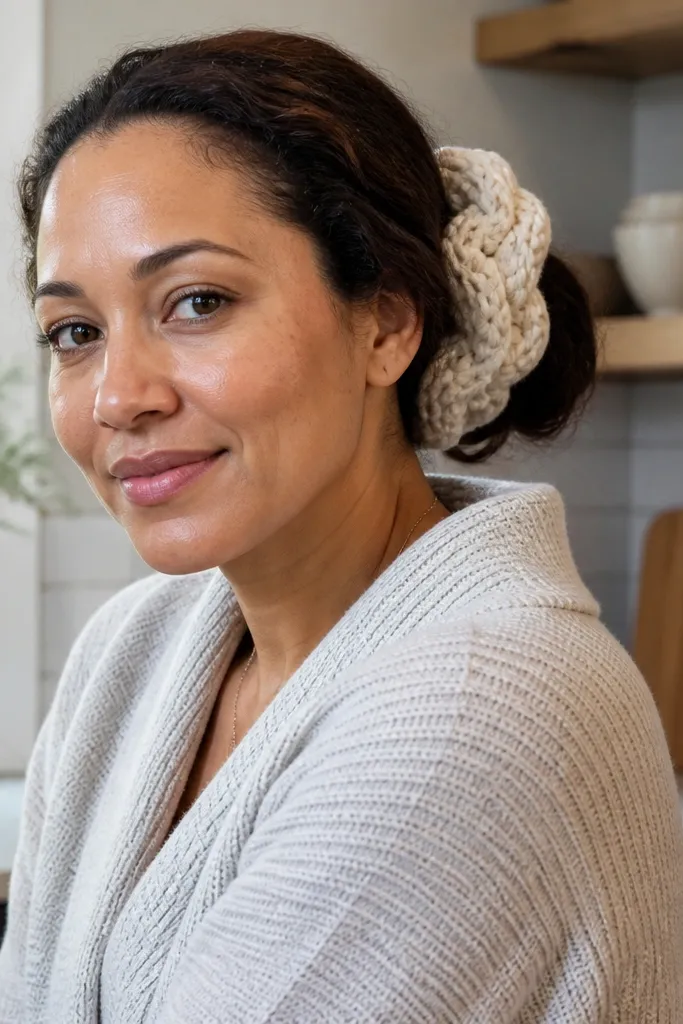
Hair accessories are a shortcut to “aesthetic” because the shape is small and the texture is visible. This scrunchie uses a braided cable look stitch pattern so the front reads like a woven rope. Make it oversized for that modern, chunky silhouette that looks good in outfit photos. Use a yarn that stretches slightly but springs back so the scrunchie holds hair without loosening.
Create a braided-looking panel by alternating front post stitches in a repeat that forms the cable ridges. Crochet a long tube panel, then fold and stitch around an elastic hair band core. Add a second row of crochet over the seam for a clean finish, then weave ends inside the tube.
Use a slightly thicker elastic than you think you need; crochet stretches around it and you want a firm hold.
Avoid super slippery yarn — the elastic can shift and the braid look gets uneven.
19. Crochet Phone Stand with Fold-Over Base and Clean Edge
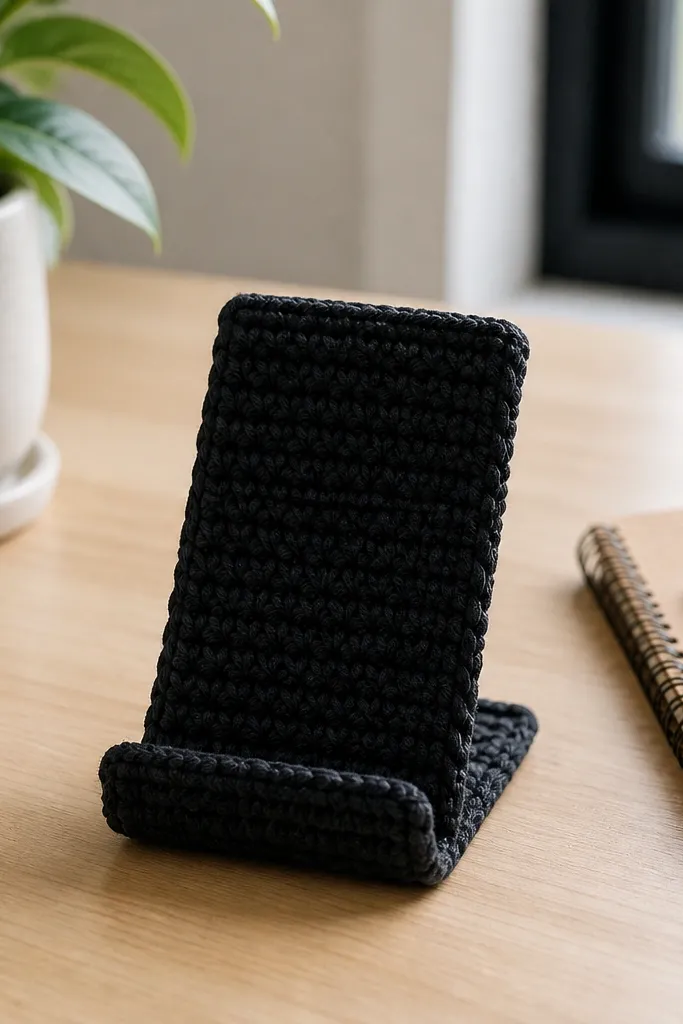
A phone stand is small, but it’s a real home project and it photographs well on desks. The fold-over base creates a modern, minimal silhouette and helps the phone sit at a stable angle. Use a thicker cotton or cotton-blend yarn for structure. This project also teaches a useful skill: building a functional “angle” with shaping and tight edges.
Crochet a base rectangle with a tight stitch to keep it rigid, then fold it at the desired viewing angle and stitch the fold in place. Create a front support lip by working short rows or a separate strip and attaching it along the fold line. Finish the top edge with single crochet so it doesn’t curl.
Test the angle by placing your phone while you’re still stitching — adjust before you weave ends.
Don’t use an open mesh — it won’t support the phone’s weight.
20. Crochet Tote Pouch Organizer with Zipper Edge
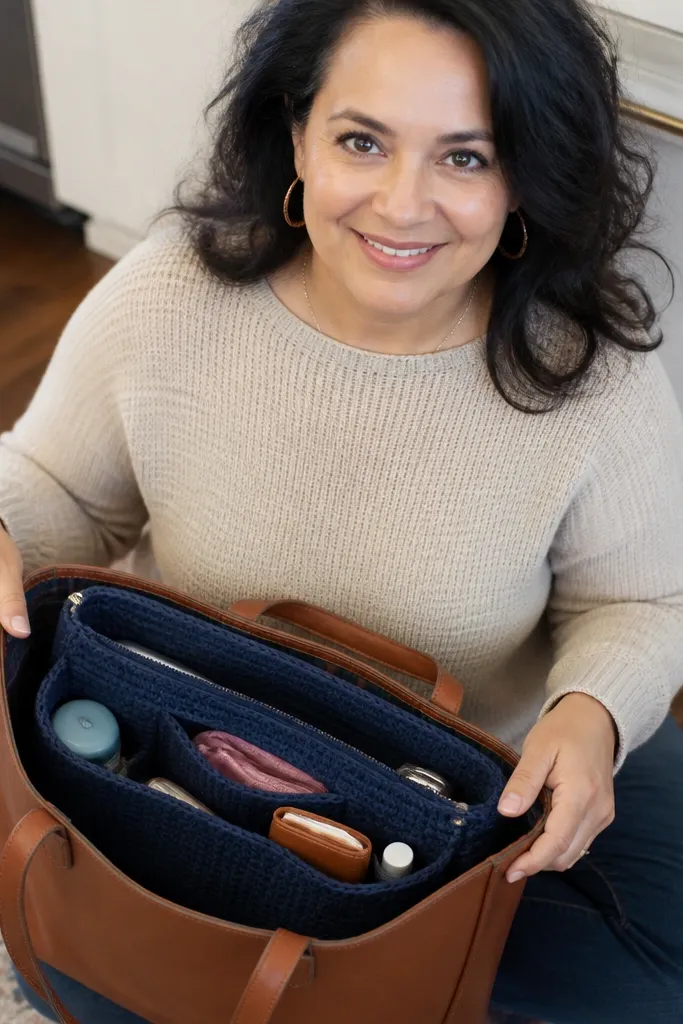
This is one of the most useful modern crochet ideas because it makes your bag look neat. The zipper edge keeps the top line crisp and prevents the pouch from flopping open. Stiff sides make it look tailored, not like a soft sack. Use a medium cotton yarn and a zipper that matches the pouch width so it stays clean on camera and in daily use.
Crochet two identical panels sized to your zipper length plus seam allowance, using a tight stitch for structure. Insert a stiff interfacing layer or cut plastic canvas into each panel to keep sides straight. Sew the zipper between panels, then crochet a border around the top to hide raw edges and finish the bottom with a tight single crochet hem.
Pro tipPress your interfacing flat before you insert it; lumps show through crochet.
AvoidSkip the zipper border — raw zipper edges ruin the modern, finished look.
21. Crisp Crochet Market Bag with Square Stitch Texture
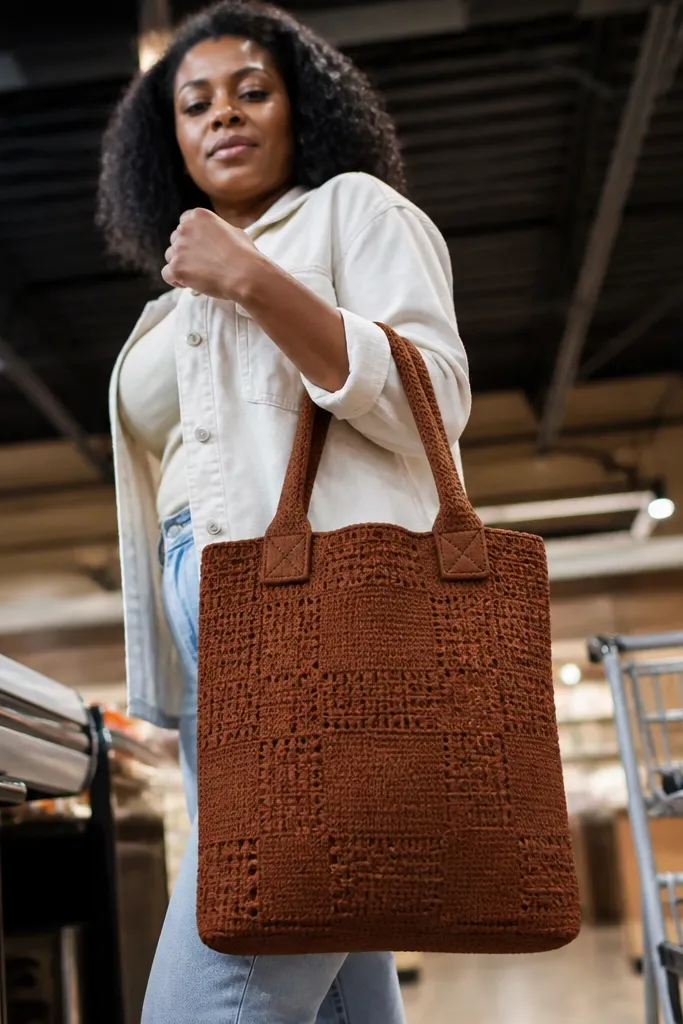
Square stitch texture reads modern because it looks like fabric, not lace. This market bag uses a repeat that creates small check-like blocks, which show up clearly in photos. Keep the yarn solid and the strap attachments reinforced so the bag looks sturdy. It’s also a good project if you want something bigger than a coaster but less complex than a cardigan.
Start with a flat base using increases to form a rectangle or square, then work straight rounds up in the square stitch pattern. Crochet straps as separate pieces so they lie straight, then attach them using reinforcement stitches in the same direction on both sides. Finish the top edge with a single crochet border and a final row that tightens the opening.
Pro tipIf your bag twists, block it on a flat surface with a heavy book while drying.
AvoidDon’t make straps out of the same thin yarn as the body — they’ll stretch and look off.
22. Modern Crochet Rug Mat with Non-Slip Backing
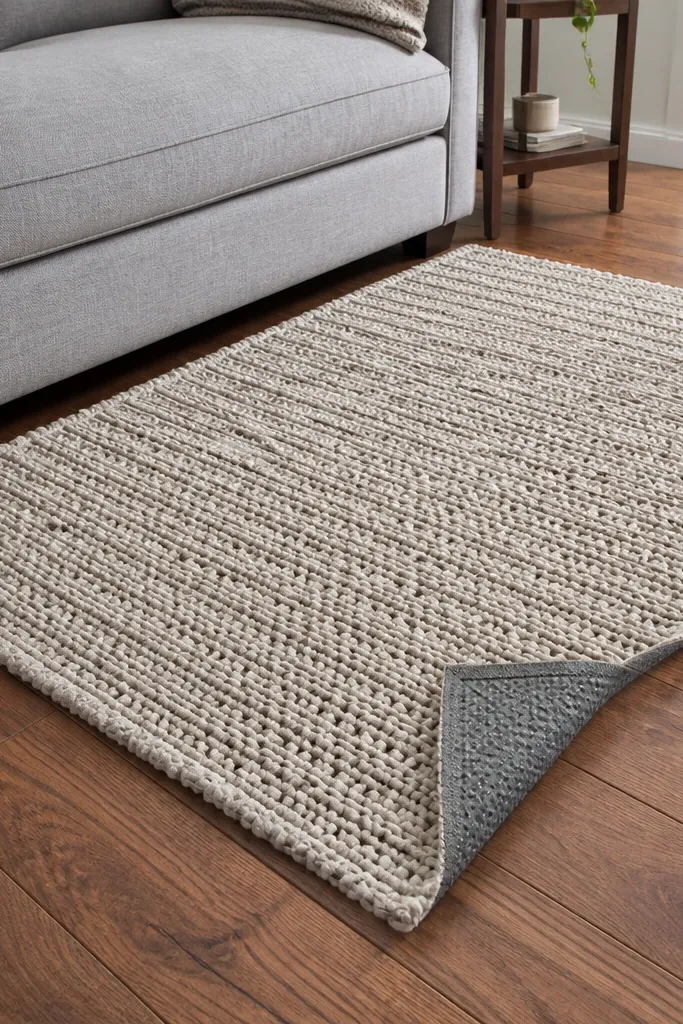
A crochet rug looks modern when it’s low profile and has traction. This idea uses a dense stitch that creates texture without big gaps, then adds a non-slip backing so it’s safe on floors. Choose a neutral palette so the rug reads like a modern interior piece. It’s an intermediate project because you’re working with thicker yarn and you need to manage weight and even tension.
Use chunky yarn and a large hook to crochet dense rows in a rectangle, aiming for a thickness that doesn’t curl at the edges. When you finish, trim the rug to a clean rectangle and attach a non-slip rug pad to the underside using fabric glue and a few stitches. Add a border around the perimeter so the edges look finished and the pad doesn’t peek out.
Work on a flat surface and check level each row; thick yarn hides mistakes until the end.
Avoid slippery yarn or loose stitches — it makes the rug look flat and it won’t stay put.
23. Crochet Tote Keychain Charm with Tiny Tassels
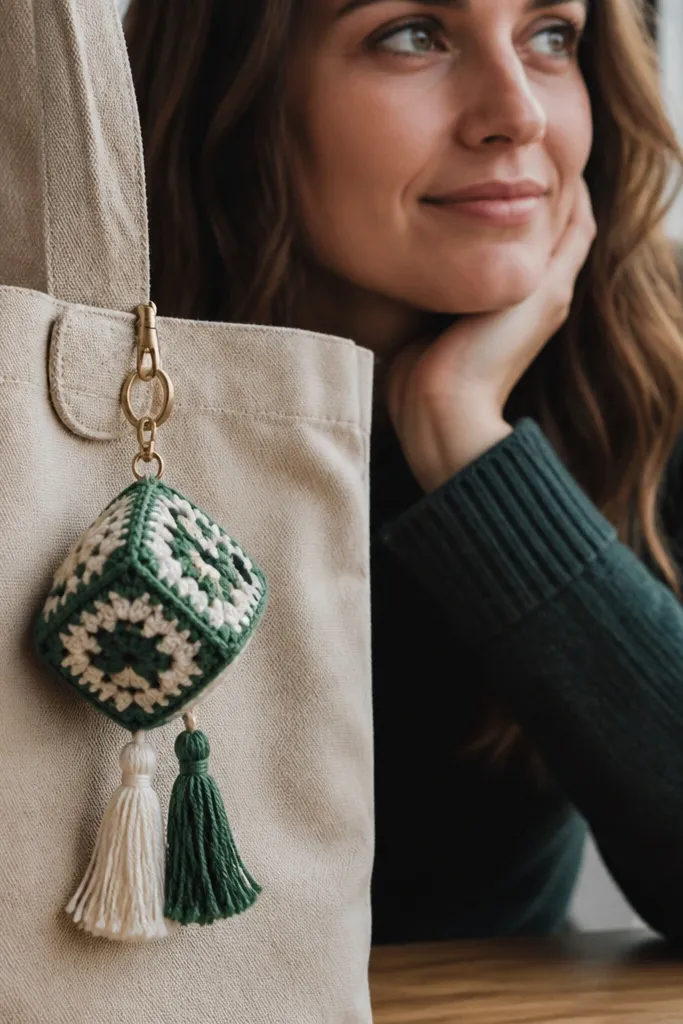
Charm keychains are small, but they look great in lifestyle photos because they add color and texture at the bag edge. This one keeps the crochet body compact and uses short tassels that don’t tangle. Two-tone color makes the shape read instantly. Use a small hook and thin cotton yarn so the charm looks neat rather than bulky.
Crochet a small geometric body like a mini diamond or rounded square, then attach a split ring at the top with a reinforced stitch. Add tassels by cutting equal lengths of yarn and attaching them through the bottom loops. Finish by tying off and weaving ends tightly so the charm looks smooth and doesn’t shed threads.
Burnish the tassel ends with a quick trim after attaching; uneven tassels scream “homemade messy.”
Don’t use long tassels — they snag on zippers and make the charm look chaotic.
24. Crochet Bucket Basket with Lid Option for Storage
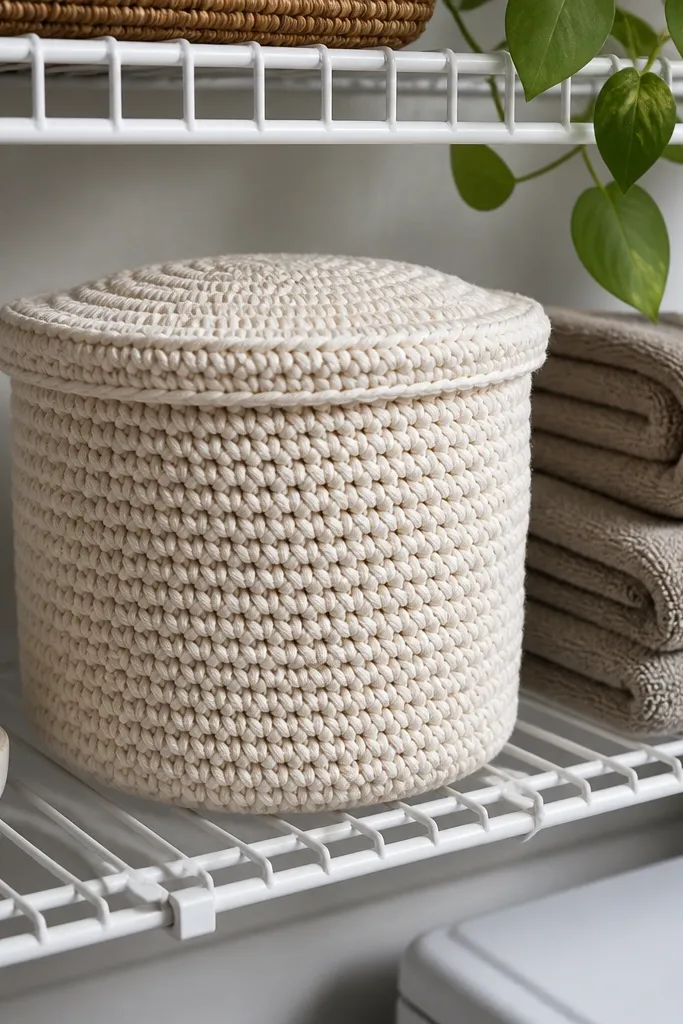
Storage baskets look modern when they have a defined rim and straight sides. This crochet bucket basket is designed to hold clutter without looking like a yarn bowl. Use a sturdy base stitch and thick cord-like yarn so the walls stand. The optional lid makes it feel more like home decor than a craft item.
Start with a flat circle base, then increase into a bucket shape by controlling how fast you widen. Crochet straight sides until you reach the height you want, then add a rim using a tighter stitch and a contrasting color for a frame effect. For the lid, crochet a matching circle top and add a small handle loop, then attach with a few stitches only if you want it removable.
Weave in ends with a tapestry needle before you add the rim — it’s much easier at the base stage.
Don’t use thin yarn for a basket — it collapses and the rim won’t look crisp.
25. Crochet Mesh Sunhat with Structured Brim and Pinline Edge
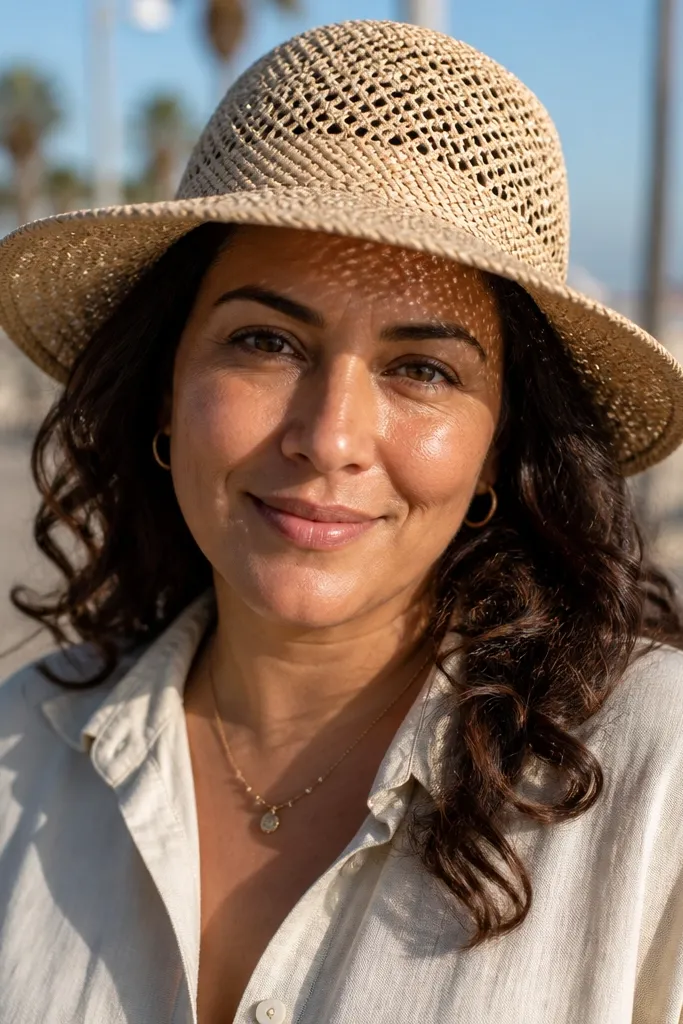
A mesh sunhat can look modern if the brim has structure and the edge is finished tightly. The mesh gives breathability and a light look, while the structured brim makes it feel intentional. Use a cotton yarn or cotton-linen blend so the hat keeps its shape in humidity. This is a photogenic summer piece because it creates a soft shadow pattern that reads well in sunlight.
Crochet the crown in rounds until it reaches the head size, then switch to mesh rows for the main body. For the brim, work increasing rounds outwards and keep stitch size consistent so the brim doesn’t ripple. Finish the brim edge with a tight single crochet row and optionally a second slip-stitch row, then block it flat over a hat form or bowl.
Pro tipBlock over a form and let it fully dry before you remove it; brim shape is the whole look here.
AvoidSkip loose edging at the brim — it curls and ruins the modern silhouette.



