
1. Zippered Granny Square Pouch in Color-Blocked Panels
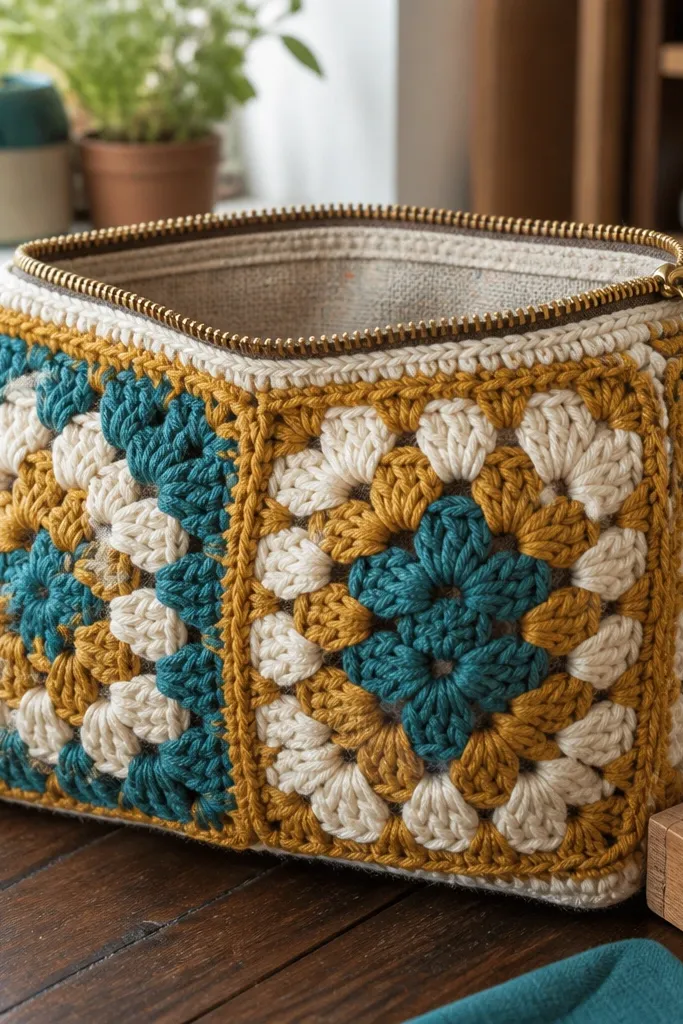
A zipper pouch makes your crochet look instantly “shop-bought” because the closure creates a clean edge and a clear shape. Color-blocking with granny square panels gives you that patchwork vibe without needing complicated shaping. Use a sturdy yarn like cotton so the pouch doesn’t slump when you set it down. This is a cute accessory for makeup, cable organizers, or even as a tiny gift bag for someone’s birthday. It takes some patience, but the finished look is worth it because the zipper line and panel borders photograph well.
Start by making 6 to 10 small granny squares (about 3 to 4 inches each) in 3 colors, then join them into two side panels sized to your zipper length. Lay your squares flat, measure the width, and crochet a simple border strip around each panel so the edges don’t ripple. Sew one panel to each zipper side, right sides facing, then line up the top edges and stitch in place. Add a lining if you want extra structure, or at least crochet a single-thick top band to cover the zipper tape. Finally, close the bottom seam with whip stitch or slip stitches so the pouch sits flat.
Pro tipChoose a zipper that matches your yarn color and keep the crochet border narrow so it doesn’t bunch under the zipper.
AvoidDon’t skip measuring the panel width against the zipper — a pouch that’s too tight looks warped.
2. Braided Crochet Phone Strap with Slider Bead
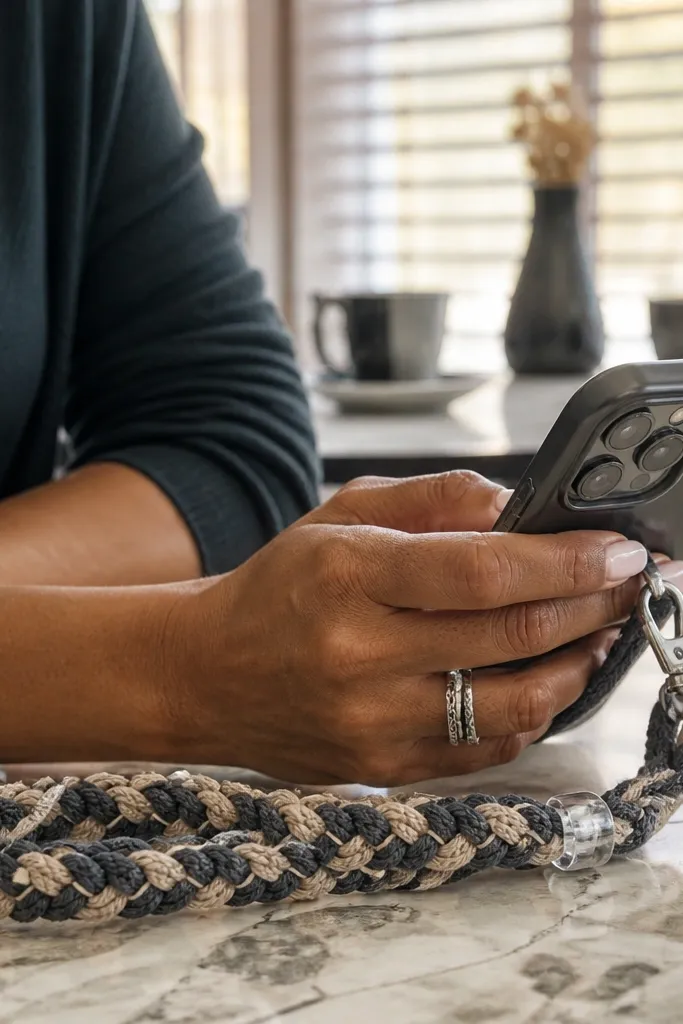
A phone strap is one of the easiest ways to make crochet look modern and intentional. The braided texture reads like a store-bought accessory, and the slider bead gives you a little “adjustable” detail that makes it feel engineered. This project also uses less yarn than you’d expect, which is great when you want something cute without committing to a big garment. It works with any bag style because it hangs neatly and doesn’t flop. If you want an accessory that looks good on a desk and in outfit photos, this one does the job.
Start with a slip knot and crochet a tight base cord using a smaller hook than the yarn label suggests. Make a long strip, then braid three narrow crochet cords together like you’re braiding hair; secure ends with stitches so it doesn’t loosen. Attach the strap hardware: sew two short fabric tabs or crochet loops to each end, then connect to a phone lanyard clip or keyring. Add a slider bead by threading it onto the cord before you knot and reinforce the end. Finish with a short knot cover to stop fraying and keep it comfortable against your neck.
Pro tipUse a hook one size smaller for the braid — it keeps the braid definition crisp.
AvoidDon’t make the cord too loose; floppy braids look messy fast.
3. Puff Stitch Ear Warmers with Buttoned Back
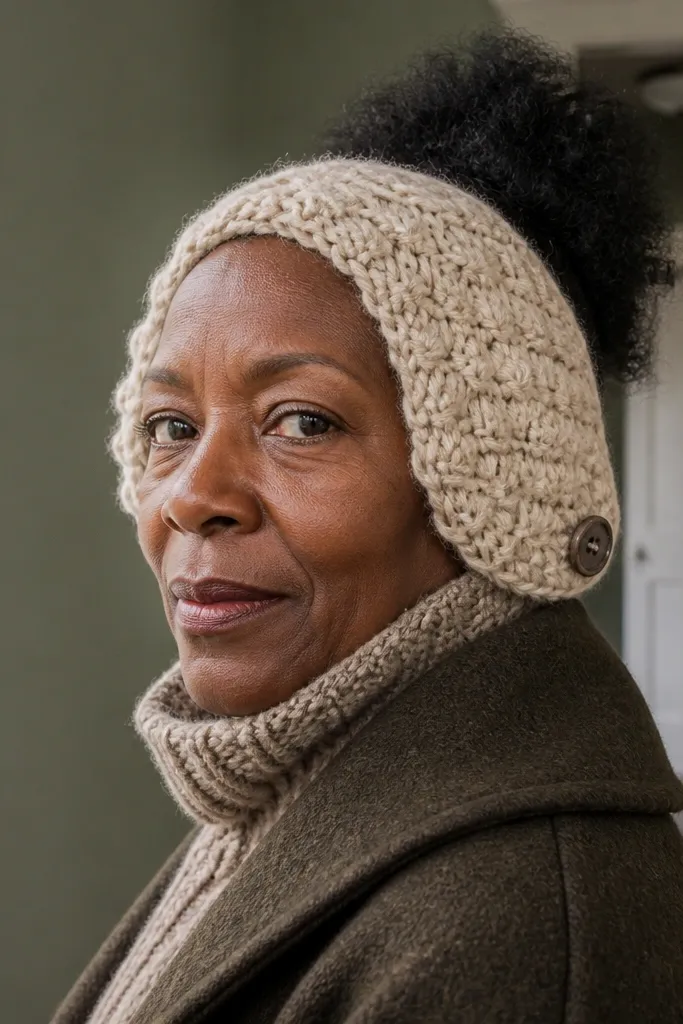
Ear warmers are cute because they frame your face and add texture that shows up in photos even when you’re wearing a beanie. Puff stitches give a bumpy, cozy look that reads “handmade” in a good way, not messy. Buttoned back closure means you can size it without stretching — it also makes it easy to put on over hair. This is a practical accessory for chilly walks, but it still looks styled because the stitch pattern is bold. It’s also faster than you think: you’re working a strip, not a full hat.
Measure around your head where the band will sit, then crochet a foundation chain that matches that length minus 1 inch for overlap. Work puff stitches in rows until the band covers the ears comfortably, then add a flat border strip along the top edge for a clean finish. Make two small button loops at one end and sew a button at the overlap point so the band stays closed. Add a bottom edge seam or slip-stitch finish so the band doesn’t curl. Weave in ends and block lightly by pinning to a flat curve.
Pro tipUse a smooth button shank (not too thick) so it doesn’t create a bulky bump under your hair.
AvoidDon’t skip the border strip — puff stitches curl if the edges are left raw.
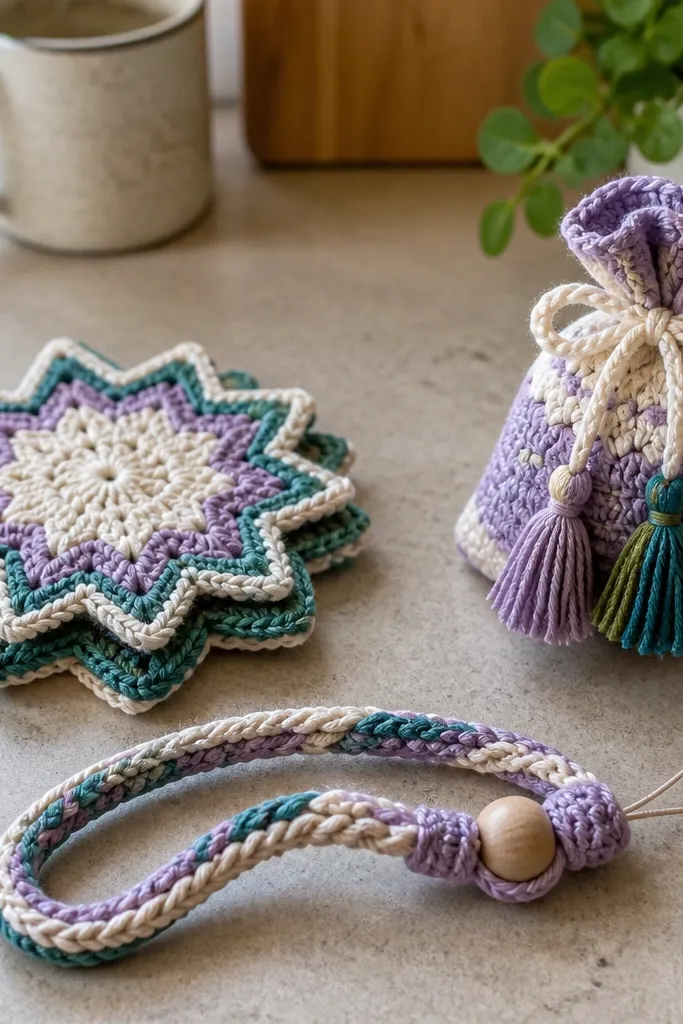
4. Starburst Coasters in 8-Point Motifs
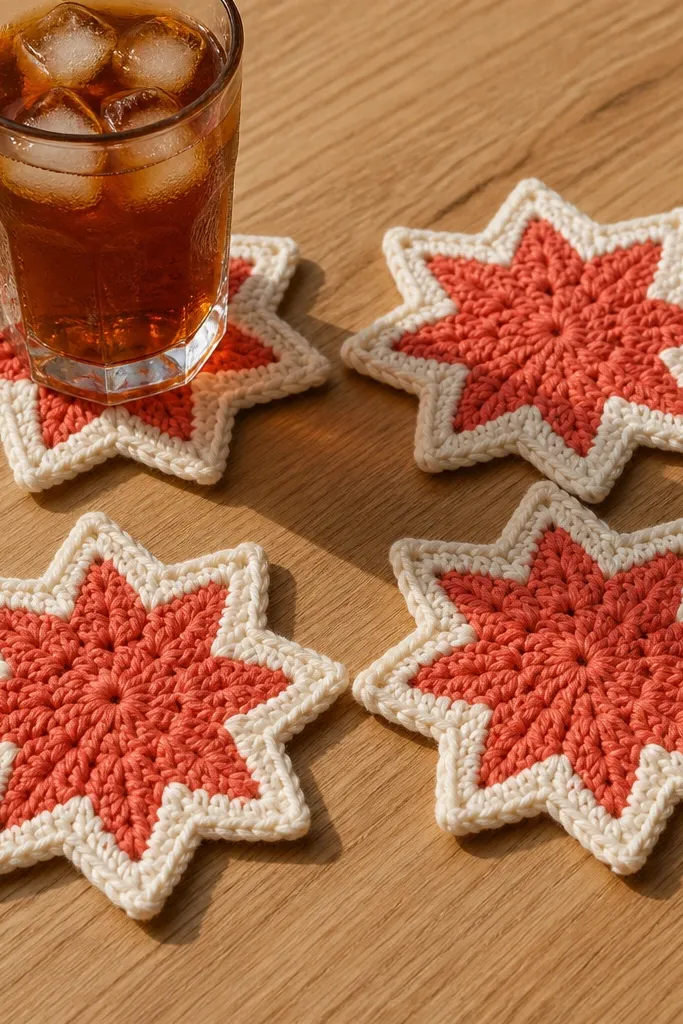
Coasters are small, quick, and extremely photogenic. The trick for cute is to use an 8-point starburst motif that creates a crisp silhouette instead of a flat blob. Starburst coasters also protect surfaces, which makes them feel useful, not decorative-only. Two-tone yarn makes the points pop and gives you that “cute set on a coffee table” look. This is an easy entry project if you want visual impact without learning complicated shaping.
Start with a magic ring and crochet 8 evenly spaced points using double crochet and a small cluster at each point. Increase each point outward in a consistent pattern until the coaster reaches about 4 inches across. Join rounds cleanly with slip stitches, then finish with a tight single crochet border for stability. Make 4 to 6 coasters in matching colorways, alternating light and dark for a set that looks intentional. Steam lightly or block flat using a towel to keep points sharp.
Pro tipUse worsted cotton and a smaller hook than recommended for a coaster that stays flat under hot mugs.
AvoidDon’t use a super-loose border; wavy edges look unfinished.
5. Macramé-Style Crochet Plant Hanger with Thick Cord Look
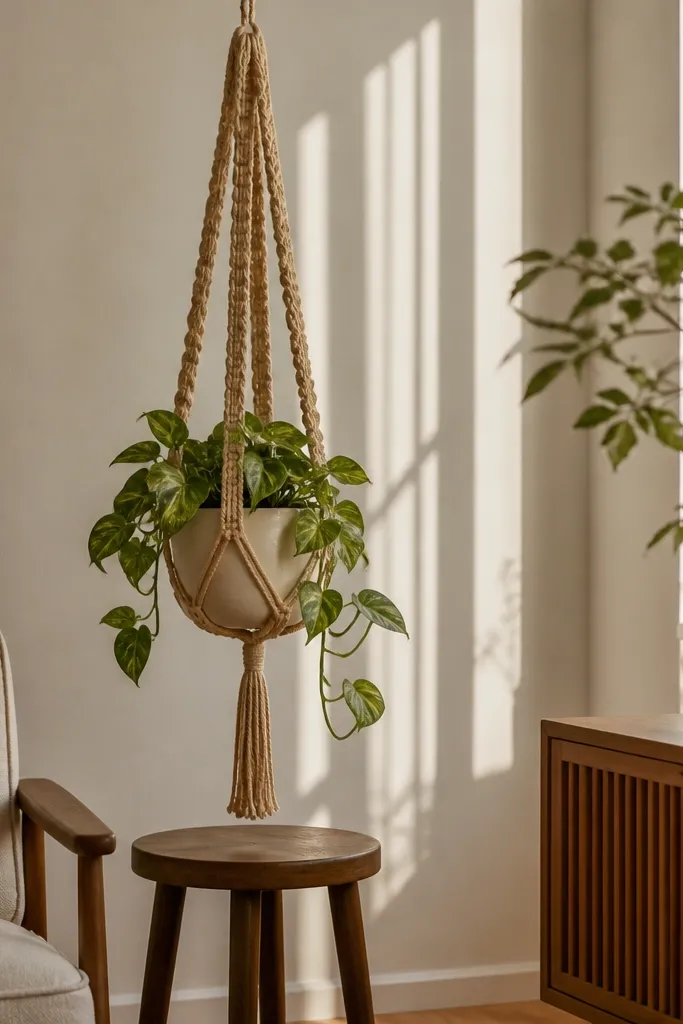
A plant hanger instantly upgrades your space and looks good even in simple corners. The key aesthetic is the thick cord look, which you get by crocheting with chunky yarn and working the rope-like stitch. This accessory is also functional — it keeps small plants off surfaces and adds height. It’s not delicate; with the right yarn and stitch tension, it holds up well for indoor plants. If your goal is cute decor with crochet, this is one of the most “styled” options.
Choose chunky cotton or a cotton-acrylic blend for grip and durability. Crochet a long rope cord using a tight stitch pattern like single crochet in the back loop only, keeping tension firm. Create the hanger length by folding the cord into three equal sections, then crochet a wrap section near the top to form the loop. Braid or twist the three strands together if you want a thicker look, then secure with tight slip stitches. Add a simple cradle by crocheting a small round base or using a fabric strap so the pot sits level.
Before finishing, pull the cord taut and measure the hanger from hook to cradle so the pot sits at the height you want.
Don’t use thin yarn; it makes the rope look stringy and it feels flimsy.
6. Chunky Crochet Bookmark with Tassel Fringe
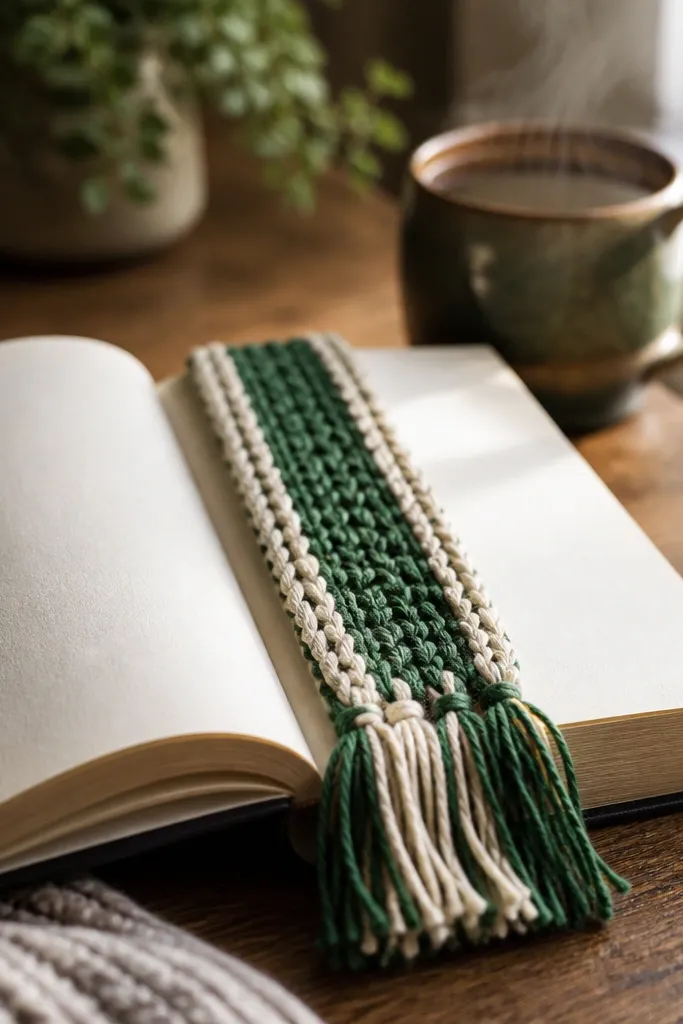
Bookmarks are cute because they sit in the book and look like an intentional accessory, not an afterthought. Chunky yarn gives you a bold, cozy look and makes the bookmark easy to grab. Tassel fringe adds movement, which reads great in photos and on desks. This is also a perfect stash project because you can use leftover skeins in stripes. It’s quick enough for a weekend and sturdy enough to survive daily use.
Chain a length about 2 inches wide, then crochet rows in half double crochet until you reach the desired height (around 6 to 7 inches). Add a stripe pattern by switching colors every 2 to 3 rows so the look stays graphic. Finish the top with a row of single crochet to prevent stretching. For the tassel, cut 10 to 14 strands about 6 inches long, fold in half, and attach through the top edge with a crochet hook. Trim tassel ends so they hang evenly.
Pro tipAdd a thin stitch row at the bottom edge so the bookmark doesn’t curl after a few uses.
AvoidDon’t make the tassel too heavy; thick knots can bend the bookmark.
7. Bobbled Keychain with Split-Ring Attachment
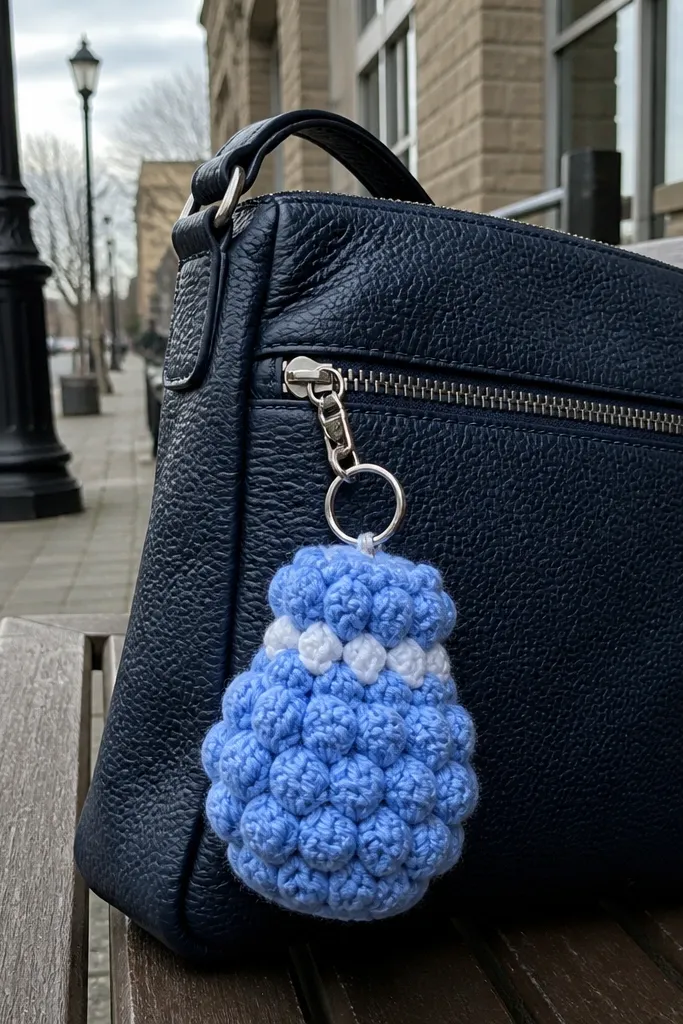
Keychains are small enough to finish fast, but they still need to be cute and durable. Bobble stitches create a dense, textured surface that looks playful and catches light. A split ring keeps it tidy and lets the keychain swing without twisting the crochet. This accessory is perfect for bags, backpacks, and as a gift when you want something handmade that doesn’t take forever. It’s also a great way to use mini yarn scraps.
Make a small base circle: start with a magic ring, then crochet 6 single crochets, increasing to form a circle about 2.5 inches wide. Work bobble stitches in the next rounds so the surface stays thick, then finish with a flat border round. Sew or crochet a small loop at the top for attachment. Use a split ring through the loop and reinforce with a few stitches so it won’t tear. Weave ends tightly and trim close.
Pro tipUse a tight stitch gauge and a smaller hook so the bobbles stay firm instead of squishy.
AvoidDon’t leave the bobble round loose — it makes the keychain sag.
8. Sunburst Mandala Coaster Set with Color Gradients
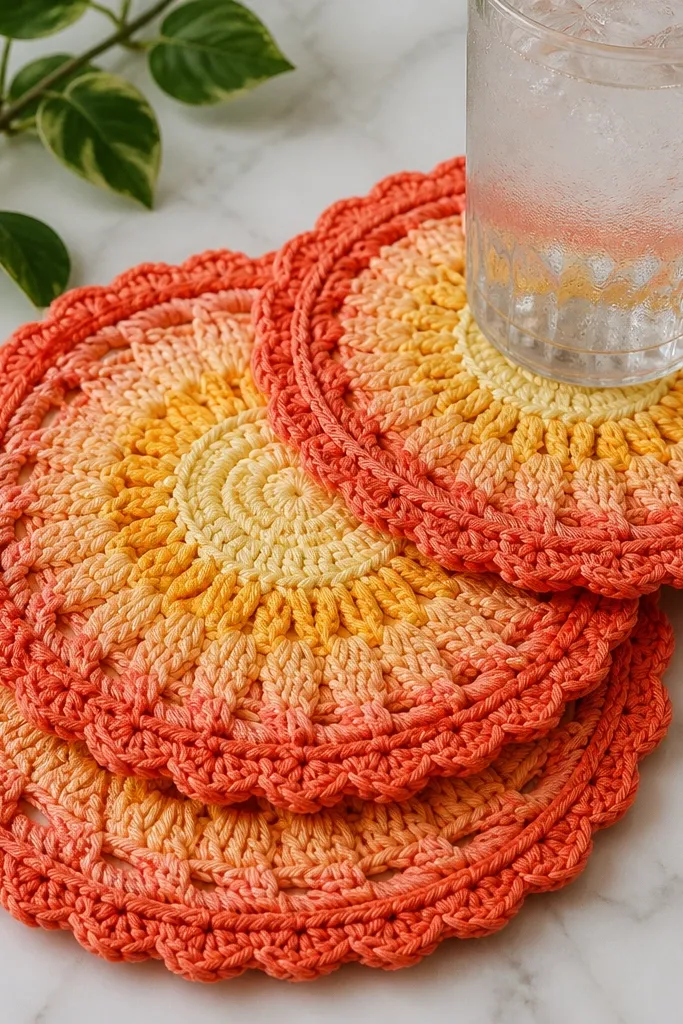
If you want something that looks like it belongs in a boutique gift shop, go for a mandala-style coaster. The sunburst pattern creates layered rings that are instantly readable, and gradients make the colors feel intentional instead of random. This accessory is a visual anchor on a table because it frames drinks with bold shape. It’s also practical: the thicker rounds create some cushioning. You’ll feel the difference compared to a thin doily — these look cute and hold up better.
Start with a magic ring and crochet tight rounds of double crochet clusters that radiate outward, increasing at consistent intervals. Build ring layers with alternating stitch heights so the sunburst lines stay sharp. Switch colors every 1 to 2 rounds for a smooth gradient effect. Finish with a final round of single crochet or crab stitch for a firm edge. Block flat and let it dry fully so the rings hold their shape.
Pro tipPick a cotton yarn and use a smaller hook than the label for a coaster that stays crisp.
AvoidDon’t use slippery yarn for mandalas; it blurs the ring definition.
9. Crochet Tote Strap Covers with Buttoned Tabs
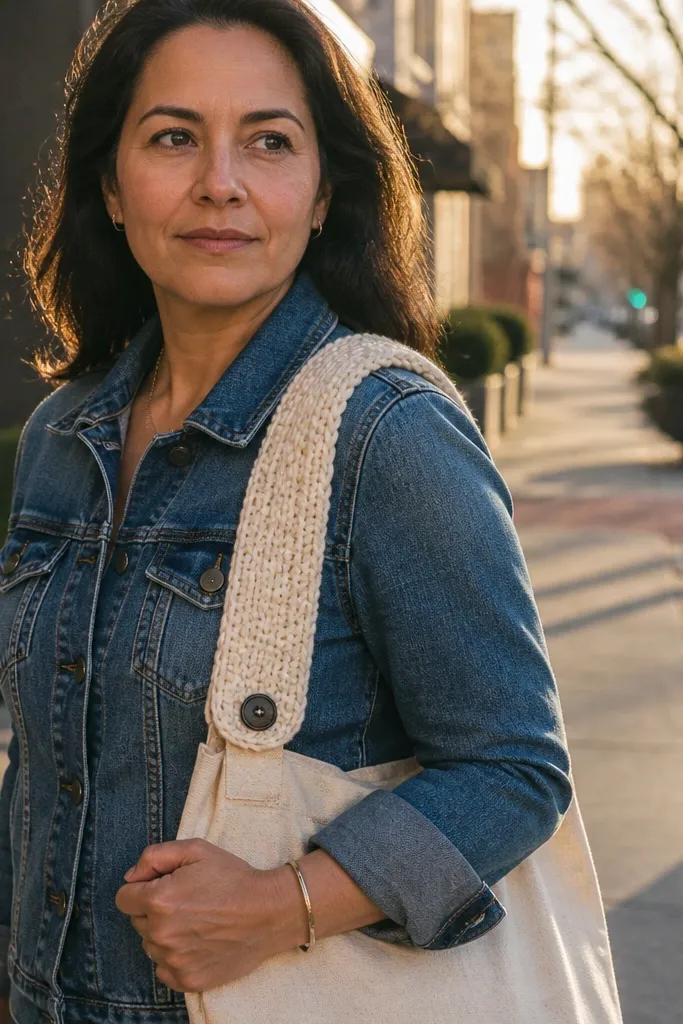
Strap covers are the secret “cute accessory” move because they upgrade an everyday tote without changing the bag. Buttoned tabs keep the cover from sliding, which makes it look neat instead of bunched. Crochet strap covers also let you match your yarn to your outfit — neutral for everyday, bright for summer. The stitch choice matters: use a firm stitch so the cover doesn’t collapse under weight. This is a small project with a big visual payoff.
Measure your tote strap width and wrap a strip around it with a little overlap. Crochet a rectangle using half double crochet or moss stitch in tight rows until it covers the strap thickness. Fold the rectangle and stitch the sides so it forms a sleeve. Add button tabs by crocheting two small loops on one side and stitching a button on the other. Sew a short interior tie stitch if the strap is smooth so the cover grips better.
Use a stitch pattern with low stretch, like moss stitch, so the cover stays flat on the strap.
Don’t crochet too wide — strap covers that hang over the edges look sloppy.
10. Minimal Crochet Headband with Bow Knot
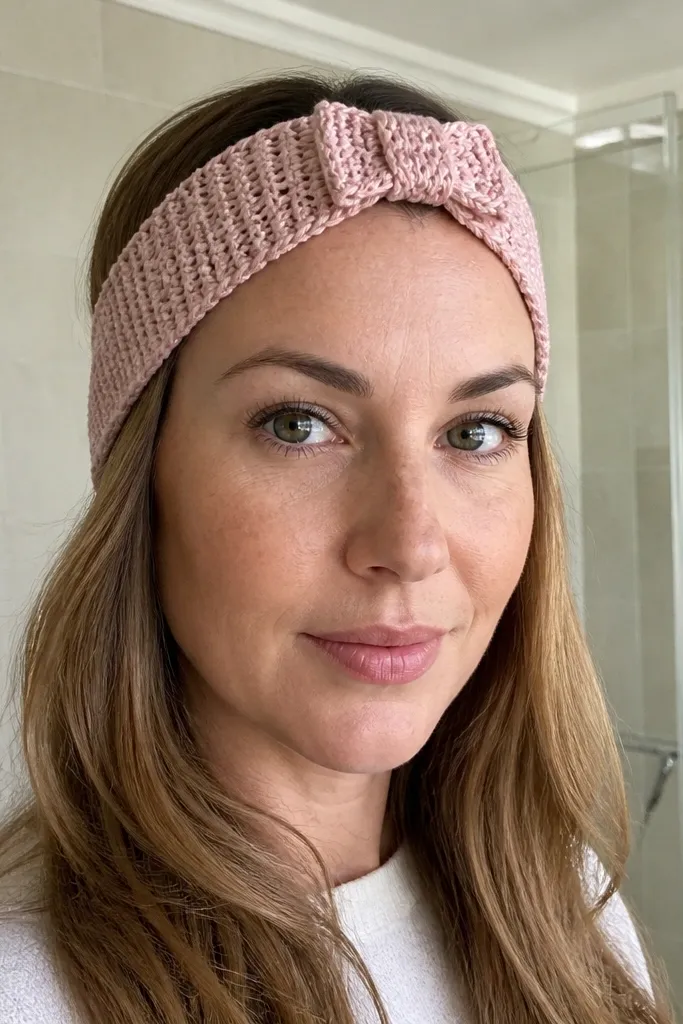
A headband is cute because it instantly frames your face and turns a basic outfit into something styled. The bow knot adds a soft, feminine detail without needing a bulky flower. Keep the headband narrow and firm so it sits smoothly and doesn’t flip. This is also a beginner-friendly project that looks polished when made with a solid color. It works for hair days, gym days, and casual weekends.
Chain to match the head circumference with a little stretch allowance, then crochet a tight band using single crochet in the back loop only. Work until the band reaches about the width you want (around 1.5 inches). For the bow, crochet two small rectangles, fold them into loops, and stitch a center knot using yarn. Attach the bow to the side of the headband with a few secure stitches. Weave ends and block flat so the bow looks crisp.
Use a thinner yarn than you think and a tighter hook for a headband that lies flat.
Don’t use a lacey stitch — it stretches and looks thin under hair.
11. Crochet Lace Bookmark Bookmark with Scalloped Edge
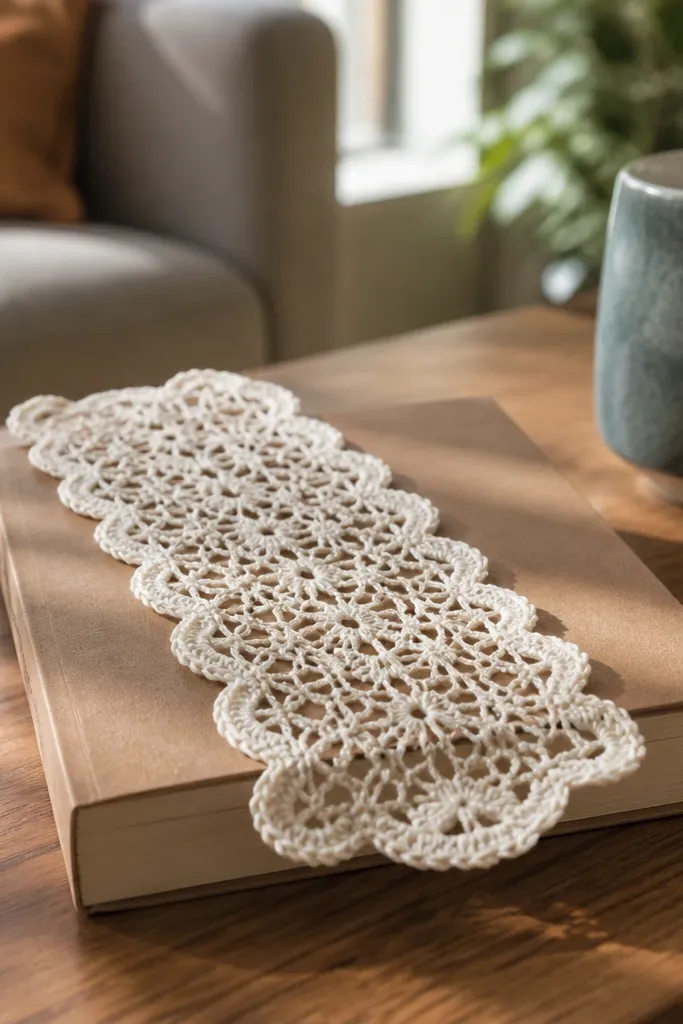
A scalloped lace bookmark looks delicate but still reads clearly in photos. The goal is a clean edge and a light, airy texture that doesn’t tangle. This accessory feels fancy without being hard, especially if you keep the lace pattern to one or two rounds. It also makes a great gift because it looks like it belongs with a nice book. If you’re building a cute crochet accessory set, this pairs well with coasters and simple keychains.
Start with a foundation chain sized to fit the page edge comfortably. Crochet a straight panel in a lace repeat using double crochet and chain spaces, keeping the pattern consistent. Add a final scalloped edge by working shells around the sides and bottom. Finish the top with a small loop for a ribbon or to clip it in place. Block lightly so the scallops stay even.
Pro tipUse cotton or cotton-acrylic for bookmarks so they keep shape after washing.
AvoidDon’t make the lace too wide; wide bookmarks curl and look messy.
12. Crochet Bag Charm Flower with Detachable Ring
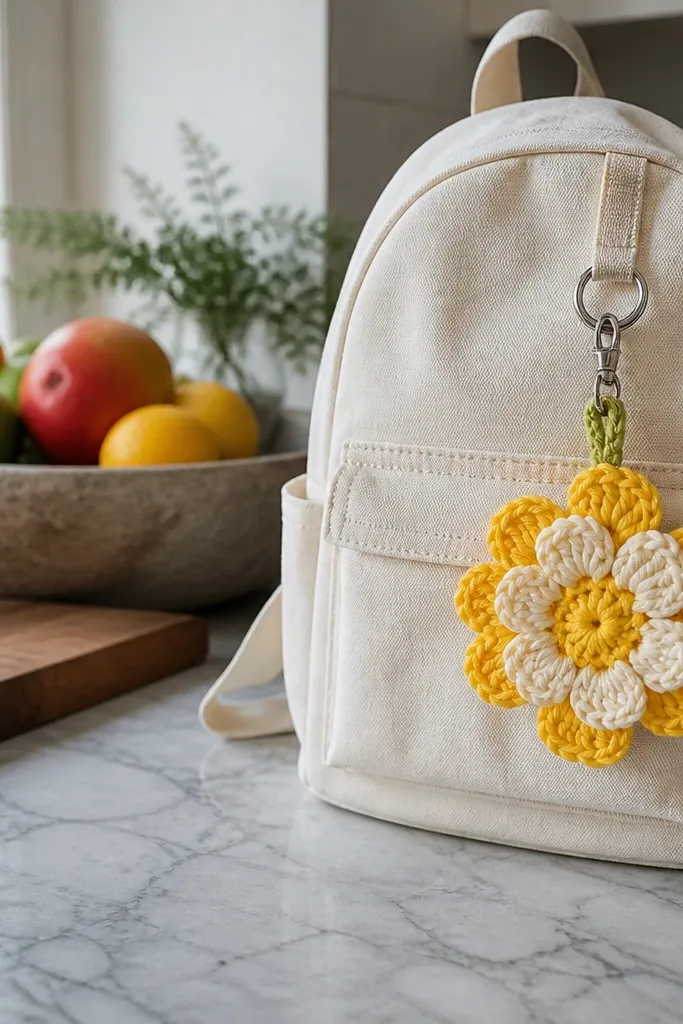
Bag charms are cute because they add personality fast, and a flower motif is instantly recognizable in photos. A detachable ring means you can move it from tote to backpack without re-stitching. Choose a flower shape with clear petals so it doesn’t look flat or undefined. This accessory also hides yarn scraps in a satisfying way: you can make petals quickly and then assemble. It’s one of the easiest ways to make crochet look playful and intentionally styled.
Make 6 to 8 petals using a simple petal pattern: a short base chain folded and worked into double crochet shells. Sew petals around a center circle, then add a small raised center using bobbles or a tight cluster. Attach a ring by sewing a small loop on the back, then pass a metal keyring through. If you want it to hang straight, add a small counterweight stitch at the bottom. Finish with a small leaf or two for balance.
Keep petals slightly stiff by using a smaller hook and firmer yarn.
Don’t skip a sturdy center; floppy centers make the petals collapse.
13. Mini Crochet Scrunchie Cover with Button Detail
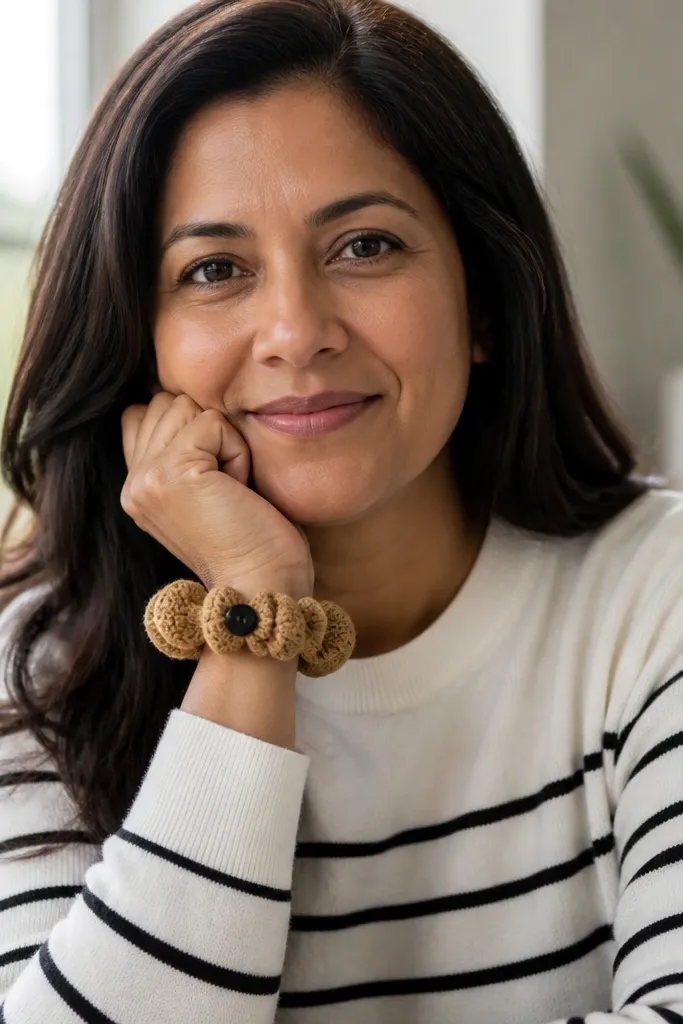
This is a small accessory that looks surprisingly cute because crochet texture shows through the hair. Instead of making a full scrunchie from scratch, you cover a simple hair elastic or scrunchie base so it’s comfortable and secure. A tiny button detail makes the whole thing look intentional, not like a random cover. It’s also a stash buster because you can use a few yards of yarn and still finish quickly. Wear it with neutral outfits for texture contrast.
Start by wrapping yarn around a small elastic base (or a foam-free hair tie) to measure the circumference. Crochet a tight tube or a strap that matches the elastic length, then stitch it into a sleeve. Slide the sleeve over the elastic and stitch the ends in place. Add a small button by sewing it through the crochet fabric near one seam, then weave ends securely. Keep the button low-profile so it doesn’t snag hair.
Use a yarn that doesn’t fuzz, because hair accessories get friction fast.
Don’t use a very stretchy stitch; the cover will slip off.
14. Crochet Coaster with Faux Leather-Look Edging
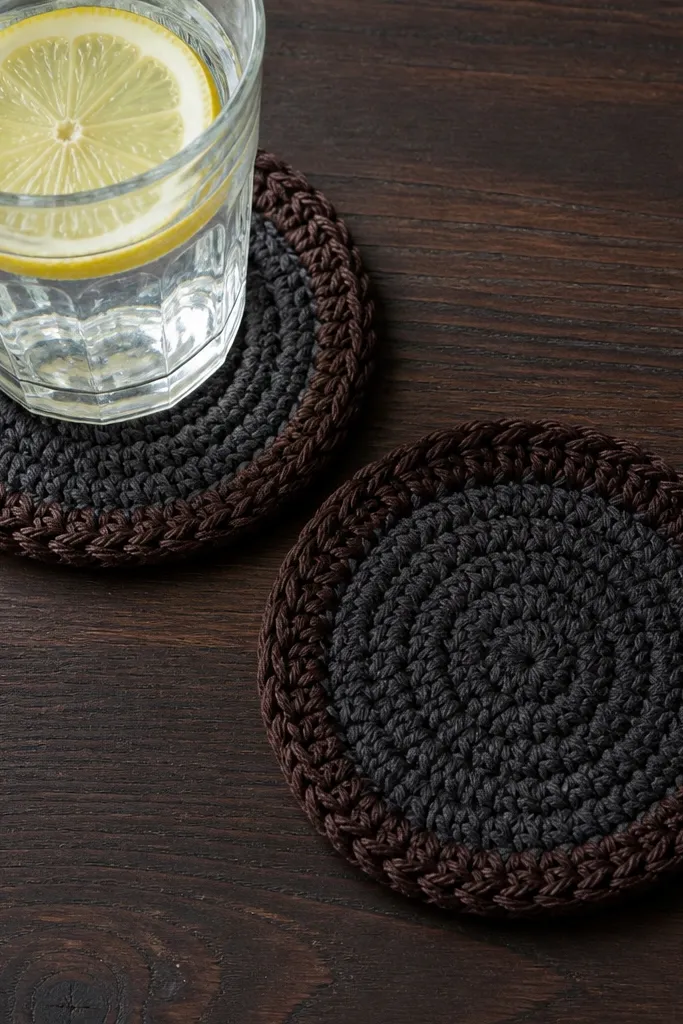
This one looks expensive because the edging creates a frame, like a leather-trimmed coaster set. The crochet body stays soft, but the darker border makes the coaster pop against wood or marble. It’s cute because it reads as a finished design object, not a homemade patch. Use thicker yarn and a firm stitch so the edge holds its shape. This is a strong pick if you want your crochet to look more modern and less “doily-like.”
Crochet the coaster base in a simple stitch like single crochet in tight rounds until you reach about 4 inches. Use a contrasting dark color for the border: work a round of single crochet, then add a second border round that creates a raised edge. For a leather-look effect, use yarn with a matte finish and keep tension tight. If you want extra structure, sew a thin felt circle to the back. Finish by weaving ends and trimming any loose fuzz.
Pro tipFelt backing makes a huge difference — it keeps the coaster from sliding and improves durability.
AvoidDon’t use a thin border yarn; it won’t frame cleanly.
15. Thermal Cozy for Water Bottle with Color-Coded Stripes
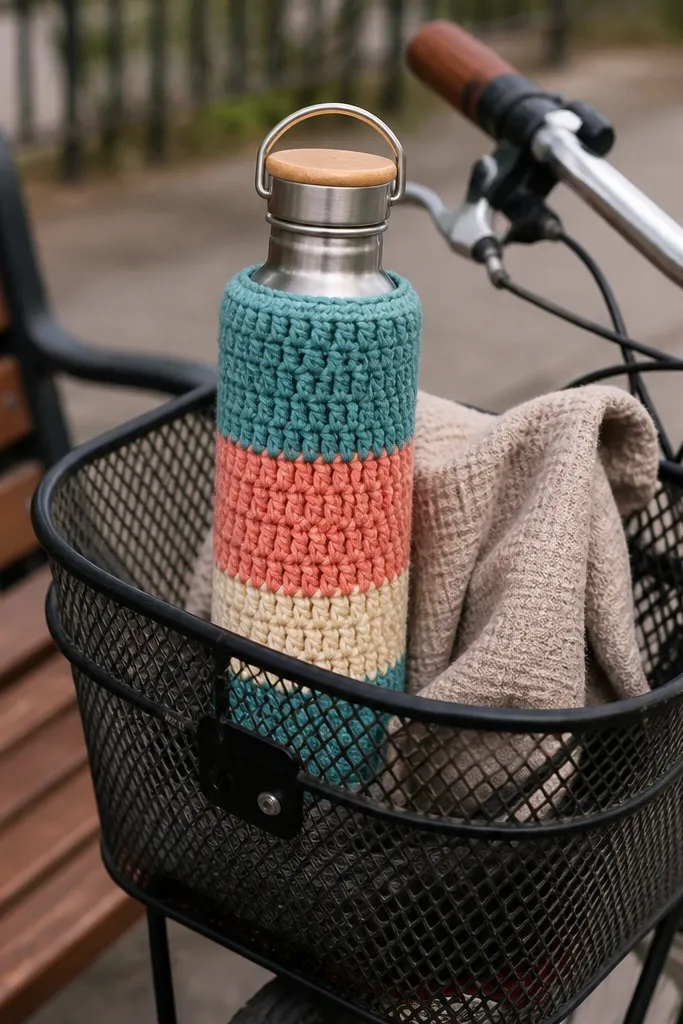
A bottle cozy is cute because it turns a plain bottle into a personal accessory. Color-coded stripes look graphic and intentional, and the cozy helps you grip without slipping when hands are cold or sweaty. This is also more useful than many crochet accessories because it gets used daily. The key is fit: it has to be snug enough to stay put. With the right yarn and a solid stitch choice, it looks clean and holds up.
Measure around your bottle and decide how tall you want the cozy (usually 6 to 8 inches). Crochet a tight tube using half double crochet, making the width slightly smaller than the bottle circumference so it stretches on. Add stripes by switching yarn every 2 to 3 rounds for clean bands. Create a top band by crocheting a few rows of single crochet around the opening to tighten the edge. Finish by weaving ends and testing fit — adjust with one extra round if it’s too loose.
Pro tipUse a hook one size smaller than the yarn label for a cozy that grips instead of droops.
AvoidDon’t choose a very drapey stitch like granny clusters for this; it won’t stay snug.
16. Crochet Bookmark Holder Pouch with Button Closure
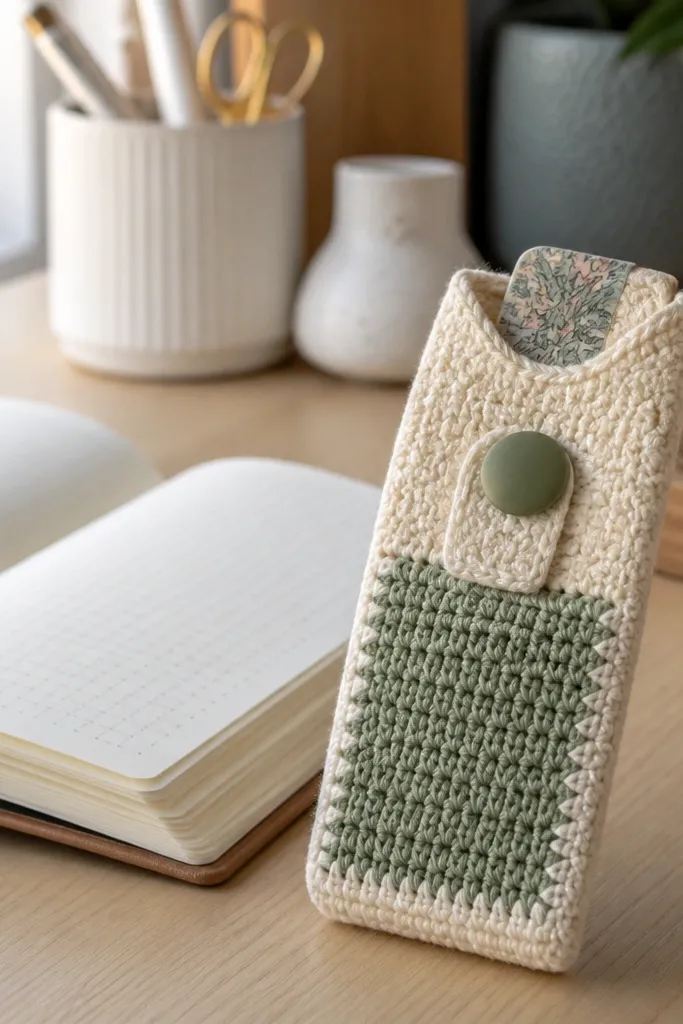
If you like cute organization, a bookmark holder pouch looks adorable and solves a real annoyance: bookmarks get lost. The pouch shape is photogenic because it has a clear front panel and a button closure that looks neat. It also makes your crochet look more “designed,” not like a flat strip. Use cotton or a firm yarn so it stands up on a shelf. This accessory is small enough to gift, and you can match it to your book cover colors.
Start by crocheting a rectangle panel about 7 inches tall and 4 inches wide in single crochet for firmness. Fold it so you create a pocket, then stitch the sides leaving the top open. Crochet a flap by adding a short row of stitches over the top edge and shaping it into a slightly curved cover. Sew a button on the front and a matching loop on the flap. Add a simple border around the opening so it doesn’t stretch.
Pro tipMake the pocket slightly wider than your biggest bookmark so it slides in without forcing.
AvoidDon’t use a loose openwork pattern; bookmarks snag and the pouch looks flimsy.
17. Crochet Lavender Sachet with Flower Loop Strap
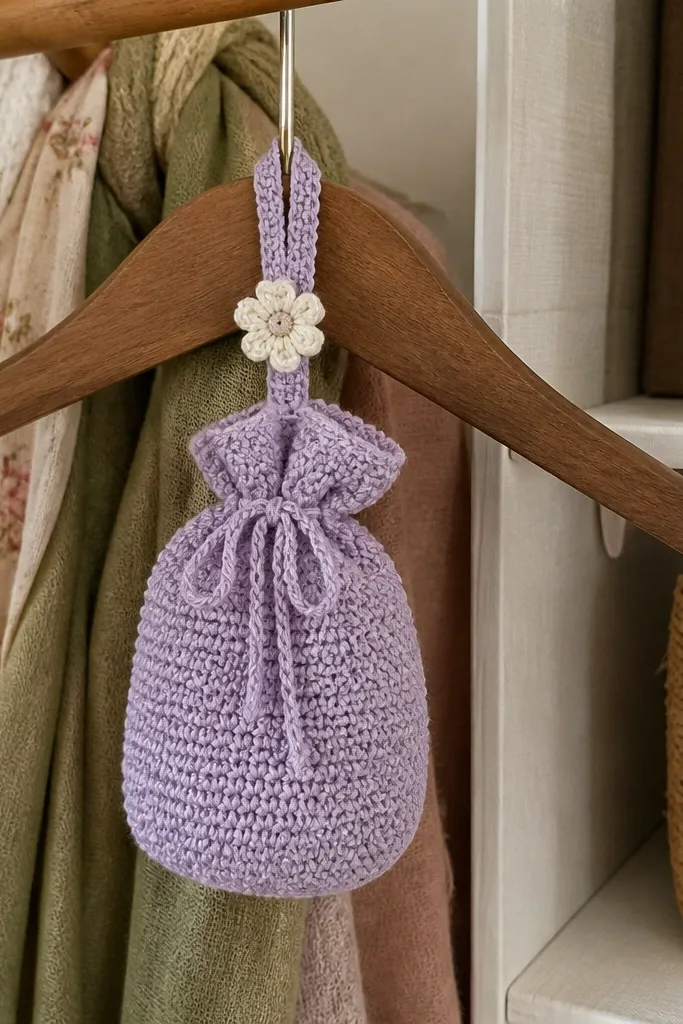
Sachets are cute because they look like little gifts and they smell good, but the accessory part is what matters here. Crochet a pouch with a tied top or a small drawstring look, then add a flower loop strap so it can hang in a closet. The flower detail makes it photogenic, and the crochet fabric keeps the scent contained. This works for drawers, closets, and even car storage. It’s a small build that feels special when you place it in a room.
Crochet a small pouch using a tight stitch like single crochet rounds until it’s about 4 inches tall and 3 inches wide. Leave a top opening, then gather the opening with a crochet chain drawstring or stitch a simple seam closure. Add a flower loop by crocheting a 5-petal flower and sewing a loop at the back, then attach it to the sachet. Fill with dried lavender (or a lavender blend) and shake down gently before closing. Finish by sealing the closure so the filling doesn’t escape.
Use a double layer if you’re using loose dried herbs so nothing leaks through the stitches.
Don’t overfill — it stretches the crochet and makes the shape look lumpy.
18. Crochet Scrappy Earbud Case in a Rounded Rectangle
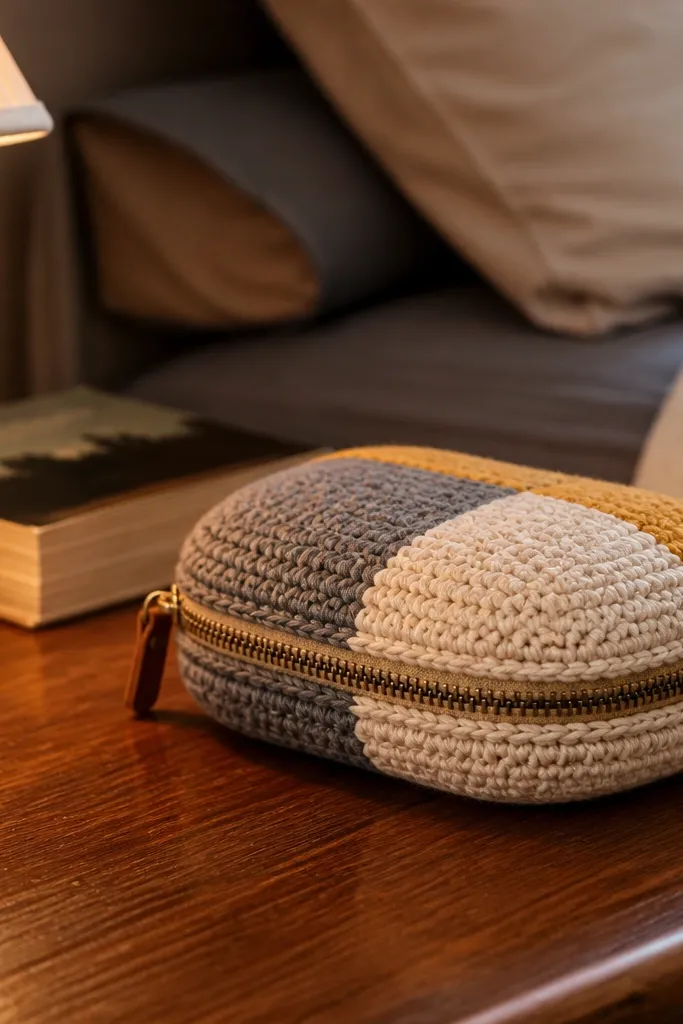
Earbud cases are one of the best crochet accessories ideas because they protect something you carry every day. A rounded rectangle looks modern, and it’s easier to keep neat than sharp corners. Color-block panels make it cute, and a zipper makes it feel finished. This project also teaches you how to work with small shaping, which improves everything else you make later. If you want something practical that still looks like decor, this is it.
Measure your earbuds case and add 1/4 inch for thickness. Crochet a base rectangle with short rows to round the corners, using single crochet for a firm shell. Create a lining pocket by sewing a thin fabric rectangle to the inside, then crochet a top border around the opening. Install a small zipper at the top by stitching it between the crochet shell and lining. Finish by adding a small pull tab in the same yarn so it’s easy to open.
Pro tipUse a zipper 1 inch shorter than the top width so the case closes cleanly without puckering.
AvoidDon’t use a floppy stitch for the body; earbuds cases need structure.
19. Crochet Wristlet Key Organizer with Snap Button
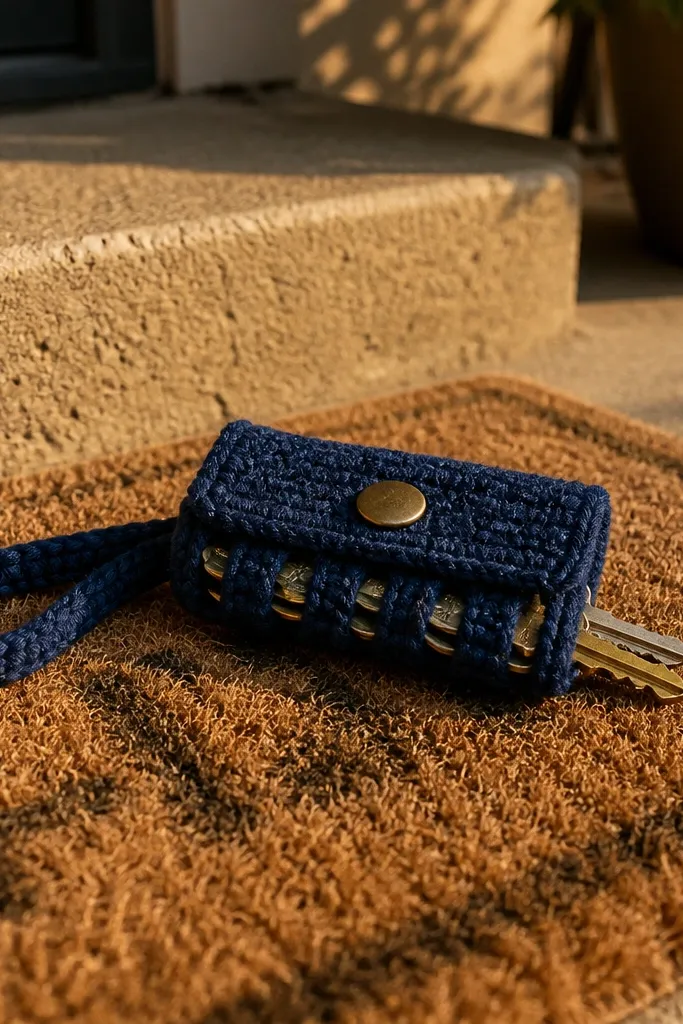
A wristlet key organizer is cute because it looks like a mini accessory bag, not a key ring. The look comes from a small wrist strap plus a front panel with neat loops that hold keys in place. Crochet makes it soft, while the snap closure makes it feel secure. This accessory is great for errands, festivals, and days when you hate digging through pockets. It also photographs well because the strap frames your hand and the key loops create texture.
Start with a wrist strap: crochet a tight band in single crochet, then join ends to form a loop. For the front panel, crochet a rectangle about 4 inches wide and 5 inches tall, then add three or four small key loops by stitching short chains and anchoring them to the panel. Sew the panel to the strap ends, centering it so it hangs straight. Add a snap button by attaching the two snap parts to the front and back overlap point. Reinforce the snap area with extra stitches so it doesn’t tear through.
Make the key loops slightly angled upward so keys don’t flop and scratch the pouch.
Don’t leave loop ends loose; keys will snag and pull them apart.
20. Crochet Waterfall Scarf Keychain with Tiny Tassels
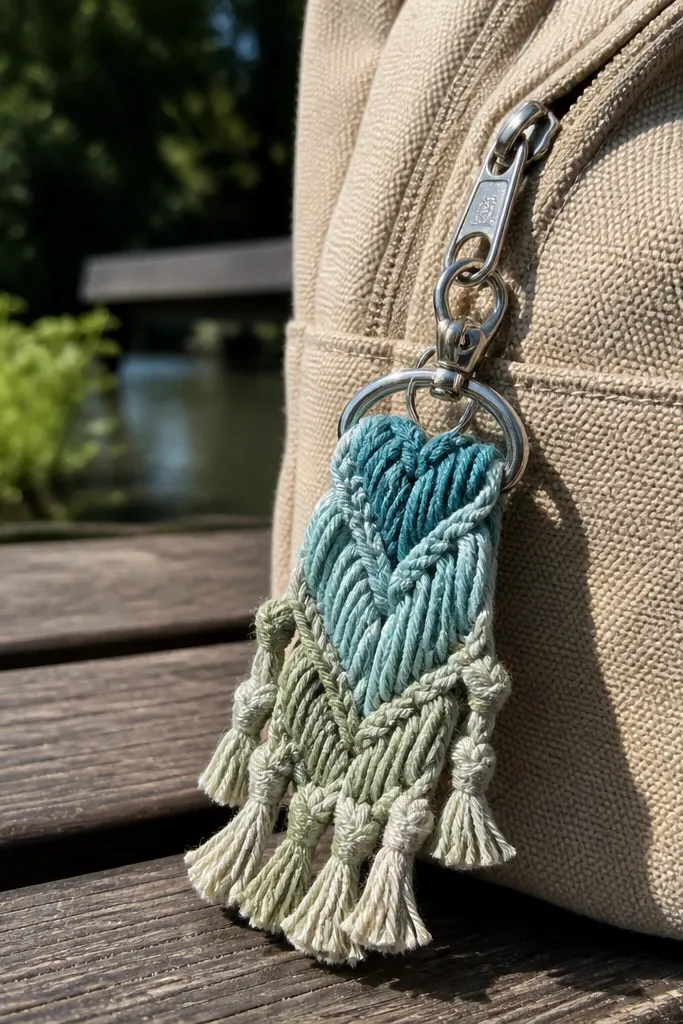
This one is pure cute. A mini scarf keychain uses a simple “waterfall” stitch pattern so it looks like flowing fabric even at tiny scale. Tiny tassels add movement, and the whole piece looks playful on a bag zipper. It’s also a clever way to use variegated yarn because the stitch pattern makes color changes look intentional. If you want your crochet accessories to look whimsical and styled, this is a strong pick.
Chain a short base and crochet a small rectangle using a waterfall lace repeat with skipped stitches or chain spaces for the drape effect. Work until it matches your desired keychain length (about 3 to 4 inches). Add a border row with single crochet for stability. For tassels, cut 6 to 8 strands, fold, and attach at the bottom edge. Sew a small loop at the top and attach to a keyring or zipper pull ring.
Pro tipBlock it lightly so the waterfall drape shows instead of curling inward.
AvoidDon’t overdo the lace; too many holes makes the mini scarf look flimsy.
21. Crochet Candle Cozy with Leaf Cutout Pattern
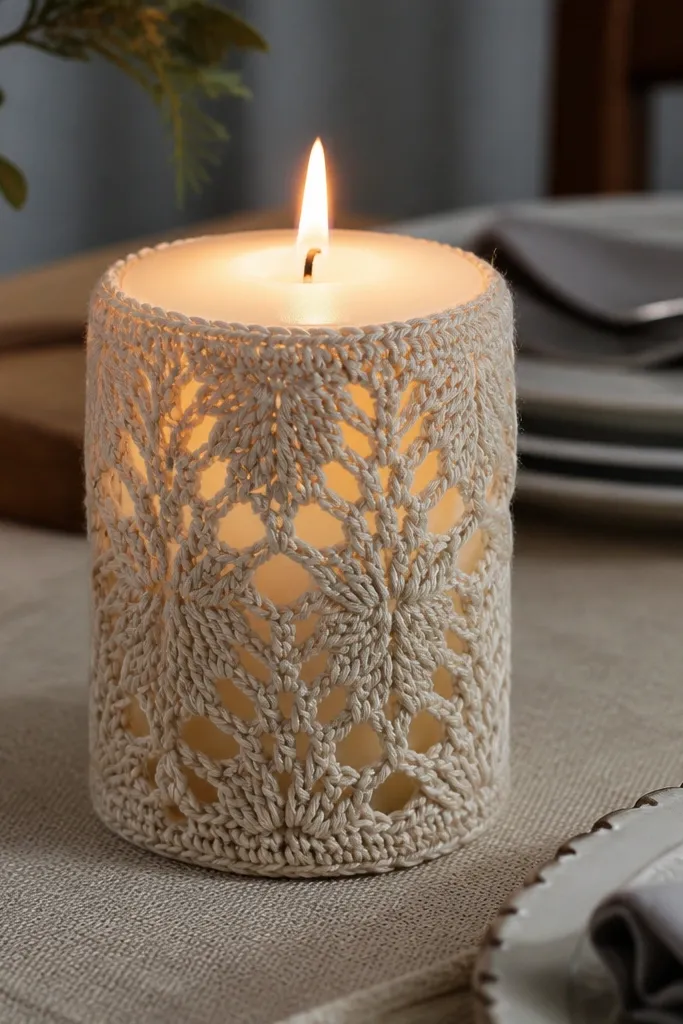
Candle cozies look cute because they turn a plain candle into a styled object. Leaf cutouts create a delicate pattern that catches light and makes the piece feel decorative without being fussy. The cozy also protects hands from heat and keeps the candle from looking like it’s sitting on display alone. Use a snug fit so it doesn’t slide and so the leaf pattern stays aligned. This is a quick accessory project that looks great on shelves, windowsills, and holiday tables.
Measure the candle circumference and crochet a fitted sleeve using half double crochet for a tighter drape. Work rows until the cozy reaches the candle height you want, then join into a tube with slip stitches. Add leaf cutouts by inserting a repeat around the tube that creates small V-shaped openings (use a yarn-over and chain-space sequence). Finish the top and bottom edges with single crochet to prevent stretch. Weave ends and check that the cozy sits without gaps.
Pro tipUse cotton or a blend that handles heat better than acrylic — it looks cleaner and wears better.
AvoidDon’t use large open holes; it looks uneven and makes the cozy too loose.
22. Crochet Bookmark with Hidden Pocket for Receipts
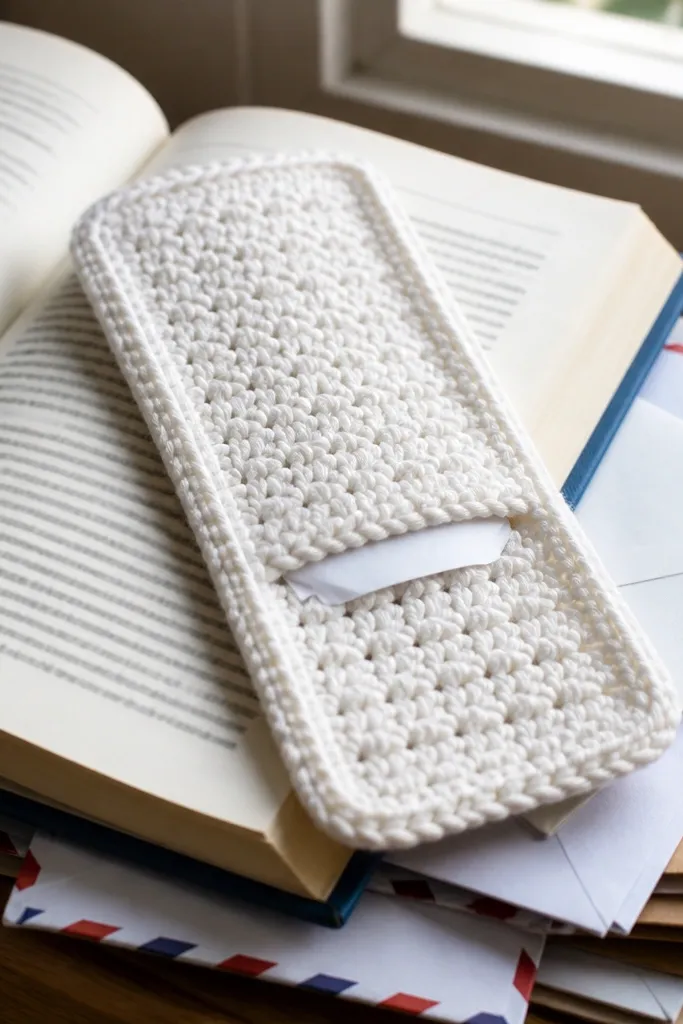
This bookmark is cute because it’s practical and it looks like a tiny design object. The hidden pocket keeps receipts, notes, or loyalty cards from crumpling — and the pocket line creates a clear visual detail. Crochet works well here because you can build structure with simple stitches and a firm border. It’s a great project for people who like accessories that do something, not just sit there. The pocket also makes it more interesting than a basic bookmark, which helps it stand out.
Crochet a main bookmark rectangle using single crochet until it reaches about 6 inches tall. Create the pocket by crocheting a smaller rectangle on one side of the bookmark and stitching along the edges to form a pocket opening. Add a top tab or loop if you want it to clip to pages. Work a border around the entire bookmark with single crochet to lock everything in place. Weave ends and block flat so the pocket edges stay crisp.
Pro tipUse a slightly stiffer yarn and tighter gauge so the pocket doesn’t collapse under paper weight.
AvoidDon’t skip the outer border — without it, the pocket seam pulls the bookmark out of shape.
23. Crochet Hair Clip Flower with Center Pearl

Hair clips are cute because they add a focal point right where photos look. A crochet flower with a pearl center looks polished, and it’s a clear upgrade from basic fabric clips. This project is small, fast, and forgiving, which makes it ideal for trying new stitches like petals and center clusters. It also works with almost any outfit color because you can match the yarn to your wardrobe. If you want an accessory that looks “done,” this is a strong one.
Crochet 5 to 7 petals in a ring, using double crochet shells for a clean petal shape. Sew petals to a tight center circle, then add a pearl by stitching it through the center with strong thread. Attach to a metal alligator clip by sewing a small fabric backing strip to the back of the flower, then stitch the clip to that backing. Keep the crochet back flat by adding a final round of single crochet. Trim stray ends and test the clip grip.
Pro tipChoose a flat pearl (not too domed) so it sits flush and doesn’t catch hair.
AvoidDon’t attach the clip directly to loose yarn ends — reinforce with a backing.
24. Crochet Jelly Roll Cuff with Rolled Petal Edges
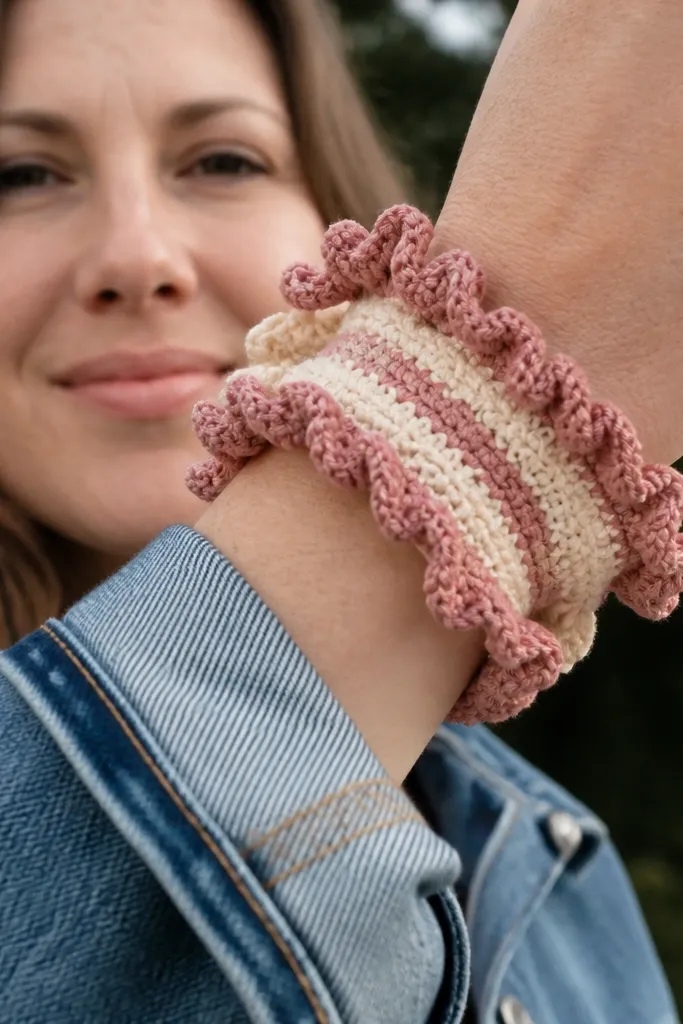
This cuff gives you that cute, “jelly roll” look without needing fancy shaping. The rolled petal edge makes it look store-bought, and the stripes keep it photogenic from every angle. It works as a wrist accessory, but it also photographs well when layered over a sweater sleeve or denim jacket cuff. Use it to turn leftover yarn into something you can actually wear, not just keep in a stash bin. Skill level is beginner-friendly because the structure relies on simple stitches and a repeatable border, and it finishes fast — you can make one in an evening.
1) Cut 3-5 yarn colors into equal-length bundles (about 60-80 yards per color) and choose a hook that matches your yarn label; aim for a fabric that holds shape (not floppy). Make a foundation chain long enough to wrap your wrist with 1.5 inches of overlap, then crochet a short rectangle in rows using single crochet or half double crochet until it’s about 3 inches tall. 2) For the rolled petal edge, crochet a border around the rectangle: work short “petal” bumps by crocheting 3-stitch clusters into the same edge stitch, then skip 1 edge stitch, repeat all the way around. 3) Fold the rectangle so the petal edge rolls outward, then stitch the overlap with a whip stitch on the inside. Weave ends tight and block lightly by misting and shaping the roll with your fingers; let it dry flat.
Pro tipIf your stripes look muddy, keep the color changes happening at the same row number on front and back so the roll edge lines up cleanly.
AvoidDon’t stretch the rectangle when you sew the overlap — the petal roll will warp and look uneven.
25. Crochet Mini Market Bag Keychain with Beaded Handle Loop
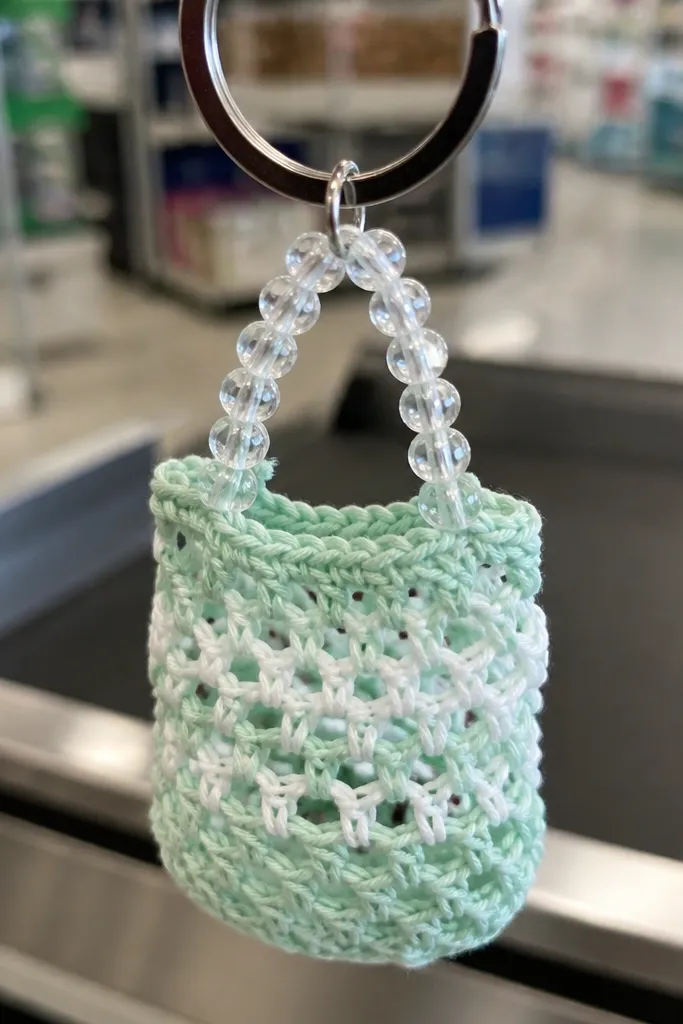
This is a cute, tiny accessory that reads as “mini market bag” instantly, and it’s perfect for keys, a zipper pull, or a backpack charm. The openwork crochet body gives it that airy, summery look, while the bead handle loop adds a crisp sparkle that shows up in photos. It’s also a smart way to use thin yarn without committing to a full-size bag. The build is quick because it’s small, and the only tricky part is keeping the handle loop centered. This suits people who want accessories that look playful and styled even when they’re clipped to something plain.
1) Use fingering or sport yarn and a smaller hook than you’d think for openwork (start with a hook 0.5-1 mm smaller than the label suggests). Make a magic ring, then crochet in rounds using chain-1 spaces for the mesh pattern; aim for a diameter of about 2.25 inches. Keep increasing for the first 3-4 rounds, then crochet straight for 2 more rounds to form a shallow “bag.” 2) To shape the top, switch to a slightly tighter stitch for one round (single crochet or slip stitch) so the opening looks defined. 3) For the handle, crochet a chain loop about 1.75 inches long, then thread 6-10 small seed beads onto the handle strands before you secure the loop ends. Attach a split ring or lobster clasp to the handle center using a short length of yarn or a jump ring, then weave all ends on the inside of the bag.
Pro tipUse a stitch marker at the start of each round so the mesh pattern stays even — uneven spacing makes the mini bag look lopsided in photos.
AvoidDon’t make the handle too long; a handle over 2 inches droops and the charm won’t sit flat against your keys.



