
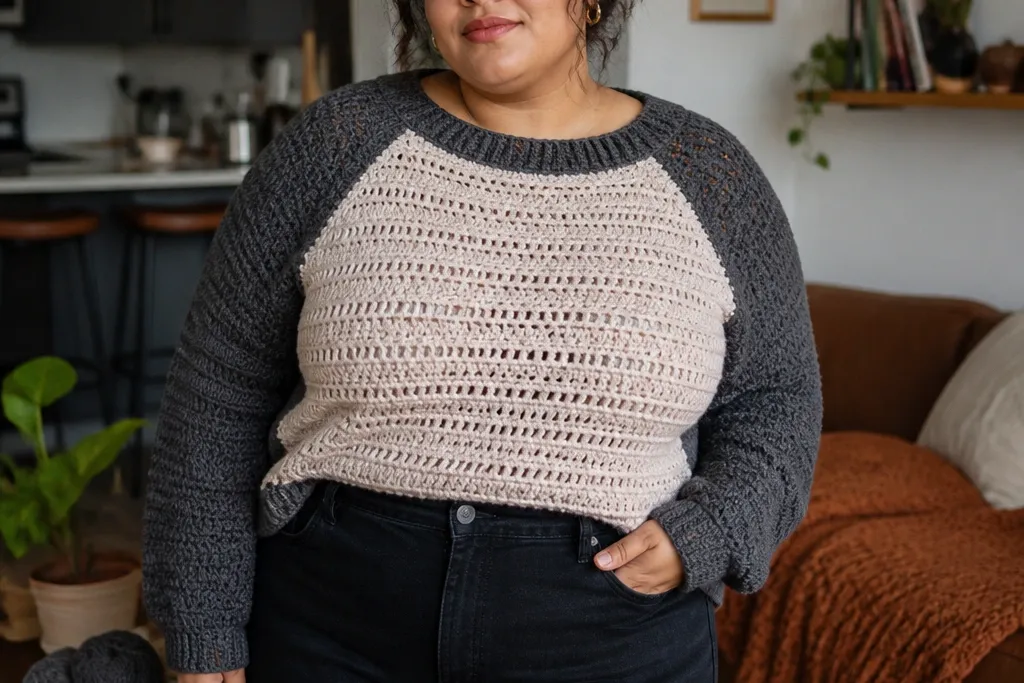
1. Raglan Ribbed-Edge Sweater in Charcoal + Oat
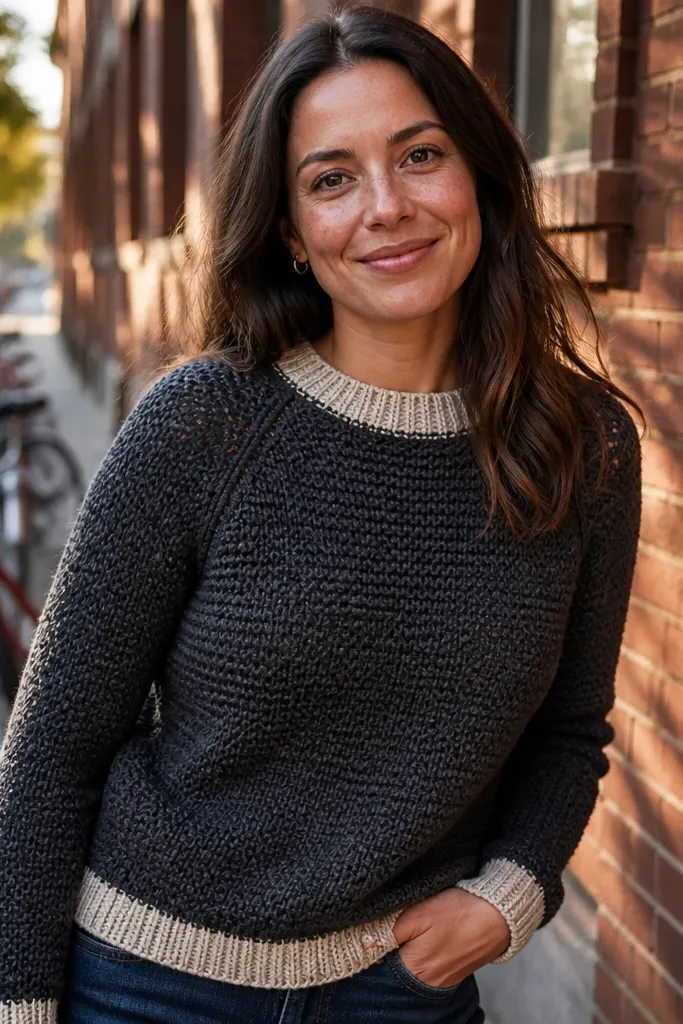
This one looks polished because the ribbed edges do the heavy lifting. Charcoal body makes the stitches look deep and clean, while oat ribbing brightens the face and makes the hemline look intentional. Raglan shaping gives you a flattering shoulder line without complicated set-in sleeve math. It’s a great “wear all week” sweater because the fabric has enough structure to hold its silhouette, especially if you keep your stitch tension steady. Skill level is beginner-to-intermediate: you’ll crochet panels, seam them, then add ribbing.
Start by making a gauge swatch in your chosen yarn weight (DK or worsted) using half double crochet for the body. Crochet the front and back as separate pieces, then build raglan using simple decreases at the sleeve-to-body join until you reach the neckline width. After you seam shoulders and sides, crochet ribbing around the cuffs and hem using a smaller hook and single crochet or front post double crochet ribbing. Finish by weaving in ends, blocking lightly, and checking the neckline sits flat.
Use a smaller hook for ribbing so it doesn’t stretch out after a few wears.
Don’t skip blocking — it makes the raglan seam line look straight in photos.
2. Color-Block Puff Stitch Sweater in Cream + Terracotta
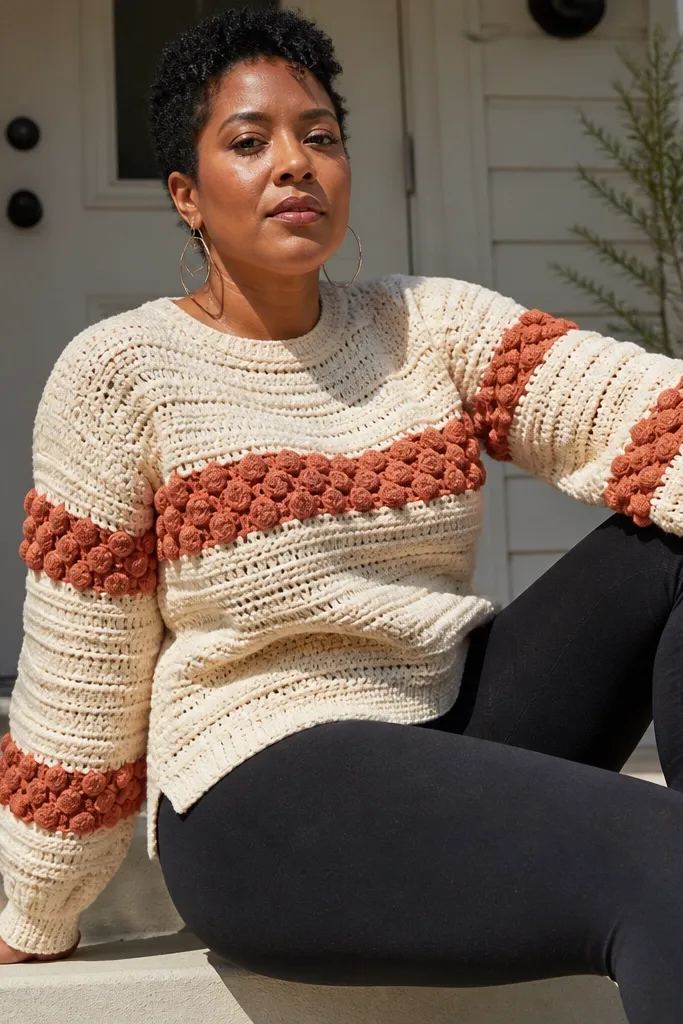
Puff stitches look dramatic, but you don’t want them everywhere because they get bulky. This design places puff stitch bands in terracotta against a cream base, so the sweater reads like a styled garment instead of a craft experiment. The color contrast is what makes it photogenic — the texture catches light along the band edges. It’s also budget-friendly because you’re using fewer rows of the “fancy” stitch. This is best for intermediate beginners who can manage repeated puff stitch rows and keep counts consistent.
Begin with a cream base sweater made in a simple stitch like half double crochet for even fabric. Mark three vertical color-block zones on the front and back, then crochet terracotta puff stitch rows only in those bands. Keep your puff stitch row height consistent by counting every stitch and using the same puff stitch definition throughout. Seam the pieces, then add a ribbed crew neckline with simple single crochet ribbing to keep the neck from stretching.
Pick terracotta yarn with a smooth texture; halo-y yarn makes puff stitches look fuzzy in daylight.
Avoid crocheting puff rows too loose — they should look raised, not saggy.
3. Oversized Drop-Shoulder Sweater in Sage with Thick Waistband
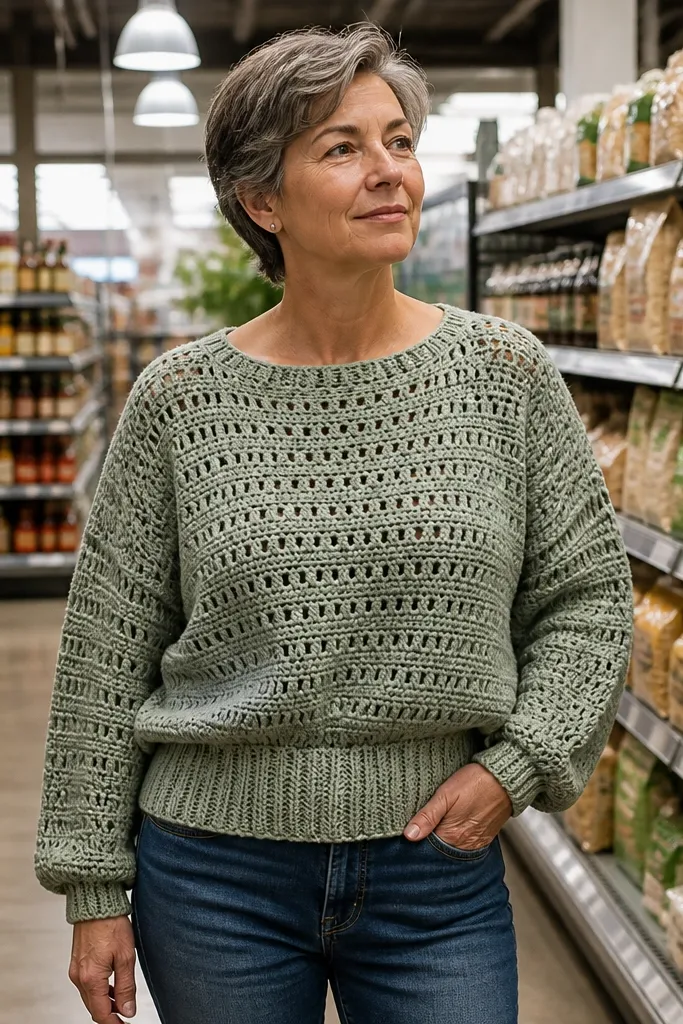
Drop-shoulder shapes look relaxed, but they can look sloppy unless you anchor the waist. This sweater uses a thick waistband rib to create shape at the bottom while the body stays airy. Sage green is an easy “aesthetic” color because it pairs with denim, black leggings, and cream skirts. The thick ribbing also makes the hem line look clean in photos, even if you’re standing casually. Crochet difficulty is mostly about panel sizing and ribbing consistency.
Crochet the body in one piece or two panels using a stitch with decent drape, like half double crochet. Build the sleeves as rectangles and attach them at the shoulder with wide openings so the drop-shoulder look stays intentional. Then crochet a thick waistband rib at the bottom using a smaller hook and front post stitches for a firm edge. Finish by adding simple cuff ribbing and seaming underarms with mattress stitch so seams look flat.
Pro tipAdd a stitch marker at quarter points on the body so the waistband doesn’t twist while you sew ribbing on.
AvoidDon’t make the waistband the same stitch as the body — it needs to be firmer or it will roll.
4. Striped Raglan Sweater with Micro-Contrast Bands
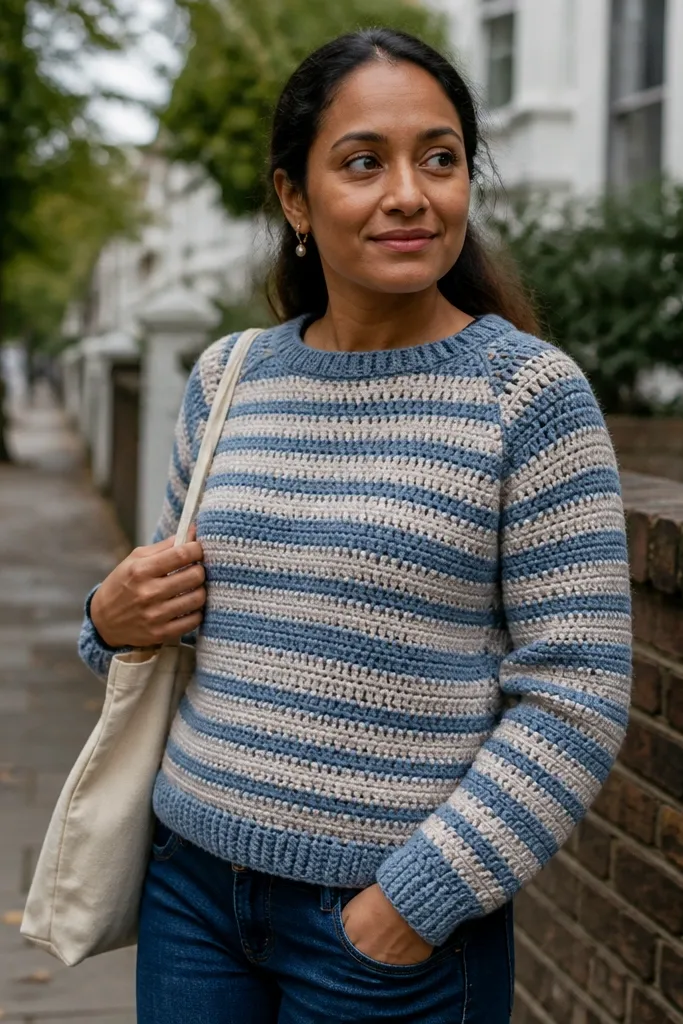
Micro-contrast stripes make even a basic raglan sweater look styled. The narrow bands create a “designed” rhythm across the body and sleeves without needing complicated textures. Choose two muted colors with similar brightness — like dusty blue and oatmeal — so the stripes look cohesive in photos. This design is great if you want something budget that still looks intentional, because you can use your leftover yarn for the stripe changes. It’s a beginner-friendly build if you keep your stripe schedule written down.
Start with a raglan pattern foundation in a simple stitch, then plan your stripe widths like 2 rows color A, 2 rows color B. Keep your increases and decreases consistent across colors so the stripes don’t distort the raglan seam line. Crochet the front and back with the same stripe timing, then match the sleeve stripe start so the whole sweater lines up visually. Seam everything, then add a narrow neck rib with single crochet in the round.
Weave ends as you go during color changes for a cleaner inside and faster finishing.
Avoid mixing three colors — stripe spacing gets messy fast and photos look chaotic.
5. Cropped V-Neck Sweater in White with Lemon Yellow Edges
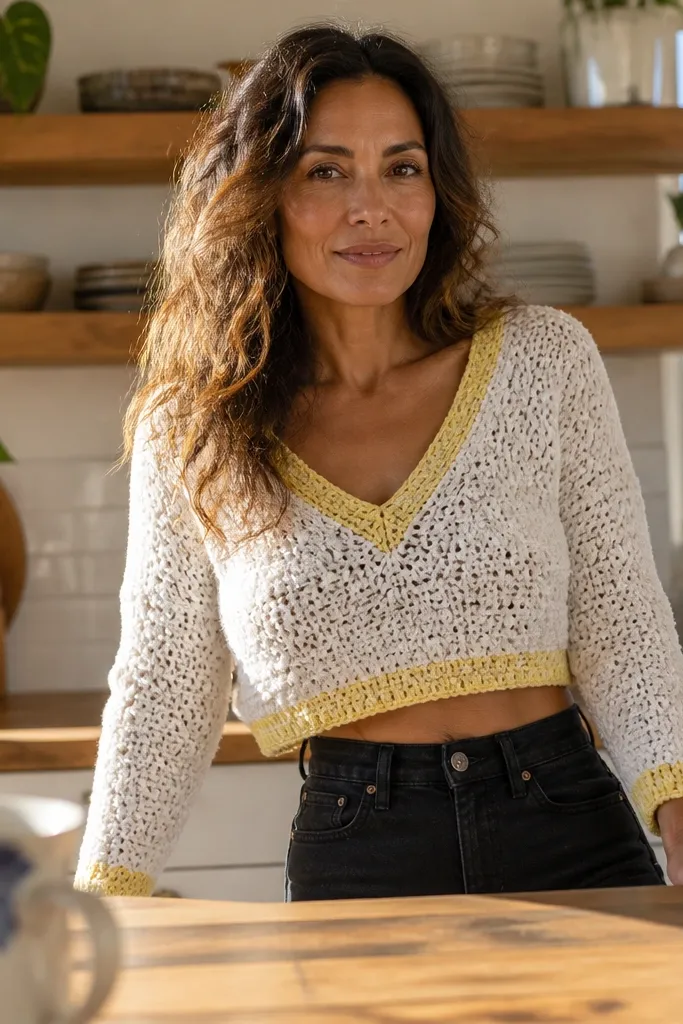
A cropped V-neck reads fresh and flattering, and the trim color makes it pop without needing heavy texture. White base yarn keeps the look bright, while lemon yellow edging frames the V so it shows up in daylight. The cropped length also makes the sweater easy to style with high-waist jeans, which is exactly what photographs well. This sweater is best for intermediate beginners because V-neck shaping needs steady decreases and clean seam finishing. The result is a “put together” top that looks expensive because of the contrast trim.
Work the body in two panels and shape the V by decreasing at the center line on both the front panels as you go. Keep the back straight for stability, then seam shoulders and sides. Crochet a V-neck edging in lemon yellow using single crochet along the neckline, then add a second round for thickness. Finish with a ribbed cropped hem and sleeve cuffs, using a smaller hook so the edges don’t flare.
Use stitch markers to mark the V decrease points so the line stays symmetrical.
Don’t crochet the V edge in the same yarn tension as the body — it will warp the neckline.
6. Honeycomb Panel Sweater in Mustard with Black Outline Border
Honeycomb texture looks high-end in photos because it has depth, and the black outline makes the texture read sharply. Instead of doing honeycomb everywhere, this idea uses honeycomb panels framed by simpler stitches, so your sweater stays wearable and not too heavy. Mustard is warm and flattering, and the black border gives the whole piece a “graphic” look. You’ll need patience for the panel texture, but the build is straightforward: panels, border, seams, ribbing. This is an intermediate project that rewards careful counting.
Crochet three vertical panels: two honeycomb panels for the sides and a simpler center panel if you want lighter weight, or honeycomb for all three if you want full drama. Use a border color like black to frame each panel with a consistent single crochet outline. Assemble the front and back by seaming the panels in order, matching stitch heights so the honeycomb doesn’t step. Add ribbing at the neck and cuffs in the border color to tie the look together.
Pro tipBlock the honeycomb panels before seaming; it makes the texture edges line up cleanly.
AvoidAvoid pulling honeycomb stitches too tight — the texture should puff outward, not lie flat.
7. Wide-Stripe Boatneck Sweater in Navy + Cream
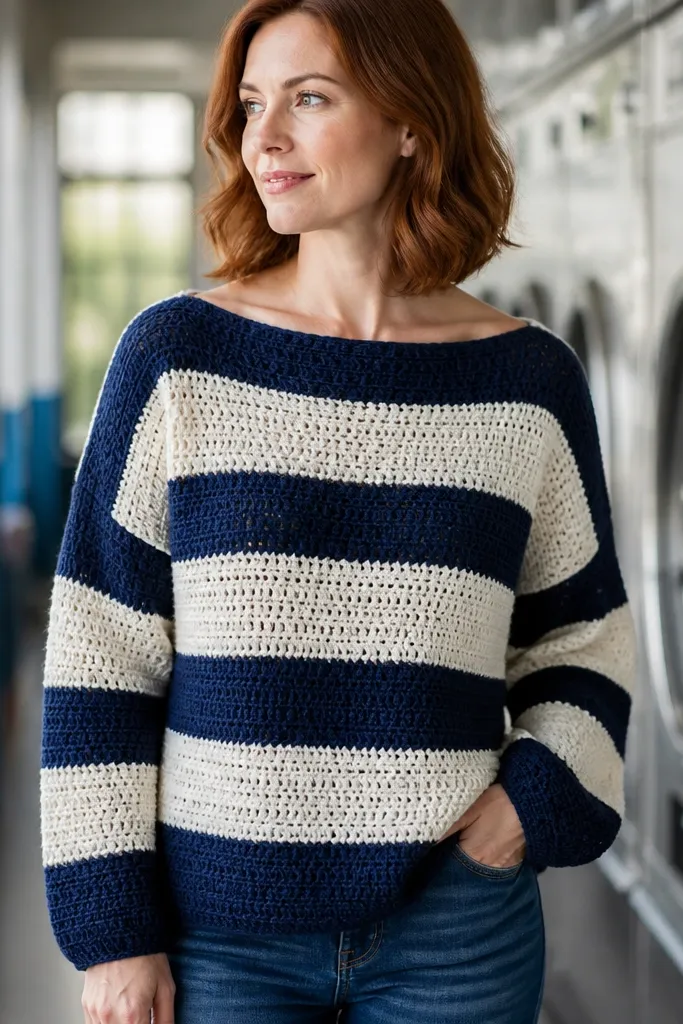
Boatneck sweaters look instantly “intentional” because the neckline frames the collarbone and shoulders. Wide stripes add boldness, and navy + cream is a color combo that always photographs clean. This design hides fit issues because the boatneck sits across the upper chest and the sleeves are roomy. It’s a good budget choice because you can use two yarn colors and keep the stitch simple. Intermediate beginners can handle it with basic shaping and solid stripe counting.
Make a rectangular body with slight shaping at the sides if you want a gentle hourglass, then crochet sleeves as rectangles. For the boatneck, you’ll shape the front and back neckline by decreasing stitches evenly across the center. Crochet the stripes by switching colors on exact row boundaries, keeping yarn tension consistent so stripes don’t ripple. Finish with a ribbed collar using front post double crochet for a firm, neat edge.
Use a tape measure to check neckline width against your own collarbone preference; boatnecks look best when they sit snug across the top.
Don’t let your stripes drift — if row counts change, the boatneck will look crooked in photos.
8. Textured Shell Stitch Cardigan in Oat + Cocoa
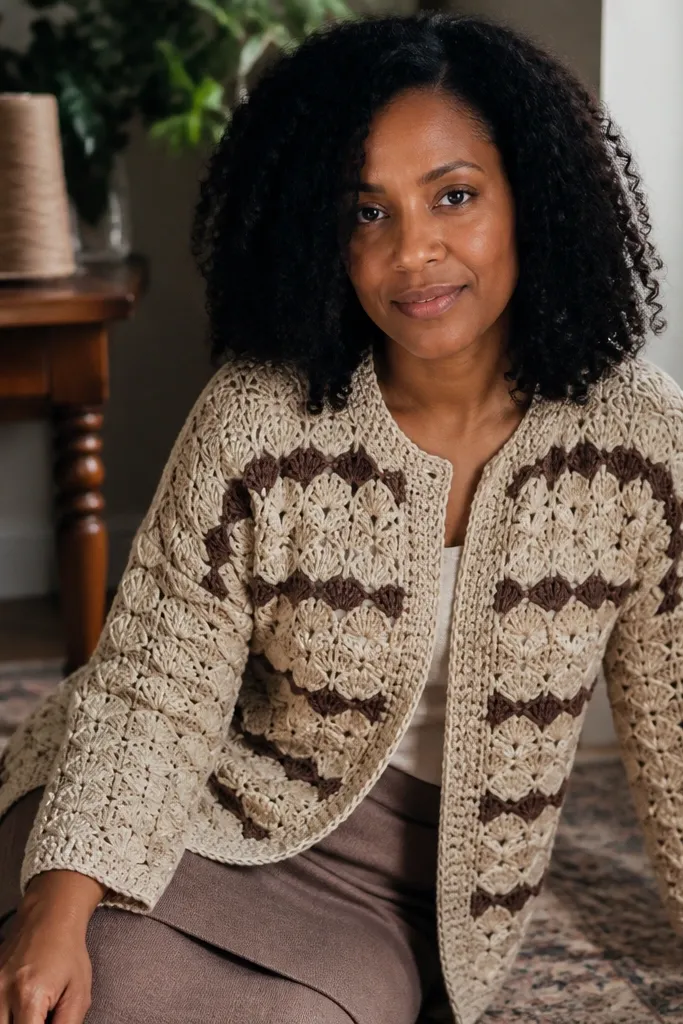
A shell stitch cardigan looks like something you’d pay more for because the texture creates a patterned fabric, not just a plain sweater. This one uses oat as the main color and cocoa for the shell rows, so it reads like a design panel even though the stitches are repetitive. The cardigan format also makes styling easy for photos — you can drape it open and let the texture show. It’s beginner-to-intermediate depending on whether you add buttonholes, but the stitch work is consistent. The look is warm, cozy, and flattering on a wide range of body shapes.
Work two front panels and one back panel with a shell stitch pattern that repeats over a set number of rows. Keep your cardigan opening clean by using a single crochet edge along the fronts throughout. Seam shoulders and sides, then crochet the neck edge and armholes in the same border stitch so everything matches. If you want an easy closure, add a simple tie belt by crocheting a long chain and stitching it to the sides.
Pro tipUse a slightly heavier yarn for shell stitch so the texture doesn’t look flat when you drape it open.
AvoidAvoid uneven shell spacing — it makes the cardigan front look wavy.
9. Sleeveless Sweater Vest in Pink with Contrast Waistband
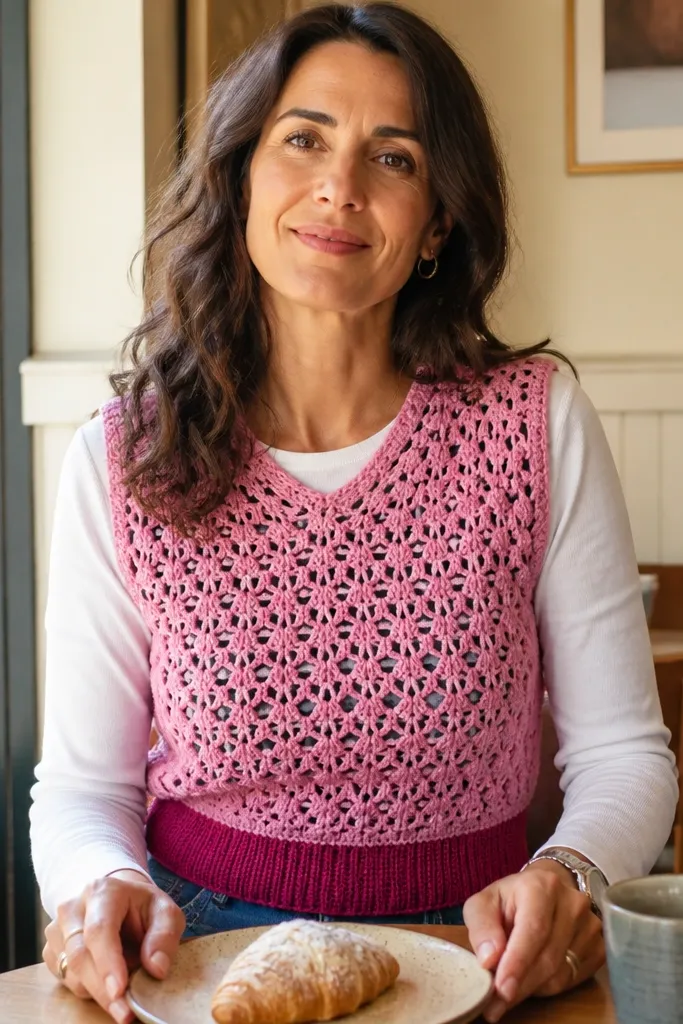
Sweater vests photograph beautifully because they show layering. This idea uses sleeveless construction so you finish faster than a full sweater and get a crisp, styled look. Pink looks great with neutral bottoms, and the contrast waistband makes the whole piece look intentional. It’s also budget-smart: less yarn than sleeves, and you can use a slightly softer yarn since you’re not crocheting thick arms. The build is straightforward — mostly rectangles and clean armhole shaping.
Crochet the front and back as separate panels with a simple stitch like half double crochet. Shape armholes by decreasing along the sides over a set number of rows, keeping the decreases smooth and symmetrical. Add a contrast waistband rib at the bottom using a smaller hook and front post stitches for firmness. Finish with a neck rib and optionally crochet a simple V or scoop neckline edging for extra polish.
Pro tipMake your armhole shaping a touch deeper than you think; it looks better in photos and feels less restrictive.
AvoidDon’t skip armhole finishing — raw edges make the vest look unfinished.
10. Chunky Cable-Look Panels in Heather Gray
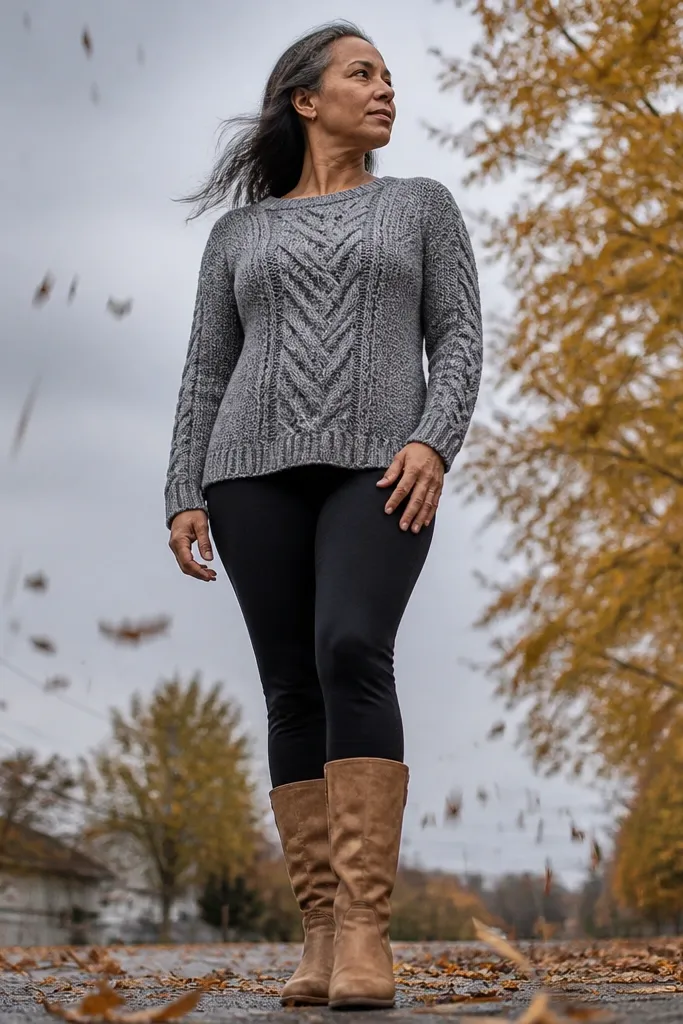
Cable-look crochet gives you that “knit sweater” vibe without needing knitting skills. This design uses a panel system where faux cables are placed down the center and along the sleeves, so the texture reads clearly even from a distance. Heather gray is a cheat code for photos because it works with almost every background and doesn’t fight your outfit. This project is best for intermediate beginners because cable-look stitches require front/back post management and careful row repeats. The result is a sweater that looks cozy and structured.
Choose a cable-look stitch pattern that works in crochet using front post double crochet (FPDC) and back post double crochet (BPDC) swaps to mimic cables. Crochet the body in three sections: left panel, center cable panel, right panel, then seam them so the cable lines up. Build sleeves with matching cable placements so the sweater looks designed. Add ribbing at cuffs and hem in a tight stitch like single crochet rib or post-stitch rib, and block lightly to set the texture.
Mark the cable repeat start on each panel before you start; cable-look rows get confusing fast.
Avoid stretching the fabric while you seam; cables should stay aligned.
11. Asymmetrical Hem Sweater in Cream with Olive Side Panel
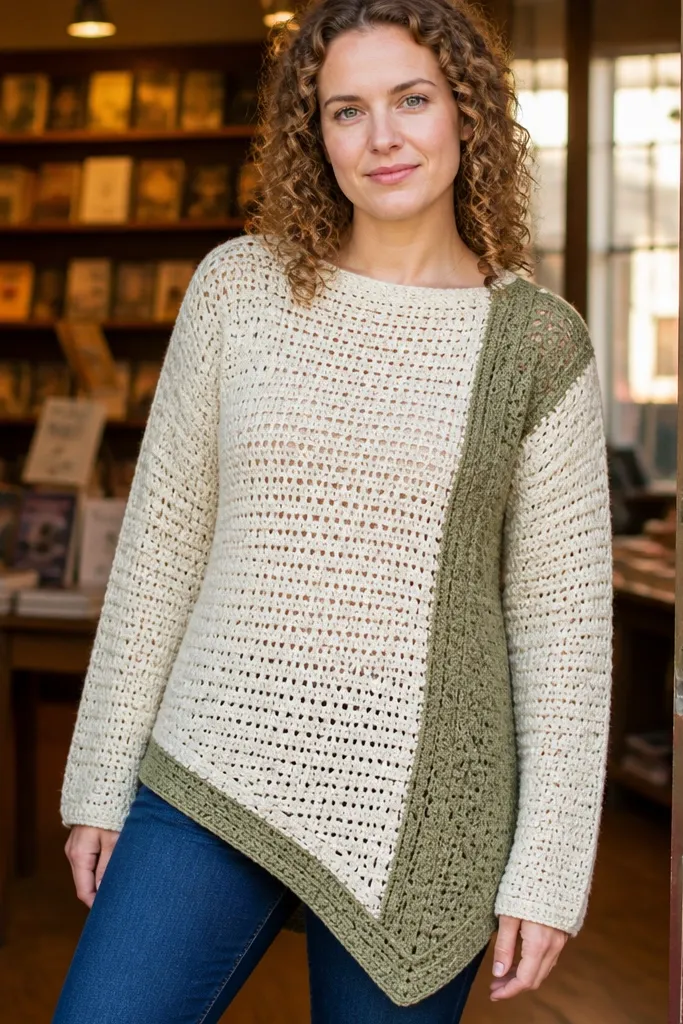
Asymmetrical hems look styled because they create movement in photos. This sweater uses a cream base with an olive side panel that visually pulls the eye across the body, making it flattering and interesting. The angled hem also hides fit issues at the waist because one side falls longer. It’s a budget crochet sweater idea that looks like a boutique item because the design detail is simple but bold. Skill level is beginner-to-intermediate: you’ll follow an easy decrease/increase schedule and focus on clean color placement.
Crochet the front and back panels with an angled hem by changing stitch counts at the side edge over several rows. Add the olive side panel by switching colors only in the side section and keeping the panel width consistent. Seam shoulders and sides, then crochet a simple neck rib in cream to keep the look clean. Finish with a hem border in cream single crochet so the asymmetry holds its shape.
Pro tipUse a row counter for the hem angle so both front and back sides match perfectly.
AvoidDon’t make the side panel too wide; it will overpower the asymmetry.
12. Lace-Open Stitch Sweater in Black with Scalloped Sleeves
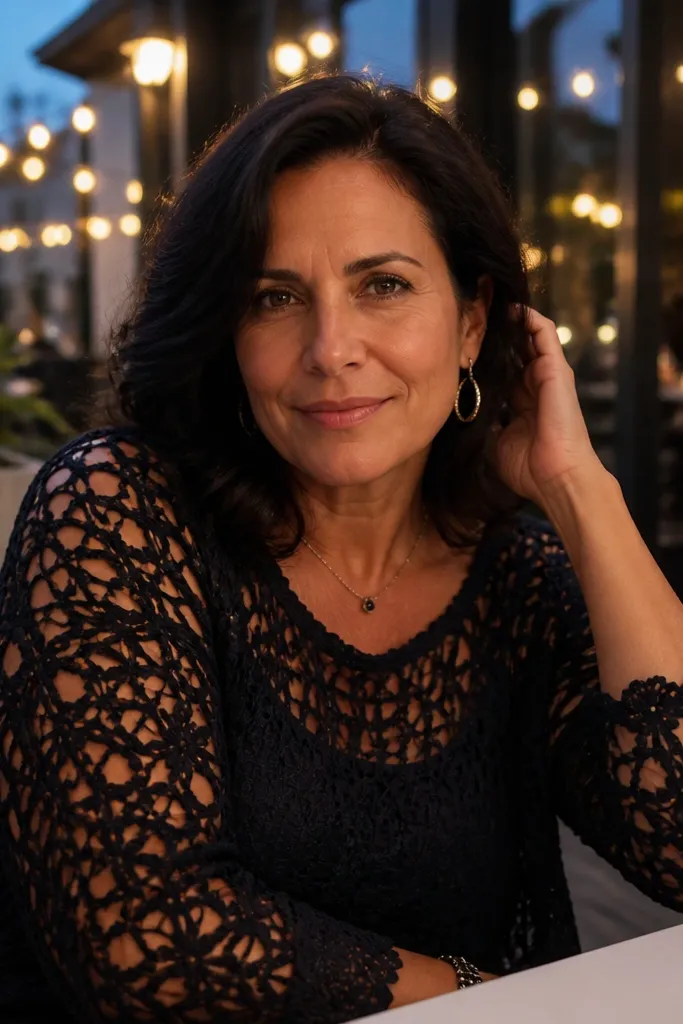
Black lace-open crochet reads elegant in photos because the negative space catches light and creates a delicate silhouette. This design uses an open stitch on the body and finishes the sleeves with scalloped edges so the details show even when you’re moving. It’s photogenic without needing heavy color contrast. The look works especially well for evenings, but it can also be a summer layering piece. Intermediate beginners can handle it if they keep stitch counts tidy and don’t rush the scallop edging.
Work the body with a lace-open stitch repeat that creates consistent holes across rows. Shape the neckline with gradual decreases so the open pattern doesn’t distort. Crochet sleeves as separate pieces and finish the cuffs with scallops by working a set number of stitches into a repeat and skipping evenly for the scallop curves. Seam everything with mattress stitch, then block to open up the lace pattern.
Pro tipBlock over a flat surface with pins — open lace stitches look best when they’re stretched evenly.
AvoidAvoid thick yarn for open lace; it kills the airy effect.
13. Striped Granny Square Pullover with Modern Neck Rib
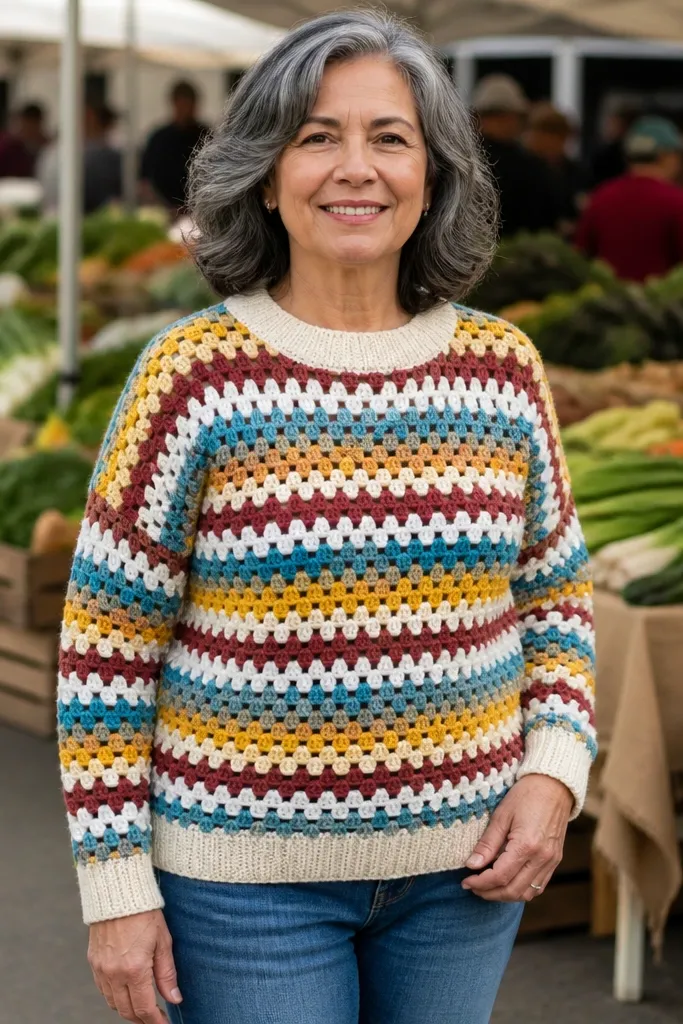
Granny square pullovers look nostalgic, but you can make them look modern by tightening the construction and adding a clean ribbed neck. This version uses striped granny square panels that line up into a sweater silhouette. The stripe direction helps the squares look intentional instead of patchwork. It’s budget-friendly because you can use scrap yarn for the squares, and you can stop once you have enough squares for your size. Skill level is beginner-to-intermediate: you’re repeating granny square rounds and then joining panels cleanly.
Make a set of striped granny squares with the same final square size, then lay them out to form the front and back panels with the stripe alignment where you want it. Join squares using a join-as-you-go method or whip stitch with minimal bulk. Crochet the neck opening by picking up stitches around the opening, then add a ribbed collar in a solid stitch like single crochet rib. Add sleeves by joining granny squares or crocheting sleeve rectangles that match the square stitch gauge.
Use the same join method for every seam so the sweater edges don’t look uneven in photos.
Don’t mix square sizes; even a few millimeters difference shows after joining.
14. Wide-Collar Sweater in Oat with Soft Fringe Cuff Detail
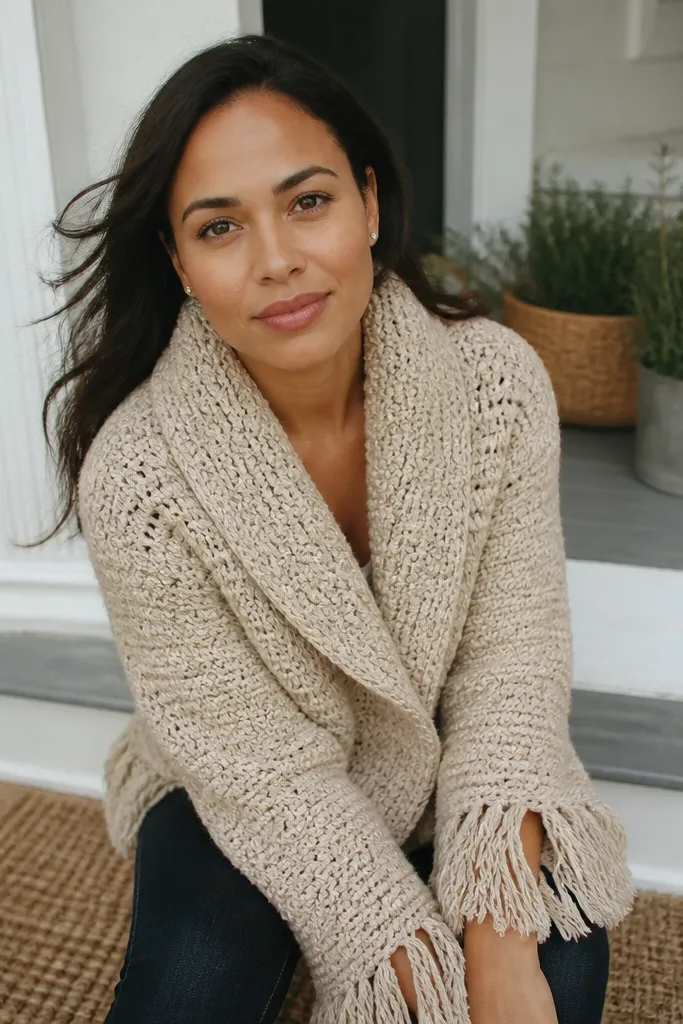
A wide collar makes a sweater look styled even when the body is simple. This oat sweater keeps the main fabric clean and then adds fringe at the cuffs for movement in photos. The fringe detail is budget-friendly because it uses short yarn lengths and a quick finishing step. It’s great if you want cozy vibes without complicated stitch patterns. Skill level is beginner-to-intermediate: you’ll crochet a straightforward body and finish with a collar and fringe.
Crochet a simple sweater body with a solid stitch and add a wider neck opening than a normal crew neck. Pick up stitches around the neckline and crochet a thicker collar band in the round using a firm stitch so it stands up. For fringe cuffs, sew or knot short strands onto the cuff edge at even intervals, trimming to a consistent length. Finish by weaving in ends and lightly blocking the collar band so it keeps its shape.
Use a yarn thickness slightly heavier for fringe than the body so it hangs with weight instead of flopping.
Avoid long fringe — it tangles and looks messy fast in photos.
15. Half Double Crochet Sweater with Contrast Shoulder Panel
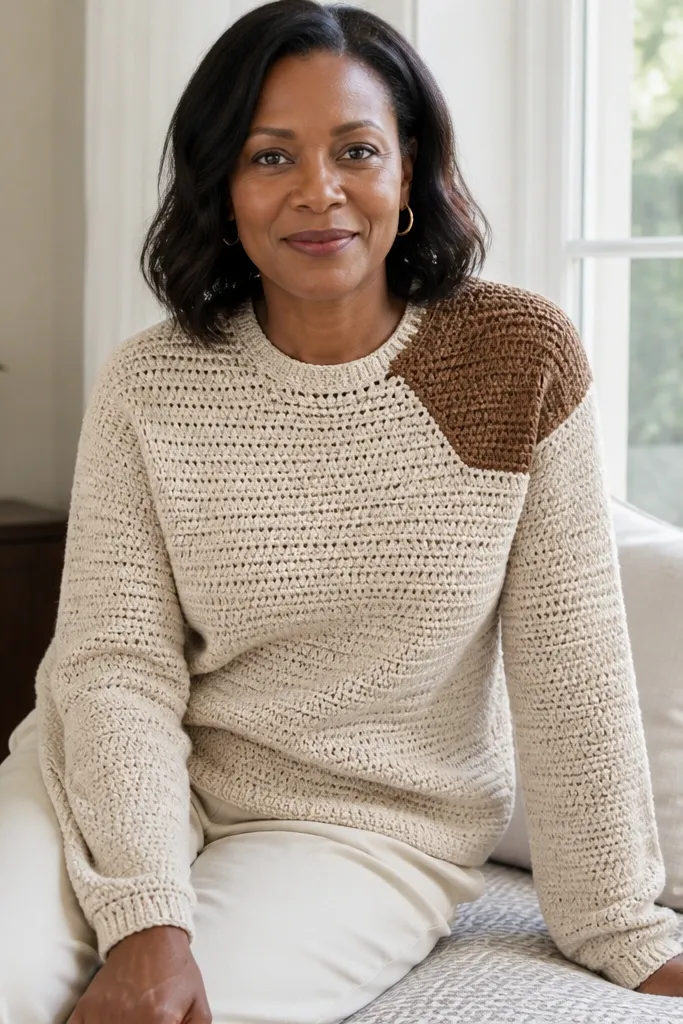
This is a “looks expensive because of placement” sweater. The body is done in plain half double crochet, then a contrast shoulder panel gives structure and a designer feel. It’s photogenic because your eyes go to the shoulder line first, and that’s where most sweaters look best when they’re shaped right. The stitch is simple, so your time goes into the design detail, not the complexity. Beginners get a win here, as long as you keep the panel edges straight.
Start with the body panels in a main color using half double crochet for even texture. Add a contrast shoulder panel by switching colors and working a rectangle on the upper front and back, then decreasing slightly to follow your shoulder slope. Seam the pieces so the shoulder panels align left to right, then add a simple rib neckline and cuffs. Finish with a clean hem border in the main color using single crochet for a stable edge.
Pro tipUse stitch markers along the color change line so the shoulder panel edge stays straight.
AvoidDon’t let the contrast panel start too low; it makes the sweater look droopy.
16. Checkerboard Textured Sweater in Teal + Cream
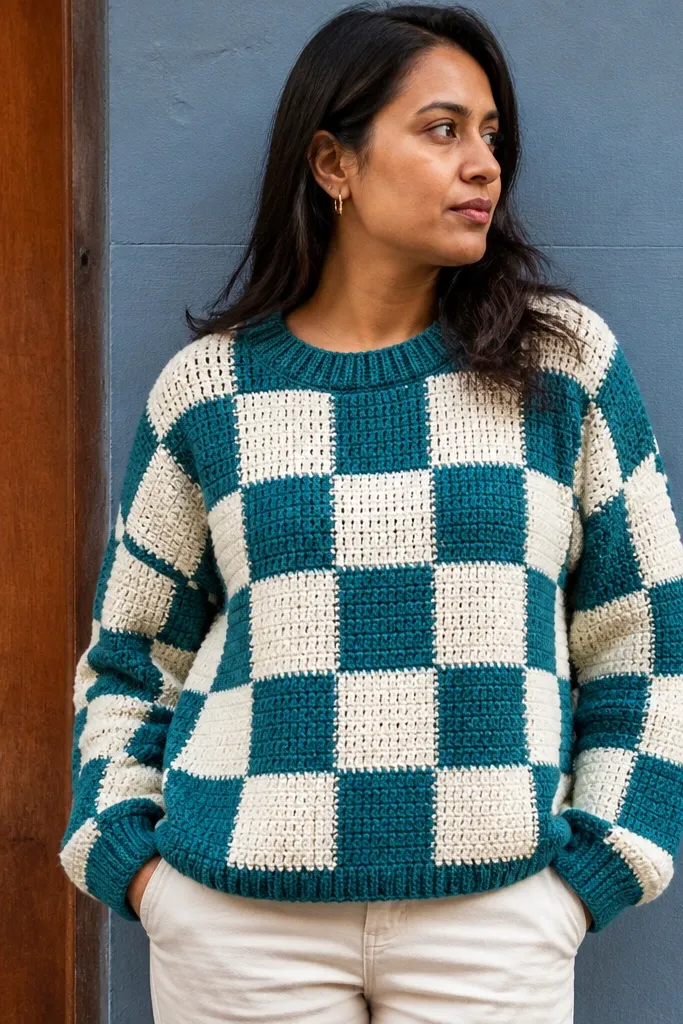
Checkerboard texture is a guaranteed photo grabber because it creates a pattern grid that reads clearly even in low detail shots. This sweater uses alternating textured rows so you get depth without complex shaping. Teal and cream is a strong combo that looks fresh against outdoor backgrounds and bright indoor lighting. The design is budget-friendly because you’re only using two colors and repeating a stitch pattern. Skill level is beginner-to-intermediate, since the main challenge is keeping the grid aligned across rows.
Choose two yarn colors and alternate them in a grid by changing color every few rows at the exact repeat boundaries. Build the texture using two stitches that look different in relief, like front post double crochet versus back post double crochet, or a switch between half double crochet and a taller textured stitch. Crochet the body panels with the checker alignment consistent, then seam shoulders and sides. Add ribbing at the neck and cuffs in one color so the pattern stays the star.
Pro tipUse the same hook size for both stitch types; texture mismatch makes checkerboards look off.
AvoidAvoid skipping a row repeat; one missed row breaks the whole grid.
17. Ribbed Crew Sweater with Button-Tab Shoulders in Rust
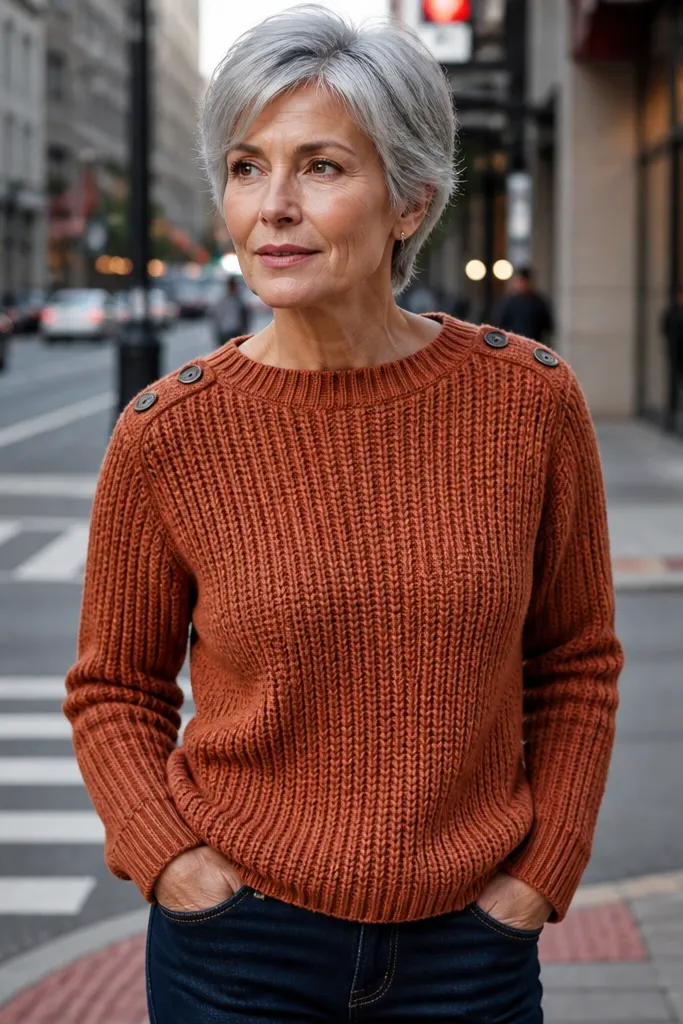
Ribbed crew sweaters look neat and store-like, and the button-tab shoulders add a sweet detail without heavy cost. Rust color is warm and photogenic, especially with cream, denim blue, or black bottoms. The ribbing also helps the sweater look structured, so it doesn’t collapse when you wear it. Skill level is intermediate because you need clean ribbing and simple button-tab construction, but the crochet stitches are still basic. This is a great choice if you want a sweater that looks “styled” even with minimal accessories.
Crochet the body in ribbing using front post/back post stitches or single crochet rib for a firm fabric. Shape sleeves by decreasing gradually to a cuff width that matches the rib stretch. Add shoulder button tabs by crocheting small rectangles and sewing them to the shoulder seam area, then stitch on buttons or simple snap closures. Finish with a ribbed crew neck and neat sleeve cuffs so the tabs sit flat.
Pro tipSew buttons on after you block and wear-test the neckline — the rib stretches slightly and you want the tab alignment right.
AvoidDon’t attach tabs before you check shoulder width; misplacement shows instantly in photos.
18. Cropped Wrap Sweater in Olive with Braided Tie Belt
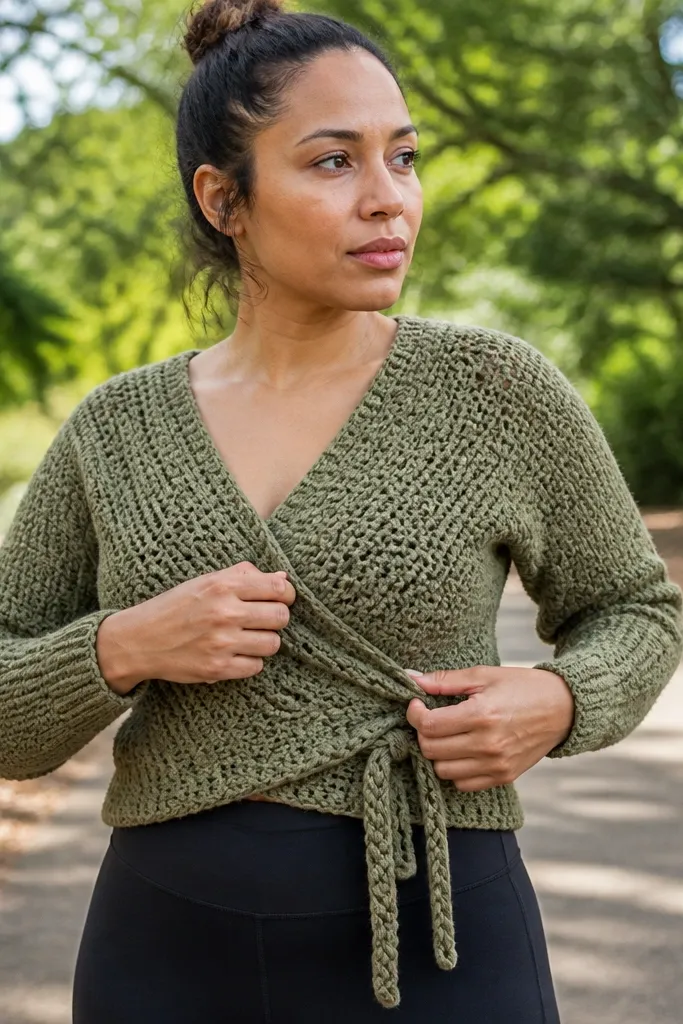
Wrap sweaters are flattering because they let you adjust the fit at the waist, and that adjustment looks good in photos. This design keeps the body simple but adds a braided tie belt so the front looks finished. Olive is a calm, stylish neutral that works with almost any color jeans. It’s budget-friendly because you’re making one wrap front structure and skipping complicated sleeve shaping. Skill level is beginner-to-intermediate: you need consistent wrap shaping and clean tie finishing.
Crochet two front panels with a cross-over overlap, shaping the neckline and front edges with even decreases so the wrap lies flat. Crochet the back panel straight and seam shoulders and sides. Add a rib border to both front edges, then attach a braided tie belt by crocheting a long chain and braiding strands or using a simple braid-like stitch. Block lightly so the wrap overlap holds its curve.
Make the tie belt long enough to wrap twice; it helps the sweater look snug on camera without extra bulk.
Avoid too little overlap — it opens up in photos and looks unfinished.
19. Thermal-Look Sweater in Cream with Vertical Slub Texture Rows
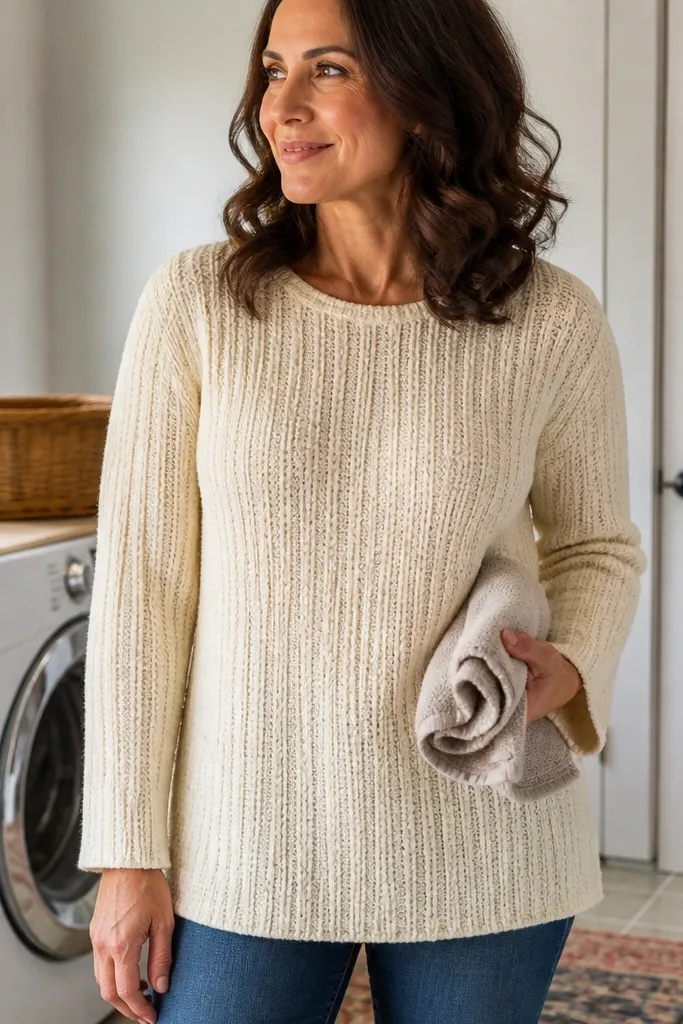
Vertical texture lines create a thermal-like effect that looks cozy and designed, even with a simple base stitch. This sweater uses cream to keep it bright and wearable, then adds vertical raised rows that catch light. The result reads “handmade” in a good way because the texture is visible without being loud. It’s budget-friendly because you’re repeating a vertical row pattern rather than doing lace all over. Intermediate beginners can manage it if they keep track of the vertical repeat.
Start with a cream body in a simple stitch like half double crochet that gives a smooth backdrop. Add vertical slub texture rows by working a repeat of front post/back post stitches (or a chosen raised stitch) at fixed intervals across the row. Crochet front and back with the same interval placement so the texture columns line up. Seam, then add ribbing at hem and cuffs using a tighter stitch and smaller hook for stability.
Use a row marker for each texture column so you don’t drift when you switch yarn balls.
Avoid changing your stitch height between texture rows; it creates a wavy column in photos.
20. Mosaic Panel Sweater in Navy with Light Blue Squares
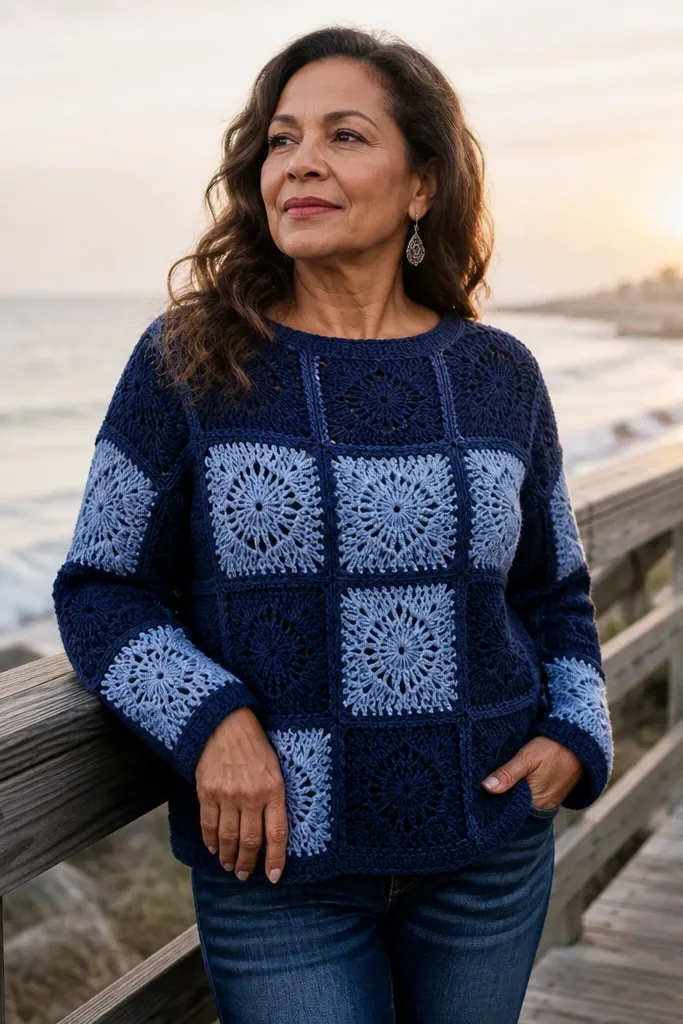
Mosaic crochet looks complex, but you can build it in panels so it stays manageable and looks clean. Navy base makes the light blue squares pop, and the contrast gives you that “designed” look without full-on colorwork everywhere. This sweater is photogenic because the pattern sits in blocks that read clearly. It’s also budget-friendly if you use small amounts of light blue yarn for the squares. Skill level is intermediate because mosaic panels require consistent stitch placement and careful row planning.
Plan your mosaic panel grid first by deciding how many squares wide each panel is. Crochet the navy background panels in a consistent stitch, then overlay the light blue mosaic pattern in selected rows to form the block effect. Assemble the front and back by seaming mosaic panels into the sweater shape, making sure the pattern lines match across seams. Add ribbing at the neckline and cuffs in navy to keep the look grounded and tidy.
Write the mosaic repeat count on paper and keep checking it — one slipped repeat shows in the block lines.
Avoid using too many light blue shades; stick to one light blue to keep the mosaic crisp.



