
1. Color-Block Mug Cozy with Contrast Border
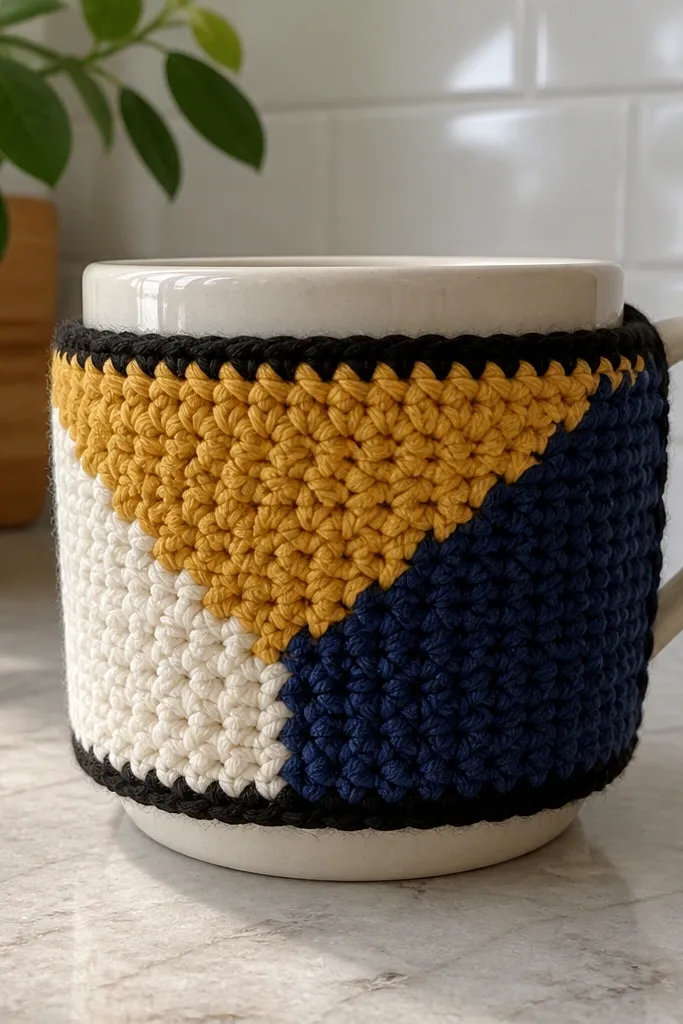
A mug cozy is a small gift that still reads as “made by a person,” not bought. The color-block layout creates instant visual structure, and the contrast border makes the edges look crisp even if your stitches aren’t perfectly uniform. Use a ribbed stitch for the body so the cozy hugs a standard mug and looks snug in photos. It’s budget-friendly because you only need enough yarn for a sleeve, and acrylic handles machine-wash care better than many delicate fibers.
Start with worsted weight yarn in two colors and crochet a snug rectangle that wraps around a standard mug. Make your base in back-and-forth rows using a ribbed stitch like alternating front post/back post or simple extended stitches for texture, then join the ends with a slip stitch. Add a border row in the contrast color around the top and bottom edges, then weave in ends and lightly steam-shape so it lies flat. Test fit by wrapping it around a cold mug; you want slight stretch, not tight compression.
Pro tipUse stitch markers at the corners so your border stays even when you rotate the cozy.
AvoidDon’t skip the border row — the cozy looks unfinished without that frame.
2. Stackable Coasters in Textured Single Crochet Squares
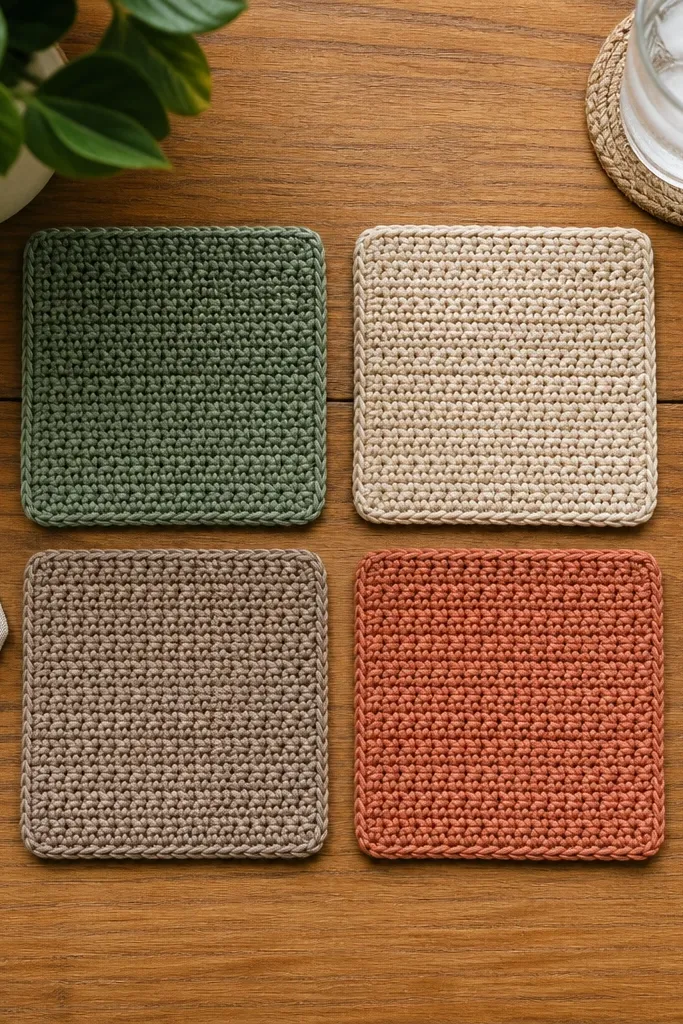
Coasters photograph beautifully because they’re flat, symmetrical, and you can show a full set at once. Textured single crochet gives a surface that looks intentional, and the square shape keeps them from curling in images. This project is budget-friendly because you can use scrap yarn, but it still looks cohesive if you stick to one neutral palette plus one accent. The finished coasters are practical too — they protect tabletops and look cute on a coffee table.
Pick cotton yarn for absorbency and stability, then choose a hook size that creates a firm fabric (often 1-2 sizes smaller than the label). Crochet 4-6 squares that are the same size — aim for about 4 inches across each coaster if you’re using worsted cotton, then adjust based on your gauge. Add a tight single-crochet border around each square to square up the edges. Block them by pinning flat and letting them dry so the corners stay crisp.
Make one “test square” first, then measure it with a ruler before you commit to the full set.
Don’t use a loose gauge — floppy coasters look messy in photos and slide on tables.
3. Mini Zipper Pouch with Granny Stripe Panel
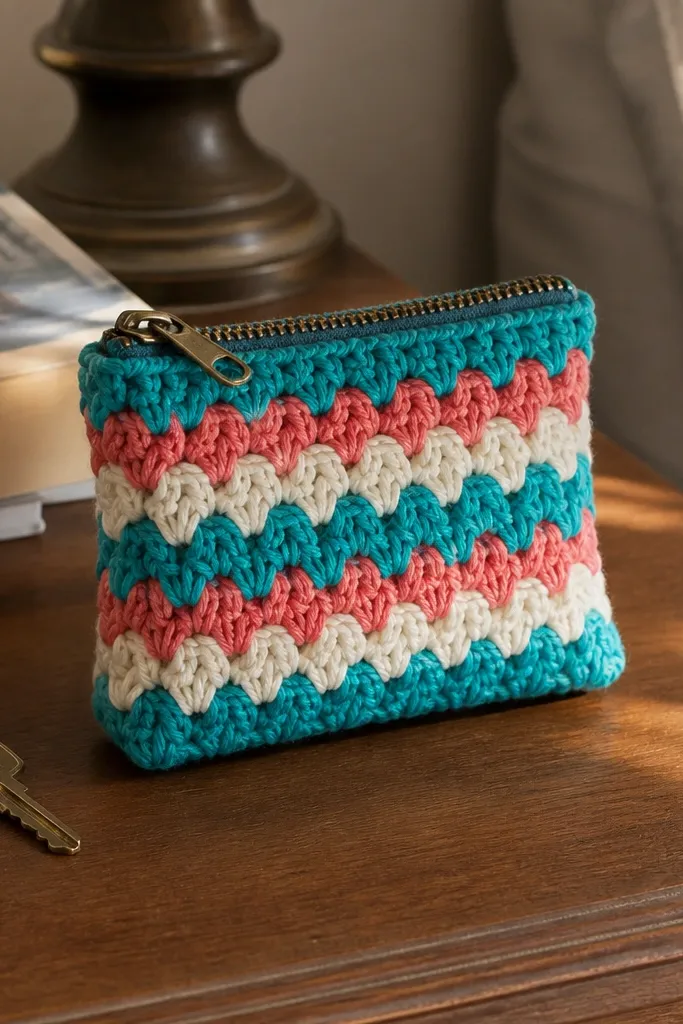
A zipper pouch is one of the fastest ways to make a crochet gift look high-end. The zipper gives a clean line that reads “finished,” while the granny stripe panel adds a graphic look that stands out in photos. You can keep it budget-friendly by using acrylic yarn and choosing a small size that doesn’t eat skeins. This works especially well for makeup, cable chargers, or travel — the pouch is small enough to gift without worrying about sizing.
Crochet a rectangle panel with granny stripe rows in two or three colors, aiming for a piece about 9-10 inches tall and 10-12 inches wide depending on zipper size. Line up your crochet panel with a zipper by laying the zipper face-down against the fabric and marking where the ends should sit. Sew or crochet a simple zipper attachment method using slip stitches or whip stitching through crochet loops for stability. Finally, add a lining if you want it to look extra clean, then stuff and test the zipper pull before gifting.
Pro tipChoose a zipper that’s 1 inch shorter than your pouch width so it lies flatter when closed.
AvoidDon’t attach the zipper after you’ve stretched the panel — crochet fabric can warp if you handle it too much.
4. Chunky Pocket Scarf with Faux Fringe Edges
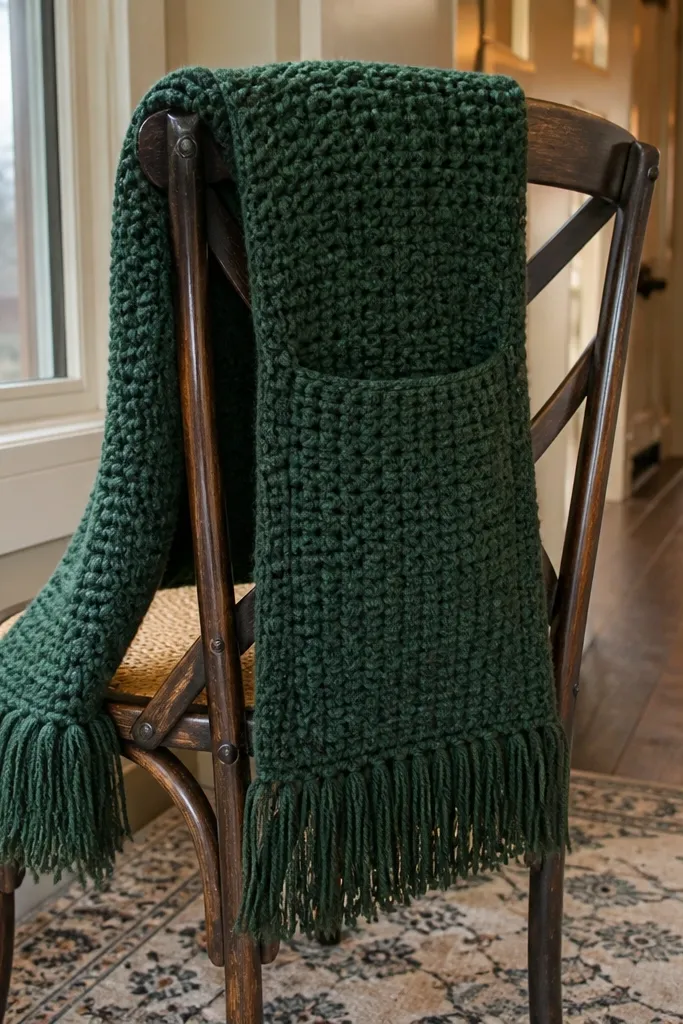
A pocket scarf is instantly giftable because it looks practical and looks good draped in photos. Chunky yarn plus a simple stitch pattern gives you that thick, cozy look without needing advanced crochet. The pocket panel adds a focal point, and the faux fringe edge makes the ends look intentional instead of ragged. This is a budget-friendly crochet gift idea because you can work in one main color and add a single accent for the pocket trim.
Use super bulky or chunky weight yarn (5) with a large hook to keep the project moving. Build a long rectangle for the scarf body using a simple stitch like half double crochet in rows, then crochet or attach a separate pocket panel about 7-8 inches wide and 8-10 inches tall. Sew the pocket panel onto the front, aligning the top edge so it sits centered. Finish the ends with short faux fringe by cutting yarn lengths, then knotting them through the edge loops, or create texture with a repeat stitch pattern if you prefer no cutting.
Pro tipSteam the scarf flat before you add fringe so the pocket sits square in photos.
AvoidDon’t make the scarf too narrow — a thin scarf hides the texture and looks less “gift-worthy.”
5. Twist Knot Headband in Two Colors
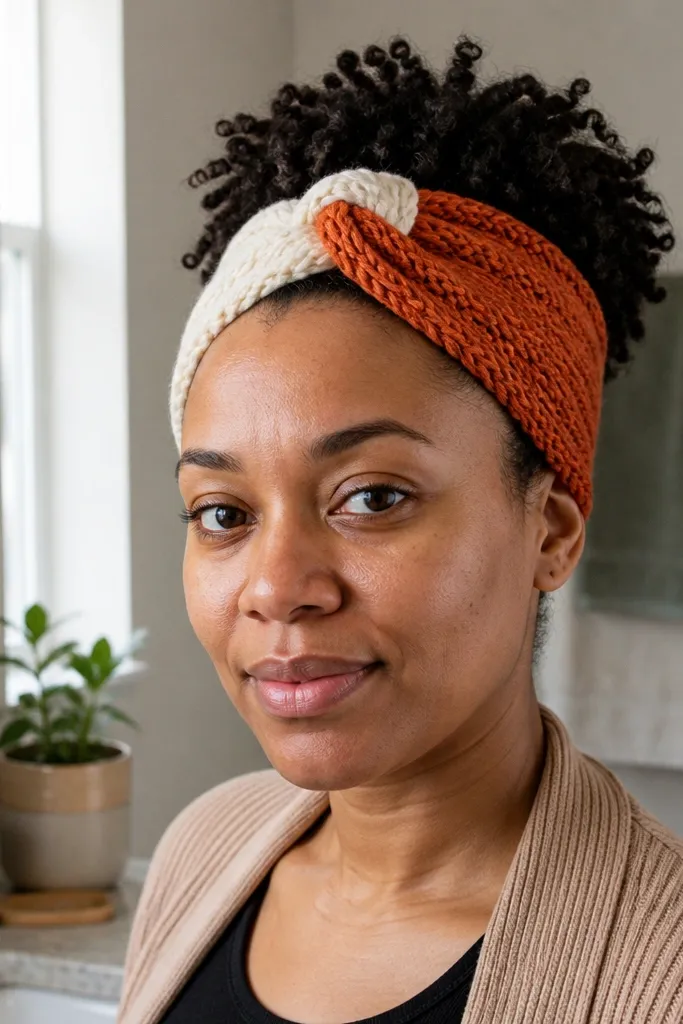
Headbands are one of the easiest ways to make a crochet gift feel personal without sizing drama. The twist knot center looks stylish in a selfie and reads clearly in flat-lay photos. Two-color contrast makes the knot pop, which is what you want if you’re working with budget yarn. This is fast enough for last-minute gifting and doesn’t require a complicated pattern — you’re building a shape, not a garment.
Choose a soft yarn with some give, like an acrylic blend in worsted (4). Crochet a long strip that wraps comfortably around the head, then fold it to form the base band. For the twist, create two short loops or a braided section using the same yarn and stitch them together at the center so it holds the knot shape. Attach the knot to the base with a few secure stitches and weave ends into the inside for comfort.
Pro tipUse a slightly smaller hook than the yarn label suggests to keep the headband from stretching out.
AvoidDon’t rely on a loose foundation chain — sloppy starts make the knot look uneven.
6. Sunburst Granny Square Tote Strap Panel
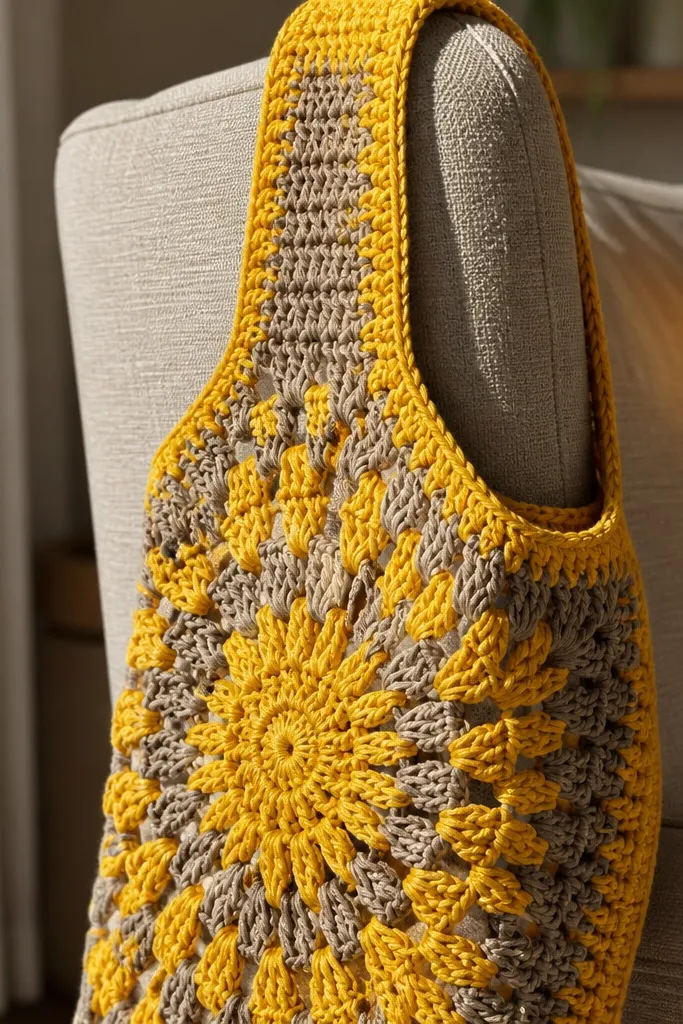
A tote strap panel looks like a designer accessory even when it’s just crochet squares. The sunburst granny design creates a graphic burst shape that’s extremely photogenic, especially if you use bright rays on a muted base. This gift idea works because it teaches a useful technique — building a structured square that can be attached to a bag or used as a standalone mini tote front. It’s budget-friendly because you can do it with scraps and only one heavy yarn for the final join.
Crochet a square using sunburst-style granny rounds — start with a small center ring, then expand with rounds that alternate color rays. Keep your stitches tight so the rays stay defined, and count rounds carefully to keep the square from warping. When the square hits your target size (around 8-10 inches), reinforce the edges with a single crochet border. Attach it to a simple tote by stitching it to a pre-made canvas bag front or by crocheting a matching base rectangle and sewing the sides.
Pro tipBlock the square before attaching so the rays sit flat and don’t curl at the corners.
AvoidDon’t skip edge reinforcement — unbordered granny squares can look wavy on a tote.
7. Rainbow Ripple Bookmark with Clean Ties
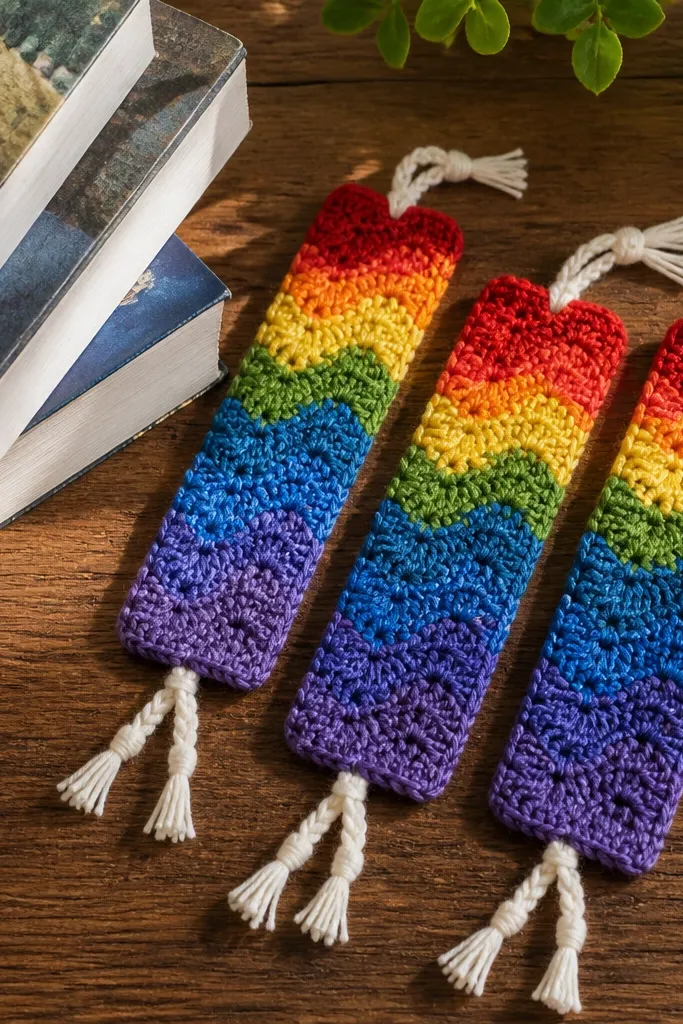
Bookmarks are small, cheap, and still look cute in a gift photo, especially as a set. A ripple pattern creates movement and a “handmade” texture you can see instantly, and the rainbow palette makes the piece feel cheerful without being childish. You can gift these to teachers, book lovers, or anyone with a stack of paperbacks. They’re budget-friendly because the yarn amount is tiny and you can use leftover skeins.
Choose DK or worsted weight yarn and a hook that produces a firm fabric. Crochet a ripple strip using a repeating increase/decrease pattern, aiming for a bookmark size about 7-8 inches long and 2-2.5 inches wide. Add a border row in a single color to stabilize the edges, then create tie loops at the top corners by chaining and slip stitching into the border. Weave ends tightly and trim close so they don’t snag pages.
Pro tipUse a solid color for the border so the ripple edges look sharp instead of fuzzy.
AvoidDon’t make the bookmark too floppy — loose tension makes it curl when it’s sitting between pages.
8. Cable Stitch Washcloth Set in Matching Colors
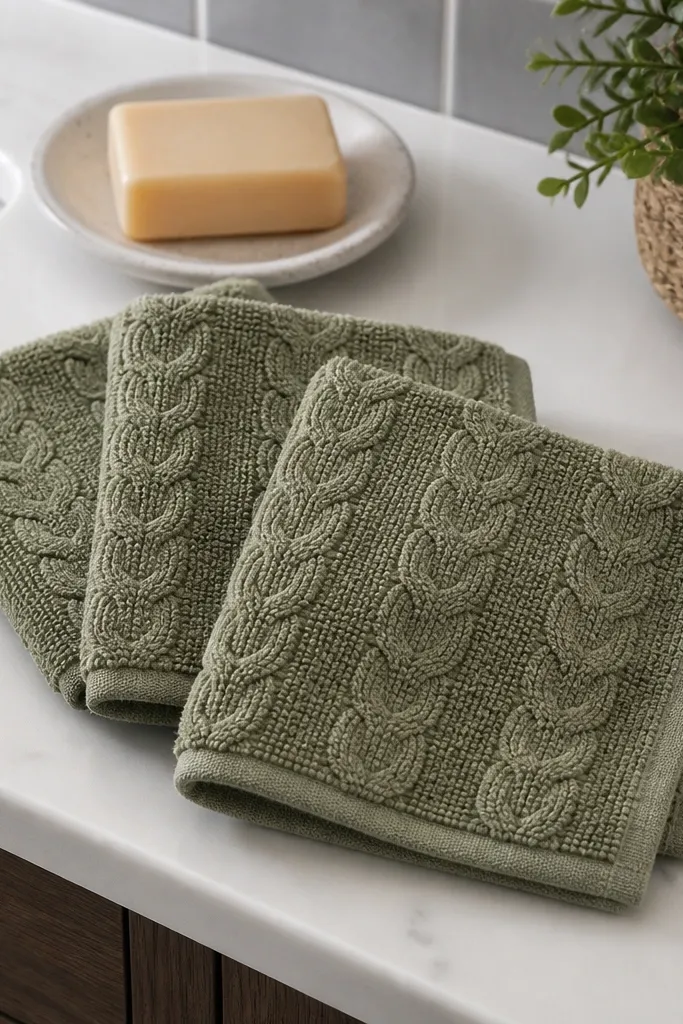
Washcloth sets look tidy on a bathroom counter, and cable stitch patterns look way more complex than they are. The raised texture gives a spa vibe in photos, and because they’re practical, the gift feels useful instead of decorative clutter. Use cotton yarn for absorbency and stitch a clean border so the edges don’t flare. This is one of the best budget-friendly crochet gift ideas because you can make multiple units from a small yarn purchase.
Pick cotton yarn in a single color family, like soft gray and cream, and choose a hook size that gives a dense fabric. Crochet a square or rectangle using a cable-like stitch pattern created by crossing front and back stitches — follow a repeat that you can count easily. Make two washcloths the same size, then add a tight border row around all sides. Block flat so the cables pop evenly and the corners stay square.
Pro tipKeep your yarn slightly taut when crocheting — cable stitches show up best when tension is even.
AvoidDon’t skip blocking, since textured washcloths can look uneven when they dry curled.
9. Crochet Key Fob with Braided Look and Metal Clip
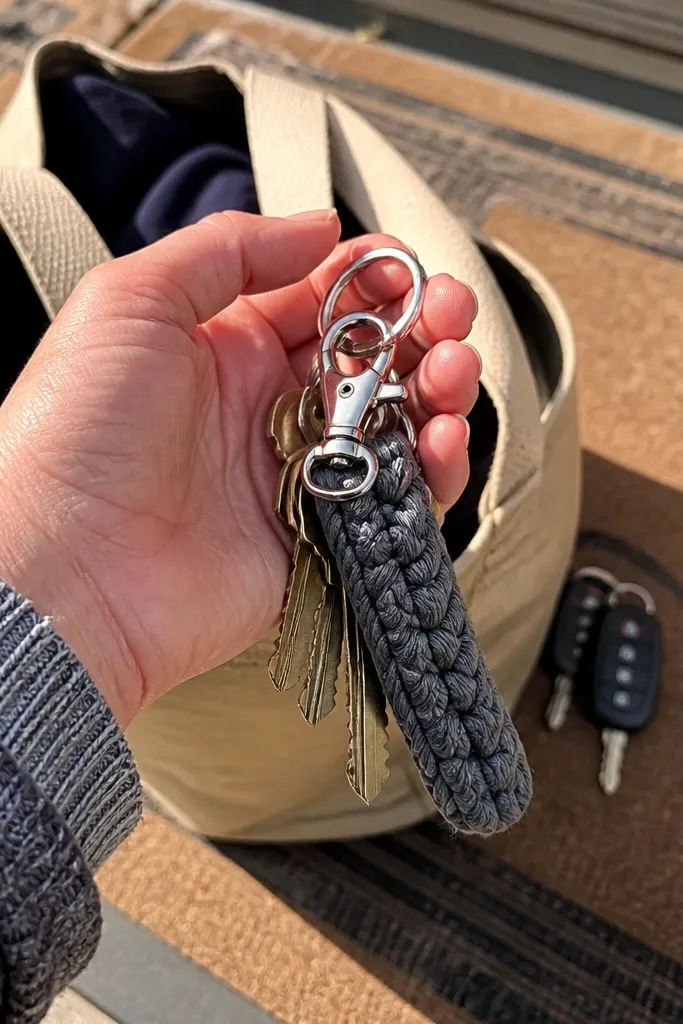
Key fobs are the kind of small gift people actually use daily, and that means they get photographed on keys and bags. A braided-look stitch creates a raised texture that stands out even with basic yarn. You also get to add hardware, which instantly makes it feel less “crafty” and more accessory-like. This is budget-friendly because you can finish it in under an evening and you only need a short length of yarn.
Use worsted weight yarn and crochet a narrow strip with a twisted or braided stitch repeat so the fabric has a rope-like texture. Aim for a length that wraps around your keyring with a little slack, then fold and stitch the seam to form a tube. Thread the metal clip through the opening or attach it by sewing loops at the top. Finish by weaving ends into the seam and trimming so nothing catches on the clip.
Pro tipAdd a tiny dab of fabric glue to the end seam before weaving ends if your yarn sheds a bit.
AvoidDon’t use a stretchy stitch — loose key fobs twist and look messy on keys.
10. Baby Bib with Geometric Edges and Button Closure
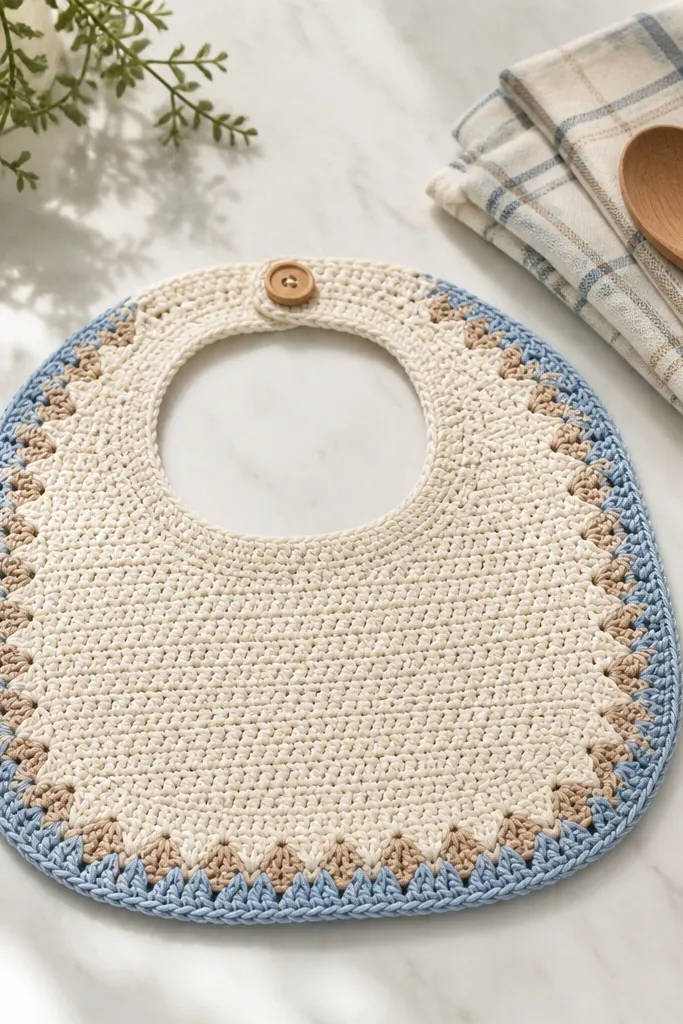
A baby bib is a practical crochet gift that still looks adorable in photos. Geometric edging gives the bib a clean frame, and a button closure keeps it neat and easy to adjust. Use cotton or cotton-acrylic blend so it holds up to washing and doesn’t feel scratchy. This is budget-friendly because the bib size is controlled and you can finish it with one main color and a contrasting trim.
Start with a cotton base panel in a simple stitch like half double crochet so it lays flat. Crochet a bib shape by increasing then decreasing in measured steps until you hit the desired width and height. Add a geometric edge with a repeating pattern of small peaks or blocks along the perimeter. For closure, crochet two short straps and sew buttons onto one side; place buttonholes with chain loops so they don’t stretch out.
Pro tipWash and dry a swatch once before you start so you know how much the fabric will shrink.
AvoidDon’t use thick fuzzy yarn — it grabs crumbs and looks messy after the first wash.
11. Amigurumi-Style Plant Pot Cozy with Leaf Appliqué
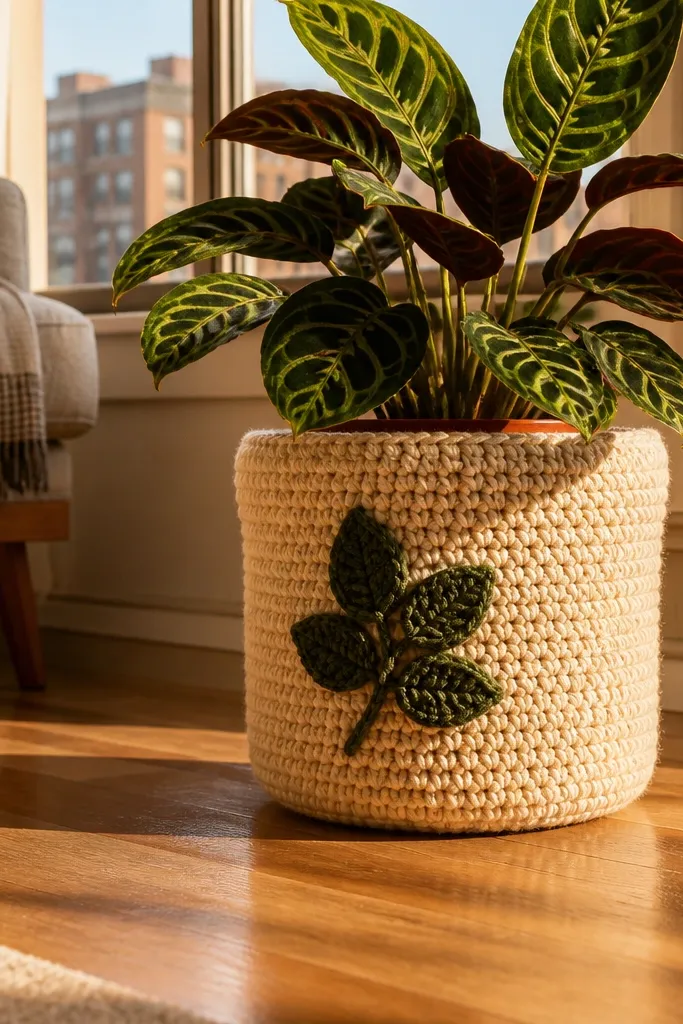
This is one of the most photogenic budget-friendly crochet gift ideas because it turns a basic plant pot into a themed decor piece. The leaf appliqué creates a clear focal point, and the cozy shape hides unsightly pot labels. Keep it simple: a snug slip-on cover and a small leaf cluster for character. It’s budget-friendly because you’re making one small garment-sized item, and the yarn amount is low.
Measure your pot’s circumference and crochet a tube or rounded cozy using single crochet so it stays firm. Work in rounds, decreasing slightly at the top to form a lip, then stop when it fits snugly around the pot. Crochet 2-3 leaves as separate pieces using a teardrop shape, then stitch them onto the front with a few secure passes. Add a simple top rim band if the top edge looks uneven after fitting.
Pro tipUse a smaller hook for the cozy body so it doesn’t sag when it’s on the pot.
AvoidDon’t overstuff — a floppy cozy looks cheap and won’t sit flat.
12. Oversized Pom-Pom Keychain Charm in One Color
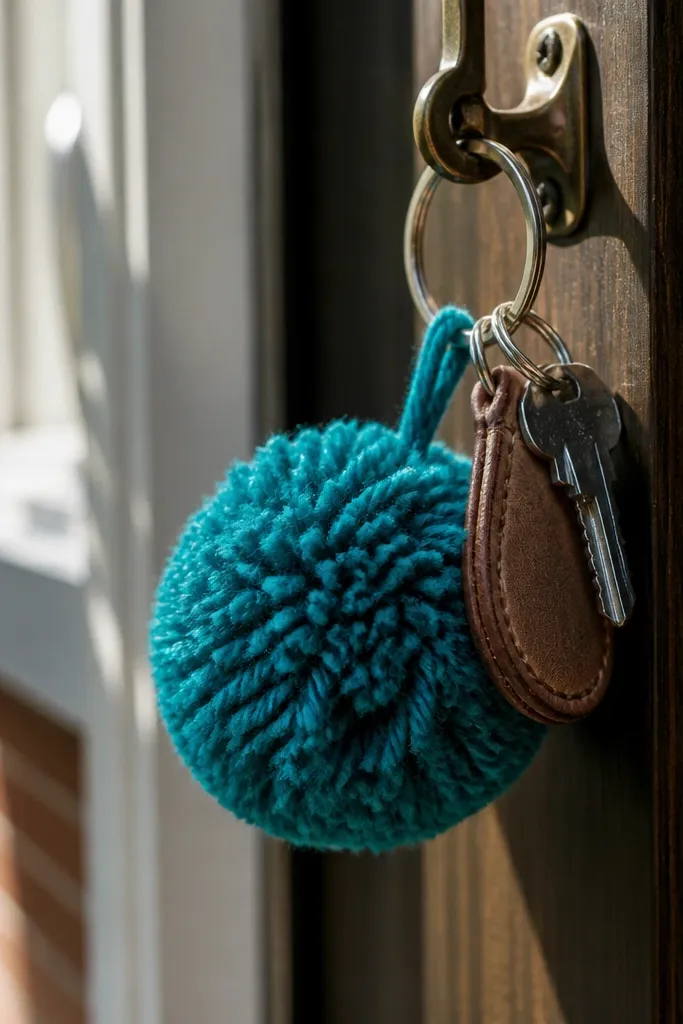
Pom-pom keychains look playful, take almost no yarn, and photograph well because the shape is instantly recognizable. A single-color pom-pom looks cleaner and more “intentional,” especially if you use a yarn with good twist definition. This works as an add-on gift for birthdays, party favors, or stocking stuffers. It’s budget-friendly because you’re basically spending a few yards of yarn plus a hardware ring.
Make a small pom-pom by crocheting a tight circle or a wrapped yarn bundle, then stitch the pieces together into a sphere. If you crochet the sphere, work in tight rounds with single crochet and keep increases controlled so it doesn’t flare. Attach a yarn loop or small chain to the top, then sew it to a metal keyring. Trim stray fibers and check the bounce by gently shaking it over a table.
Pro tipPick a yarn that holds shape (acrylic with a tight twist) so the pom-pom stays round in photos.
AvoidDon’t use long-pile novelty yarn — it hides the pom shape and looks fuzzy instead of cute.
13. Crochet Phone Sleeve with Buttoned Flap
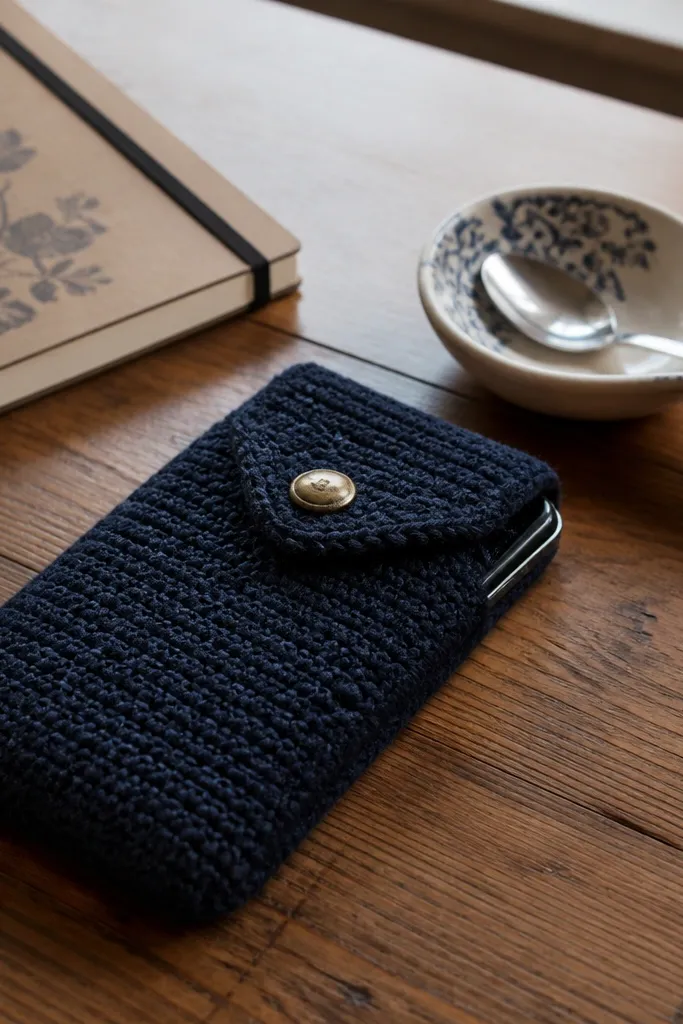
A phone sleeve is one of the most useful gifts, and the buttoned flap gives it a clean, structured look. Crochet fabric naturally adds grip, which makes it feel safer than a plain fabric sleeve. The trick for photogenic results is using a stitch that doesn’t create big holes — it should look dense and solid. This is budget-friendly because you can make it with one skein and finish it quickly.
Start by measuring your phone width and height, then crochet a rectangle that’s slightly smaller so it fits snugly. Use dense stitches like single crochet or half double crochet in rows, then fold and seam the sides. Crochet a flap panel by continuing rows on one side, then add a buttonhole or loop placement on the opposite edge. Attach a button and weave ends inside; if you want extra stiffness, add a thin fusible interfacing strip on the flap.
Pro tipAdd a short strap loop inside so you can pull the phone out without digging your fingers into the fabric.
AvoidDon’t choose an airy stitch pattern — holey sleeves look cheap and don’t protect well.
14. Granny Stripe Throw Pillow Cover with Invisible Finish
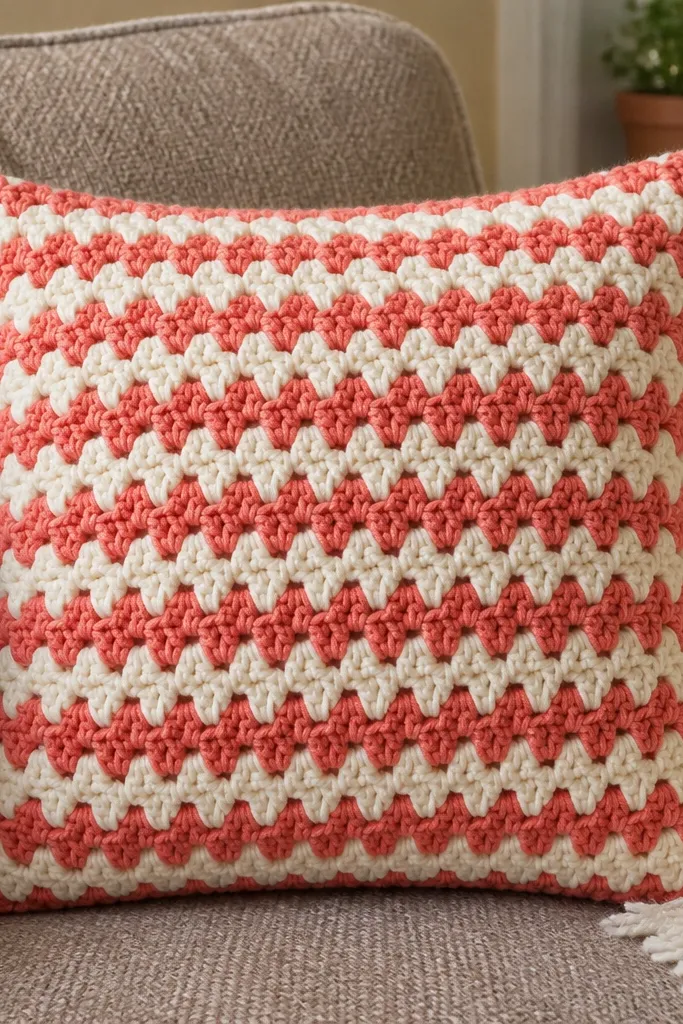
A crochet pillow cover makes a gift feel like decor, and it looks incredible in daylight photos because the stripes create movement across the surface. Granny stripe is also forgiving: you can swap colors without worrying about perfect symmetry. Budget-friendly matters here because you can use acrylic and scrap colors, but keep the pattern consistent for a polished look. The goal is a cover that fits a store-bought pillow insert and looks clean, not lumpy.
Choose an insert size first, like 16x16 inches, then crochet a cover that’s about 1 inch smaller so it stretches over the insert. Make granny stripe panels in rows and join them, then crochet a border frame around the whole cover. Add a closure method — a hidden zipper sewn to the inside edge or a buttoned overlapping flap — then test the fit with the insert. Steam or lightly block the cover so stripes lay flat before you install the pillow.
Use a border in a single color so the stripes look intentional and the edges don’t curl.
Don’t skip the closure plan — sewing ends into a loose opening makes it look handmade in the worst way.
15. Lattice Market Bag with Flat Bottom Panel
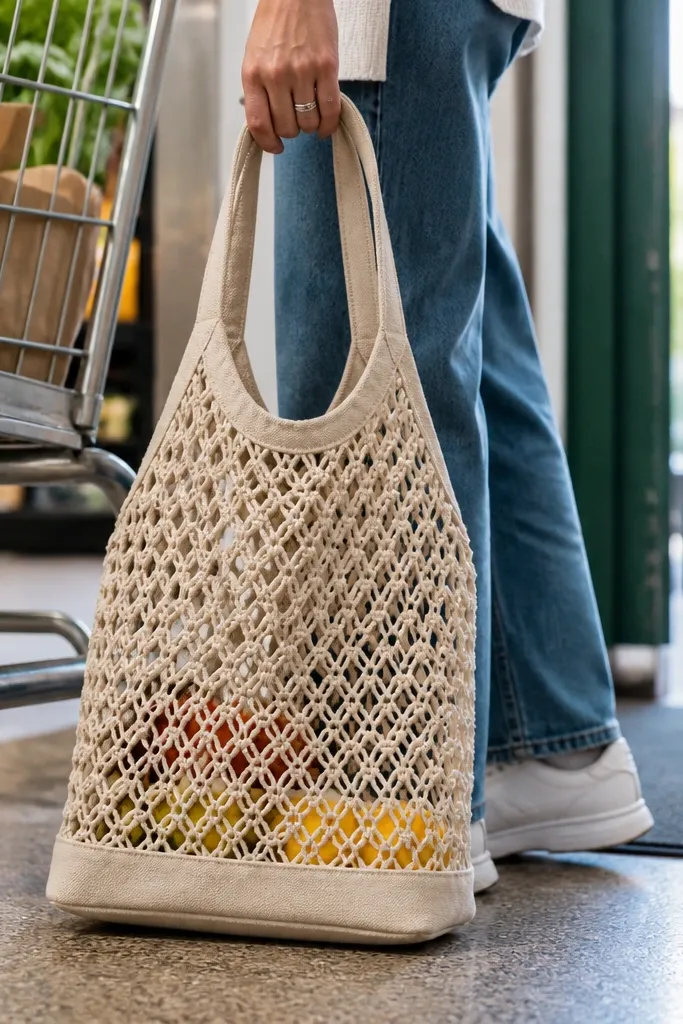
A lattice market bag looks modern and expensive because the openwork pattern creates a light, airy texture. The key to making it photogenic is the flat bottom panel and sturdy handles — those two details make it read as a real bag, not a doily. Use cotton or cotton-blend yarn so it stands up to carrying groceries and looks good after repeated use. This is a budget-friendly crochet gift idea when you keep the size medium and use one main neutral color with a contrast handle.
Start with a flat bottom panel by crocheting a rectangle with short stitch rows, then shape it into a bag by increasing at the corners and sides. Build the lattice pattern on the body using a repeat that creates consistent diamonds; keep tension steady so the open spaces look even. Crochet sturdy handles by adding extra rows or using a reinforced stitch, then attach with secure stitches. Add a top edging row to prevent stretching and weave in ends before you stretch the bag.
Pro tipUse a tape measure and check width mid-project so the lattice doesn’t narrow as you go.
AvoidDon’t use very thin yarn — the bag will collapse and the lattice pattern won’t hold its shape.
16. Stiffened Crochet Coiled Basket for Desk Cables
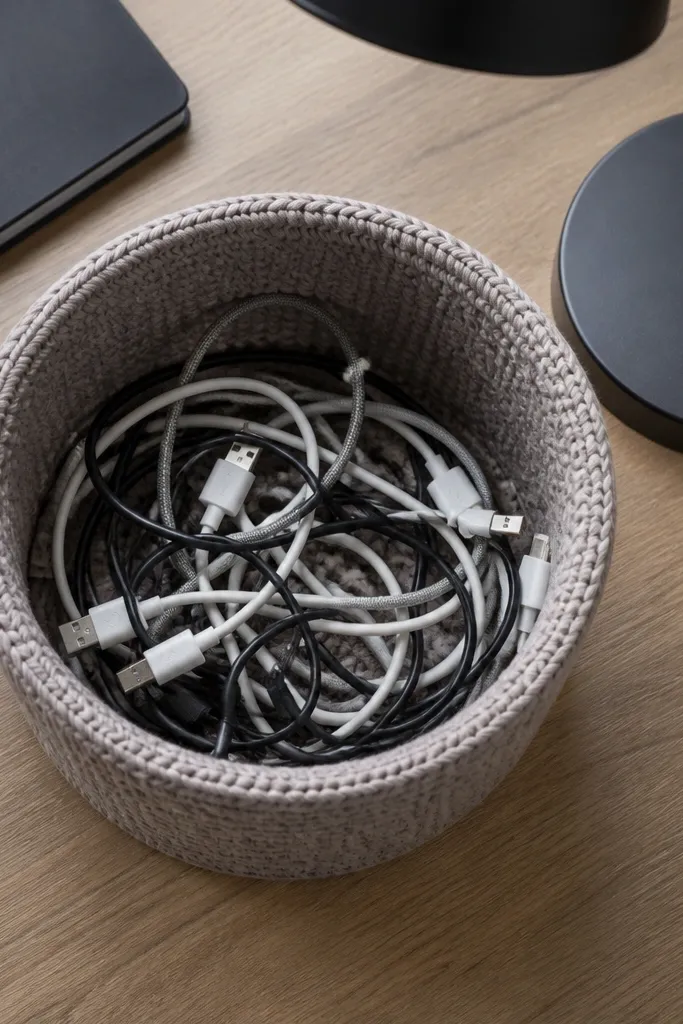
A small basket is one of the most satisfying gifts because it solves a real mess and looks good on a desk. Coiled texture looks sculptural, and a stiffened rim makes it photogenic from every angle. Choose a neutral color and keep the rim clean — that’s what makes it feel modern instead of handmade clutter. Budget-friendly crochet gift ideas shine here because you can use inexpensive acrylic and still get structure with the right stiffener.
Crochet a basket base in tight rounds using single crochet or half double crochet for a dense wall. Increase gradually to form the sides, then keep the height consistent so the basket looks symmetrical. After it’s dry-fit over a bowl or form, stiffen it by brushing diluted fabric stiffener inside and outside, then let it dry fully. Finish by trimming the rim edge with a final border row if needed, and weave in ends once the basket holds its shape.
Dry it over a smooth bowl so the interior stays perfectly round.
Don’t skip stiffening — without structure the basket looks like a floppy bowl.
17. Chevron Beanie with Clean Rolled Brim
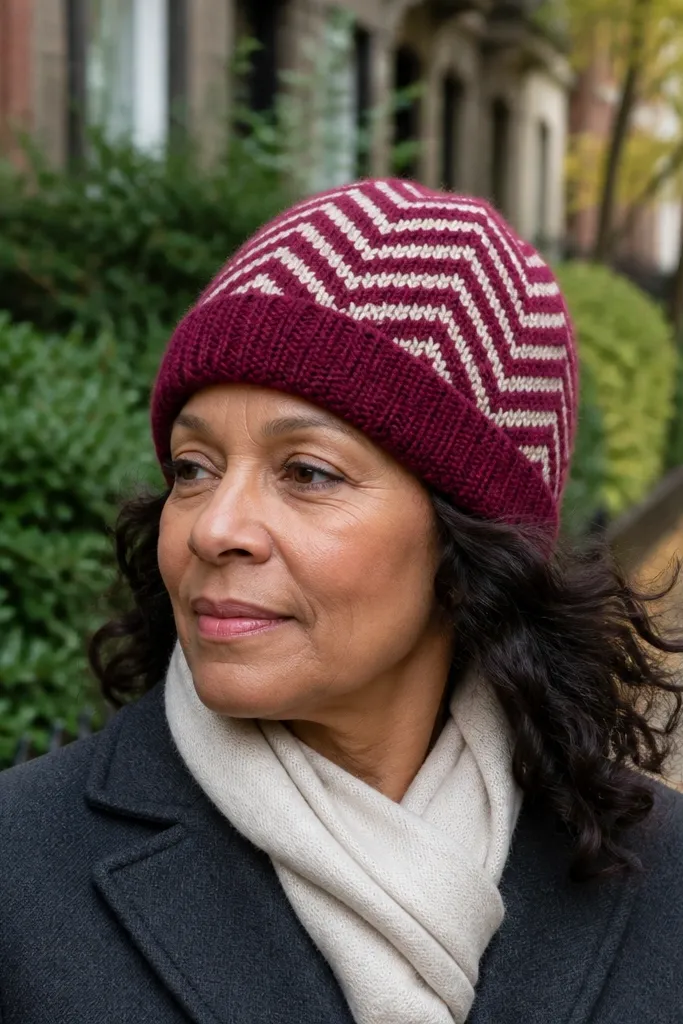
A chevron beanie is a classic gift that looks striking in photos because the V pattern creates strong lines. The rolled brim makes it look styled rather than basic, and it also helps the hat sit on heads without flopping. Pick one bold color and one neutral for the contrast chevrons so it looks intentional even with budget yarn. This project is budget-friendly because you only need enough yarn for the hat circumference and length.
Work in rounds or flat panels depending on your comfort, then shape the crown with decreases that match your chevron repeat. Crochet the body with a chevron pattern using increases and decreases on a defined row repeat so the Vs line up. For the brim, use ribbing stitches like back loop only single crochet rows to create a natural curl. Finish by sewing the crown seam (if you made panels), weaving ends tightly, and steaming lightly to set the brim curve.
Make the brim slightly longer than you think — it rolls more neatly after steaming.
Don’t ignore gauge — a too-loose beanie looks sloppy and the chevrons won’t line up.
18. Crochet Rose Appliqué on Canvas Tote Strap
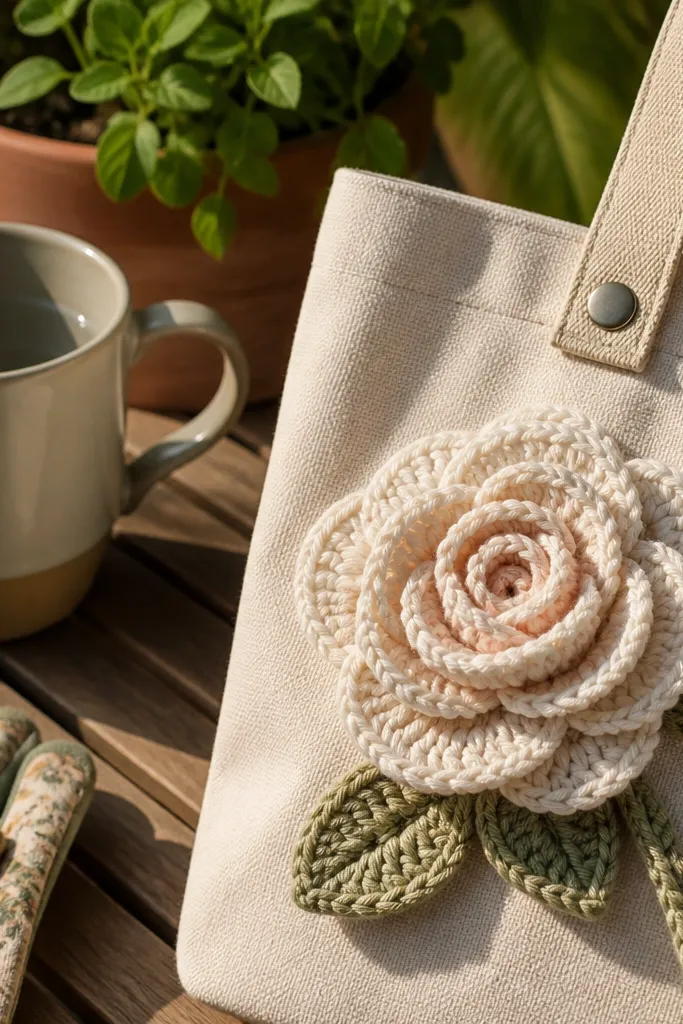
This gift is a cheat code for “looks expensive” because you’re adding one high-impact handmade element to a plain tote. The crochet rose appliqué gives a romantic focal point that shows up clearly in close photos and flat lays. It’s budget-friendly because you can make the rose with small amounts of yarn, and you can buy an inexpensive canvas tote to finish it. The result looks like a boutique accessory instead of a craft project.
Buy or reuse a simple canvas tote and decide where the rose will sit on the strap or front panel. Crochet the rose using layered petals in a spiral or concentric circle method, then stitch the petals together so the flower has depth. Add a small leaf appliqué beneath the rose for balance. Sew the finished rose to the tote using strong thread through the crochet loops, then knot and hide the thread ends inside the strap seam.
Stitch the base of the rose tightly so the petals don’t lift and cast weird shadows in photos.
Don’t place the rose too close to the edge — strap movement makes the appliqué twist and look uneven.
19. Baby Lovey Blanket with Border and Simple Corner Ties
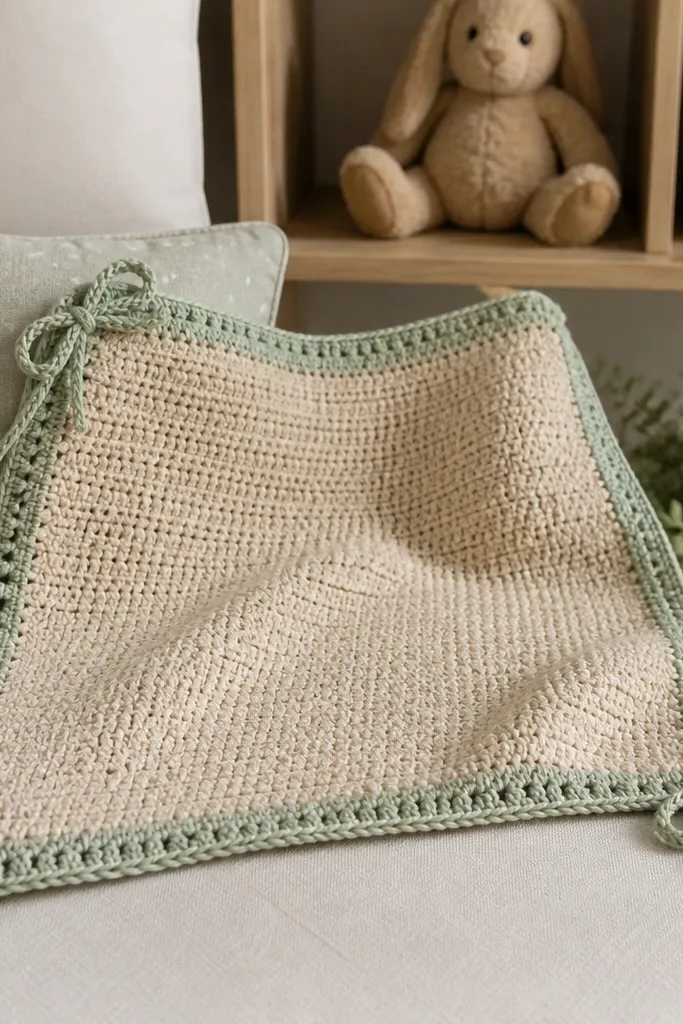
Loveys are one of the most meaningful gifts, and you can keep them budget-friendly while still making them look special. The look comes from a soft border that frames the center and corner ties that add movement in photos. Choose a simple stitch in the center like double crochet or half double crochet for a calm texture, then make the border the star. This is also a smart beginner project because the shape is controlled and you can stop at a size that fits a stroller blanket.
Pick a soft acrylic or acrylic-cotton blend and crochet a square or rounded square center, about 12-14 inches wide. Add a border around the perimeter using a stitch that creates a clean edge, like single crochet or crab stitch, then create corner ties by chaining loops at each corner and slip stitching back into the border. If you want extra photogenic texture, add a small applique like a simple star or heart in the center. Weave ends, then steam lightly so the border sits flat and the ties hang evenly.
Use the same stitch for the border every time — changing stitches mid-border makes it look patchy.
Don’t use a border that’s too loose — tied corners should look neat, not droopy.
20. Geometric Hexagon Potholder with Heat-Resistant Lining
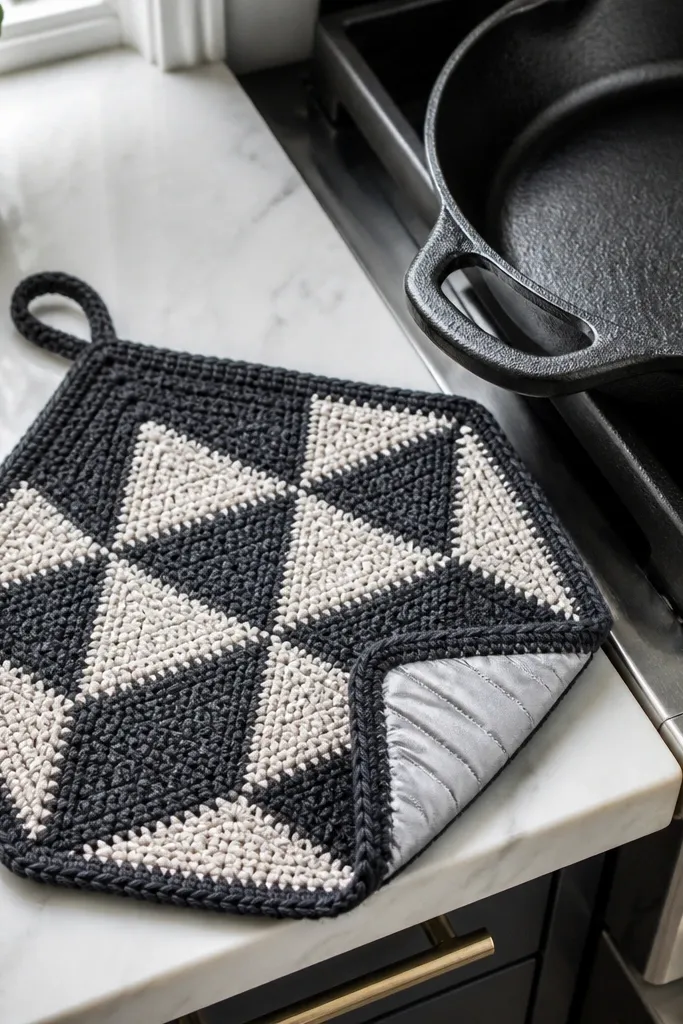
Potholders are practical gifts, and hexagon geometry makes them look modern instead of old-school. The pattern reads clearly from above, which is great for product-style photos. Crochet potholders look best when they’re dense and have a defined edge, so the hex shape holds its lines. Keep it budget-friendly with acrylic crochet yarn for the outer, but include a heat-resistant lining so it’s actually usable.
Crochet a hexagon using dense stitches like single crochet or thermal stitch style repeats, aiming for about 7-8 inches across. Make a second hexagon from a heat-resistant material like cotton batting or folded thermal fabric, then sandwich them. Sew the crochet outer to the lining around the perimeter using whip stitches through crochet loops. Add a hanging loop by crocheting a short chain strap and sewing it to one corner, then reinforce that spot with extra stitches.
Pro tipUse a contrasting top stitch color around the edge so the border looks crisp in photos.
AvoidDon’t skip lining — thick-looking crochet alone can still let heat through.



