
1. Scalloped Edge Cropped Cardigan in One Color
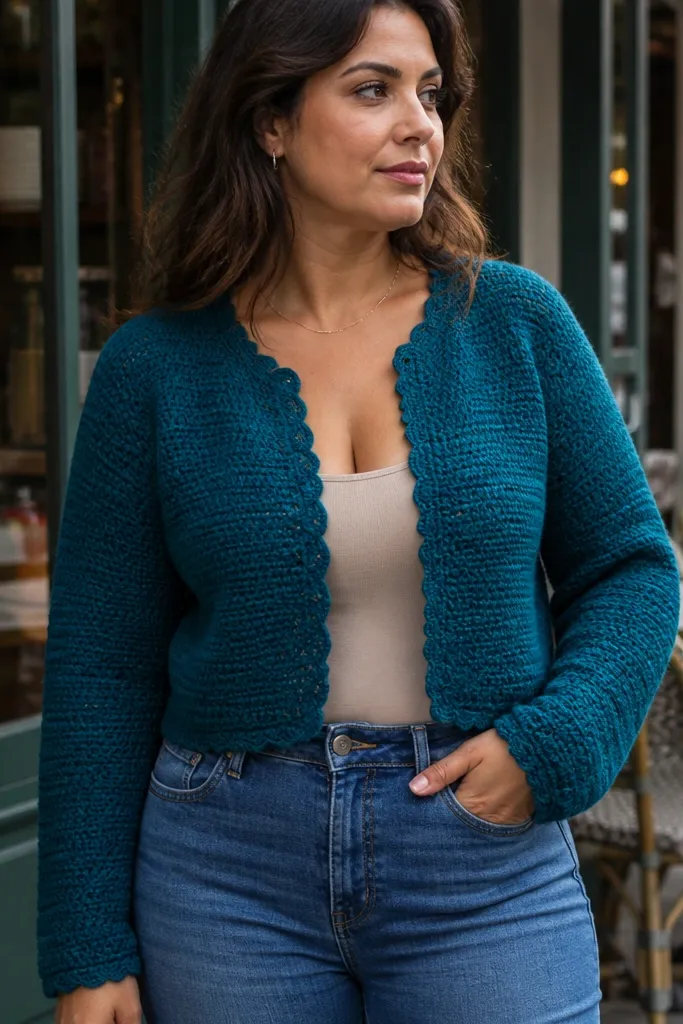
A cropped cardigan looks cozy because it frames the body and adds warmth without swallowing your shape. Go with a single yarn color so the scalloped edge reads as intentional trim instead of random texture. Use a slightly thicker yarn (worsted or thick DK) and keep the body stitches consistent so the cardigan hangs smoothly. This piece photographs well with jeans or a slip skirt because the hem detail catches light and gives your outfit a focal point. Skill level is beginner-friendly because the shape stays simple: body panels plus a clean front edge.
Start by making a gauge swatch in your chosen stitch and block it, then measure your bust or chest. Crochet two identical front panels and one back panel to your desired length (cropped usually hits at the high hip). Work a simple sleeve shape or choose short sleeves made from one rectangle each, then seam them in. Finally, crochet a scalloped border along the front edges and hem, then add ribbing bands at the cuffs and bottom if you want extra snugness.
Add a second border pass on the scallops using a smaller hook for sharper edges.
Skipping blocking makes scallops look wavy instead of crisp.
2. Raglan Sweater with Cozy Funnel Neck
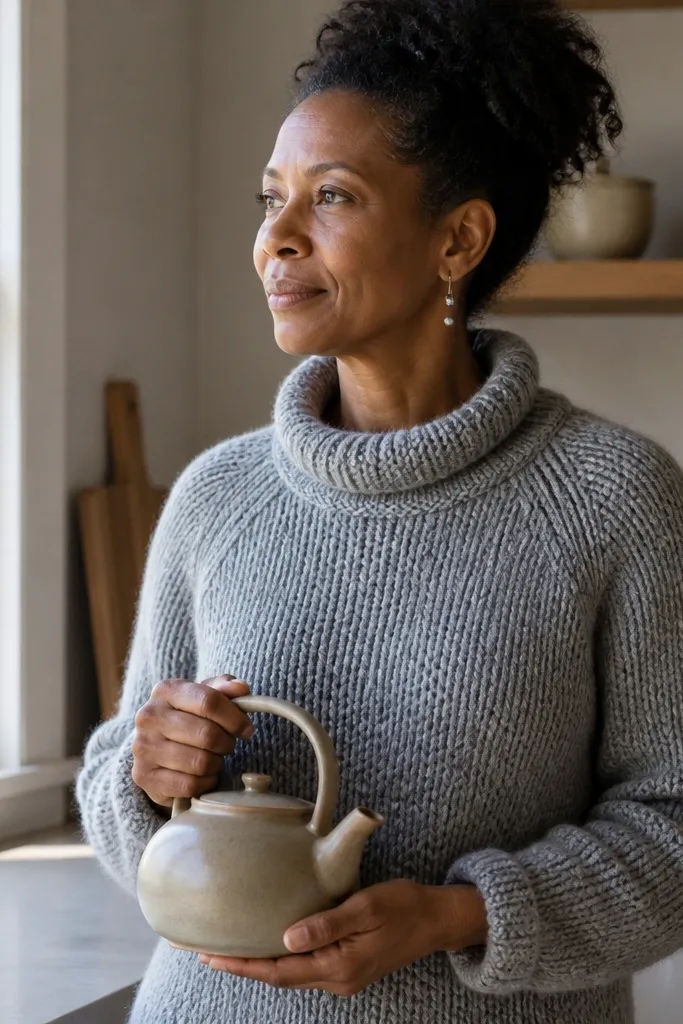
Raglan construction gives crochet clothes a more “store-bought” look because the sleeve line is smooth and naturally shaped. Pair it with a funnel neck for cozy warmth that doesn’t flop — it should sit like a folded collar, not a loose scarf. Choose a yarn that feels soft against skin, like a wool blend or high-quality acrylic, and keep the stitch count even so the neck stays structured. This sweater is a great photo piece because the raglan lines guide the eye and the neck detail looks intentional in any lighting. It takes longer than a scarf, but it’s still a realistic DIY build.
Begin with the neck and raglan shaping: crochet the yoke until it reaches your underarm depth, placing markers for each raglan seam. Then split for sleeves and body, following your stitch pattern and keeping decreases symmetrical at the raglan lines. Crochet the sleeves down to your wrist and seam them using mattress stitch for a clean finish. Finish by picking up stitches around the neck opening and working in rounds for the funnel neck until it reaches your preferred height, then bind off without stretching.
When picking up neck stitches, use a hook one size smaller to keep the funnel from stretching out.
Using a loose bind-off on the neck makes the collar roll outward.
3. Wrap Top with Thick Textured Stripes
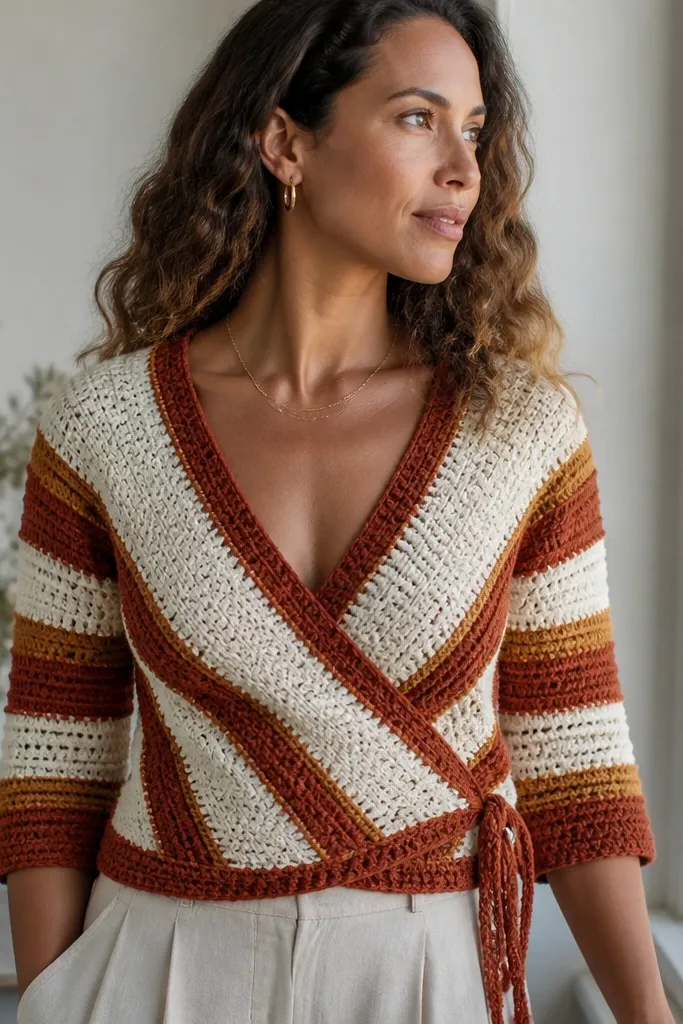
A wrap top reads cozy because it hugs where you want shape and leaves you adjustable comfort. Thick textured stripes add visual depth without needing lace, and they photograph beautifully because raised stitches catch highlights. Choose two or three colors that look good together in real outfits — rust plus cream, or olive plus oatmeal. This project is ideal for spring-to-fall cozy because you can wear it over a tank or long-sleeve. It’s also a forgiving pattern since the wrap ties let you fine-tune fit.
Start by crocheting a rectangle for the front panel with your stripe pattern, then make a second panel if your design uses two layers or a single front with a back panel. Crochet a matching back panel to the same width and join at the sides, leaving enough room for your arms. Add wrap ties by crocheting long chains with a consistent stitch border, then attach them to the front corners or along the sides for a clean look. Finish by working a simple border around the neckline and armholes so the edges don’t curl.
Use a firm border stitch like single crochet to keep the wrap from rolling.
Crocheting the tie ends too thin — thick ties look better and hold shape.
4. Fuzzy Yarn Beanie with Double-Brim Edge
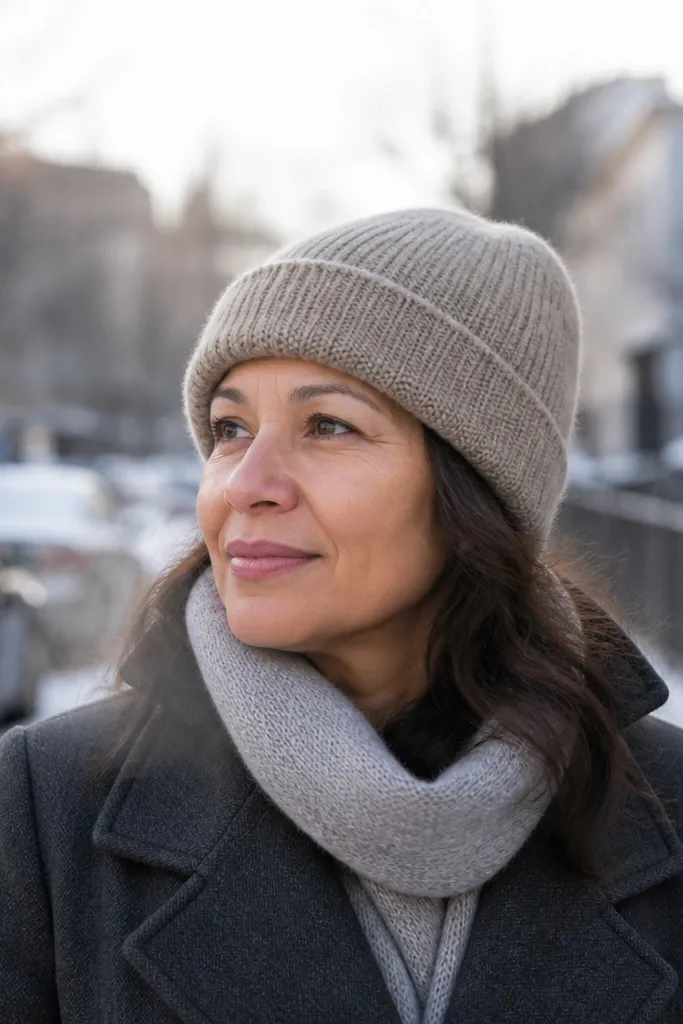
Cozy crochet clothes ideas aren’t only sweaters — hats make outfits look finished fast. A double-brim beanie gives you extra warmth and a clean silhouette in photos, especially with neutral winter coats. Use fuzzy yarn for that soft, cozy look, but keep the structure by using a tighter stitch and a solid crown. The double brim also hides minor wonkiness at the crown decreasing because it covers the join. This is a quick project that helps you practice tension before you tackle garments.
Start with a magic ring and crochet in rounds using a solid stitch until the crown diameter matches your head measurement plus a little give. Decrease evenly as you approach the final round so the top closes neatly. Work one brim round, then fold up and crochet a second brim layer to lock it in place. Add an optional pom or keep it clean and smooth depending on your yarn’s fluffiness.
If the yarn sheds, keep the brim slightly tighter and skip long fringe-style finishing.
Going too loose on the first rounds — the crown will look flat and wide.
5. Textured Cowl Dress with Side Slits
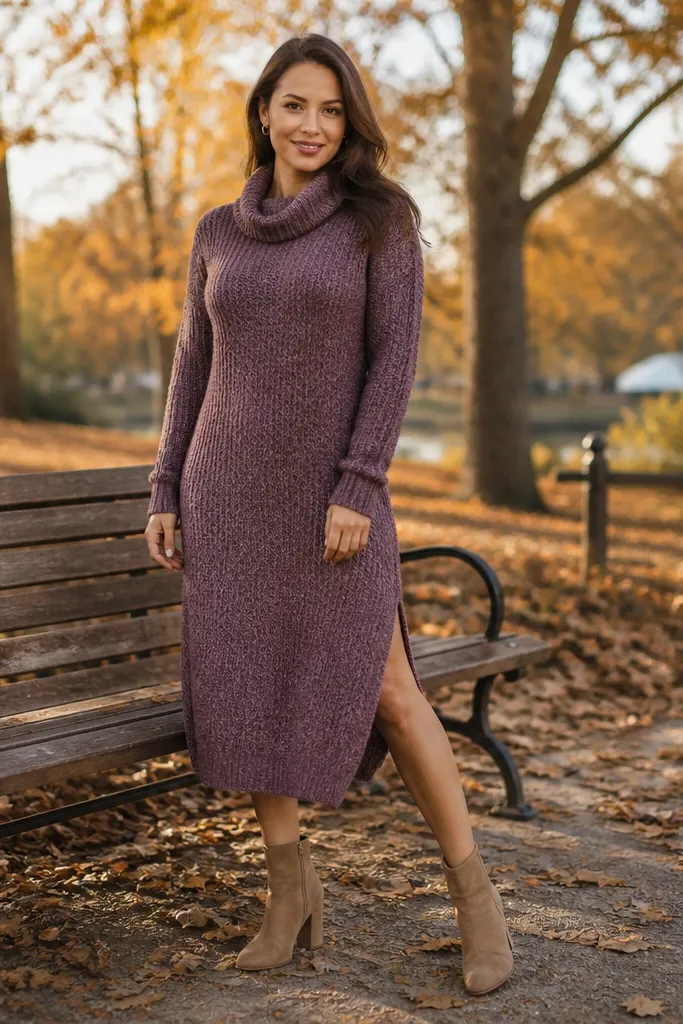
A cowl dress is cozy because it wraps your neck and then drapes from the body, creating warmth without bulky bulk. Side slits make it look modern and help it move, which also improves how it looks in photos. Use a textured but consistent stitch so the dress has dimension without lace complexity. This is a bold piece, but the build is straightforward: a front and back that you join, plus a cowl neck worked from picked-up stitches. It’s best for intermediate crocheters who can keep stitch counts steady over longer panels.
Pro tipBlock the panels before seaming so the textured stitch settles into a consistent shape.
Crochet two long panels using your chosen textured stitch, matched to your desired length and hip measurement. Seam the panels at the sides, then leave a gap at where the slits should be, reinforcing the slit edges with a border stitch. Create the cowl by picking up stitches around the neckline opening and crocheting in rounds or turning rows until it folds over naturally. Finish by adding a simple hem border and blocking flat so the cowl drapes instead of standing straight.
AvoidSkipping slit reinforcement — unbordered openings stretch and look messy.
6. Ribbed Leggings Cover Pants in Soft Wool-Blend
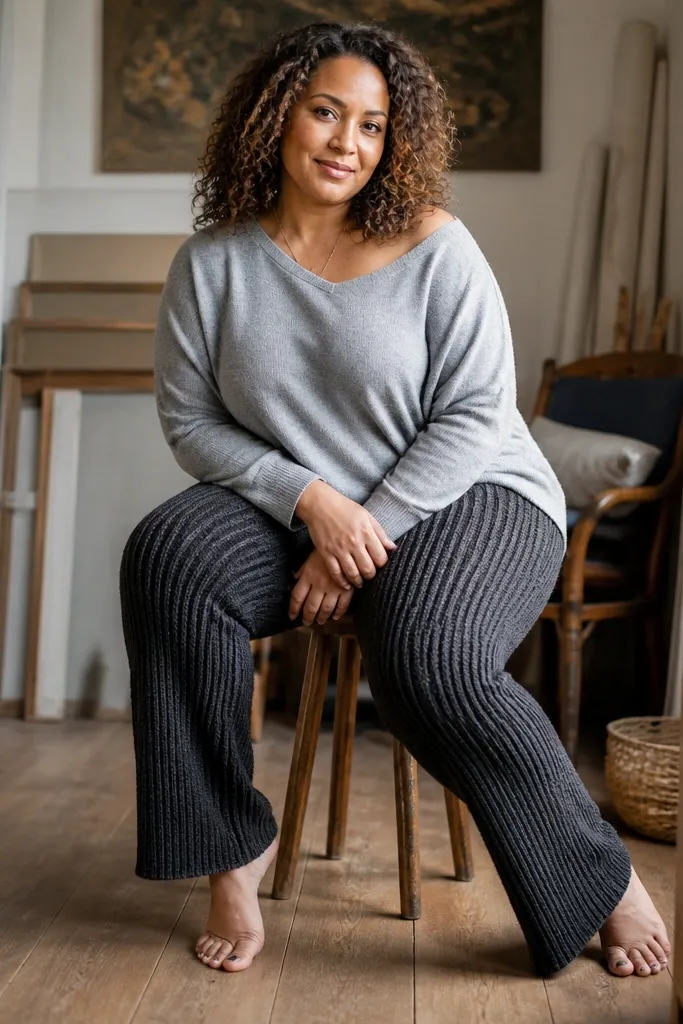
Crochet leggings covers are cozy when they hug without feeling stiff, and ribbing is the easiest way to get that fit. The visual payoff is huge: rib lines look clean and flattering, and they photograph well because the texture creates depth. Pick a wool-blend or a soft acrylic with good recovery so the fabric snaps back after wear. These are also a smart DIY because you can make them in sections — cuffs, legs, then a waistband. They’re best for knit-like tension skills and careful measuring.
Pro tipUse a smaller hook for the waistband than for the legs to keep it from sagging.
Start by measuring around your calf at the widest point and around your ankle, then choose a rib stitch that gives stretch. Crochet cuffs first as a tube, then work upward in rounds or in joined rows, decreasing slightly toward the ankle if needed. Add a waistband by working ribbing with a tighter gauge and finishing with a fold-over band or an elastic-casing. Weave in ends tightly and steam or light block to smooth rib lines before you wear them.
AvoidMaking ribbing too tall — it can bunch at the ankle and look bulky.
7. Color-Blocked Granny Square Skirt
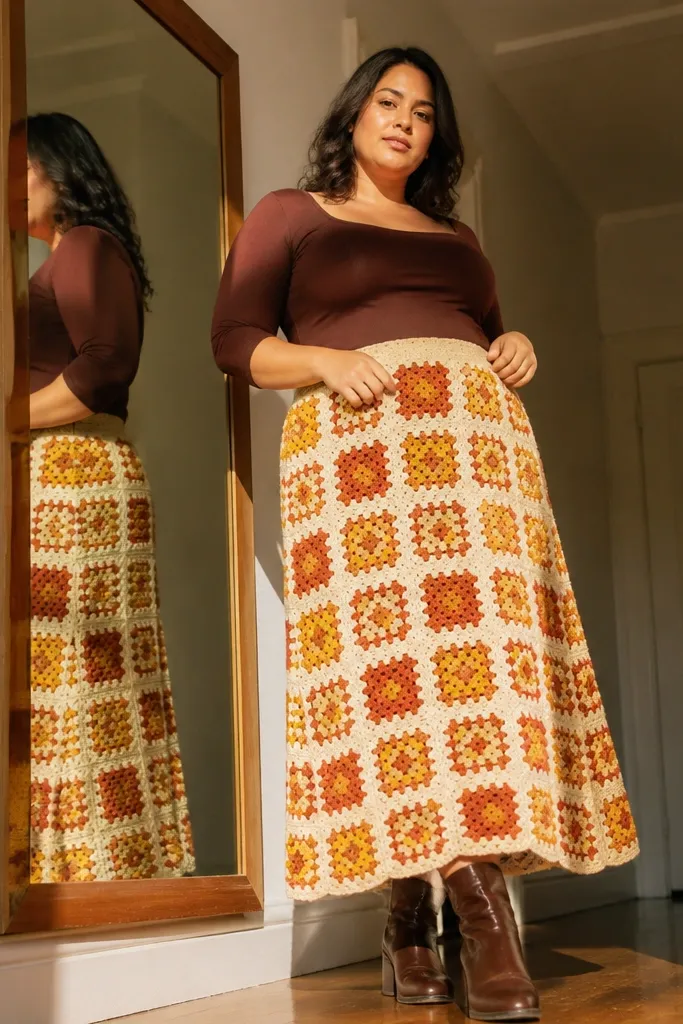
A granny square skirt looks cozy because it’s playful and warm, and the flared shape hides fit anxiety. Color-blocking keeps it photogenic instead of chaotic: pick two to four colors and repeat them in a pattern. Use medium weight yarn so the squares lay flat and don’t puff up too much. This skirt is also easy to customize — you can lengthen it for fall or make it knee-grazing for summer nights. It’s a solid choice if you like making many small units and then assembling them neatly.
Make a set of granny squares in your chosen colors, each square the same size after blocking. Plan your layout by drawing a grid: start with a waistband strip width, then add rows until you reach your hip and desired flare. Join squares with a flat seam method so the join lines don’t create lumps. Crochet a waistband band and add a simple tie or elastic casing for comfort, then finish the hem with a border row that matches the skirt colors.
Block squares before joining — it stops the skirt from developing twist.
Joining squares without planning the flare — you’ll end up with a straight, less flattering hem.
8. Thermal-Style Crochet Hoodie with Kangaroo Pocket
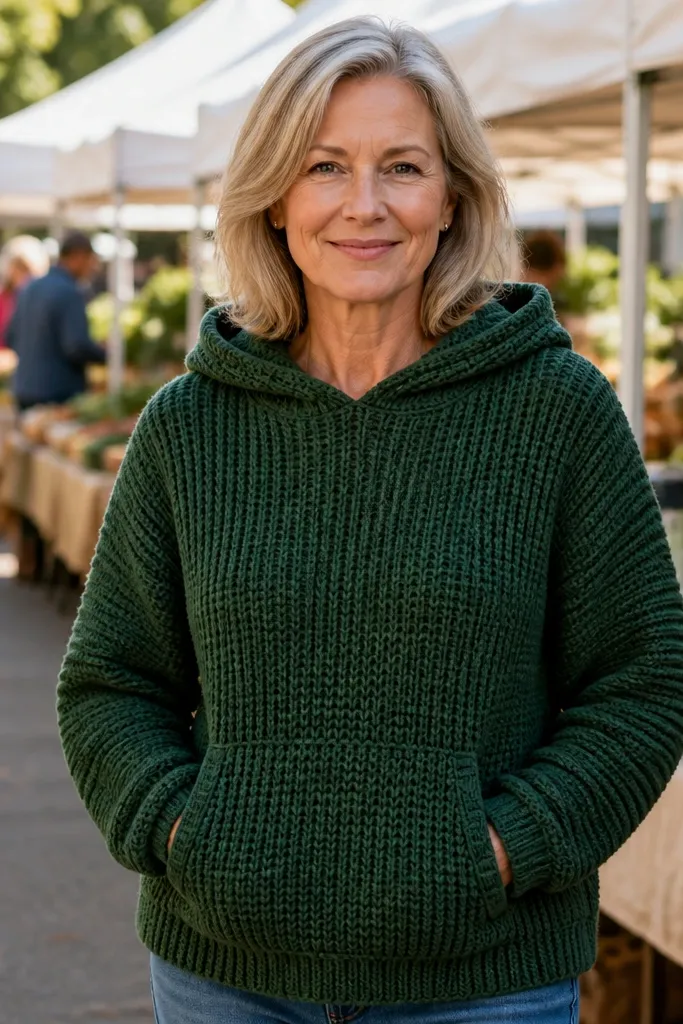
A crochet hoodie looks cozy because it adds structure: hood, cuffs, and pocket. The kangaroo pocket is the photo magnet because it creates a strong front shape, not just a flat rectangle. Use a stitch pattern that resembles thermal knit — dense and vertical — so it stays warm and doesn’t collapse. This is a great DIY if you want a true “wear it to errands” piece. Expect a moderate time commitment because you’re building multiple sections, but the finish is worth it.
Pro tipSew pocket edges with a whip stitch so they don’t warp when you stretch the hoodie.
Start with the body panels using a dense stitch like half double crochet in rows, then seam shoulders. Work sleeves separately to the right circumference and seam them into the armholes. Crochet the hood by picking up stitches around the neckline and increasing at the top for a rounded shape, then line the inside with soft fabric if you want comfort. Make the pocket from two rectangles, sew them onto the front, then finish cuffs and hem with ribbing bands made from smaller hook sizes.
AvoidUsing a drapey yarn — hood edges will flop and look unfinished.
9. Lace-Inspired But Dense Crochet Scarf Wrap Cardigan
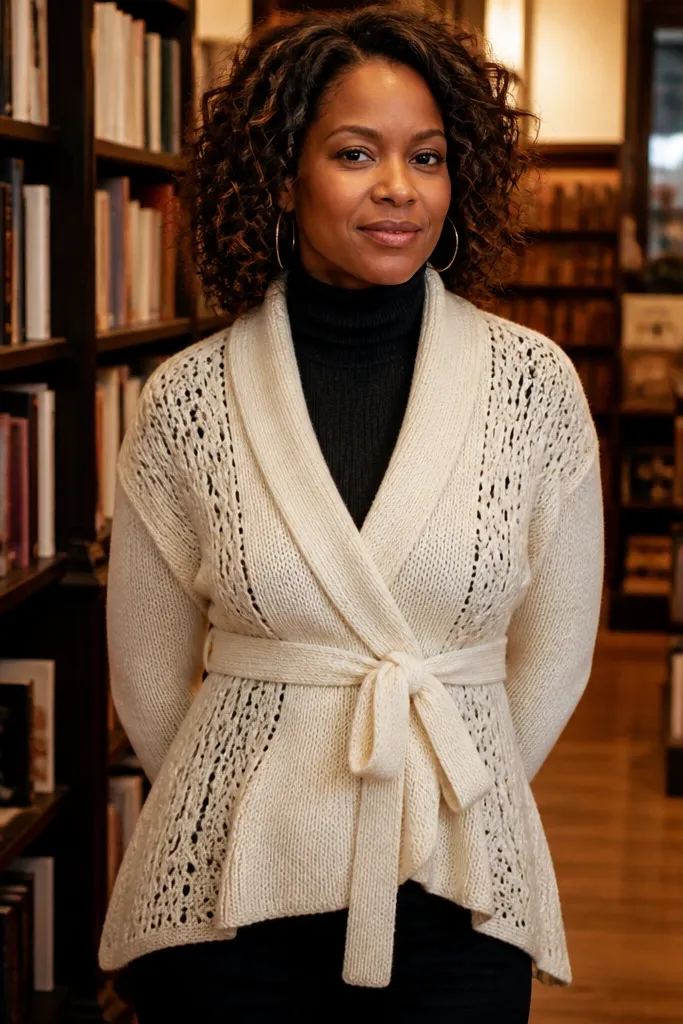
This cardigan style reads cozy because it’s wrapped and layered, like a scarf that grew sleeves. Keep the pattern lace-inspired but dense so it still feels warm; use a textured openwork repeat only near the outer panels, not all over. The tie at the waist makes it flattering and gives you a clear styling shape in photos. Choose neutral yarn so the texture reads clearly and doesn’t turn into visual noise. It’s a good intermediate project because you’ll pay attention to symmetry and tie placement.
Pro tipUse a border row of single crochet before any decorative edge so the texture doesn’t warp.
Crochet two long front panels and one back panel in a consistent stitch, using an openwork repeat only in the sections you want visible. Seam shoulders and side seams, then crochet armholes edges with a firm border. Add ties by crocheting long chains with a stitch border, then stitch them to the front edges at matching heights. Finish by adding a border around the entire wrap opening so it lays flat and doesn’t curl.
AvoidPlacing openwork too close to the neckline — it looks scratchy and stretches out.
10. Triangle Shawl Top with Cross-Over Tie
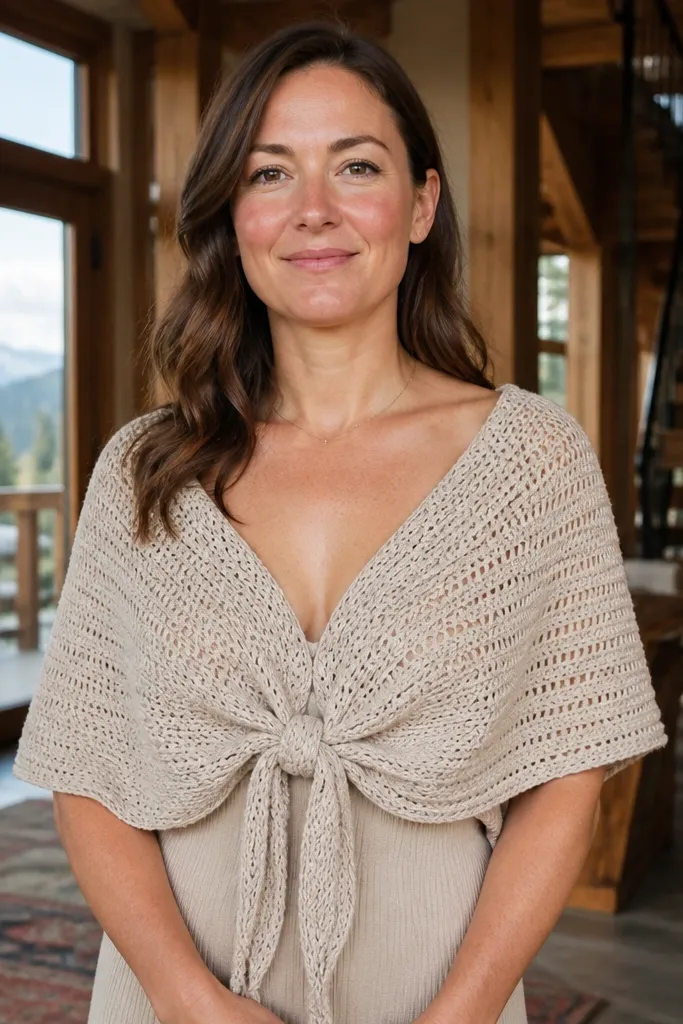
Triangle shawl tops are cozy because they create warmth around your torso without heavy sleeves. The cross-over tie makes the neckline look intentional and keeps the fabric from slipping, which is the difference between “cute” and “wearable.” Use a soft yarn and a stitch that creates a gentle drape, like double crochet with a consistent tension. This top photographs well because you get diagonal lines and a defined center point. It’s beginner-friendly if you can manage basic increases and keep stitch counts even.
Start with one triangle panel by crocheting a base chain and increasing at the corners until it reaches your desired size. Crochet a matching triangle panel or use one large panel folded for a layered look. Add a cross-over tie by attaching long chain cords to the top corners and threading them through a small loop or button at the opposite side. Finish edges with a simple border stitch to prevent curling.
Block the triangle before tying it — diagonal lines look sharper when the fabric lays flat.
Skipping a border — triangle tops curl and the neckline won’t sit right.
11. High-Waist Wrap Skirt with Waistband Casing
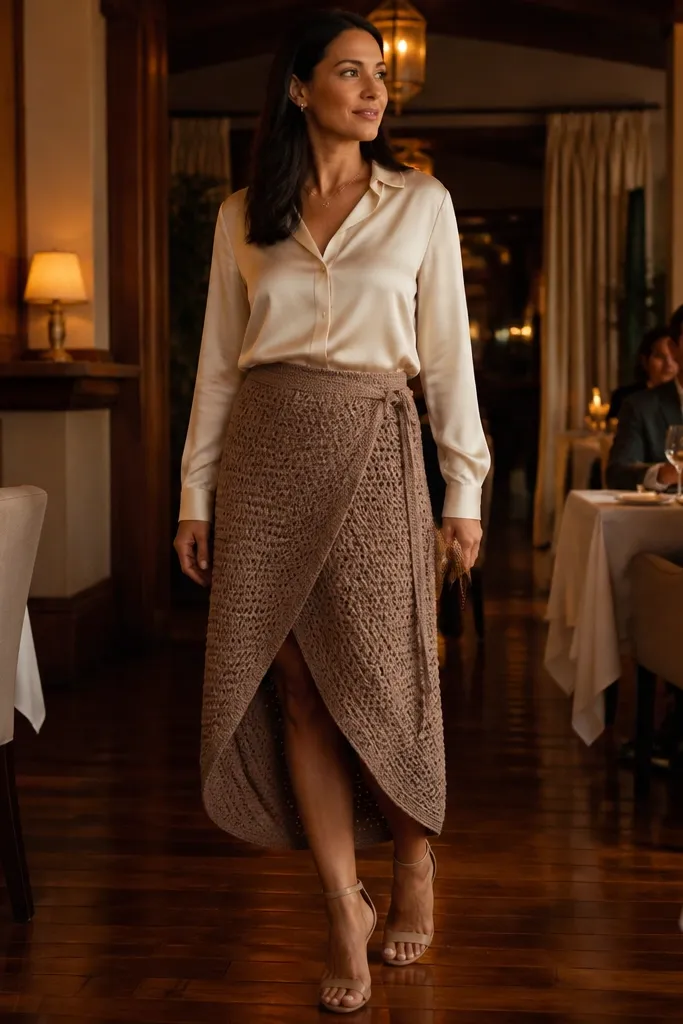
A wrap skirt gives you cozy comfort because you control fit at the waist and you get movement when you walk. The waistband casing looks polished and prevents the fabric from rolling, which is the common problem with crochet skirts. Choose a medium yarn and a stitch that holds shape, like half double crochet or a simple mesh with strict gauge. This skirt is also easy to style: it pairs with fitted tops, boots, and chunky cardigans. It’s a great project for anyone who wants a photogenic bottom half without sewing a full garment.
Pro tipMake the waistband slightly tighter than your waist measurement so it stays flat.
Crochet two long skirt panels to your desired length, then seam them at the sides, leaving the wrap opening at the front. Work a wide waistband strip by crocheting a casing around the top edge, then thread a drawstring or elastic through. Add ties at the side seams or front corners, then reinforce the tie points with extra stitches so they don’t rip. Finish the hem with a border row and block to control flare.
AvoidCrocheting the skirt too long without checking stride — it can snag and look messy in photos.
12. Chunky Cable-Look Cowl Neck Sweater Vest
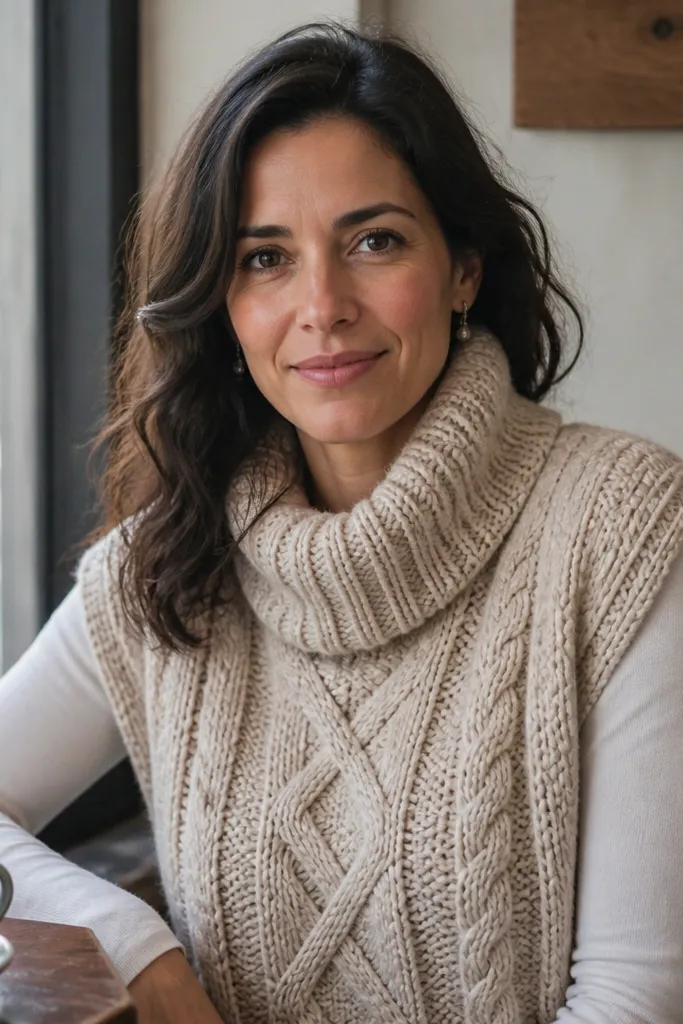
A sweater vest feels cozy because it keeps your core warm while letting your arms stay flexible. Cable-look panels add a high-end look without needing real cable stitches — you can create the effect with front-post and back-post textures. The cowl neck is a visual anchor, making the vest look stylish even with a plain shirt underneath. Choose a thicker yarn and keep the cable-look bands centered for a clean silhouette. This is a strong beginner-to-intermediate project because you’re repeating a limited motif.
Pro tipMark cable-look band stitch counts on paper so you stay aligned when you switch rows.
Crochet a back panel and two front panels with simple base texture, then add cable-look bands on the fronts using front-post/back-post stitches. Seam shoulders and sides, then measure armholes for sleeve openings. Create the cowl by picking up stitches around the neck and working in rows until it folds to your preferred height. Finish armholes and hem with a tight border so edges don’t curl.
AvoidMaking the cowl too shallow — it should cover the base of your neck, not sit like a bandana.
13. Cozy Ribbed Fingerless Gloves with Button Tabs
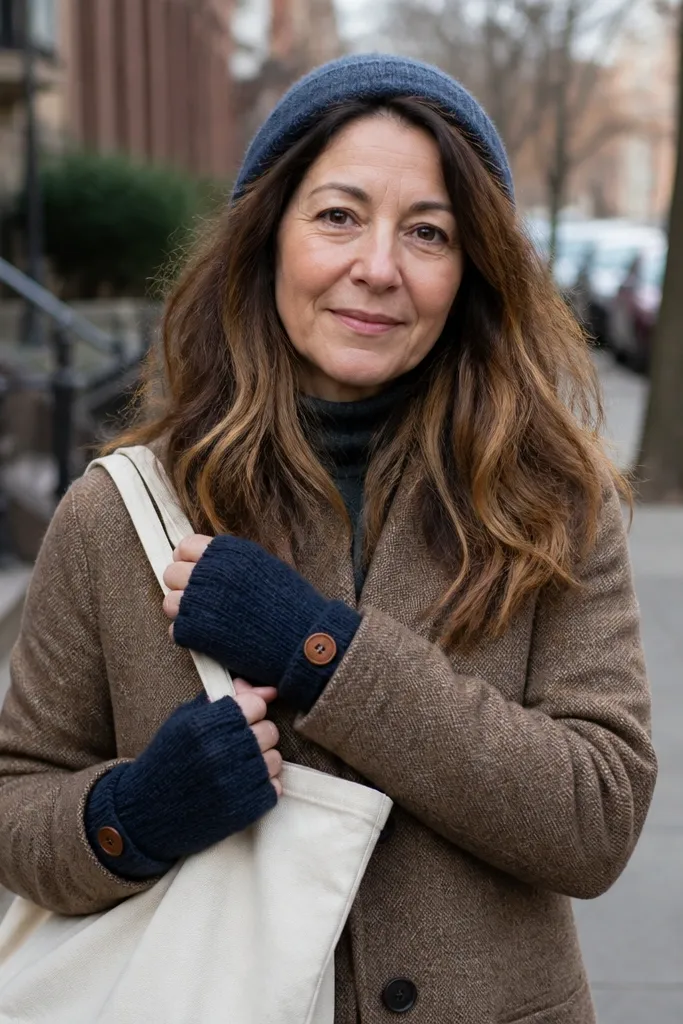
Fingerless gloves add cozy warmth to your hands without blocking movement, and they make outfits look styled even when you’re just running out. Ribbing keeps the fit snug and makes the texture look neat in photos. Button tabs keep them from sliding down, which is the real comfort issue with many crochet gloves. Choose a yarn color that matches your coat or bag for a clean look. These are small projects that train your finishing skills for bigger clothes.
Measure around your wrist and the length from wrist to just below the knuckles. Crochet a ribbed cuff by alternating your chosen stitch pattern in rows or rounds, then shape the hand section with decreases near the back of the hand if needed. Crochet finger openings separately or leave gaps by increasing across the top. Add button tabs by sewing small loops or crocheting tie-on tabs, then attach buttons so the fit stays put.
Use stitch markers on each glove so your finger gaps match exactly.
Skipping sizing — one glove that’s 1 cm longer looks awkward in photos.
14. Textured Poncho with Fringe That Actually Hangs
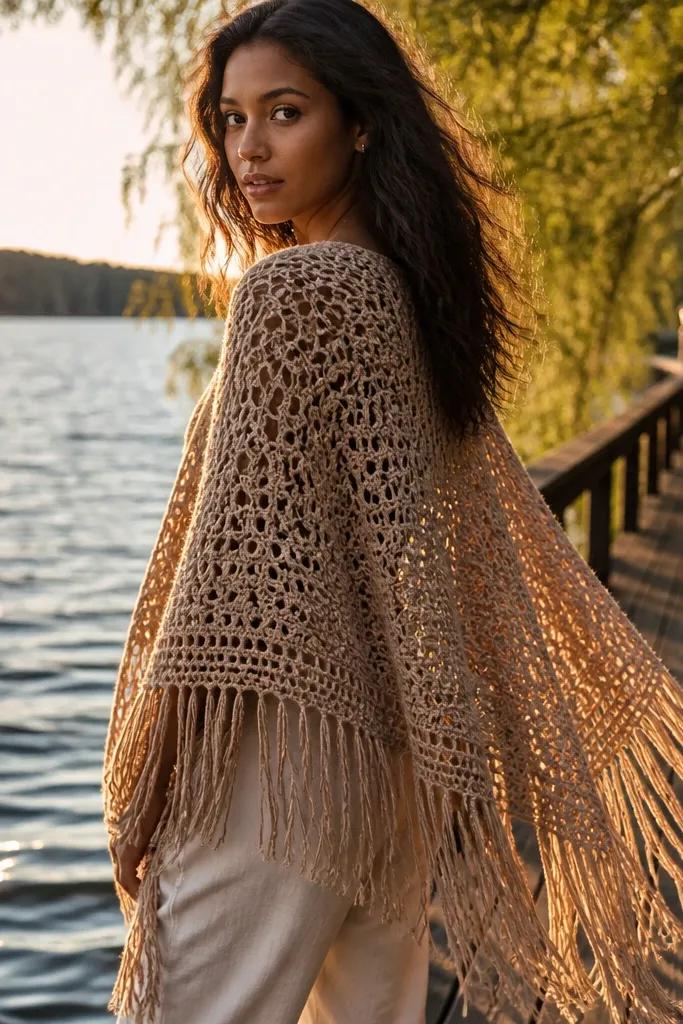
A poncho is cozy because it wraps your shoulders and looks effortless, but the fringe is what makes it photogenic. If the fringe is too short or too thin, it looks like a mess; when it hangs at the right length, it frames your outfit beautifully. Use a yarn with good drape and keep the stitch pattern consistent across the body so the fabric doesn’t twist. This is a great “quick win” clothing project that still looks high-effort in photos. Beginner-friendly if you stick to a simple construction.
Start with a rectangle body panel in a textured stitch, then create a center hole or neckline opening by leaving a gap and crocheting around it for the shoulder opening. Add side openings if you want a more mobile look. Attach fringe by cutting strands twice the desired final length and folding them through the bottom edge, then trimming so they hang evenly. Finish the neckline with a border row or a ribbed band for structure.
Cut fringe strands after you block the poncho so the final length looks right.
Adding fringe before blocking — it makes the strands uneven.
15. Chunky Infinity Scarf That Doubles as a Neck Warmer
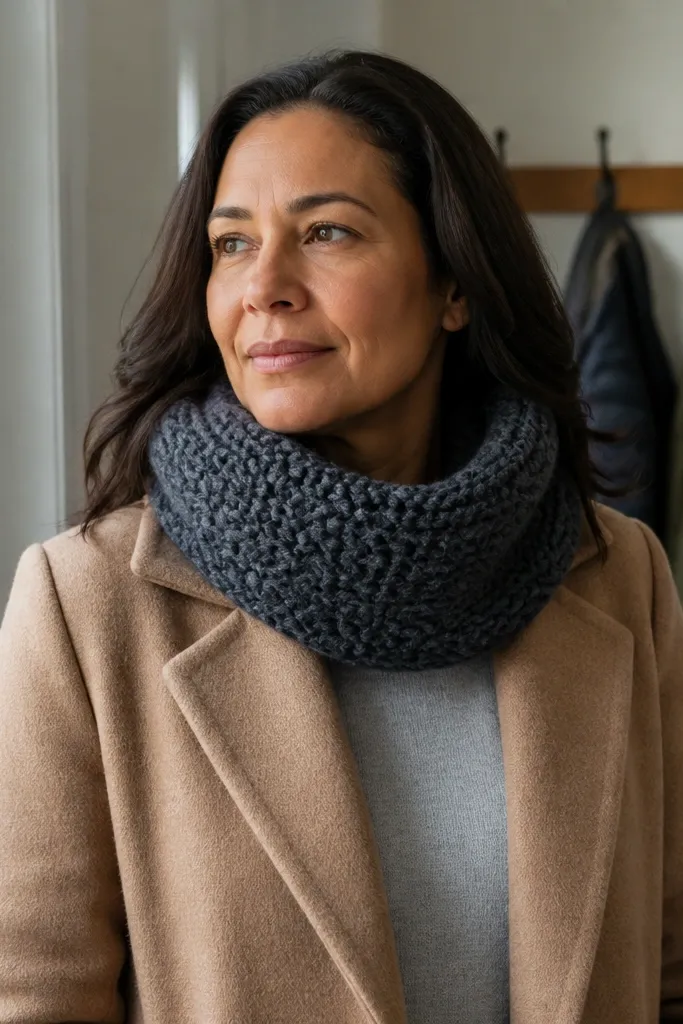
This one is cozy crochet clothes ideas with a real styling trick: it wraps like a scarf but sits like a neck warmer because it’s chunky and thick. The look is clean when you use a dense stitch and keep the tube size consistent. Choose a yarn with gentle texture so it looks cozy without looking messy. It’s photogenic because the scarf creates a strong color block around your face and neck. It’s also fast, which means you can finish and wear it quickly.
Pro tipUse a stitch that resists curling so the scarf stays flat around your neck.
Crochet a long strip in dense stitches until it reaches your desired circumference when joined. Join the ends using a flat seam so the join line doesn’t create a ridge. Work a border around the outer edge if you want extra thickness and a cleaner silhouette. Block lightly so the tube keeps its circle shape.
AvoidMaking it too loose — a floppy infinity scarf looks less cozy and more sloppy.
16. Sleeveless Crochet Midi Dress with Square Neckline
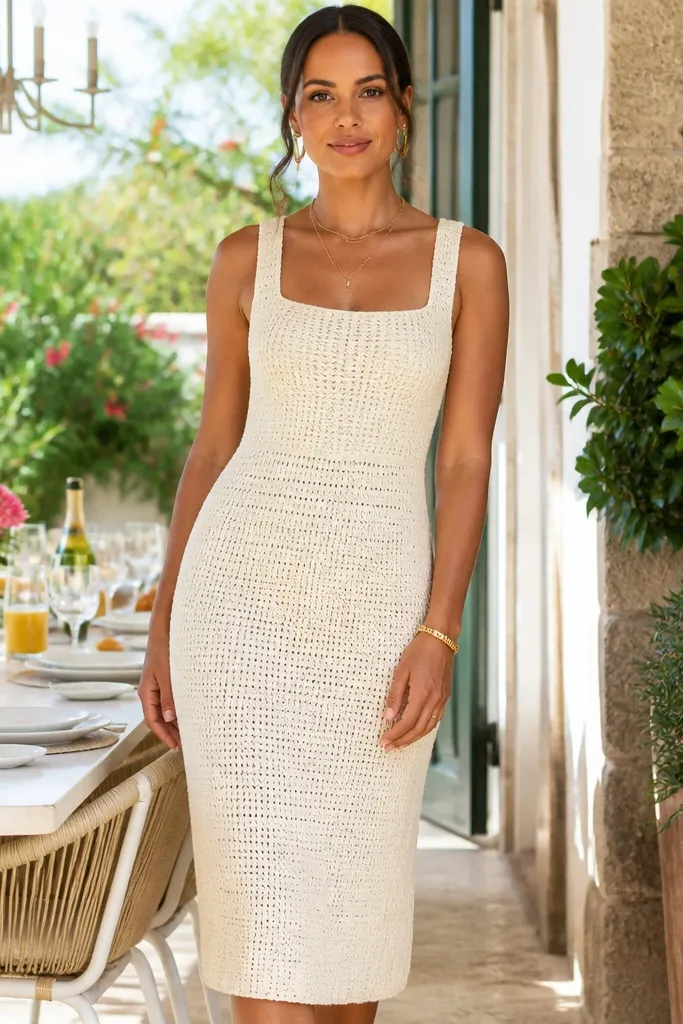
A sleeveless midi dress reads cozy because it’s long, warm-looking, and still breathable. The square neckline is flattering and makes the dress photograph well because it frames the shoulders and collarbone area. Use a stitch that creates a firm fabric, like half double crochet in rows, and keep the bodice fitted so it doesn’t look like a blanket. This dress is ideal for cooler evenings because you can add a cardigan or jacket later. It’s intermediate only because you’ll be measuring for armhole and bodice shaping.
Crochet the bodice in rows with shaping: decrease slightly toward the waist and increase toward the bust as needed. When the bodice fits, continue into the skirt section by widening with evenly spaced increases. Crochet straps from a narrow strip and sew them securely at the corners of the square neckline. Hem the bottom with a border row and block so the midi length hangs straight.
Try the bodice on before you start the skirt section — it’s the fastest place to fix fit.
Skipping strap reinforcement — thin strap seams loosen and look sloppy.
17. Crochet Turtleneck Top with Drop-Shoulder Sleeves
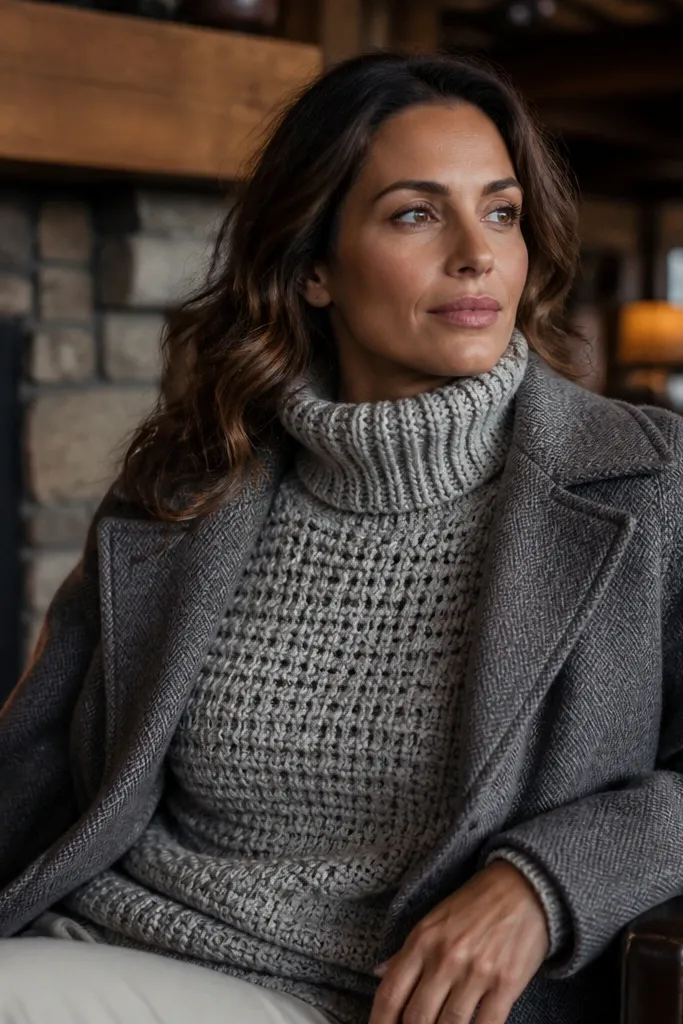
A turtleneck top is cozy because it gives warmth at the neck and a clean, polished look under jackets. Drop-shoulder sleeves keep the construction easier than set-in sleeves, and they look relaxed in photos. Choose a yarn that doesn’t feel scratchy and use a stitch that holds a bit of structure. This top works with skirts, high-waist jeans, and long vests, so it’s a wardrobe builder. Skill level is beginner-to-intermediate with careful measurement at the neckline.
Crochet the body as a rectangle for the torso, then seam the sides for your desired fit. Build drop shoulders by leaving armhole openings and adding sleeves as rectangles sewn into the shoulder seam area. For the turtleneck, pick up stitches around the neck opening and crochet in rounds or rows to create height, tightening with a smaller hook if it stretches. Finish by adding a ribbed cuff at sleeve ends and a hem border to stop curling.
If your yarn stretches, add a short elastic thread inside the ribbing of the neck edge.
Making the turtleneck too wide — it should sit snug, not hang like a hood.
18. Oversized Pocket Hoodie Cardigan
This is cozy because it looks like a hoodie and a cardigan at the same time. Oversized pockets add weight and shape, so the front looks intentional and warm. A hood gives you that wrapped-in-comfort vibe even when the fabric is lightweight. Keep the cardigan length around high hip or slightly longer for the best photo effect with leggings or jeans. This project is a good intermediate build because you’re combining a cardigan body with hood construction and pocket placement.
Pro tipPocket placement: measure from shoulder seam to pocket top so both sides align in photos.
Crochet a cardigan body with longer front panels and a back panel, leaving an open front. Add sleeves using rectangles with slight shaping or simple set-in seams for a clean arm line. Make a hood by picking up stitches around the neckline and increasing at the top until it rounds, then crochet the hood longer than you think so it frames your face. Sew on two large pocket rectangles on the front panel, then finish edges with a border and add cuff ribbing bands.
AvoidAttaching pockets too low — they sag and make the cardigan look uneven.
19. Textured Headband with Buttoned Bow Detail
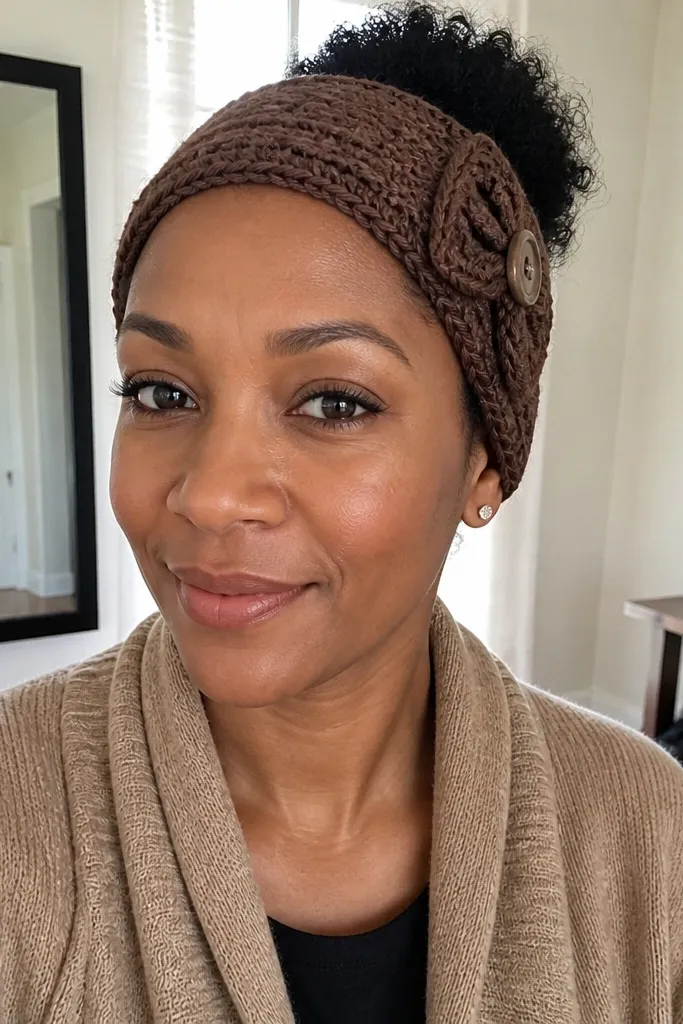
Headbands count as cozy crochet clothes ideas because they complete the look and keep your hair out of your face when you’re wearing layers. The buttoned bow detail makes it photogenic without adding bulk, and it works with beanies and coats. Use a textured stitch band for structure so it doesn’t roll, then add a small bow from a narrow strip. This is a quick project that’s perfect for practicing finishing edges and creating neat small shapes. It also makes a great gift because it’s fast and looks styled.
Pro tipUse a slightly smaller hook for the bow pieces so they keep their shape.
Crochet a long band to fit your forehead snugly, then join the ends or seam it into a loop. Add a fold-over band by crocheting a second strip across the top length if you want a thicker look. For the bow, crochet two short strips, fold them into loops, then sew them to the center of the headband. Finish with a small button or sewn-on center to hold the bow shape.
AvoidMaking the band too loose — it slides and ruins the clean look.
20. Crochet Baby Doll Dress with Flared Skirt Panels
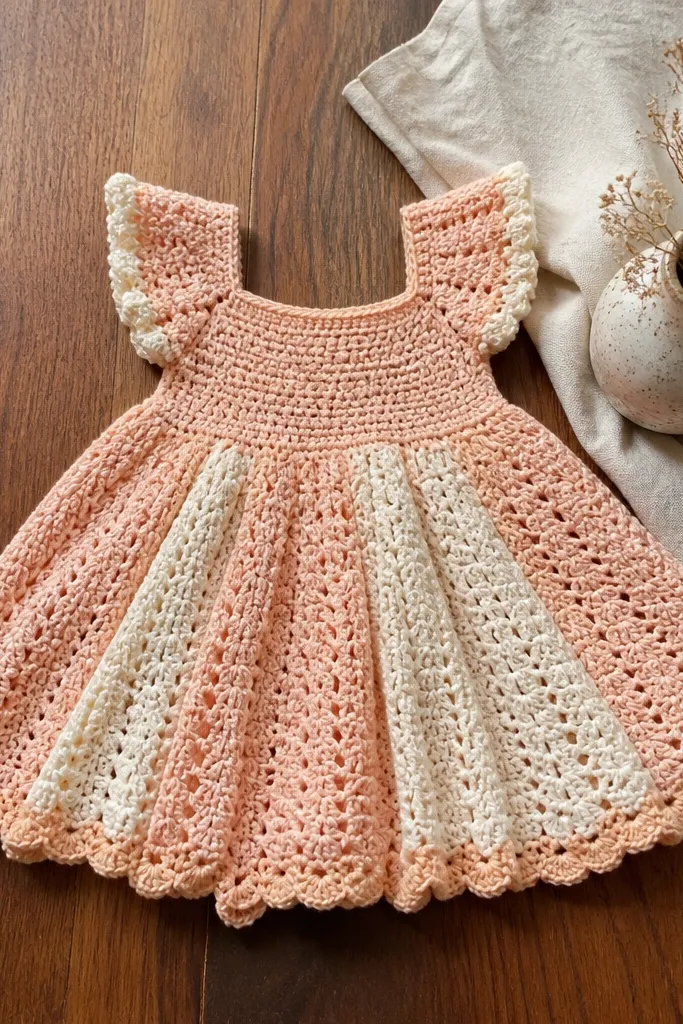
A baby doll dress is cozy because the fitted bodice plus flared skirt creates warmth without clinging. It’s also extremely photogenic: the flare makes movement visible, and the neckline looks sweet without needing lace everywhere. Use a firm stitch for the bodice and a lighter, drapier stitch for the skirt panels if you want that airy-cozy contrast. This dress works best in soft pastel or warm neutrals so the texture shows clearly. It’s beginner-intermediate because you’ll be working with shaping at the waist.
Pro tipKeep skirt increases controlled: too many increases make the hem look uneven.
Crochet the bodice in rows until it fits your bust and waist, then place a marker at the waist seam. Crochet skirt panels separately with increases at the top so they flare, then join them to the bodice at the waist line. Add straps or a simple neckline border, then crochet a hem border to keep the skirt from curling. Block flat and then lightly steam to set the flare.
AvoidUsing the same stitch tension for bodice and skirt — it changes how the flare behaves.
21. Cozy Crochet Socks with Turn-Over Cuff
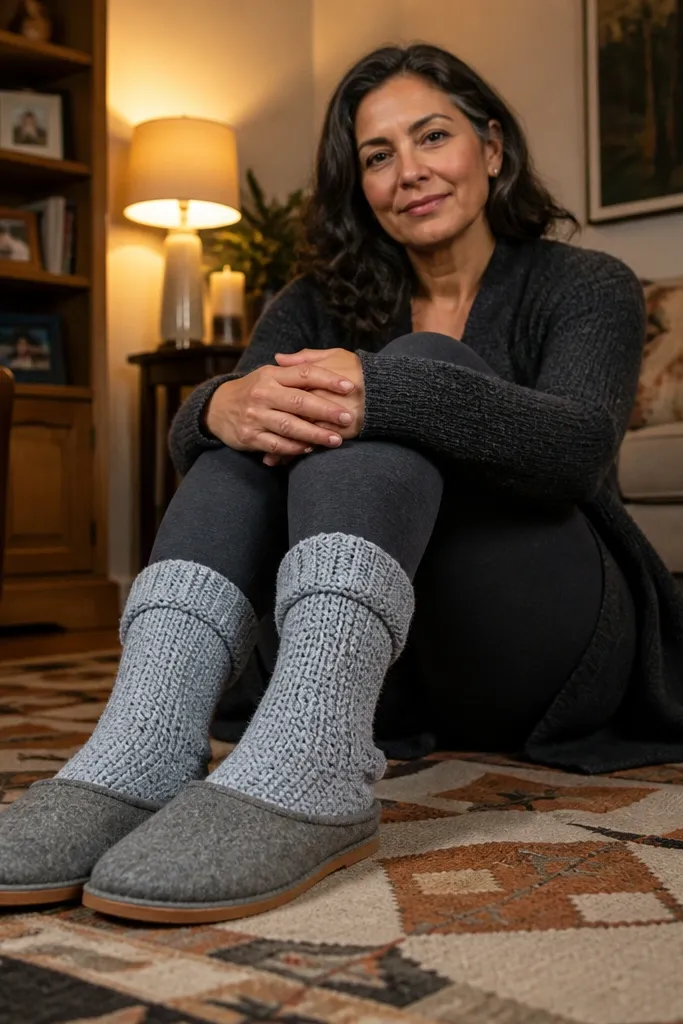
Socks are small, but they make crochet clothes ideas feel complete. A turn-over cuff looks cozy and neat, and it hides the join area where you switch from cuff to foot. Choose a yarn with nylon content or sock yarn so it holds up to wear. The look is clean when you keep the stitch pattern simple and the ribbing consistent. These are a practical DIY that also teaches you how to manage shaping and finishing in tight spaces.
Pro tipUse a tapestry needle to weave ends across stitch columns so they don’t pop open.
Start with the cuff by crocheting ribbing in rounds to your desired height, leaving a slight stretch. Then shape the foot by working decreases and increases to fit the heel and instep, using markers to keep counts consistent. Add an optional heel flap if you want extra durability. Finish by sewing the toe seam neatly or closing with a gather stitch, then weave in ends tightly and block to smooth the shape.
AvoidSkipping a reinforced toe — thin toe stitches wear out first.
22. Monochrome Crochet Pants Set with Cropped Jacket
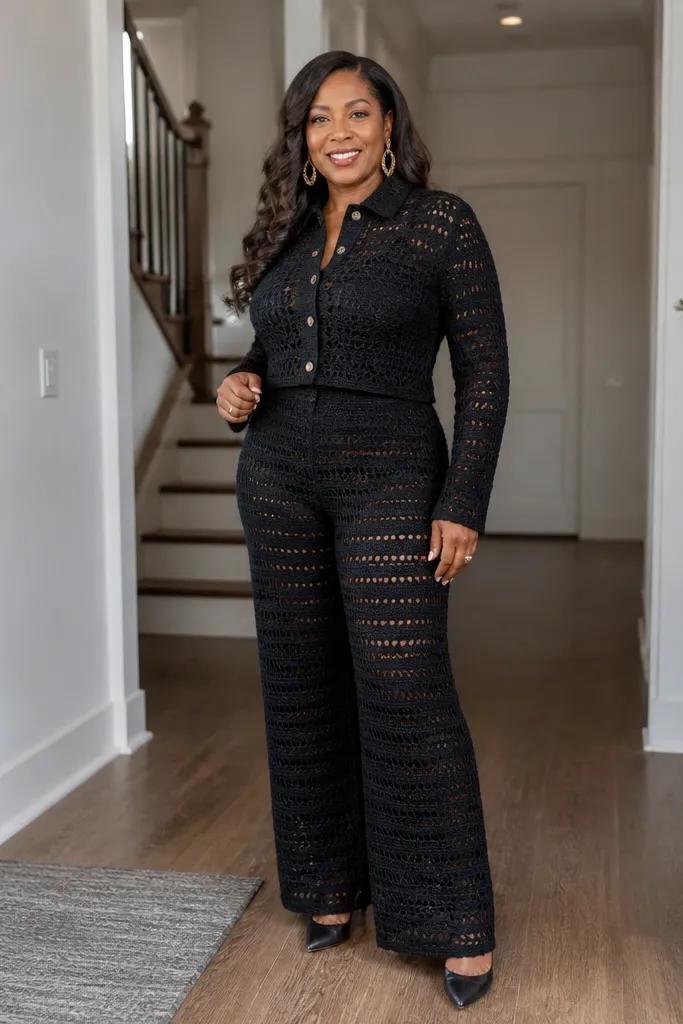
A matching set is cozy because it removes outfit guesswork and looks styled in a single photo. Keep it monochrome so the texture is the focus, not the color mixing. A cropped jacket balances the look with pants and makes the set feel intentional instead of costume-like. Choose a stitch that looks like knit rib or structured rows, so the jacket and pants both hold shape. This is a bigger project because you’re making two garments, but the payoff is huge because you’ll wear them together.
Pro tipPick one trim material like wooden buttons and repeat it on both pieces for a cohesive look.
Choose one base stitch pattern and use it for both pieces so your textures match visually. Make the cropped jacket first: crochet panels with front edges and add a simple sleeve, finishing with ribbed cuffs and hem. Then crochet pants covers or pants with ribbing at cuffs and a waistband casing for comfort. Block both pieces, then do a final edge border pass so the silhouettes look crisp.
AvoidUsing different yarn lots or dye batches — even “same color” can look mismatched next to each other.
23. Textured Wrap Cardigan with Wide V-Neck
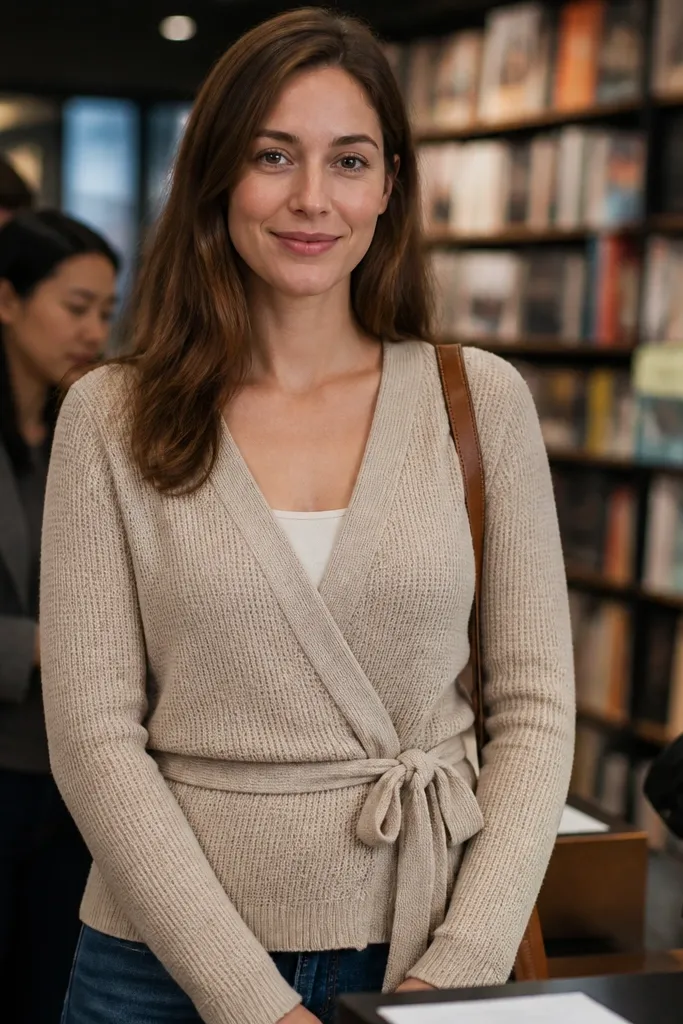
A wide V-neck wrap cardigan looks cozy because it frames your face and layers easily over tops without bulk. The wrap tie keeps the front closed and adds shape, while a textured stitch band adds visual interest that still reads clean. Choose a yarn that drapes and use a firm border so the V stays sharp. This cardigan is photogenic with a simple tank and jeans because the V shape and texture pull focus. It’s a strong DIY for intermediate crocheters who can handle panel construction and neat finishing.
Crochet two front panels and one back panel in a textured stitch, keeping stitch counts consistent across panels for symmetry. Seam shoulders, then crochet the wrap opening edges with a tight border stitch so they don’t curl. Add a wide V tie area by crocheting longer front edges and then finishing with ties or a button-and-loop closure. Finish cuffs and hem with ribbing or a dense border row to keep the cardigan from stretching out.
Measure the V depth on your body and adjust before adding the final border; once it’s finished, it’s hard to correct.
Skipping edge stiffening — wrap edges curl and the V looks rounded.
24. Waffle-Stitch Cocoon Wrap Cardigan with Thumb Loops
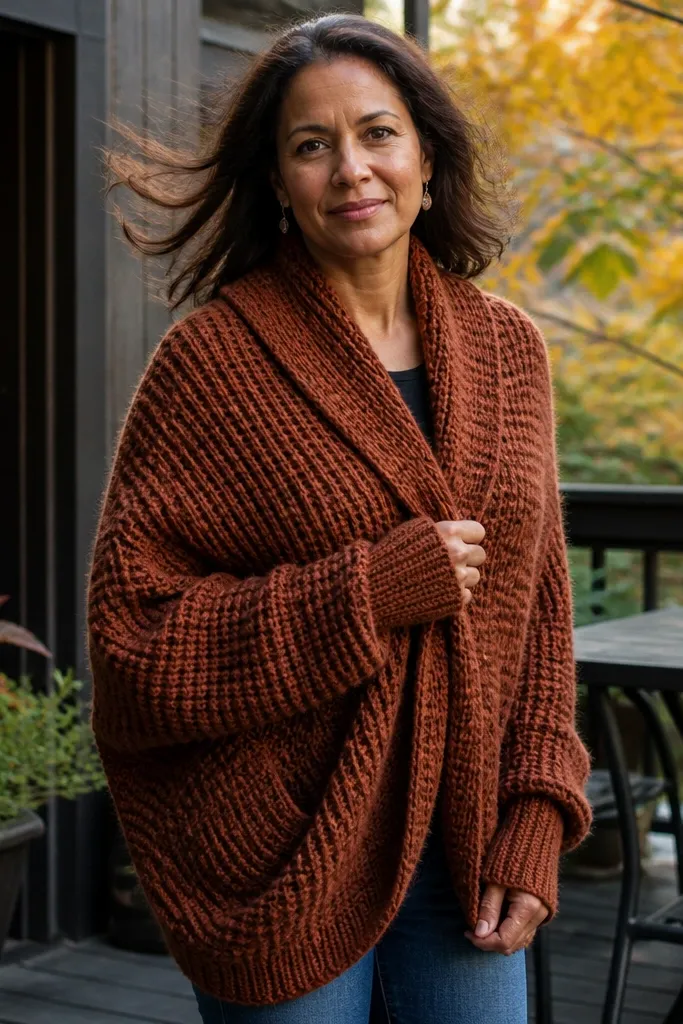
This cardigan is all about warmth and shape. The waffle stitch gives you a thick, bumpy fabric that blocks wind and holds heat without looking bulky. The cocoon cut drapes close to the body but still feels roomy through the arms, so it looks good on photos and feels good on real days. Thumb loops keep sleeves from riding up and make the whole thing look intentional instead of “made in a hurry.” This is a mid-level project that takes a bit of time because you’re building texture, but the pattern is straightforward in construction and works well for cold-weather layering.
Start with a chunky yarn in a worsted or bulky weight and a hook sized to match your gauge (usually 5.5 mm to 6.5 mm). Make a swatch in waffle stitch and measure your stitch count per 4 inches so your cocoon width lands right; aim for about 10-12 stitches across 4 inches. Crochet two identical panels using the waffle stitch for the front and back length, then seam the sides to create the cocoon shape. Add a wrap front by leaving one side as a long overlap panel and crocheting a simple ribbed edge on both front openings; attach ties or a button-and-loop closure at the overlap point. For thumb loops, pick up stitches at the cuff opening and crochet a short loop band (about 2 inches long) so your thumb sits inside without twisting the sleeve. Weave ends tightly and steam-block lightly so the waffle texture stays crisp.
Use stitch markers every 10 stitches on the first row of each panel so your waffle pattern doesn’t drift and look uneven in photos.
Don’t skip a gauge swatch — waffle stitch changes fabric density fast and your wrap width will end up too narrow or too wide.
25. Crochet Thermal Pocket Poncho with Hood and Side Ties
This poncho looks cozy from every angle because it’s built like outerwear. The thermal-style stitch creates a fabric with air pockets that reads thick in photos and feels warmer than flat lacework. A hood adds the “blanket on your shoulders” vibe, while front pockets keep your hands warm and give the garment weight so it falls nicely. Side ties let you cinch the shape at the waist or leave it loose — great for different body shapes and different styling days. It’s an intermediate build because you’re combining a hood, pockets, and a draped body, but the main body uses repeatable stitch rows and doesn’t require complicated shaping.
Pro tipBlock the hood and pocket rectangles before sewing — thermal stitch holds its shape better when it’s steamed flat first.
Choose a yarn that holds texture well, like wool-blend or acrylic-wool, in worsted or bulky weight, and use a hook that matches your gauge (often 5.0 mm to 6.0 mm). Crochet the main poncho body as a rectangle with a slight taper: start with a wide foundation chain, work thermal rows for the length, then reduce at both edges every few rows until your bottom width matches your desired drape. Leave two side openings for armholes by skipping a section near the top and then continue around the opening edges for a clean finish. Make pockets as two identical thermal rectangles, then sew them onto the front panel before you attach the hood so alignment is easier. Crochet a hood by picking up stitches along the neckline and working short rows to round the top; finish with a ribbed edge that matches the pocket trim. Add side ties by crocheting narrow braided cords or crocheting long chains and attaching them at the sides so you can cinch securely without stretching the fabric.
AvoidDon’t attach pockets after the hood — you’ll fight alignment and the hood seam will sit crooked over the pocket top edge.



