
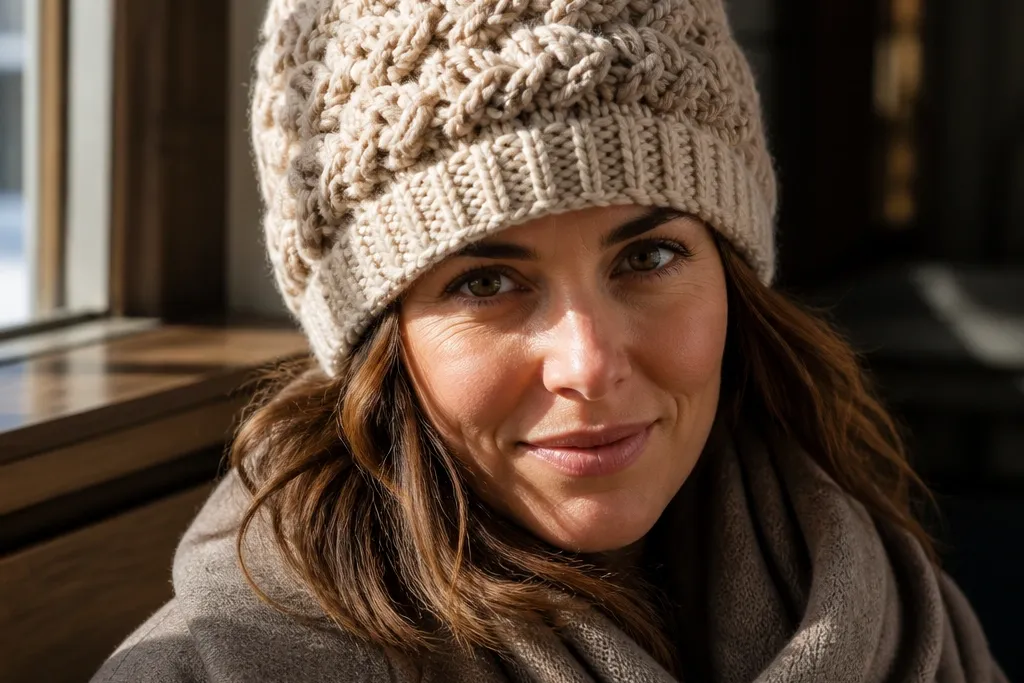
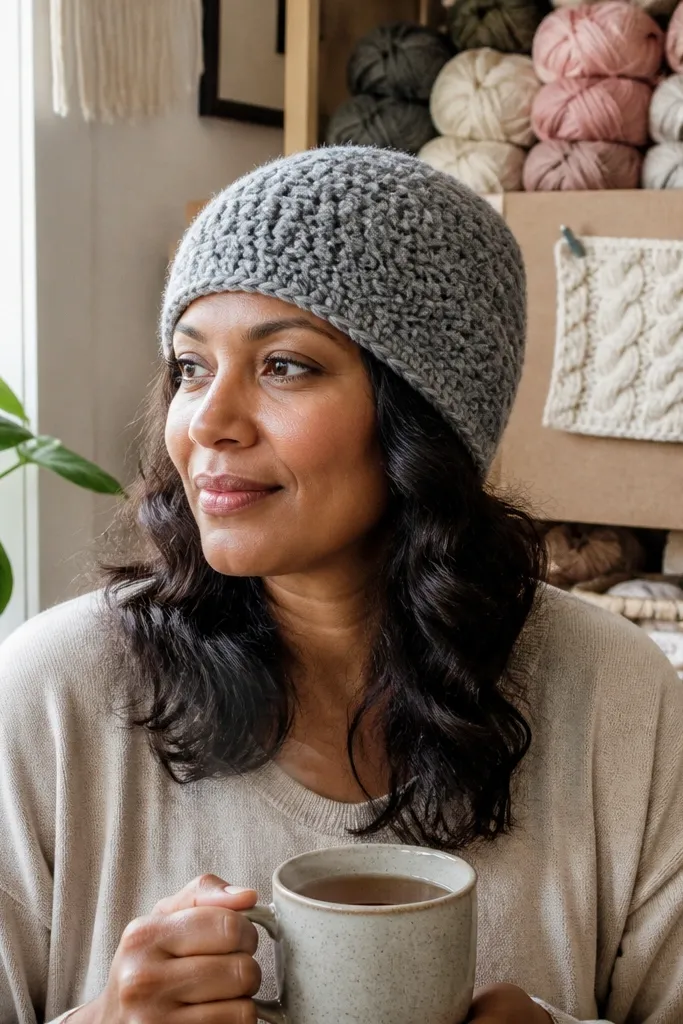
1. Cinnamon Ribbed Beanie with Twisted Post Brim
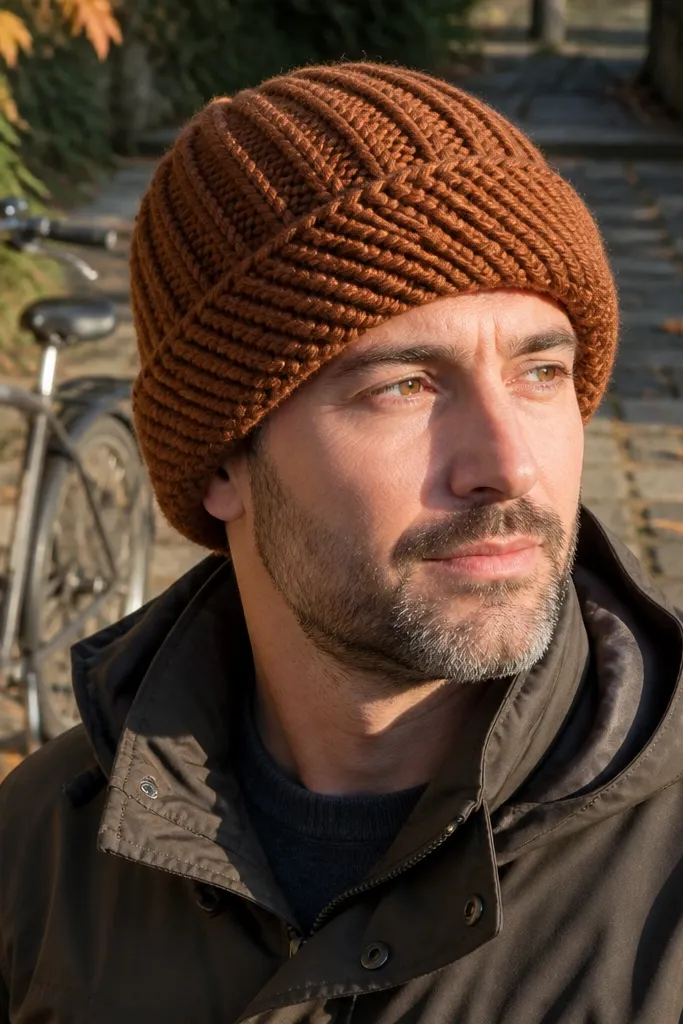
This one looks cozy because the brim does the heavy lifting. The twisted post stitches create ridges that catch side light, so the hat reads as thick even when you’re using DK yarn. The body stays simple — mostly stockinette or basic rounds — so the texture doesn’t fight the color. It’s a great first “stylish” upgrade if your hats look flat, because you only need to learn one stitch behavior for the whole project.
Start with a brim in 1x1 rib. Work 2-3 rounds of rib, then switch to twisted front post/back post combinations for 6-8 rounds to build height. After the brim, transition to plain rounds (single crochet or half double crochet) for the body until you hit your desired length, then decrease evenly for the crown.
Use a stitch marker in the rib pattern so your post stitches don’t drift left or right.
Don’t use a loose gauge on the brim — floppy rib kills the look.
2. Oatmeal Basketweave Slouch Hat
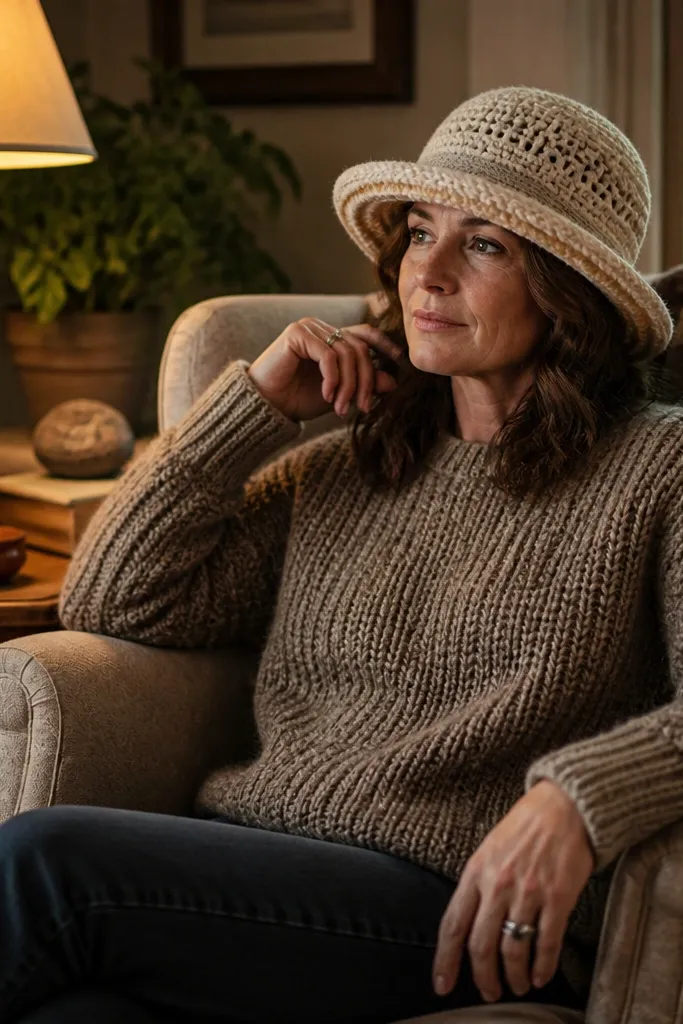
Chain to fit the head circumference, join to work in rounds, and then build the basketweave panel using front post/back post swaps in a repeating block. Work a few rounds of plain stitches before the pattern starts so the top doesn’t pucker. Continue basketweave until you reach your slouch height, then decrease gradually by 6-8 stitches spaced evenly around the crown.
Basketweave texture looks warm and handmade because it creates a woven grid across the whole hat. This design is especially photogenic in natural light — the “cells” cast tiny shadows that make the hat look plush. Use a slouch shape if you like a relaxed vibe, but keep the brim structured so it still looks intentional. It’s a solid project for gifting because the finished fabric looks like you spent more time than you did.
AvoidSkip the temptation to rush the pattern repeats — if the grid shifts, it looks messy fast.
Pro tipMark the start of each basketweave block with a removable marker; it keeps the grid straight.
3. Forest Cable-Look Beanie with Chunky Stripe
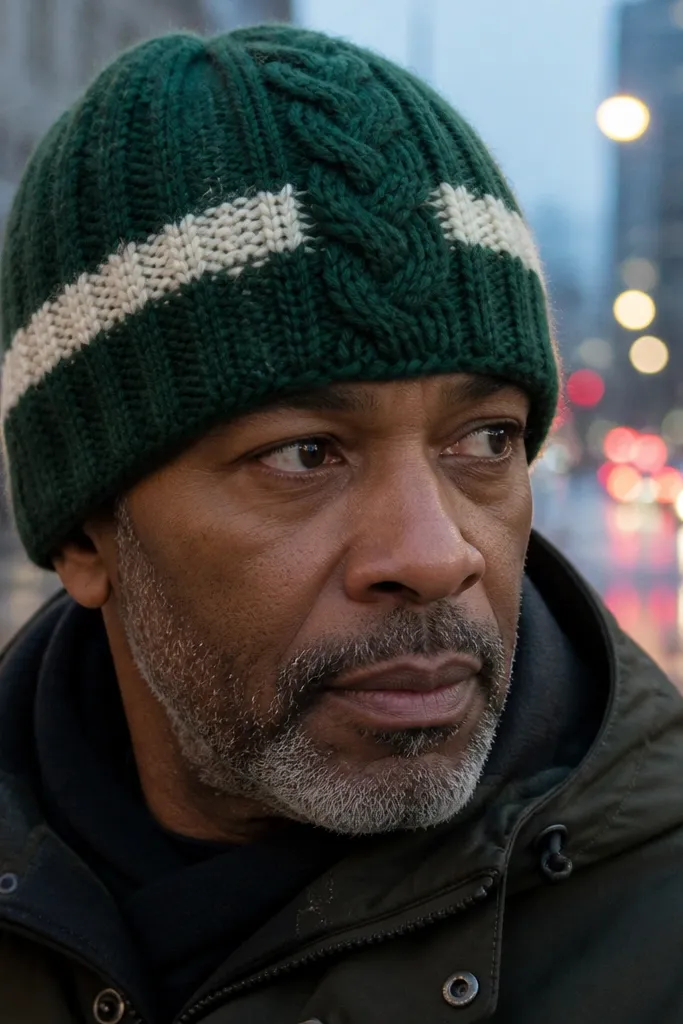
Work a ribbed brim in 1x1 rib for stretch, then switch to a main body round. Create a central panel by repeating a front-post/back-post cross pattern across a set number of stitches, while the rest of the round stays simple. Add the contrasting stripe by changing yarn for 2-3 inches, then return to the cable panel until you finish crown decreases.
Cable-look designs read stylish because they create a rope effect without needing true cable stitches. Here, you get a central cable panel and a bold contrasting stripe around the midsection, so it looks designed rather than “just a hat.” The deep green yarn makes the texture pop, and the stripe keeps photos interesting from any angle. This is a confident-beginner project: you repeat a cable-style front/back post rhythm and keep everything aligned.
AvoidDon’t change yarn mid-row unless you’re comfortable weaving ends — it shows on textured fabric.
Pro tipKeep your cable panel width odd-numbered so the center “rope” stays centered visually.
4. Berry Puff Stitch Crown Beanie
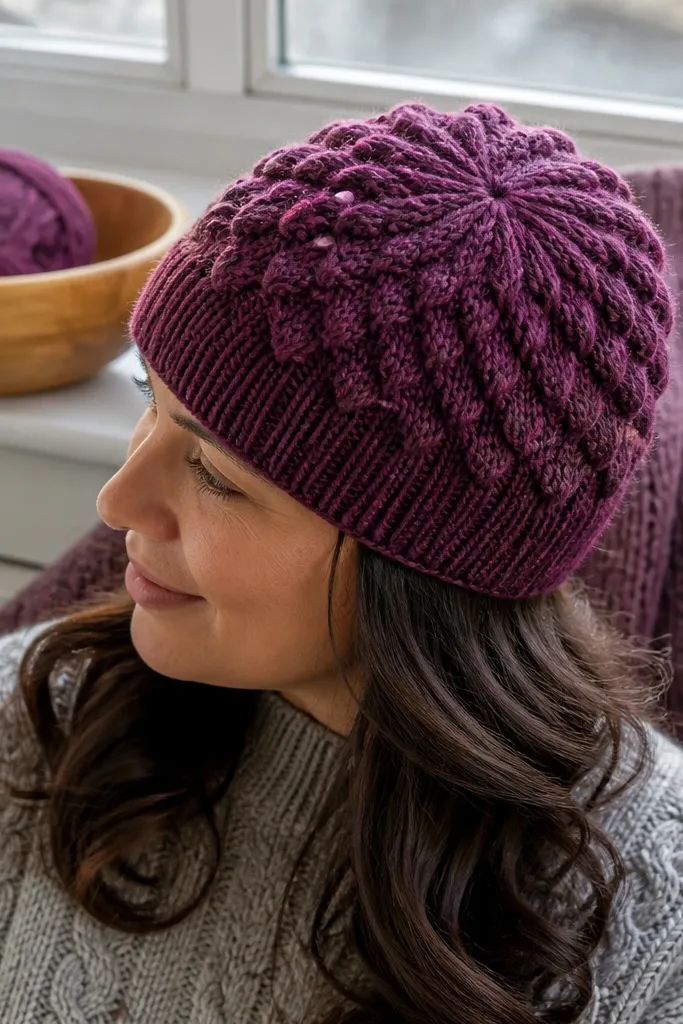
Puff stitch is the quickest way to make a hat look cozy because it literally adds volume. Concentrating the puffs at the crown keeps the design photogenic without making the whole hat stiff or overly bulky. Berry shades also look great in photos because the raised stitches catch highlights and deepen shadows. This is a great choice when you want drama but don’t want to manage complex shaping all over the body.
Start with a smooth lower section in single crochet or half double crochet so the hat fits cleanly. Build the crown by placing puff stitches in a shrinking oval pattern — keep the puff count reducing every 2-3 rounds. When the crown gets tight, finish with a final round of decreases and weave the tail through the last stitches.
Use a consistent puff height by counting yarn overs and keeping the loop pull tight but not straining.
Don’t make puffs too tall — if they sag, the hat looks uneven.
5. Sand Dune Linen-Style Crochet Beanie

Work a folded brim first by crocheting a brim width you like, then folding and stitching the inside edge to create a clean band. Use a simple textured stitch repeat that alternates worked and skipped stitches in a way that creates a linen weave effect. Continue the pattern for the body, then decrease with evenly spaced reductions over 4-6 rounds to shape the crown smoothly.
If you like cozy but not loud, this “linen-style” texture gives you that soft, natural look. The stitch pattern makes tiny ridges that look like fabric, and the neutral sand color makes it easy to pair with everything. It’s photogenic because the texture is fine — you see it as soon as light hits the surface, not because it’s chunky. This is a good project for anyone who wants a stylish hat that still feels calm and wearable.
AvoidDon’t skip the brim fold — a plain edge makes neutrals look unfinished.
Pro tipBlock the finished hat lightly by pinning the brim flat — it sharpens the folded edge.
6. Mocha Spiral Twist Beanie with Faux Waffle Band

Start with a ribbed band, then swap to a faux waffle strip for 4-6 rounds using front post/back post combinations in a square-ish rhythm. After that band, switch to a spiral twist effect by increasing or decreasing stitch counts slightly around the round and using a consistent twist pattern direction. Keep the spiral centered by marking the first stitch of each round, then decrease for the crown once you reach your length.
This design looks like it has movement, even when it’s sitting still. A spiral twist effect draws your eye upward, while a waffle-like band near the brim signals cozy thickness. Use mocha or chocolate yarn to make the twist lines look crisp instead of muddy. It’s a strong option if you want a hat that looks styled on camera without needing a pom-pom or bold color.
AvoidDon’t ignore round markers — spiral patterns drift fast if you lose your starting point.
Pro tipUse a slightly tighter hook for the waffle band so it stays dense and doesn’t collapse.
7. Champagne Seed Stitch Earflap Hat

Work the main beanie in rounds using seed stitch logic by alternating single crochet and chain skips in a consistent repeat. When you reach the earflap area, stop the round and work back and forth for two flaps, shaping with short rows so they curve around the ears. Finish with a tie or button loop by chaining a few lengths and attaching them at the flap edges, then seam the last stitches and weave ends.
Earflaps make a hat instantly cozy, but seed stitch keeps it from looking bulky or stiff. This combination looks cute on camera because the texture is even and the earflap edges frame the face. Champagne-colored yarn makes the whole thing feel warm and bright instead of dark and wintery. This project is ideal if you want functional warmth and a styled look, not just a basic beanie.
AvoidDon’t make earflaps too short — you want them to cover the ear, not just touch it.
Pro tipChoose a yarn with a bit of structure (cotton blend or wool blend) so earflaps hold their curve.
8. Slate Cloud Stitch Beanie (Soft Texture)

Cloud-like stitch patterns look plush because they create little loops or soft bumps that resemble waves. In slate gray, the bumps look even more dimensional, and the hat photographs beautifully because the texture stays visible without being flashy. The cuff keeps it tidy so the hat doesn’t look stretched out. This is a great “cozy but not chunky” option when you want comfort for cool mornings and still want a clean silhouette.
Start with a ribbed cuff in 1x1 rib for 2-3 inches. Switch to the cloud stitch repeat for the body, keeping the stitch count consistent so the texture doesn’t balloon. When you reach the crown, decrease using a regular interval so the cloud texture stays aligned over the decreases, then finish with a final cinch round.
If your cloud stitch curls, block it flat for 20-30 minutes before final shaping.
Don’t use a super-slippery yarn — cloud stitches lose definition on smooth fibers.
9. Rosewood Granny Stripe Beanie with Tight Join

Granny stripes can look messy fast, but this version keeps them photo-friendly with tight joins and consistent row height. The color palette — rosewood with a warm neutral — makes the hat look cozy and styled, not like a patchwork accident. You get bold horizontal bands that show clearly in pictures, even at a distance. If you want the retro vibe with a polished finish, this is the one.
Work long granny-style stripes in rows or in continuous rounds, but keep the stitch height consistent across every row. Use a tight join method by finishing each row with the same slip stitch placement so gaps don’t show. After you’ve built the height, seam or join to form the crown and add decreases at the top by reducing the stitch count evenly across the last few stripe rows.
Weave ends as you go between stripes so the inside stays clean and the outside doesn’t get lumpy.
Don’t leave big gaps at joins — they show as bright lines in photos.
10. Ivory Scalloped Edge Beanie with Post-Stitch Body
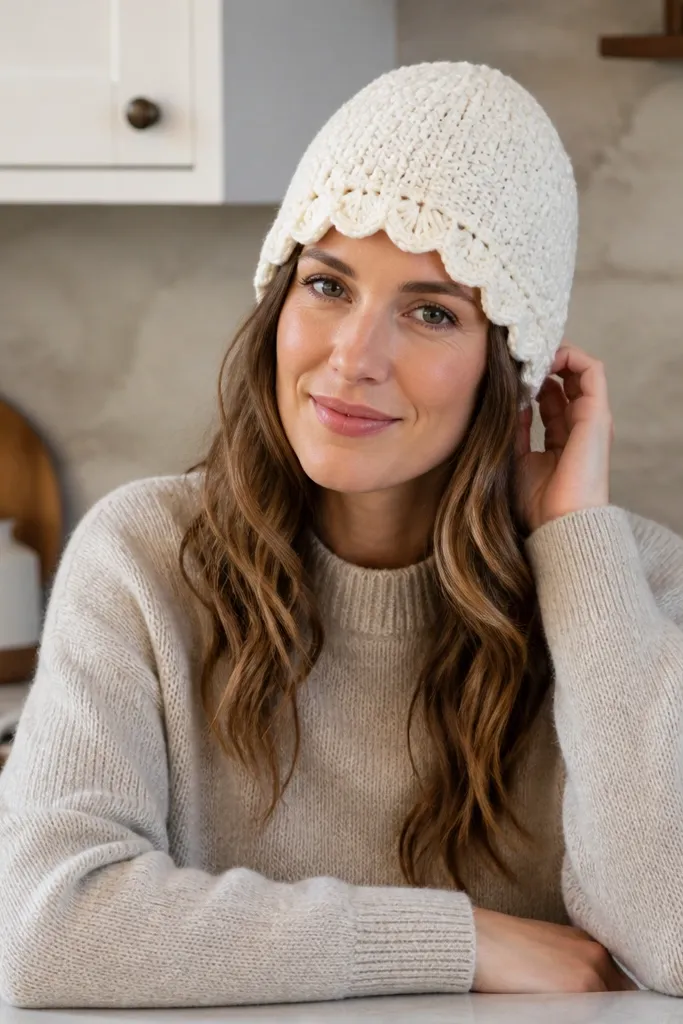
Build the body first using front post/back post stitches in rounds so you get a dimensional fabric. When you reach the brim, switch to a scalloped edge by working a repeat that creates a series of rounded points along the circumference. Add a final round of slip stitches or single crochet to lock the scallops in place, then shape the crown with evenly spaced decreases.
Scallops instantly read cute, and the post-stitch body keeps the hat cozy and structured. The scalloped brim frames the face and looks great even when the rest of your outfit is simple. Ivory yarn makes the scallops look crisp and delicate, while the raised stitches prevent it from looking flat. This is a solid choice for anyone who wants “stylish cozy” without a pom-pom.
AvoidDon’t stretch the scallops while joining — they’ll flare and look wavy.
Pro tipUse a smaller hook for the scallop brim so the points hold their shape.
11. Blackberry Ripple Beanie with Side Stripe
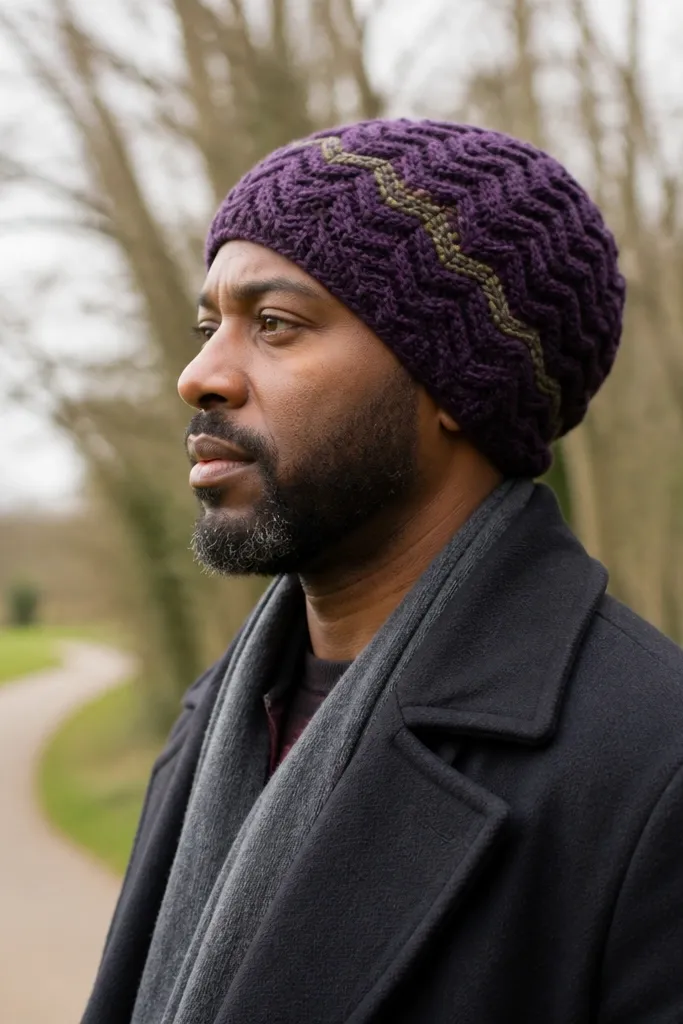
Start with a ribbed edge for fit, then work ripple stitch in a repeat across the circumference by following a consistent increase/decrease rhythm. Keep a simple stitch panel on one side so the stripe area stays straight and contrasts with the ripples. Finish the height, then decrease gradually for the crown while maintaining the ripple rhythm until the top closes.
Ripple stitches create a wavy silhouette that looks stylish in motion. Add one side stripe and you get a design that reads intentional from every angle, not just from the front. Blackberry purple makes the ripple lines look dramatic and cozy without needing extra decoration. This is a good pick if you want something more “fashion” than basic textured beanies.
AvoidDon’t let the stripe panel drift — anchor it with stitch markers.
Pro tipChoose a yarn with good twist (not overly fuzzy) so the ripple peaks look sharp.
12. Teal Starburst Beanie with Minimal Ends
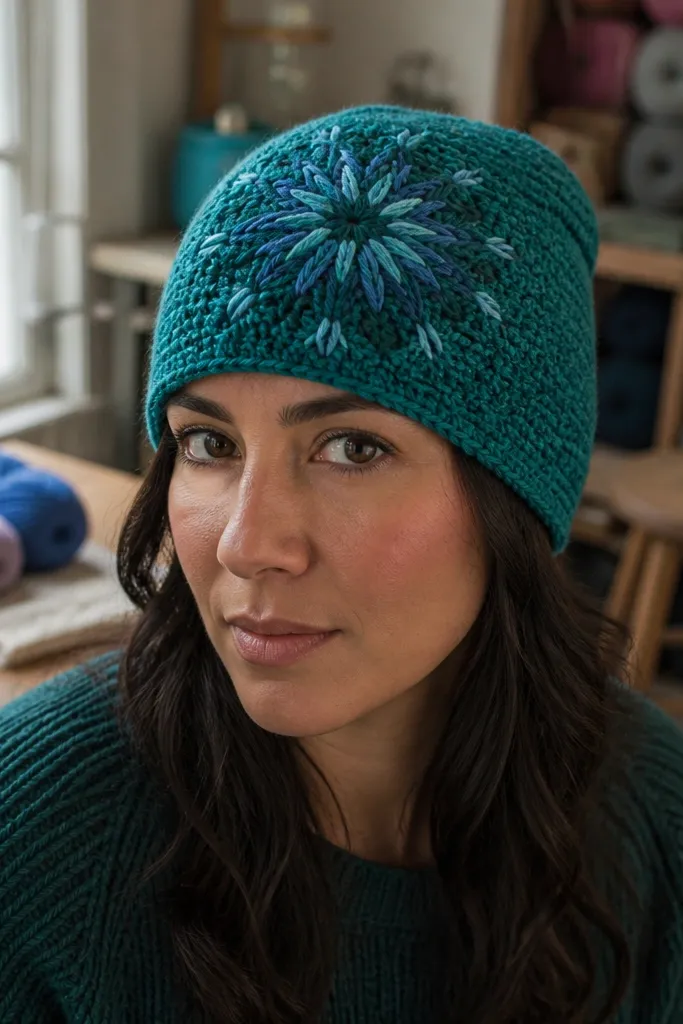
Work a smooth base in rounds until you’re ready for the starburst center. Create the starburst by increasing stitches into a diamond or star shape using a repeat of paired stitches and then working textured stitches across the increased area. Once the burst is formed, keep the rest of the round simple and continue until you reach crown shaping, then decrease evenly to close.
Starburst textures look like you planned the design, because they create a focal point. This hat has a starburst panel that’s bold in photos, while the sides stay smooth so the hat doesn’t become visually noisy. Teal is a great color for this because the raised bursts show color depth and shadow. The project is manageable if you’re comfortable with basic increases and working a panel pattern in rounds.
AvoidDon’t start the starburst too high — it makes the crown look crowded.
Pro tipKeep your starburst stitch count consistent by counting the peaks, not just the rows.
13. Cream Faux Cable Rib Hat with Folded Brim
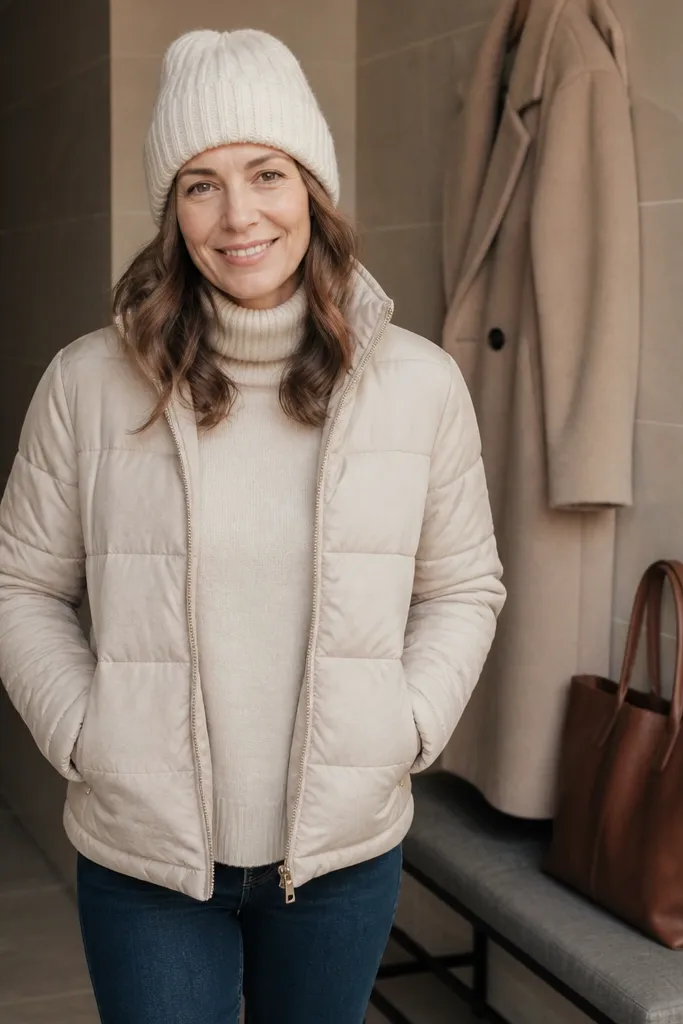
Start with a ribbed base in back-loop only single crochet or half double crochet so it has a tight, stretchy fabric. Create faux cables by swapping front post/back post behavior across a narrow set of stitches that repeats every few rounds. Fold the brim by crocheting extra length at the bottom, then folding and sewing the inside edge so the fold stays even.
Cables on a rib base look classic, and the folded brim makes the hat feel extra cozy. The faux cable method gives that rope look without the complicated cable needle routine. Cream yarn makes the rib lines clean and photo-ready, and the fold adds structure so it sits right on your head. This is a great “winter outfit” hat if you wear scarves and want a matching set vibe.
AvoidDon’t make the rib too loose — faux cables look blurry on slack fabric.
Pro tipUse a tapestry needle and thread the sewing through the back loops only for a clean fold.
14. Sage Waffle Stitch Beanie with Pom-Pom Optional

Waffle stitch is the definition of cozy-looking crochet because it makes a thick, grid-like fabric. Sage green keeps it calming and wearable, and the texture holds up well in photos without needing color changes. If you want extra cuteness, you can add a pom-pom, but the hat looks complete even without one because the fabric does the work. This design is also forgiving: small stitch imperfections don’t ruin the waffle pattern.
Work a ribbed bottom edge in 1x1 rib for 2 inches. Then switch to waffle stitch by using front post/back post blocks in a consistent repeat, alternating the block positions every few rounds to create the grid. Keep going until you reach the desired length, then decrease by reducing stitch counts in the waffle blocks so the grid stays aligned while closing the crown.
If your waffle looks flat, go up one hook size for the body after the brim — it opens the texture.
Don’t flatten the waffle with aggressive blocking — pin gently and let it keep its puff.
15. Terracotta Herringbone-Style Beanie
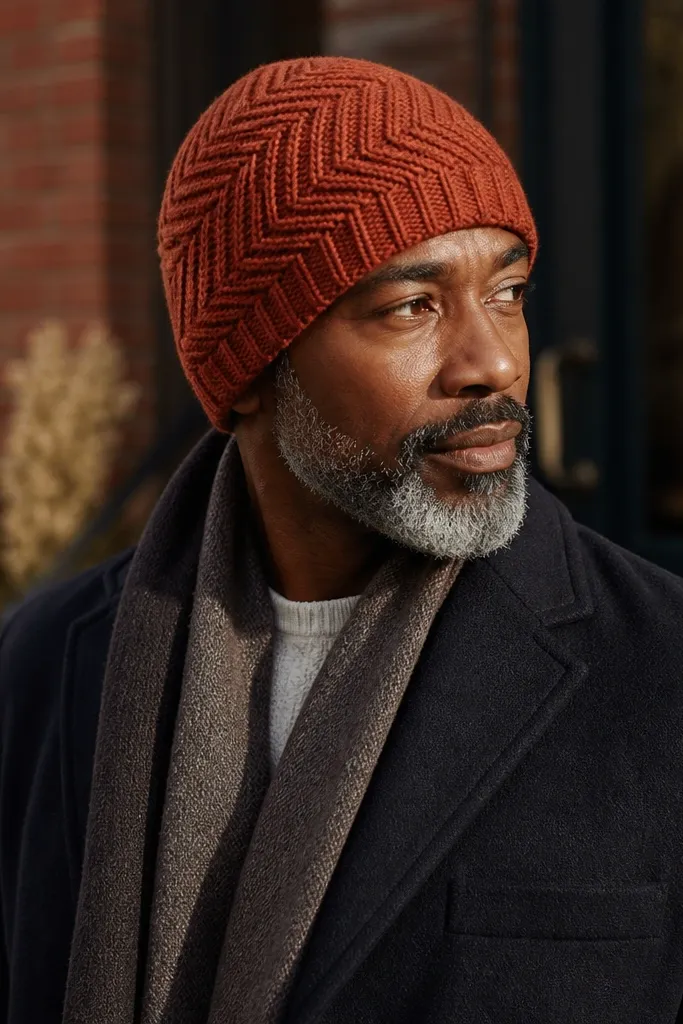
Start with a ribbed brim in a simple rib stitch for stretch. Work the herringbone-style repeat by alternating two stitch directions across the round, using consistent stitch placement so the diagonals line up. Continue until you reach the main height, then shape the crown with evenly spaced decreases that keep the diagonal flow going toward the top.
Herringbone-style crochet looks sharp because the diagonal pattern creates a tailored fabric effect. Terracotta makes the stitch angles look warm and dimensional, especially in side lighting. This hat is a great choice when you want “cozy and stylish” without big bulky stitches or loud color blocks. The pattern is clean enough for beginners who can follow a repeat, and the finished hat looks like a knitted piece from a store.
AvoidDon’t skip counting diagonals — one off-by-one repeat ruins the herringbone look.
Pro tipUse a stitch marker every pattern repeat so the diagonal direction doesn’t drift across rounds.



