
1. Chunky Puff Stitch Wall Hanging in Warm Oat
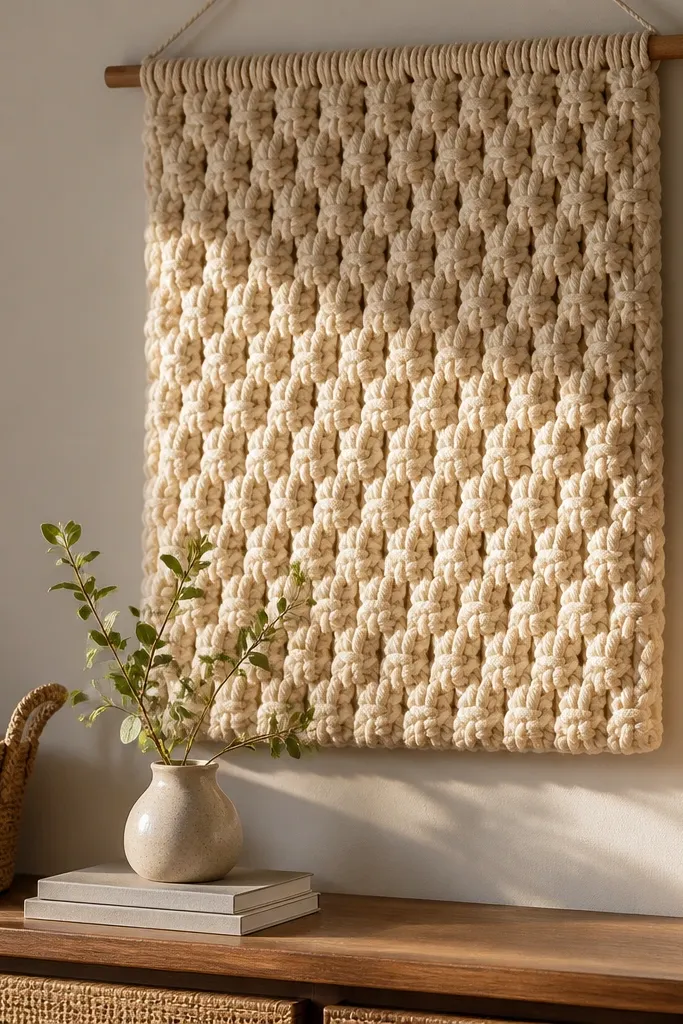
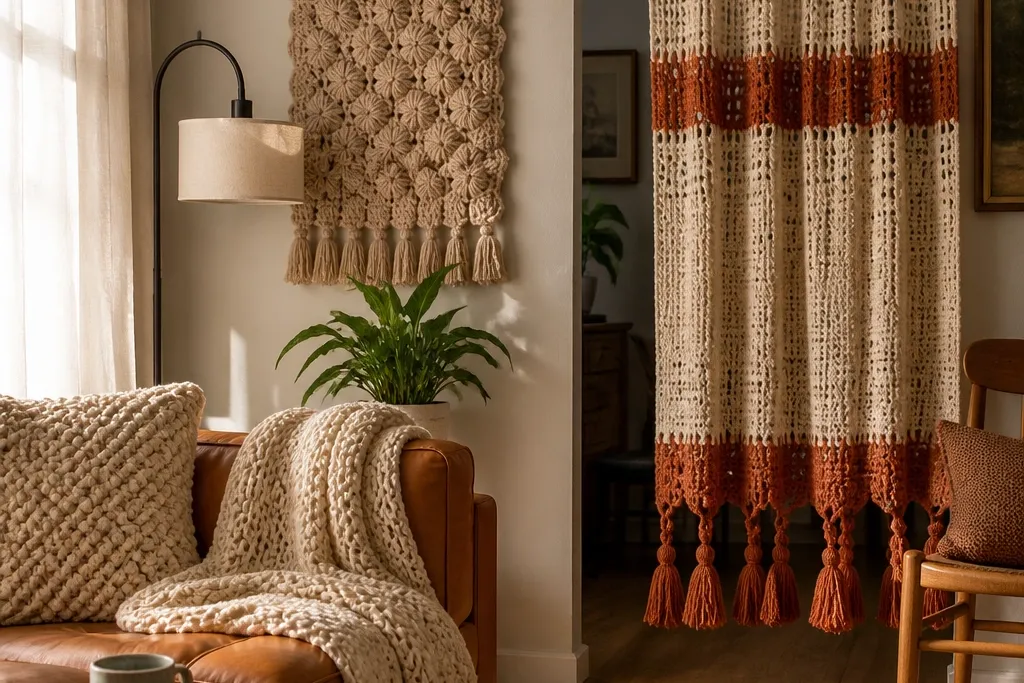
This is the easiest way to make a wall look instantly cozy because puff stitches create a bumpy, light-catching surface. Choose a warm oat yarn and keep the pattern mostly straight so the piece reads clean from a distance. The raised texture softens the look of a blank wall without needing complex motifs. It also photographs well because the stitch height creates shadow lines — that’s what makes it feel plush. Plan for a medium size that sits at eye level, like a vertical panel, so it frames the room instead of disappearing into it.
Start with a foundation chain long enough to make a panel about 14-18 inches wide. Crochet puff stitch rows in a consistent grid, keeping your tension firm so the fabric doesn’t balloon. Add a simple top hanging loop by crocheting a short chain and securing it to the final row with slip stitches. Finish by weaving in ends, then block the panel by pinning it flat to a board so the edges don’t curl. If you want extra structure, tack a thin felt strip to the back with fabric-safe glue along the top third.
Pro tipUse a size smaller hook than the yarn label suggests for tighter puff definition and a cleaner edge.
AvoidDon’t let puff rows get loose — airy puffs make the hanging look flat instead of plush.
2. Granny Cluster Doorway Curtain Panel
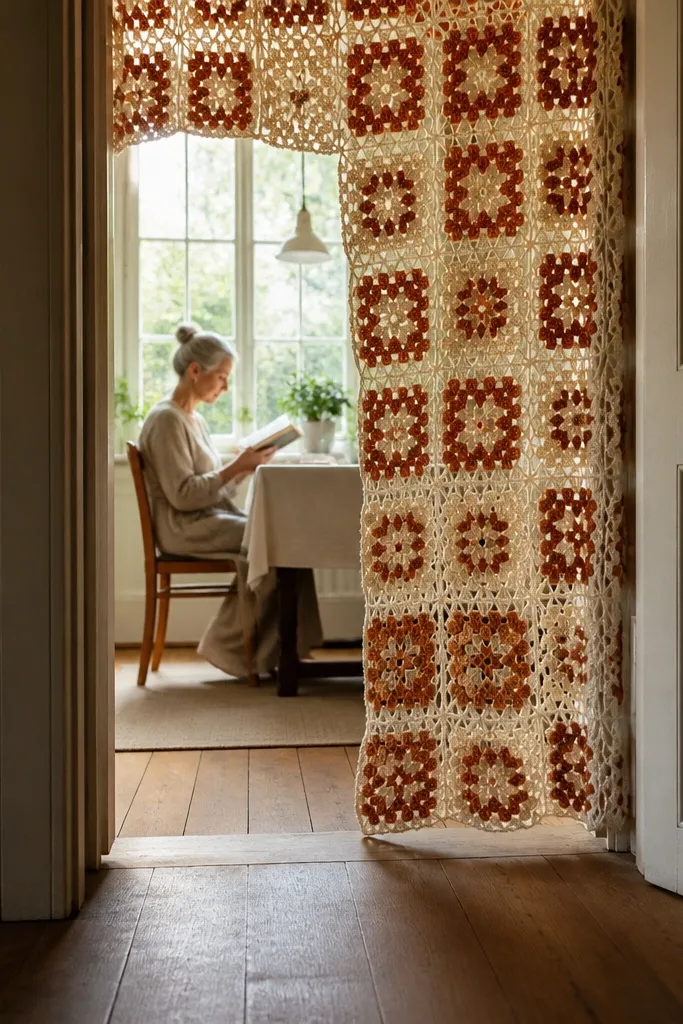
A doorway panel adds cozy because it creates a soft boundary without blocking light completely. Granny cluster shapes look complex but are repeatable, and the open spaces let the room breathe. Use two warm colors — cream and terracotta — so the piece reads warm even when daylight changes. Hang it high and let it fall straight so it frames photos and makes the doorway feel intentional. This works best for small apartments, studios, or any room where you want separation without a bulky curtain.
Make a series of granny clusters in horizontal rows, aiming for a final width that spans the doorway opening plus a few inches. Join clusters as you go with slip stitches so the fabric stays sturdy and doesn’t twist. Add top hanging ties by crocheting long chains in intervals, then stitch them to the top edge so you can tie the panel to a tension rod. For a clean drape, block the panel by pinning the edges flat and smoothing each cluster. If you want it to hang straight, weave a thin curtain-weight cord into the bottom edge using a tapestry needle.
Pro tipChoose a yarn that has a little twist (not super fuzzy) so clusters stay crisp and readable in photos.
AvoidAvoid single-color repeats all the way through — the panel looks flat unless you alternate warm tones.
3. Square Coaster Set with Textured Border
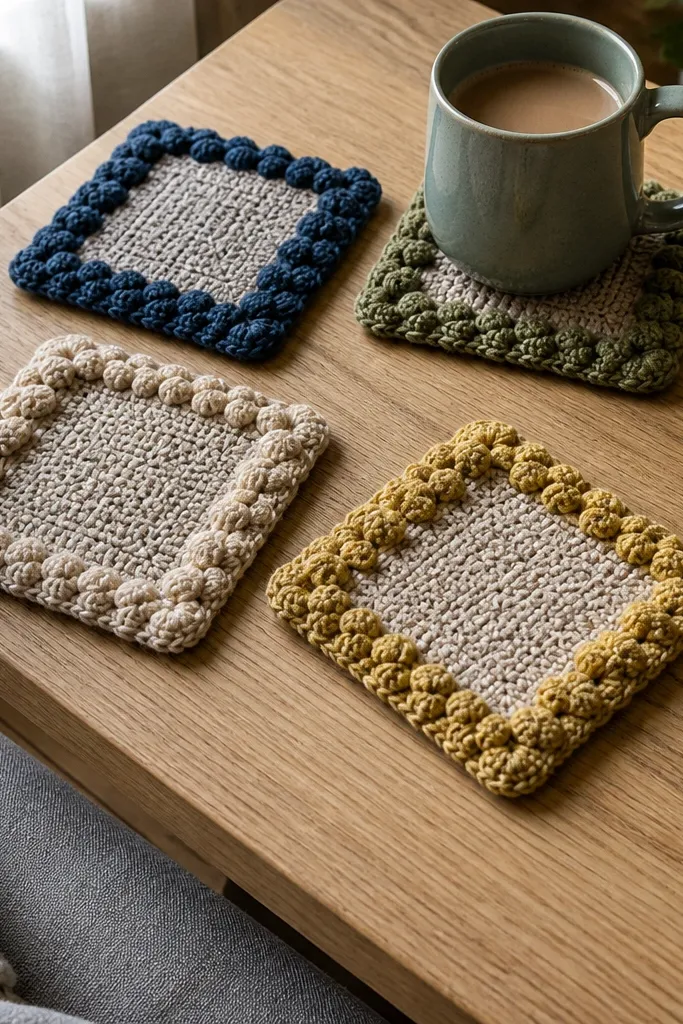
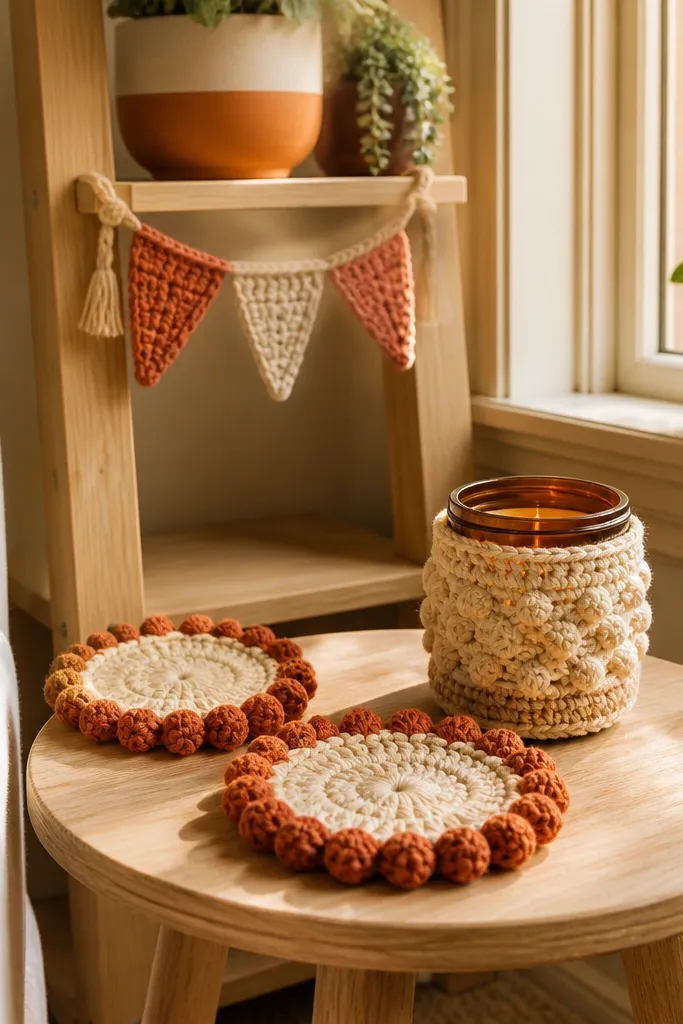
Coasters are cozy decor because they’re small, frequent-touch items that also show up in every photo on a side table. Crochet makes them look handmade and soft, but the key is to give them a dense surface that doesn’t absorb spills instantly. Use a neutral base with a textured border — bobbles or popcorns — so you get the raised cozy look without thick bulk. Make a set of four or six so you can style a table and not just decorate one spot. This is also one of the fastest projects on the list.
Start with a tight stitch base using worsted weight and a hook one size smaller than the label. Crochet a square to about 4x4 inches, then add a border row that uses bobbles spaced evenly around the perimeter. Make sure the border doesn’t flare by keeping stitch counts consistent. Block lightly so corners stay square. For durability, glue a thin non-slip felt pad to the underside and seal the surface with a fabric-safe spray designed for yarn.
Test thickness by stacking two coasters — if they wobble, your base stitches are too loose; tighten the hook size.
Don’t choose an open-lace stitch for the top — it looks pretty but stains fast.
4. Woven-Look Crochet Basket for Throws
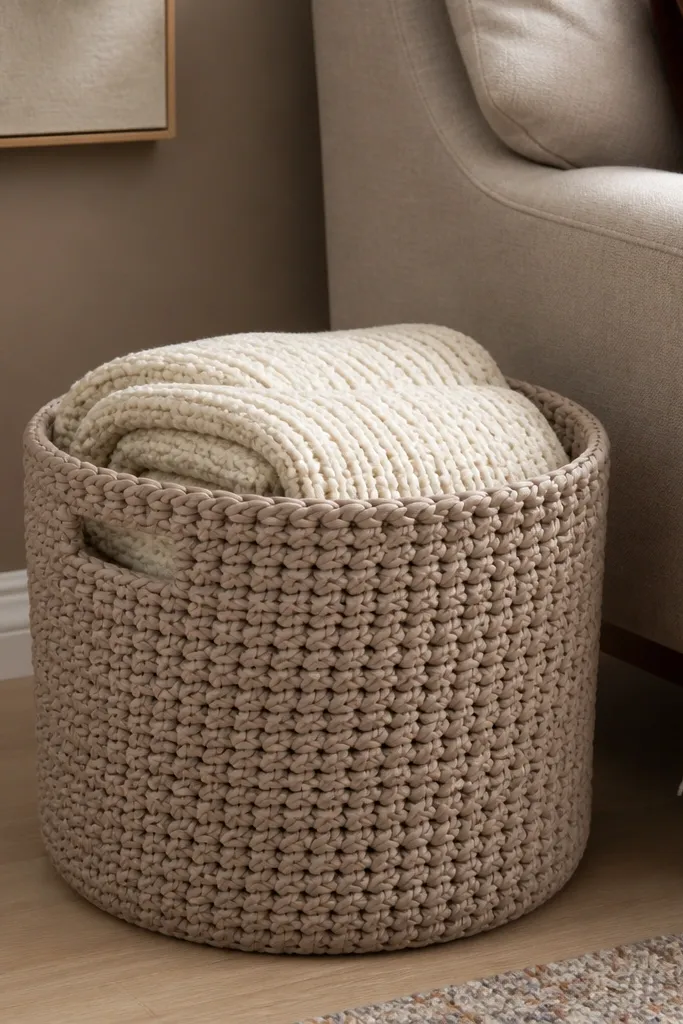
A basket turns cozy from “soft” to “organized soft.” Crochet baskets hide clutter and make throws look like part of the decor instead of a pile. The woven-look stitch pattern creates a grid texture that reads cozy even when the basket is empty. Use a thicker yarn for the body and a tighter stitch so the basket stands up. Style it near a couch or bed with one folded throw inside — it gives you instant warmth and a tidy silhouette.
Crochet the basket base first in tight rounds, aiming for a diameter around 10-12 inches. Build the sides with a stitch that mimics weaving, like front-post/back-post combinations that create a raised rib-grid. Add a firmer rim by crocheting an extra round with smaller hook size or by doubling yarn through the last round. If you want crisp sides, insert a plastic canvas circle at the base and remove the need for flimsy structure. Finish by weaving in ends and trimming loose fuzz.
Pro tipUse stitch markers every round — losing one stitch in a basket changes the curve and makes it look homemade in a bad way.
AvoidDon’t skip reinforcement if you want it to hold weight; a flimsy basket collapses in photos.
5. Textured Crochet Pillow Cover with Contrast Cord Edge
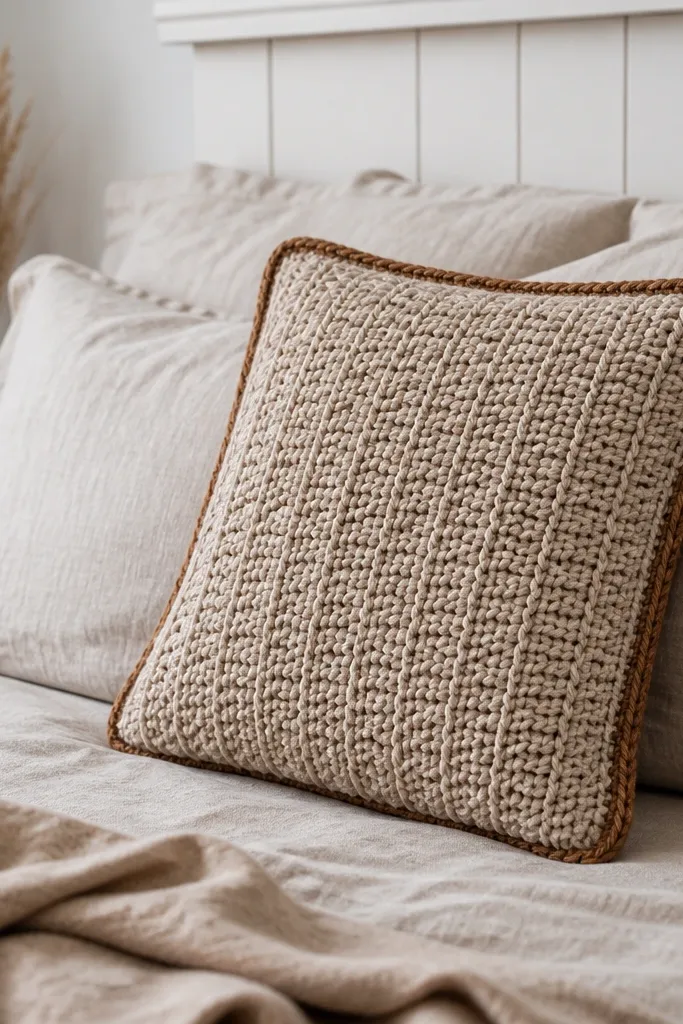
Pillows are the fastest cozy signal because they sit in the viewer’s line of sight and add softness you can touch. A textured center stitch, like alternating front-post rows, gives depth without complicated colorwork. A contrast cord edge makes the cover look finished and store-bought, not like a panel that got stitched on. Choose a pillow size that matches your furniture — 18x18 inches looks right on most couches, while 20x20 can fill a reading chair better. This project also lets you swap covers seasonally without changing your pillow insert.
Make a front panel by crocheting a rectangle sized to the pillow insert with a little negative ease, then add a back panel with overlap tabs or a simple zipper seam. Work the textured stitch across the front panel and keep the edges clean with a single border row in a tighter stitch. Sew panels together using mattress stitch for minimal seams. Add a contrast crocheted cord edge by crocheting a small chain cord, then whip-stitch it around the perimeter. Insert a pillow form and close the back so the cover lays flat.
Pro tipMeasure your pillow insert height and width before crocheting so your cover doesn’t pull tight or sag.
AvoidDon’t use a lacy stitch for the front panel; it wrinkles and looks thin on camera.
6. Crochet Plant Hanger with Macramé-Style Twists
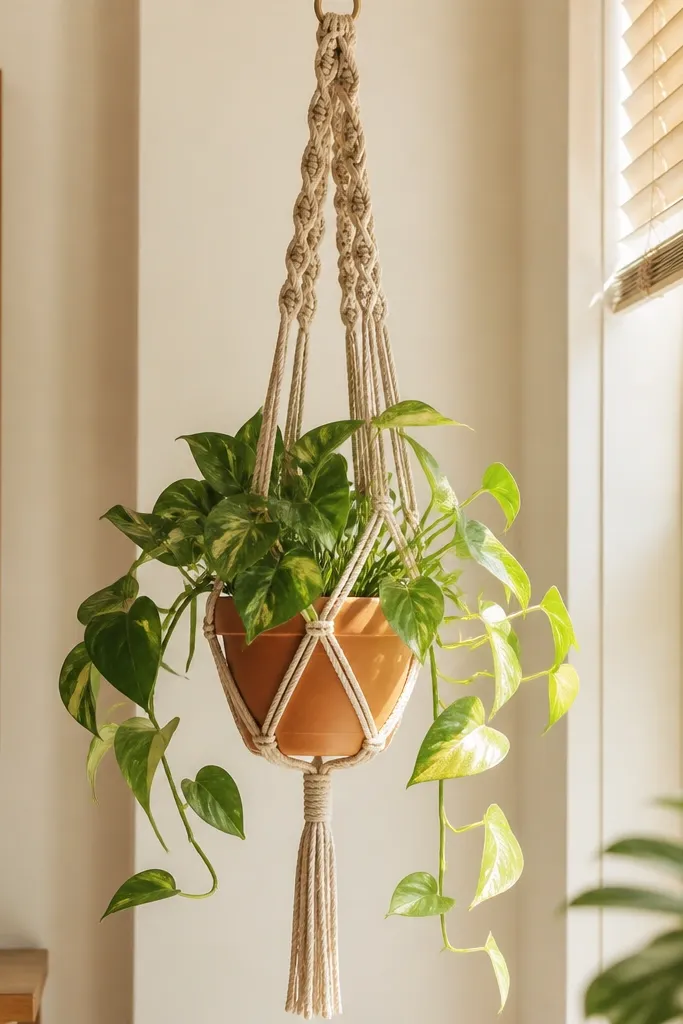
A plant hanger feels cozy because it adds soft vertical lines and a handmade texture that looks good next to shelves and windows. Crochet with twist-like structure reads ropey and sturdy, which matters because hangers take weight. Keep your color warm and low-contrast so it doesn’t fight the plant. This is also a practical decor upgrade: it frees floor space and makes the room feel lighter. If you have bright window light, the yarn texture catches highlights and looks good in daylight photos.
Start with a braided or twisting stitch pattern for the top section so the hanger has structure. Crochet a length that places the pot at the right height — measure from the ceiling hook to the pot rim and subtract a few inches for slack. Use a tighter stitch and a hook size smaller than normal to prevent stretch. Add a top loop by chaining and anchoring with slip stitches. For the basket section, crochet a snug ring or a small cylinder that fits your pot diameter and tie the pot in place with a fabric strap if needed.
Pro tipUse a smooth yarn like cotton-blend or tightly spun acrylic so it doesn’t fuzz up and look messy near the ceiling.
AvoidDon’t use super stretchy stitches; a droopy hanger makes the whole setup look careless.
7. Cozy Crochet Table Runner with Eyelet Striping
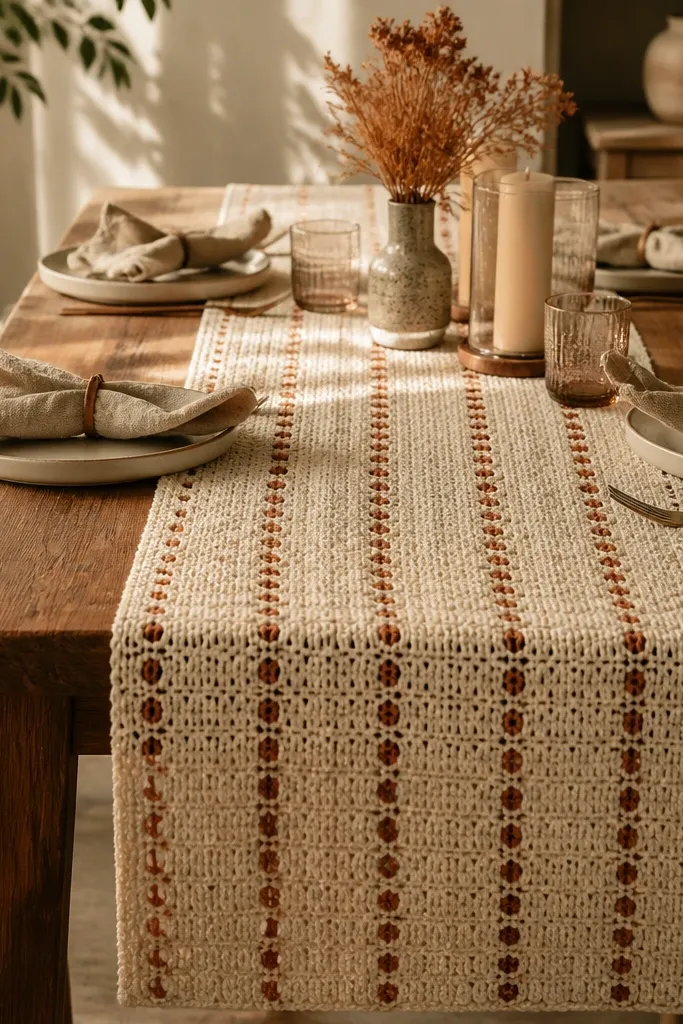
A table runner makes a room feel cozy because it adds a long, soft texture line across a surface that otherwise looks bare. Eyelet striping gives it a light, airy look while keeping the overall fabric structured. Use warm cream and a second warm accent color for stripes so it reads styled. Keep the runner length aligned with your table — too short looks like you forgot to finish it. This works for dining tables, entry consoles, and even a dresser top where you want a calm focal strip.
Pick a width around 12-14 inches and crochet a foundation chain long enough for your desired length. Work alternating rows: one plain textured row for stability, then one eyelet row using consistent spacing so it doesn’t warp. Add a simple border row on both ends to keep edges straight. Block the runner flat and weigh the corners with pins or small clothespins. If you want it to stay in place, sew small non-slip fabric dots to the underside.
Pro tipIf your eyelets curl, adjust hook size smaller and block harder — the border should hold the shape.
AvoidDon’t mix three stitch types; the runner looks busy and less cozy.
8. Crochet Candle Sleeve with Tucked Border
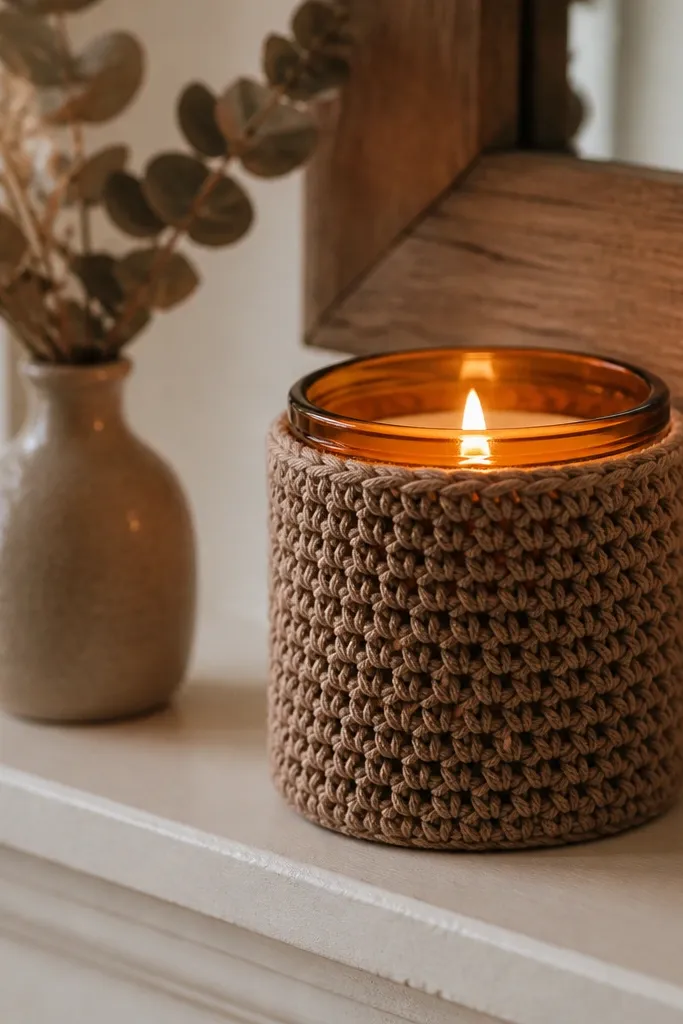
Candle sleeves are cozy decor because they frame the flame and soften the look of glass jars. This one is built to look neat — a snug fit plus a tucked border that creates a crisp edge. Choose a yarn in warm taupe, camel, or cocoa so it looks good with amber candlelight. Use it on nightstands, shelves, or a mantel where you want warmth without heavy wall decor. If you keep the opening wide enough for air, it also looks safer than loose, drapey crochet.
Measure the candle jar circumference and height, then crochet a tube with a tight stitch that won’t stretch too much. Add the tucked border by crocheting a short row of slip stitches or short clusters along the top edge to create a fold-like rim. Leave the top open enough for the flame clearance. Weave in ends tightly and block the sleeve so it keeps a smooth shape. If you want extra stability, stitch a thin ribbon inside at the top so it doesn’t slide down.
Pro tipUse cotton yarn for sleeves around heat sources because it holds shape better than acrylic.
AvoidDon’t crochet a long sleeve that reaches too low over the jar base; it looks sloppy and can snag.
9. Granny Square Floor Cushion with Fringe Edges
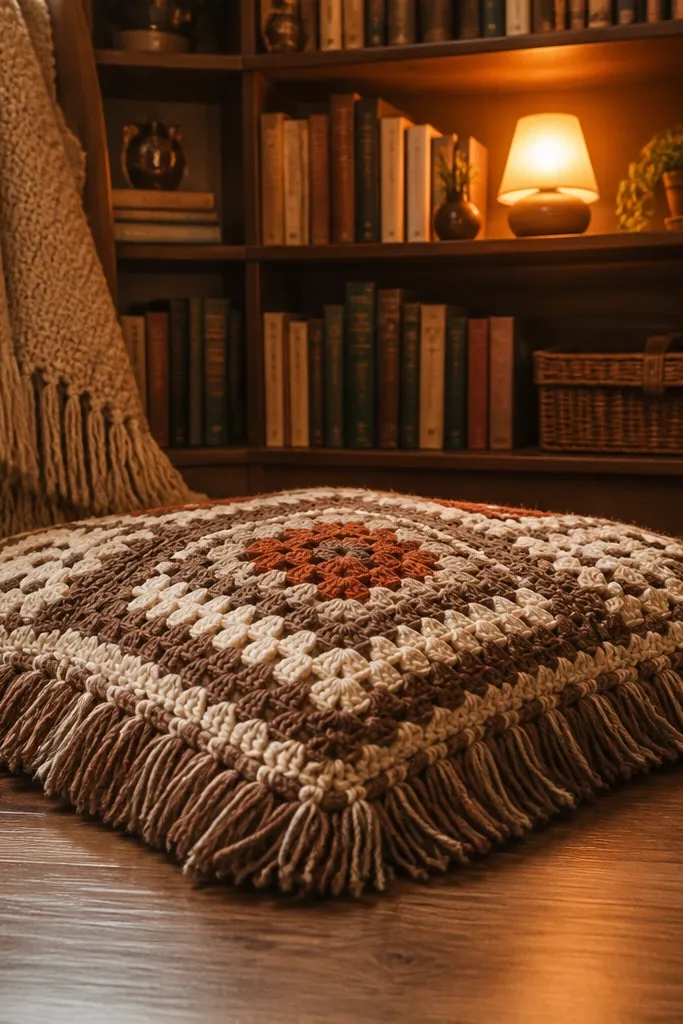
A floor cushion reads cozy immediately because it signals a place to sit and relax. Granny squares give you a bold, photogenic pattern, and fringe adds softness at the edges where the eye lands. Use warm browns and creams or add a muted rust accent to keep it cozy instead of loud. This project works for reading corners, kids' play nooks, and extra seating where you want something soft but not bulky. Make it thick enough that it looks like it belongs on the floor, not like a thin cover.
Start with a square base that matches your cushion insert size — a common target is about 20x20 inches. Crochet granny squares and join them into a larger panel, then assemble into a cover with a simple envelope back or zipper seam. Add fringe by cutting yarn strands and attaching them evenly along the outer edge after assembly. Stuff with a firm cushion insert so the cover doesn’t sag and look flat. Block lightly to even out corners and keep fringe lengths consistent.
Pro tipPre-cut fringe strands using a cardboard guide so every strand matches in length.
AvoidDon’t use thin yarn for a floor cushion; it collapses and stops looking cozy.
10. Crochet Shelf Garland with Mini Bunting Triangles
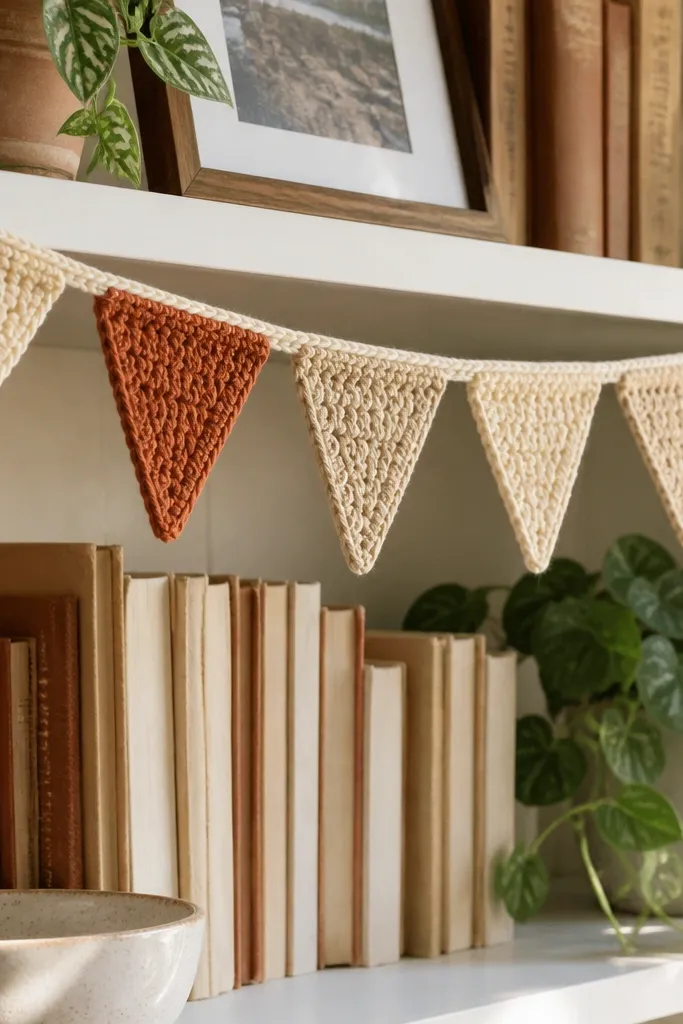
Garlands make shelves look styled because they add a horizontal rhythm and small pops of texture. Mini triangle bunting is easy to repeat, and it looks cute without overwhelming the shelf items. Use two or three warm colors and alternate them so the garland looks intentional. This works especially well on bookshelves, above a desk, or along a mantel line. The best part is that you can adjust the length exactly to your space.
Crochet small triangles using a simple decrease pattern so each one stays crisp. Make enough triangles to cover your shelf width with a little spacing between them. String them by crocheting a thin chain cord or using a cotton twine strand and sewing each triangle at the base. Add a small loop or tie at both ends so you can hang it neatly. Block the triangles flat so they don’t curl on the shelf.
Pro tipUse a slightly smaller hook for triangles than for the chain cord so the bunting doesn’t sag.
AvoidAvoid uneven triangle sizes — one off-size triangle makes the whole garland look rushed.
11. Crochet Pegboard Cover for Wall Organization
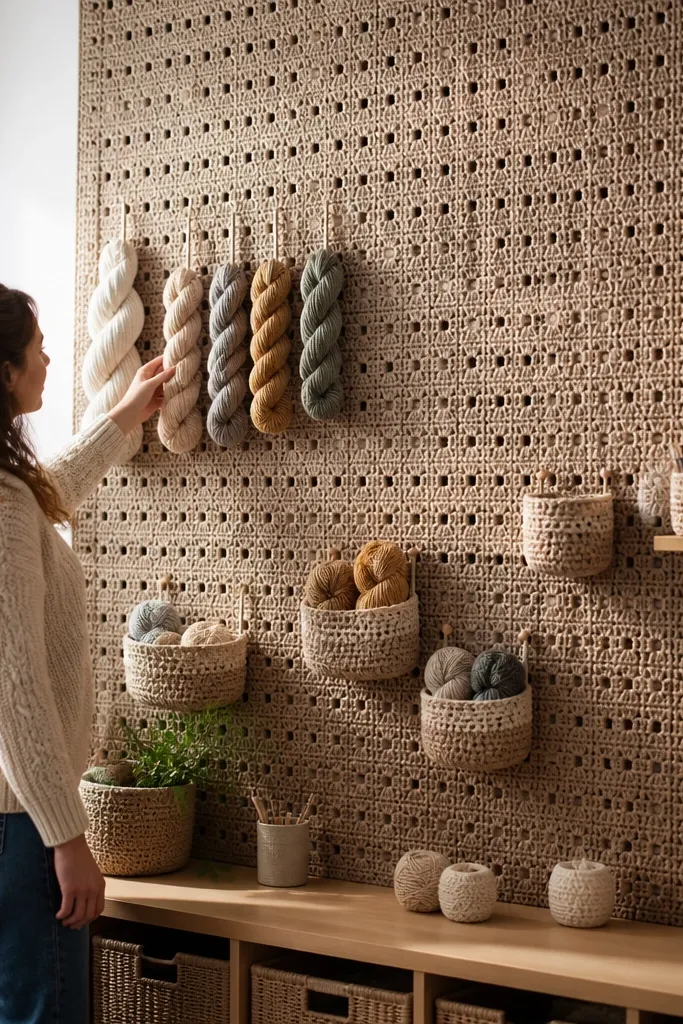
This is cozy decor that also solves clutter. A crochet cover over a pegboard or slat wall makes tools, yarn, or small baskets look like part of the room instead of random storage. The texture makes the wall feel soft, and the repeated holes guide the eye. Use warm neutral yarn and keep the crochet pattern tight so it doesn’t look messy around edges. It’s perfect for craft rooms, laundry corners, and entries where you want hooks but hate exposed hardware.
Measure your board and decide how much crochet you want to cover — cover the main face and leave corners clean. Crochet a mesh-style panel that matches the board size, then attach it by weaving around the holes or securing at the perimeter with stitches. Reinforce stress points near hooks with extra stitches so the crochet doesn’t tear. Add small crocheted tabs at the bottom so the fabric hangs evenly. Finish by trimming any loose ends and smoothing the surface by steam-blocking.
Pro tipUse a yarn with low fuzz so the board stays readable and doesn’t look dusty in photos.
AvoidDon’t crochet the cover too loose — saggy mesh makes hooks look crooked.
12. Crochet Round Table Mat Set with Textured Ring
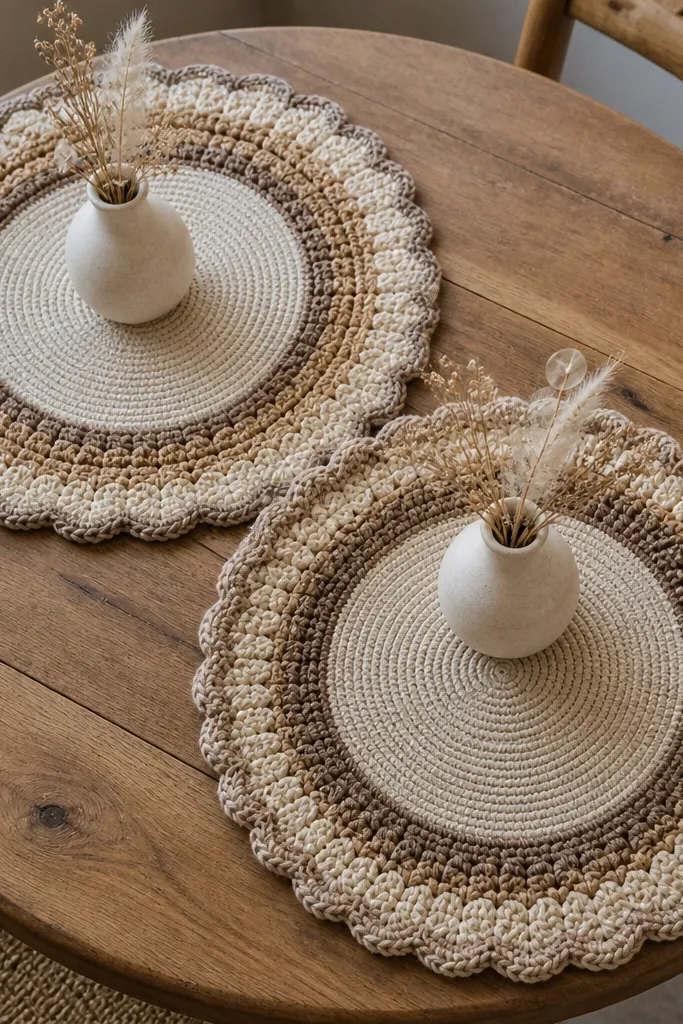
Round mats look cozy because they soften sharp corners on tables and make centerpieces look grounded. A textured ring around the edge adds a border effect and frames whatever you put in the middle — candle, vase, or bowl. Choose warm neutrals and keep the center simple so the mats don’t compete with your decor. Make a set of two or four so you can style them as a cluster. These also photograph well from above because the border creates a clear shape.
Start with a magic ring and crochet in tight rounds to build a center disk about 6-8 inches wide. Add a textured ring by switching to a stitch like bobbles or front-post rib for one to two rounds near the outside edge. Maintain consistent stitch counts to keep the mat perfectly round. Weave in ends and block flat so the border doesn’t ripple. For protection, glue a thin non-slip felt circle to the underside.
If your rounds ripple, count stitches every 2 rounds and correct early — fixing later is annoying.
Don’t block too wet — yarn can stretch and the mat ends up uneven.
13. Crochet Headboard Throw Pillow with Cable Panels
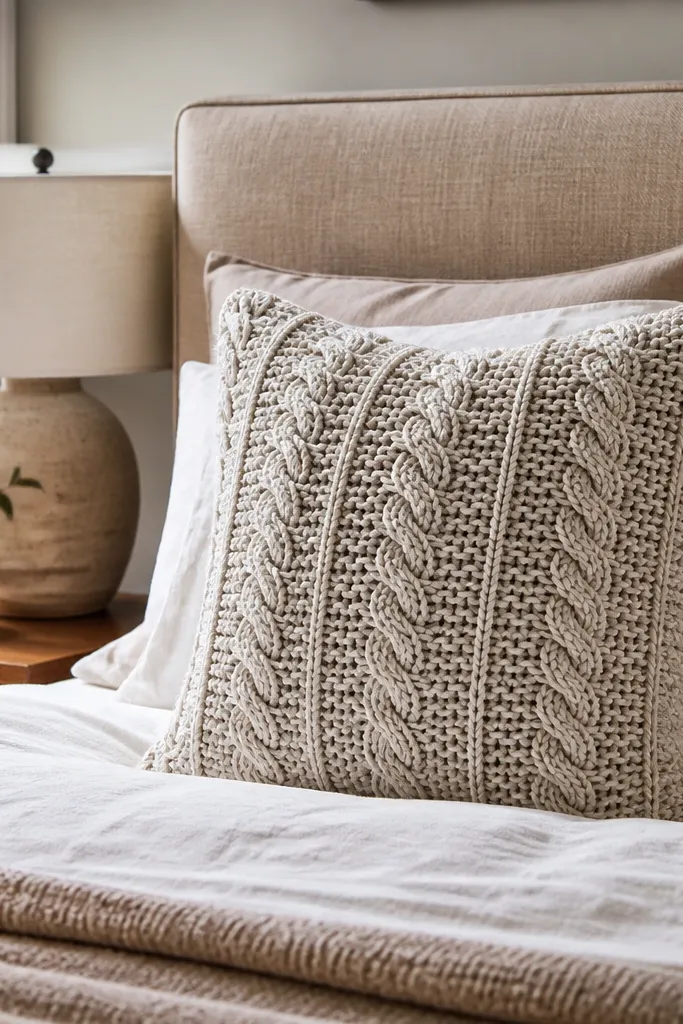
Cable-style crochet looks cozy because it creates structured, raised lines that resemble knitwear. On a bed or reading chair, cable panels make the whole corner feel warmer without adding clutter. Keep the color warm and slightly marled for depth, like oatmeal heather. This project looks more advanced than it is, especially if you use a simple cable panel repeat. Make one large pillow for a headboard or two smaller ones for symmetry.
Choose an insert size like 20x20 inches and crochet a front panel with two cable columns and plain stitch sides. Work the cable panels by crossing a small number of stitches over — keep the crossing consistent every few rows. Crochet a back panel with an envelope overlap so the cover comes on and off easily. Sew or seam the panels, then weave in ends tightly. Block the finished cover so cables pop and edges lie flat.
Mark your cable rows with stitch markers — losing the crossing rhythm ruins the look.
Avoid oversized cable repeats — big crossings on a small pillow make it look warped.
14. Crochet Wreath with Firm Backing for Cozy Wall Styling
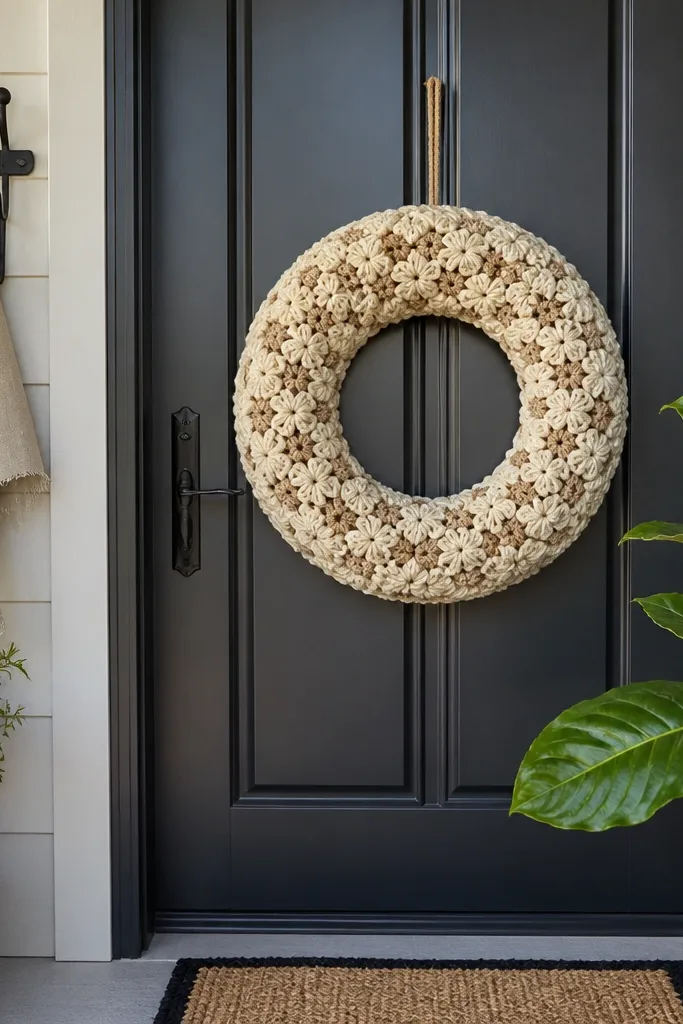
A crochet wreath makes a wall feel cozy because it adds a soft circular shape and a handmade texture that reads warm year-round. The trick is firm backing — without it, wreaths flop and look unfinished. Use a warm neutral base and build texture with tufted yarn or small cluster rounds. This looks great on entry doors, above a shelf, or on a bedroom wall where you want a focal point. It also works with seasonal swaps by changing only the center accent.
Start with a ring form made from foam, craft wire, or a thick cardboard circle wrapped in batting. Crochet a base band around the ring using tight stitches so the backing doesn’t show. Build texture by attaching small clusters or yarn tufts at regular intervals, securing each one firmly to the ring. Add a hanging loop by stitching a length of yarn to the top and reinforcing it with a few extra stitches. Finish by trimming tufts to a consistent length and fluffing the surface.
Pro tipUse a yarn that holds shape and isn’t too fuzzy so tufts look intentional instead of messy.
AvoidDon’t skip the ring — a floppy wreath won’t hold that cozy circular silhouette.
15. Crochet Throw Blanket Edge with Moss-Stitch Border
If you already have a plain throw, adding a crochet border is the most cost-effective cozy upgrade. Moss stitch looks textured and calm, and it frames the blanket so it reads like a finished piece, not a random cover. Pick a warm color that matches your room palette so the border blends and warms up the whole fabric. This project is also forgiving because you can measure and adjust the border length to your throw. It’s a good move when you want cozy but don’t want to crochet a whole blanket from scratch.
Lay your throw flat and measure each side length, then calculate how many border stitches you need based on your gauge swatch. Crochet moss stitch rows around the perimeter, working corner increases so corners stay square. Join border ends invisibly and weave in yarn tails on the underside. Block the border by pinning it flat so it lies smoothly against the throw. If the throw edge curls, stitch the border to the fabric every few inches with small hand stitches.
Pro tipUse a smooth yarn for the border so it doesn’t snag on the blanket fibers.
AvoidDon’t pull the border too tight — tight edges pucker and ruin the cozy, relaxed look.
16. Crochet Wall Vase Cover for Dried Stems
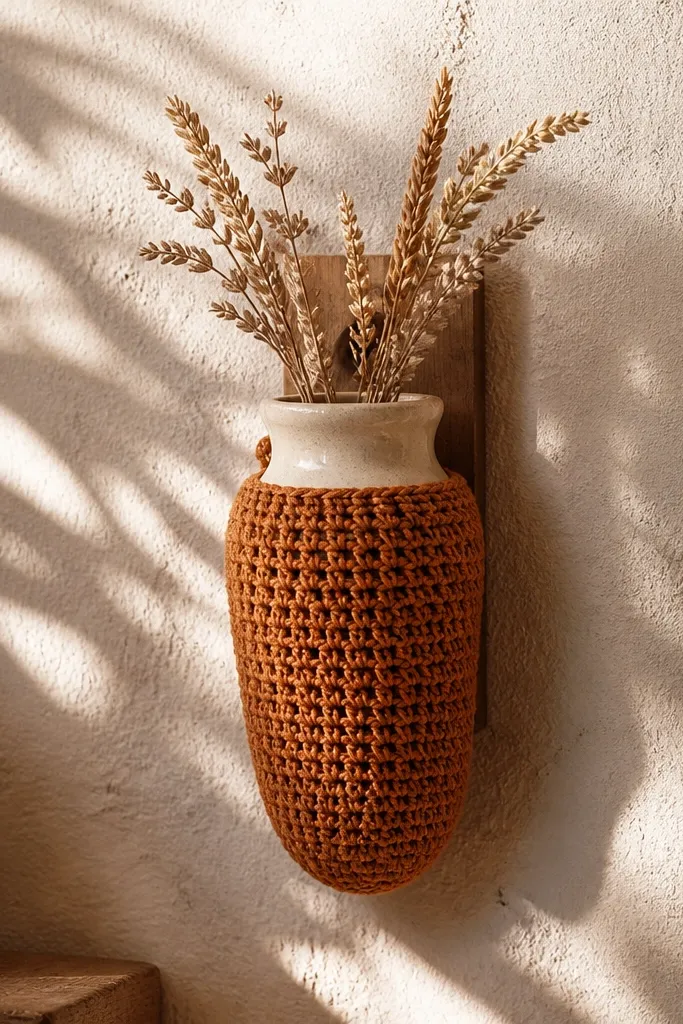
A wall vase cover adds cozy because it turns simple dried stems into a framed display. The crochet sleeve softens the silhouette and makes the arrangement look intentional, even with plain materials. Use a warm color and a simple stitch texture so the vase stays the focal point. This is a great decor fix for blank wall areas near shelves where you want something vertical but not bulky. It also photographs well because the crochet texture creates a soft backdrop behind the stems.
Pick a vase shape you already own or plan to buy, then measure its width and the height you want exposed. Crochet a sleeve with a dense stitch so it holds shape around the vase — a tight single crochet works well. Add a small top opening and a loop for hanging by stitching a reinforced strap to the back of the sleeve. Mount the vase using a hook and a sturdy wall bracket, then slide the vase inside the sleeve. Secure with a couple of hidden stitches or a strap so it doesn’t shift.
Pro tipIf you want crisp edges, block the sleeve over the vase shape using pins wrapped around it.
AvoidAvoid loose, holey stitches around the stems — the arrangement looks messy when viewed straight on.
17. Crochet Cozy Coaster Tray with Raised Handles
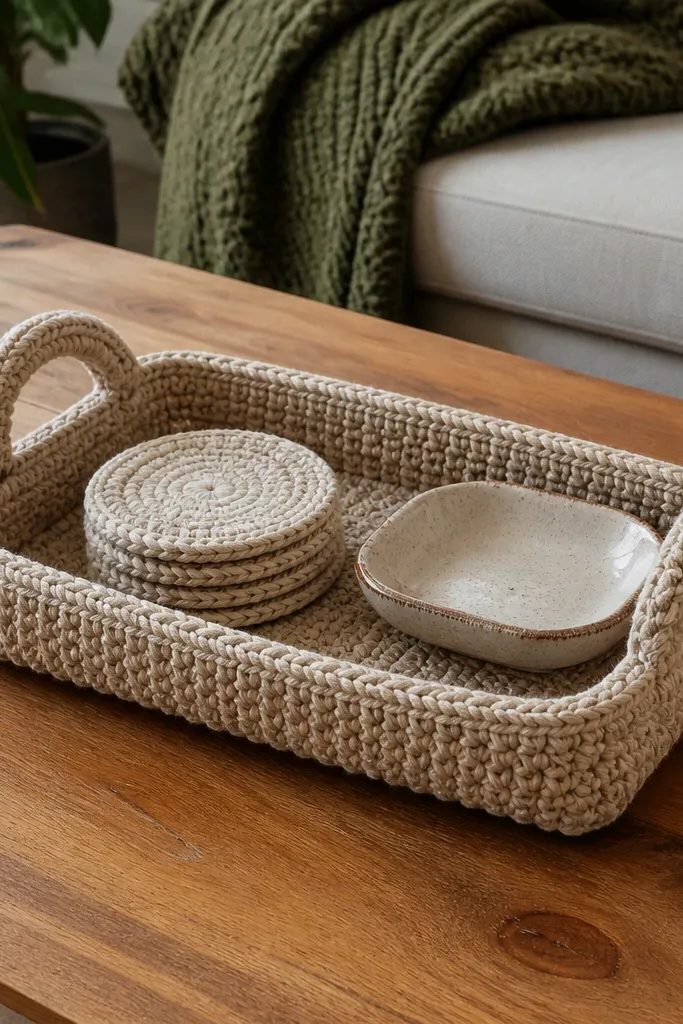
A coaster tray turns small items into a styled set. Raised handles make it look like a decorative object, not just a bunch of coasters, and they create a clear shape in photos. Use a sturdy yarn and a dense stitch so the tray holds weight and doesn’t sag. Match the tray color to your room and add a subtle textured rim for depth. This is perfect for coffee tables, bedside setups, and desk corners where you want cozy without clutter.
Crochet a dense base circle or square about 8-10 inches wide, then build sides with straight rows until you reach a shallow tray depth. Add a textured rim by switching to bobbles or a front-post rib for one or two rounds. Create handles by crocheting two thick strips and sewing them to the sides at equal heights. Make matching coasters separately, then stack them inside the tray for a complete look. Block flat and reinforce the underside with a thin non-slip layer.
Pro tipWeigh down the tray while it dries so it stays flat and doesn’t curl at the edges.
AvoidDon’t make the sides too tall; tall trays look top-heavy and less cozy.
18. Crochet Corner Shelf Cover with Pocket Organizer
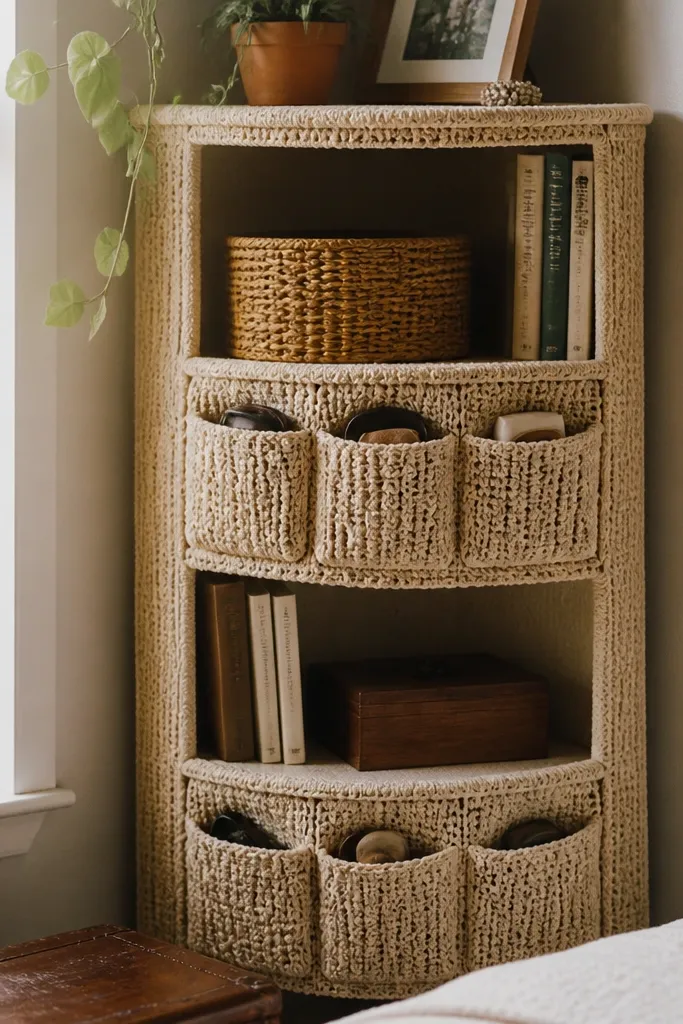
This is cozy decor that also looks tidy. A crochet corner shelf cover with pockets makes the shelf look styled even when you’re storing random small items. The pocket front gives you a textured vertical panel that reads warm, and it hides mess from view. Use a warm neutral yarn and stitch texture that holds its shape so the pockets don’t sag. This works in bathrooms, craft rooms, and entry nooks where small items pile up fast.
Measure the shelf front and crochet a panel that covers it, leaving space for the shelf opening. Crochet the pocket section by making two vertical pocket pieces and sewing them onto the panel at the right height. Attach the finished cover to the shelf with hidden ties or a few stitches at the back so it’s removable. Add a simple border row around the edges to keep it clean. Block flat before installing so the pocket lines stay straight.
Pro tipUse stitch markers to place pocket seams evenly so both pockets match in height.
AvoidDon’t use thin, drapey yarn for pockets — they sag and look sloppy.
19. Crochet Door Draft Stopper with Striped Cozy Panel
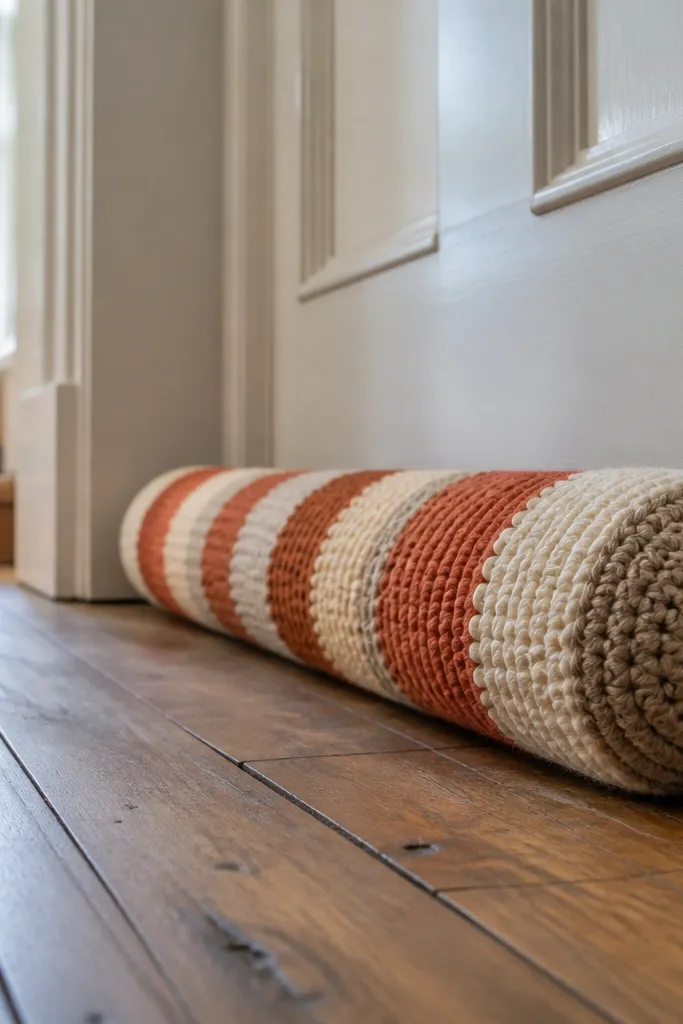
Draft stoppers feel cozy because they fix the sneaky cold spot that makes a room uncomfortable. Crochet makes them look cute, especially when you use stripes that match your decor. The rounded shape looks good in photos because it creates a soft silhouette along the floor. Use warm colors like oat, clay, and rust so it blends instead of looking utilitarian. This project also gives you instant function, not just decoration.
Crochet a long tube to the length of your door gap, aiming for about 30-36 inches depending on your space. Use a dense stitch so the filling doesn’t show through — keep counts consistent for a straight tube. Add stripes by switching yarn colors every few rows, then finish with a sealed end and an adjustable top opening if you want to change filling. Insert polyfill or fabric-wrapped foam to keep it firm and rounded. Close the opening and weave in ends tightly.
Pro tipMake it slightly thicker than the gap — a firm stopper seals better and looks plush.
AvoidAvoid overstuffing with loose fiber — it forms lumps that show through the stitchwork.
20. Crochet Cozy Wall Pocket for Remote, Pens, and Small Stuff
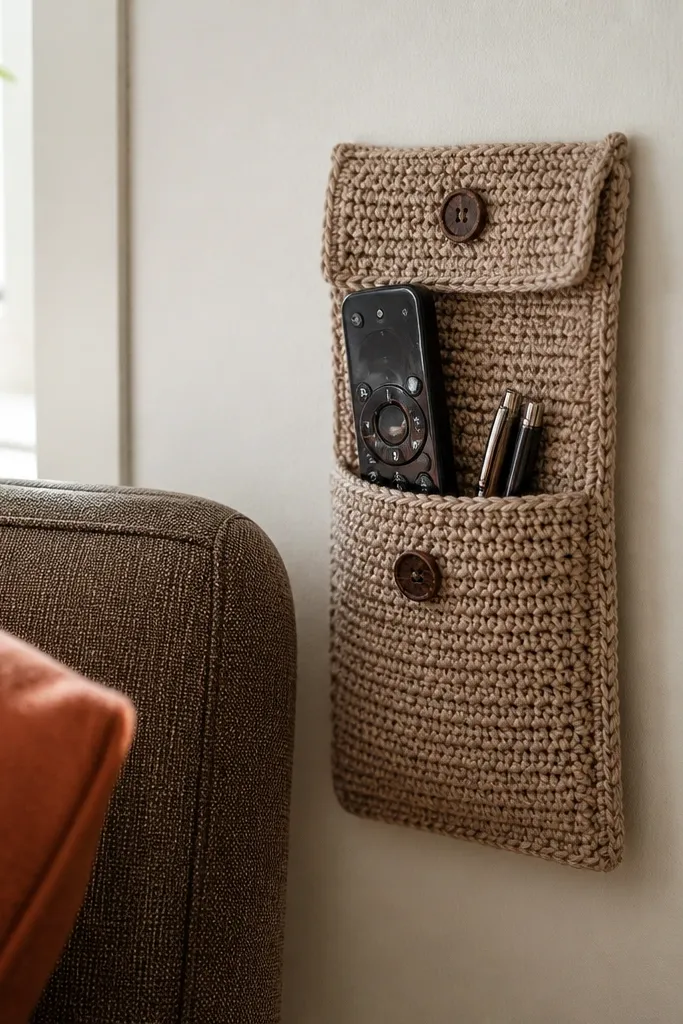
A wall pocket keeps everyday clutter off surfaces, and that instantly makes a room feel more cozy. Crochet adds softness to the organization so it doesn’t look like plastic bins or ugly wall hooks. Use a flap with buttons or a tight drawstring so items stay hidden. The pocket also creates a neat vertical texture on a wall, which looks great next to art or shelves. Place it in the living room for remotes or in a bedroom for pens, lip balm, and small essentials.
Start with a rectangle pocket panel sized to hold your items — a good target is about 8-10 inches wide and 10-12 inches tall. Crochet a dense base stitch so the pocket stands up. Add the top flap by continuing rows or crocheting a second panel and sewing it into place with an overlap. Install a simple closure using two buttons or a crocheted loop and tie. Block the pocket so corners stay crisp, then sew a hanging loop or attach ties to the back.
Pro tipUse a stiff yarn or add a thin interfacing strip on the back to stop the pocket from sagging.
AvoidDon’t make the pocket too open at the top — it dumps items and looks messy.



