
1. Cloud-Edge Baby Lovey Square
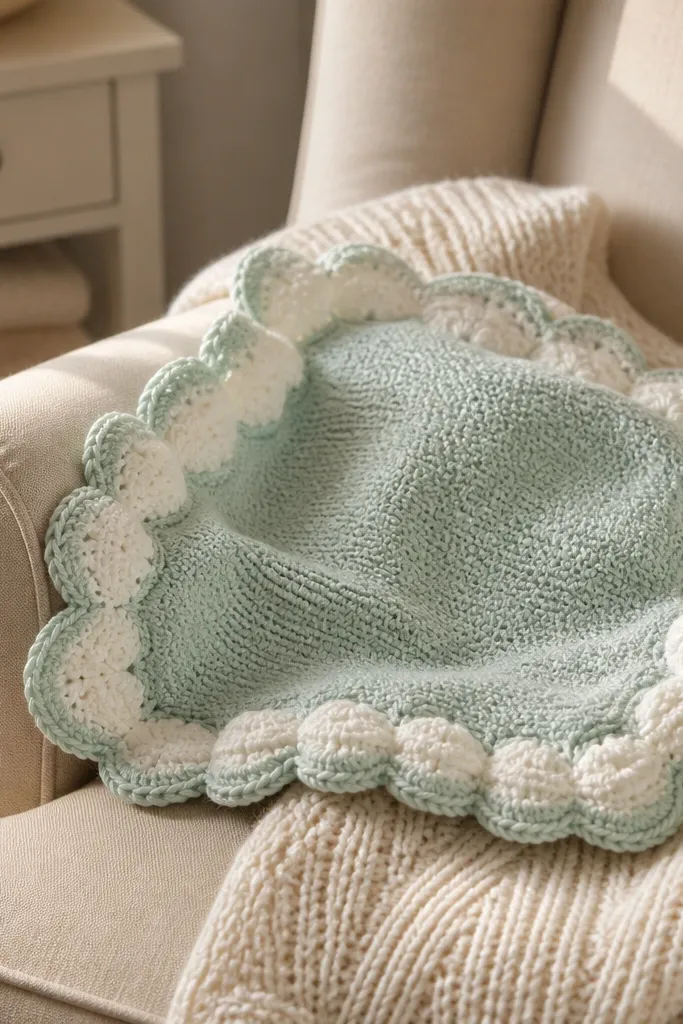
Start with a center square worked in a simple stitch like single crochet for a clean surface. Work the cloud border by alternating short clusters and chained gaps around the perimeter, keeping each scallop the same size. Finish by weaving in ends tightly and blocking lightly so the scallops stay crisp. Add a small stitched-on applique in the center if you want extra personality, like a tiny star or heart.
This lovey looks like a mini comfort blanket because the border does the heavy lifting. The scalloped “cloud” edge frames a smooth center, so the piece reads as cute and intentional even if your center stitches aren’t super dense. It’s also a great first baby crochet project because it’s one flat piece with a clear finishing step. Use it for newborn photo props, daycare nap buddies, or as a first “blankie” that’s small enough to wash and dry.
AvoidDon’t use a super-loose stitch for the center — it makes the lovey look droopy instead of plush.
Pro tipBlock the border by pinning the scallops to a foam board so they stay evenly rounded.
2. Rainbow Stripe Baby Beanie with Tie Top
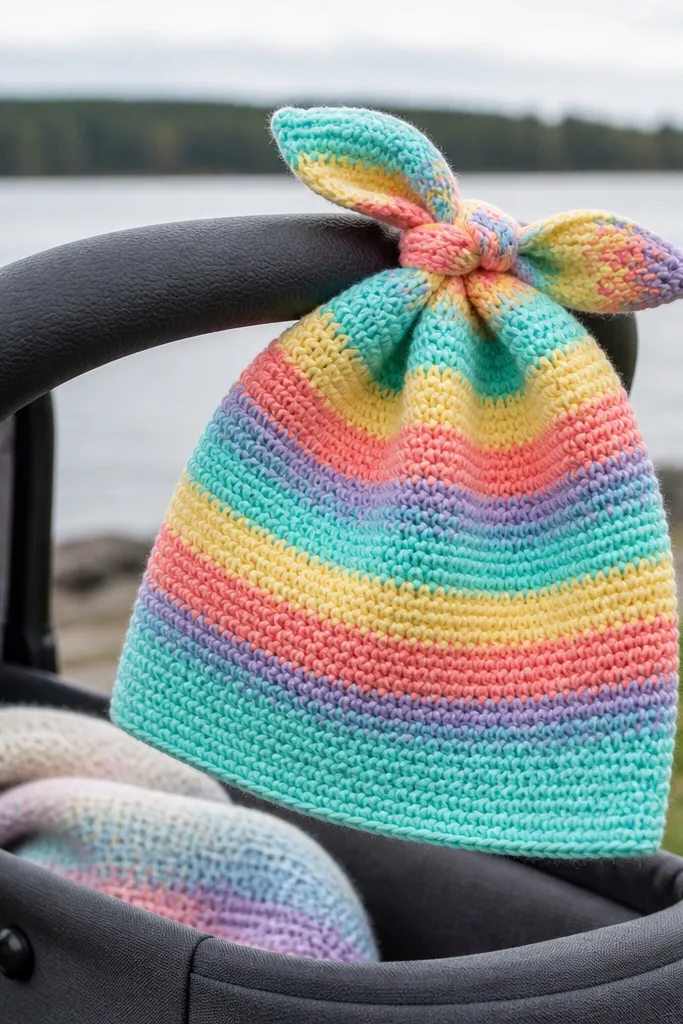
A striped beanie photographs like a little gift-wrapped statement. The tie top adds a playful silhouette that stands out in winter photos and makes the hat feel “finished,” not just a tube. This is one of the easiest baby crochet ideas that still looks custom because color placement creates the style. It’s also practical: you get warmth without bulky yarn, and it works well for 0-3 months.
Chain and crochet in the round using DK or worsted weight, increasing gradually until you hit the right circumference. Switch colors every 2-3 rounds to create bold rainbow bands, keeping tension consistent so stripes line up. Add a small top tie by crocheting a short cord or using a yarn pom and stitching it securely at the crown. Weave ends on the inside, then add a quick single crochet edge around the brim for stability.
Use a stitch marker at the start of each round so your stripe joins land in the same spot every time.
Skip super stretchy ribbing if you’re new — it can twist and make stripes look uneven.
3. Mini Amigurumi Bunny Lovey with Floral Bow
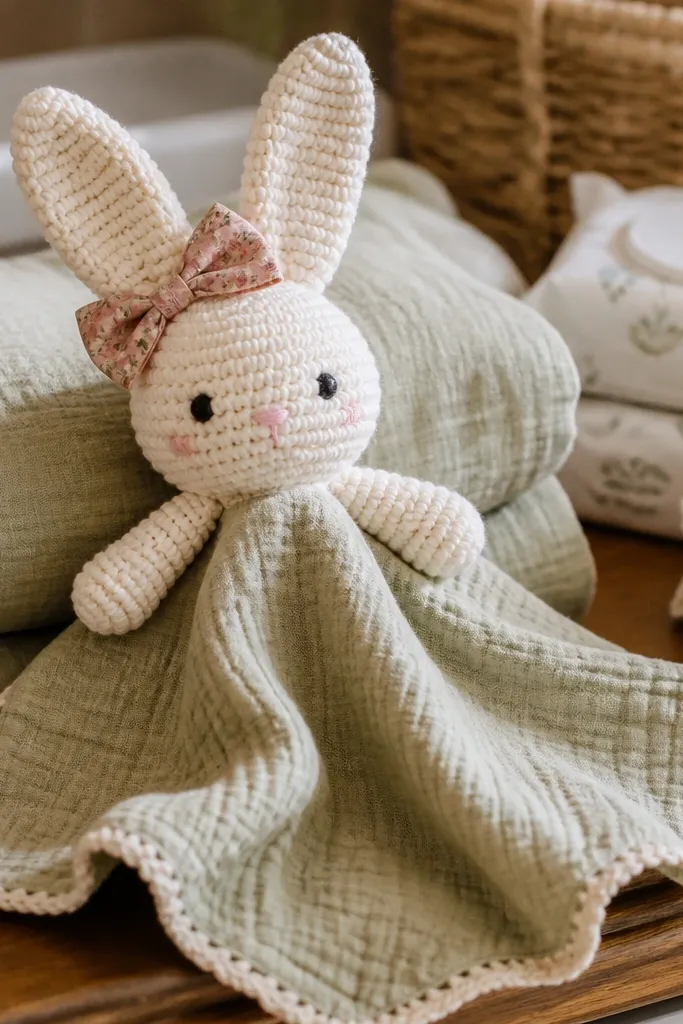
Crochet the bunny head and ears in one piece or sew ears on, depending on the pattern you use. Stuff lightly so the face stays rounded but not stiff, then embroider a simple nose and mouth with contrasting yarn. Make a small bow by crocheting a narrow strip and folding it into loops, then stitch it at the side of the head. Attach a small blanket square to the bunny’s body if you want it to function as a true lovey.
This one is photogenic because it has a clear focal point: the bunny face. Long ears give it vertical charm, and the bow adds a sweet pop without needing a lot of extra pieces. Keep the body small so it stays lightweight for newborn hands and doesn’t take forever to stuff. This is a strong gift choice when you want something that looks like a toy but still works as a comfort item.
AvoidDon’t overstuff — it makes the ears stand weirdly and the face lose its softness.
Pro tipUse safety eyes only if you’re confident they’re secured; otherwise, embroider for a cleaner, photo-friendly face.
4. Heart-Motif Baby Blanket Corner-to-Corner
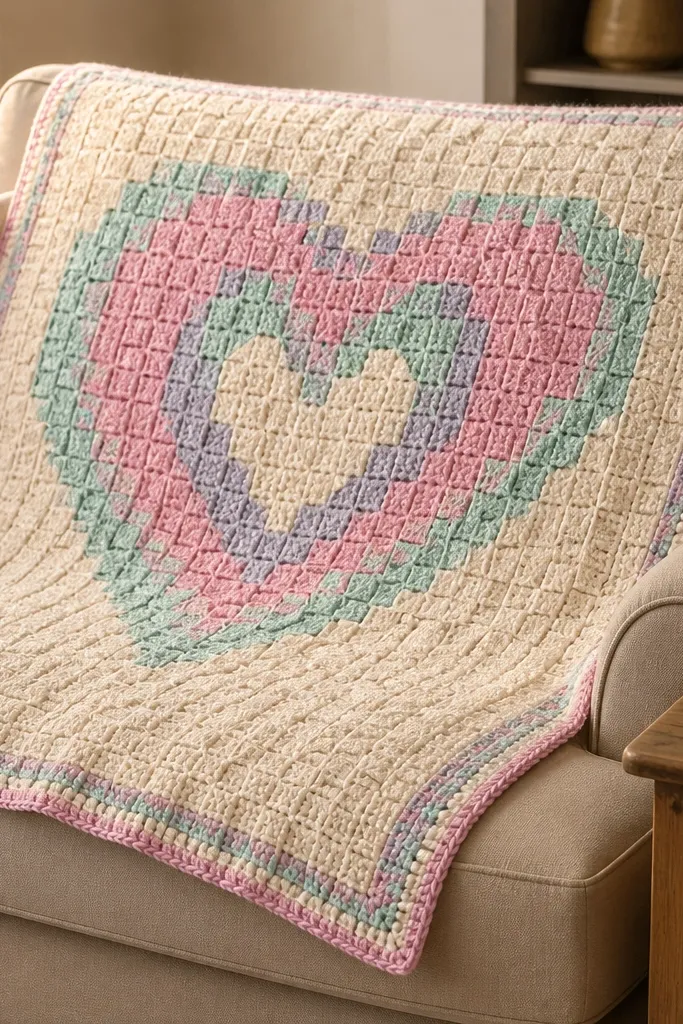
Work C2C with diagonal blocks, increasing until you reach the width you want, then decrease to finish the bottom edge. Use a chart or planned color changes so the heart motif sits centered. When you reach the final block, crochet a simple border in a single color to frame the hearts. Weave ends as you go so the back doesn’t get bulky.
Corner-to-corner (C2C) heart blankets look “designer” because the pattern creates a graphic grid. The hearts pop when you use two or three pastel colors and keep the background solid. This is a great gift if you want a baby blanket that doesn’t feel boring, and it’s also easier to track than row-based charts. You can keep it small for 1-2 weeks of gift timelines, then add a clean border for a polished edge.
AvoidDon’t change colors mid-block — it creates messy joins that show in close-up photos.
Pro tipChoose one background color that matches the baby’s neutral nursery palette for better photo contrast.
5. Strawberry Ruffle Baby Booties
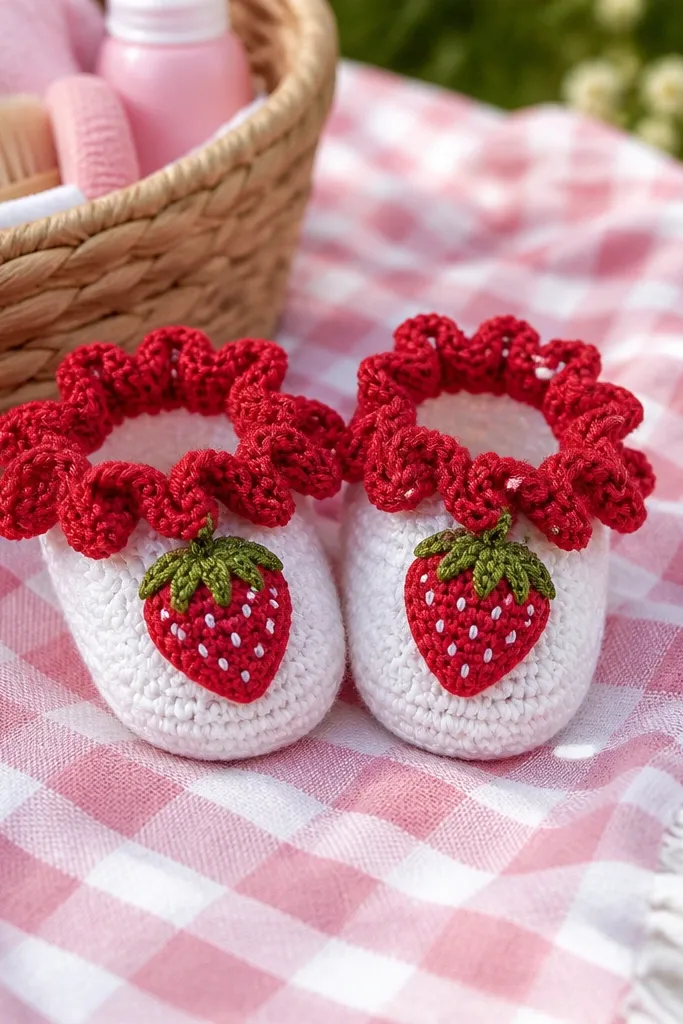
Booties are always gift-worthy, but the ruffle turns them into a photo prop. The strawberry theme reads instantly, and the white dot accents make it look playful rather than generic. These are best for 0-3 months because the silhouette stays neat and the ruffle doesn’t fight the shape. If you want something that looks adorable at a baby shower without being complicated, this is the sweet spot.
Start with a bootie base in a simple stitch that holds shape, then build the toe and heel with short rows or increases. Crochet the strawberry body in red, then add white dot accents using small circles stitched on or worked as you go. Create the ruffle by crocheting a chain-scallop or puff-like edge around the top opening. Finish with a small tie or a stitched cuff so the ruffle stays flat against the ankle.
Use tighter stitches at the heel and sole so the booties don’t look wobbly.
Skip floppy yarn for booties — it makes the ruffle collapse and the strawberry shape blur.
6. Bicolor Baby Scarflette with Fringe
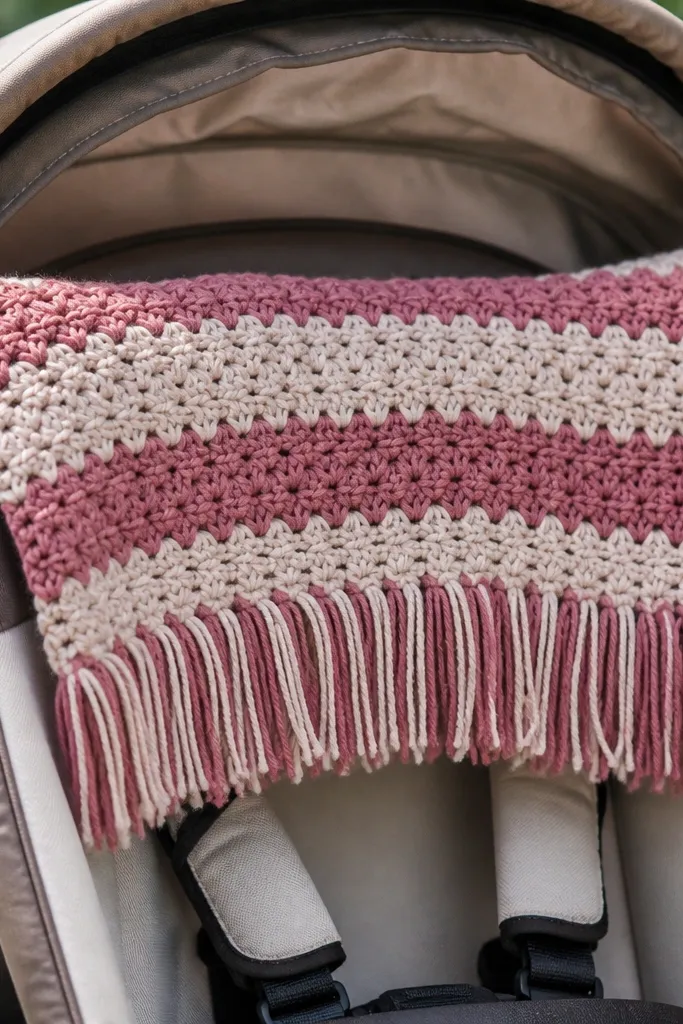
A scarflette looks more “gift” than a hat when it’s styled well. The bicolor effect makes it look intentional even with a simple stitch pattern, and fringe adds movement in photos without being fussy to make. Keep it short for baby comfort: this is for draping lightly over a stroller or car seat, not for long wraps. This project works well when you want something quick that still feels warm and cute.
Chain to the desired width using DK weight, then crochet in rows with a stitch that doesn’t curl, like half double crochet. Switch colors halfway to create a clean two-tone block look. Work a simple border in a matching color, then add fringe by cutting yarn strands and knotting them at the ends. Trim fringe to even lengths, then block the scarflette flat so the edges don’t curl.
Cut fringe strands longer than needed, then trim after you knot so they match perfectly.
Don’t use a stitch that curls on the edges — the scarflette will look untidy in photos.
7. Ocean Wave Baby Blanket with Shell Border
Waves read as movement, and that’s why this blanket looks good even from a quick phone snapshot. Use blues and a pale neutral background so the wave texture shows up. The shell-like border gives it that “handmade heirloom” look without needing complicated shapes. This fits baby gifts for anyone who likes ocean themes, and it’s also a solid choice for spring and summer nurseries.
Work the blanket in rows using a wave repeat stitch, keeping your stitch count consistent across rows. Alternate depth by using slightly darker and lighter blues every few rows, or keep one blue and add texture only. When you reach the final row, crochet a border with scallops that mimic shells — small shell clusters spaced evenly. Block flat so the wave ridges look smooth and defined.
Use a border color that’s one shade lighter than the waves to make the texture pop.
Don’t stretch the blanket while blocking — waves should keep their height, not flatten.
8. Sunburst Baby Hat with Puff Crown
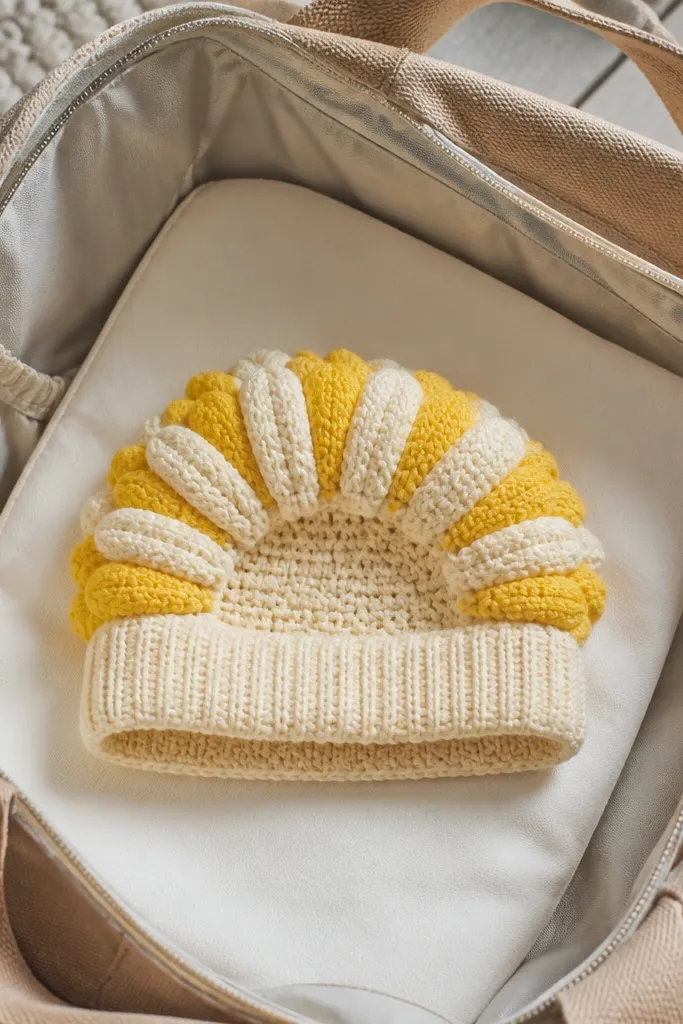
Crochet a basic beanie body in a solid stitch, then build the puff crown by working puff stitches in a radial pattern around the top. Space puffs evenly so you get a clean starburst effect instead of a lumpy cap. Finish with a brim round in single crochet or half double crochet for structure. Weave in ends, then lightly steam or block to set the crown shape.
A puff crown gives a hat a “wow” look without needing fancy colorwork. Sunburst shaping makes the top look like it has rays, which is incredibly photogenic from above and in stroller pics. Keep the brim simple so the crown texture stays the focus. This is a great gift when you want something cheerful and bold but still quick enough to finish before the shower.
AvoidDon’t skip a structured brim — without it, the hat edge rolls and looks sloppy.
Pro tipMake puffs the same size by using the same yarn-over count each time.
9. Oatmeal Cable-Style Baby Blanket Panel
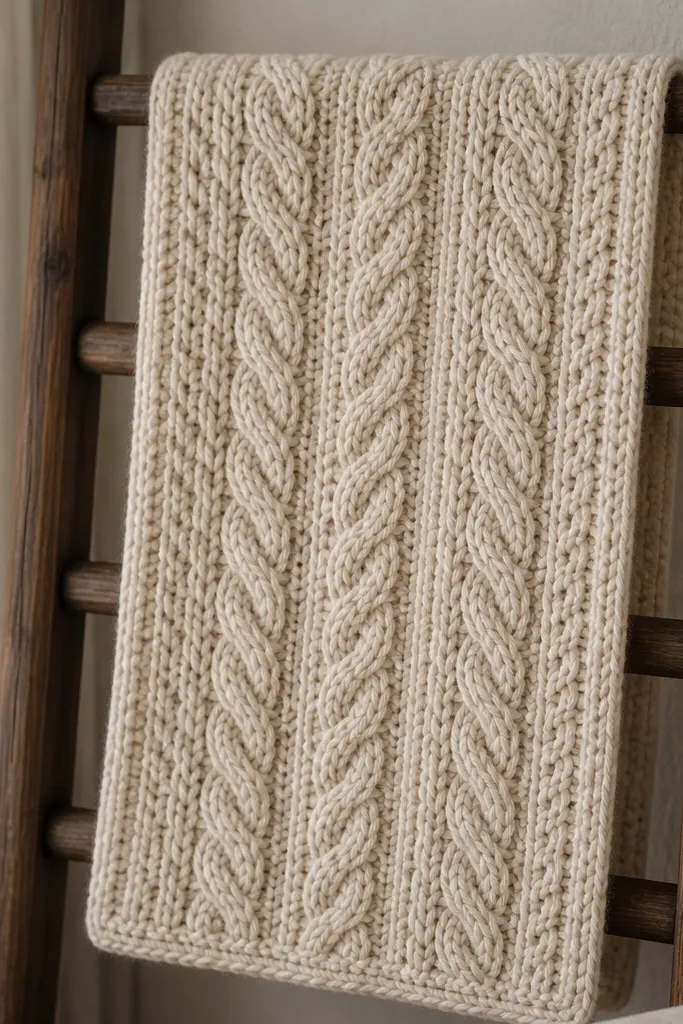
Neutral baby gifts photograph better than people expect. This oatmeal cable-style panel gives a knit-like look using crochet techniques, so it feels cozy and expensive without actually being hard. The textured vertical ridges are great for close-ups and make the blanket look thick even when you use a lighter yarn. It’s perfect for modern nurseries that lean beige, gray, and warm whites.
Use worsted weight and a stitch pattern that creates raised ridges, like front-post/back-post work to mimic cables. Start with a foundation row, then repeat a 10-12 stitch cable panel across the width you want. Keep the background stitch simple so the ridges stay readable. Add a border with a couple rounds of single crochet and finish with a neat edge for photo sharpness.
Use a stitch marker on each side of the cable panel so your pattern stays centered.
Don’t choose a yarn that’s too fuzzy — it hides the cable texture.
10. Pastel Granny Square with Photo-Ready Border
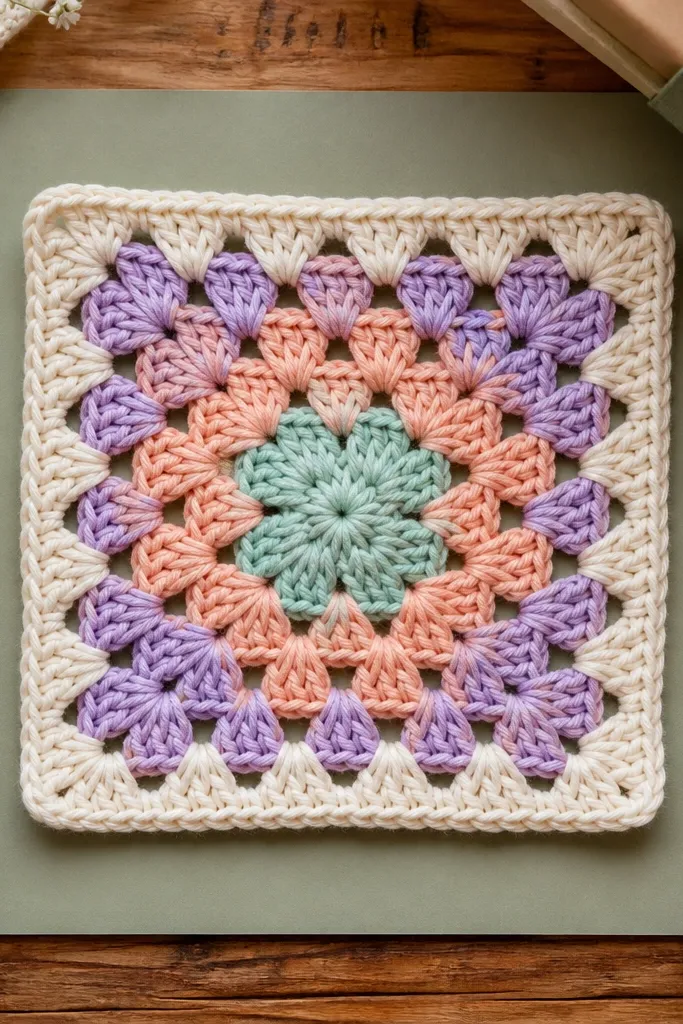
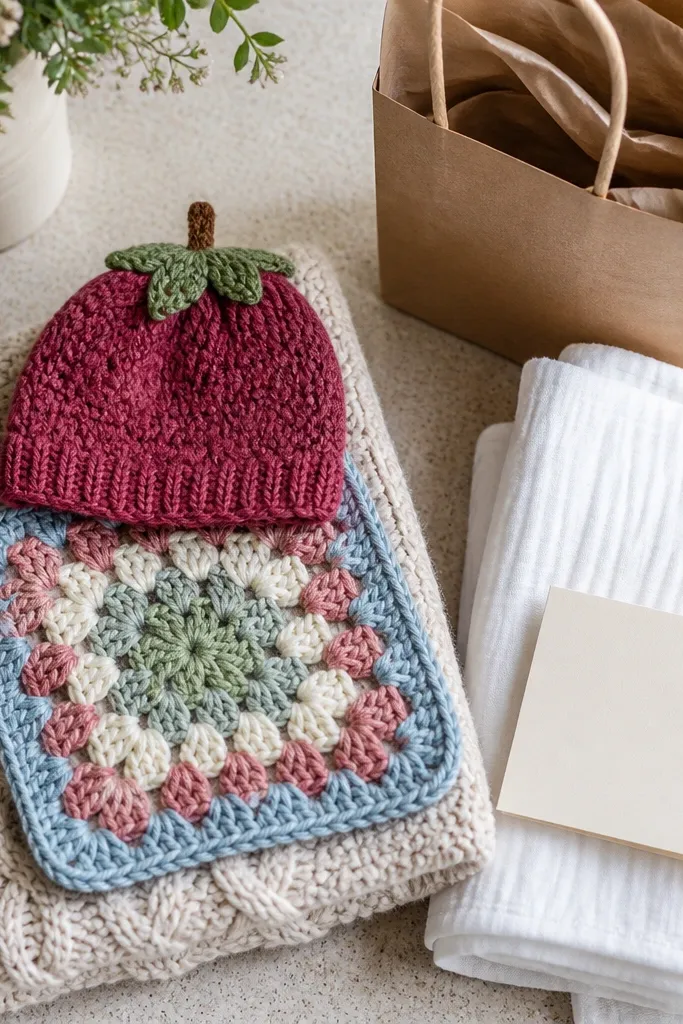
A single granny square can look like a whole gift when the border is strong. This idea uses pastel rounds inside, then frames the square with a bold, clean border so it stands out on a gift table. It’s also a smart choice when you want something fast and you don’t want to commit to a full blanket. Add a matching mini tag or wrap it around tissue paper and it looks intentionally styled.
Make one granny square using 4 or 5 pastel colors, keeping the clusters consistent so the square stays flat. After you finish the final round, add a border with two colors: one for the top and bottom and another for the sides. Crochet the corners with extra stitches so the square doesn’t warp. Weave ends, then block lightly to keep edges crisp.
Use a contrasting border color that matches the gift wrap — it makes the photo look coordinated.
Don’t use too many colors in the border — it blurs the shape.
11. Berry Patch Baby Beanie with Side Patch
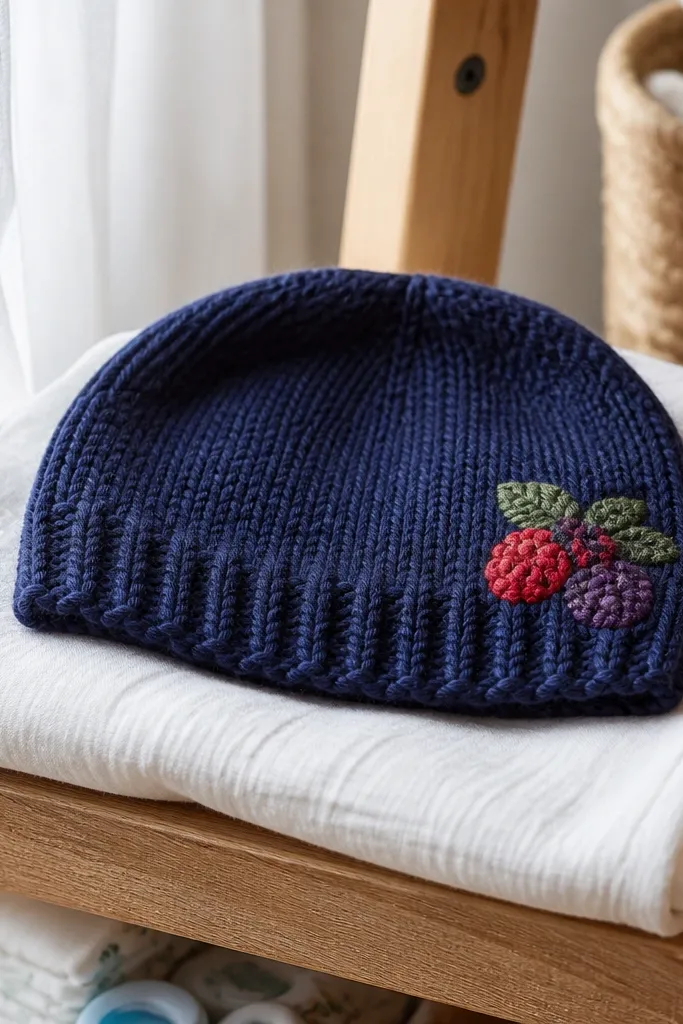
Work a basic beanie in DK or worsted with a steady stitch pattern that won’t curl. When the hat is nearly done, crochet a small berry patch: small leaf shapes and tiny round berries in alternating colors. Stitch the patch onto the side with matching thread or yarn, then add a few surface stitches to secure edges. Finish with a brim round for structure and weave ends inside the hat.
This beanie stays clean and wearable, then adds personality through a side patch. The main hat uses one solid color so it doesn’t compete with the applique, and the berry patch gives that cute “made for this baby” look. It’s also a good option if you want an easier project that still feels thoughtful. The patch makes it easy to photograph because it has a distinct shape and color contrast.
AvoidDon’t attach the patch too early — wait until the hat is blocked so placement looks straight.
Pro tipUse surface embroidery on the berry seeds with a contrasting yarn color for extra definition.
12. Knot-Edge Baby Burp Cloth Cover
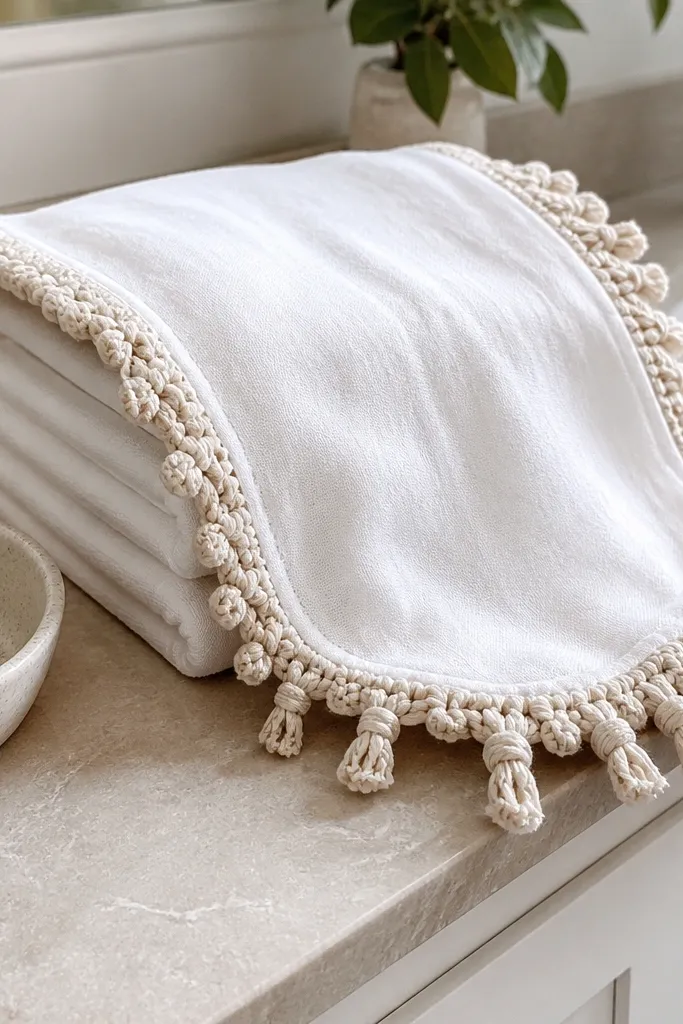
Burp cloths are practical, but the crochet edge makes them look like a gift instead of an afterthought. This cover uses knot-like fringe that frames the cloth and adds texture that shows up in pictures. It’s also a quick win because you’re not building a whole object from scratch — you’re dressing something useful. Great for baby showers because it’s easy for the recipient to use immediately.
Choose a standard burp cloth size and measure its width and height once laid flat. Crochet a border frame around the edges so the cloth sits snug inside, using a stitch that won’t stretch too much. Add knot fringe by cutting yarn strands and tying them into the border loops at even intervals. Sew or crochet the corners so the cloth doesn’t slip, then test-fit before fully finishing.
Wash and dry the burp cloth first so your crochet cover doesn’t shrink off-center later.
Don’t make fringe too long — it tangles and looks messy when the cloth moves.
13. Tiny Dino Hooded Baby Towel
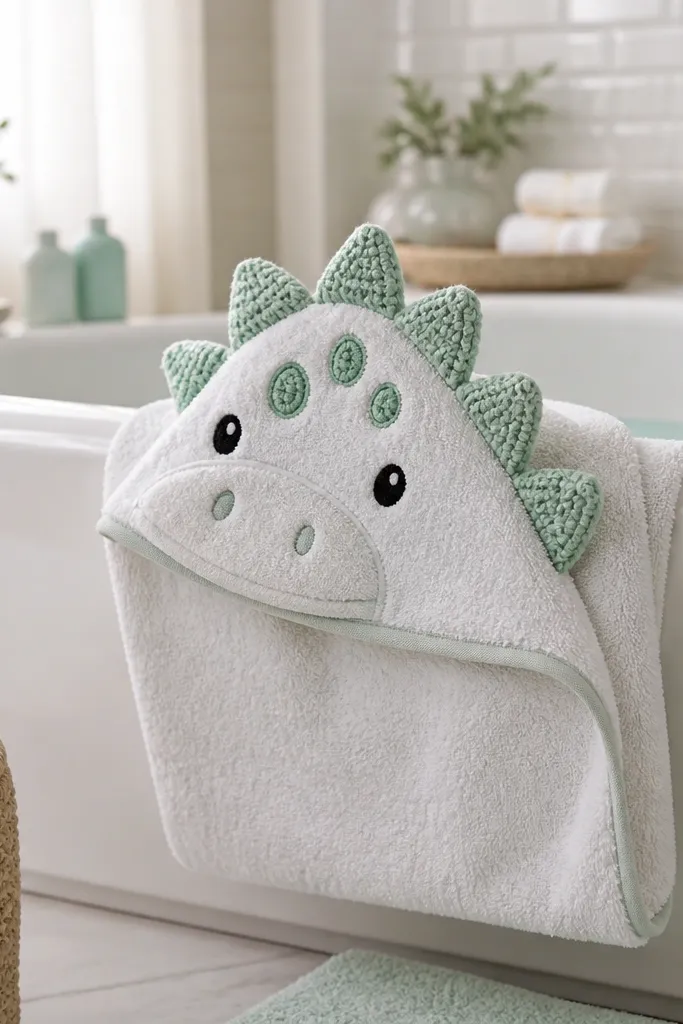
Start by crocheting a hood shape that matches a towel’s width, using a simple stitch that holds shape. Add the dino face panel by sewing on a snout patch and crocheting small eye details. Create spikes by crocheting small triangles or short shell bumps along the top edge of the hood. Attach everything securely with tight stitches so the face doesn’t shift during washing.
A hooded towel is already a fun bath-time item, and the dino face turns it into a character. This is one of those baby crochet ideas that looks like a handmade costume accessory in photos. The hood keeps the face framing cute, and the spikes add texture without needing a lot of bulk. It’s a strong gift for baby boys and girls, and it’s also practical because towels get used fast.
AvoidDon’t use thick acrylic for the hood — it can feel bulky against baby skin.
Pro tipUse cotton yarn for the towel-facing side so it doesn’t feel scratchy when wet.
14. Bow-Tied Baby Headband with Textured Flower
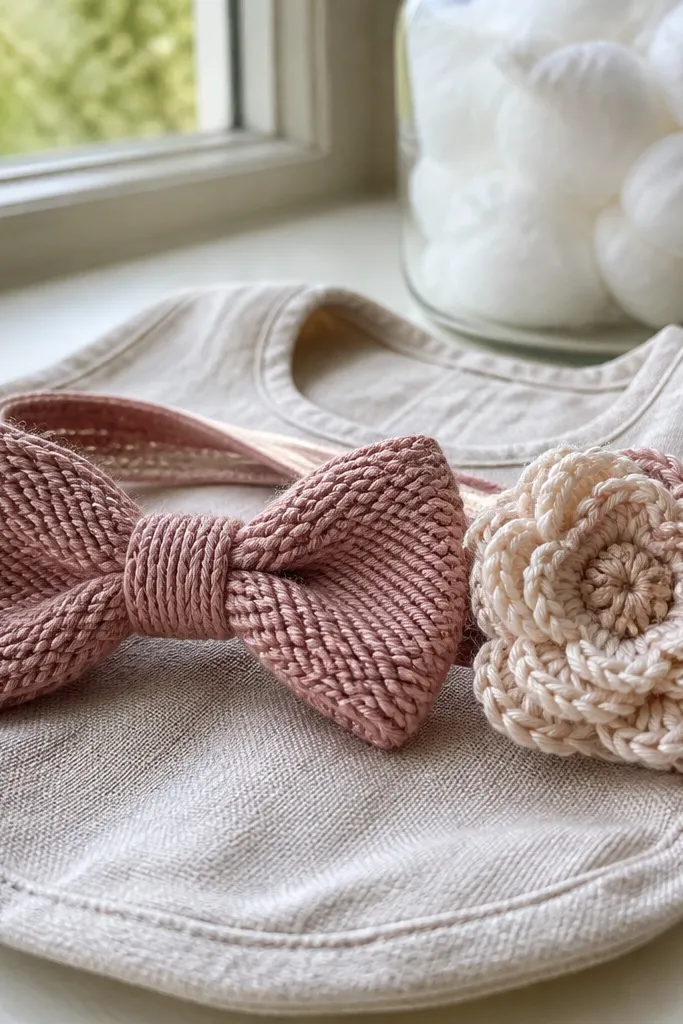
Crochet a simple headband strip in a stretchy-but-stable stitch, then join it to the right length for 0-3 months. Make a bow by crocheting two loops and stitching them together, then attach it at the top or side. Create the flower with layered petals using double crochet and chain spaces for a dimensional look. Secure the flower with a small center circle and weave ends on the inside.
Headbands are small, so they’re easy to finish fast, and the bow makes them instantly gift-ready. The textured flower adds depth that shows in natural light, which is why this looks good in phone photos. Keep the flower slightly flat so it sits comfortably and doesn’t snag. This is a great choice when you want an accessory that feels special without the complexity of a full hat.
AvoidSkip big, floppy petals — they sit crooked and catch on hair and hats.
Pro tipIf you’re using a non-stretch stitch, add a single crochet row at the ends to prevent gaps.
15. Striped Baby Cocoon Sleep Sack Cover
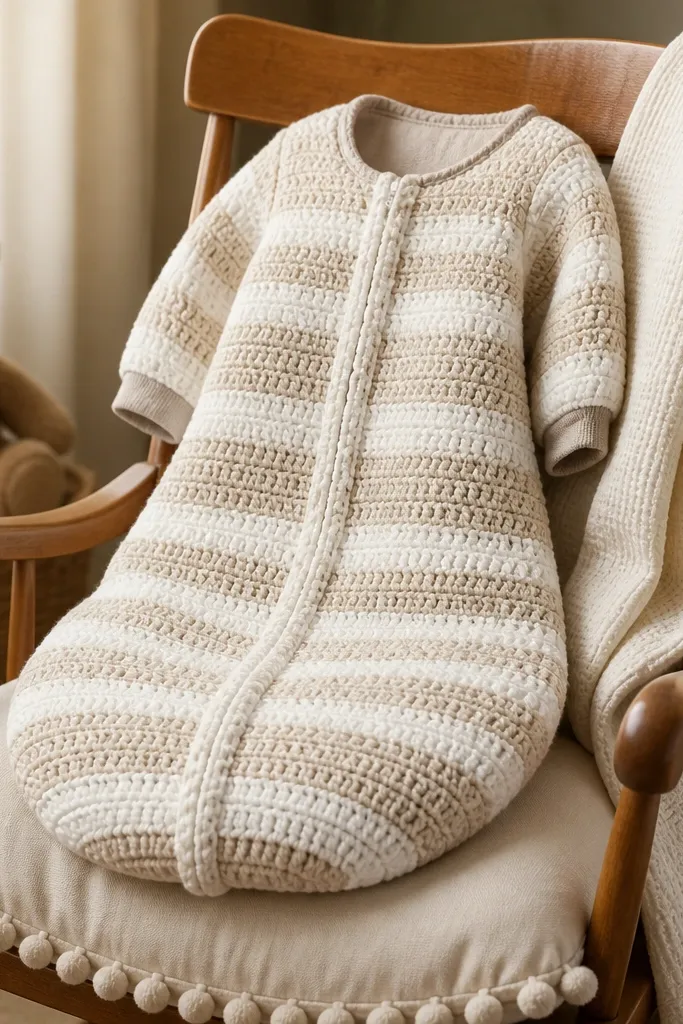
This is a “look expensive” project because the cocoon silhouette reads as a full outfit. The secret is clean stripes and a smooth front panel, so the texture doesn’t fight the shape. It’s also practical: you can layer it over a store-bought cocoon for the photo moment and daily use. Choose soft neutrals or a gender-neutral palette so it works for any nursery.
Work a rectangular front panel with stripes, then fold and seam to create a cocoon opening. Add simple arm and neck openings by stitching around the openings and creating a clean edge with a single crochet round. Crochet a matching back panel or extend the front into a one-piece cocoon if your pattern supports it. Finish with a smooth border at the bottom edge so it doesn’t curl.
Use stitch markers on both sides of the seam so stripes line up when you fold.
Don’t crochet the panel too loose — loose fabric makes the cocoon look saggy in photos.
16. Seafoam Starfish Blanket Border
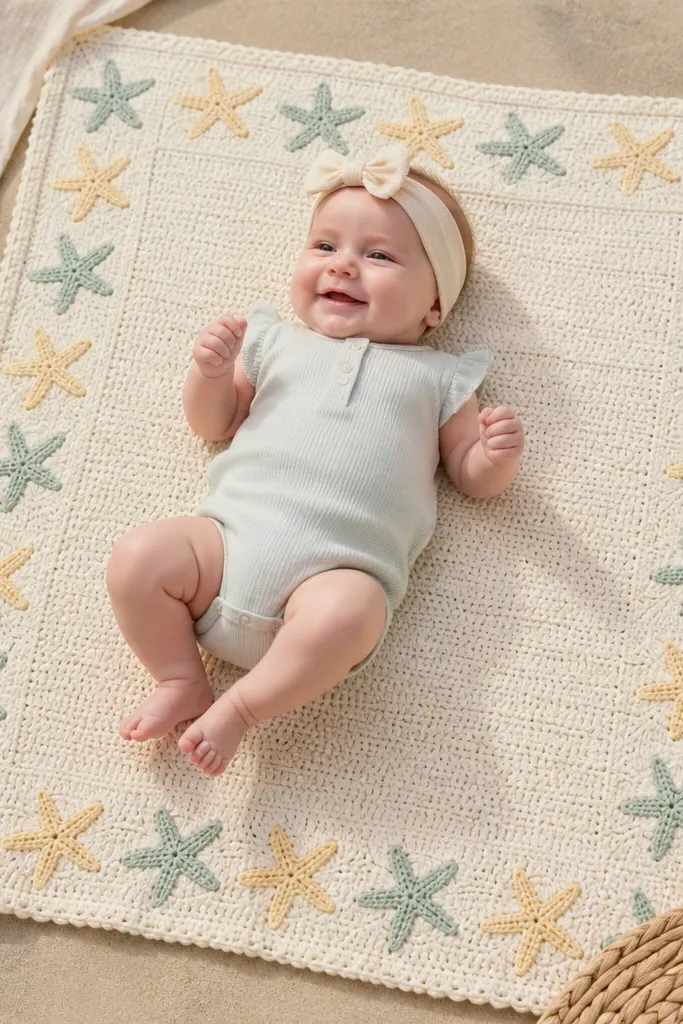
Instead of a full patterned blanket, this idea adds starfish along the border so the center stays calm. That balance is why it photographs well — busy edges frame the gift without overwhelming the whole piece. Use seafoam and pale yellow for a fresh look, or go coral and cream for warmer tones. It’s a smart pick when you want to make a blanket faster but still give something that looks themed and special.
Start with a simple solid-color baby blanket base in single crochet or half double crochet. Crochet the starfish border by working small star points at fixed intervals along each side, with a different stitch or color for each point. Keep the starfish size consistent by counting stitches per arm. Finish with a final border row that ties everything together and prevents curling.
Block the border after you finish it so star points stay crisp and symmetrical.
Don’t place starfish too close — crowded points look messy when the blanket folds.
17. Lemon Slice Baby Rattle Cover
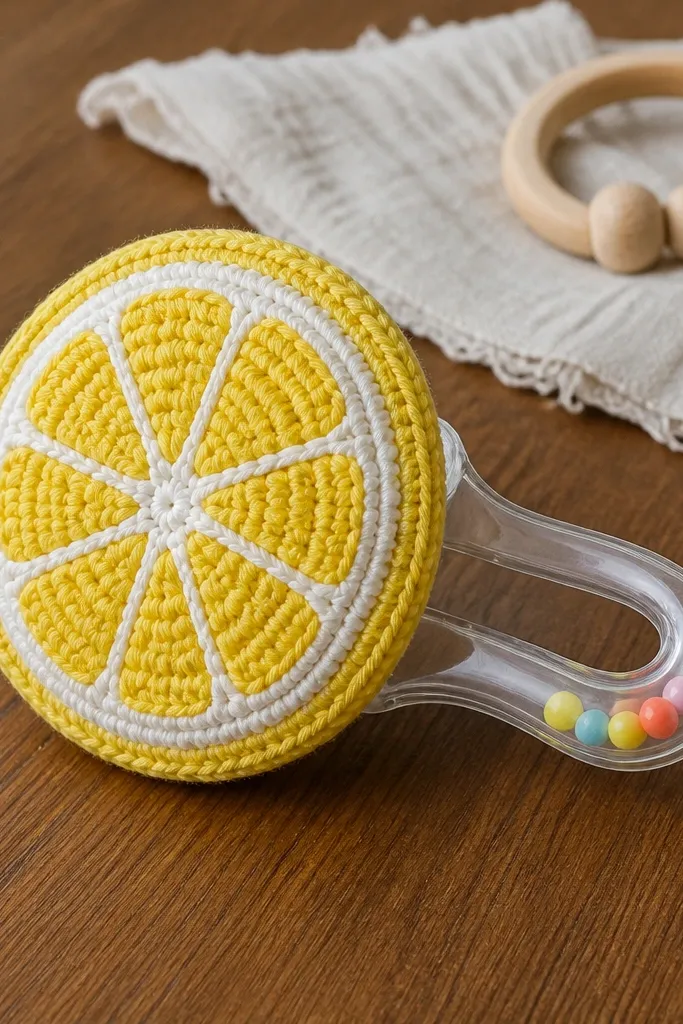
This is a giftable crochet idea that looks like food art. A lemon slice cover is bright, graphic, and easy to recognize in photos, even if the background is busy. The texture comes from ridges and layered circles, which makes it feel tactile. It also covers a store-bought rattle or teether handle, so you get the best of both worlds — quick crochet plus a functional baby item.
Crochet layered circles for the lemon: a base ring, a thicker rind ring, and small segments if your design includes them. Add textured pips in a contrasting color by crocheting tiny circles or surface stitches around the rind. Leave an opening or loop for the rattle handle, then stitch the back layer securely. Finish with a smooth edge around the opening so it doesn’t snag.
Use tight single crochet for the rind so the cover doesn’t collapse under movement.
Don’t use long dangling yarn strands — they catch on fingers and toys.
18. Peach Puff Stitch Baby Blanket with Simple Border
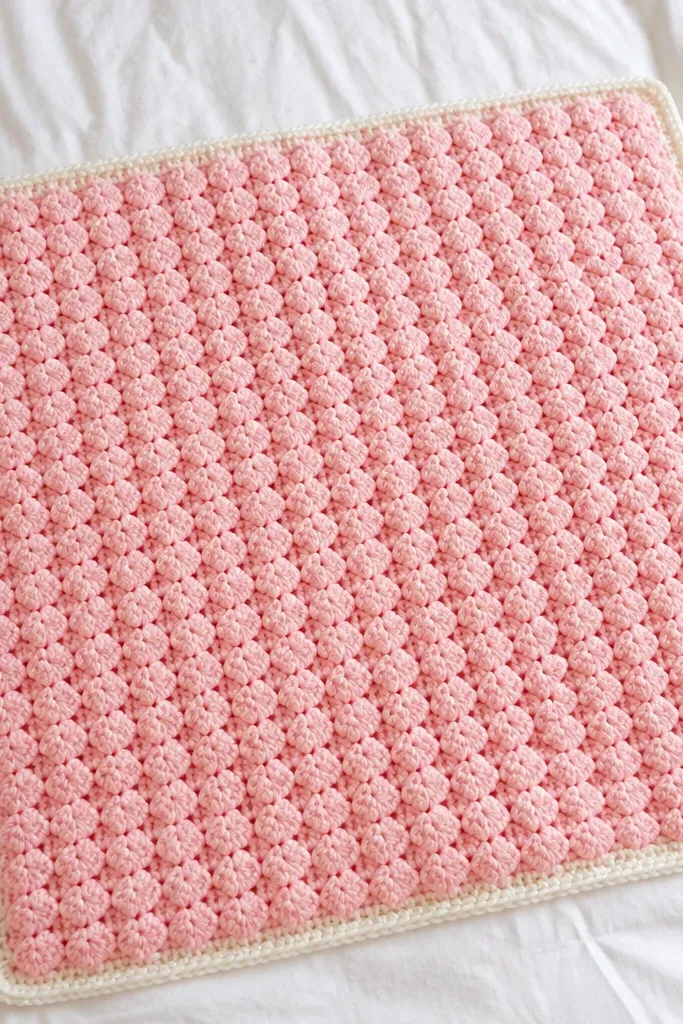
Puff stitches look fluffy in photos, and the raised texture gives a “soft” feel even before anyone touches it. Peach is also a flattering baby color that pops in daylight without needing complicated designs. Keep the border simple so the puff texture stays the hero. This is a nice choice when you want a blanket that looks plush and handmade, but you don’t want to deal with intricate shapes.
Work a foundation row and then create a repeating puff stitch pattern across the width. Keep your stitch count consistent and place puff stitches evenly so the texture forms a grid. Add a border of single crochet or a tight shell row after finishing the main section. Weave in ends and block lightly to smooth the fabric and help the puffs sit evenly.
Count your spaces between puffs — the pattern looks best when the puff grid is uniform.
Skip very slippery yarn — puff stitches can loosen and look uneven.
19. Mini Granny Heart Applique Onesie Tag
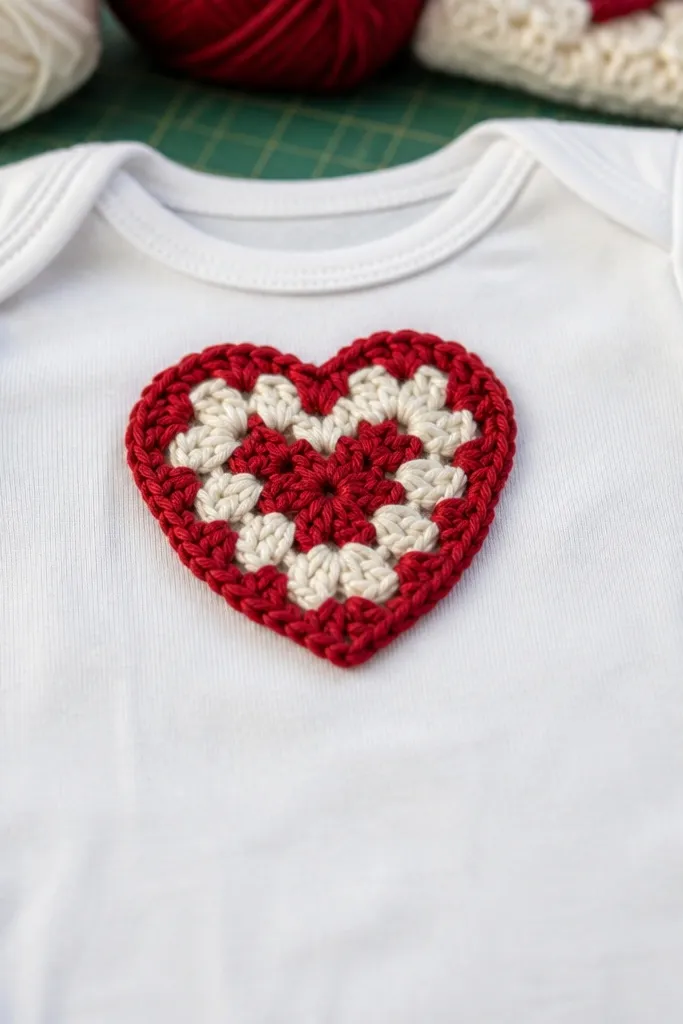
This is how you make an ordinary onesie look handmade without crocheting a whole outfit. The mini granny heart is bold and readable in photos, and it takes almost no time compared to wearable projects. Use it as a tag or applique on the chest or sleeve hem. It’s also a smart gift add-on when you want to stretch your time and still deliver something that looks thoughtful.
Crochet a small granny heart using a tight stitch so it holds its shape. Add a border round in a contrasting color to make the heart pop against the onesie fabric. Stitch the heart onto the garment at two or three points so it stays flat when the baby moves. Weave ends into the heart first, then trim extra yarn for a clean finish.
Use matching thread color and run the needle through garment fabric for a flatter applique.
Don’t attach a big applique — it can twist and look crooked after washing.
20. Two-Tone Baby Mittens with Thumb Contrast
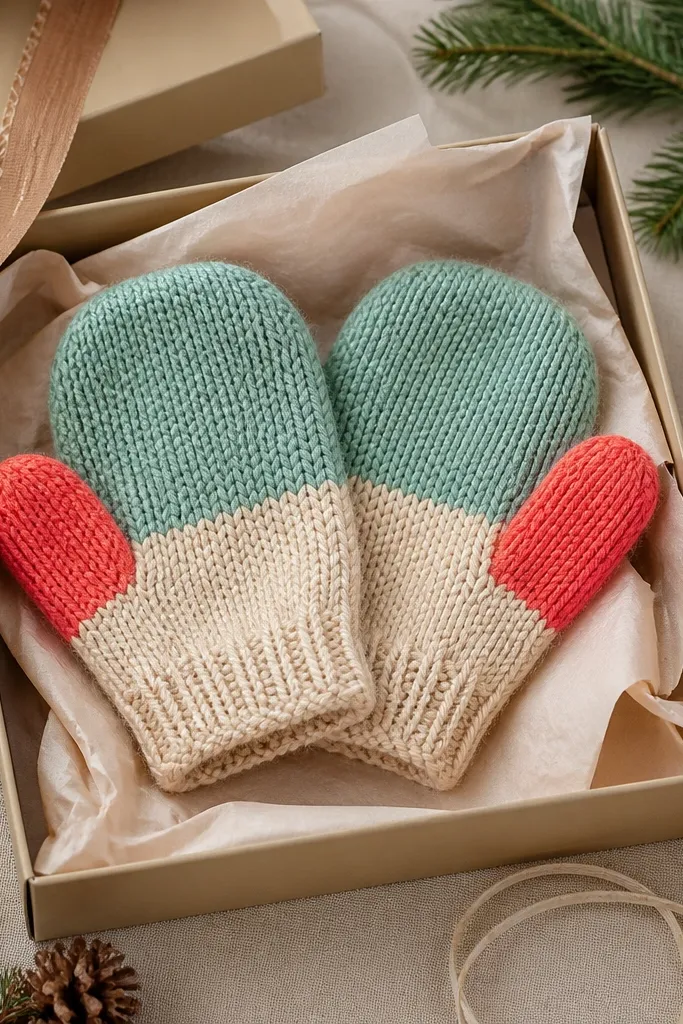
Mittens are a small item, but they look adorable in pairs and in gift wrap. The two-tone design makes them feel custom, and the thumb contrast adds a clear visual detail that reads in photos. This is also a practical gift because babies lose mittens less often than socks when the cuff fits right. Choose soft colors like cream with sage or white with dusty blue for a clean look.
Crochet each mitten in the round or in panels, then seam carefully. Work the cuff in the main color, then switch yarn at the thumb section for contrast. Shape the top with decreases so it fits the hand without bunching. Finish with a simple edging round and weave ends inside the cuff where they won’t scratch.
Keep the thumb area slightly tighter than the palm so it looks neat when the mitten is worn.
Don’t leave bulky seams at the thumb — they show and feel uncomfortable.
21. Picture-Perfect Baby Boot Cuff with Button
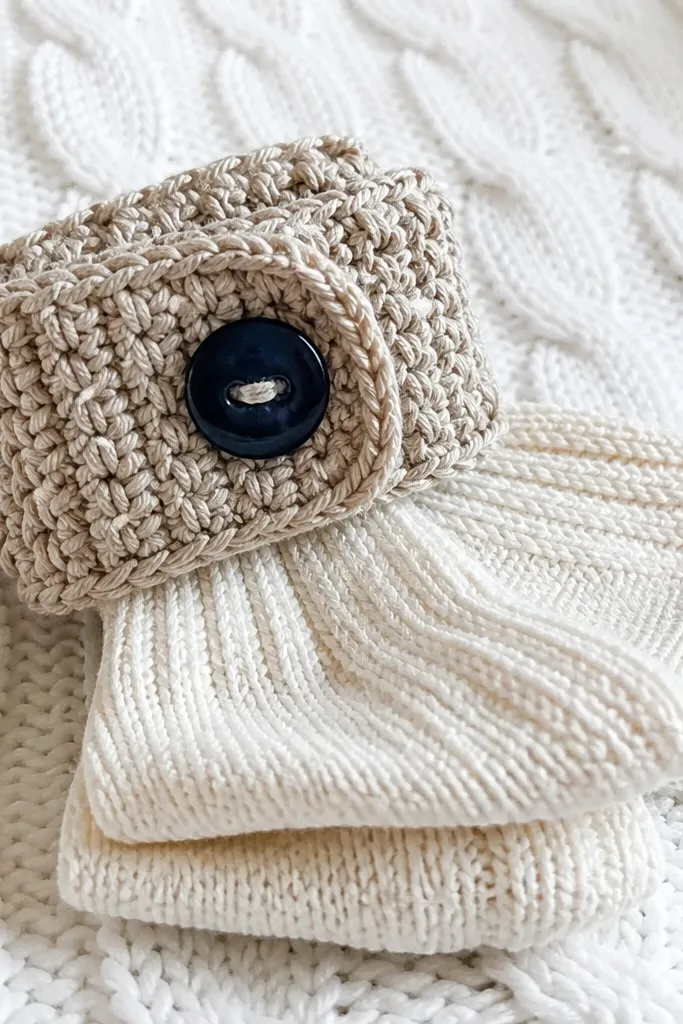
Boot cuffs look polished when they sit above shoes or socks, and the button detail makes them feel like a real outfit. This gift works when you want something quick and wearable without full booties. The cuff shape also helps keep the yarn from bunching around the ankle. Pick a neutral base and a single accent color so the button stands out in photos.
Measure the ankle circumference and crochet a short cuff strip that fits snugly without stretching out. Join into a ring and work a few rounds to build height, then add a ribbed-looking effect with front-post/back-post stitches. Create a button loop by chaining a small opening at one point and reinforcing it with extra stitches. Sew a matching button on the opposite side and trim loose ends.
Use a fabric-covered button for baby comfort so it doesn’t scratch skin.
Skip oversized buttons — they can snag blankets and look bulky.
22. Rainbow Granny Band Baby Blanket Runner
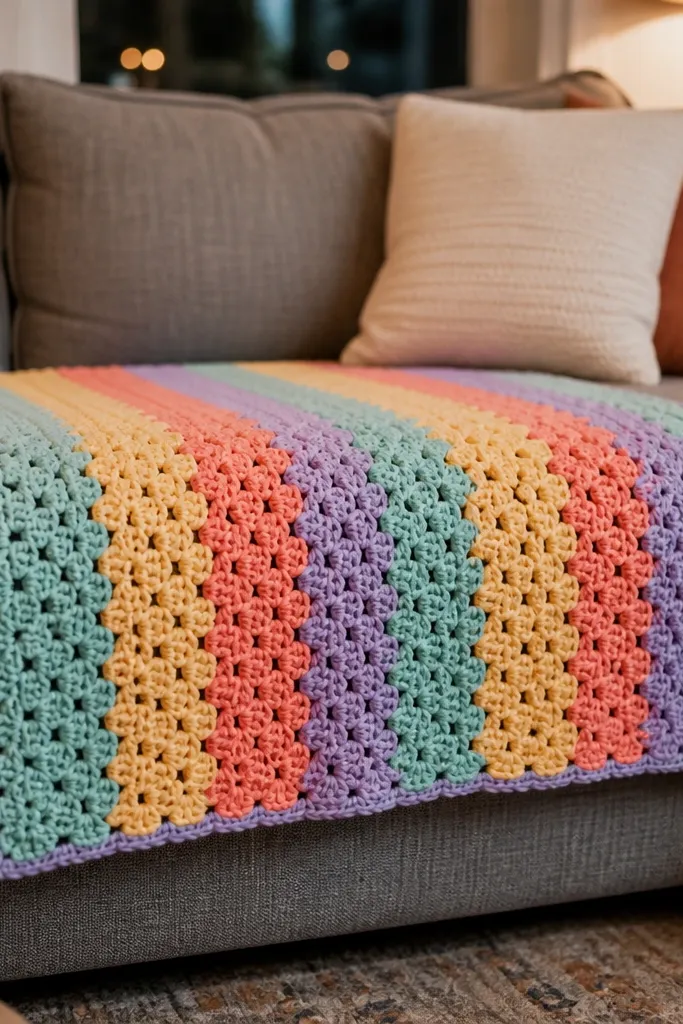
A small “runner” blanket is easier than a full throw, and it still looks like a big gift. Granny bands in rainbow colors create a graphic stripe effect that photographs beautifully on a couch or changing table. It’s also a beginner-friendly construction because you can make bands separately and join them neatly. Great for people who want a colorful nursery piece without committing to a large blanket.
Make several granny bands as separate strips, each in a single rainbow color or two-color combination. Each band should be the same width and stitch count so joining looks clean. Join bands with slip stitch or single crochet, then add a border around the entire piece. Block lightly so the border stays straight and the color bands look crisp.
Join bands using single crochet in the same color as your border so seams blend.
Don’t skip checking band width — uneven strips make the final blanket look crooked.
23. Pastel Flower Crochet Mobile Frame Cover
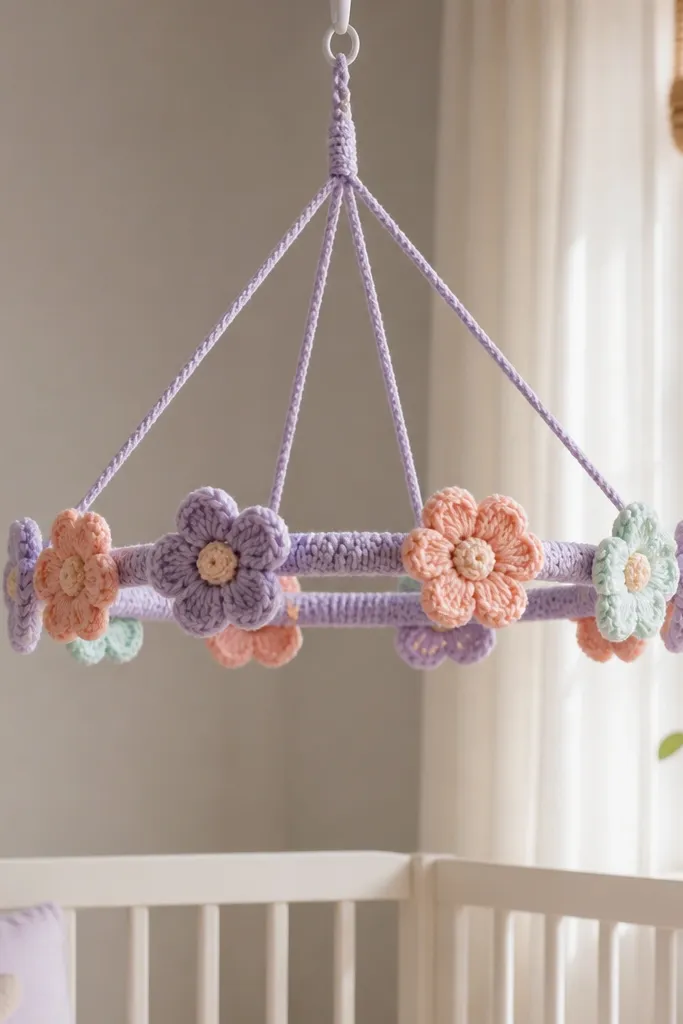
Mobiles are visual by nature, and a crochet frame cover turns them into a handmade centerpiece. This design focuses on a ring with evenly spaced flower accents, so the look is balanced and photogenic from multiple angles. It’s a good gift when you want something that feels decorative and special but doesn’t require a full blanket. Keep the flowers small and lightweight so the mobile hangs correctly.
Wrap your ring frame with a base crochet band using a stitch that grips the frame, then work evenly spaced flower motifs around the outside edge. Attach flowers with a short connecting stitch so they sit flat against the ring. Add a final border round to hide any uneven edges. Make sure the finished cover doesn’t add too much weight to the mobile by keeping yarn and stuffing minimal.
Use a slightly tighter tension on the ring base so flowers stay evenly spaced.
Don’t make flowers too large — they can weigh the mobile down and change how it swings.
24. Berry Basket Baby Bib with Scalloped Rim
Crochet the bib base in rows with a slight curve, then add a scalloped rim around the bottom edge. Create a small berry basket applique by crocheting a basket shape and adding tiny berry circles on top. Stitch the applique securely so it doesn’t lift when the bib gets pulled. Finish by adding a simple strap or tie using yarn that holds tension.
A crocheted bib looks adorable, and the scalloped rim makes it look like a finished dessert plate for babies. The berry basket applique gives it a cute theme without requiring complicated shaping. This is a strong gift for 3-6 months when babies start grabbing everything. Choose yarn that dries fast and stays soft after washing so the bib doesn’t feel stiff over time.
AvoidDon’t skip a stable rim — a floppy edge curls and looks messy quickly.
Pro tipAdd a thin lining fabric or use a yarn that’s easy to wipe so the bib stays practical.
25. Starry Night Baby Blanket with Contrast Border
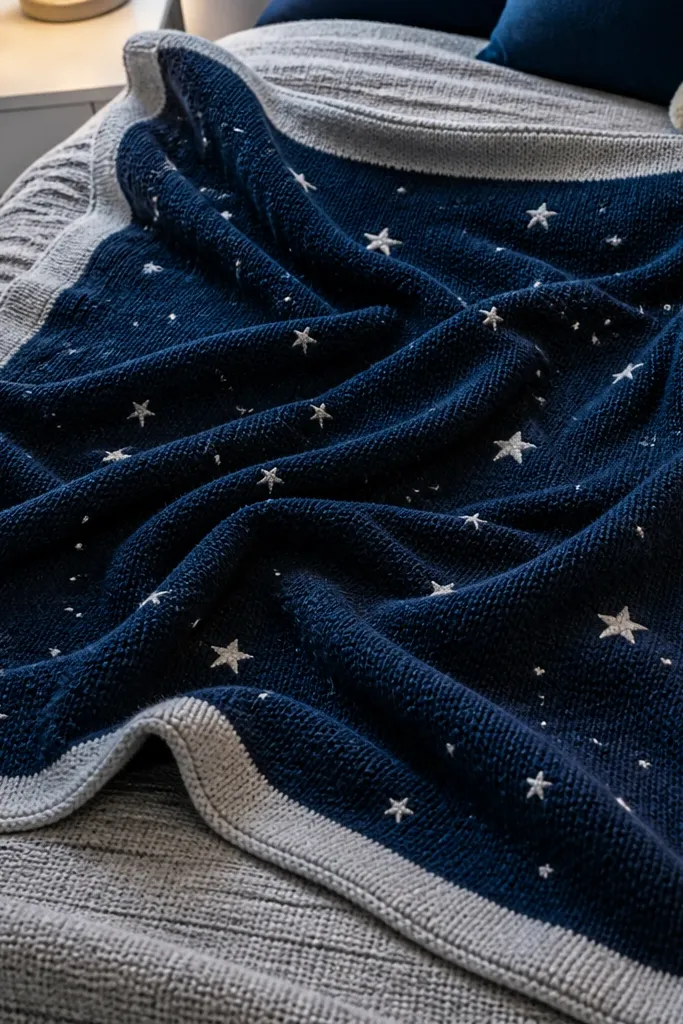
Dark blankets with tiny star details photograph like a themed night sky. The contrast border is what makes it look intentional instead of chaotic — it frames the star field and keeps the edges neat. This is a great gift if you want something that feels special for bedtime. Use navy and light gray or white so the stars show clearly without needing heavy colorwork.
Crochet the blanket base in a dark color using a simple stitch so the surface is even. Add stars by working small star shapes or surface stitches at scattered intervals, keeping spacing consistent. When the main panel is done, add a contrast border in a lighter color with one or two rounds for clean edges. Weave ends carefully because dark yarn shows stray tails.
Plan star placement with a quick sketch so the pattern feels balanced, not random.
Don’t overcrowd the stars — too many details blur when the blanket folds.



