
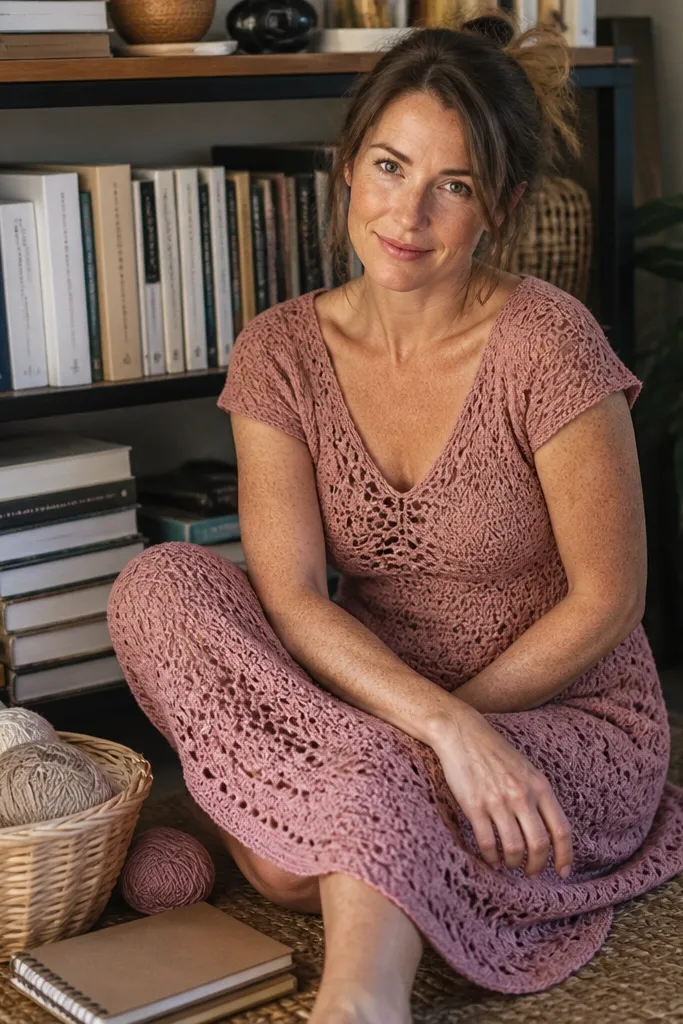
1. Square-Neck Summer Slip Dress with Waffle Panels
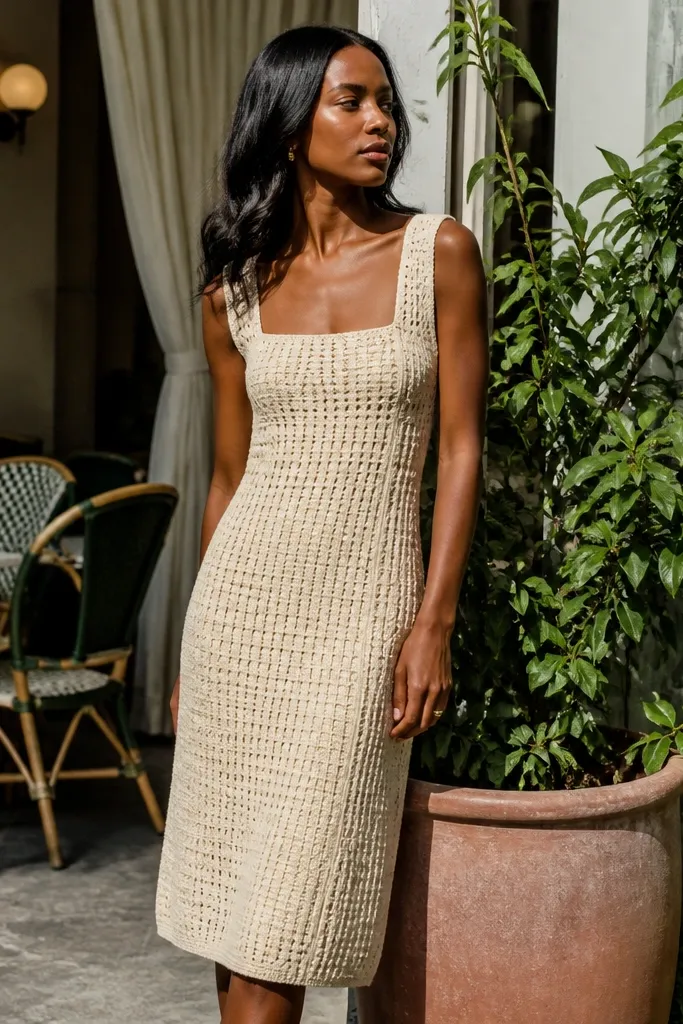
This is the “looks store-bought” slip dress look without the hard parts. The square neckline frames your collarbones, and the waffle texture gives structure so the dress doesn’t cling or collapse. Work it in a light neutral like oat or sand so the fabric reads clean in daylight photos. You get an easy silhouette that still looks intentional because the panel texture creates visual depth. Skill level is beginner-friendly if you can keep rows even and count stitches at the start of each row.
Start by crocheting two body panels to your target length, using a waffle stitch pattern across each panel with a stitch count that matches your desired width. Then join the panels at the sides, leaving openings for armholes, and add a simple strap/upper band that keeps the square neckline crisp. Finally, crochet a straight hem band and block the whole dress — pin the neckline corners and smooth the waffle pattern flat.
Use stitch markers at every row end for the first 6-8 rows so your panel edges stay square.
Don’t skip blocking — waffle fabric looks sloppy and wavy when it dries unpinned.
2. Crochet T-Shirt Dress with Short Sleeves and Front Wrap Tie
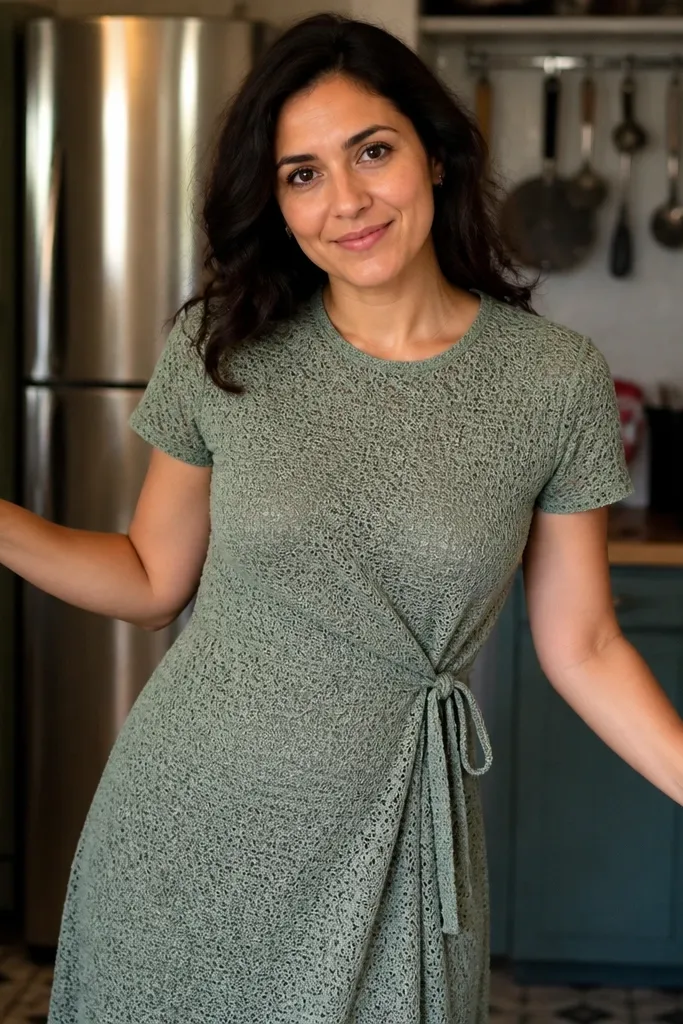
If you want comfy and flattering, this is the dress you build. It uses a t-shirt shape — straight body with a gentle waist — and the front wrap tie creates shape fast. The wrap detail also hides small fit issues because you can tighten or loosen it at the bust and waist. Choose a yarn with soft drape so the wrap tie falls naturally. It photographs well because the tie creates a clear focal point and the short sleeves look neat without complicated shaping.
Pro tipMake the tie band longer than you think — you can always trim after blocking.
Crochet the body in joined rounds or flat panels, aiming for a relaxed fit through the bust with about 2-4 inches of ease. Add short sleeves by picking up stitches around the armhole and crocheting in rounds for a few inches, then finish with a ribbed cuff using front-post/back-post stitches. For the wrap, crochet two tie bands and stitch them to the front edges, then add a small buttonhole loop or a simple slip-knot tie closure.
AvoidAvoid tight armholes; if you crochet the armhole too narrow, the sleeves pull and the dress looks strained in photos.
3. Raglan Sleeve Midi Dress in Soft Greys with Textured Stripes
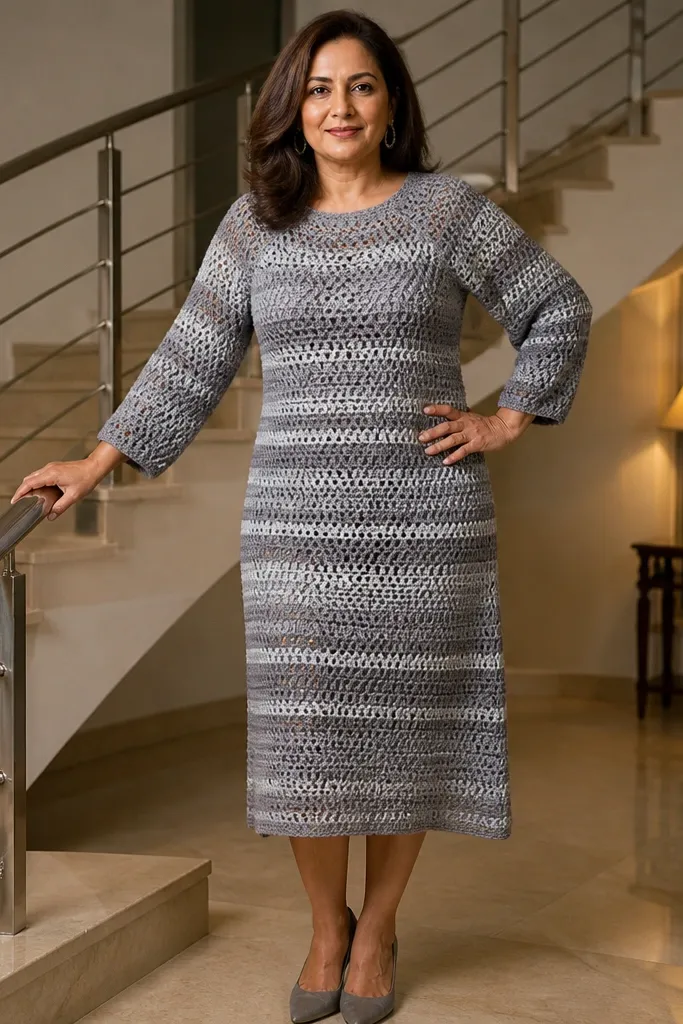
Raglan seams instantly make crochet look “real clothing.” This design keeps construction manageable while giving you that sleeve-to-body slope that’s flattering and easy to wear. Textured stripes add depth without needing complicated stitch libraries. The midi length is also more forgiving than a short dress because small unevenness at the hem is less noticeable. Pick a soft grey or heather yarn so the stitch definition shows without looking loud.
Pro tipCount raglan increases every row and keep them symmetrical — it’s the difference between “cute” and “clean.”
Start the dress from the top down: crochet a simple raglan yoke using increases at four raglan lines, then separate the body and sleeves when the yoke reaches your underarm point. Work the body in stripe sections, alternating between a smooth stitch and a textured stripe like a compact puff or mini bobble row pattern. Finish the sleeves by crocheting down from the underarm, then add a hem band and block to set the raglan angles.
AvoidDon’t change stitch patterns mid-row; it creates a visible seam bump.
4. Crochet Granny Square Skirt Dress with One-Piece Joining
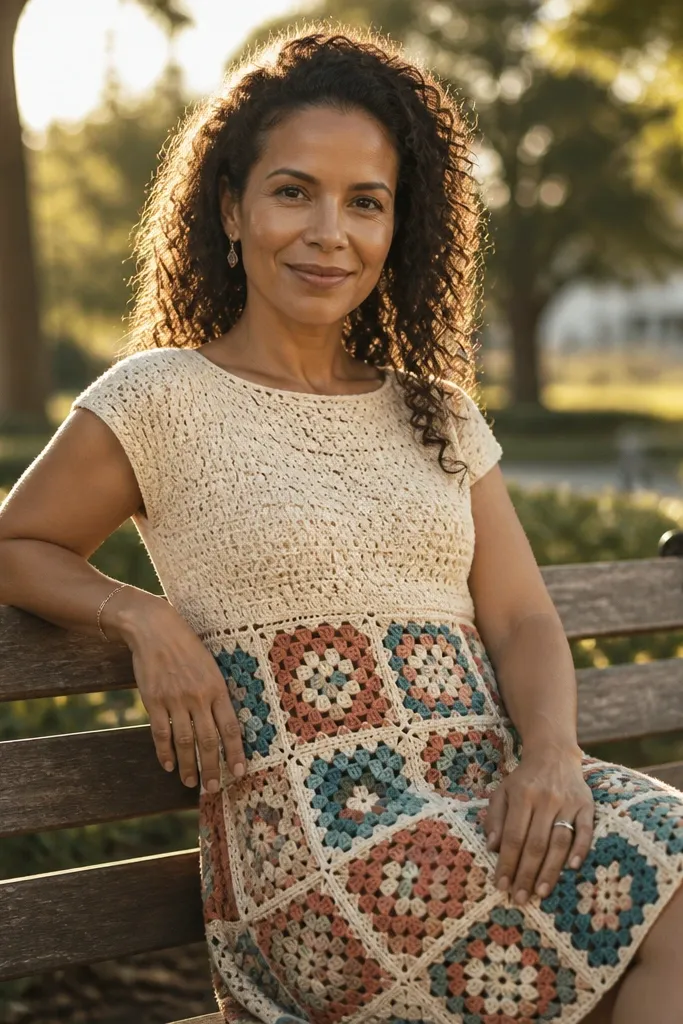
This is for the look of a patchwork dress without fully separate pieces. The skirt uses granny squares for that classic visual pop, while the bodice stays solid for a polished top half. It’s photogenic because the color blocks form a clear pattern line that reads instantly. Keep the palette tight — 3-4 colors max — so the dress looks styled instead of chaotic. Skill level is intermediate only because joining needs patience, not because the stitches are hard.
Pro tipPress your squares flat before joining — steam lightly with distance so the motif edges sit clean.
Build a skirt panel by joining granny squares in rows until you reach your target hip width and length. Use a solid stitch for the bodice, crocheting it separately to match the skirt opening, then sew or join the bodice to the skirt with a slip-stitch join for a flatter seam. Add straps or a simple neckline band, then block the dress to relax the joined squares and even out spacing.
AvoidDon’t mix square sizes; one off-size square makes the hem curve uneven.
5. Off-Shoulder Crochet Dress with Buttoned Shoulder Straps
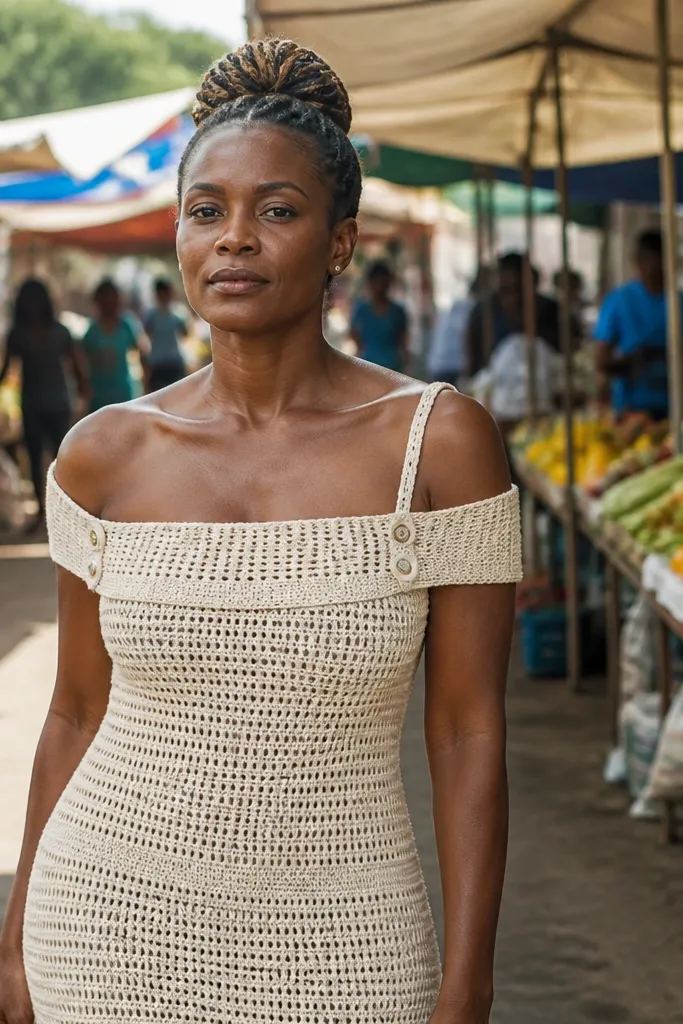
Off-shoulder is the easiest way to look dressed up, and crochet can do it without complicated shaping. This version uses wide off-shoulder bands that sit comfortably, then you add small buttons or ties at the top so the neckline stays put. The visual payoff is the exposed shoulder line, which looks great in photos and on real bodies. Choose a light yarn and a stitch with good drape so the bands don’t stand up like cardboard.
Pro tipUse 2-3 button placements per side so the neckline doesn’t gap when you move.
Crochet the body in flat rows to your dress length, leaving armhole openings where the off-shoulder bands will sit. Then crochet two wide bands across the top edges, using a stitch that creates a firm edge, like a single crochet border first and then a few rows of half double crochet. Add button tabs at each side and sew matching buttons so the bands can anchor. Finish with a hem border and block to set the off-shoulder curve.
AvoidSkip overly stretchy stitches at the neckline — if it stretches, the off-shoulder line droops.
6. Sleeveless Crochet Fit-and-Flare with Eyelet Waist Panel
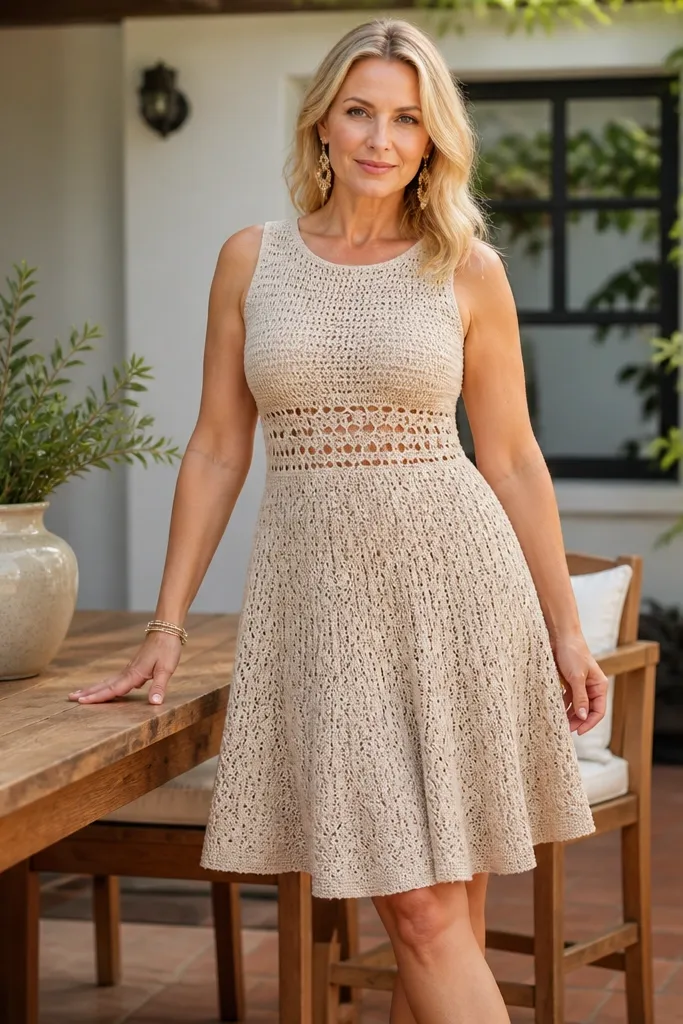
Fit-and-flare is a cheat code for flattering shape, and the eyelet waist panel makes it look fancy. You get a defined waist without building a complex bodice — just a controlled increase pattern into the skirt. The eyelets read as a delicate “belt” that draws the eye to your waistline in photos. This dress is especially good for warm weather because it’s sleeveless and the eyelets add airiness. It’s beginner to intermediate depending on how comfortable you are with simple shaping.
Work the bodice in straight rows to just below the waist, then switch to an eyelet pattern for a short waist band that matches your stitch count. Increase into the skirt by adding evenly spaced increases each round or row until you reach your flare width, then keep the skirt pattern uniform down to the hem. Finish armholes with a clean single crochet edging and add a light lining stitch if your yarn is see-through after blocking.
If your yarn is drapey, add a slightly firmer hem band so the flare doesn’t curl upward.
Don’t over-increase too fast; if the flare starts immediately at the waist, the waist loses definition.
7. Long Sleeve Crochet Bodycon with Vertical Cable Illusion Bands
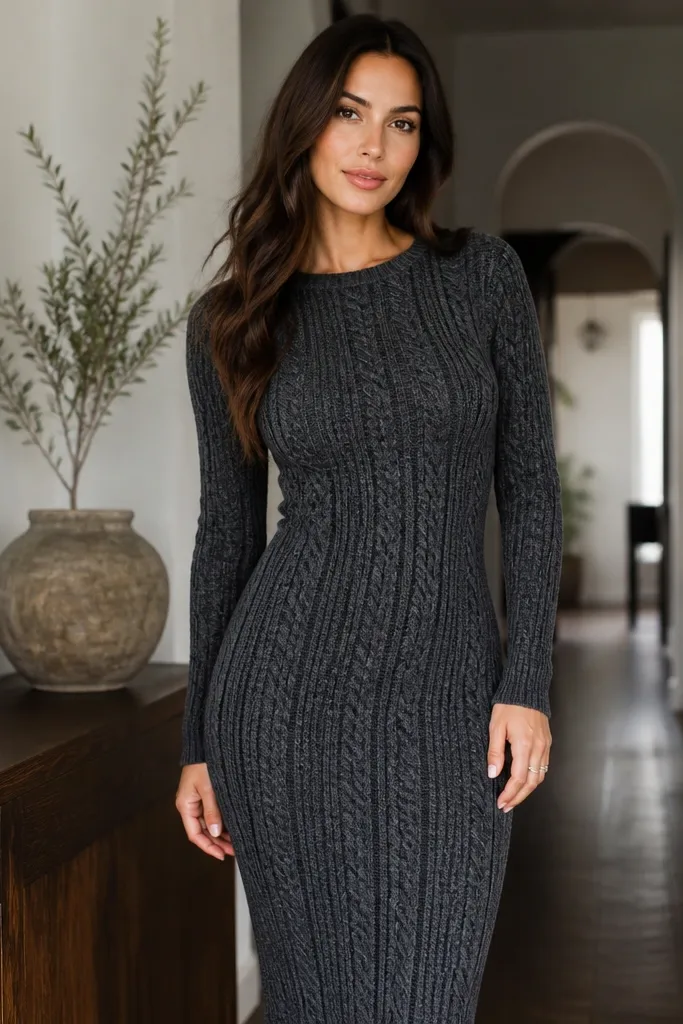
Want the bodycon look without wearing something that fights you? This design uses vertical texture bands that create a slimming optical effect. The body stays fairly close, and the vertical pattern keeps it looking intentional. Choose a slightly thicker yarn and a stitch pattern that has structure so the dress doesn’t stretch out. It’s very photogenic because vertical lines show up clearly in most lighting. This is more advanced than a simple A-line, but the moves are still manageable if you can follow a repeating pattern.
Pro tipUse a tape measure to check width every 10 rows so the bodycon stays consistent.
Start with vertical band planning: crochet a foundation row that divides into smooth panels and textured cable-illusion panels (use front-post/back-post or simple crossed stitches). Build the body upward in rows, keeping your stitch repeat aligned, then add long sleeves by picking up stitches around the armhole and working straight down with the same panel logic. Finish with a ribbed cuff and hem band to control stretch, then block lightly so it sets without losing shape.
AvoidDon’t use a super-slinky yarn; it will stretch and the vertical pattern will blur.
8. Crochet Tiered Midi Dress with Double-Row Ruffles
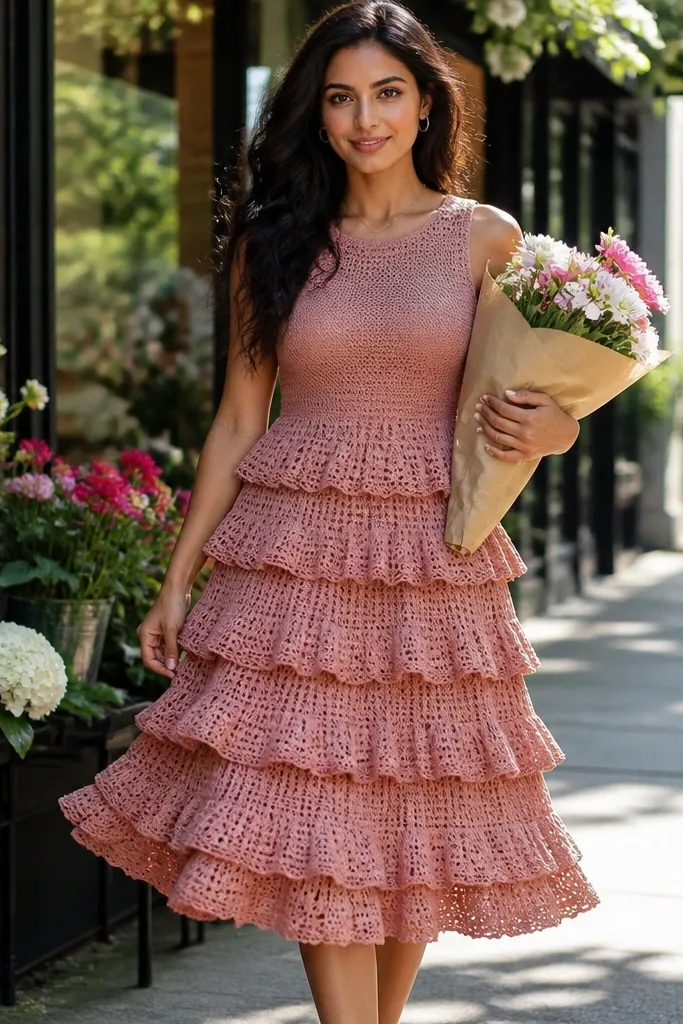
Tiered dresses photograph like crazy because each layer catches light differently. This one uses double-row ruffles so the skirt looks full without needing extreme flare. The bodice stays simple and flat so the focus stays on the tiers. Pick blush, dusty rose, or soft peach for a flattering tone in daylight photos. It’s beginner-friendly because you’re repeating the same ruffle technique across tiers.
Pro tipSteam-block ruffles with pins — lift and set the ruffle wave instead of pressing it flat.
Crochet a simple bodice rectangle or fitted panel, then attach the first tier by crocheting a ruffle row along the bottom edge of the bodice. Make each ruffle tier with a repeat that alternates taller stitches and chain spaces, then work a second ruffle row slightly below to create that double-layer look. Repeat for the second and third tiers until you reach midi length, then add a hem border and block to shape the ruffles.
AvoidDon’t attach tiers with a tight seam; it will pinch the ruffles and kill the volume.
9. One-Skein Crochet Dress with Crochet Lace Panel Front
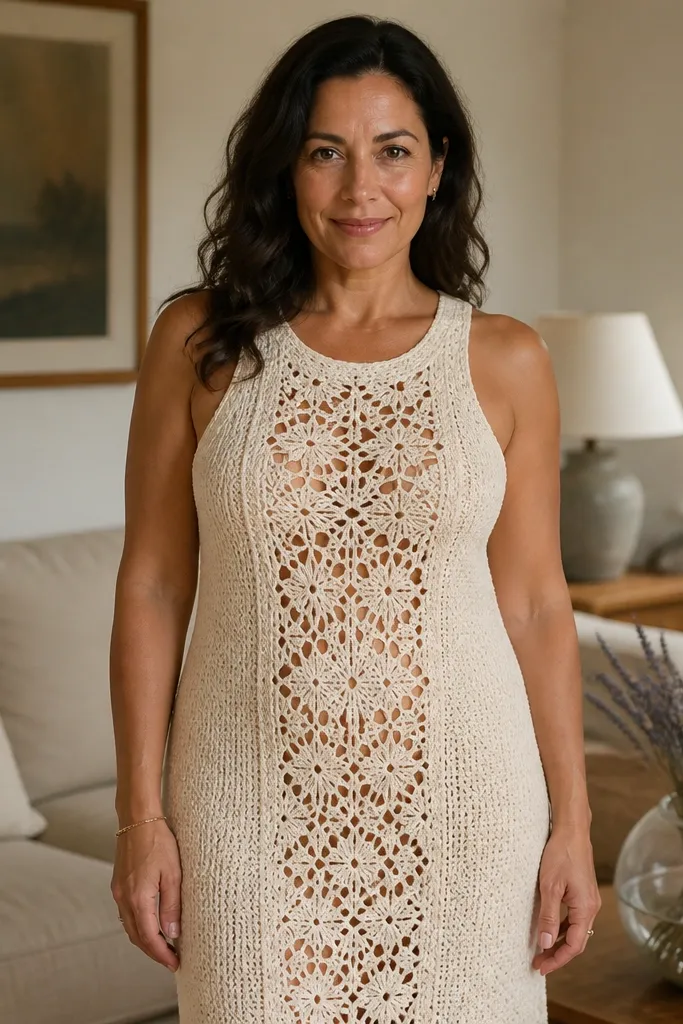
This is for the “I want lace but I don’t want a huge project” vibe. The front has a lace panel that gives the dress a high-end look, while the back stays simple for easy progress. It’s photogenic because the lace panel becomes a clear focal point, especially in front-facing photos. Keep the yarn color light so the lace holes show cleanly. This is a great pick when you want a quick win that still looks special.
Pro tipCount lace repeats twice before you join — misalignment shows fast in lace.
Choose a dress length you can finish within your yarn amount, then crochet a simple back piece and two side panels or a front panel that includes the lace section. Build the lace panel using a repeating lace stitch chart or pattern with consistent hole spacing, then join the front and back at the sides. Add a neckline band and armhole edging, then finish with a straight hem band. Block flat so the lace holes open up evenly.
AvoidDon’t use a heavy yarn for lace; bulky yarn makes the holes look messy.
10. Crochet Wrap Maxi Dress with Side Slit and Tension-Friendly Fabric
Wrap maxi dresses look romantic, and crochet can pull it off cleanly when the stitch pattern has good tension control. This version uses a side slit to add movement in photos and makes the dress easier to walk in. The wrap ties let you adjust fit without doing complex shaping on the body. Use a stitch that stays flat, like half double crochet in a consistent repeat, so the fabric doesn’t curl. It’s intermediate because wrap construction means careful tie placement.
Pro tipMake the wrap overlap wider than you think for comfort, then adjust with tie tension.
Crochet the main dress base in two overlapping panels that meet at the front wrap area, leaving an intentional gap for the wrap opening. Add a slit by stopping one panel’s length earlier and finishing the slit edge with a firm border band. Crochet long ties in matching yarn and sew them at the sides so they anchor at the waist and hip. Finish with a neck band or simple crossover edge and block to set the overlap and slit angle.
AvoidAvoid loose finishing at the slit edge; it curls and looks unfinished.
11. Crochet Halter Neck Mini Dress with Back-Tie Detail
Halters make crochet dresses look intentional fast, because the neckline draws the eye up. This mini dress uses a halter band and a back-tie strap so the top stays secure while the body hangs smoothly. The back tie is also a photogenic detail because it creates a visible shape when you turn. Choose a solid stitch for the body so the halter is the star. This is beginner-friendly if you can crochet even rows and do simple strap attachments.
Crochet the body in a basic shape to your mini length, then create the halter by crocheting a front band that forms around the neck with a stitch count that fits snugly. Add back ties by crocheting two long straps and attaching them to the back edges of the halter area. Crochet a clean armhole edge if your body shape includes openings, then add a hem border and block so the halter lies flat. Tie straps should be long enough to adjust after blocking.
Use a slightly firmer stitch for the halter band so it doesn’t stretch out after wear.
Don’t skip a neckline edge finish; raw edges curl and ruin the halter line.
12. Crochet Off-Center Button Shirt Dress with Waist Seam
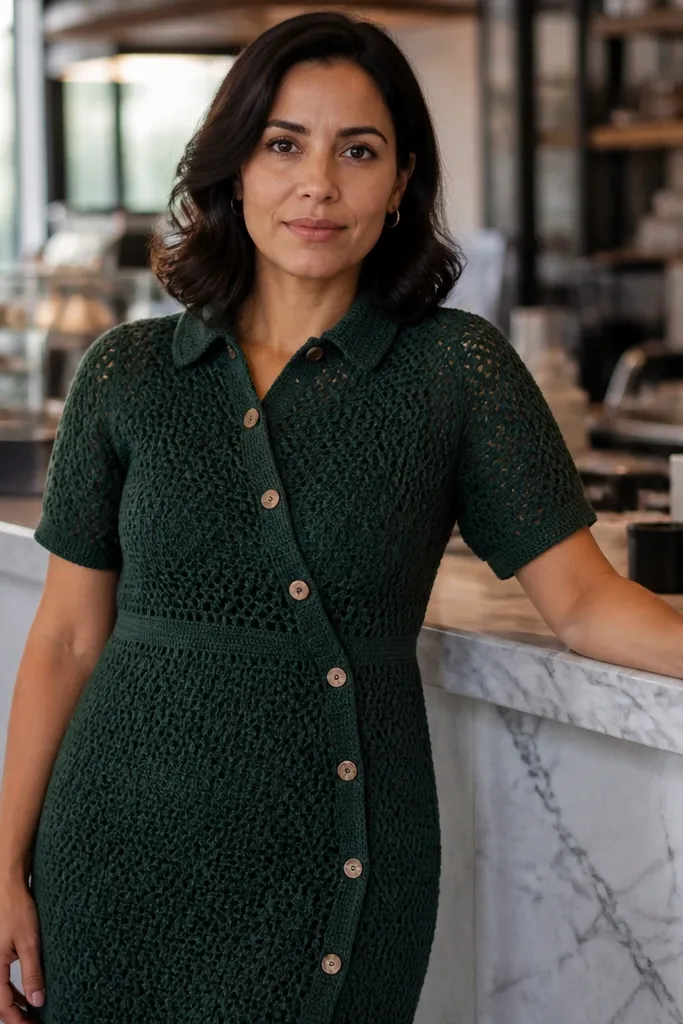
A shirt dress look is easy to style because the button line gives structure and makes the silhouette readable. This design adds a waist seam so the dress doesn’t look like a tunic. The off-center buttons create a slimming diagonal line, and the collar band makes it look like a real garment. Pick a deep green or black yarn so the button line pops visually. Skill level is intermediate because you need consistent button placket edges.
Build the body in two sections: upper bodice rows and a lower skirt section, then join them at a clear waist seam by aligning stitch counts. Create the button placket by working extra rows on one front panel edge and adding evenly spaced buttonholes. Add a simple collar band by picking up stitches around the neckline and working a short border in rows, then finish cuffs and hem with single crochet edging. Block to sharpen the placket line and keep the collar flat.
Mark buttonhole positions on paper first — it keeps spacing even across the placket.
Avoid uneven placket tension; if one side pulls, the buttons won’t line up.
13. Crochet Cold-Shoulder Dress with Mesh Lace Sleeves
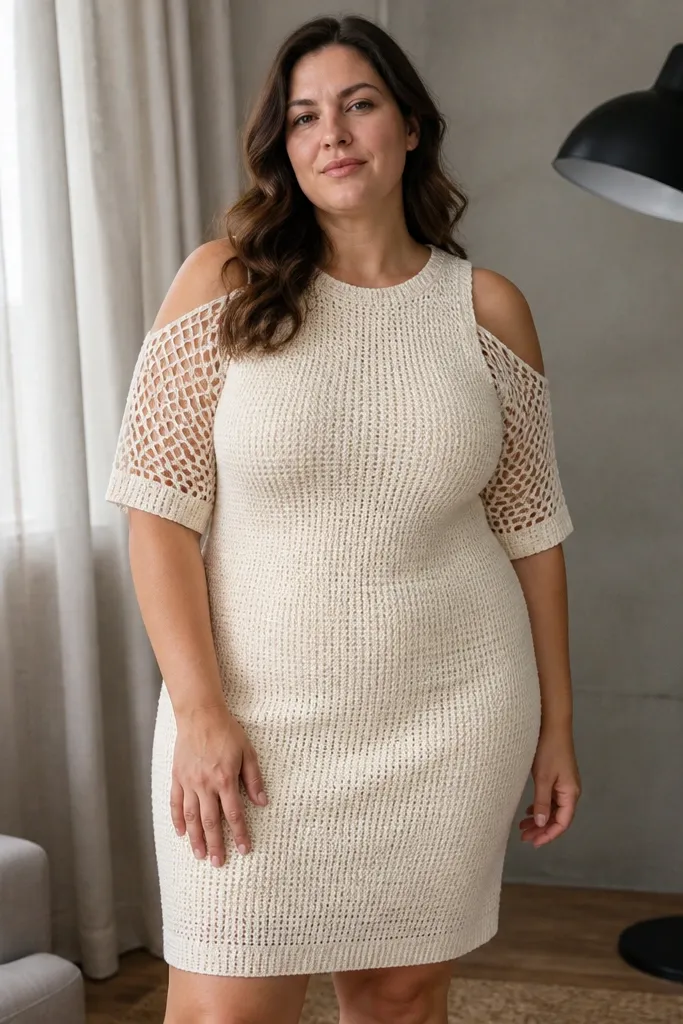
Cold-shoulder crochet looks modern and airy without going full sheer. The trick is to keep the body solid and use a mesh-like lace for the sleeve openings, so you get contrast and clean edges. This dress is photogenic because the shoulder cutouts create a strong shape line, and the mesh sleeve adds texture without bulk. Choose black or charcoal for a dramatic look and better contrast with the lace holes. It’s intermediate because openings and sleeve edging need careful stitch count.
Pro tipUse a smaller hook for the neckline and armhole borders; it keeps edges crisp.
Crochet the body with armhole cutouts by stopping rows at specific points and then finishing the edges with a firm border stitch. For the mesh sleeves, pick up stitches around the opening and work a short lace pattern that creates the airy cutout effect, then add a cuff edge. Join front and back neatly at the shoulders, then add a neckline band and hem border. Block to open lace holes and smooth the cutout edges.
AvoidDon’t pick up too few stitches around openings — the edges will ripple.
14. Crochet Ribbed Column Dress with Side Slits
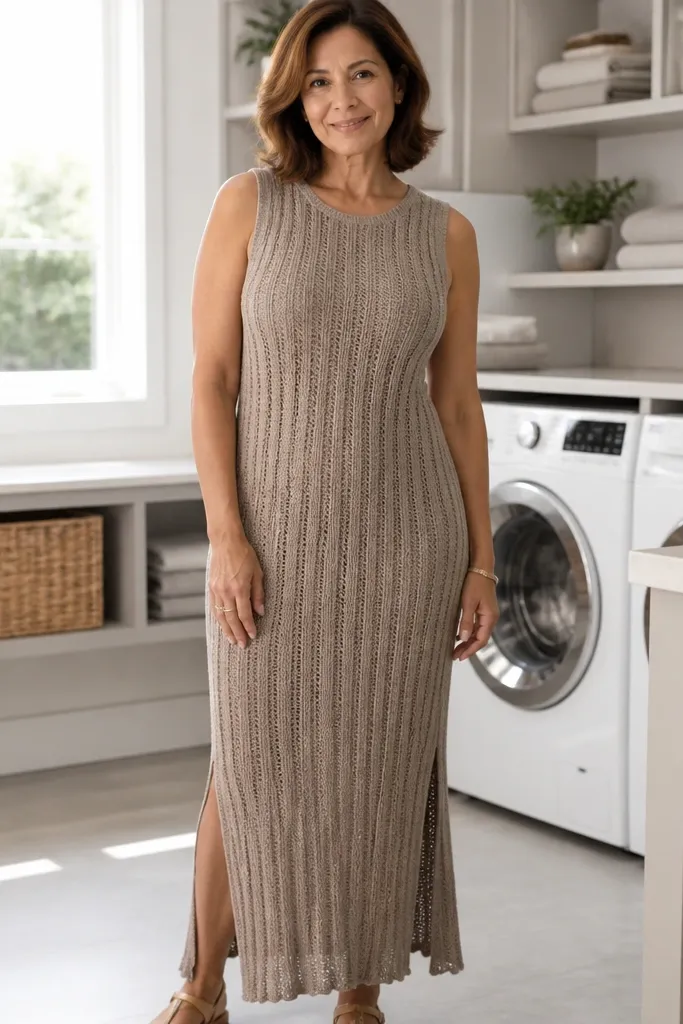
This is the “minimal, flattering, and photo-ready” dress. Ribbing creates a vertical column look that flatters and makes the dress look expensive even with simple construction. Side slits add movement and make the hemline feel intentional instead of flat. Go for a neutral color like taupe or oatmeal so the rib texture reads cleanly under different lighting. Beginner to intermediate, because the rib stitch is repetitive and forgiving.
Pro tipCheck rib width every few rows; ribbing grows or shrinks quickly if tension changes.
Work the dress in panels or one continuous piece using a rib stitch like front-post/back-post crochet in a consistent repeat. Add side slits by leaving gaps at the bottom side edges while you continue the center panels down to length, then finish slit edges with a border band. Join seams with mattress stitch or a slip-stitch join to keep them flat. Finish the neckline with a rib band and block to even out the rib columns.
AvoidAvoid loose rib rows — sloppy tension makes the column look wavy instead of straight.
15. Crochet Floral Applique Sundress with Solid Back
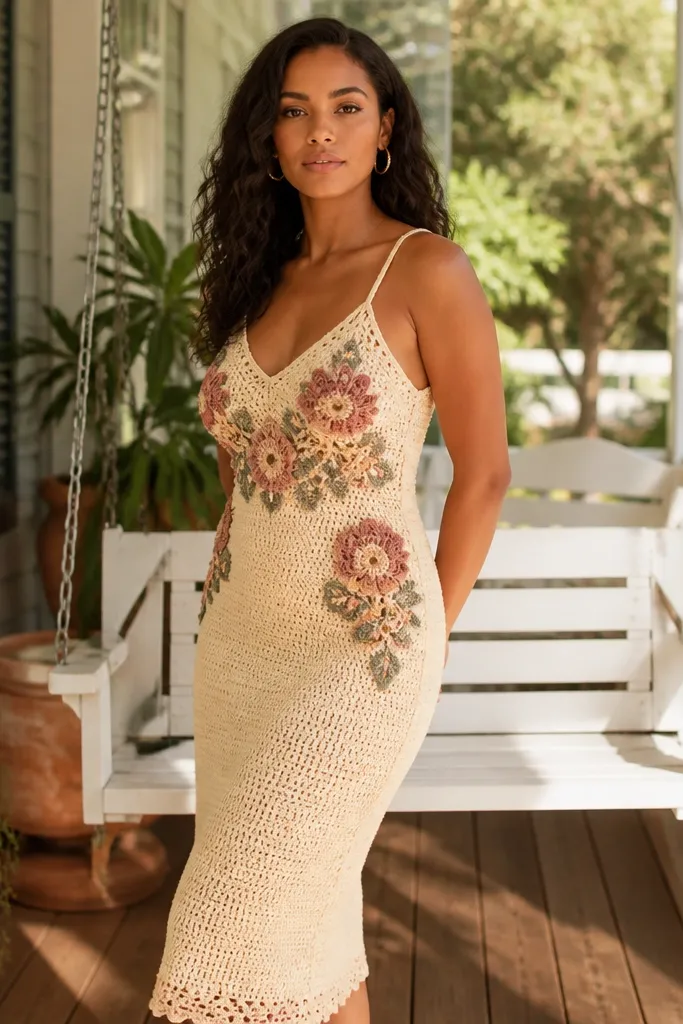
Appliques are the fast route to a dress that looks styled, not plain. This sundress keeps the back solid so it hangs smoothly, then adds floral applique clusters on the front for that sweet, cottage-meets-modern look. The applique placement makes the dress photogenic because your eye lands on the flowers first. Use a contrasting yarn color for the appliques, like cream base with dusty rose or sage flowers. This is intermediate mainly because applique placement needs planning.
Crochet a simple sundress body in straight rows or panels, keeping the front and back identical in shape until applique time. Place floral appliques on the front by sketching a rough layout with chalk or stitch markers, then sew each applique down securely with a matching yarn. After appliques are attached, add straps or a neckline band, then crochet a hem border and block to set the applique edges flat. If the applique bumps too much, add a thin stitch around edges to anchor it to the fabric.
Space appliques with equal gaps — uneven spacing is what makes it look handmade-in-a-bad-way.
Don’t attach appliques before you block the base; the fabric shape changes and the flowers drift.



