
1. Color-Blocked Men's Crochet Beanie in Charcoal + Forest
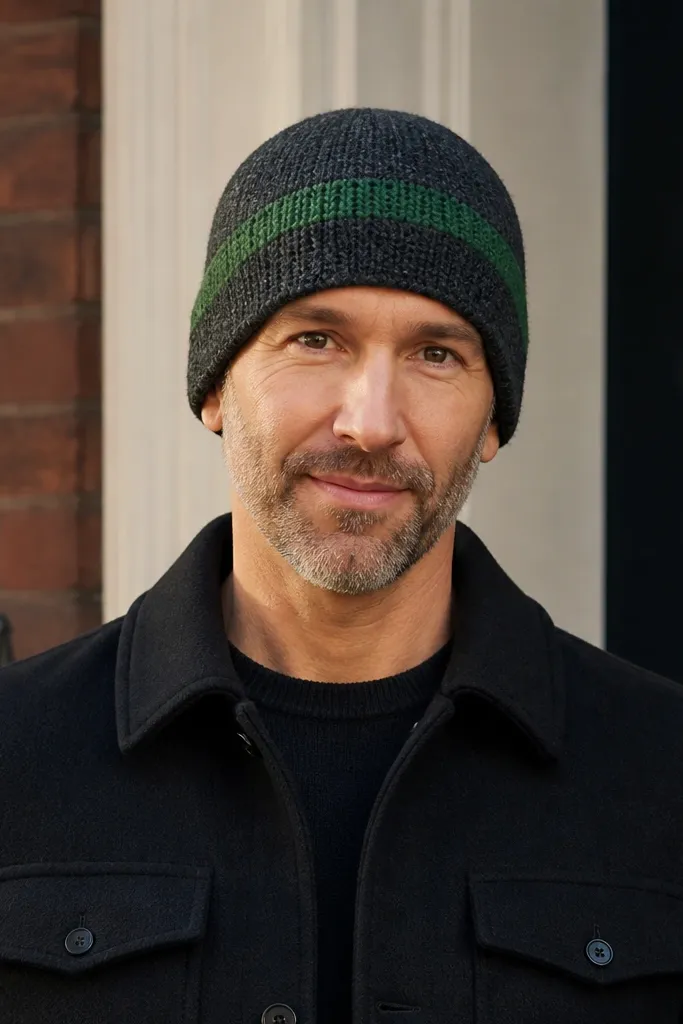
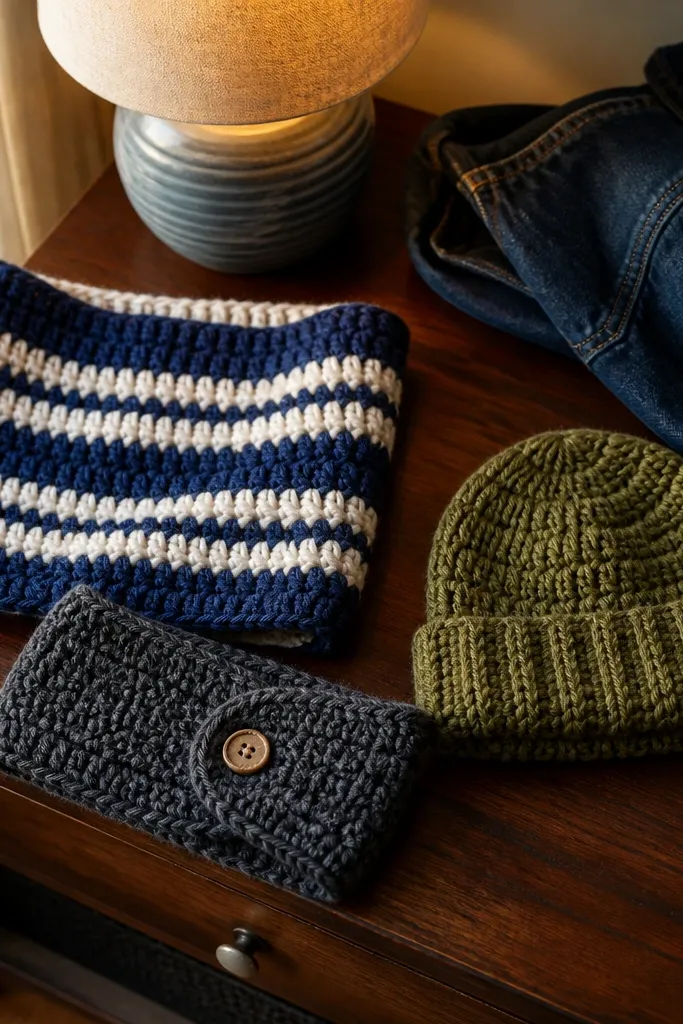
This beanie looks stylish because it uses strong color contrast and dense stitches that hold their shape. The charcoal base reads clean and modern, and the single stripe gives the piece a deliberate graphic feel. Dense rounds also help avoid the “wavy” look that happens when tension drifts. You’ll feel the difference in how it fits — snug at the head, not loose around the crown. This is an easy crochet idea for men that looks good even with simple styling: hoodie, denim jacket, or a knit coat.
Start with a tight, dense stitch pattern like single crochet or half double crochet in the round. Chain a foundation size that matches the head circumference you want, then crochet straight for 3-4 inches before starting decreases for the crown. Add the forest stripe by switching yarn for one or two rounds, then return to charcoal for the final rounds. Finish with a tight slip-stitch edge and weave in ends tightly on the inside.
Use a stitch marker for the first stitch of every round so the stripe stays perfectly level.
Don’t use a loose stitch pattern for the crown — it makes the beanie collapse instead of sit clean.
2. Ribbed Crochet Headband with Button Tab
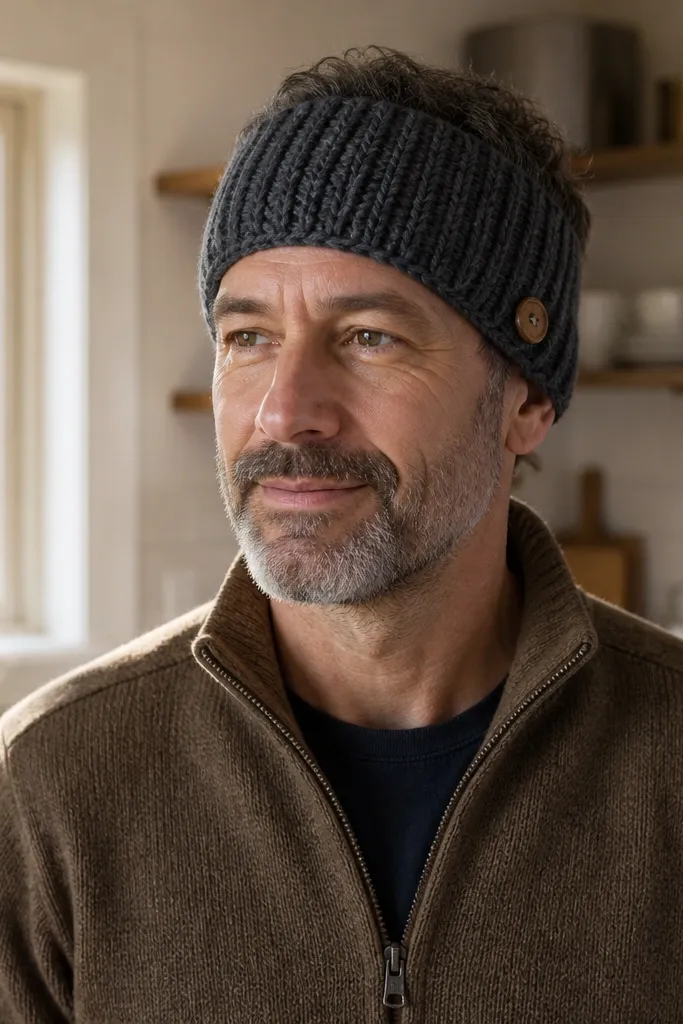
A ribbed headband looks sharper than a flat band because the texture creates a “built-in” structure. Add a button tab and you get a practical adjustment that also looks intentional. This is a great men’s accessory because it works for hairlines, hats that are too hot, and cold mornings without covering the whole head. The ribbing also hides minor tension differences, so your first few rows don’t have to be perfect. Style-wise, it pairs easily with flannels, beanies, or a bomber jacket.
Work a ribbed fabric using front-post and back-post stitches (like post double crochet) for a vertical knit-like texture. Measure around the head where you want it to sit, then crochet a band to that length minus about 1 inch for stretch. Leave a short gap or make one end longer so you can attach the button tab. Sew a small button on one side and crochet a tight buttonhole tab on the other.
Block lightly by misting and stretching to the final width; ribbing looks much cleaner after blocking.
Don’t make the buttonhole too loose — it will make the band look sloppy when worn.
3. Slick Single-Crochet Cowl with Double-Stripe Border
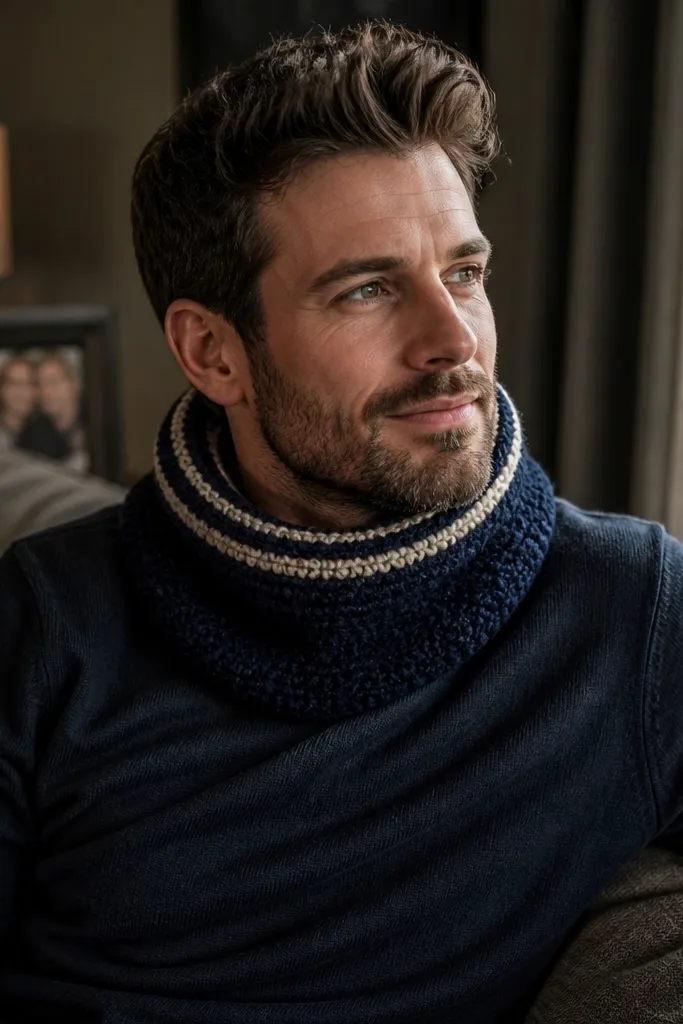
This cowl looks stylish because it’s smooth and thick, not open and airy. Single crochet creates a dense fabric that sits flat on the neck instead of flipping. The double stripe at the top acts like a collar detail — it frames your face and makes the piece look designed. Use a navy base and cream stripes for a classic, masculine look. It’s also a perfect gift because it’s quick and doesn’t require complicated sizing.
Chain to the circumference you want for the cowl, then work single crochet back and forth for about 8-10 inches of height. Join the ends carefully to avoid a bulky seam — slip stitch the last row to the first and weave the seam inside. Add stripes by switching yarn for two short rows, keeping them aligned with the top edge. Finish with a tight border row in the base color to lock everything in.
Keep your stripe rows the same tension as the main fabric; stripes show every wobble.
Skip chain-3 turning habits with single crochet if you’re getting height drift — it causes the cowl to look uneven.
4. Weekend Grocery Tote Cover in Thick Granny Panels
This tote cover is stylish because it turns a plain bag into a textured accessory with a clear pattern rhythm. Thick granny panels give visual interest without looking lacy or fragile. It also protects your bag from scuffs and makes the whole thing look intentional. Choose a neutral like coffee brown with a darker border to look masculine and grounded. This is one of the easiest crochet ideas for men because it’s basically panels that you assemble, not a complex wearable.
Make several granny square panels using double crochet clusters so the fabric stays thick. Each panel should be large enough to cover a side section of the tote — measure your bag and build panels to that width. Use a border row in a darker color around every panel so edges line up. Sew panels to the tote cover with a whipstitch through the crochet edge, then reinforce corners with extra stitches.
Use a cotton yarn blend so the tote cover doesn’t stretch out after carrying weight.
Don’t use thin lace-weight yarn for granny panels — the cover will warp and look cheap.
5. Chunky Fingerless Gloves with Square Cuff
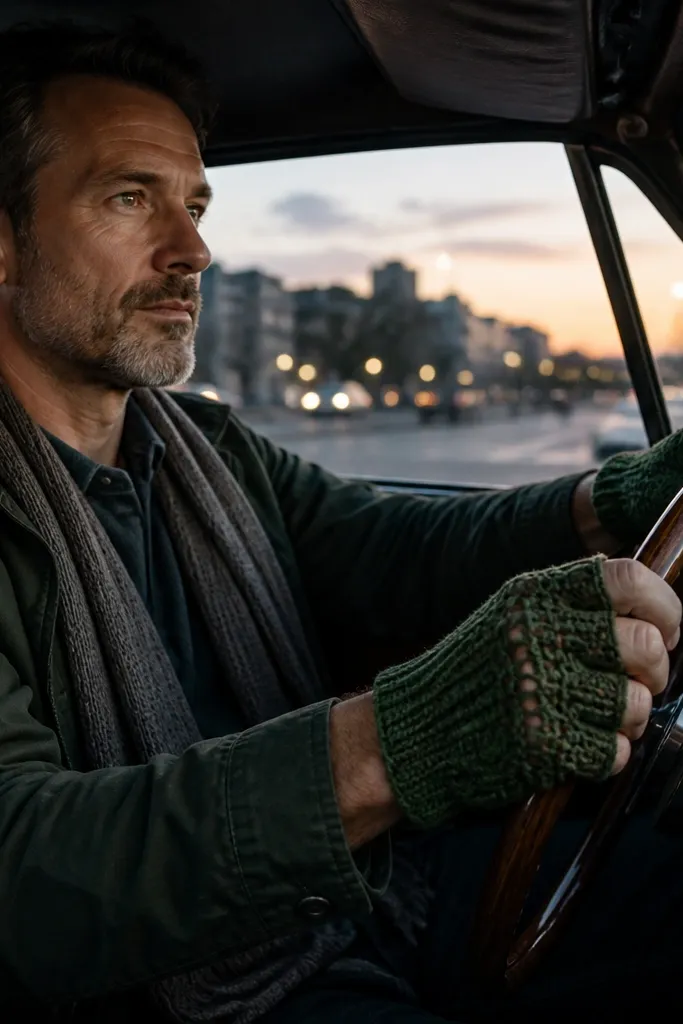
Fingerless gloves look good when the cuff is structured. A square cuff gives a clean, masculine line and keeps the glove from rolling. Chunky yarn makes the texture visible even from a distance, and it also speeds up the build. This project is practical for driving, phone use, and chilly evenings, but it still reads as a fashion accessory. The square shape makes it photogenic because the edges are crisp.
Start the cuff by crocheting a rectangle to the width of your wrist and the height you want, then fold and seam only one side to create the cuff opening. For the hand section, work a wider rectangle and shape by decreasing on the sides toward the knuckles. Add an opening for fingers by skipping stitches and then working small straps across the gap. Finish with a ribbed edge using front-post/back-post stitches so it grips without being tight.
Try the glove on every 2-3 rows to prevent the hand section from getting too narrow.
Don’t skip the ribbed edge — without it, the cuff slides down and ruins the look.
6. Minimalist Crochet Key Fob with Leather Loop Top
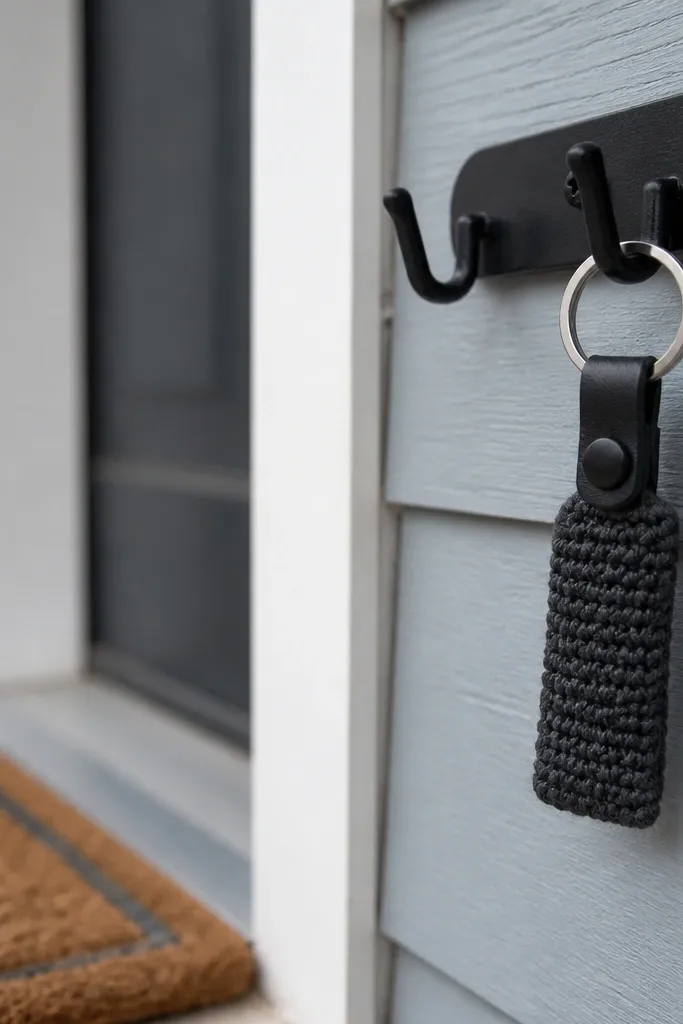
This is a small project, but it looks expensive because of the materials contrast. Crochet alone can look soft and fuzzy; adding a leather loop at the top makes the fob feel sharp and purposeful. Keep the crochet part tight with single crochet so it stays firm around the metal ring. Use a dark color like black or deep navy for a clean, modern look. It’s also a great “first stylish item” because mistakes are easy to hide in a small piece.
Crochet a tight tube using single crochet in a narrow width so it wraps around a key ring without gaps. Make it long enough to cover the ring and leave room for a seam inside. Fold it and seam the sides with whipstitch, then attach a small leather loop using rivets or sturdy thread through the leather holes. Finish by weaving in ends inside the tube so nothing pokes.
Coat the ends of the yarn threads with fabric glue and let them dry before trimming so it won’t unravel.
Avoid loose stitches — a floppy fob looks messy and twists.
7. Flat Knit-Look Scarf with Alternating Single Crochet Rows
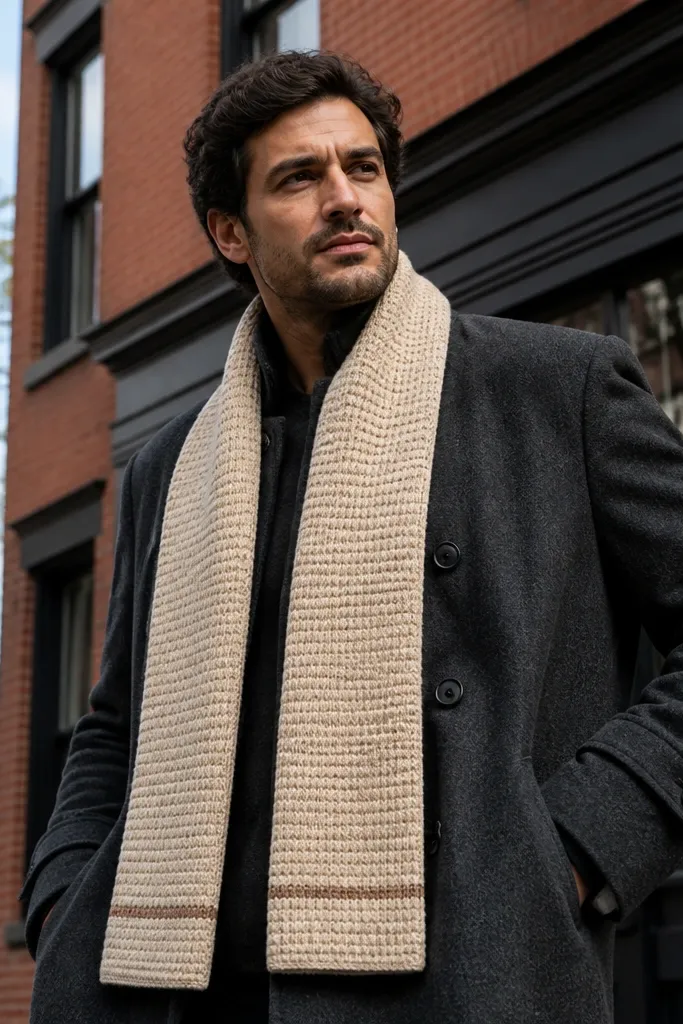
A scarf looks stylish when it lies flat and doesn’t curl. Alternating single crochet row techniques create a subtle knit-like texture that reads clean, not lacy. Keep the color solid or use one accent stripe near the ends for a “tailored” look. This style is photogenic because the fabric edge is straight and the drape looks even. It’s also forgiving for beginners because you’re not chasing complex stitch patterns.
Chain a width that gives you a scarf about 7-9 inches wide after blocking. Work single crochet across for several rows, switching to a slightly different single crochet variation every other row to create texture bands. Keep your turning method consistent so edges don’t grow or shrink. For finishing, add a simple border row at both ends and block the scarf by pinning it flat until dry.
Pro tipBlock on a towel with measurements — straight edges matter more than the pattern.
AvoidDon’t skip blocking — unblocked crochet scarves curl and look less polished.
8. Modern Crochet Pocket Beanie with Side Flap
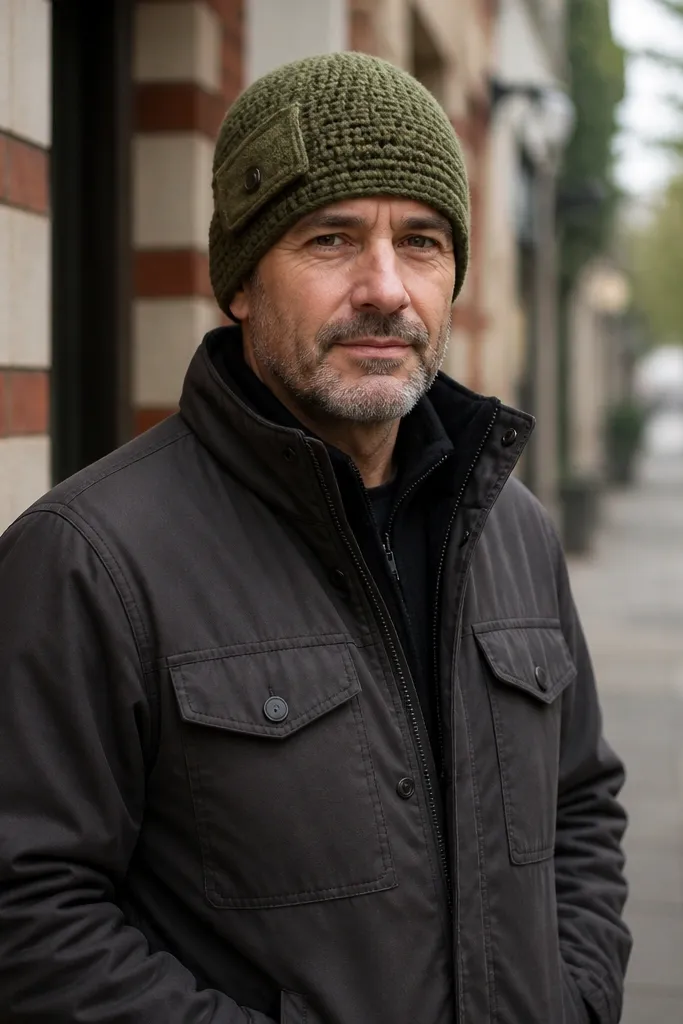
This beanie looks stylish because it adds function without turning into a gimmick. A side flap pocket makes it feel like a jacket detail, and it gives the piece a strong shape. Olive yarn keeps the vibe grounded and masculine, and the pocket creates a clear focal point. Use dense stitches so the pocket sits flat and doesn’t sag. This is a clear “easy crochet idea for men” because the base is a standard beanie — the pocket is the only extra step.
Crochet the beanie body in rounds using a dense stitch until it reaches the desired hat height. For the pocket, crochet a small rectangle panel in the same stitch pattern and seam it to the side of the hat at the flap placement. Add a flap edge by folding the panel and stitching along one side only, leaving the opening. Sew a simple button or snap at the flap closure point and weave everything inside.
Place the pocket panel using stitch markers first; once you stitch it, it’s hard to move cleanly.
Avoid floppy pocket yarn — if the yarn doesn’t hold tension, the pocket sags.
9. Two-Tone Crochet Belt with Buckle Loop
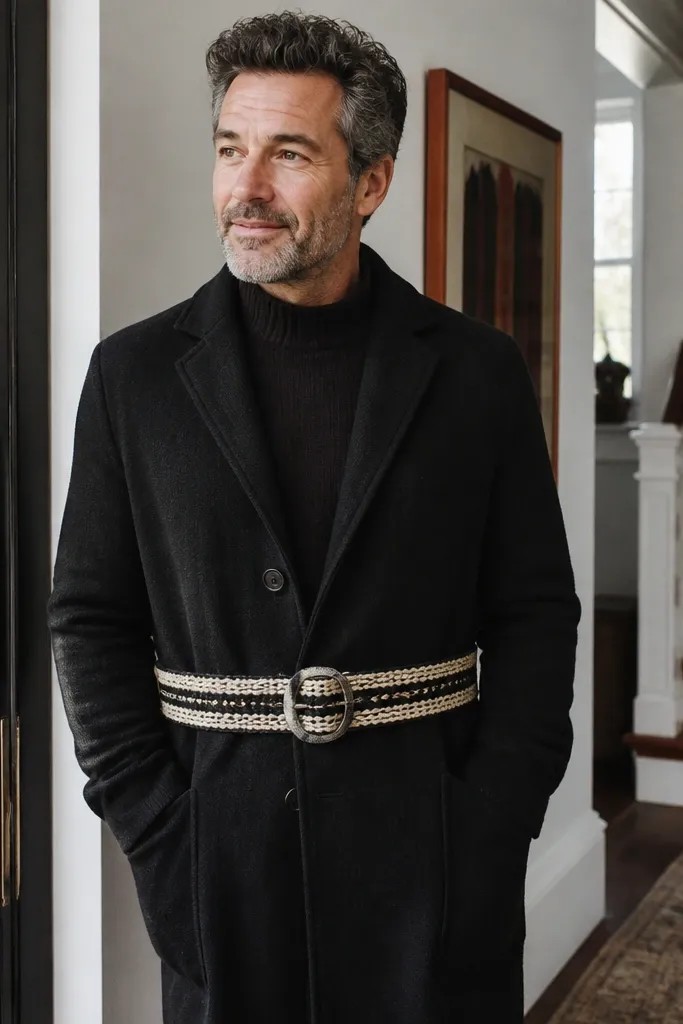
A belt makes crochet look instantly more “menswear” because it’s structured and worn at a fixed position. Two-tone striping adds graphic style without needing complicated colorwork. The trick is to use a stitch that stays firm and a yarn that doesn’t stretch. When done right, it looks like a fabric belt, not a knitted rope. This project is also practical for everyday outfits: jeans, chinos, and overshirts.
Use a firm stitch like single crochet or half double crochet with a narrow width so the belt doesn’t roll. Crochet a long strip to your waist measurement plus overlap for the buckle. Then reinforce the strip by crocheting a second layer across the back or by lining with thin fabric stitched in. Add a buckle loop by crocheting a small reinforced strap and sewing it to the belt at the correct position.
If the belt stretches, line it — even thin cotton fabric improves the look fast.
Don’t make it too wide — wide crochet belts look bulky and lose the clean silhouette.
10. Lace-Resistant Crochet Summer Bandana in Solid Blocks
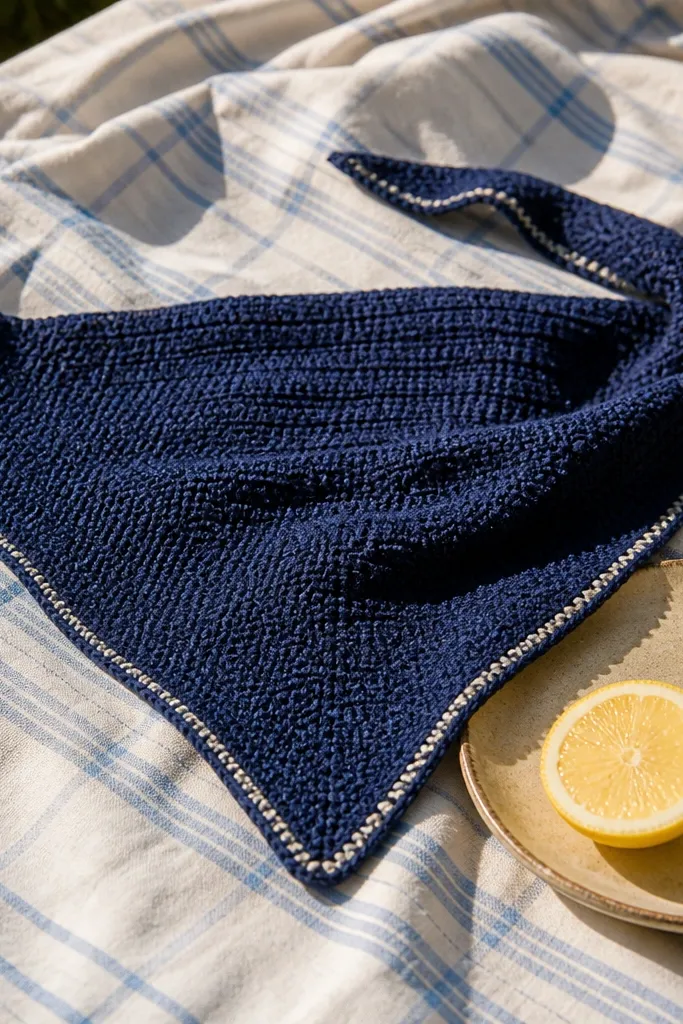
A bandana looks stylish when it has sharp points and enough density to drape without collapsing. Instead of airy lace, use solid stitch blocks so it reads clean and masculine. Navy with a subtle accent stripe at the edges looks especially good because it frames the face. This item is photogenic because the triangle shape creates a clear geometry, and it’s easy to style with denim jackets or simple tees. It’s also quick since the shape is simple even if you’re new.
Build the bandana as a triangle: start with a small chain and increase at the corners so the triangle grows evenly. Use a solid stitch like half double crochet for the body so the fabric holds its shape. Add a narrow border stripe along one edge by switching yarn for a few rows as you approach the final size. Finish by weaving in ends and blocking the triangle flat so the points stay crisp.
Pro tipPin the triangle points while blocking so both sides match — geometry matters here.
AvoidAvoid ultra-open stitches — they curl and look ragged when tied.
11. Crochet Laptop Sleeve with Quilted Texture Panels
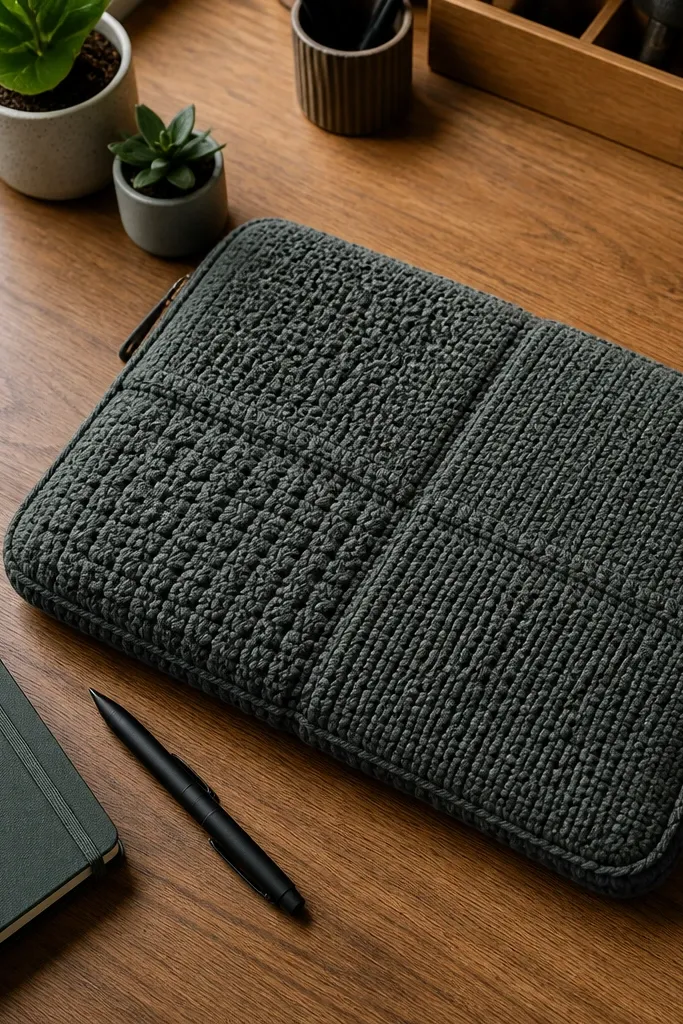
This laptop sleeve looks stylish because it’s structured and thick enough to look like a real accessory, not a cover. Quilted texture panels create depth and hide minor stitch variation, which helps your finished piece look intentional. Choose a muted color like gray or dark green for a clean, modern look. It also protects your laptop from light bumps, and the zipper makes it feel finished. If you want an “easy crochet idea for men” that looks like something bought in a store, this is it.
Crochet two identical rectangles for the front and back using a raised texture stitch like puff stitch panels or bobble-like clusters, keeping the edges straight. Make the rectangles slightly larger than your laptop dimensions so it slides in comfortably. Add a lining by sewing a thin cotton or felt fabric inside if you want a more premium look and better protection. Sew panels together with the zipper installed along the top edge, then reinforce corners with extra stitches.
Use a zipper that’s close to the sleeve width; a short zipper makes the top look crooked.
Don’t skip lining if you’re using acrylic yarn — it can feel scratchy and offers less protection.
12. Crochet Pocket Scarf with Hidden Tie Ends
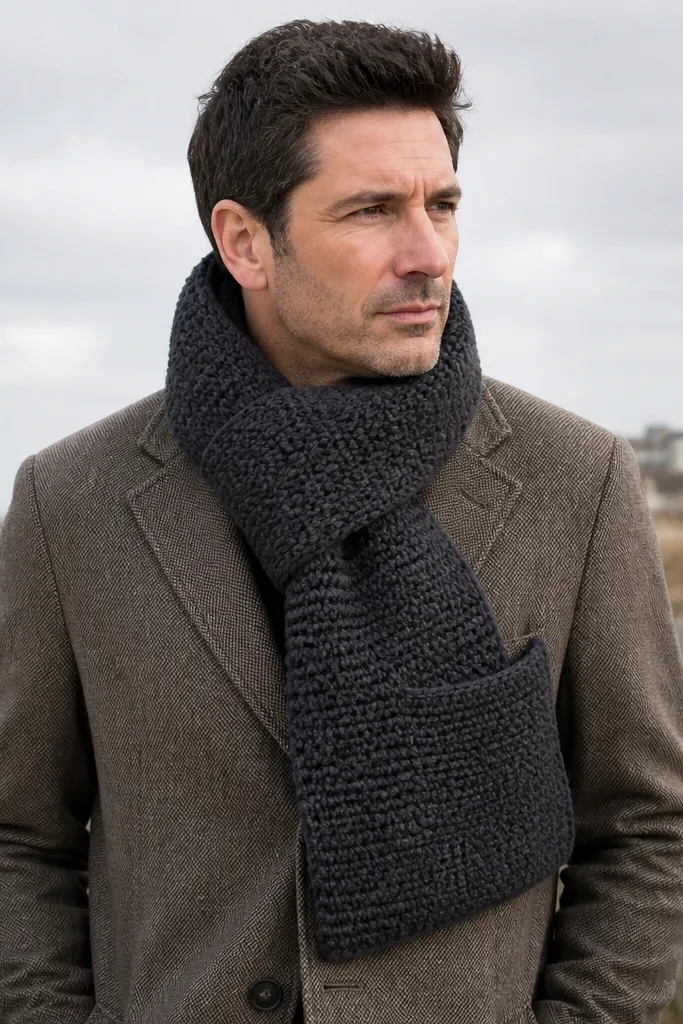
A pocket scarf looks stylish because it has a clear “coat accessory” function. The pocket creates bulk in the right place, and hidden tie ends keep the front clean instead of dangling. This design also makes the scarf stay put during windy walks. Use a dark neutral like charcoal to keep it masculine and easy to pair. It’s also a smart choice if you want a scarf that doesn’t look like a basic rectangle.
Start with a scarf base in a flat stitch like single crochet rows, crocheting two long panels to the same length. Place a pocket panel on the front by crocheting a smaller rectangle and sewing it to the scarf front along the sides and bottom. For hidden ties, crochet two narrow strips and sew them into the interior near the ends so they only appear when you pull them through. Block flat so the pocket lays smooth and the ties stay aligned.
Pro tipMake the pocket slightly deeper than you think — shallow pockets look like a patch instead of a real feature.
AvoidAvoid leaving tie ends outside — they twist and make the scarf look unfinished.
13. Statement Crochet Shoulder Bag Strap with Woven Look
A statement strap turns basic crochet into a fashion accessory. The woven-look texture hides uneven tension and gives a “fabric braid” appearance that photographs well. Keep it narrow and structured so it sits flat on your shoulder instead of rolling. This is stylish for men because it looks like an accessory detail, not a handmade craft. Pair it with a small crossbody bag or even a plain canvas tote.
Work a long strap using a stitch that mimics weaving, like front-post/back-post patterns in a tight gauge so it stays firm. Crochet to your desired length, then reinforce both ends by sewing a fabric strip inside the last inch. Attach hardware by crocheting two small end loops and sewing them to the hardware rings, or use a strap connector if you have one. Finish by weaving ends inside the reinforcement so nothing shows.
Use a slightly thicker hook than the yarn label suggests for extra firmness in strap projects.
Don’t make the strap with too much drape yarn — it will twist and look cheap.
14. Geometric Crochet Coaster Set in Dark Neutrals
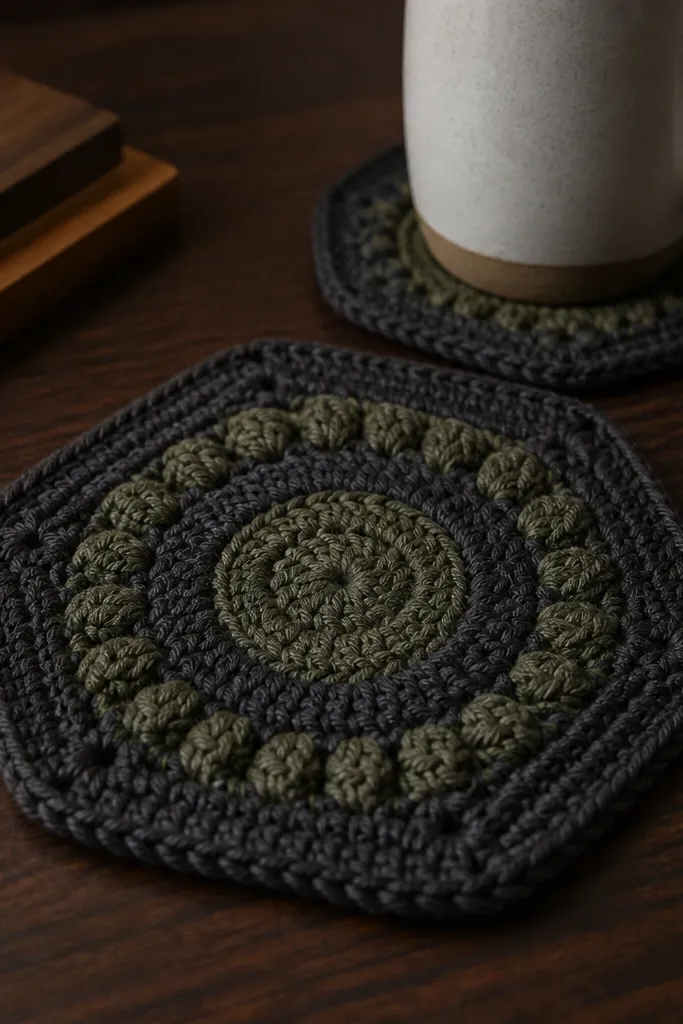
Coasters are small, but this set is stylish because the geometry is clean and the colors are grown-up. Use circular rounds with alternating stitch heights to create a subtle 3D look, then keep the palette to two dark neutrals. This makes them look like desk accessories, not random craft squares. They’re also practical, which matters because men’s spaces get used hard. You can stack them neatly, and the pattern lines photograph well on a coffee table.
Crochet each coaster as a circle: start with a magic ring and increase evenly so it stays flat. Alternate between two stitch types every few rounds to create geometric bands — keep the increases consistent. When you reach your diameter, finish with a tight edge row for crispness. Make four coasters with the same stitch counts, then weave ends tightly and block flat if you see any ripple.
Use a cotton yarn so the coasters don’t absorb spills and they dry faster after washing.
Skip fuzzy yarn — it catches dust and makes the coasters look worn quickly.
15. Cable-Textured Crochet Crewneck in Heather Gray
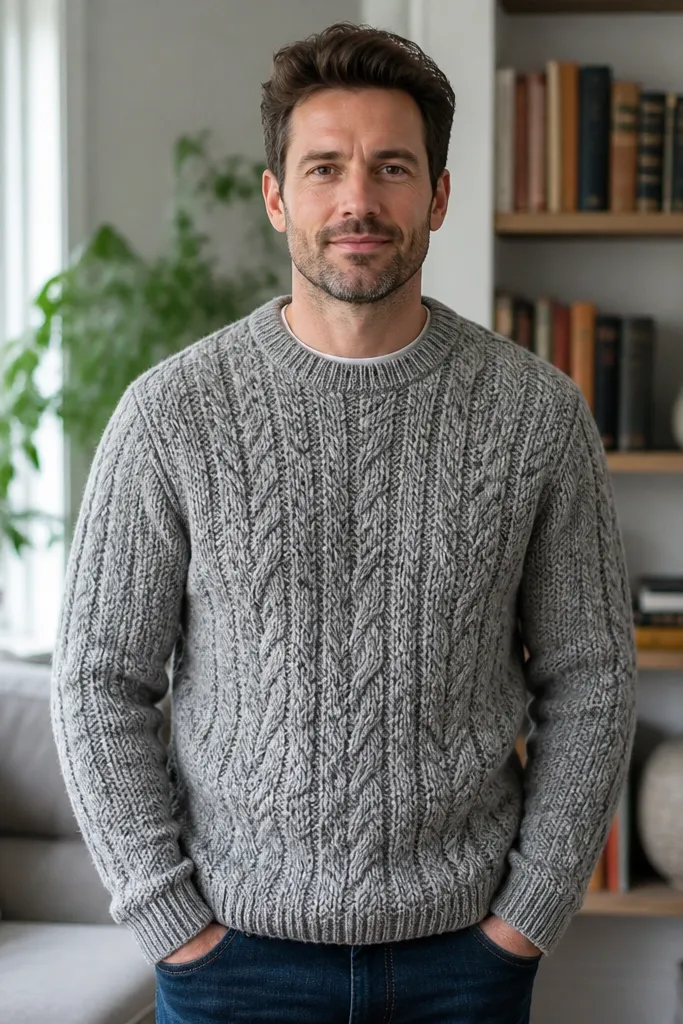
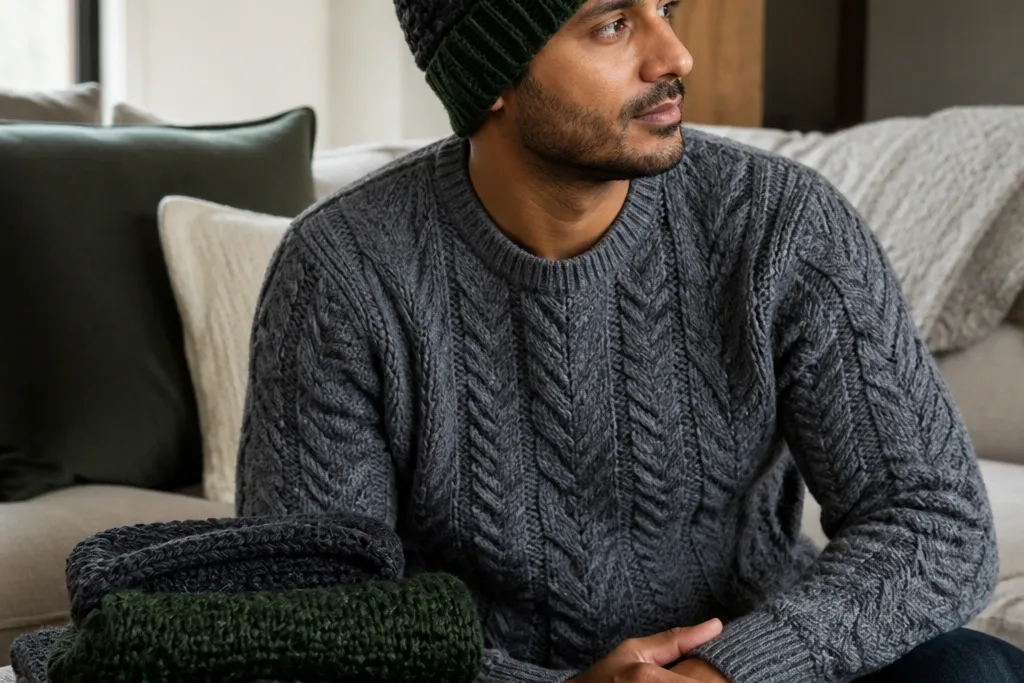
A men’s crewneck is the easiest way to make crochet look intentional, not handmade-in-a-week. This design uses raised cable-like stitches so the fabric reads thick and structured from across the room. Heather gray keeps it wearable with dark denim, black trousers, or even joggers, so it looks stylish without loud colors. It also fixes the biggest crochet problem for men’s clothing — fabric that hangs flat and looks too “blanket-y.” This project is a clear win if you want something that looks like it belongs in a store, not a craft bin. Plan on taking your time with the stitch repeats; the reward is a clean neckline and a sweater body that holds its shape.
Use worsted weight yarn in heather gray (about 900-1100 yards for a size M to L) and a 5.5 mm crochet hook. Start by making a gauge swatch in the cable texture stitch pattern and measure how many stitches fit across 4 inches — then adjust until you hit a fabric width that matches your chest measurement plus 2-3 inches for ease. Work the front and back panels separately in rows until they reach your desired length, then crochet the shoulder seams using a whipstitch or slipstitch seam. Pick up stitches around the neckline and work 2-3 inches of ribbing with a smaller hook (4.5-5 mm) so it doesn’t stretch out. Finish with ribbed cuffs and a bottom hem, then block the garment by dampening and pinning flat so the raised texture stays crisp.
Pro tipDo the neckline ribbing with a smaller hook and count stitches carefully — it stops the collar from going wavy after a few wears.
AvoidDon’t skip a swatch; without it, the cable texture will pull in and the crewneck will end up either tight or baggy.



