
1. Cream-and-Cinnamon SC Bookmark with Fringe
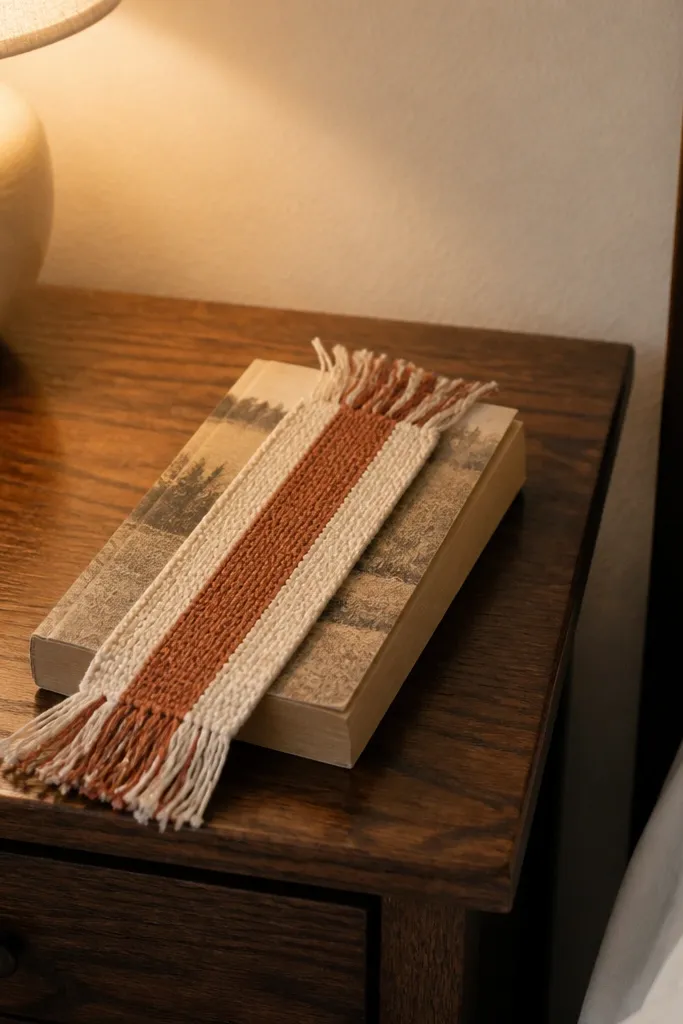
This bookmark is a fast win because it’s just a narrow rectangle with a color stripe and a tidy fringe. The SC stitch keeps edges firm, so it doesn’t curl like looser stitches can. Use a cream yarn with a cinnamon stripe so the texture reads clearly in photos and in your hand. It’s also practical: the fringe adds a little motion without requiring any complicated assembly. You’ll finish it in about 30 minutes because there’s no shaping and the fringe is quick to cut and attach.
Start with a slip knot and chain 15-18, then work SC across until the bookmark is about 6-7 inches long. Add a short cinnamon stripe by switching yarn color for the last 2-3 rows, then finish with cream for one final row to frame the edges. Cut 12-16 fringe strands, each about 2.5 inches long, fold them in half, and pull through every other stitch at the bottom edge. Weave in ends on the back only, then lightly trim fringe to even lengths.
Use a stitch marker at the first SC of each row so your edges stay straight.
Don’t use very thin thread yarn — it makes fringe attachment slower and the bookmark looks flimsy.
2. Rainbow Mini Coaster in DC Rounds
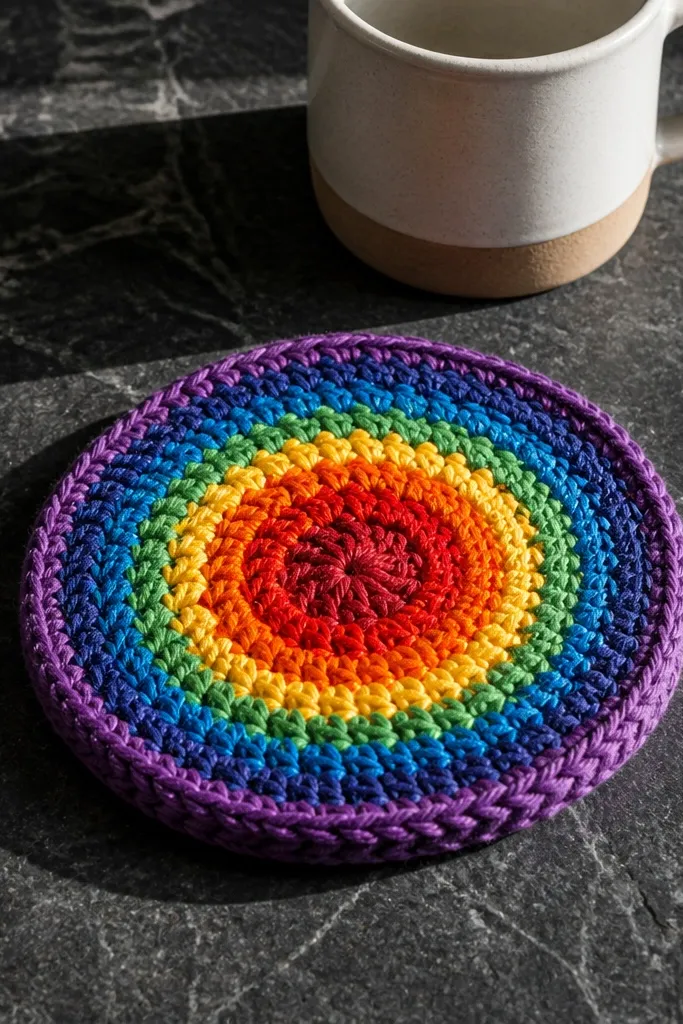
A mini coaster looks great because it’s round, bright, and instantly recognizable as a finished home item. DC rounds also build height quickly, so you get a thick, photo-friendly surface in one sitting. Color banding is the aesthetic cheat here — switch colors every round and you get stripes that hide minor tension wobble. It’s a beginner-friendly way to practice counting without stress. This one fits the 30-minute promise because you’re making a small diameter piece, not a full placemat.
Work a magic ring with yarn color 1, then chain 3 (counts as DC) and DC 10-12 into the ring. Join with a slip stitch, then switch colors each round and increase by working 2 DC in evenly spaced stitches so the coaster stays flat. Keep rounds small until the coaster is about 4 inches across. Finish with one round of SC around the edge for a clean border, then weave in ends tightly.
Pro tipPress it flat under a heavy book for 10 minutes after you weave ends.
AvoidDon’t skip the SC finishing round — it makes the edge look unfinished.
3. Two-Tone Phone Cozy with Button Tab
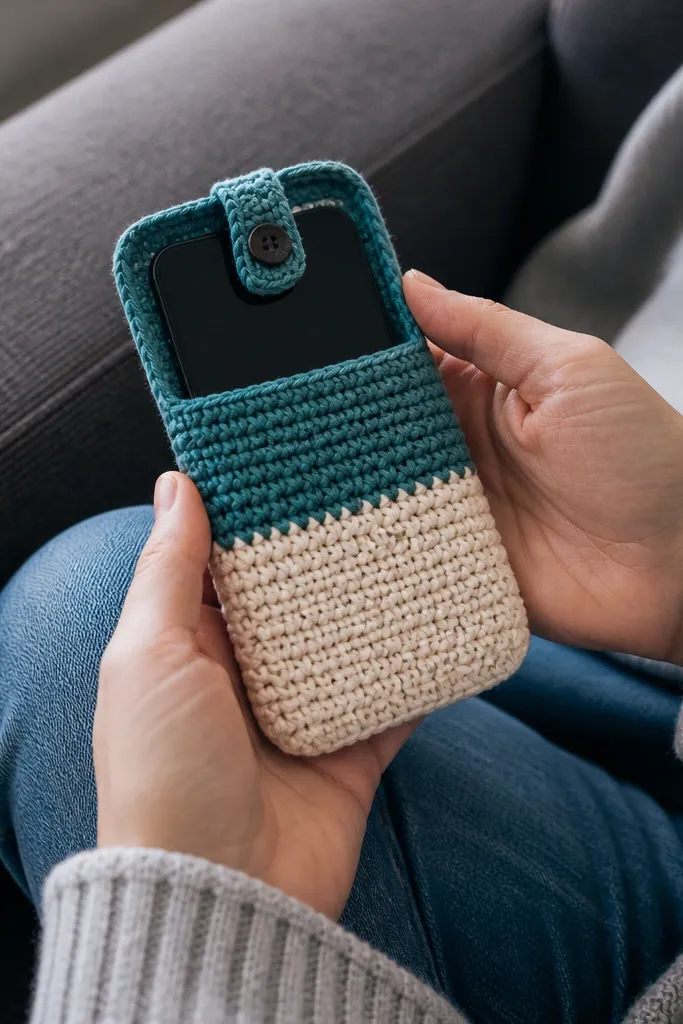
This phone cozy is photogenic because the color blocking makes the shape look intentional. It’s also practical: thick fabric protects your phone from scratches and reduces that “cheap sleeve” look. The build uses simple rows and one small tab for a button, so it stays beginner-friendly. You’ll get a clean fit by measuring your phone width and aiming for slight negative ease. This project delivers the 30-minute payoff because it’s basically one rectangle plus quick edging.
Chain 26-34 depending on your phone width, then work HDC rows until the cozy is about 0.5-1 inch taller than your phone. Fold the rectangle so the short sides meet, then sew the sides closed with a whip stitch leaving the top open. Add an edging around the opening in SC to tighten the look. Make a small tab on one side by working a few SC stitches across, then attach a button on the opposite edge.
Use a larger hook than the label for the cozy — it makes it easier to slip on and off.
Don’t make it too tall; tall cozies take longer to block and look bulky.
4. Solid Granny Stripe Keychain
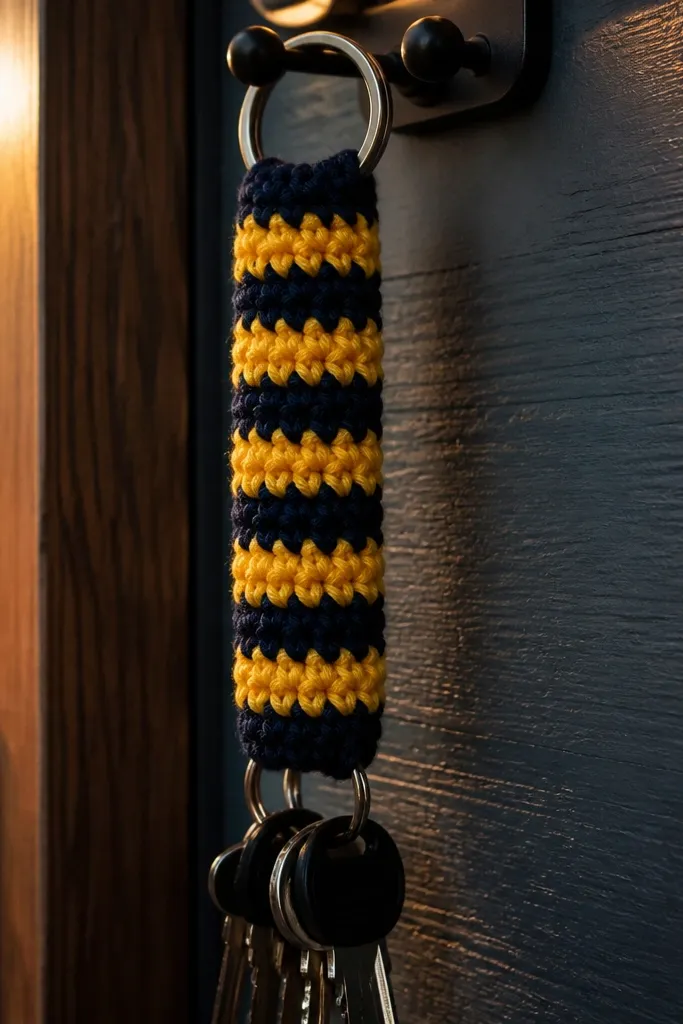
The solid granny stripe is the aesthetic version of “easy.” You get bold visual rhythm from alternating colors, and the stitch pattern is forgiving. It’s a keychain, so you don’t need a large piece — that keeps it within 30 minutes. The fabric is dense enough to look neat, not lacy and floppy. Add a small ring and a short tassel and you’re done. This is a great first “granny-inspired” project because it teaches the repeat without complicated geometry.
Chain 4 and join to form a loop, then work 3 DC into the ring for the first cluster. Alternate colors and repeat a simple 2-row stripe: cluster rows with the same spacing, then a row of SC between clusters if you want a cleaner edge. Keep going until the strip is about 4-5 inches long. Sew the strip into a loop shape, attach a keyring, and add a 1.5-inch tassel through the top.
Pro tipWeave ends as you go by tucking them into the next color change row.
AvoidDon’t use too many color changes — 2-3 stripes look sharp and finish faster.
5. One-Skein Mini Hot Pad with SC Border
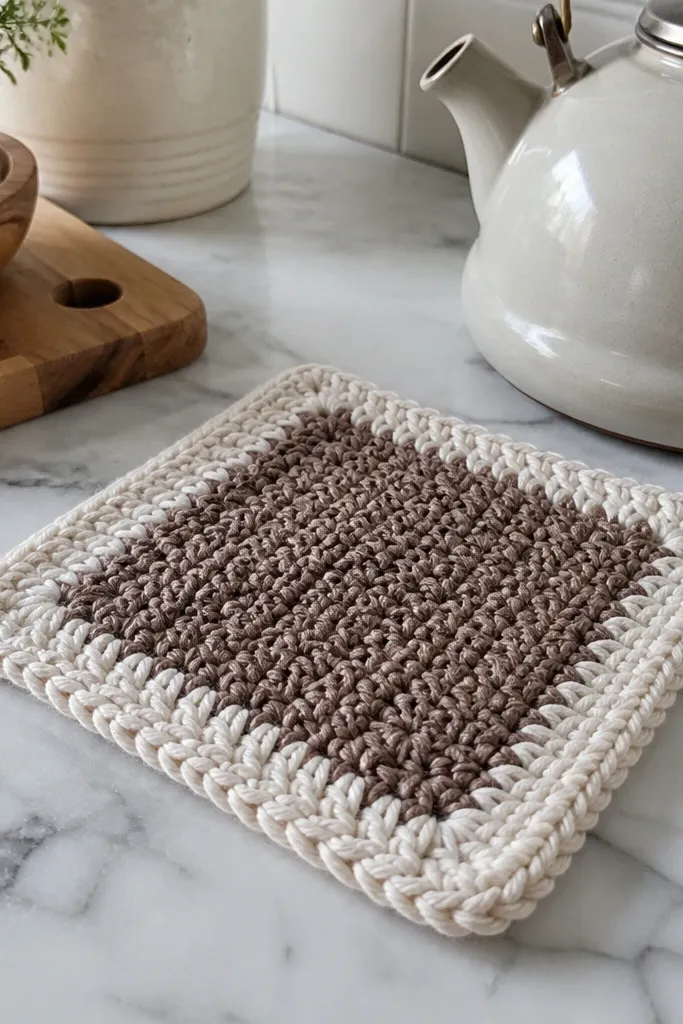
A hot pad looks like something you bought because it’s thick and structured. The trick is using a tighter stitch and a thicker yarn so it holds shape, not a floppy washcloth. This project is also honest about beginner time: you’re making a small square, and the SC border makes it look finished even if your center isn’t perfect. Choose cotton or a cotton blend for better heat resistance and a tidy texture. You’ll finish it fast because there’s no fancy edging beyond the border.
Chain 26-30, then SC back and forth until you have a square about 6-7 inches. Add a simple texture row by switching to HDC for one or two rows if you want contrast. When it reaches the right size, border it with 1 round of SC around the entire square, working 3 SC in each corner. Weave ends and lightly block by pressing with a warm iron through a cloth.
If your square curls, add one extra SC row before the border.
Don’t use acrylic alone for heat — it can soften and look shiny under stress.
6. Textured DC Washcloth with Color Edge
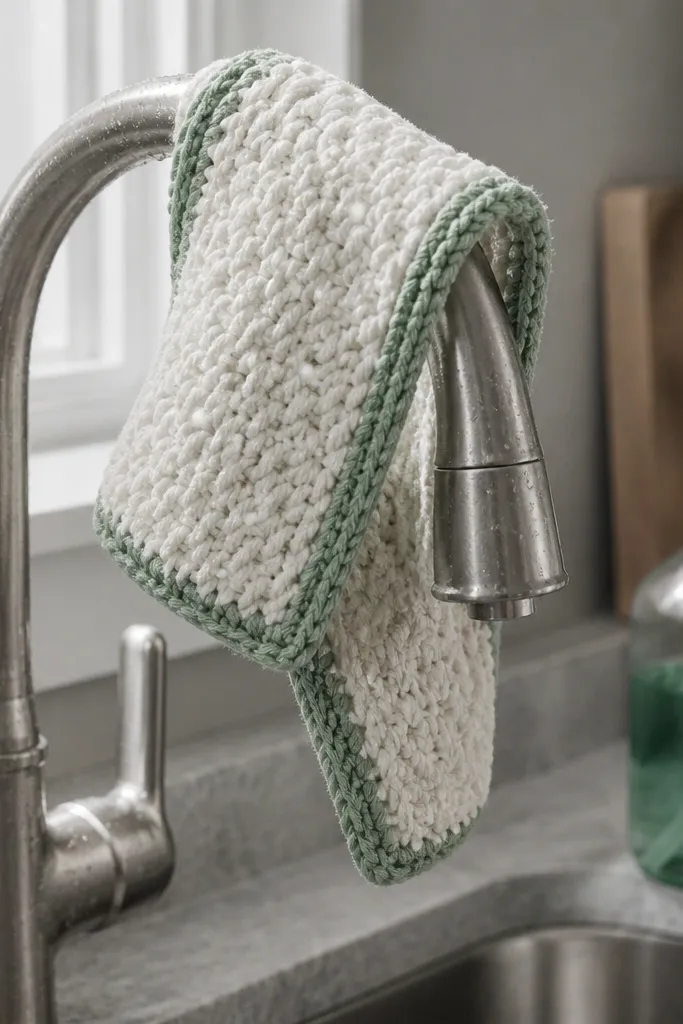
A washcloth is a beginner project that still looks good because the stitch texture shows up quickly. DC creates height fast, and a color edge frames the piece so it reads as intentional, not like practice yarn. It’s also useful, which makes it easier to finish without losing motivation. Choose a cotton yarn that has good structure so the texture doesn’t collapse. You can finish a small one in 30 minutes and still have it look like a real item, not a swatch.
Chain 28-32, then DC across for 6-8 rows. For texture, swap every other row to a simple variation like alternating DC into front loop only for 1-2 rows. Switch to a contrasting color for the last 1-2 rows to create a clean edge band. Finish with an SC border along the perimeter and weave ends.
Keep your turning chain consistent — use chain 3 for DC every row to avoid height drift.
Don’t make it too wide; huge washcloths take longer to reach a satisfying thickness.
7. Mini Wall Hanging with SC Strips and Fringe
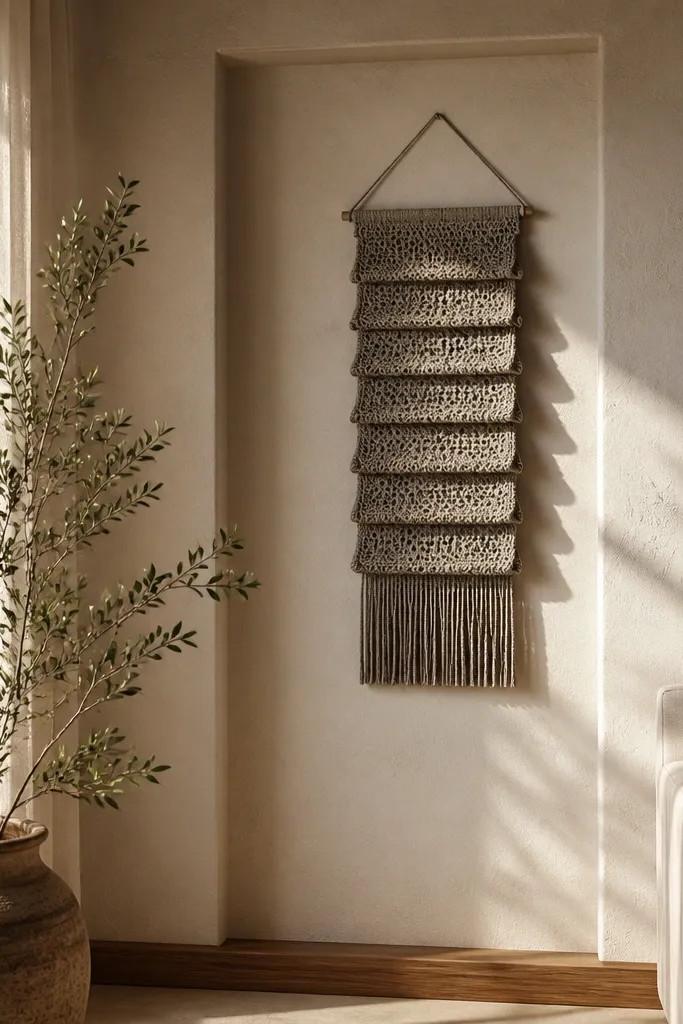
This mini wall hanging looks artsy without needing any complex shaping. The design is basically several short SC strips stacked together, then finished with fringe. It’s photogenic because the layered strips create shadows, so even a simple stitch pattern looks dimensional. Keep colors earthy or monochrome for a clean aesthetic. This works for beginners because you can stop when the strips are the right length — no complicated assembly after that.
Make 3-5 strips of SC, each about 5 inches long and 6-8 stitches wide. Lay strips next to each other and sew them together along one short edge so they form a fan-like rectangle. Add a top loop by attaching a chain 15-20 at the center and securing with SC. Finish with fringe: cut 20-25 strands, fold in half, and pull through the stitches along the bottom edge.
Use yarn in two plies for fringe — it holds shape and doesn’t twist as much.
Don’t pull fringe too tight; it puckers the bottom edge.
8. Quick Crochet Headband with HDC Rib
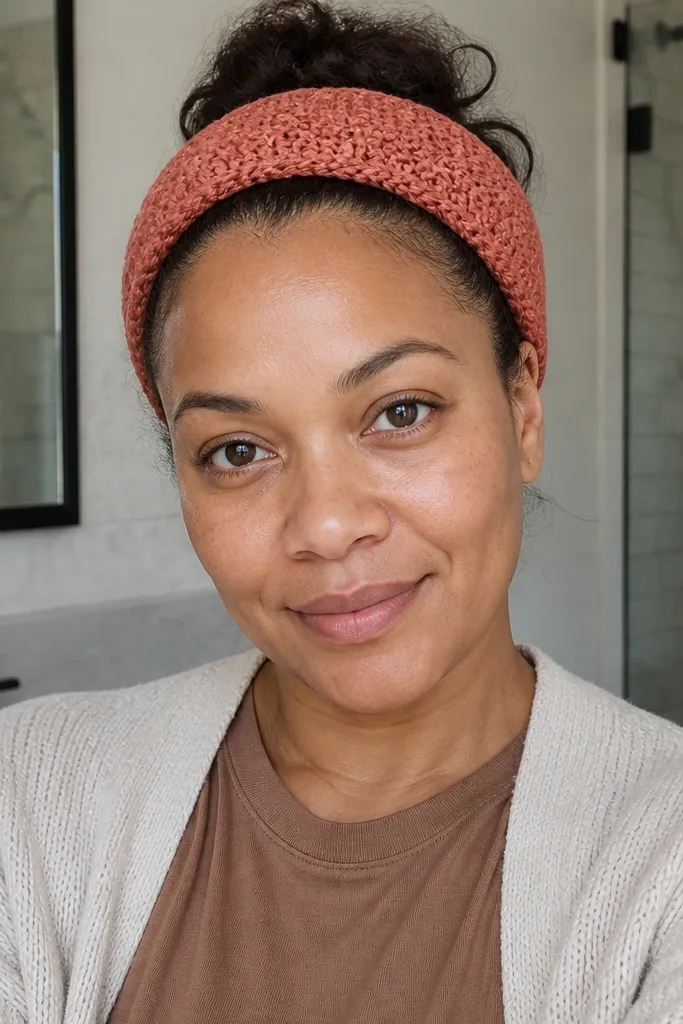
A headband is one of the best 30-minute beginner wins because it’s narrow and stretchy. HDC rib creates a clean look that matches the “knit-like” vibe people want. You also get instant wearability, which keeps beginners moving. Make it in a solid color and it looks polished, not like a practice piece. The ribbing hides small tension differences because the texture is consistent.
Chain a length that fits snugly around your forehead — start with 8-12 chains depending on yarn weight. Work HDC in the back loop only across, then turn and repeat for 20-25 rows until it wraps comfortably. Seam the ends with a mattress stitch so the seam disappears. Add a simple SC border around the top edge if you want a neater finish.
Pro tipTry it on as you go — stop when it covers the forehead without gaps.
AvoidDon’t stretch the headband while seaming; it will twist later.
9. Cup Cozy with V-Stitch Front Panel
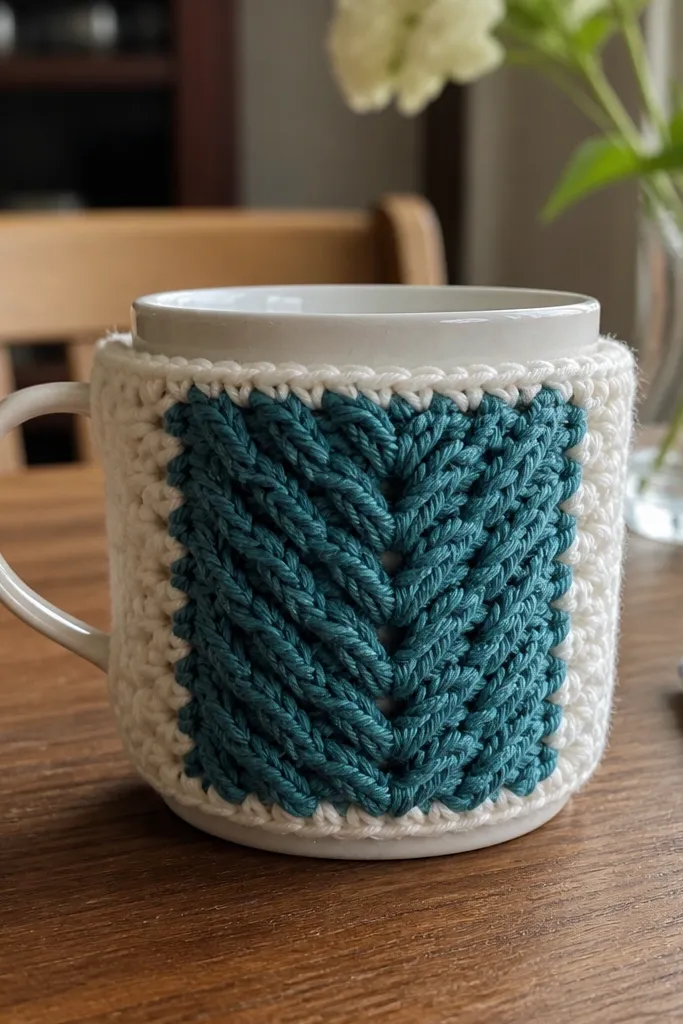
This cozy looks cute because the V-stitch forms a clear texture panel that photographs well. It also fits the 30-minute rule because the piece is small and the pattern repeat is easy. The front panel gives visual interest while the back can be simple SC for speed. Pick a two-color scheme so the V texture pops. It’s a practical project too, and the snug fit keeps it from sliding off your mug.
Chain 28-34, then work SC rows for the back until the cozy height matches your mug. For the front panel, switch to a V-stitch repeat using DC (V stitch) across for 4-6 rows. Fold and sew the sides, then add an SC edging around the opening to tighten. Weave ends and block lightly by steaming from a distance.
Pro tipMake the opening slightly tighter — 1 extra SC row makes it grip the mug better.
AvoidDon’t use a loose stitch pattern on the back; it makes the cozy sag.
10. Mini Market Bag Strap Swatches (No-Handle Version)
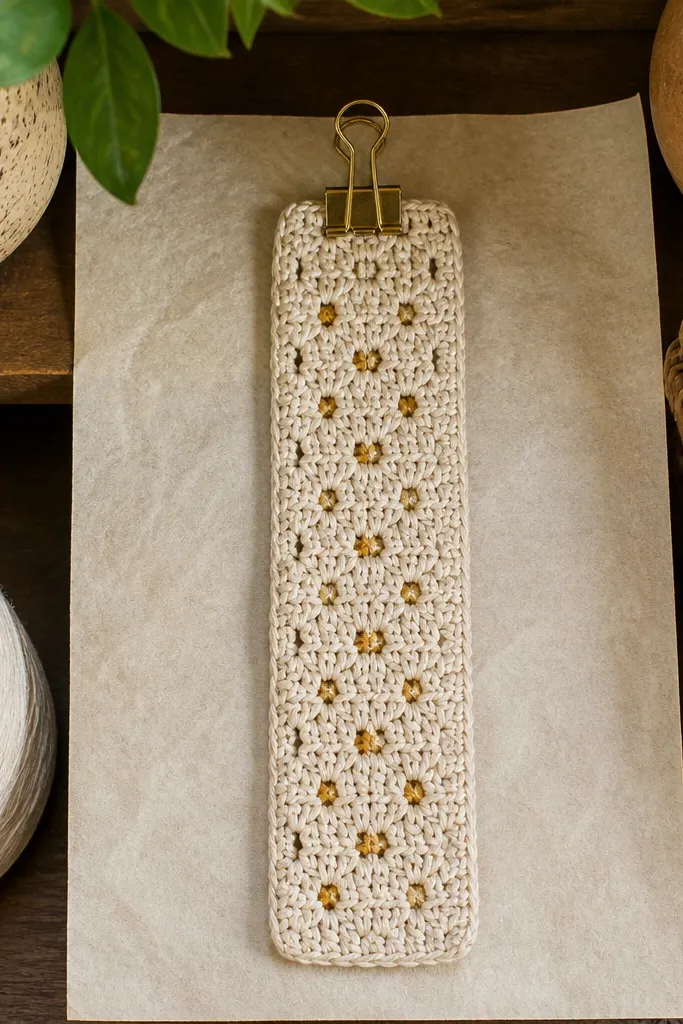
If you want something that looks like real craft decor, make a strap-style swatch that you can use as a bag charm, key strap, or small organizer handle. Openwork patterns photograph beautifully because light passes through the holes. This project stays beginner-friendly by using repeating chains and simple DC placement rather than complex lace. It also gives you a practical skill: tension control in openwork. Finish it quickly because it’s short, and you can stop once it looks balanced.
Chain 24-28, then work a simple openwork pattern: DC in certain chain spaces with chains between. Repeat the pattern rows until the strap is about 10-12 inches long. Add SC edges on both long sides to make it look clean and sturdy. Finish by weaving ends and folding the strap ends in half for quick knot-like ties if you want a charm.
Pro tipCount your chain spaces — openwork looks best when the holes are consistent.
AvoidDon’t skip edge SC; without it the strip curls and looks unfinished.
11. Two-Minute Pom-Pom Garland with Crochet Links
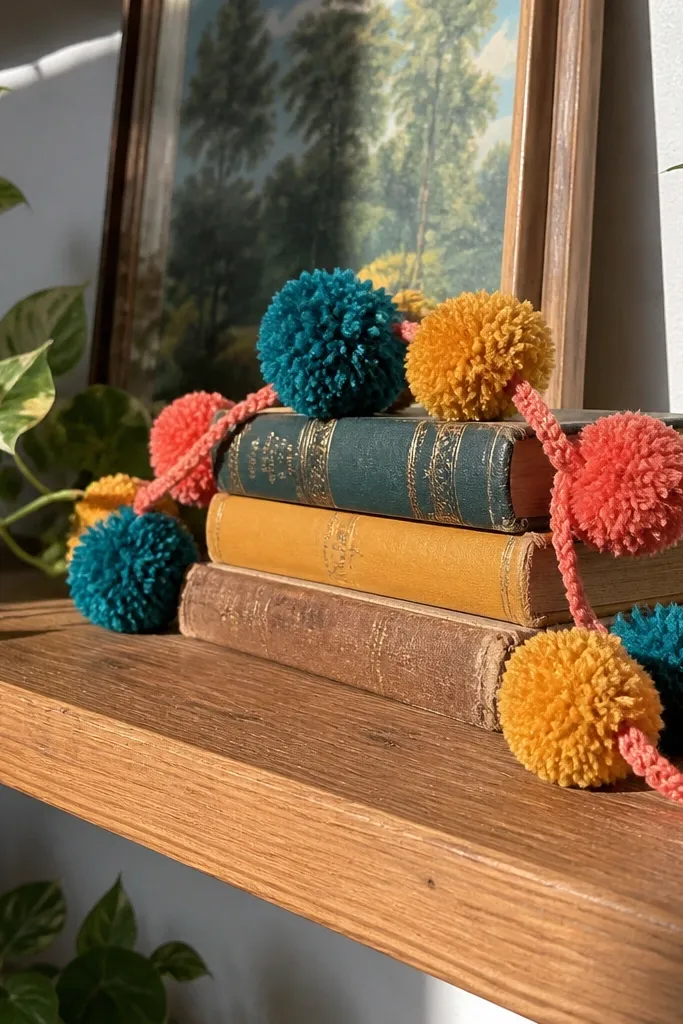
This garland looks playful because it mixes crocheted links with pom poms. The crochet links keep it organized, and the pom poms add instant color pops on a shelf or around a mirror. It’s perfect for beginners because you’re not building a big lace pattern — you’re repeating a tiny unit. The whole thing stays under 30 minutes because each link is quick and the pom poms can be pre-made from yarn scraps. It’s also easy to scale up if you want more length later.
Make a chain long enough for your garland, then create crochet links by working SC into the chain at intervals to form small “nodes.” Attach pre-made pom poms by sewing them onto every other node. Keep link spacing even so the garland hangs with a smooth rhythm. Finish by weaving ends and tying the ends with a short chain loop for hanging.
Use a thick yarn for pom poms so they stay round and don’t flatten.
Don’t attach pom poms to every link; it gets heavy and the garland droops.
12. Sage Leaf Coasters with Simple Appliqué
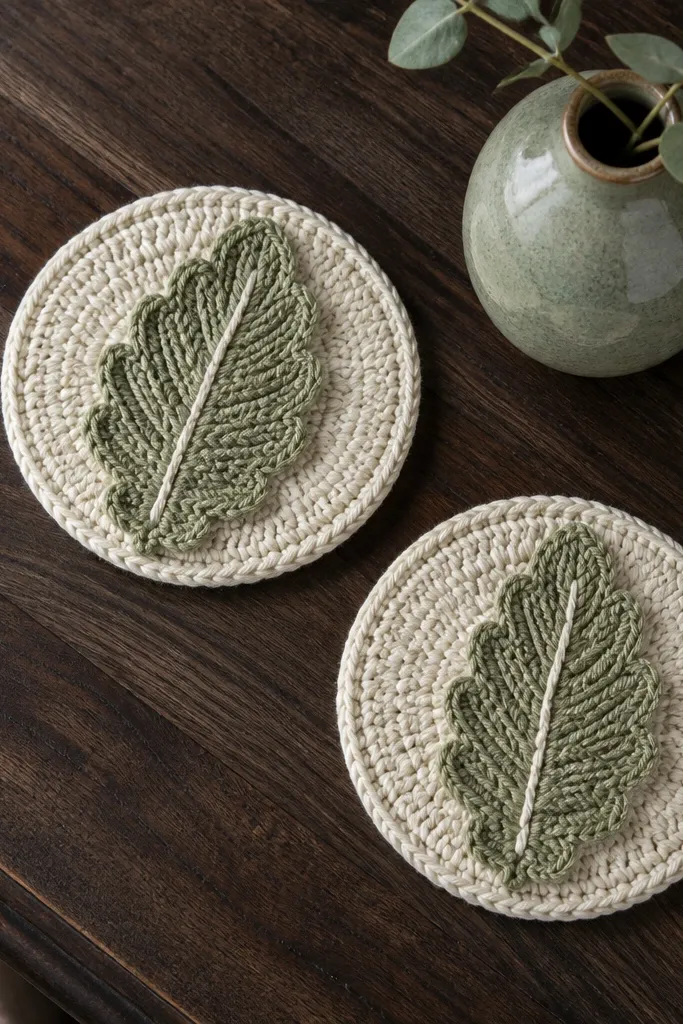
Leaf appliqué makes a coaster look styled, not homemade. You get two looks at once: a simple round base and a leaf on top that catches light and adds dimension. This is a good beginner project because the leaf shape uses basic stitches in short sections, not complicated increases. Use a contrasting color like sage on cream for photos. You finish fast because the base is quick and the appliqué is small.
Crochet a plain round coaster base using DC rounds until it’s about 4 inches wide. For the leaf, start with a short chain and work alternating SC/HDC rows in a leaf-like taper, then stitch it onto the center of the coaster. Add a small vein line with a thin yarn strand and a backstitch or simple stitch through the leaf. Weave all ends on the back of the coaster so the front stays clean.
Stitch the leaf using a whip stitch around the edges so it lays flat.
Don’t overstuff the appliqué — flat looks better and sits cleaner on the coaster.
13. Mini Basket Bowl for Keys with SC Spiral
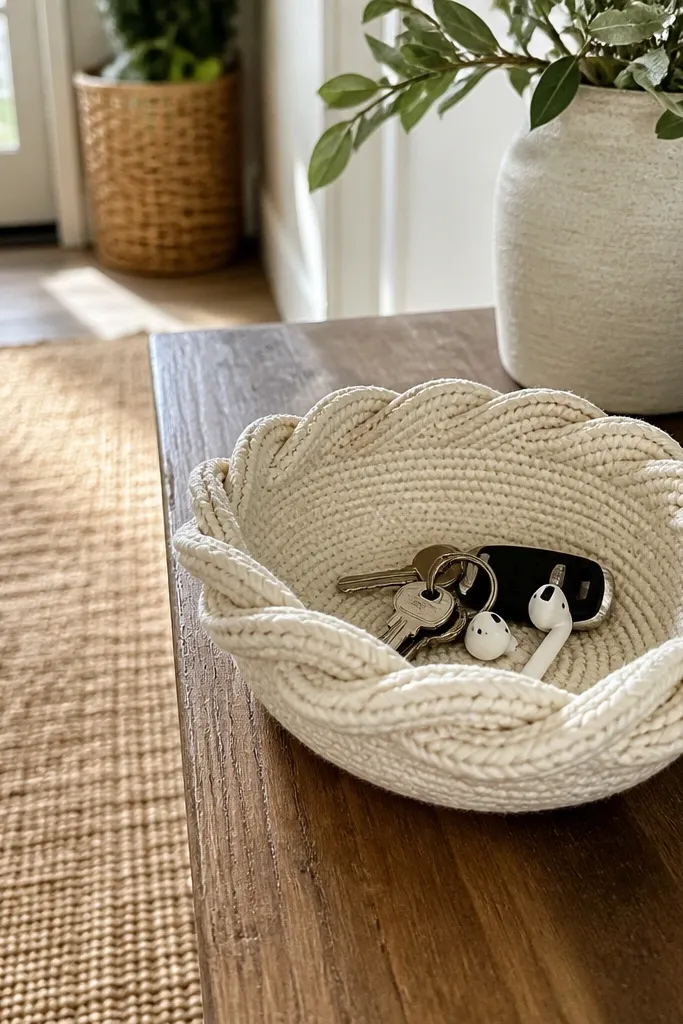
A mini basket bowl gives you instant organization and looks expensive because the spiral edge looks sculpted. SC in a spiral (no joining) creates a smooth, dense fabric that holds items like keys and earbuds. This is beginner-friendly because it’s one continuous repeat with clear markers. It stays within 30 minutes because it’s small — think 4-5 inches wide. The basket shape also hides minor stitch imperfections since the spiral is forgiving.
Start with a magic ring and SC 6-8 into it. Increase evenly each round to reach about 4-5 inches wide, keeping the spiral continuous and using a stitch marker each round. When you reach the width, stop increasing and SC straight for 2-3 more rounds to build height. Finish by tightening the last round slightly, then weave ends inside the bowl.
Use a marker at the start of the round so you don’t lose your place in the spiral.
Don’t use a slippery yarn — the spiral can loosen and the bowl looks uneven.
14. Chunky Scarf Cuff in One Rectangle
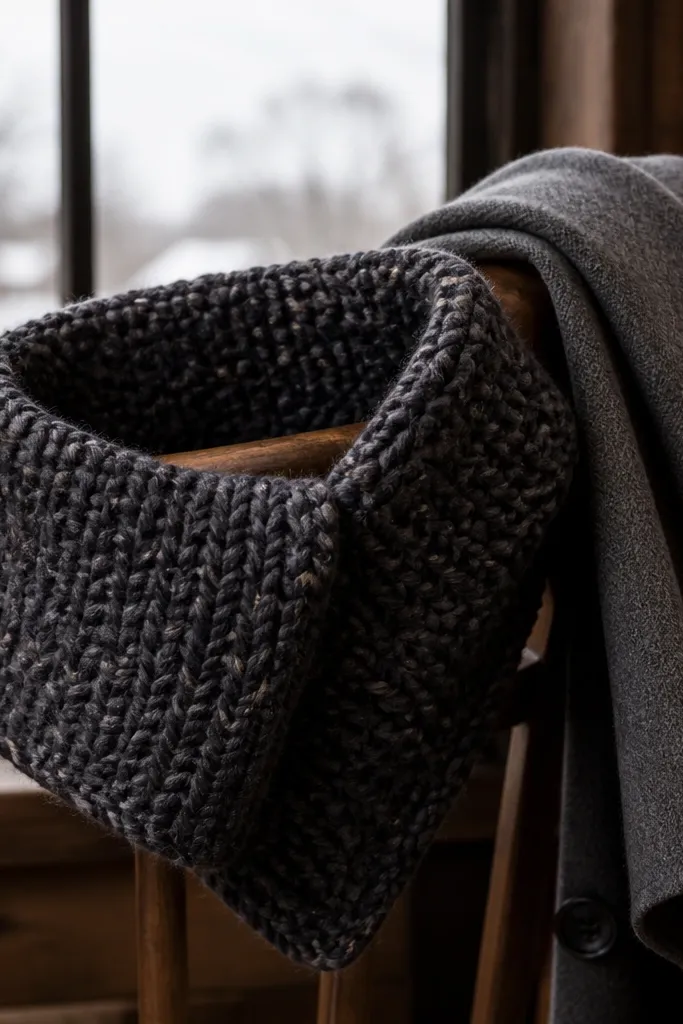
This scarf cuff looks like a designer accessory because it’s thick, wide, and wraps cleanly. It’s also a beginner project that stays fast because it’s one rectangle with a quick seam. Use chunky yarn and HDC so the fabric builds in big, satisfying steps. The cuff shape hides uneven edges because the seam is minimal and the width gives visual balance. You can finish it in about 30 minutes if you keep the rectangle size moderate.
Chain 32-44 depending on your yarn thickness and desired wrap width. Work HDC rows until the rectangle is about 8-10 inches long. Fold to create a tube, then sew the short ends together with mattress stitch to keep the seam neat. Add one row of SC around the top and bottom edges for a clean frame.
Pro tipChoose a yarn with some loft so the cuff looks plush even with simple stitches.
AvoidDon’t make it too long — long cuffs take longer to reach thickness and look bulky.
15. Triangle Shawllet with DC and Chain Spaces
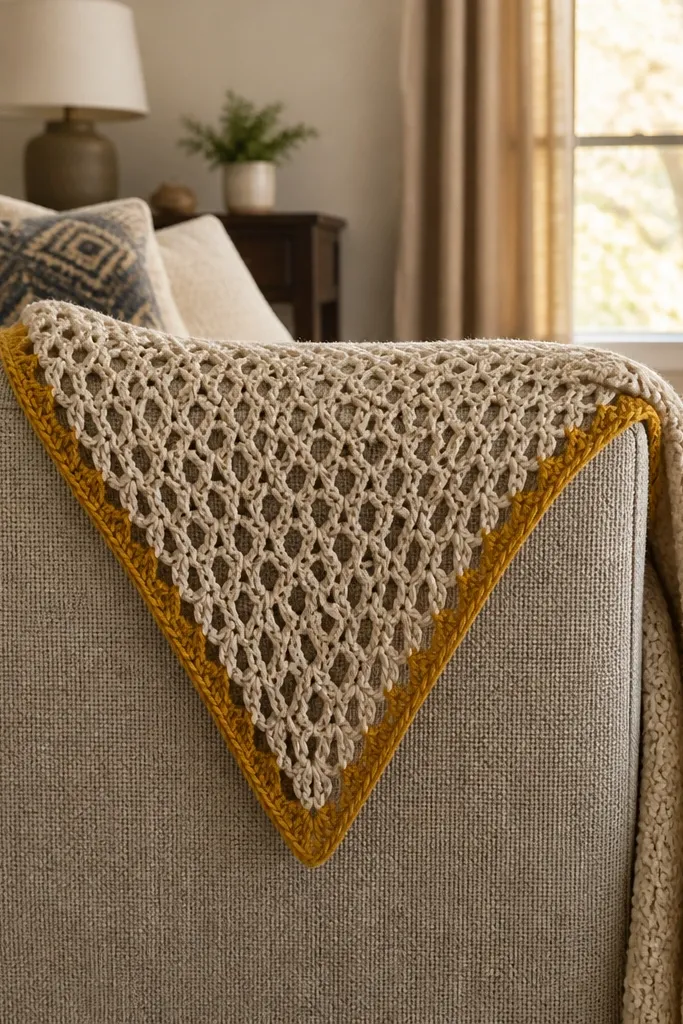
A tiny triangle shawllet looks instantly put-together because it frames the neck and shoulders. The design uses DC with chain spaces so it grows quickly and has an airy look that photos well. Beginners like it because the increases are predictable — you’re building one triangle. Keep it small enough for 30 minutes, and it becomes a wearable accessory instead of a long project you abandon. Use a soft color like dusty rose or cream for a clean aesthetic.
Start with a chain 4 and build a small triangle by working DC and adding chain spaces at regular points. Increase at the triangle corners each row by adding extra DC at the ends. Continue until it’s about 10-12 inches tall and 8-10 inches wide at the base. Border it with one round of SC or a simple picot edge if you want a decorative finish.
Pro tipBlock it with steam and pins — triangle edges look much straighter after blocking.
AvoidDon’t use super fine yarn; triangle pieces take longer to size up.
16. Heart Coaster with SC Half-Heart Shape
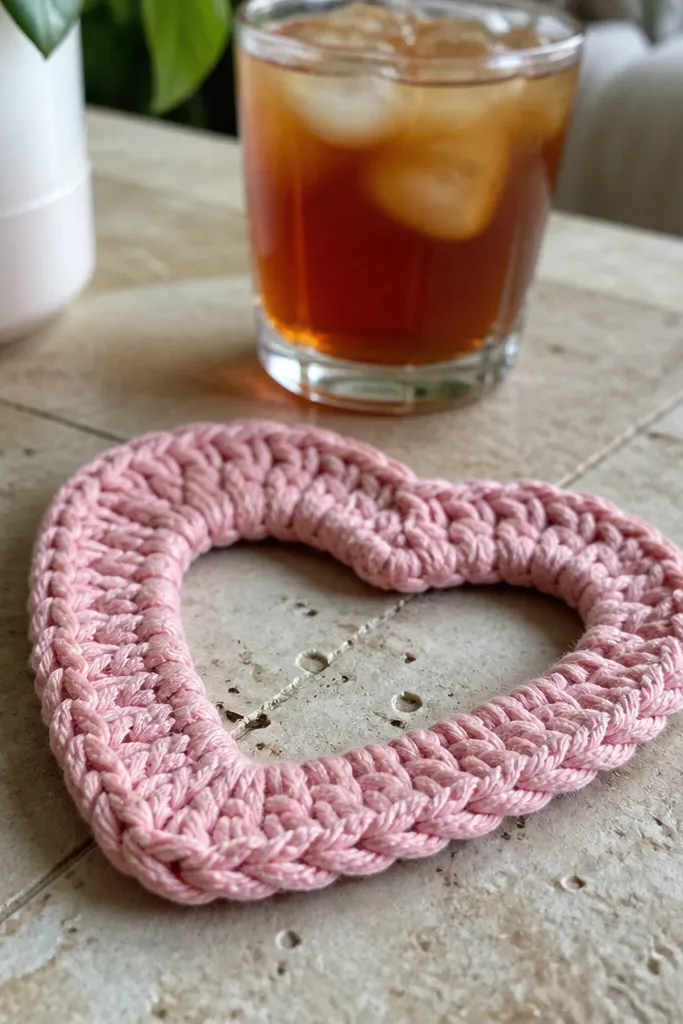
Heart coasters are photogenic because the shape is instantly clear and cute without being childish. This one uses SC so the fabric is firm and the edges stay crisp. You also get a satisfying finish because the heart outline gives you a clear stopping point. It’s a great beginner project because you can work it as two halves that meet at the bottom point. Keep it small and you’re done within the 30-minute promise.
Chain 18-20 and work SC across for the first half, then increase at the outer edge each row to form the curve. Repeat for the second half by mirroring your stitches, then join the halves at the bottom point with SC across the meeting stitches. Add a border around the heart using SC for a clean outline. Weave ends and lightly block so the heart stays symmetrical.
Pro tipCount your rows for both halves — matching row counts makes the heart look even.
AvoidDon’t stretch the heart while joining — it will distort the curves.
17. Boho Bookmark with Shell Stitches Border
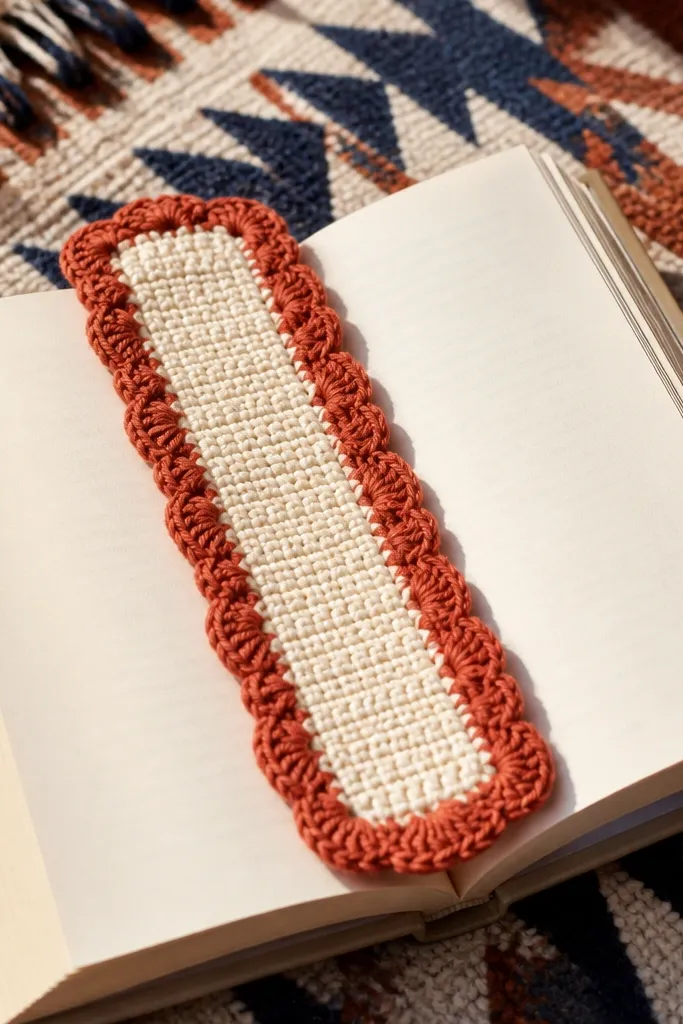
Shell borders look “boho” fast because the stitch pattern creates little waves of texture. The center stays simple with SC or HDC, so you’re not juggling complicated repeats across the whole piece. This bookmark is also practical and easy to photograph — it’s flat and has high-contrast edges. It fits 30 minutes because you only need a short shell section for impact. Pick two colors and keep the center plain for a clean look.
Chain 16-18 and work SC rows until the bookmark is about 6 inches long. Switch to a second color and work a shell border along one long edge, using a DC cluster sequence repeated across. Add the same shell border on the other long edge for symmetry. Finish with a final SC row around the top and bottom edges, then weave ends.
Use a larger hook for shells only — it makes the shell shape more defined.
Don’t overdo shell rows; one border band looks better and finishes faster.
18. Mini Plant Pot Cover with Vertical Texture Ridges
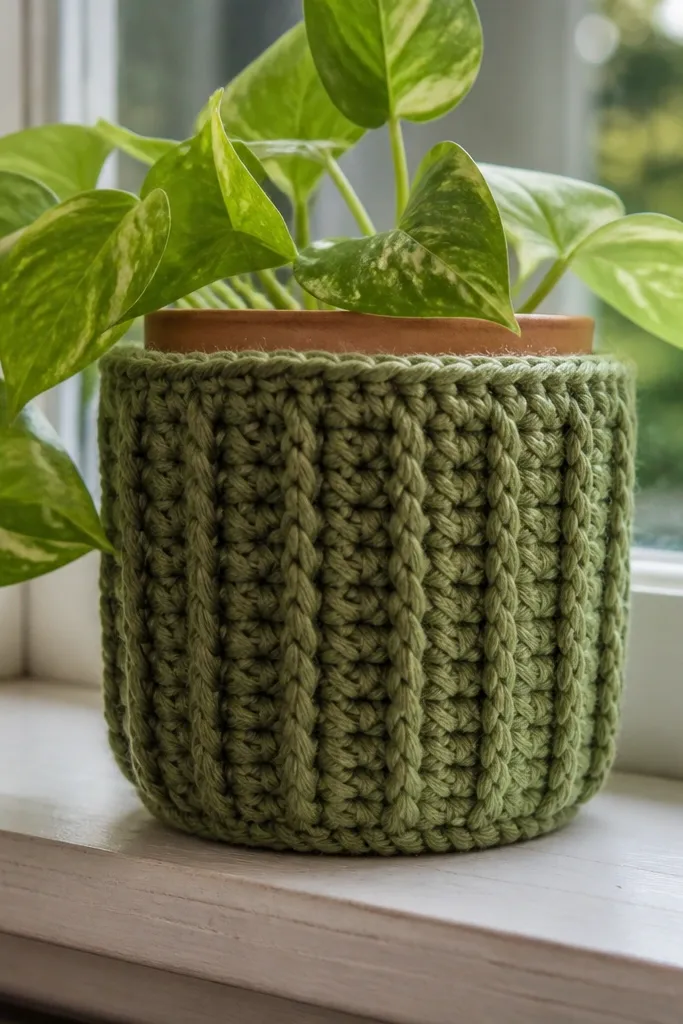
A pot cover is one of the most aesthetic beginner projects because the vertical ridges look like knit and hide minor unevenness. It also makes a cheap pot look curated. Use SC or HDC as a base and add simple ridge texture with back loop-only or front loop-only rows. Keep the size small so it’s truly 30 minutes. This project is a good choice if you want something that looks great even when you don’t get perfect tension.
Measure your pot circumference and chain a length that matches it snugly. Work HDC in rows or in a short tube method, adding ridge rows by switching between back-loop-only and front-loop-only. Continue until the cover height reaches the pot base plus a little extra for top edge. Finish with an SC border around the top opening and weave ends inside.
If your cover is slightly loose, add one more ridge row — it tightens visually.
Don’t use very open lacy stitches; pot covers need structure.
19. Rainbow Key Cap Cozy with Slip-Stitch Finish
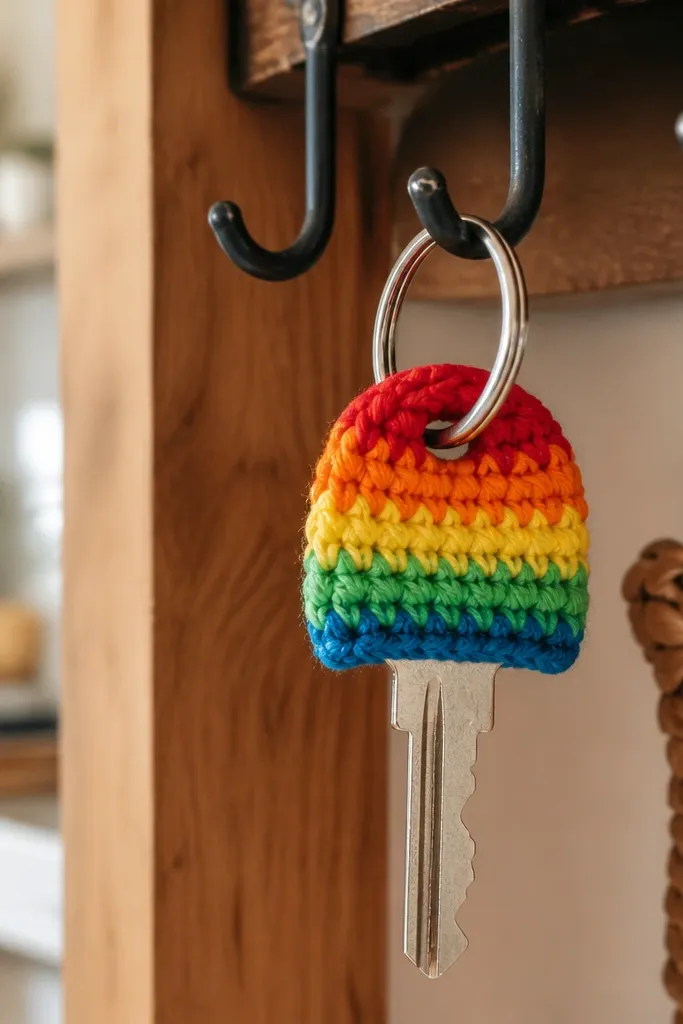
Key cozies are small, fast, and photo-friendly because they’re clearly functional and colorful. The rainbow stripes make the stitch work look intentional even if you’re still learning tension. This project uses simple shaping: a rectangle that wraps around the key head with a snug seam. A slip-stitch edge keeps the opening from curling. It’s a 30-minute project because the size is tiny and finishing is minimal.
Chain enough for a rectangle that wraps around your key head snugly, then work SC rows until it covers the key head height. Fold and stitch the sides, leaving one end open if you want the key ring to attach. Add a strip of SC around the opening and close with a slip stitch to keep it tight. Weave ends and trim any long tails.
Use a yarn color sequence that starts and ends with the same color for a cleaner look.
Don’t make the rectangle too wide; extra width makes the cozy look baggy.
20. Mini Scrunchie Cover with DC Loops
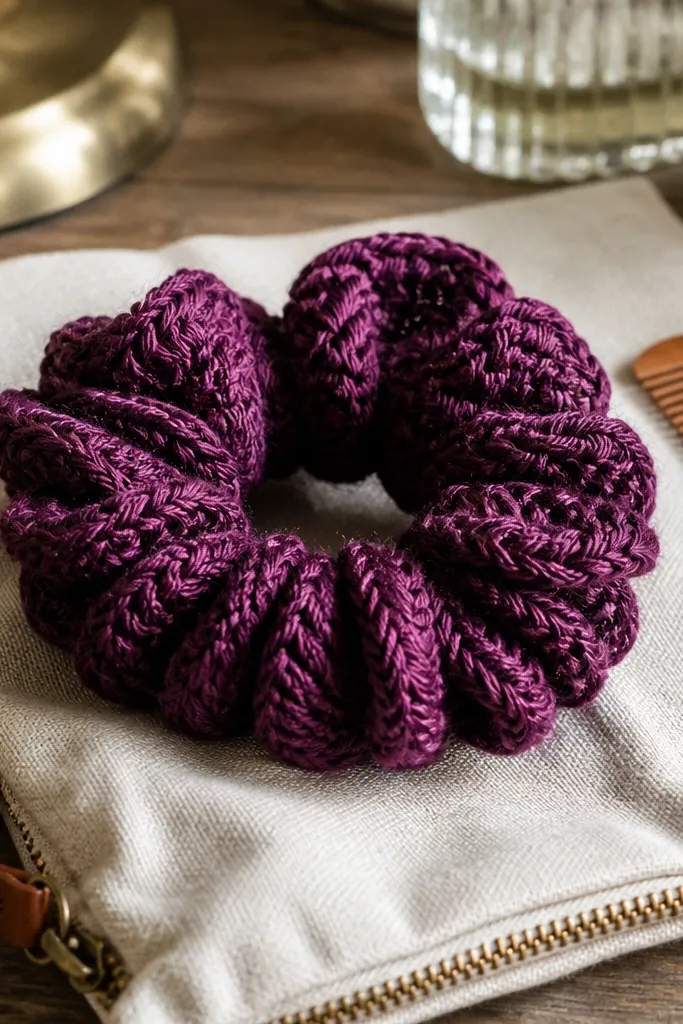
This scrunchie cover turns a basic hair tie into a cute accessory. The looped DC texture looks dimensional and catches light, so it looks nicer than plain SC. Beginners like it because you’re essentially covering a small band with repeated stitches. It also finishes quickly because the circumference is small. Choose a soft, slightly stretchy yarn and keep the stitches firm so it doesn’t collapse.
Chain a length that wraps around your scrunchie band snugly, then work DC across in rows until you can seam it into a tube. Stitch the tube to fit the scrunchie and leave enough opening to slide it on. Add a top trim row of SC to close the edge neatly. Weave ends inside so the outside stays smooth.
If your scrunchie cover is too stiff, switch to HDC for the main band.
Don’t crochet too loosely; a loose cover slips off and looks messy.
21. Cozy Ear Warmer Headband with FPDC Accent Row
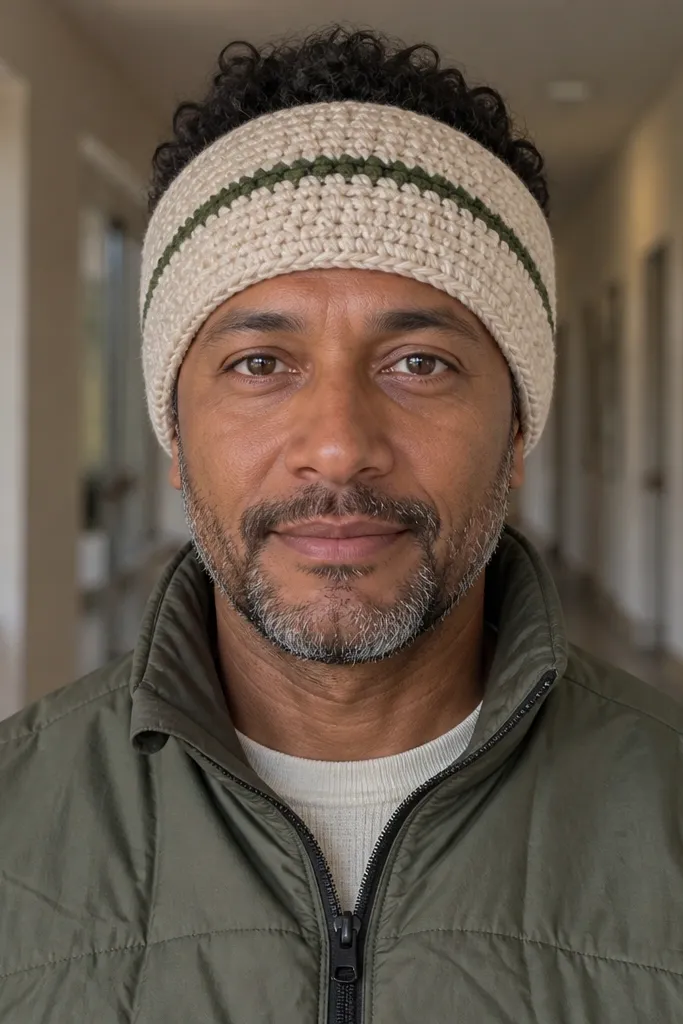
This ear warmer looks special because it has one raised accent row using front post double crochet (FPDC). Everything else stays simple so you get the beginner advantage without the complexity of full textured patterns. It also photographs well because the raised row makes a shadow line. Keep it narrow and short so it finishes fast. This is a great choice if you want something wearable that still fits the 30-minute promise.
Chain 10-14 and work HDC rows until it reaches the length from ear to ear over your head. Switch to FPDC for one row: work DC around posts so the row appears raised, then return to HDC for the final rows. Seam the ends with mattress stitch for a flat join. Add a thin SC edging along the top and bottom edges to clean up the shape.
Pro tipUse a slightly smaller hook for the FPDC row so the accent stays crisp.
AvoidDon’t do FPDC on every row; it takes longer and looks cluttered on a narrow band.
22. Simple Crochet Rose Pin for Bags
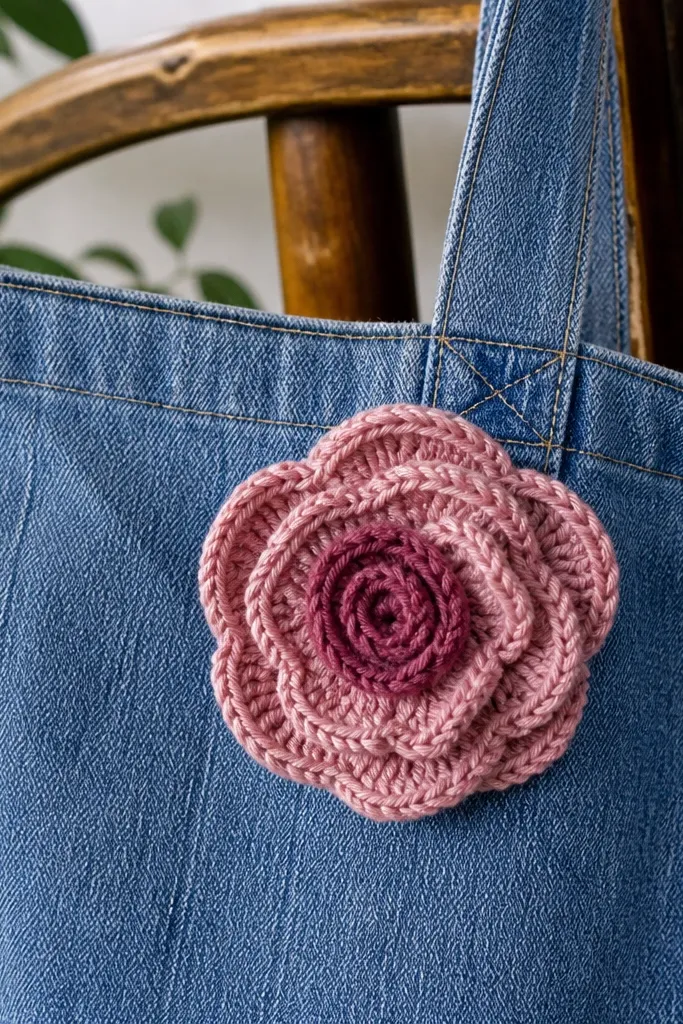
A crochet rose pin makes any tote or jacket look styled. The layered petals create a clear shape that reads well in photos, even when the petals are made from simple repeats. This is beginner-friendly if you keep the rose small and focus on one petal layer sequence. You get a finished accessory in 30 minutes because you’re not making a whole bouquet. Use a soft color combo like cream petals with blush center.
Start with a magic ring and work a tight cluster for the center. Build petals by working DC shells around the center, repeating a shell sequence 4-6 times. Keep the petals short so the rose stays compact. Finish with a few SC around the base to shape the bottom, then attach a pin back with a few secure stitches.
Pro tipUse a stiff yarn or lightly starch after finishing so petals hold their curve.
AvoidDon’t make the rose too large; bigger roses take longer to layer and look flatter.
23. Striped Drawstring Pouch Topper
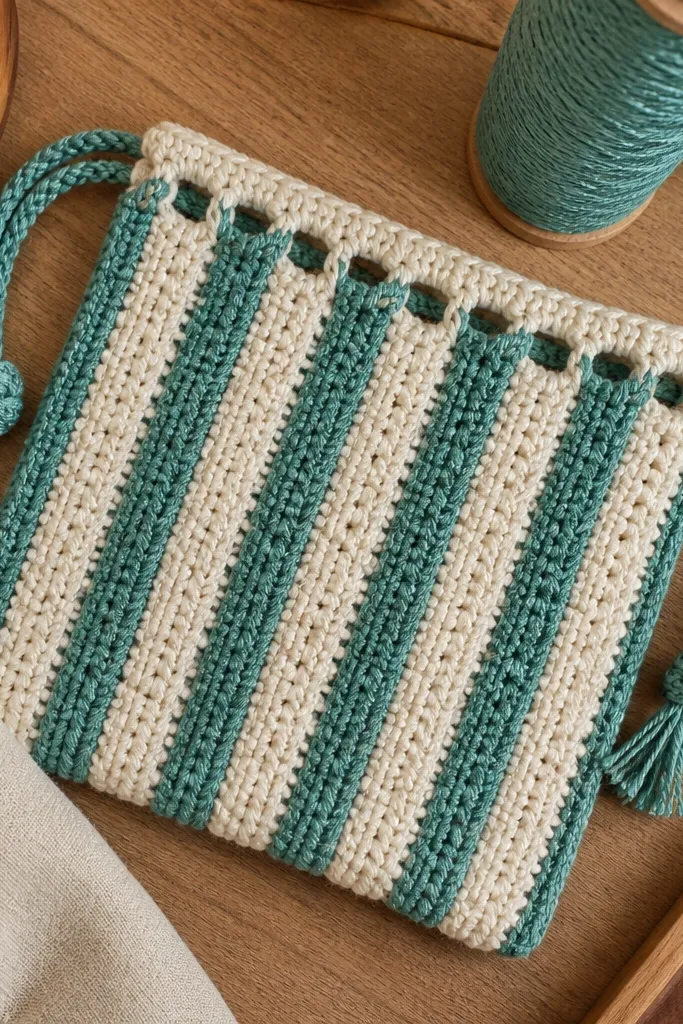
This is a practical “decorative utility” piece: it’s the top section of a drawstring pouch that looks good even by itself. The striped look hides imperfect tension, and the open channel makes it functional fast. Beginners like it because you’re working a rectangle with a simple DC-and-chain spacing pattern. It’s photogenic because it has a neat rim and visible channel lines. You can complete the topper in 30 minutes and use it on gift bags, organizers, or small sachets.
Chain enough stitches to wrap around your intended pouch opening, then work HDC rows for 2-3 inches. Switch to a channel row by working DC in stitches and chaining 1-2 between groups, then repeat one more row to reinforce the channel. Fold the rectangle into a ring and seam the sides. Add a final SC round to lock the rim and weave ends.
Use cotton for the channel — it slides cleaner with drawstrings than acrylic.
Don’t skip the rim SC round; it makes the opening edge look wavy.
24. Mini Wall Shelf Plant Hanger in Single Strap
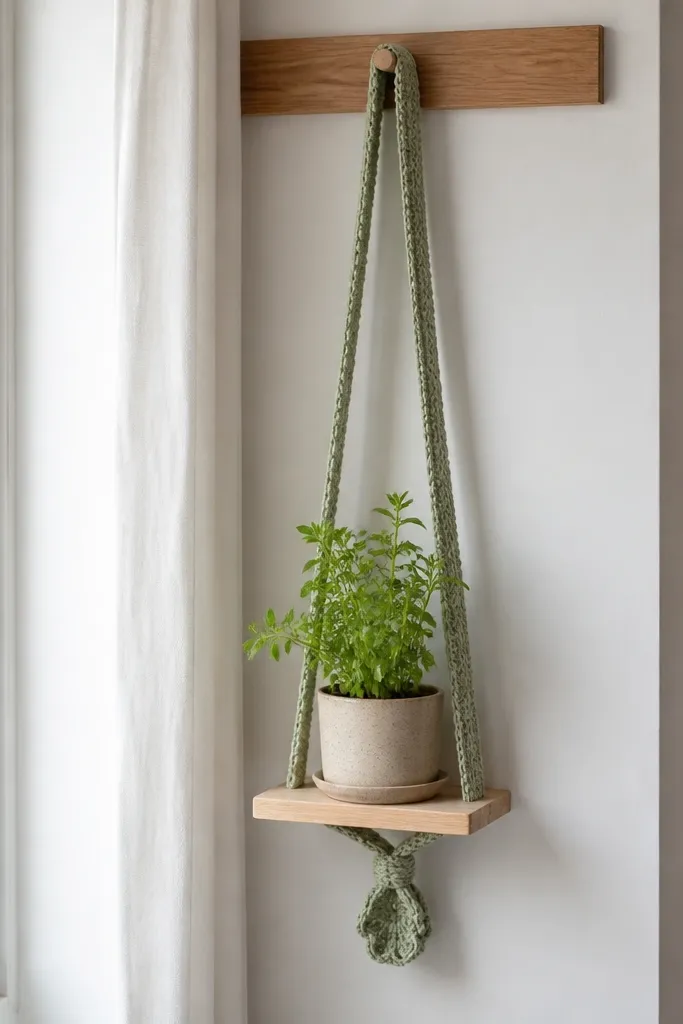
A single-strap plant hanger is visually delicate and still beginner-friendly. The look comes from a clean strap with a small decorative knot or picot edge. It’s photogenic because it hangs straight and creates vertical lines in a room. This one fits 30 minutes because you’re making a short strap, not a full macramé-style project. Use a soft, smooth yarn so the strap drapes well in photos.
Chain 120-160 depending on desired length, then work a simple repeat like SC back and forth or a basic HDC row pattern. Create a decorative top by adding 1-2 rows of picots: chain 3, slip stitch back into the base, repeat across. At the bottom, add a short loop by working SC around the last section to form a small ring. Weave ends and check length by holding it against a shelf.
Pro tipBlock by laying it flat on a towel and pinning the top loop — it hangs straighter.
AvoidDon’t use a very fluffy yarn; it hides the strap shape and looks fuzzy.
25. Geo Coaster Set in Two Colors (Make One First)
Geometric coasters look modern because the two-tone blocks create high contrast. You only need to make one coaster in the 30-minute window, then repeat the same build for a set. The pattern uses simple color changes and a firm stitch base so it doesn’t curl. It’s beginner-friendly because you’re not doing complex shaping — just switching colors at set rounds. Choose black and cream or navy and off-white for the cleanest look.
Start with a magic ring and work DC rounds until you reach about 4 inches diameter, using a stitch marker to keep round count. Switch colors at specific rounds to create block sections: for example, 1 round black, 1 round cream, repeat until you get 6-8 total rounds. Finish with an SC border in the darker color for crisp edges. Weave ends on the back and press flat for 10 minutes.
Pro tipPlan your color blocks with round numbers on paper before you start.
AvoidDon’t blend too many colors — 2 tones look sharp and hide tension differences.
26. Butterfly Appliqué Patch for Tote
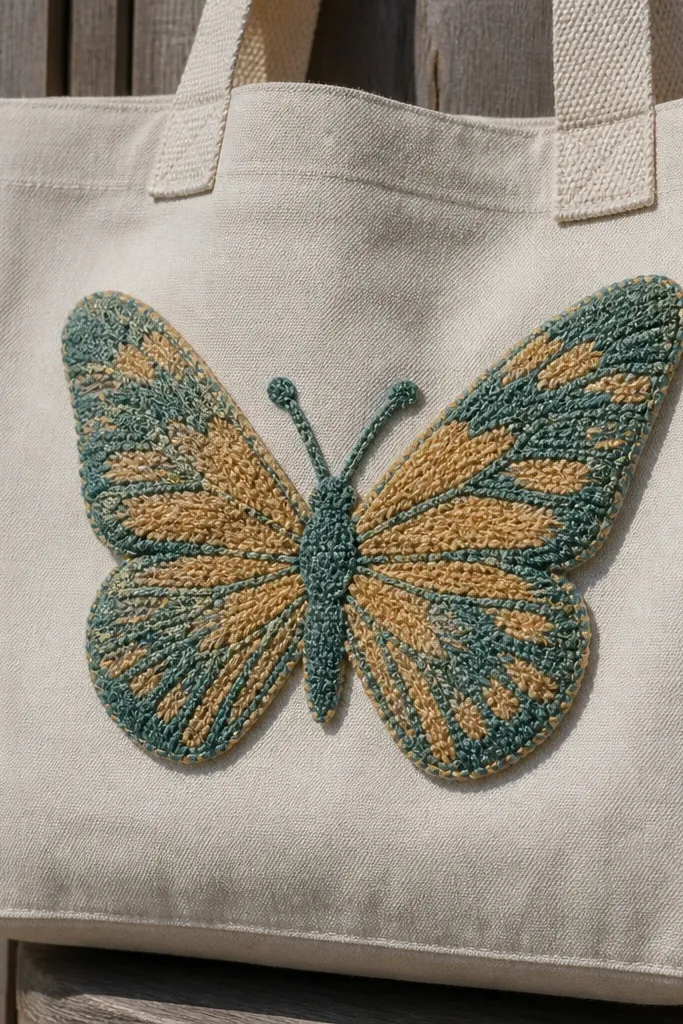
A butterfly appliqué is a photogenic upgrade that still stays beginner-simple. The wings are made from short stitch clusters that look detailed without needing advanced shaping. It’s perfect for 30 minutes because you can keep it small and stitch it onto a bag, pillow cover, or scarf. The look comes from color contrast and the wing outline — keep those clean and it reads as a butterfly immediately. This project also teaches a useful skill: appliqué construction without bulk.
Create a small body first using a short chain and SC back and forth, then stitch it in the center. Build wings by working two symmetrical wing shapes: a short cluster section for the top wing and a slightly wider section for the bottom wing. Use color A for one wing and color B for the other for contrast. Sew the appliqué onto your base and add 2-3 tiny stitch lines across the wings for definition.
Use a tapestry needle and sew with the yarn tail so the appliqué edges don’t show knots.
Don’t overstuff the body; it should lie flat on fabric.
27. Mini Market Bag Coaster in Open DC Pattern
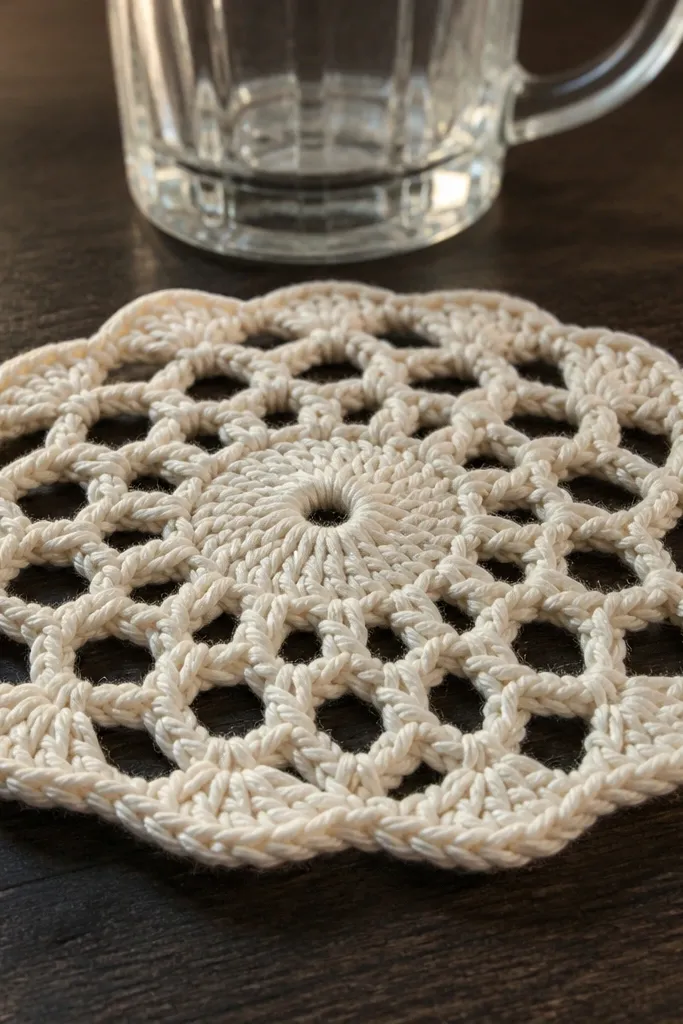
This open DC coaster looks like lace but it’s still fast because it’s a small circle. The open pattern creates a delicate, airy look that photographs beautifully against a dark table. It’s beginner-friendly if you keep it simple: one repeat around, no complicated increases beyond early rounds. Use cotton or cotton-linen blend so it holds its shape. You finish quickly because the diameter is small and you only need a few rounds.
Make a magic ring and DC into it, then join and work 2-3 rounds increasing evenly to reach about 3.5-4 inches. Use a repeat that alternates DC and chain spaces so the holes form a consistent ring. Add one SC border round around the edge to keep it from curling. Weave ends and lightly block to open the lace.
Pro tipBlock lace coasters — the pattern pops more when flat.
AvoidDon’t skip the edge border; open circles curl without it.
28. Fast Crochet Scrubbie with Loop Stitch
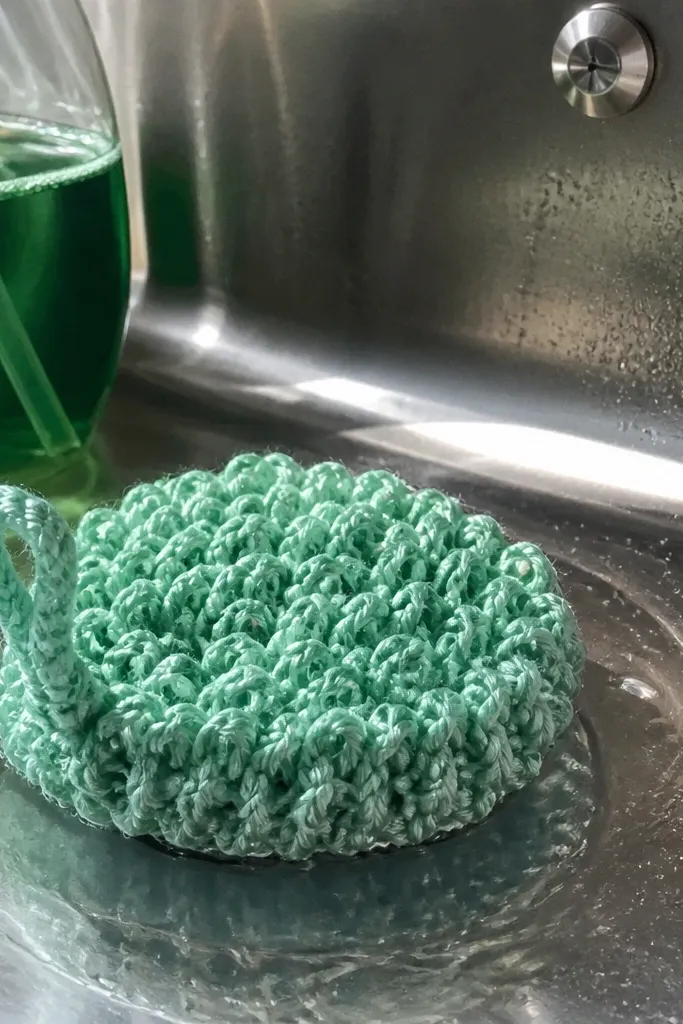
A scrubbie is a beginner project that looks good because the texture is the whole point. Loop stitch creates that bumpy surface that catches light and looks satisfying in photos. It’s also quick because scrubbies are small and you don’t need perfect shaping. Use cotton or a scrubby yarn blend for durability. This fits the 30-minute promise because you’re making a compact square or circle and then finishing edges.
Make a small base chain and work into it with SC for a few rows to create a foundation. Switch to a loop stitch method where you create extra loops at regular intervals across each row. Continue until you have a square about 5 inches wide. Border with SC all around and weave ends on the back where it won’t scratch.
If loops look uneven, slow down and keep your loop height consistent.
Don’t use yarn that sheds fibers; it makes scrubbies look messy and wear out faster.
29. Mini Beanie for Doll Head in SC Rounds
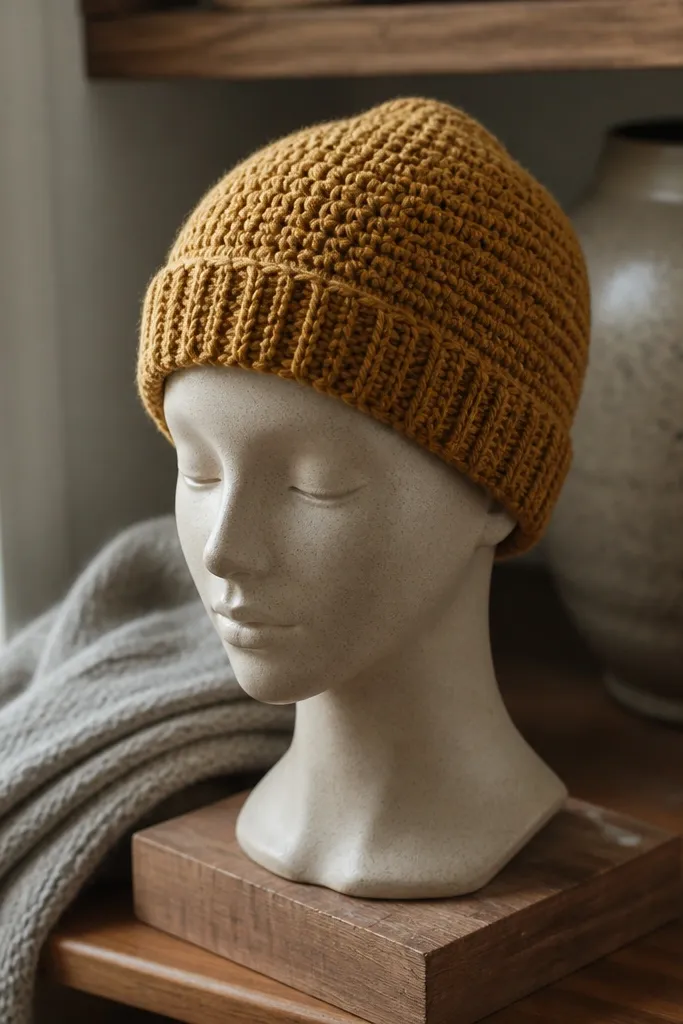
A tiny beanie is a surprisingly good aesthetic project because it looks like a real garment, just scaled down. SC rounds create a firm fabric, and a simple rib cuff makes it look polished. This is beginner-friendly if you keep it small and follow a clear round increase plan. It’s also a great way to practice reading your own tension because small hats expose unevenness quickly. Finish in 30 minutes by using a thick yarn and stopping at doll size.
Start with a magic ring and SC 6-8 stitches. Increase evenly each round until the opening matches the doll head circumference, then stop increasing and work straight rounds until it covers the head. Create a rib cuff by working back loop-only SC for 1-2 rounds, then fold the cuff down. Weave ends and secure any loose spots with a couple of stitches.
Pro tipUse a stitch marker every round so you don’t accidentally over-increase.
AvoidDon’t make the crown too wide — it makes the beanie look like a bowl.
30. Simple Crochet Scrunchie Bow Clip
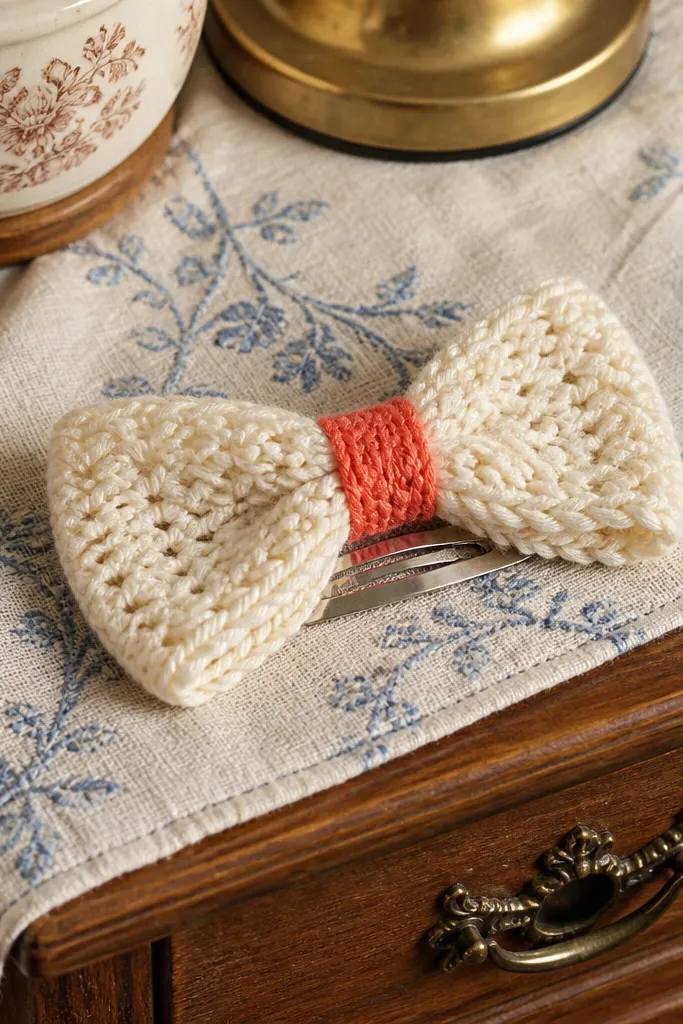
A crochet bow clip looks cute and intentional because bows have a clear silhouette. This one uses a flat bow shape stitched in the center and attached to a hair clip or elastic. Beginners can do it quickly because it’s basically two identical bow pieces plus a center tie. Pick contrasting yarn for the center so it pops in photos. This project is photogenic on bags too, so you get more use out of the same build.
Chain 10-14 and work SC/HDC rows until the bow piece is about 2 inches long. Make two identical pieces, then sew them together along the sides leaving a small opening at the top. Pull yarn through the center to cinch and shape the bow, then secure with tight stitches. Attach to a clip or elastic with a few strong stitches through the back of the bow.
Pro tipUse a thin yarn needle for the cinch so you don’t snag the outer stitches.
AvoidDon’t skip cinching — without it the bow looks like a flat rectangle.



