
1. Neon Candy Heart Keychain with Clean Border
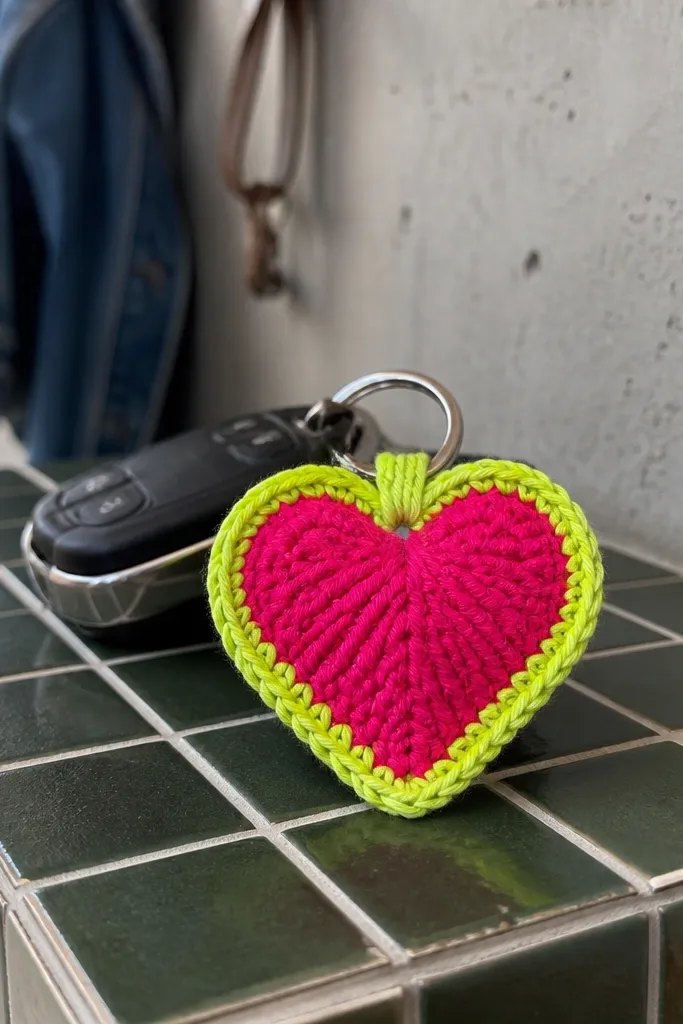
This one looks good because it has a bold outline and high-contrast color blocks, so the heart reads instantly in photos. Use two yarn colors — one for the heart and one for a thin border — to make the shape pop instead of blending into the background. The stitches stay flat with single crochet worked in a tight gauge, and the border gives you that “sticker” look. It’s a fast build for gifts because it doesn’t need complicated assembly, just a neat edge and a simple keyring attachment.
Pro tipAfter you finish the border round, lightly block the heart by pinning it flat for 20 minutes — it makes the point look sharper.
Start by crocheting a heart shape in solid color using single crochet increases and decreases, keeping the rows even so the point stays sharp. When the heart is done, do a round of single crochet around the outside in white, then add a second tiny round only on the top edges for a crisp frame. Sew or crochet a small loop at the top center, then attach to a keyring with a split ring. Finish by weaving in ends tightly on the back and lightly trimming fuzz so the border stays clean.
AvoidDon’t use loose stitches for the border; it will ripple and ruin the crisp photo look.
2. Mini Strawberry Charm with Seed Texture
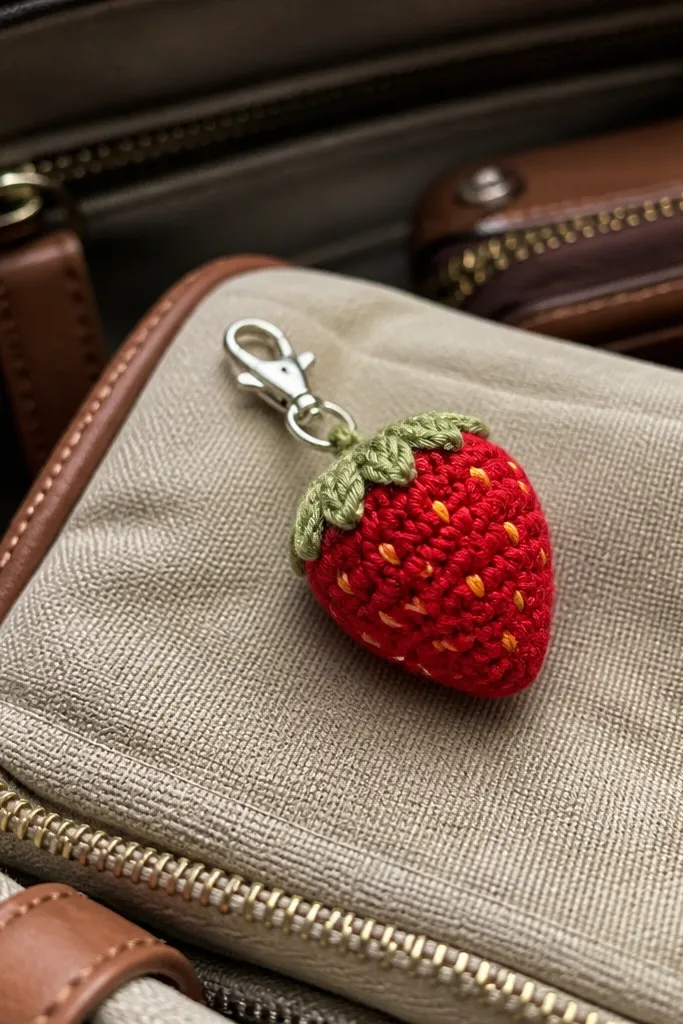
A strawberry is photogenic because it has clear color separation — red body, yellow seeds, and a green cap. The seed texture is what makes it look handmade instead of plain, and it’s easier than you think. Crochet surface stitches let you place seeds precisely so they don’t smear across the curve. This keychain also holds up on a bag because the body shape is mostly flat with a little structure, so it doesn’t collapse when it swings.
Pro tipUse a tapestry needle to anchor seed dots deeply so they don’t pull loose after repeated rubbing.
Crochet the strawberry body in red using short rounds so it stays compact, then slip stitch to close and fasten off. Add the green top by working a small cap in green with short scalloped points around the upper edge. For seeds, use yellow yarn and surface crochet dots: stitch in and out on the front, spacing them evenly from bottom to top. Finally, attach a small loop or sew a crocheted strap to the back top, then connect to a keyring.
AvoidSkip stuffing a strawberry body unless the pattern is designed for it; extra bulk makes the seeds look lumpy.
3. Pastel Rainbow Tile Keychain (Flat Granny Stripe)
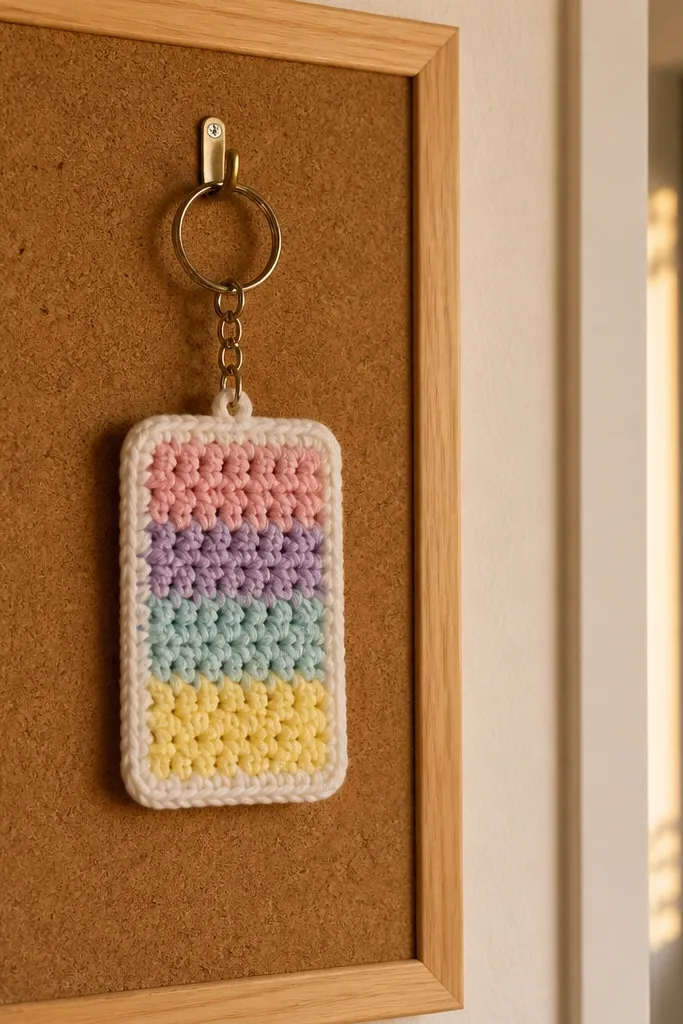
This is the kind of keychain that looks like a tiny wall art piece hanging off your bag. The flat rectangle is perfect for photos because the stripes stay straight, and the pastel palette reads clean. A border round is what makes it look finished instead of like a random swatch. Since it’s mostly flat, it’s also durable — fewer areas to snag and no complicated shaping.
Pro tipCount stitches per stripe and keep the row height identical — tiny inconsistencies show up fast in rainbow projects.
Make a small rectangle using granny stripe logic but keep it flat: work multiple rows of stripes with single crochet transitions so edges don’t curl. Choose 5-7 pastel colors and keep each stripe consistent in height. After the rectangle is complete, add a single crochet border in white, then do one more round with slip stitches to lock the shape. Sew or crochet a top loop centered on the back, then attach with a split ring.
AvoidDon’t skip the final border round; without it, the rectangle edges wander.
4. Matte Black Cat Face Keychain with Pointed Ears
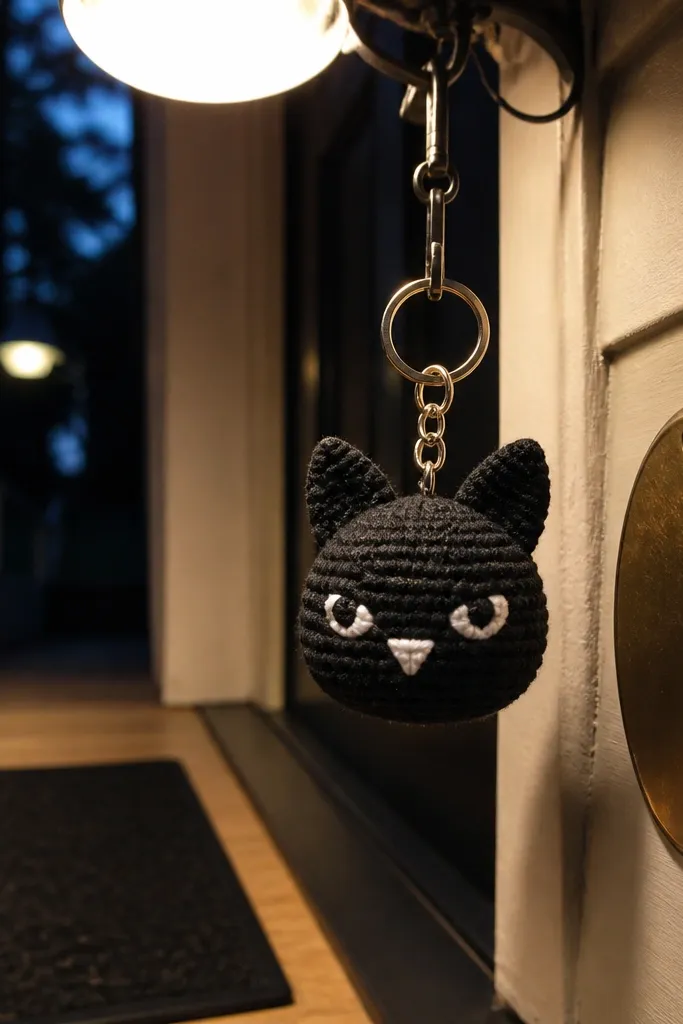
Black cat faces look striking because they rely on contrast, not color variety. This design uses a matte black yarn and clean white accents for eyes, so it reads clearly even in low light. Pointed ears add a playful silhouette, and a flat face keeps it from twisting on the keyring. It’s also great for beginners who want a “wow” look without complex shaping.
Pro tipUse yarn ends as anchors for the ears so the triangles sit firmly instead of flopping.
Crochet a simple base shape in black using single crochet so it stays flat, with increases at the top for ears. Build ears as triangles stitched onto the top corners, then attach a small white patch for the eye area. For eyes, use black yarn to stitch pupils onto the white, keeping them symmetrical. Add a top loop behind the head and attach to a keyring; finish by weaving ends and trimming any long fibers.
AvoidDon’t use fuzzy yarn for the face details; it blurs the eyes and makes the look messy.
5. Ocean Wave Keychain with White Foamy Edges
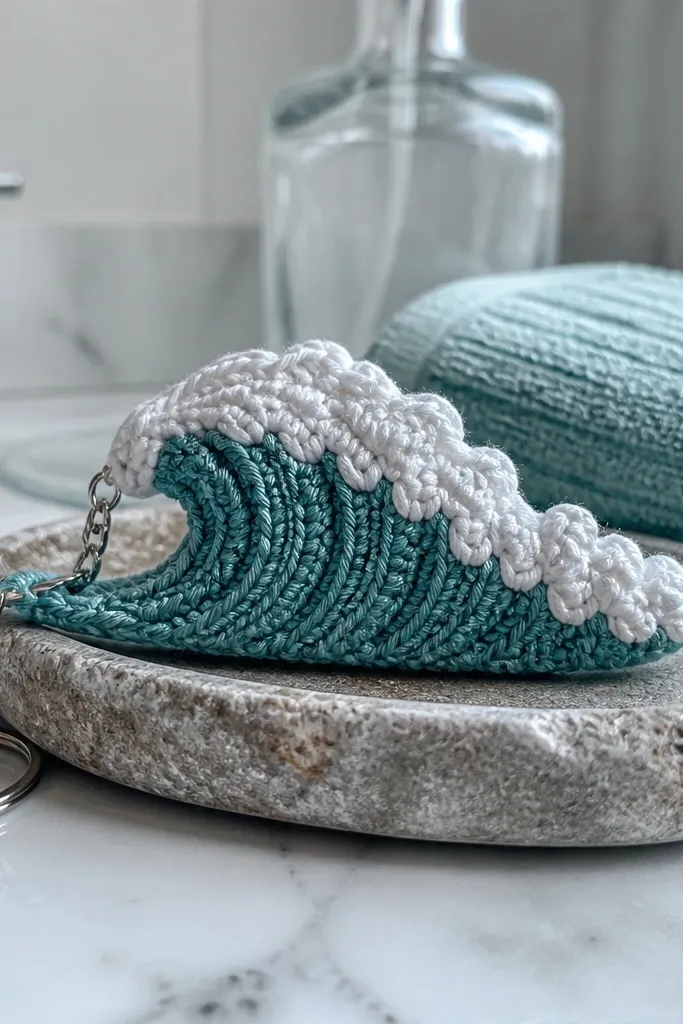
Waves are gorgeous because the pattern naturally creates movement, and the foamy edge gives it that “photo postcard” look. You’re building a single wave panel that curves slightly, then adding white edging so it looks like water hitting a shoreline. The key to the aesthetic is crisp scallops along the top edge and a clean attachment point so it doesn’t twist. This one also works well for themed bags and beach pouches.
Crochet a wave panel in blue using rows that alternate increases and decreases to create a gentle curve. Choose a stitch like half double crochet for a smooth fabric, then keep stitch counts consistent across the length. When the panel is done, work a white scallop border along the top edge only, using 5 to 7 scallops depending on your width. Add a small top loop on the back center and attach to a keyring.
Block the wave panel flat for 10 minutes, then let it dry — you’ll get a cleaner curve for photos.
Don’t put scallops on the bottom edge; it makes the wave look like a wavy coaster instead of a water edge.
6. Pearl Bow Keychain in Soft Cream
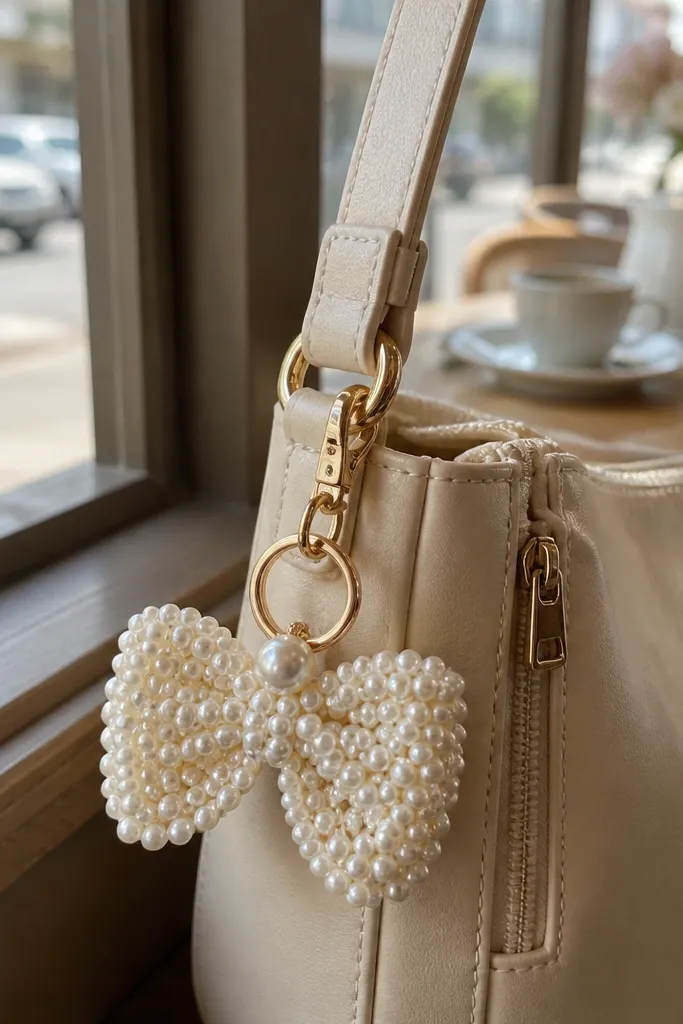
A bow looks classy because it has symmetry, and symmetry reads “designed” at a glance. This version uses a soft cream yarn and a small pearl button or bead at the center for shine. The bow arms are crocheted to hold their bend, so it doesn’t look like a flat ribbon. It’s also a clean gift because it doesn’t need long assembly — just two bow halves and a center attachment.
Pro tipUse a bead that’s larger than the thread hole so it sits high and catches light.
Crochet two matching bow loops in cream by working a short oval in single crochet, then shaping with slight increases toward the center. Sew the loops together at the center and add a small cinch stitch across the middle so the bow has that folded ribbon look. Attach a pearl bead or small button using thread through the center. Finally, sew a narrow loop behind the bow base or crochet a short chain strap, then connect to a keyring.
AvoidDon’t use a super-thin yarn; the bow will look limp and won’t hold the folded shape.
7. Color-Block Phone Keychain Charm (Screen + Buttons)
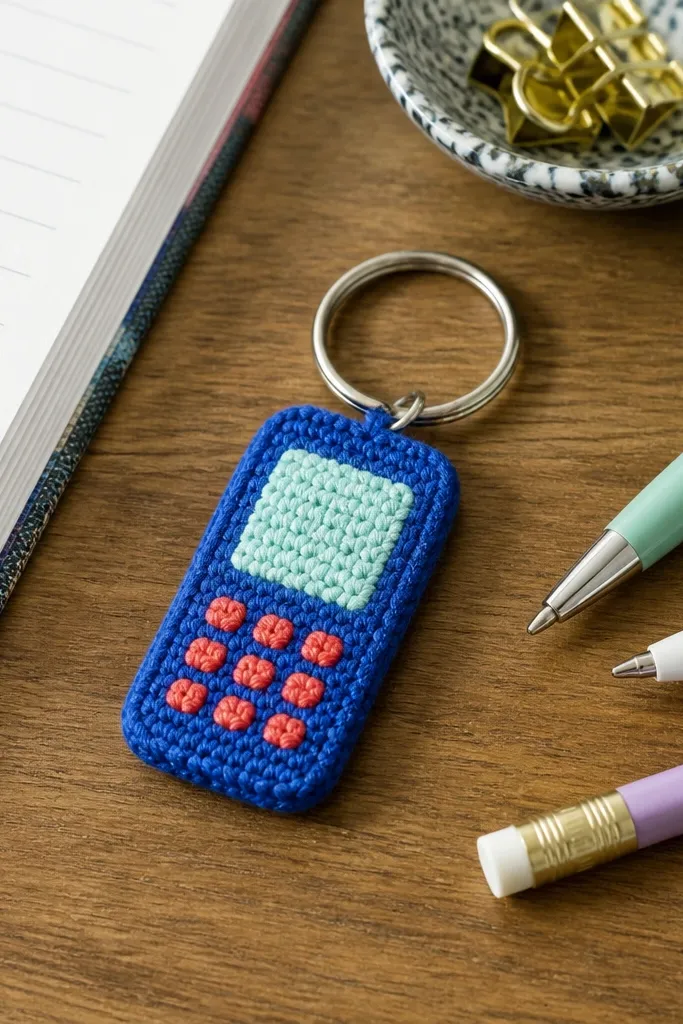
This looks like a tiny gadget, and that’s the whole point: clear shapes and color-blocking make it instantly recognizable. You’ll build a flat phone outline, then add a contrasting “screen” rectangle and small button dots. It’s excellent for people who like modern, graphic aesthetics rather than cute animals. Because it’s mostly flat, it slides against bags without turning into a tangled mess.
Work a phone body in single crochet as a rectangle with slightly rounded corners by doing a few increases at the top and decreases at the bottom. Add a second layer or a front panel by stitching a contrasting screen rectangle onto the front. For buttons, surface crochet tiny dots or short stitches on the side in a darker color. Add a top loop at the back center and attach to a keyring with a split ring.
Use stitch markers to keep the screen rectangle centered; off-center screens look “off” in photos.
Avoid adding too many tiny details; three button dots plus a screen is plenty for readability.
8. Sunflower Keychain with Layered Petals
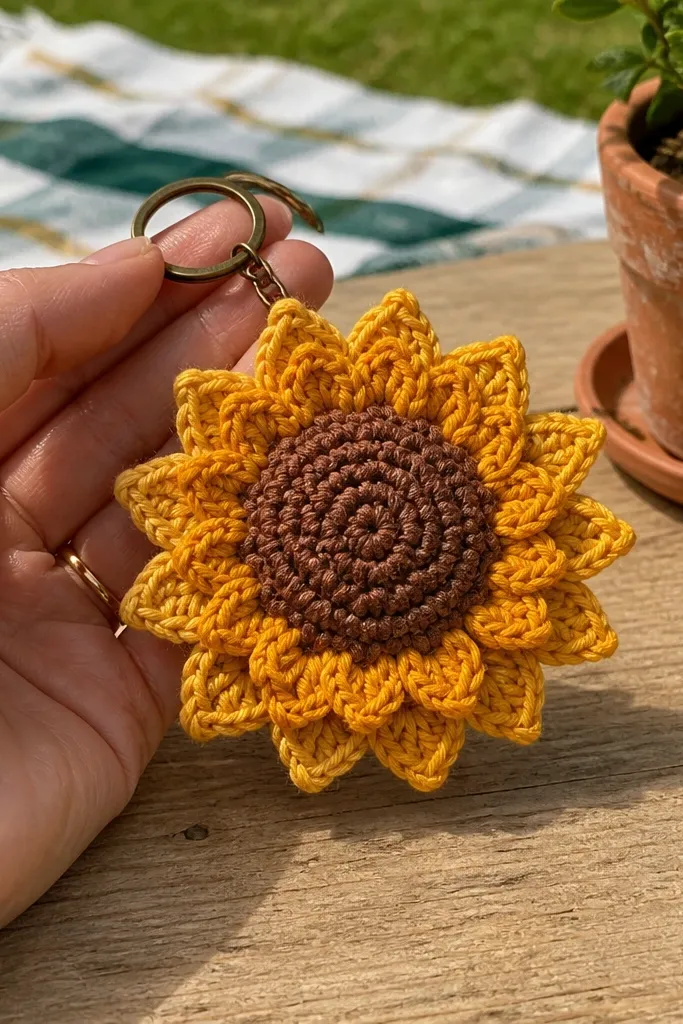
Sunflowers photograph like they’re smiling because the petals are layered and the center looks textured. The layered petal effect makes the keychain look thicker and more dimensional without needing heavy stuffing. The brown center uses surface texture stitches so it reads as a “seed” area. This is a great choice if you want something that looks handmade and cheerful, even when it’s small.
Pro tipKeep petal points uniform by doing the same number of stitches in each petal base.
Crochet a flat round base in yellow, then create petals by working small V-shaped stitches around the edge to form layered points. Stack a second ring of petals slightly larger or slightly offset for the dimensional look. Make the center in brown with surface texture using tight stitches or small popcorn-like bumps. Attach a top loop on the back and connect to a keyring; weave ends on the back so the front stays smooth.
AvoidDon’t stuff the center heavily; it can warp the petal ring and make the sunflower look lopsided.
9. Gummy Bear Keychain with Glossy Color Pop
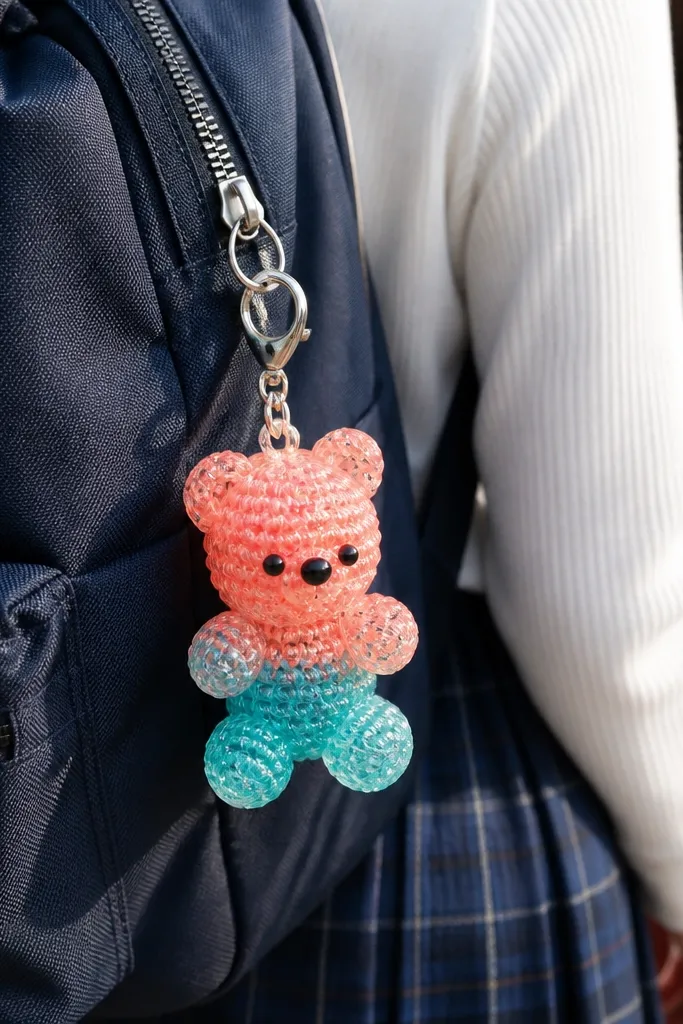
This one looks like candy because it uses rounded shapes and a bright color palette. The bear is small, but the surface is smooth and the limbs are simple, so it stays cute rather than bulky. A tiny bead or embroidered eye gives you that glossy look in photos. If you want a keychain that looks fun on a backpack zipper pull, this is the one.
Crochet the bear body as a single rounded form in one bright color, using tight single crochet rounds. Add arms and legs as small oval pieces sewn symmetrically to the sides and bottom. Stitch a snout patch in a lighter tone and add a small bead eye or embroidered eye with black yarn. Attach a top loop behind the head or stitch a strap at the back, then connect to a keyring.
Use polyester fiberfill lightly so the surface stays smooth; overstuffing makes seams show.
Skip long loose yarn tails near joints; they catch on fabric and ruin the clean candy look.
10. Geometric Hexagon Keychain with Stitch-Pattern Border
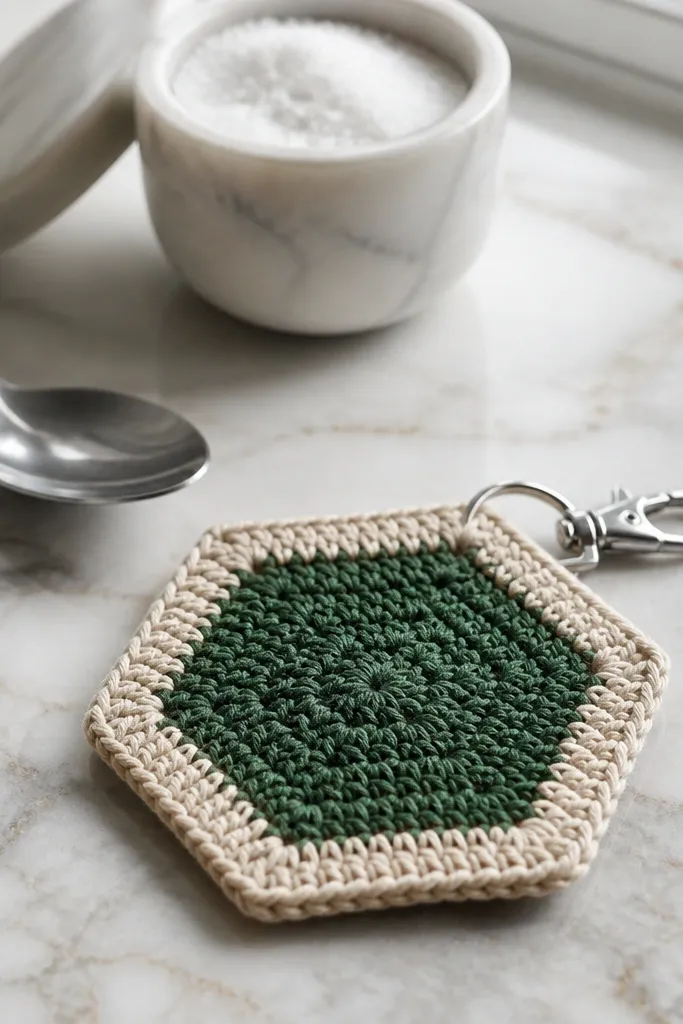
Geometric designs look expensive because they’re clean and structured. A hexagon keychain is easy to photograph since it has strong lines, and the border pattern makes it feel designed rather than basic. Use two yarn colors — one for the hexagon face and one for a patterned edge — to create a crisp frame. This style also works for keychains that hang flat, so it doesn’t twist around the ring.
Crochet a hexagon using single crochet in rounds, increasing at the corners to keep the sides equal. When the hexagon is complete, add a contrasting border round with a simple stitch texture like alternating front-post and back-post stitches or a small checker-like pattern. Attach a top loop by stitching a short chain into the border on the top corner. Weave ends tightly and press the piece flat with your fingers before adding the keyring.
Choose a slightly thicker yarn for the border so the frame looks defined in photos.
Don’t use a border stitch that curls; keep it tight for a flat, geometric look.
11. Mini Bag Charm Keychain in Two-Tone Stripes
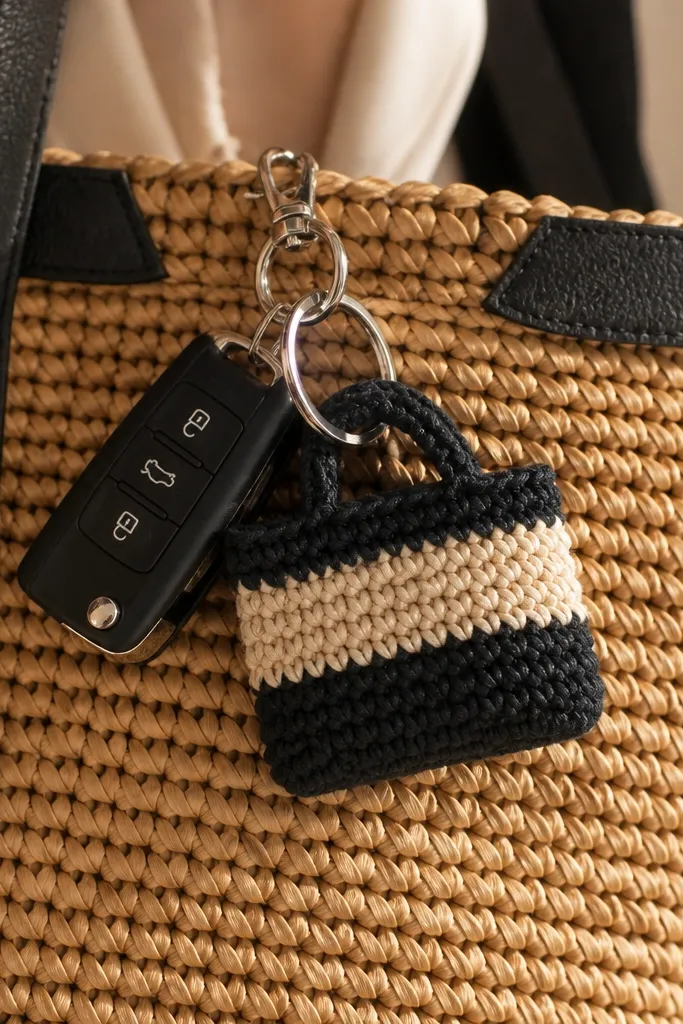
If you like accessories that look like they came from a boutique, make a tiny “bag” shape. Two-tone stripes create instant visual interest, and the handle makes it read as a charm rather than a flat patch. This keychain is built to hang straight, so the stripes stay aligned instead of wrapping around the keyring. It’s also a good way to use leftover yarn while still producing something that looks intentional.
Crochet a small pouch shape in rounds using alternating colors for clean stripes, keeping the width consistent. Add a top flap or slight opening by stopping short of full closure, then seam the sides to form the bag shape. Create a small handle by crocheting a short chain and slip stitch it across the top openings, then secure ends on the inside. Add a keyring loop at the back top and weave in ends tightly.
Use a stitch marker to keep stripe changes even — crooked stripes show fast on small items.
Don’t overstuff the pouch; it makes the handle angle weird and the charm looks tilted.
12. Crescent Moon Keychain with Star Confetti
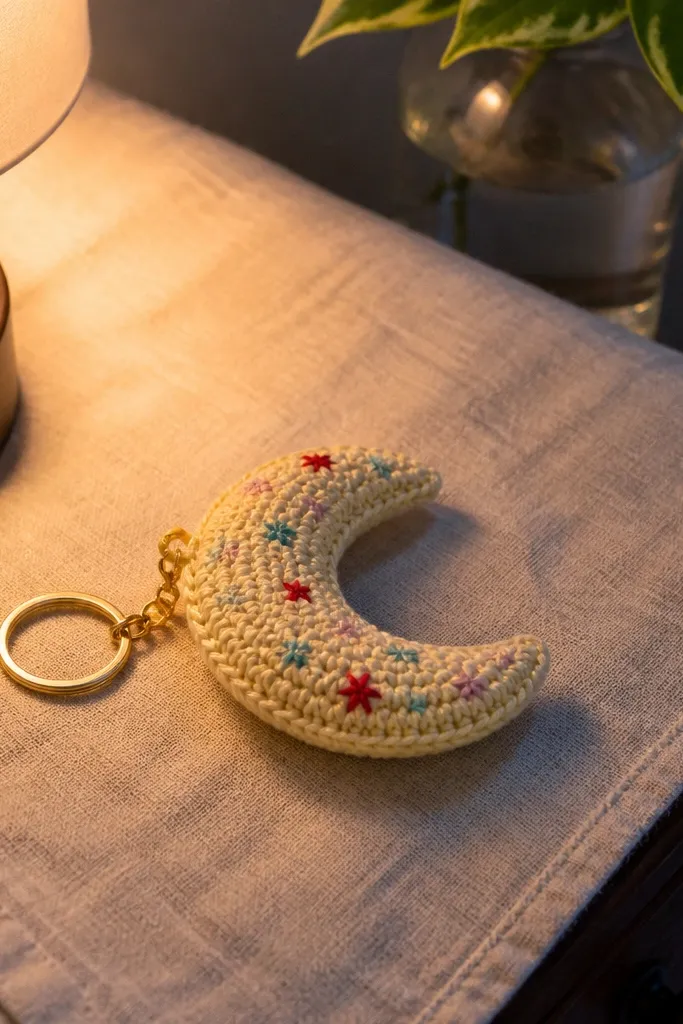
A crescent moon is photogenic because it’s instantly recognizable and it gives you a natural place to add tiny star details. This version is cream or pale gold with multicolor stars scattered on the flat front for a playful, night-sky vibe. The look stays neat because the stars are made as small surface stitches instead of separate appliques that can peel. It’s quick, it hangs flat, and it reads well on keyrings and bag zippers.
Pro tipKeep star sizes consistent by using the same surface stitch count for each one.
Crochet a crescent moon in a smooth yarn using short rows so the curve is even, then slip stitch to shape the ends. Add a thin border in a slightly darker shade if you want extra definition. For stars, use surface crochet: create tiny 3-stitch “points” and stitch them down in different colors across the moon. Add a top loop at the center back and attach to a keyring.
AvoidDon’t add too many stars; crowded moons look messy and lose the clean silhouette.
13. Cherry Blossom Keychain with Petal Cluster
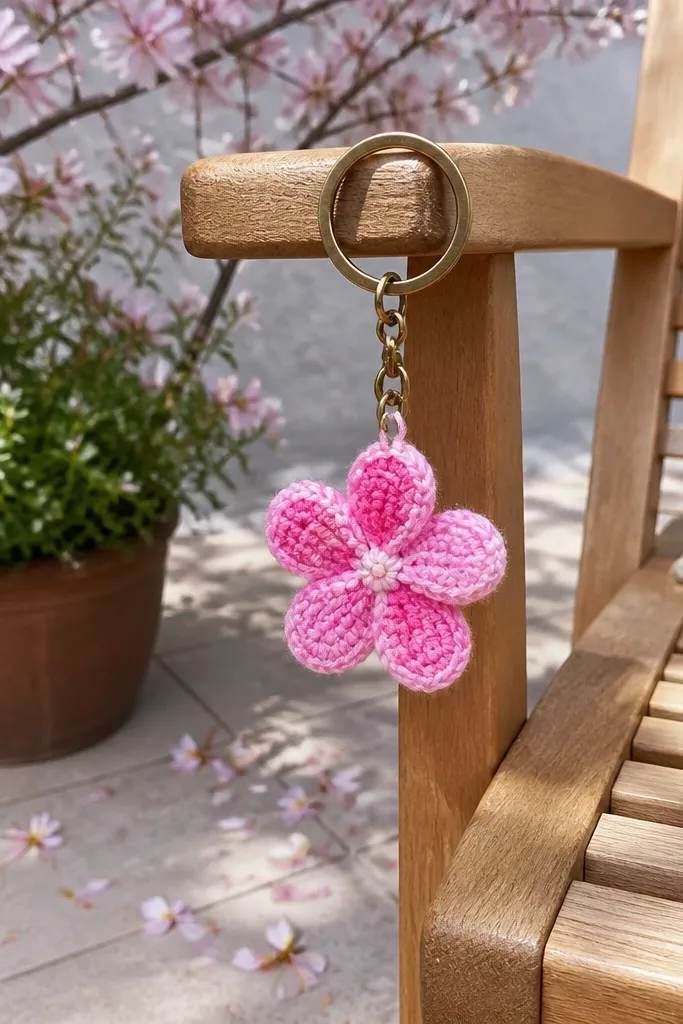
Cherry blossoms look gentle and pretty, but they also photograph well because the petals are rounded and countable. This design makes a small flower cluster with five petals and a tiny center dot, so it reads clearly even at a glance. Use a soft pink gradient yarn or two pink shades to create dimension without complex shaping. It’s a great pick for spring-themed bags, keyring gifts, and anyone who wants something delicate-looking that still holds its form.
Pro tipIf your petals curl, block them gently by pinning the flower flat for 15 minutes.
Crochet a small ring base, then work five rounded petals by crocheting a mini fan around the ring using half double crochet and a few chains to separate petals. Add a center in yellow or warm orange using tight single crochet or a small yarn loop cinch. Optional: attach a second flower slightly behind the first for layered depth. Sew a top loop onto the back and attach to a keyring; weave ends into the center so they don’t show through petals.
AvoidDon’t use very thin lace yarn; the petals will look see-through and uneven.
14. Rainbow Heart Keychain with Raised Stitch Texture
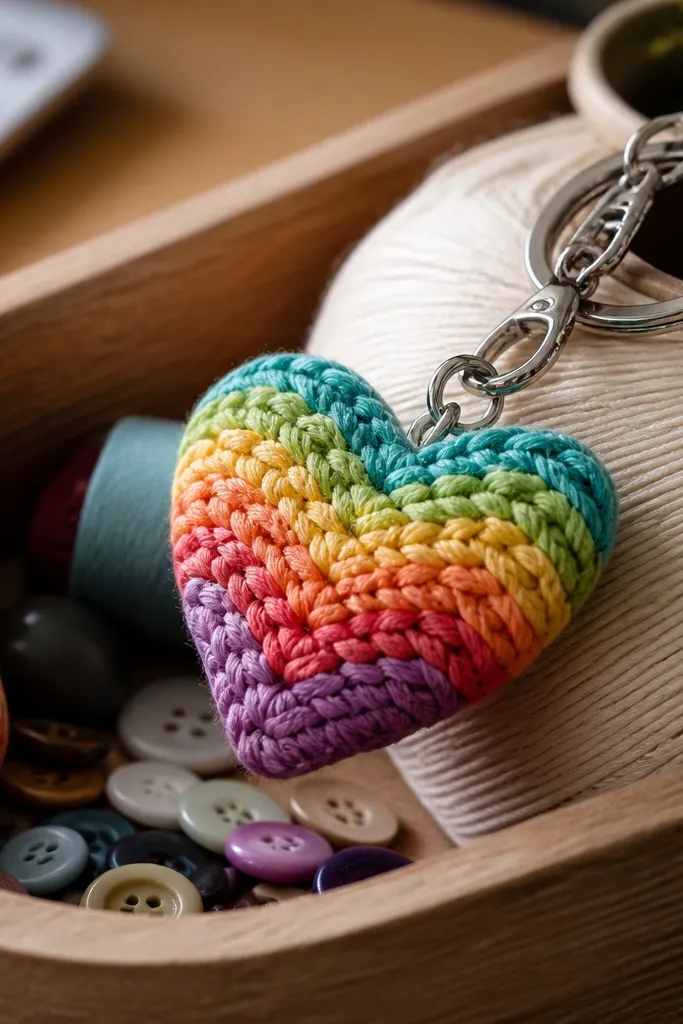
This heart is gorgeous because the surface has texture lines that catch light — that’s what makes it look handmade in photos. Instead of flat stripes, you’re creating a raised effect using textured stitches in rainbow colors. The result is a keychain that looks like it has dimension even without heavy stuffing. It’s also a good choice if you want something more interesting than a basic heart but still straightforward to assemble.
Pro tipSwitch colors cleanly by finishing the last stitch of the current color and pulling the new color through — it keeps texture lines aligned.
Work a heart base in a solid color first using single crochet so the shape stays crisp. Then add rainbow texture bands across the front using a raised stitch pattern like front-post/back-post in horizontal rows, switching colors at each band. Keep the textured rows centered and even by counting stitches between color changes. Add a top loop at the center back and attach to a keyring; weave ends carefully to keep the front smooth.
AvoidAvoid loose joins between color bands; gaps make the rainbow look messy.
15. Coffee Cup Keychain with Brown Sleeve and Foam Top
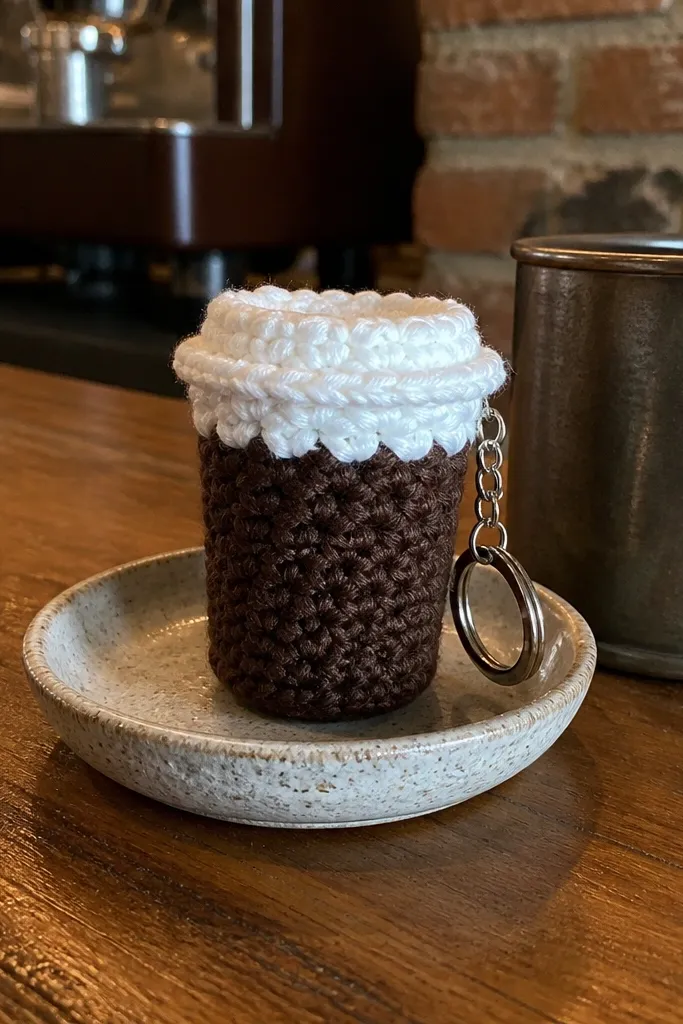
Coffee cup keychains look adorable and also feel practical because the shape is simple and recognizable. The brown sleeve and white foam top create contrast that makes the keychain look like a real drink. Use stiffening so the cup edge stays flat and doesn’t curl, especially around the foam. This one is great for everyday bags and desk keyrings, and it’s easy to customize with different sleeve colors.
Crochet a small cup body using single crochet in a light tan or cream, working in rounds with slight decreases at the top for a cup opening. Add a brown sleeve band around the middle by crocheting a separate band and sewing it on, or by working it directly as a color change. Create the foam top with white yarn using a scalloped edge around the top opening. Add a loop at the back center and attach to a keyring; weave ends into the sleeve seam for a clean finish.
Stiffen the cup base with a thin cardboard circle glued behind the bottom so it stays upright when it swings.
Don’t crochet the foam edge too large; oversized scallops make the cup look like a wavy coaster.
16. Cherry Pie Slice Keychain with Crust Crumb Border
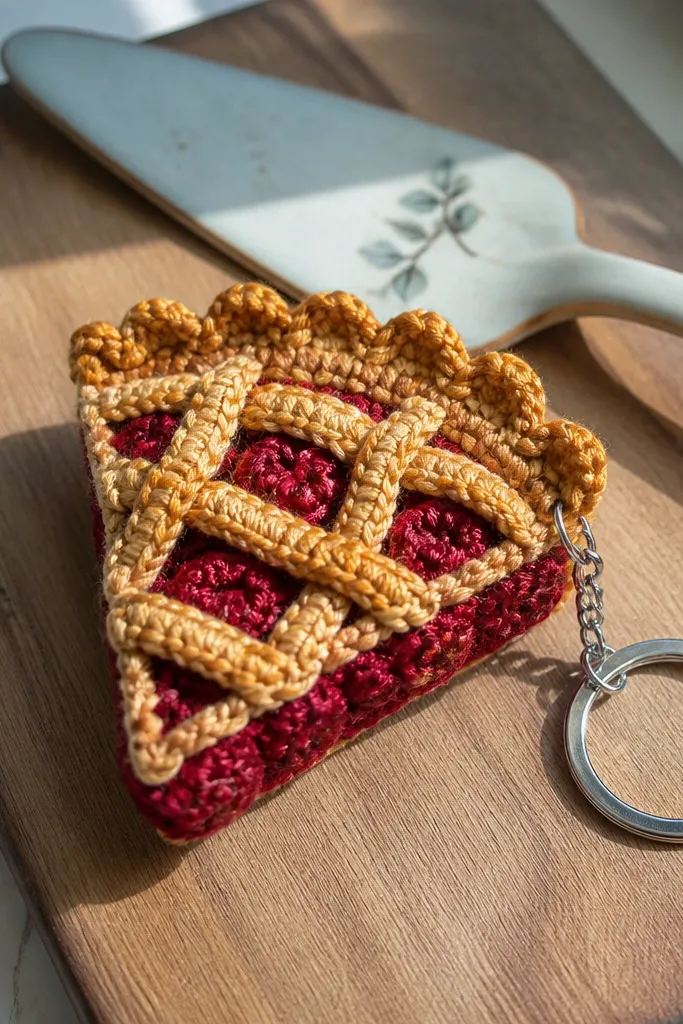
Pie slices look amazing because they combine color layers and a clear top structure. This design uses a red filling, a gold crust outline, and a simple lattice top so it looks like food instead of a flat badge. The crumbs on the crust edge add texture that shows up well in photos. It’s a little more work than a heart, but the payoff is a keychain that looks like an actual slice.
Pro tipUse a smaller hook for the lattice so the grid lines stay tight and readable.
Crochet a wedge-shaped slice in multiple colors by building a triangular base in gold for the crust edge, then adding red stitches for the filling. For the lattice top, work thin strips in gold across the top in a grid pattern and weave them down with surface stitches. Add small “crumb” dots by surface crocheting tiny gold bumps along the crust edge. Attach a top loop at the back point of the slice and connect to a keyring.
AvoidDon’t skip the lattice; a plain top makes the slice look like a generic triangle.
17. Pear Shaped Keychain with Leaf and Seed Specks
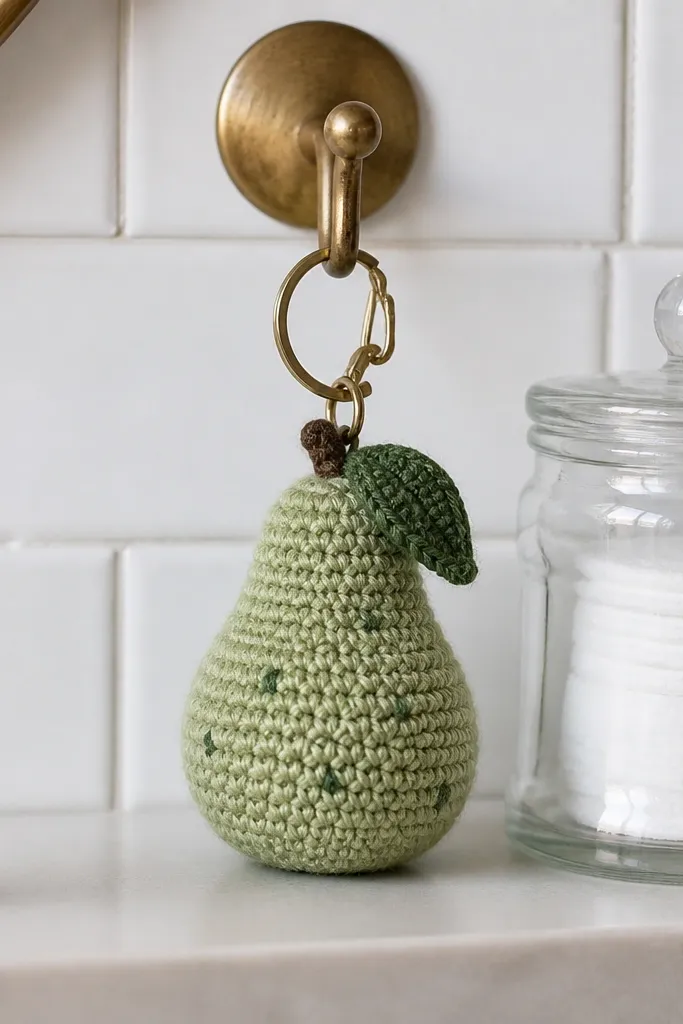
A pear keychain looks fresh because it has a clear drop shape and a leaf detail that frames it. Green yarn with a lighter highlight creates a “skin” look, and seed specks add realism without making the piece complicated. This is one of those designs that looks cute from far away and still has detail close up. Keep it mostly flat with a slight taper so it doesn’t flop on the ring.
Pro tipPlan your seed placement before you stitch by lightly marking dots on the fabric with a washable fabric pencil.
Crochet the pear body in rounds with decreases at the top and increases at the belly to get the drop shape, using single crochet for firmness. Add a small leaf by crocheting a teardrop leaf shape in green and sewing it to the top. For highlight, stitch a lighter green vertical patch down one side using surface crochet. Add seed specks with brown yarn surface stitches, then attach a top loop behind the leaf and connect to a keyring.
AvoidDon’t overdo specks; too many makes the pear look dirty instead of textured.
18. Bicolor Initial Keychain with Contrast Shadow Stitch
Letter keychains are gorgeous when the letter has a clean outline and a readable shape. This one uses a bicolor build: the letter in one color and a contrast shadow stitch around it, so the letter looks crisp from any angle. It’s also a giftable format because you can match initials to a bag, keyring, or school backpack. The trick is keeping the letter edges tight with single crochet and not letting the outline stretch.
Crochet the letter shape using single crochet in tight rows, following your letter’s curves and corners by increasing/decreasing at the right points. Make a second outline layer in a contrasting color by working single crochet around the letter edges, or by attaching a separate crocheted outline piece. Attach a top loop to the back of the letter, centered, and reinforce the loop with extra stitches. Weave ends on the back, then lightly block the letter flat so the outline stays even.
Pick a bold letter style for readability; blocky shapes look best at keychain size.
Avoid thin yarn for letters; skinny yarn makes curves wobbly and the outline loses definition.
19. Cozy Buffalo Check Keychain with Tiny Tassel
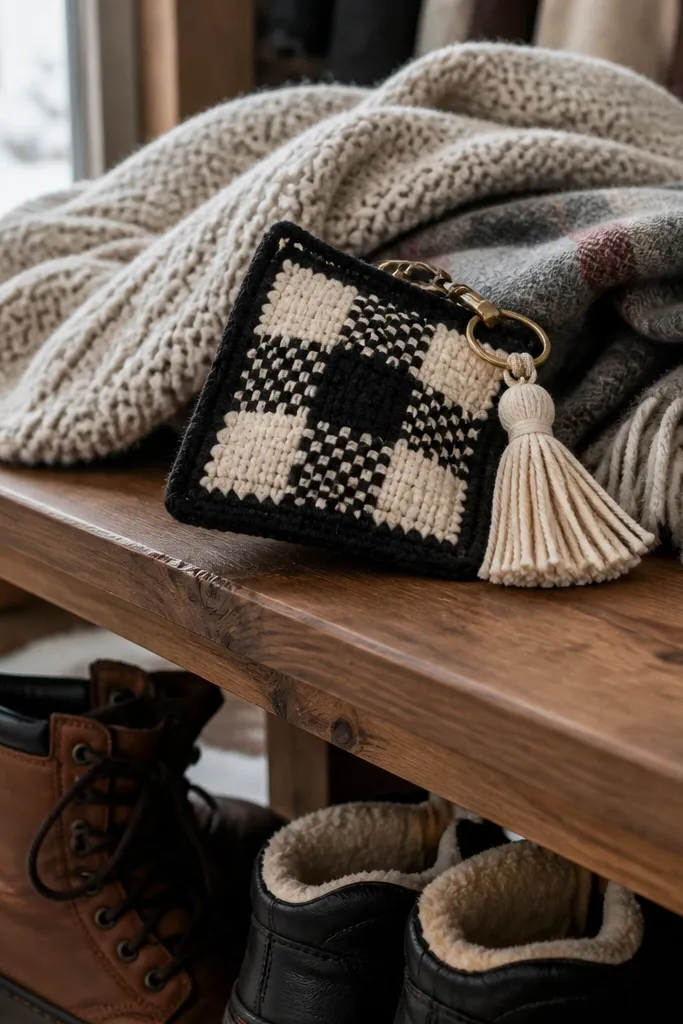
Buffalo check looks instantly cozy and photogenic because it’s pattern-driven, not detail-driven. A small square with a tidy border reads like a miniature fabric patch, and the tassel adds motion when it swings. The color combo matters — black and cream is the cleanest look for photos, but you can swap in navy and white if you prefer. This is a great choice when you want something that looks “designed” without needing appliques.
Pro tipTrim the tassel ends to equal lengths after it’s attached; it looks way neater in photos.
Create a small square in black and cream using a simple plaid method: alternate color blocks in rows, keeping each block the same stitch width. Work a single crochet border around the square in cream or black for a clean frame. Make a tassel from 6 to 10 strands of yarn, tie it at one end, then stitch it to the top corner. Add a top loop or sew a strap to the back, then attach to a keyring.
AvoidDon’t let plaid blocks become uneven; one wide block makes the whole keychain look sloppy.
20. Lavender Bunny Keychain with Floppy Ears (Flat Front)
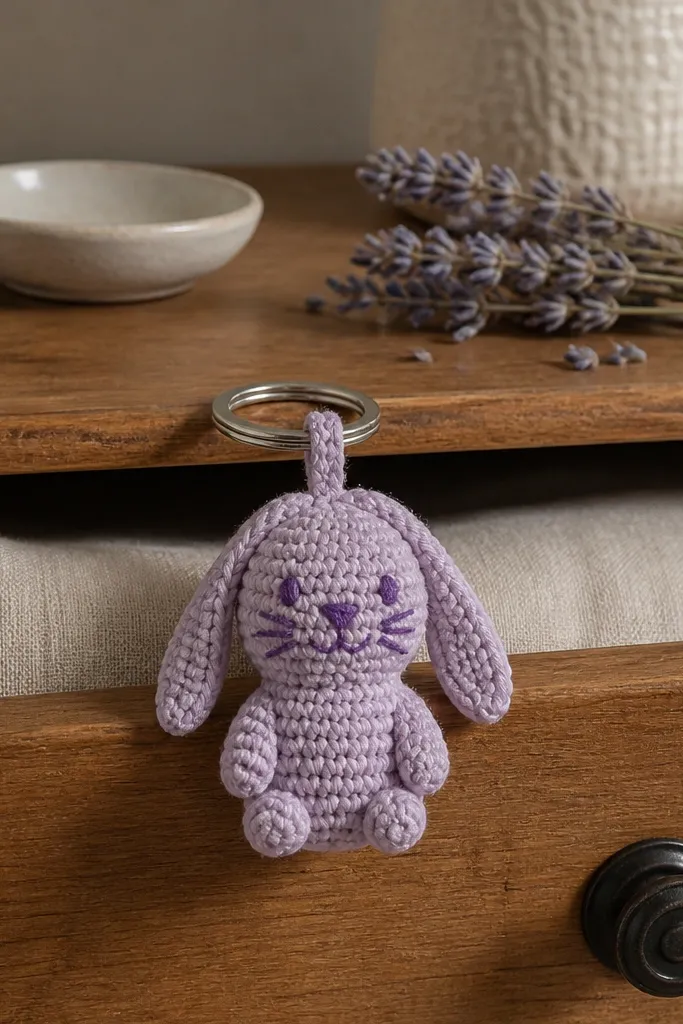
This bunny is cute without being bulky because the front stays flat and the ears are shaped with stitch control. Lavender yarn gives a soft, aesthetic look, and the stitched nose and whiskers make it readable at small size. Floppy ears add personality, but only if they’re anchored well so they don’t twist around the keyring. This one is a strong pick for gifts because it looks sweet and intentional, not random.
Pro tipAnchor the ear join with 6 to 8 tight stitches so it stays in the same floppy angle every time it moves.
Crochet a bunny head base in lavender using single crochet for firmness, then add cheeks with slightly lighter yarn by surface stitching a small oval area. Create the ears as long ovals or triangles crocheted in lavender, then attach them to the top sides so they hang forward. Add a tiny nose using a small circle in pink and stitch whiskers with thin black yarn. Sew a top loop behind the head and connect to a keyring; weave ends into the base so they don’t show through the ears.
AvoidSkip long chains for the ears; they stretch and make the bunny look droopy in a messy way.



