
1. Two-Tone Herringbone Stripe Scarf
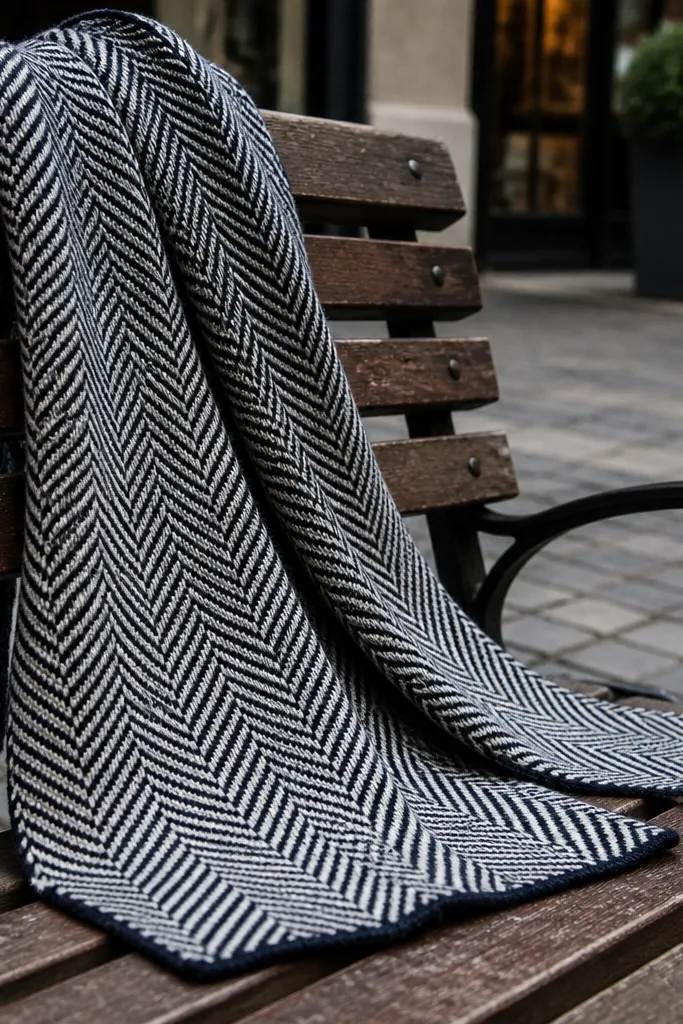
This one looks like store-bought knitwear because the diagonal structure catches light as the scarf moves. It’s photogenic in a way plain stripes never are, since the surface has ridges instead of flat loops. You’ll get a scarf that drapes smoothly without collapsing, especially in DK or light worsted yarn. It’s a great “daily reach” scarf because it goes with denim, boots, and neutral sweaters without clashing.
Start with two solid colors and a hook size that matches your yarn label for DK or light worsted. Work a short foundation chain, then crochet alternating diagonal blocks using a front-post/back-post style pattern so you get the herringbone look. After you finish your stripe repeats to your desired length, add a single-row border in the darker color with evenly spaced stitches across both edges. Finish by weaving ends tightly and blocking lightly by pinning the scarf flat for 30-45 minutes.
Pro tipUse stitch markers every repeat (every 10-12 rows) so the diagonal rhythm stays even.
AvoidDon’t skip the border row — it’s the difference between “pattern” and “crochet rectangle.”
2. Giant Puff Row Scarf in One Color
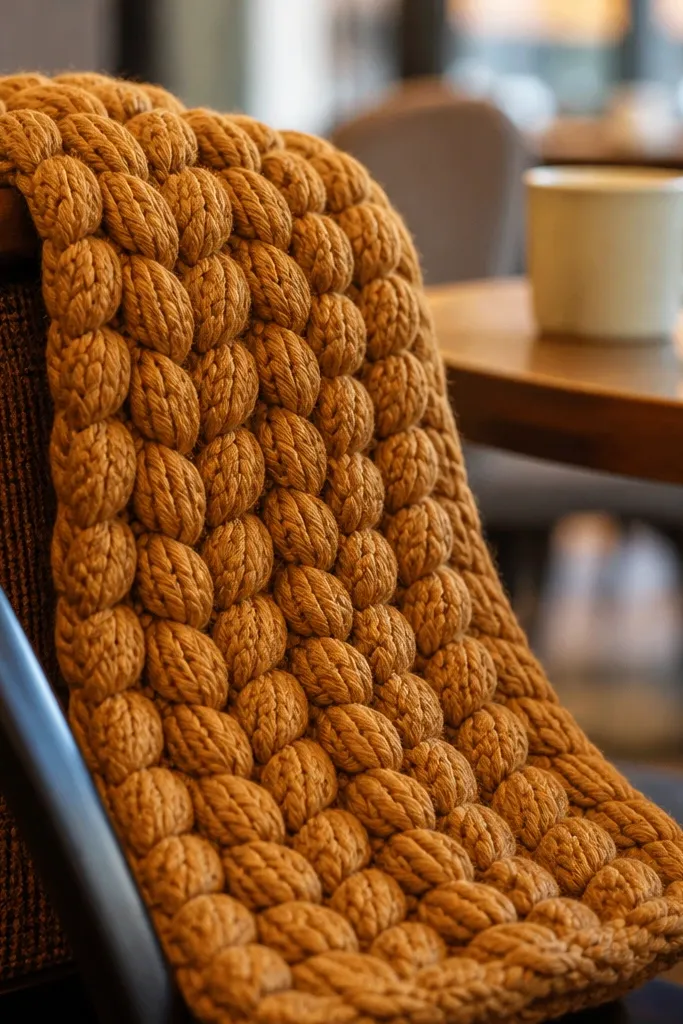
Puff stitch rows make a scarf that looks chunky and cozy without needing multiple colors. The texture is bold enough to read well in photos even when the scarf is just draped over a chair. Use one color so the puff pattern stays the star, and choose a yarn with a little bounce so the puffs hold their shape. This is an easy crochet scarf idea for days when you want instant “wow” from one simple repeat.
Chain a width that matches your yarn and your desired scarf thickness, then start with a base row in single crochet or half double crochet for stability. For each texture row, work puff stitches across the row using the same number of puffs and consistent spacing. Alternate one puff row with a simpler row (like half double crochet) so the scarf doesn’t become too dense. Finish with two border rows in single crochet along both edges to lock in the shape.
Count puffs by stitch, not by eyeballing — mark the start of each puff row with a marker.
Don’t make your puff height inconsistent — keep the yarn pull the same on every puff.
3. Color-Blocked Scarf with Clean Vertical Panels
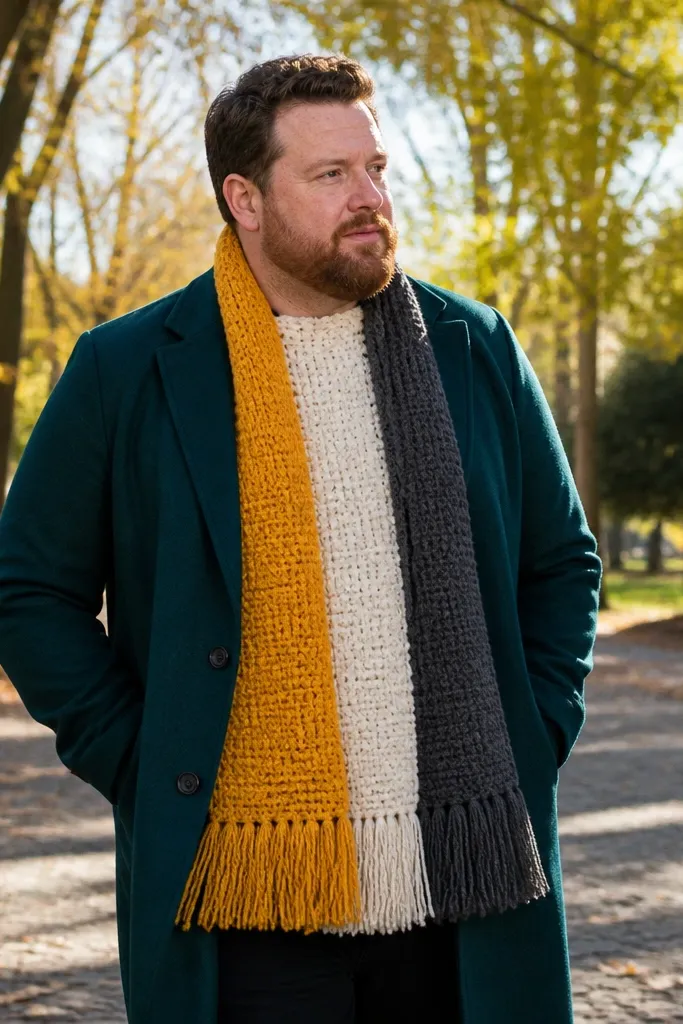
Color blocking is the quickest path to an aesthetic scarf that looks styled, not DIY. This design uses vertical panels so your scarf looks graphic and intentional, even if you only do one stitch pattern all the way through. It’s ideal for stash yarn because you can swap colors without changing the structure. The clean edges and simple repeat keep it beginner-friendly while still looking sharp in photos.
Pick three coordinating yarn colors and decide your panel widths (for example, 10-12 inches per panel). Crochet the scarf in a simple stitch like half double crochet, switching colors at the row where the panel ends. Use a consistent color-change method by finishing the last stitch of the row with the new color pulled through. Add a border row in the middle color across the entire scarf so the edges look finished and uniform.
Pro tipKeep your panel color changes on the same stitch column every row to avoid a wavy seam.
AvoidDon’t leave long yarn tails — weave them in as you change colors so the scarf stays clean.
4. Lace Panel Scarf with Eyelet Rows
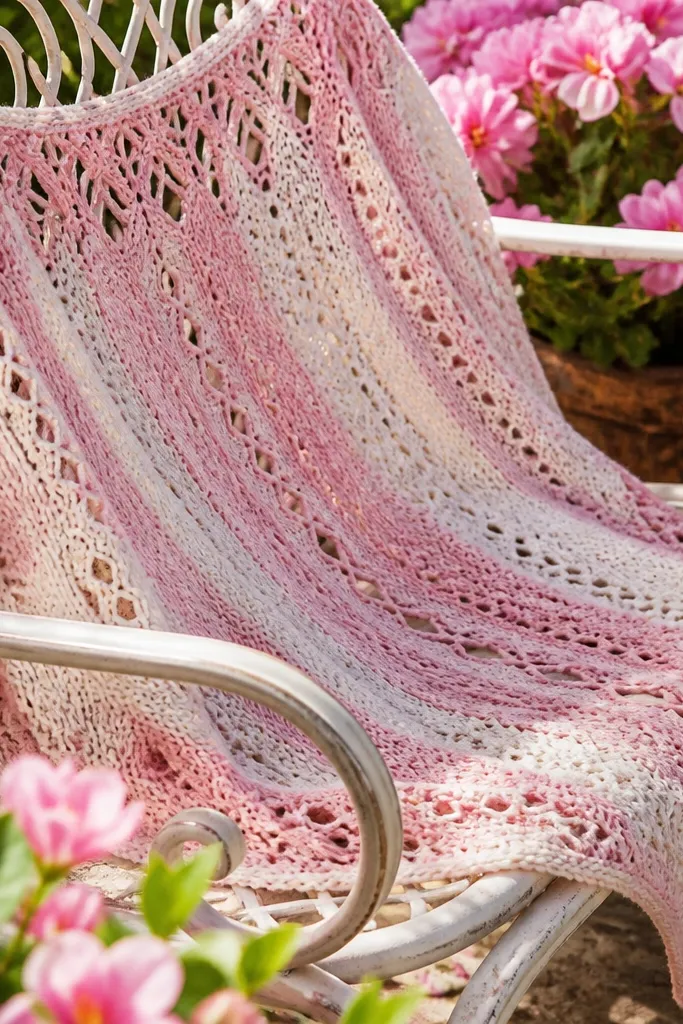
If you want a scarf that looks light and pretty in spring photos, go for lace panels. Eyelet rows create a delicate drape and show off the yarn color, especially in soft pinks, creams, or light blues. This scarf looks more complex than it is because the visual interest comes from a repeat you can memorize quickly. It’s also great for layering over a denim jacket because the holes reduce bulk.
Work a foundation chain in a multiple that matches the eyelet repeat, then start with a base row in double crochet or half double crochet. Build the lace by alternating rows that include yarn overs and skipped stitches, keeping the pattern repeat centered. Add a narrow border row at both ends using single crochet so the lace doesn’t curl. Finish with a simple wet-block by pinning and misting so the eyelets open up.
Pro tipUse a stitch marker at the start of every eyelet repeat so your skips stay aligned.
AvoidDon’t stretch the scarf while pinning — lace looks best when it holds its shape without warping.
5. Waffle Stitch Scarf in Warm Neutrals
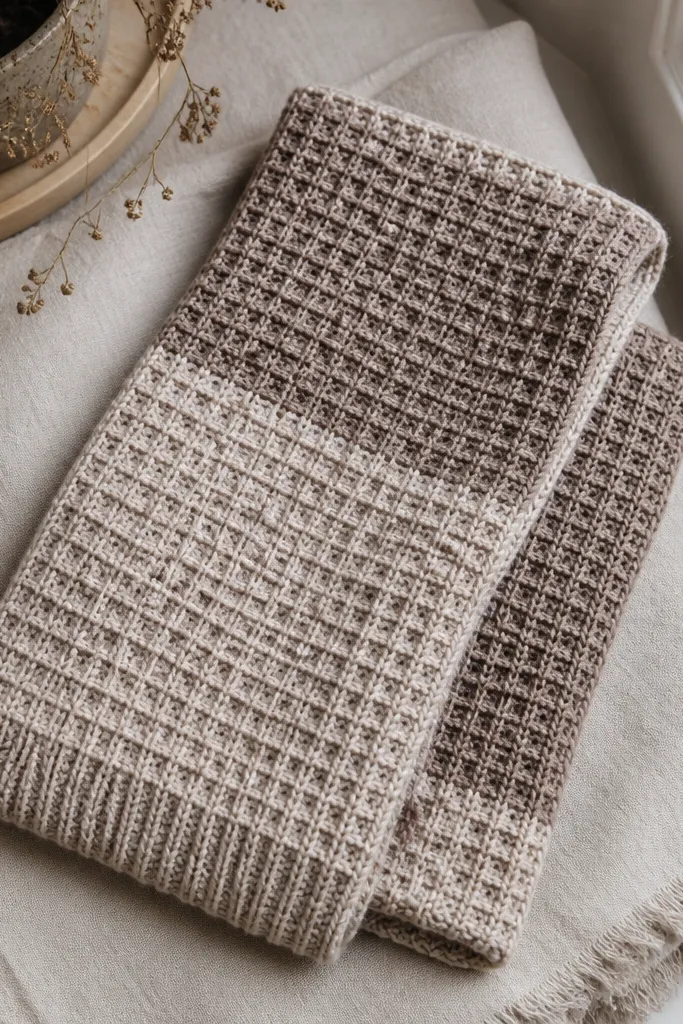
Waffle stitch makes a scarf that looks like it has structure, not just loops. The grid texture reads clearly in close photos and gives you that “handcrafted but polished” look. Choose warm neutrals like sand, oatmeal, or mushroom and the scarf will blend into nearly every outfit. It’s also practical because the fabric has thickness without feeling stiff.
Chain to your desired width, then work a waffle pattern that alternates front-post/back-post-style blocks or double crochet groups with spacing. Keep the repeat consistent by counting the grid squares across the row. After your length is done, add a border made from single crochet rounds across the ends and along the long sides for a neat finish. Weave in ends and block so the waffle squares lay flat and square.
Pro tipUse a slightly smaller hook than the label if you want crisp waffle texture.
AvoidDon’t rush the grid alignment — if your square counts drift, the whole scarf looks off.
6. Striped Fringe Scarf with Oversized End Tassels
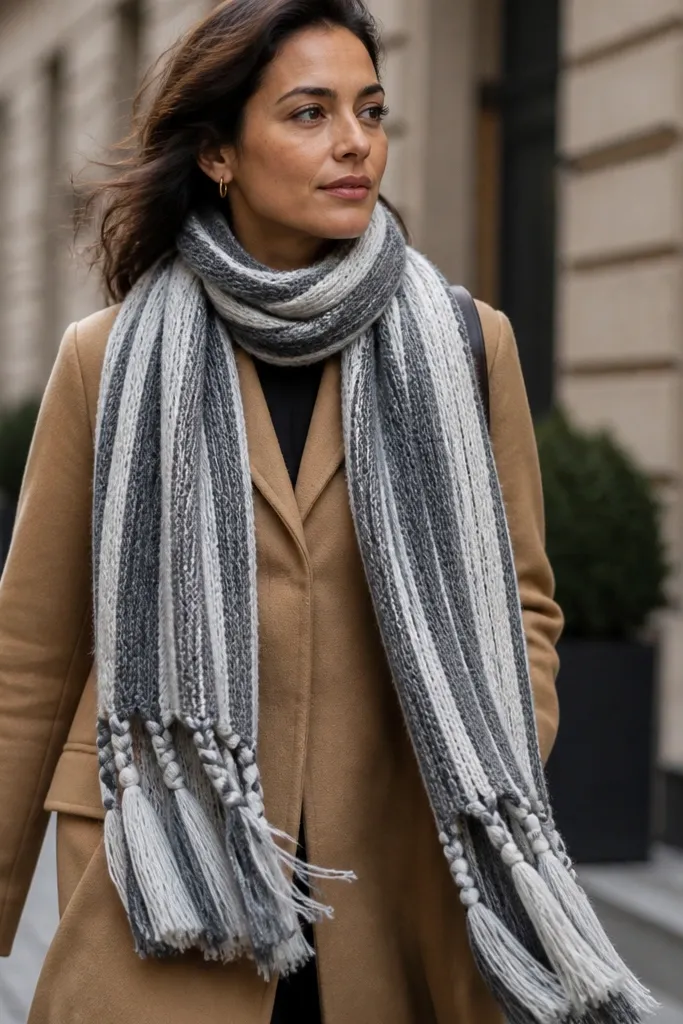
Fringe is the fastest “aesthetic multiplier” in scarf photography. This design uses simple stripes with a clean stitch body, then finishes with big, even tassels that swing when you walk. The scarf looks intentional even if the stitch inside is basic, because the fringe does the heavy lifting visually. It’s an easy crochet scarf idea for beginners who want a dramatic result without complicated shaping.
Choose two colors and work a stripe pattern using half double crochet for a flexible drape. Keep each stripe to a consistent row count, like 6-8 rows per color. When you reach the last row, attach fringe by cutting strands twice the tassel length and folding them in half to pull through the edge loops. Comb the fringe and trim to make the ends even.
Pro tipCut a few extra fringe strands — trimming gets messy if you run short.
AvoidDon’t use stiff yarn — fringe looks scratchy and uneven when the fiber doesn’t move.
7. Seed Stitch Scarf with Two-Sided Texture
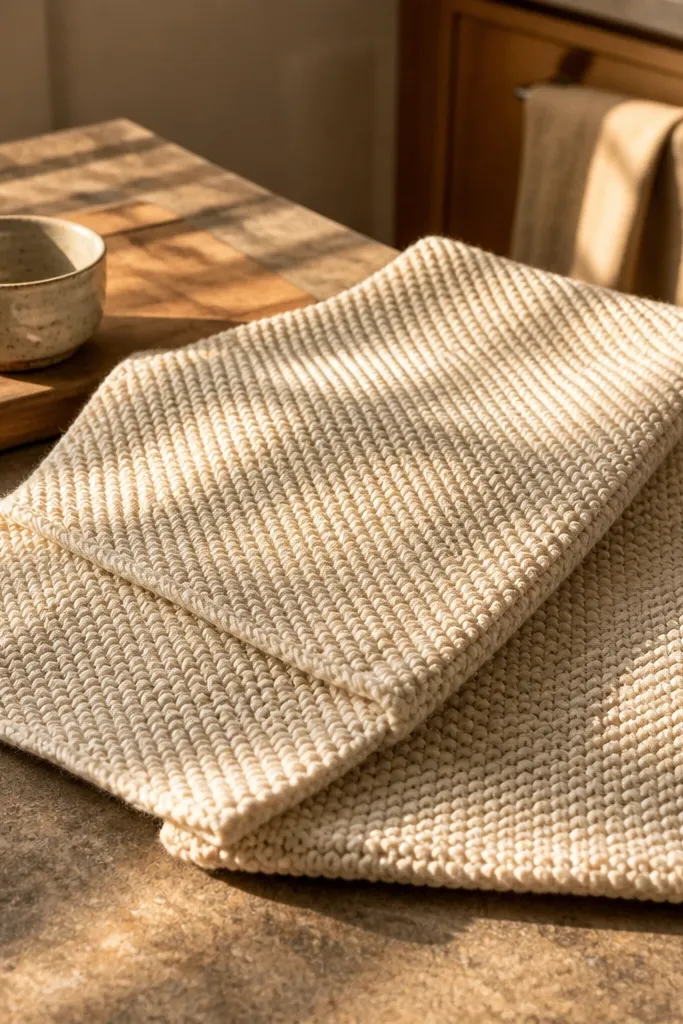
Seed stitch gives you a scarf that looks good from both sides, which matters when you wrap it and it flips in photos. The texture is subtle but dense enough to create warmth and a premium look. This is also one of the easiest crochet scarf ideas to keep consistent because the pattern repeat is simple and forgiving. Pick a deep green, teal, or burgundy and it photographs beautifully against light walls.
Chain a width that matches your yarn and target scarf thickness, then work a base row in single crochet. For seed stitch, alternate single crochet stitches into the same stitch and into the next stitch in a repeating pattern, keeping your count steady. Continue until you reach your length, then finish with a border row of single crochet for crisp edges. Block lightly so the bumps show clearly instead of looking flat.
Use a hook with a smooth throat so the yarn slides and your texture stays even.
Don’t skip the border row — seed stitch edges can look ragged without it.
8. Corner-to-Corner Style Scarf with Gingham Look
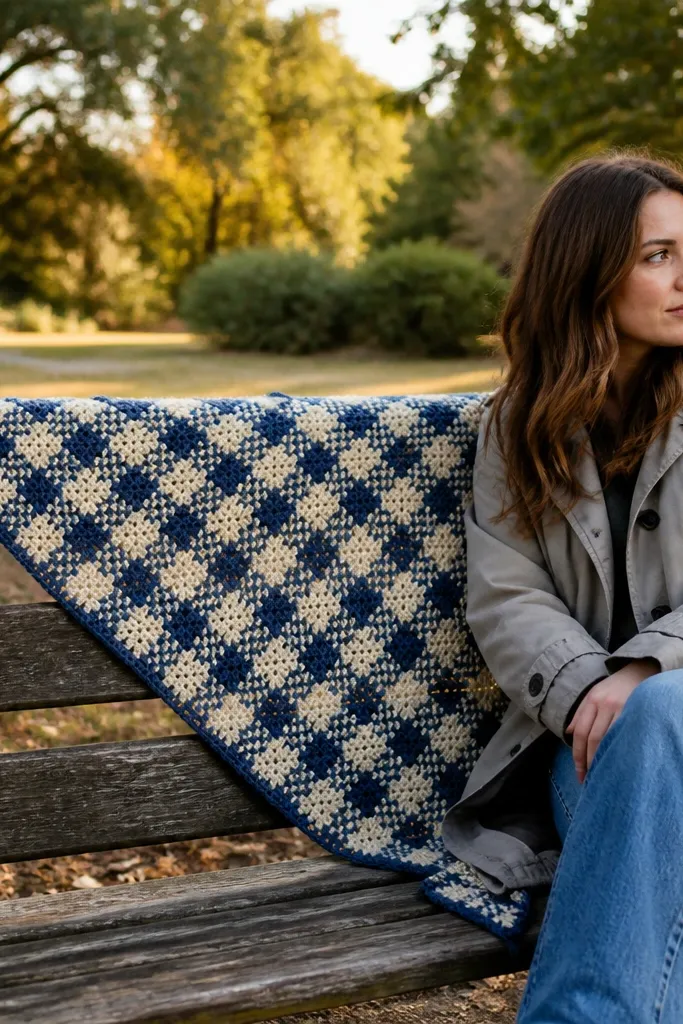
This scarf looks like a woven gingham because it’s built from little blocks. The C2C-style construction creates that grid without needing actual knitting. It’s a strong pick for an aesthetic scarf because the pattern reads clearly from a distance and up close. Use two colors for a clean check vibe, and keep the stitches tight so the squares look crisp in photos.
Pick two yarn colors and decide your block size, like 1 square equals a small cluster of stitches. Work diagonal blocks following a C2C-style approach: build up small square units, increasing to a midpoint and then decreasing to taper or keep a rectangle. Join color blocks by switching yarn at the end of a block and weaving ends as you go. Finish with a simple border row in one color to unify the whole scarf.
Pro tipPlan your color counts before you start so the check pattern doesn’t drift mid-scarf.
AvoidDon’t pull too tight when switching blocks — tight joins make the grid warp.
9. Shell Stitch Scarf with Curved Edges
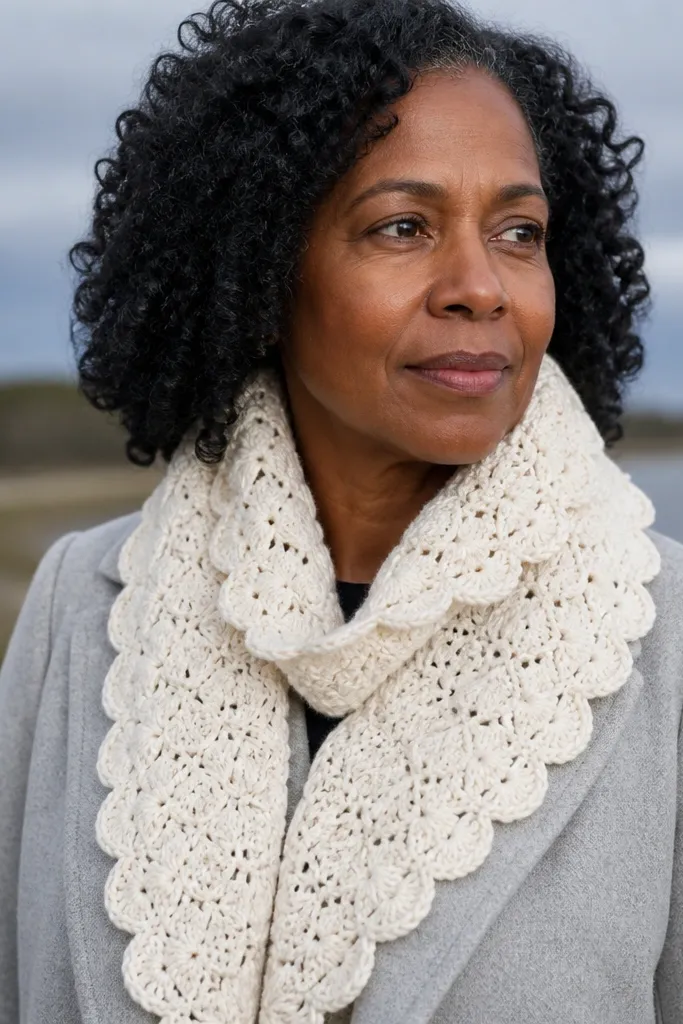
Shell stitch creates a scalloped texture that frames your outfit without adding bulk. The shells catch light and look feminine in a way that still feels modern, especially in white, cream, or pale gray. This scarf is ideal for draping over a coat collar because the texture naturally makes it sit nicely. It’s an easy crochet scarf idea with a repeat you can memorize quickly.
Chain a multiple that matches the shell repeat, then start with a foundation row of single crochet to set the spacing. Work the shell pattern by crocheting a set of stitches into the same point, then skip stitches to create the shell gaps. Repeat across the row and continue for your desired length. Finish with a border that repeats the shell shape along the ends, then block to encourage the scallops to open.
Use a stitch marker every shell group so your skips stay consistent across the row.
Don’t choose a slippery yarn — shells spread out and look messy.
10. Double Crochet Rib Scarf with Bold Contrast Trim
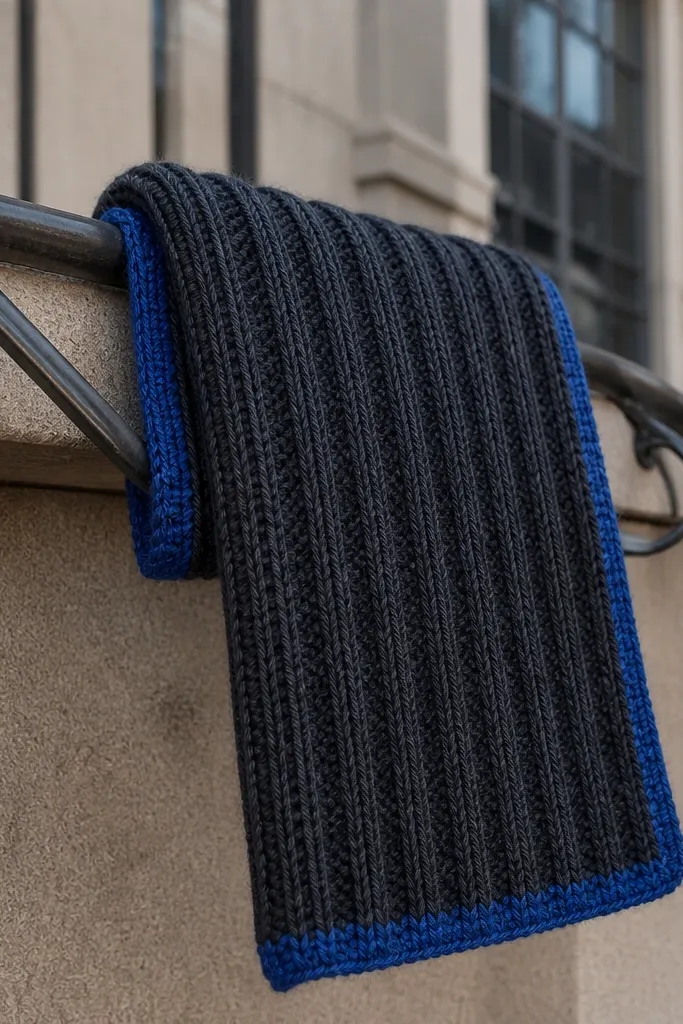
Vertical rib texture looks clean and tailored, the kind of scarf that looks like it belongs with a structured coat. This one uses a simple double crochet rib effect for a strong drape, then adds a contrast trim to make it pop in photos. It’s a smart pick when you want an easy crochet scarf idea that looks more graphic than cozy. Pick one main color and one trim color like red, mustard, or cobalt.
Start with a foundation chain for your width, then work double crochet rows using a ribbing method where you alternate front and back placement to create vertical columns. Keep your rib columns even by counting rows of the same placement pattern. When you reach your length, add a trim border by switching to the accent color and working a consistent edge stitch down each side. Weave ends and block so the ribs stand up instead of flattening.
Accent trim looks best when it’s one full color all the way around the ends, not scattered bits.
Don’t pick a trim yarn that’s too thin — it should look like a deliberate stripe, not a thread.
11. Bobble Row Scarf with Minimal Base
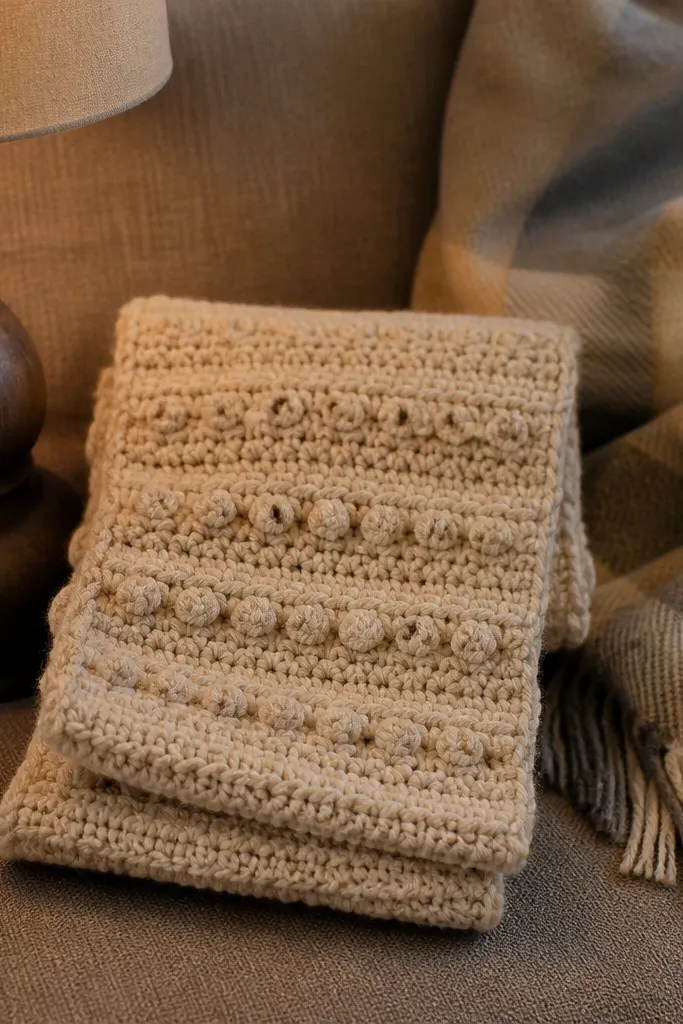
Bobble rows add a playful, tactile look without turning the whole scarf into a thick blanket. The base rows stay smooth, so the bobbles stand out like tiny dimples. This scarf looks cute in everyday outfits and reads well in photos because the texture is concentrated in stripes. Choose a neutral base with a slightly different shade for the bobbles, or do all one color for a monochrome texture look.
Chain your width and work a few base rows in half double crochet for a calm background. Create bobble stripes by placing bobble stitches at the same points across rows, then fill between bobble rows with smooth stitches. Keep the bobble count consistent by marking the start of the bobble sequence and counting across. Finish with a narrow border row in single crochet and weave ends tightly to avoid bumps at the edges.
If your bobbles look lumpy, reduce the bobble stitch height and keep the yarn pull consistent.
Don’t spread bobbles unevenly — the scarf looks sloppy when spacing drifts.
12. Moody Ombre Scarf with Simple Rows
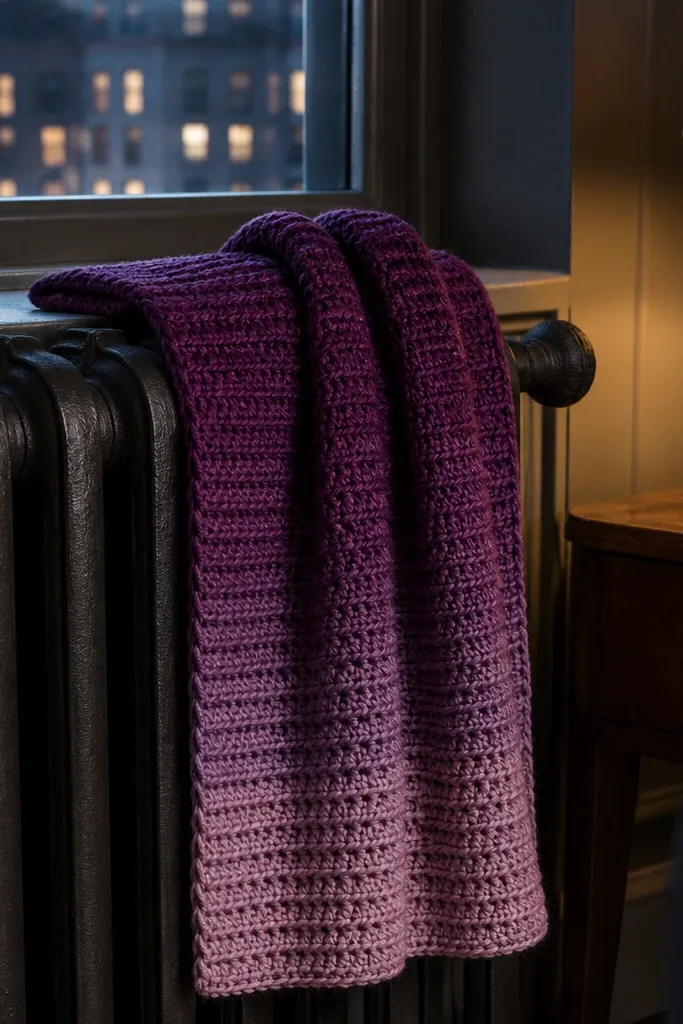
An ombre scarf looks polished because the yarn does the design work. You want the stitch to be simple so the color transitions stay smooth and don’t compete with texture. This is one of the best Easy crochet scarf ideas for people who want a “designer yarn” look without learning a complex pattern. It also photographs beautifully because the gradient creates depth even on a plain background.
Pick an ombre yarn with long color runs so the transition is visible across the scarf. Work the scarf in a single repeating stitch like double crochet or half double crochet using the hook size on the label. Keep your row count consistent so the gradient lands evenly from one end to the other. Add a border in a matching solid tone from the yarn label colorway if available, or use a solid coordinating yarn for a crisp finish.
Before you start, wind the yarn and check where the long runs start and end so your ends don’t land on awkward colors.
Don’t use a busy stitch pattern — it can chop the gradient and make it look patchy.
13. Giant Rib Scarf with Thick Yarn and Quick Build
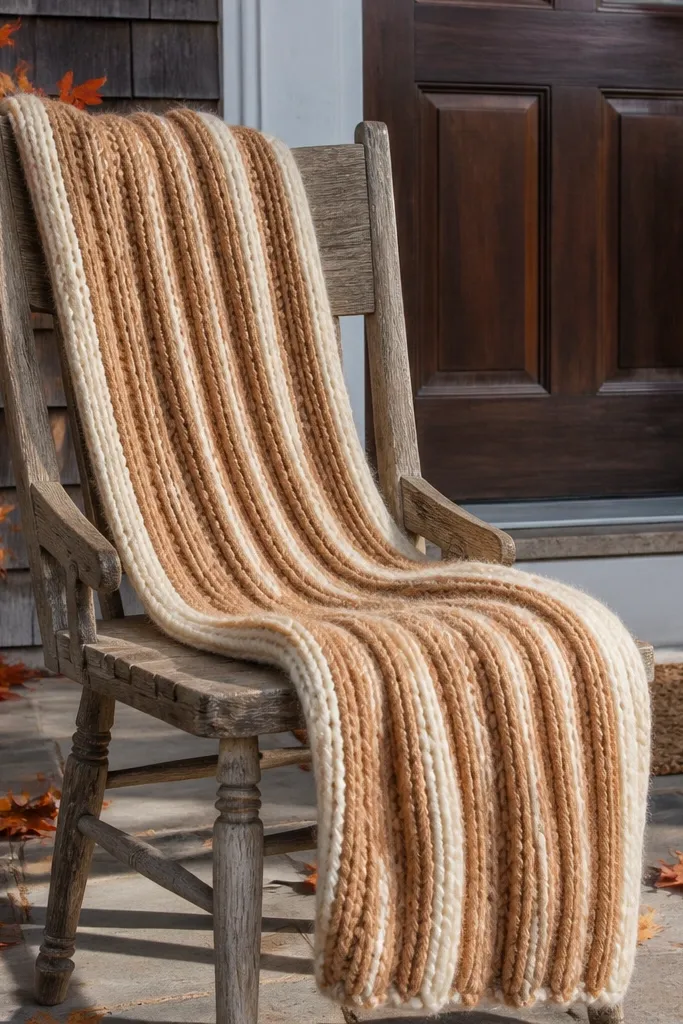
Thick yarn plus ribbing makes a scarf that looks chunky, cozy, and expensive fast. The rib texture stretches slightly, so it drapes well and doesn’t feel stiff when you wrap it. This is a go-to Easy crochet scarf idea when you want something that looks substantial without hours of work. Use camel and cream, or go monochrome for a calm, modern look.
Choose bulky or super bulky yarn and a hook sized for that weight so your scarf builds quickly. Work a rib pattern using front-post/back-post style stitches to create big vertical columns. Crochet until the scarf reaches your preferred length, then finish with a ribbed border by repeating the same post placement for a couple of rows. Weave ends and block by laying it flat with gentle stretching so the ribs stay defined.
Pro tipUse a larger hook than the label if you want softer drape instead of a tight, stiff fabric.
AvoidDon’t tighten your stitches — ribbing needs room to flex or it looks rigid.
14. Triangle Lace Wrap Scarf with Open Center
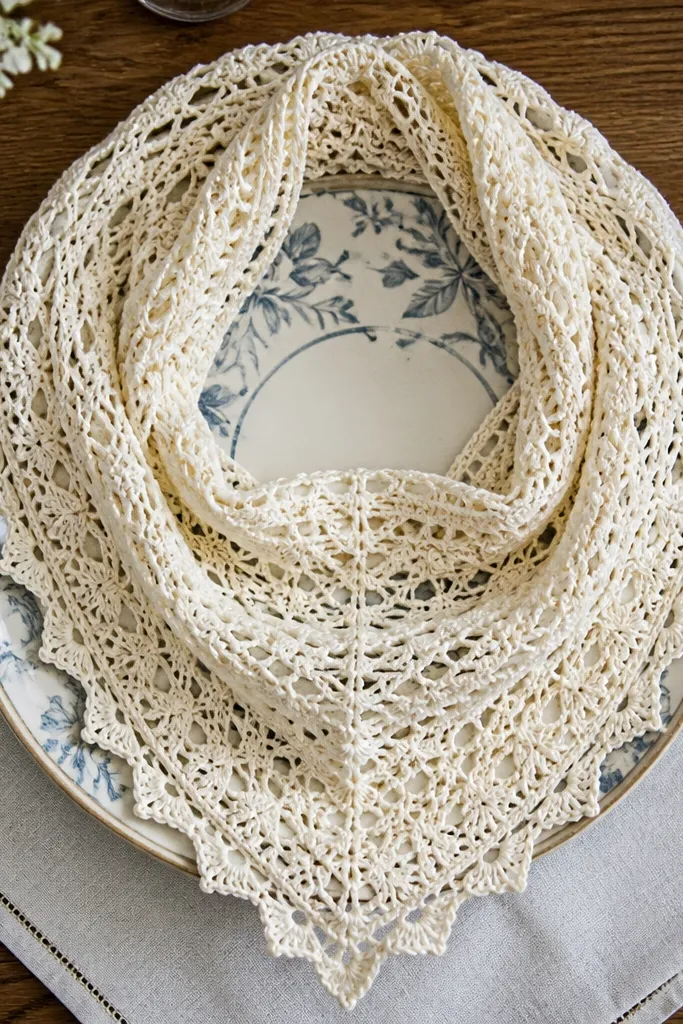
This is an easy crochet scarf idea that looks like a wrap even when you crochet one piece. The open center gives it a delicate silhouette, and the triangular shape makes it sit nicely on shoulders instead of hanging straight down like a standard scarf. It photographs beautifully because the negative space shows against your outfit. Choose a soft color like light gray, sage, or pale sand for a calm, flattering look.
Start with a chain and build a triangle using increases at the edges row by row. Use a simple lace repeat with yarn overs and consistent spacing so the open center stays airy. Keep the lace repeat centered, and add a border stitch pattern along the increasing edges so the triangle lines look intentional. When you reach the width you want, stop increasing and crochet a few rows even to finish, then block hard enough to open the lace.
Pin the triangle by its corners and mist the surface — blocking is what makes the open center look crisp.
Don’t skip consistent edge increases — uneven increases make the triangle look lopsided.
15. Striped Granny-Inspired Scarf with Straight Edges
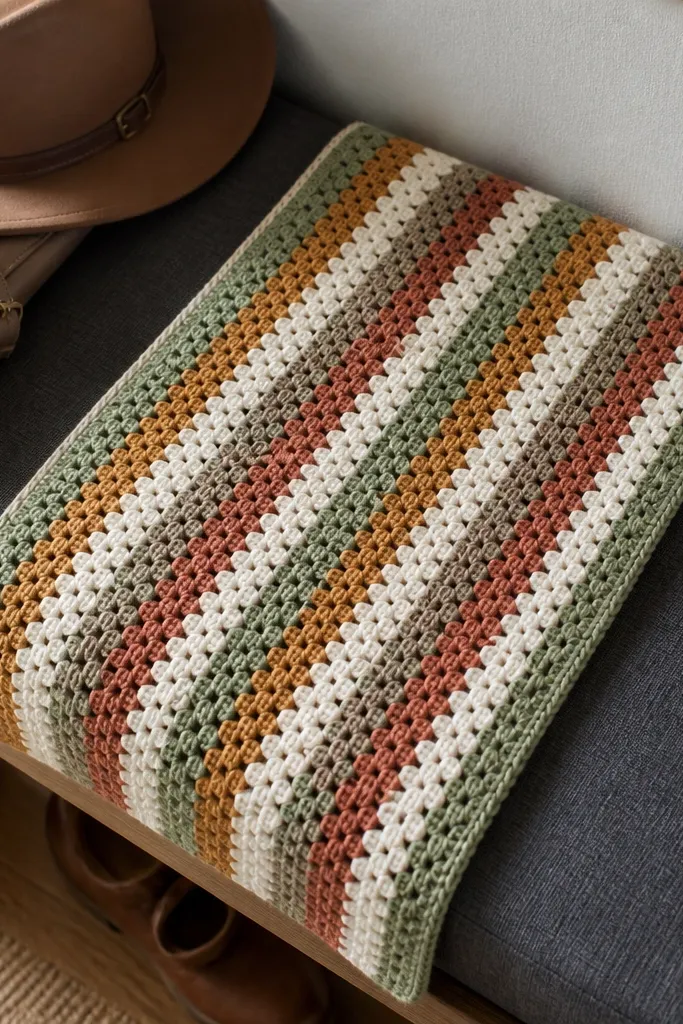
Granny inspiration reads instantly recognizable, but this version keeps the edges straight so it looks modern instead of patchwork. The stripe plan makes it photogenic, and the texture gives depth even with short rows. It’s a solid pick when you want a fun scarf that still looks clean on a coat. Use 3-4 colors max so the pattern stays readable in daylight.
Pick a width that fits your stitch repeat and chain accordingly, then work rows that mimic granny clusters in a straight format. Alternate rows between colors at the same height so stripes stay aligned. After each color change, keep tension consistent so the texture doesn’t pucker. Finish with a border that uses single crochet in one color across the ends and along the sides, then weave ends and block to straighten the scarf.
Use the same color order on every stripe so it looks planned, not random.



