
1. Square-Neck Ribbed Crop Top in Black + Oat
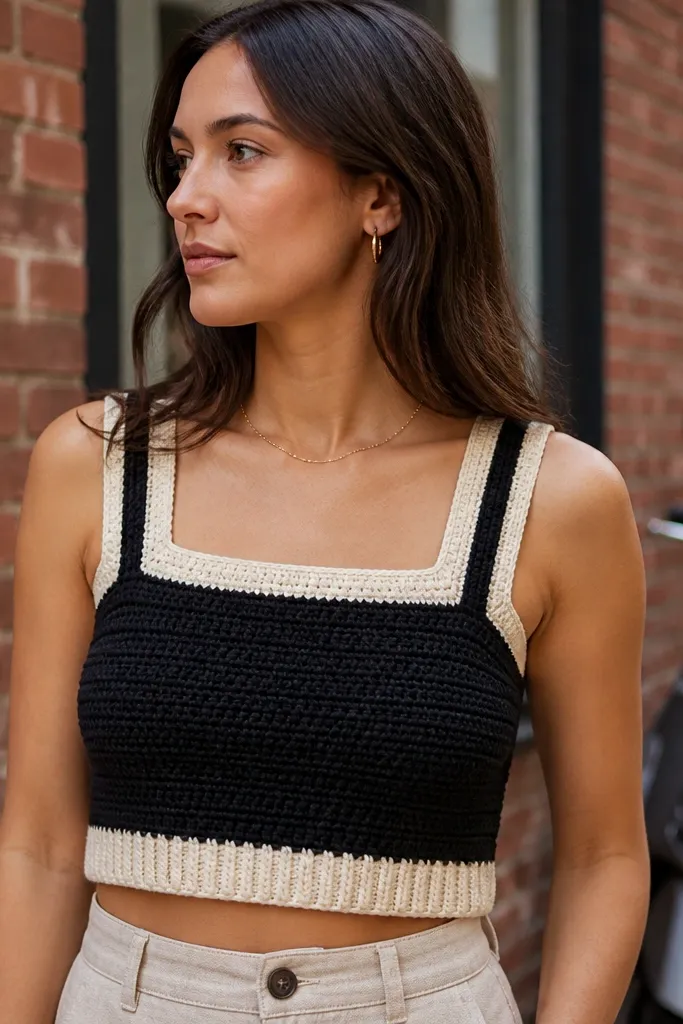
This crop top looks modern because the ribbing locks the fabric into flat bands instead of letting it ripple. The square neck reads fashion-forward, and the contrast between black and oat makes the shape pop in photos without needing heavy embellishment. Use a tighter rib stitch (back-post work) so the neckline doesn’t stretch into a scoop. It’s a great first “real garment” because you build it in panels, then seam cleanly at the sides.
Start by making a 10x10 cm gauge swatch in your rib stitch and measure how many stitches fit across 25 cm. Crochet two front panels and two back panels using the same stitch pattern, with black for the torso and oat for a central or side band. Add the square neckline by decreasing in the front panels over the same number of rows on both sides so it stays symmetrical. Finish edges with a single crochet border, then seam shoulders and sides, leaving openings for the sleeves if you want an off-shoulder look. Block flat before wearing so the ribbing snaps back to a clean outline.
Use stitch markers every 10 rows when shaping the neckline so both sides keep the same angles.
Don’t use a stretchy lacy stitch here — the neckline will collapse.
2. Crocodile-Stitch Halter Top with Pearl Buttons
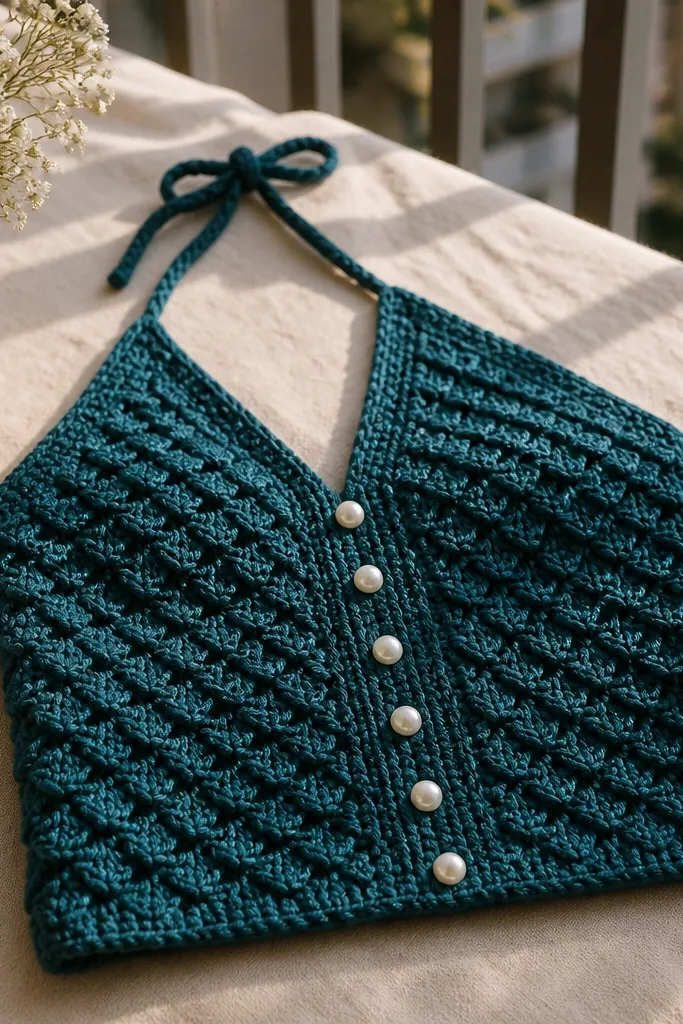
Crocodile stitch looks expensive because it creates raised, scale-like texture that catches light. A halter neckline is also naturally photogenic: it frames the collarbones and keeps the focus on clean lines. The pearl buttons add a tailored detail that makes the crochet read like a top from a boutique. This is a medium-skill project because the stitch pattern is denser, but the payoff is a structured fabric that doesn’t look flimsy.
Work a halter band first: crochet a row that fits snugly around the neck, then build outward with crocodile stitch for the front and back panels. Stop each panel at a length that hits your preferred underbust point, then shape the sides with decreases to keep it from looking boxy. Sew on pearl buttons at the center join or one side strap so the halter can be adjusted. Add a clean border around the arm openings using crab stitch for a smooth, slightly stretchy finish. Block with the halter band slightly stretched so it holds its curve.
Check your halter fit by measuring around your neck with a soft tape — crochet stretches less than you expect after blocking.
Don’t skip blocking — crocodile texture only looks crisp when it’s set.
3. V-Neck Vest with Color-Block Panels and Ties
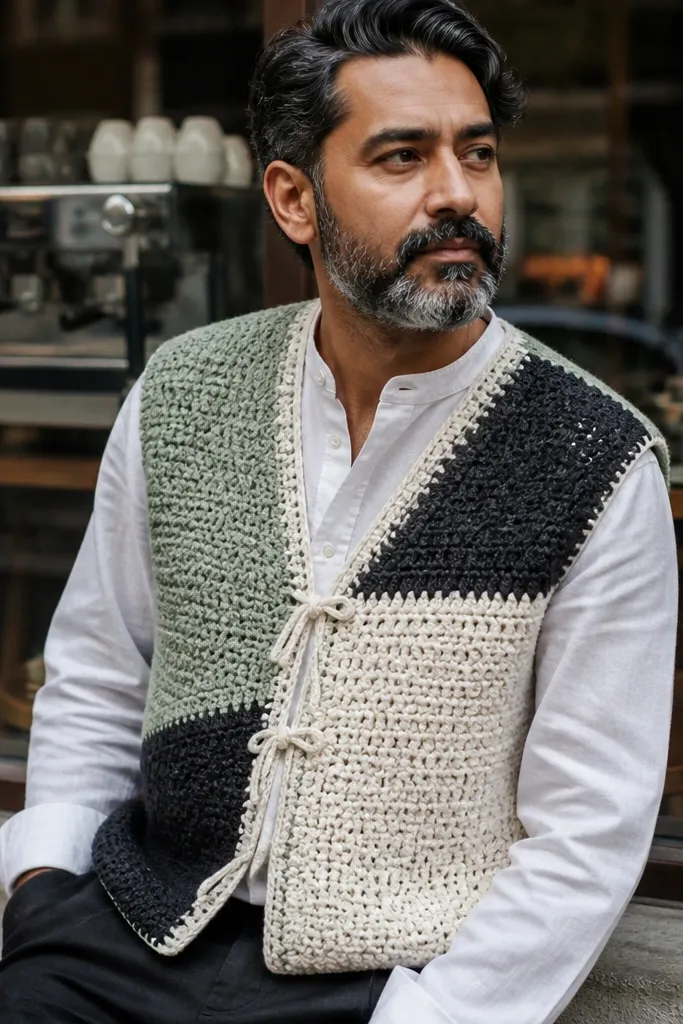
A crochet vest is the easiest way to make “Modern crochet clothing ideas” feel street-style. Color-block panels create a built-in tailoring effect, and the V-neck elongates your torso without needing complicated shaping. Tie closures keep it adjustable, so the fit looks intentional instead of random. This project is great for transitional weather and layering over fitted tees or button-downs.
Choose three yarn colors and swatch each so the stitch height matches across panels. Crochet a center panel for the back and two front panels with color-block sections, keeping stitch counts aligned for the V shape. Shape the V-neck by decreasing at the center edge of each front panel on a steady schedule. Add tie straps by crocheting long chains and securing them to the inside corners. Sew side seams, then border the neckline and edges with single crochet in the same contrasting color for a clean frame.
Use the same yarn weight for all colors. If one color is thicker, your V-neck will look crooked.
Don’t put the color changes on random row numbers — it makes the vest read uneven.
4. Long-Sleeve Puff-Shoulder Sweater Top
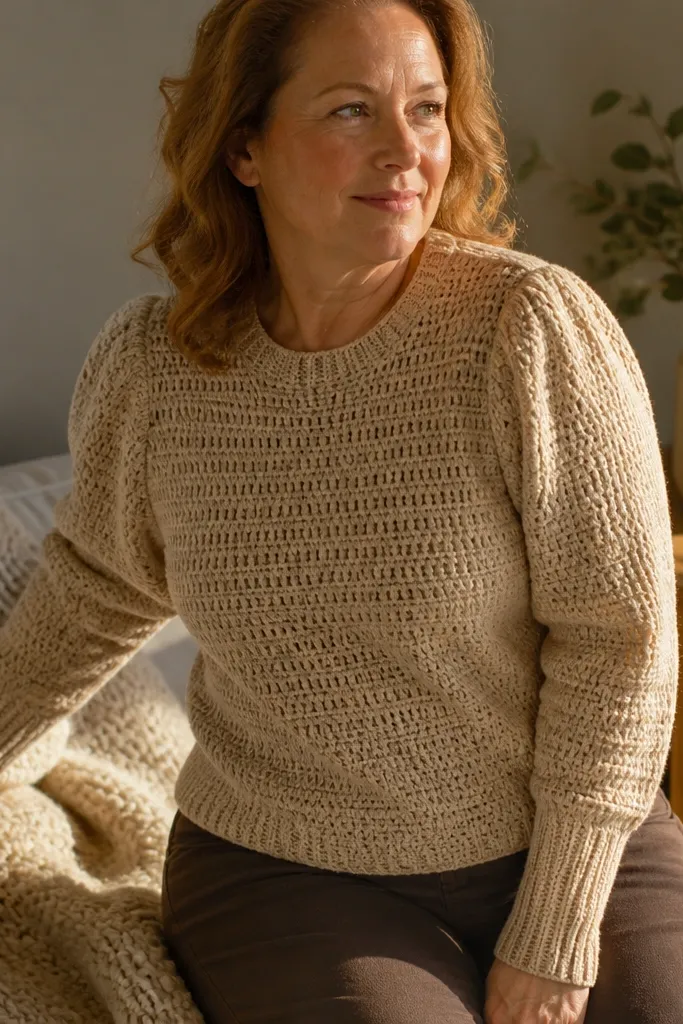
Puff shoulders instantly make crochet look current. This sweater top uses a denser stitch for the body and a ribbed cuff so the sleeves don’t balloon. The silhouette is clean in photos because the shoulder volume is controlled, not random fluff. It’s a satisfying build if you like structure: you’re basically making a fitted torso with shaped sleeves, then finishing edges for a sweater-like look.
Start with a torso panel that matches your bust measurement, then divide for front and back. Crochet sleeves separately, using increases to build the puff at the upper arm and decrease toward the cuff. Add ribbing at cuffs and hem using back-post double crochet or back-post single crochet for a tight band. Join sleeves to the body with mattress stitch so seams stay flat. Border the neckline with a ribbed band worked in rounds, then block to set the puff shape.
Make your puff increases gradual over 6-10 rows. Big jumps look like costume crochet.
Don’t use a thin lace yarn — puff shoulders will collapse.
5. Off-Shoulder Eyelet Dress for Summer Photos
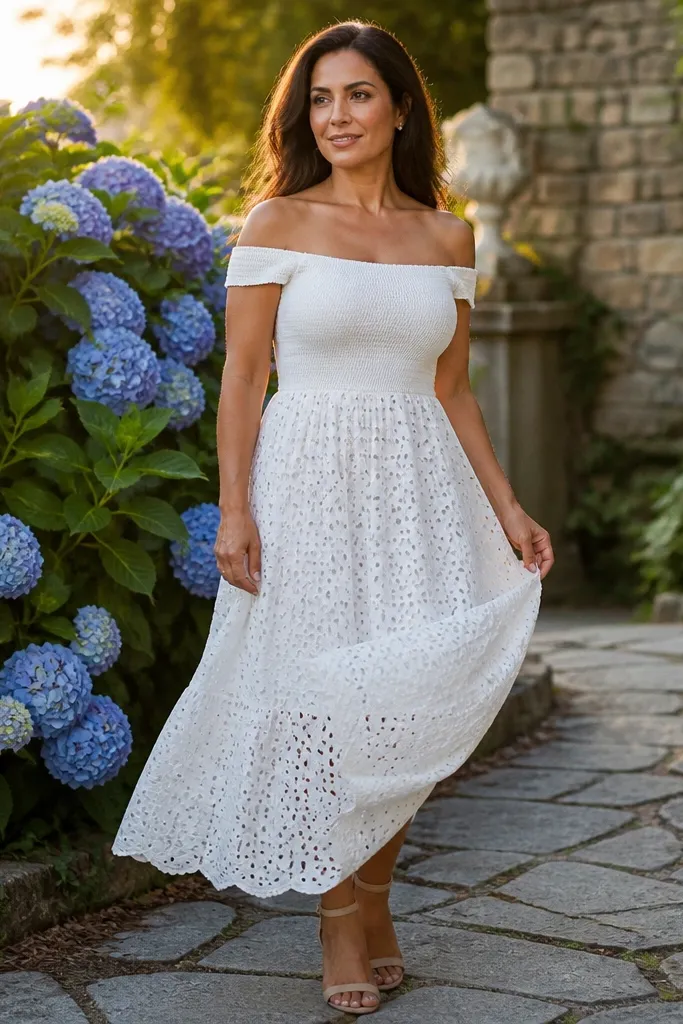
Eyelet and off-shoulder together look airy and modern, but only if the bodice stays fitted. This dress uses a firm stitch base for the upper section and then adds eyelets lower down, so it doesn’t stretch out at the neckline. The off-shoulder look is all about straps and edge finishing, not luck. If you want something that looks good in bright light, this is a strong pick.
Work a fitted bodice in a solid stitch, then add an eyelet skirt section once you reach the hip. Create the off-shoulder openings by leaving specific stitch counts on each side and crocheting a strap band to bridge the gap. Add a lightweight elastic through the neckline casing if your stitch pattern is too open to hold shape. Finish the neckline and sleeves with single crochet or crab stitch so the edges don’t curl. Block aggressively, especially around the strap band, for a crisp silhouette.
Use elastic no wider than 6 mm for the neckline casing so it stays hidden.
Don’t let the bodice be entirely eyelet — it will stretch and look sloppy.
6. Midi Wrap Skirt with Slit and Braided Waist Tie
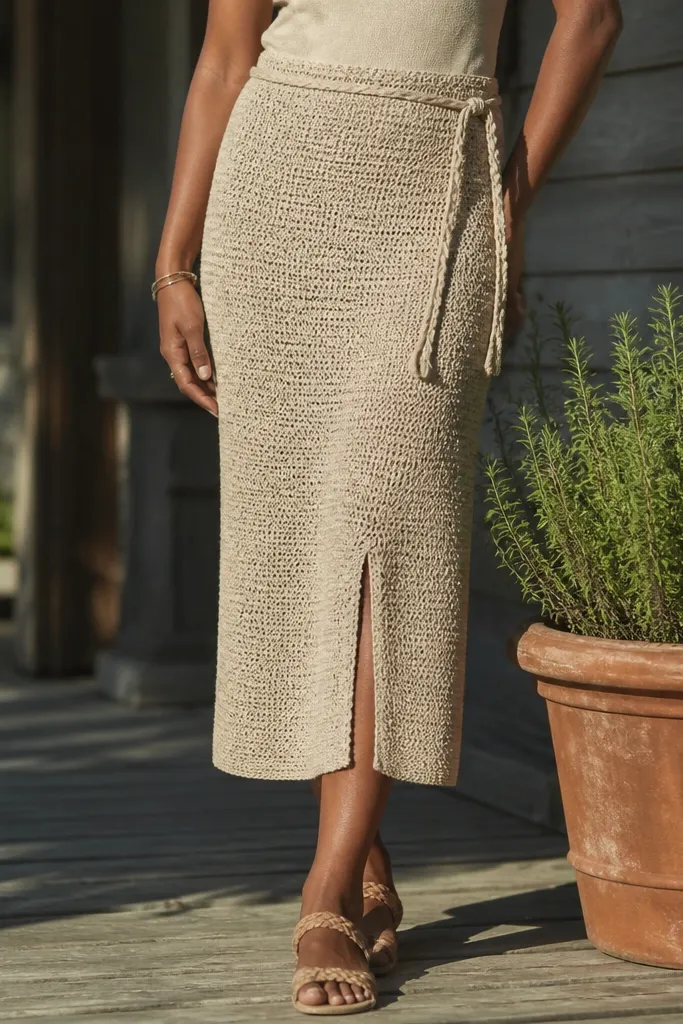
A wrap skirt is flattering and also very photogenic because the fabric moves. The key is keeping the crochet panel structured enough to hold a straight hemline, then adding a slit so it looks intentional instead of bulky. A braided waist tie looks handmade but clean, and it lets you adjust fit without pinning. This project gives you “modern crochet clothing ideas” without needing complex garment blocks.
Measure your waist and hips, then crochet two panels that overlap at the front. Build the skirt to your midi length, keeping stitch counts consistent so the hem doesn’t flare. Add a side slit by leaving a gap in one panel’s stitch pattern and bridging it with a clean edging. Crochet a braided tie: make a chain, then work a simple braid-like pattern or use a cord method and attach securely at the inside corners. Border the top edge with single crochet and weave in a row of elastic if needed for comfort.
Use a slightly stiffer yarn blend so the hem stays flat when you walk.
Don’t skip reinforcing the tie attachment points — ties rip out first.
7. Asymmetrical One-Shoulder Top with Chain Fringe Hem
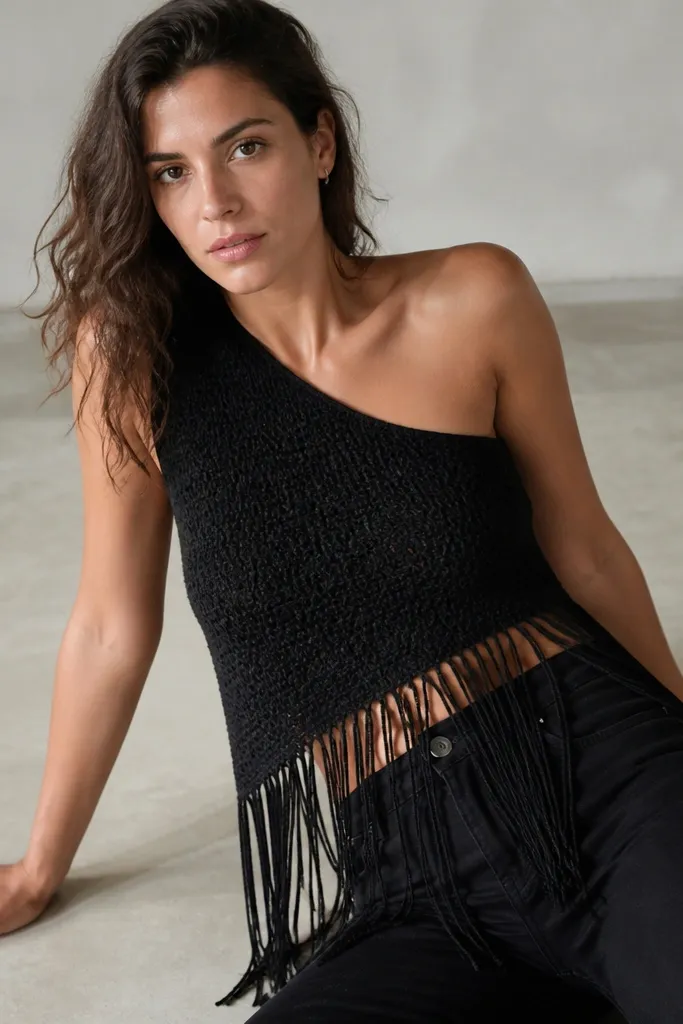
Asymmetry reads fashion-forward fast, and chain fringe adds motion that looks great in photos. This top is built with a firm stitch for the main panel and a controlled fringe line so it doesn’t turn into a tangled mess. The one-shoulder strap gives you a strong shape even if you keep the body simple. Skill level is medium, mostly because you’re managing uneven edges and a clean fringe placement.
Start by crocheting the main panel as a rectangle, then shape one side by decreasing to create the one-shoulder slope. Add a strap band that’s wide enough to cover the shoulder seam area, then attach it to the opposite edge. For the fringe hem, mark an even row across the front, then cut and attach chain fringes in consistent lengths using the same stitch spacing. Border the neckline with single crochet so the asymmetrical edge stays tidy. Block flat, then lightly steam fringe so it hangs evenly.
Pro tipMeasure fringe lengths with a ruler on a piece of cardboard so every strand matches.
AvoidDon’t attach fringe randomly across uneven stitch rows.
8. Cowl Neck Pullover with Thick Border Finish
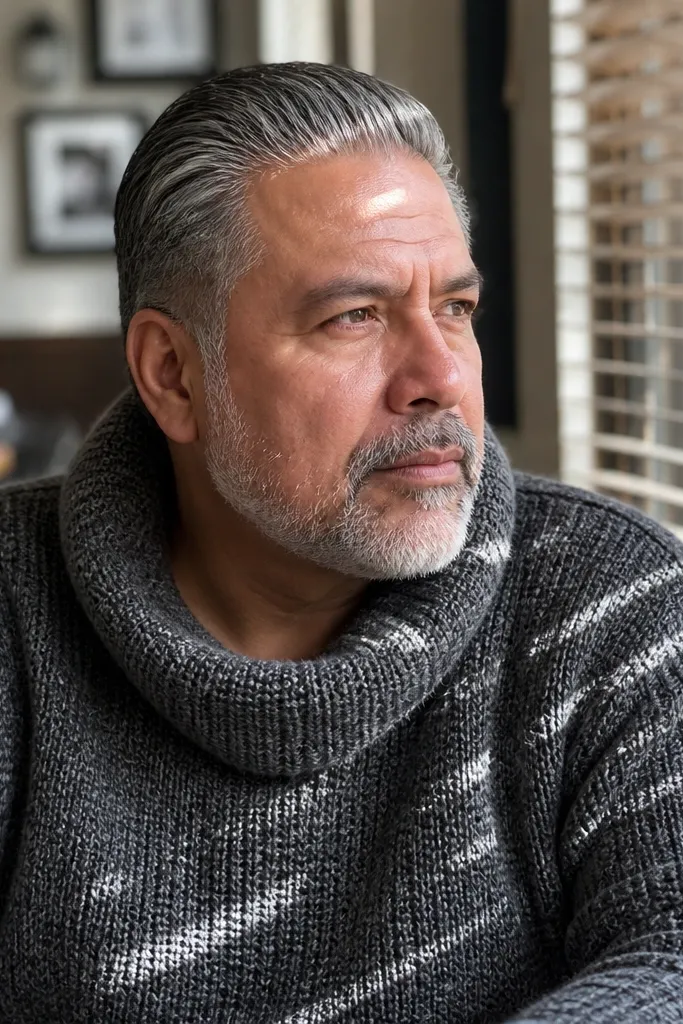
A cowl neck makes crochet look intentional because it creates a smooth frame around your face. The trick is using a stitch that drapes without sagging, then adding a thick border that holds the neckline shape. This pullover looks modern because the cowl is controlled, not floppy. It’s also comfortable: you get warmth without a tall, bulky collar.
Work the body in a solid, medium-density stitch for stability, leaving openings for sleeves or joining in rounds depending on your comfort level. Crochet the cowl as a separate band, then attach it around the neckline with a slightly tighter gauge so it curls into a cowl. Add a thick border by working multiple rows of single crochet or a dense stitch around the bottom edge of the cowl. Sew sleeves with flat seams, then border sleeve cuffs with a ribbed band. Block in place on a mannequin or flat surface so the cowl keeps its curve.
If your cowl curls the wrong way, flip the border edge so the heavier edge sits at the bottom.
Don’t use an overly open lace stitch for the cowl — it collapses.
9. Short-Sleeve Cardigan in Granny-Stripe Panels
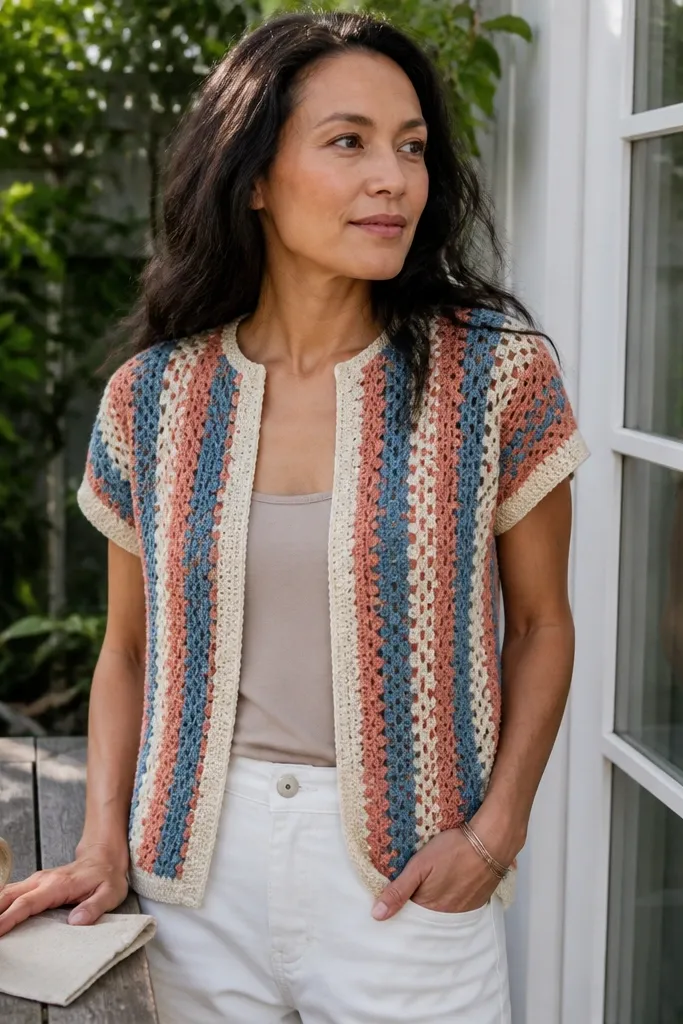
Granny stripes can look dated, but they look modern when you use a tight color plan and keep the panels straight. This cardigan uses narrow stripes with a consistent stitch height, then adds a clean front border so it reads like knitwear. The short sleeves keep it wearable indoors and outdoors, and the open front makes layering easy. It’s a beginner-friendly garment because you’re assembling panels instead of doing complex shaping.
Pick 3-4 colors and keep stripe width consistent by repeating the same number of rows per color. Crochet back and two front panels in stripe blocks, then seam at the shoulders. Add sleeve panels by continuing stripe rows and then shaping into a short sleeve with slight decreases. Crochet front edges as a dense border and attach buttons or sew in a snap band for closure. Block the panels flat before seaming so the stripes line up.
Use a darker color for the first stripe row so the border doesn’t look thin at the edges.
Don’t mix stripe row heights — the cardigan front will twist.
10. Mesh-Panel Top with Solid Center Stripe
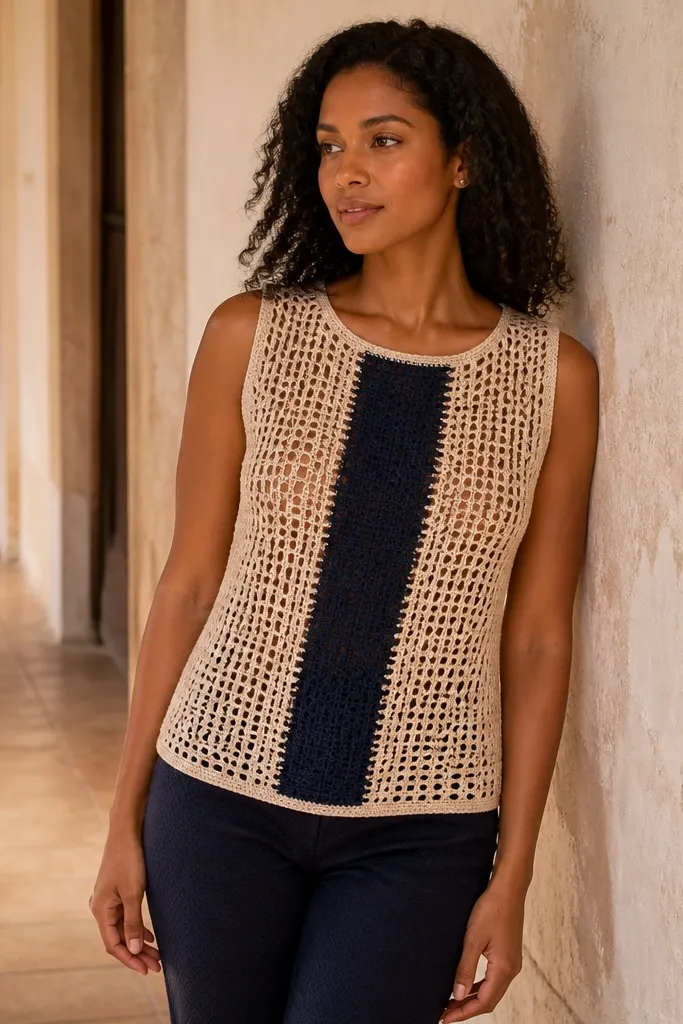
Mesh panels are breathable and look airy, but the solid center stripe is what keeps it modern and slimming. The contrast creates a clean vertical line in photos, and the solid stripe prevents the whole top from looking see-through or shapeless. This is a smart project if you want something light without going full lace. The look is graphic, almost like a sporty knit.
Start with a solid center panel that matches your bust measurement and desired length. Crochet mesh side panels separately, keeping the mesh stitch count aligned with the center panel edges. Seam the three panels together, then add a neckline band using a dense stitch for stability. For armholes, work a single crochet border to keep the mesh from curling. Block to open the mesh pattern, then press seams flat.
Try a cotton blend for mesh so it drapes instead of clinging.
Don’t skip a dense neckline band — mesh will stretch out.
11. Ribbed Bodycon Dress with Side Cutouts
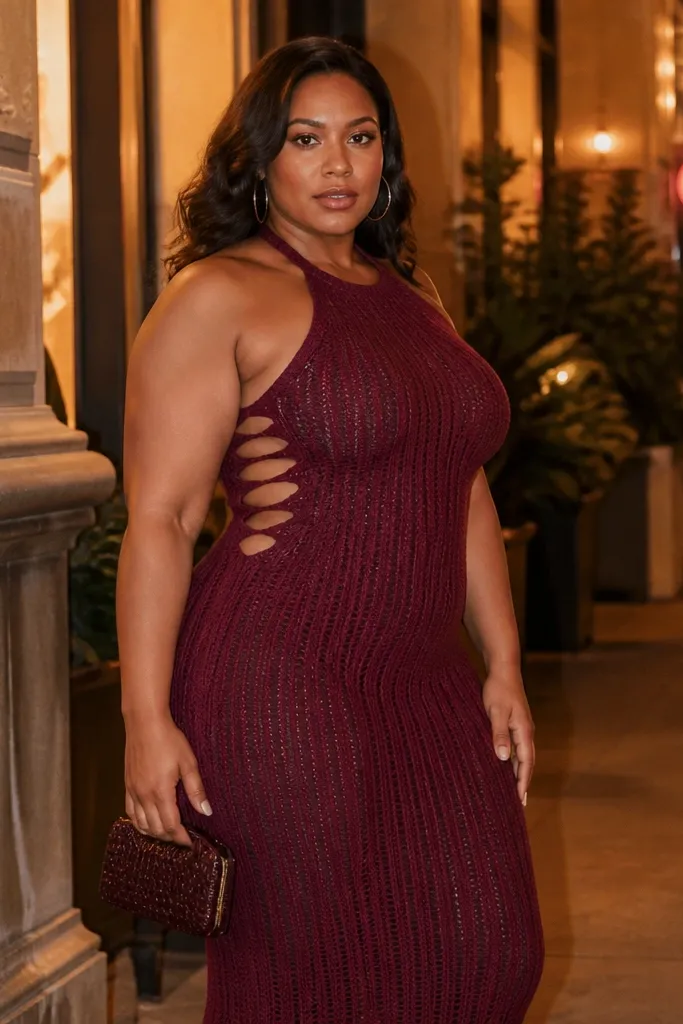
A bodycon crochet dress can look sleek if the fabric is ribbed and the cutouts are placed with intent. Side cutouts add a modern edge and create a flattering silhouette without needing complicated lace. This project is photo-ready because the ribbing creates vertical lines that read crisp. Skill level is medium to advanced due to fit and shaping, but the result looks like wearable fashion.
Swatch for rib stitch gauge and measure stretch after blocking. Crochet front and back panels with ribbing, shaping decreases or increases to match bust, waist, and hip measurements. Create side cutouts by pausing stitches at marked intervals and bridging the gap with a smaller band so the opening stays clean. Sew side seams with mattress stitch, then add a ribbed hem and ribbed neckline band. Block with tension so the dress holds its body-hugging shape.
Use stitch markers at every shaping change so both sides match perfectly.
Don’t make the rib stitch too loose — bodycon needs firmness.
12. Berry-Colored Crochet Bucket Hat with Structured Brim
If you want modern crochet clothing ideas that are instantly stylish, start with a hat you can wear with everything. A structured brim makes the hat look clean, not floppy, and the bucket shape frames your face in a flattering way. Berry tones photograph well in daylight and add color without forcing you into a full garment. This is a quick project with clear results, and the brim construction is the part that makes it look “designed.”
Work the crown in rounds, increasing evenly until it reaches your head circumference. Build the bucket sides to your desired height, then switch to a stiffer brim method by increasing row by row more slowly. Add structure by using a brim pattern that alternates dense stitches and then finishing the brim edge with a tight border. If your yarn drapes too much, sew in a thin brim stiffener or a strip of fusible interfacing on the inside. Block the hat over a bowl or hat form so the brim keeps its curve.
Pro tipTest brim stiffness by wetting a small brim swatch and seeing how it dries — adjust stiffness before the full build.
AvoidDon’t use a very fuzzy yarn here — it blurs the brim edge.
13. Open-Back Halter Top with Tension Straps
An open-back halter top looks modern because it creates a strong silhouette from the front and back. The tension straps keep the fabric from sagging and pulling away from your body, which is the difference between “cute” and “actually flattering.” This top is photogenic because the back details are visible even when you’re walking. It’s medium skill since you’re working out placement, but the construction is still straightforward with bands and seams.
Crochet a front panel that covers the bust with a stable stitch, then create the halter straps by working narrow bands and attaching them to the front corners. For the back, crochet a back band that’s shorter and shaped to your desired open-back height. Add tension straps by crocheting thin strap cords and securing them at points where you want the fabric to sit smoothly. Finish all edges with single crochet so straps don’t curl. Block with the straps slightly stretched so they hold their tension.
Pro tipUse a slightly tighter hook size for straps to stop stretching over time.
AvoidDon’t skip edge borders on the open-back — it rolls instantly.
14. Pleated-Look Skirt with Waffle Texture Panels
This skirt gives a pleated look without doing hundreds of folds. The waffle texture creates natural ridges that read like pleats, and the panel construction keeps it structured. It’s modern because the ridges are evenly spaced and the silhouette stays clean at the hem. This is a great “statement but wearable” piece, and it photographs well because the texture catches light from multiple angles.
Crochet multiple waffle-texture panels, each the width of one pleat “section” you want. Assemble panels with seams placed so the ridges line up across joins. Add a waistband band in a tighter stitch so it doesn’t stretch out, and choose a closure like a button or tie at the side. Keep the skirt length mid-calf or longer so the texture reads as intentional. Block the skirt while pinning the ridges flat so the waffle pattern stays crisp.
Count ridges, not rows — waffle texture changes height faster than you expect.
Don’t use a super-thin yarn — waffle ridges need substance.
15. Raglan Sleeve Top with Color-Matched Seams
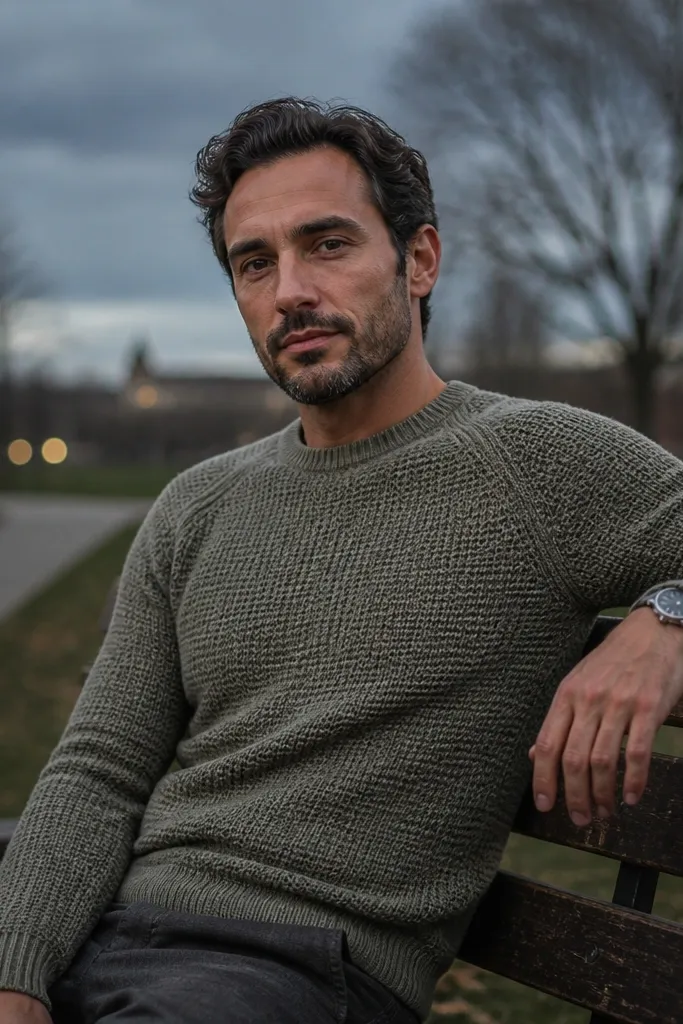
Raglan sleeves make crochet look like real knitwear because they create diagonal seam lines that shape the shoulder. Matching the yarn color to your seams makes the garment look seamless from a distance, which is exactly what you want for stylish photos. The body can be simple, but the raglan construction gives it an instant designer vibe. This is a medium-skill project because you’re joining sleeves to the body with careful stitch counts.
Start with the back and front yokes, working raglan increases to form the diagonal seams. Continue into sleeves and torso by increasing/decreasing at the raglan lines so the sleeve cap sits correctly. Use the same stitch pattern for all joined sections to keep texture consistent. When you reach the waist, separate into body and sleeves if your method requires, then finish with ribbed cuffs and hem using back-post stitches. Block to set the diagonal lines.
Mark raglan lines with a different color of stitch marker thread so your increases never drift.
Don’t join at random stitch counts — raglan seams show every mismatch.
16. Crochet Kimono Wrap with Wide Sleeves
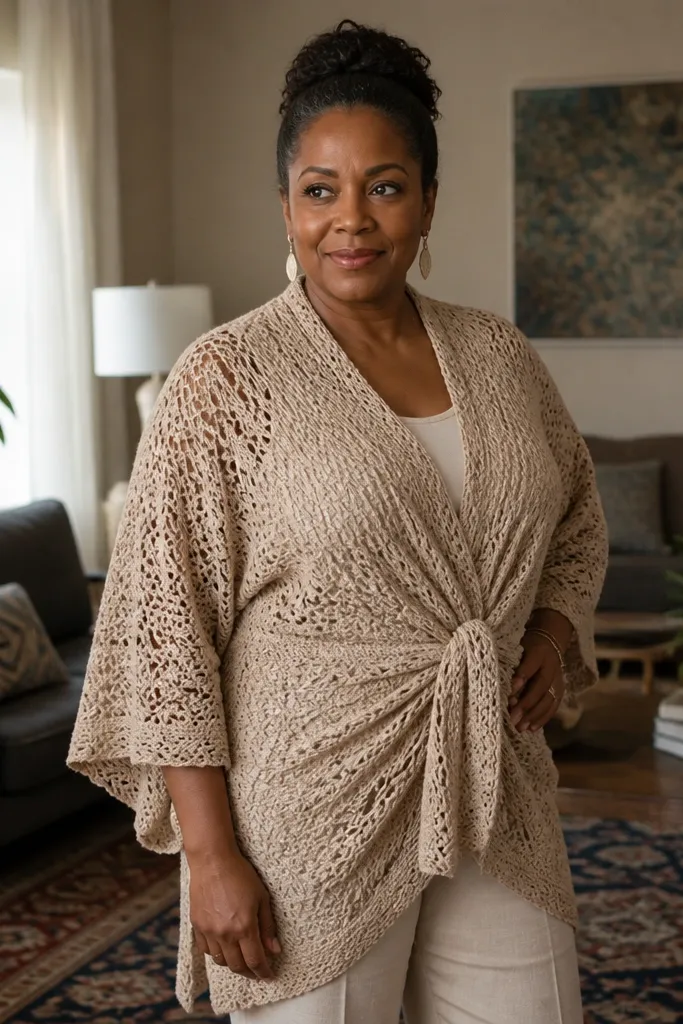
A kimono wrap looks modern because it’s loose where it should be and structured where it matters. Wide sleeves photograph beautifully because they create shape in motion, and the wrap front makes it easy to style with jeans or a slip dress. This project is forgiving on fit, but it still looks polished when you finish the edges cleanly and add a tie that sits flat. The result is a light layer that feels intentional.
Start by making a back panel and two front panels as long rectangles, then shape the opening into a V so the wrap sits correctly. Crochet wide sleeves as separate pieces and seam them into the front and back panels at the side edges. Add a tie by crocheting a long cord or braid and attaching it at the inside of the front panels so it doesn’t flare outward. Finish the wrap edges with a dense border and single crochet around the V opening. Block flat, then hang to let the drape settle.
Pro tipUse a slightly heavier yarn for the tie so it doesn’t twist and flip in photos.
AvoidDon’t leave the wrap edge raw — it curls and looks unfinished.
17. Crochet Shoulder Bag with Chain-Link Handle
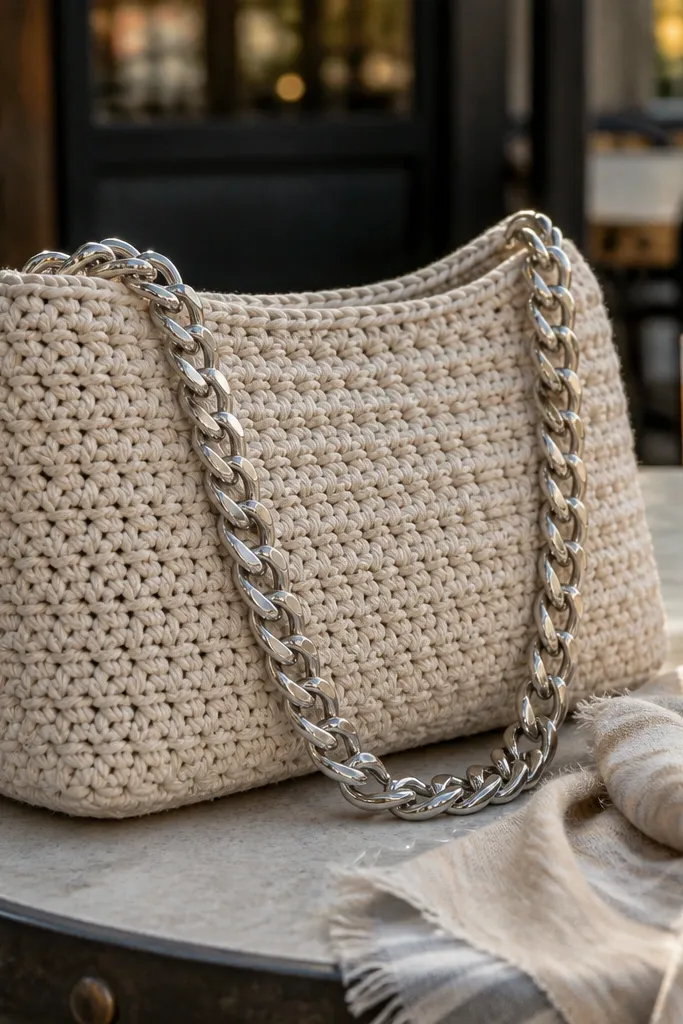
A shoulder bag is the fastest way to make crochet look styled, not homemade. The chain-link handle adds a hard, modern contrast to soft yarn and makes the bag look like an accessory from a store. Keep the bag structured with dense stitches and a firm base so it holds shape in photos. This project is great for practicing finishing skills you’ll use on clothing too.
Crochet a firm base using tight stitches and work up the sides in a dense pattern until you reach your bag height. Add a top edging row that compresses slightly so the opening doesn’t stretch. For the handle, sew chain links into the bag sides using strong thread and reinforce with a second stitch pass around each attachment point. Add a simple lining if you want a clean interior look, then secure it with a few hidden stitches. Block the bag base flat before you attach the handle so it stays square.
Use a metal needle and thick thread for handle attachments — yarn alone won’t hold under stress.
Don’t use an airy stitch for the bag body — it collapses.
18. Slouchy Beanie with Two-Tone Stripe and Clean Turn-Up
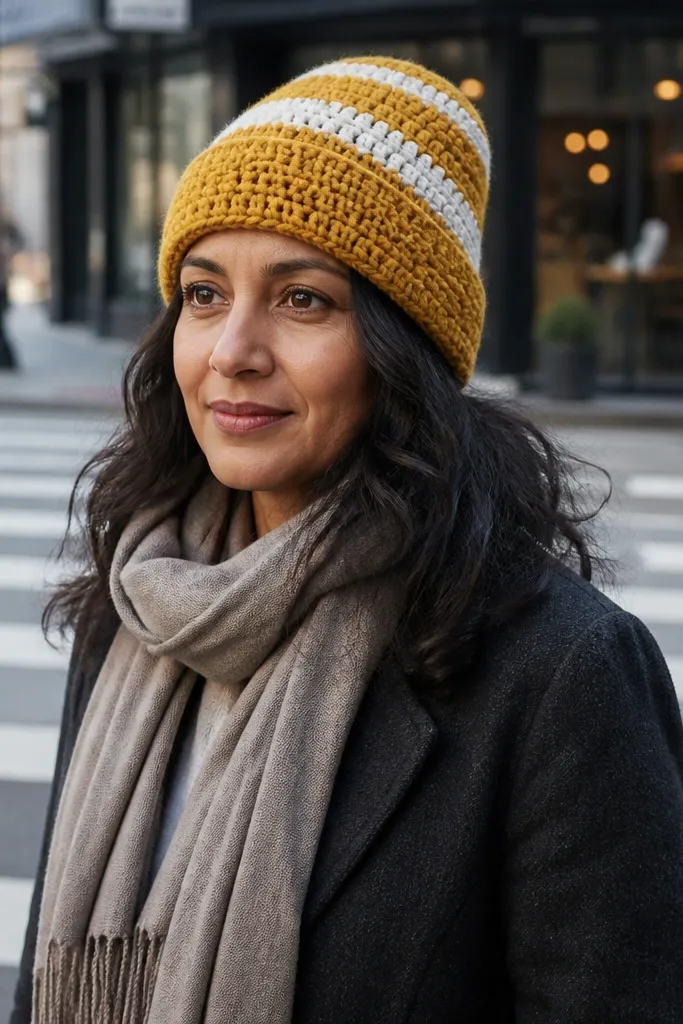
A two-tone slouchy beanie looks modern because the stripe acts like a design element, not just color. The clean turn-up cuff matters — it frames your face and keeps the hat from looking like a loose tube. This is a quick accessory that upgrades every outfit, and it’s easy to photograph because hats have clear shape. Use a stitch that holds density so it doesn’t look flat.
Work the crown in rounds, increasing until it fits your head circumference. Continue in the round without increases until you hit your slouch height, then start the two-tone stripe at a row where the cuff will turn neatly. For the cuff, work a few extra dense rows and then fold up, either by building it as a separate section or by tightening stitch placement. Weave in ends tightly and block over a head form or bowl so the slouch keeps its curve. Add a border row if the edge looks uneven.
Keep the stripe change at the same place on every round so it looks intentional, not accidental.
Don’t use thin yarn for a slouchy shape — it will look limp.
19. Crochet Jumpsuit with Tie Waist and Wide Leg Panels
A jumpsuit is bold and extremely photogenic, and the tie waist is the detail that makes it flattering instead of bulky. Wide leg panels create that modern “flow” look while staying readable in photos because the fabric is panel-constructed. The key is building a stable torso and using a stitch that doesn’t stretch at the hips. This project takes longer, but it’s one of the most satisfying “wearable crochet clothing ideas” on the list.
Start with the torso: crochet front and back panels with shaping for bust and waist, then add a tie waistband band using dense stitches. Build legs as two separate panels, then seam them to the torso at the inseam. For wide legs, keep increases minimal and maintain stitch counts so the hem stays straight. Add a neckline and sleeve openings with dense borders, then create a clean closure at the front using buttons or ties. Block your finished jumpsuit flat, then hang to let it relax into drape.
Measure your inseam on a pair of pants you already like and match the length row-for-row.
Don’t crochet the waistband in a stretchy stitch — ties need a firm base.
20. Crochet Bikini Top with Solid Triangle Cups
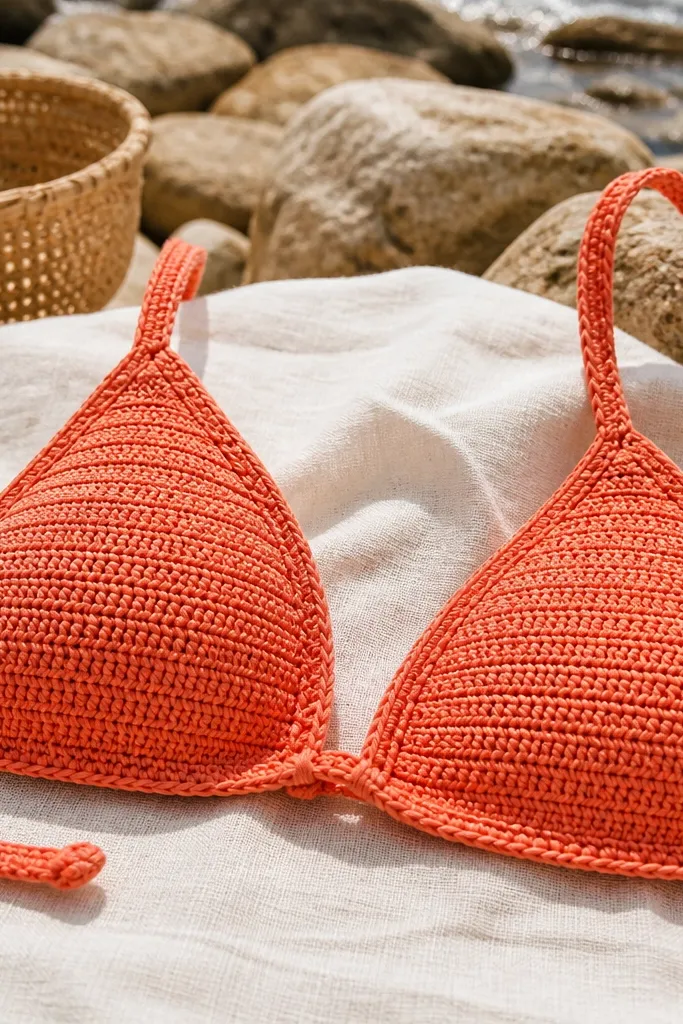
This is for people who want modern crochet clothing ideas that look like swimwear design, not beach craft. Solid triangle cups create a clean shape and photograph well on sunlit skin. The straps keep everything in place, and the edges look polished when you border them tightly. Skill level is medium because you’re managing cup shaping and strap attachment, but the build is quick compared to a dress.
Crochet triangle cups from the bottom point upward with increases to shape the top edge. Keep the stitch dense so the cups hold form, then add a border row around the cups to hide any uneven edges. Attach neck straps and side straps using sturdy yarn or a thin nylon cord inside if you need extra stability. Sew strap attachment points securely so they don’t gap. Block the cups to set the curve, then check fit by placing them on a lined bra form.
Pro tipUse swim-friendly yarn or a cotton blend that handles water without turning stiff.
AvoidDon’t use an overly open stitch for cups — it won’t hold shape.



