
1. Cherry Duo Keychain with Seed Speckles
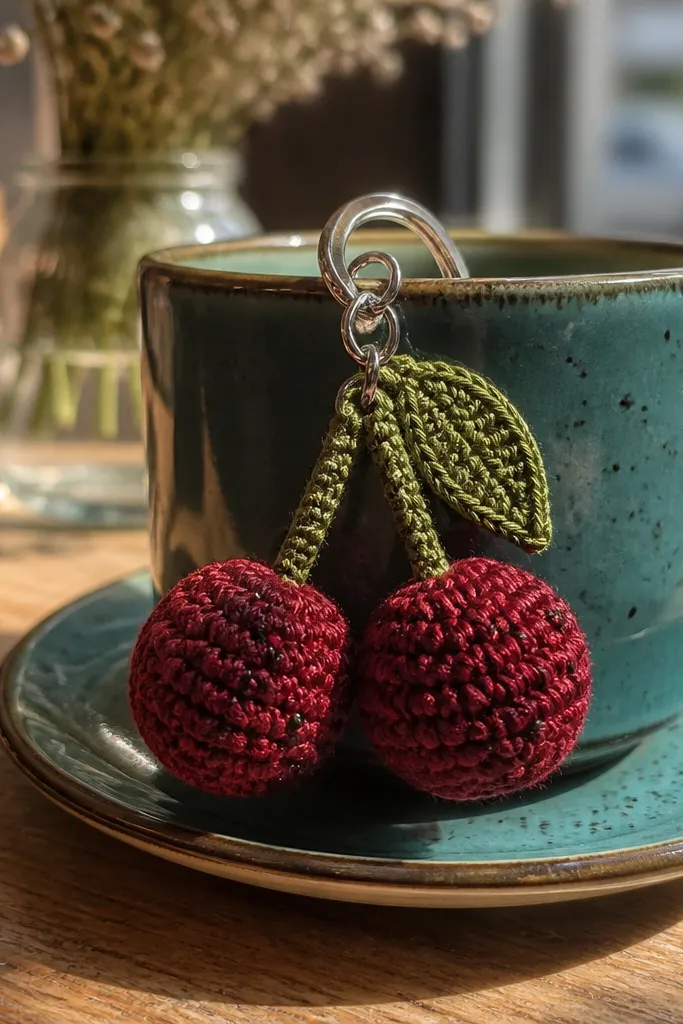
This one sells because it’s instantly recognizable and the colors pop without needing extra decoration. The cherry shape is simple but photogenic: rounded body, a tight top stem, and a leaf that frames the whole piece. Use black seed speckles sparingly so they look like seeds, not random dots. It’s also durable since you can make it firm with double crochet rows and avoid floppy stuffing. Skill level is beginner-friendly if you can do basic rounds and simple color changes; time is usually about 45-70 minutes per piece depending on how neat your color changes are.
Start by crocheting two identical cherry halves (or one full round cherry) in red using a tight stitch pattern like single crochet in the round. Add a small green leaf on the top with a few increases and then stitch it down so it lies flat. Sew or surface-stitch a handful of tiny black seed dots across the red using a tapestry needle and short lengths of black yarn. Finish by attaching a split ring to the stem area using a short yarn strap that you crochet as a loop or sew firmly into the top. Weave in ends tightly on the inside and trim close so nothing catches keys.
Pro tipUse a slightly smaller hook than the yarn label for the cherry body so it stays round and doesn’t collapse.
AvoidDon’t overstuff — it makes the cherry look lumpy and the leaf flips out of place.
2. Neon Candy Stripe Heart Keychain
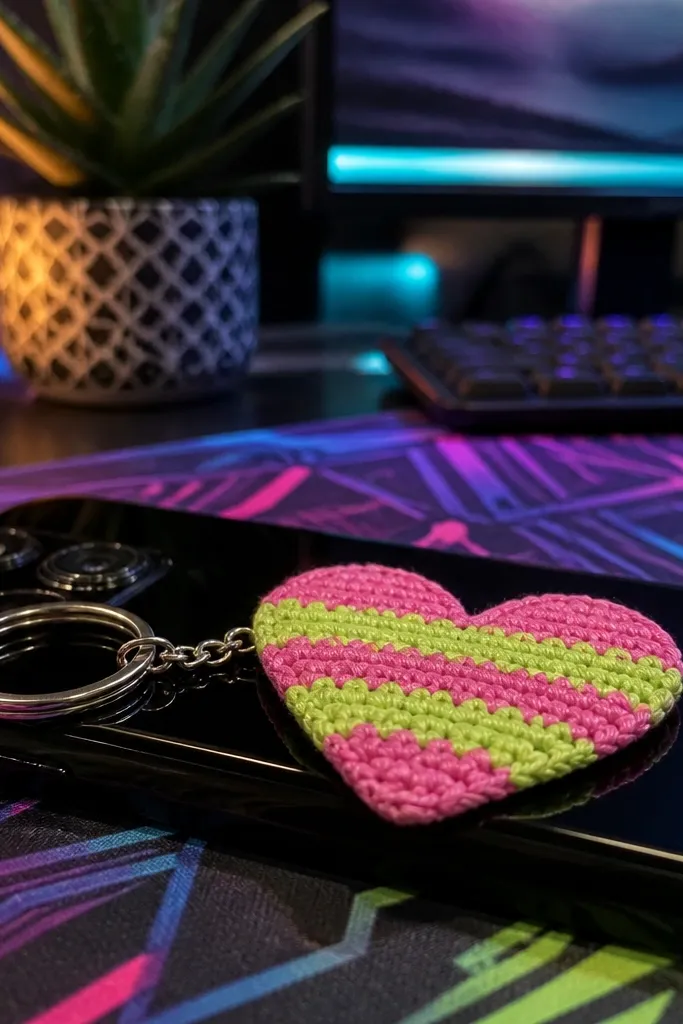
A candy stripe heart is pure thumb-stopping color blocking. The heart shape reads instantly, and the alternating stripes add motion even in still photos. Keep it flat-ish so the stripes stay crisp; that flatness also makes the keychain easier to attach to hardware cleanly. This project is a great pick for fast sales because you can produce multiple hearts quickly once your stripe rhythm is set. It’s beginner to intermediate depending on how confidently you do heart shaping, but you can keep it simple with a basic granny-style heart outline.
Choose two high-contrast colors and crochet your heart in rows or in a simple heart motif, keeping stitch count consistent for clean edges. Plan your stripe widths: do 2-3 rows per color so the stripes are visible without looking messy. When you reach the top curve, reduce stitches gradually so the heart points stay sharp rather than rounded. Attach a loop by chaining 15-25 stitches and slip stitching to form a strap, then sew the strap onto the top center. Weave in ends on the wrong side and press the piece flat with your hands before photographing.
If your stripes look wavy, switch to single crochet for the stripe sections to lock in the edges.
Don’t use too many colors — three is the max before the heart stops reading clearly.
3. Mini Rainbow Waffle Keychain
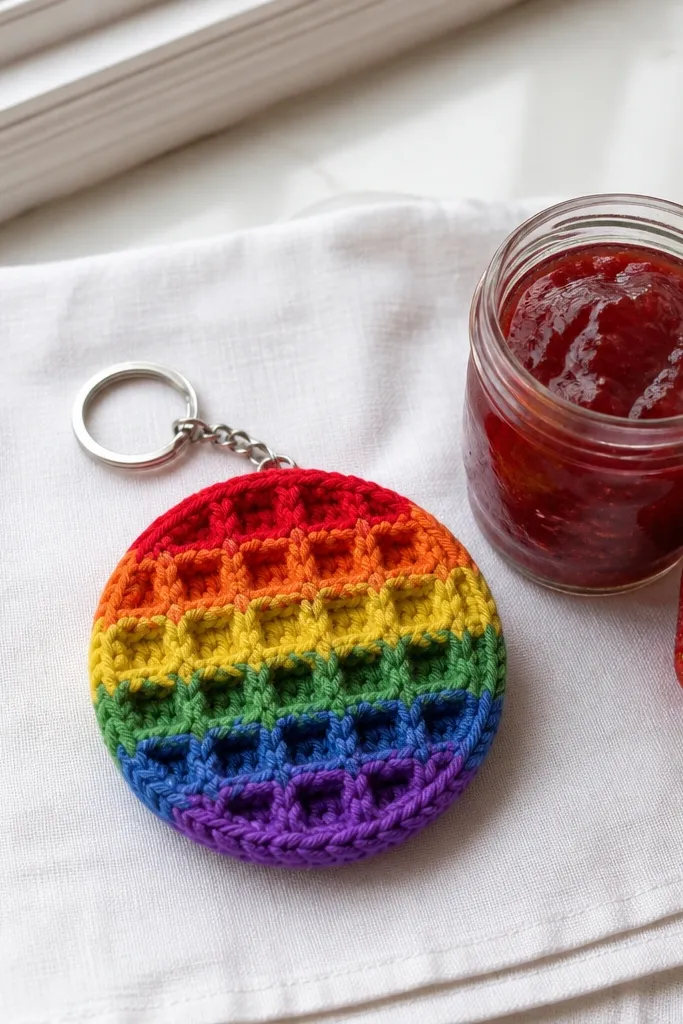
This looks like a tiny snack and that’s why it sells. The waffle texture gives you that “I need to touch it” surface, and the rainbow stripes make it pop even at small sizes. It’s also one of the easiest photogenic pieces because it’s flat, so it lays perfectly on a background. You can make it with no stuffing and no face details, which means fewer finishing steps. Expect about 60-90 minutes per keychain depending on how fast you work the waffle stitch.
Crochet a flat square base in a tight stitch like single crochet, then switch to a waffle texture stitch pattern for the surface. Create the rainbow effect by swapping colors in sections across the square — keep each color block wide enough to read. Add a simple border row around the edges to make the waffle look finished. For the key attachment, crochet a small strap at one corner or sew a short loop to the back using yarn doubled for strength. Weave ends on the back and trim so the waffle texture stays clean.
Pro tipUse a stiff cotton yarn for the waffle so the texture doesn’t collapse into flat fuzz.
AvoidDon’t skip the border row — it’s the difference between “practice square” and “product.”
4. Tropical Pineapple with Crochet Beads
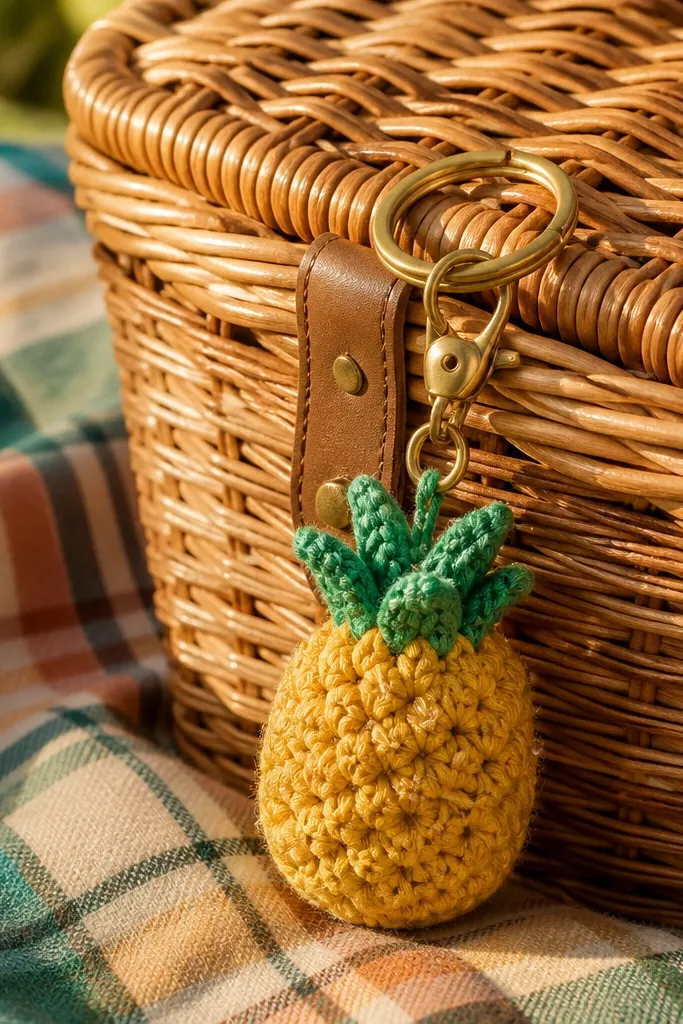
Pineapple keychains sell because the shape is iconic and the texture looks complex without being too hard. The trick for speed is building it with a simple pineapple body and then adding a few bead accents that catch light. Those beads make photos look shinier and more “gift-worthy” than plain yarn. Keep the body firm and slightly domed so it doesn’t flop. This is best for intermediate beginners who can do basic increases and basic bead threading.
Crochet the pineapple body in yellow using rounds with controlled increases and decreases to form a dome. Use a stitch like half double crochet for density, then switch to green for the leaf top in a separate piece that you sew down firmly. Add bead details by threading small seed beads onto a thin yarn strand and stitching them into the body in a few evenly spaced lines. Attach a split ring through a sewn-in yarn loop at the top so pull load goes into yarn, not loose stitches. Weave ends tightly and secure the bead thread with a couple of knots on the inside before trimming.
Pro tipChoose matte beads instead of super shiny ones — they look cleaner in photos and don’t glare.
AvoidDon’t bead the whole fruit — a few lines look intentional; too many looks cluttered.
5. Chunky Strawberry with Leaf Fringe
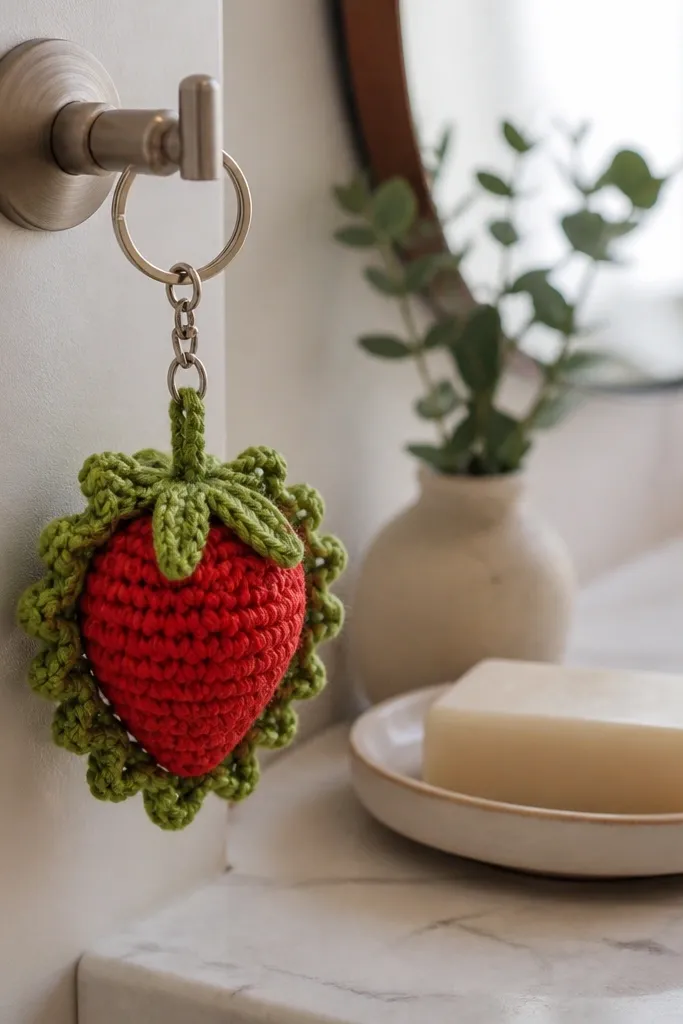
This is an “aesthetic cuteness” piece because the leaf fringe creates a little frame around the strawberry. It looks fuller than flat motifs, so it stands out on a key ring. Use a firmer stitch and minimal stuffing so it doesn’t turn into a squishy blob. The red body with green top reads instantly, and you can stitch on tiny yellow seed dots without over-detailing. Time is about 60-80 minutes if you keep stuffing light and focus on clean edges.
Work a strawberry body in red using tight rounds (single crochet or half double crochet) and add shallow shaping with decreases near the bottom. Make the leaf top in green by crocheting several short leaf segments that you sew into a circle. For fringe, leave a few leaf segments with short dangling strands or stitch small yarn loops along the edge so they fan out. Attach a key loop at the top center by crocheting a chain strap and sewing it into the leaf base. Finish by adding seed dots with yellow yarn using surface stitches — 8-12 dots is enough.
If your strawberry looks stretched, block it by pinning lightly and misting the cotton blend, then letting it dry flat.
Don’t overstuff — it makes the leaf fringe collapse inward.
6. Black Cat with Glowing White Eyes Keychain
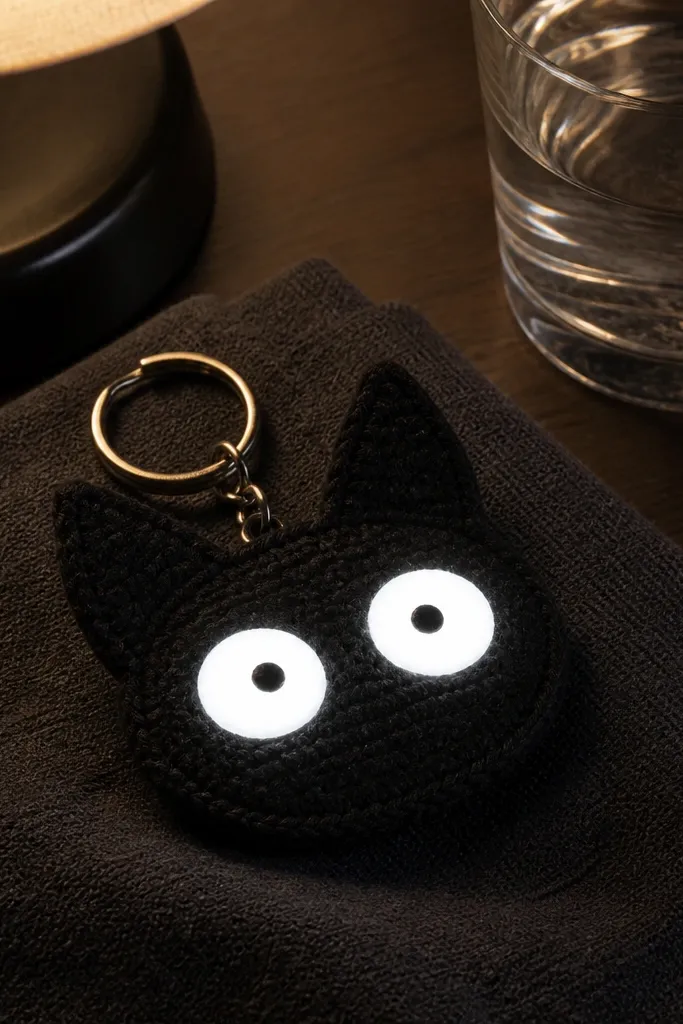
Animal keychains sell, but black cats sell harder because the contrast is dramatic and the shape is instantly readable. The key to a “sold fast” look is oversized eyes: stitch white eye patches and add tiny black pupils so the face pops in photos. Keep the cat flat-backed or lightly stuffed so it doesn’t turn lopsided. This project is great for selling as a set too, because you can make multiple cats with the same body and swap eye color. Beginner to intermediate if you’re comfortable with basic shaping and surface applique.
Crochet the cat body in black using a simple oval or round base with slight shaping for the head. Create ears with two small triangles stitched on top; keep them firm by using fewer rows and tighter stitches. Make the eyes as separate white circles and sew them on, then add pupils with black yarn in a centered French knot or small tight stitches. Add a tail by crocheting a short chain or a small tube and sewing it to the side. Attach the key loop at the top by sewing a strap into the head seam before you weave in ends.
Pro tipUse felt or yarn for eye backing, but for crochet-only eyes, use a tighter hook and fewer increases so the eyes don’t ripple.
AvoidDon’t place eyes too low — the cat reads sleepy instead of cute.
7. Two-Color Gingerbread Man Keychain
This looks like a holiday ornament, but it’s a keychain so it works year-round if you choose a warm neutral palette. The sold-fast angle is the “icing” outline: use a second color to trace the arms, legs, and face so it looks crisp. Keep the body dense with a solid stitch so it doesn’t deform. You can also add a tiny bow tie or a simple button line for extra photogenic detail without adding bulk. Skill level is beginner, and you can finish one in about 50-75 minutes.
Crochet the gingerbread body with a tan yarn using a flat or slightly rounded motif, then add arms and legs as short protrusions or separate pieces sewn on. Use white yarn to surface stitch the icing lines: small zigzags for the border and short vertical lines for buttons. For the face, do simple stitch eyes and a small mouth, keeping them centered and proportional. Attach a loop at the top by sewing a short strap or chaining a loop and hiding the join under the icing border. Weave ends on the back and keep the surface stitching tight so it stays clean on photos.
Pro tipSwitch to single crochet for the base if your tan yarn is slippery — it keeps the shape from stretching.
AvoidDon’t use a fuzzy novelty yarn for the icing — it blurs the outline.
8. Pastel Flower Pop Keychain with Button Center
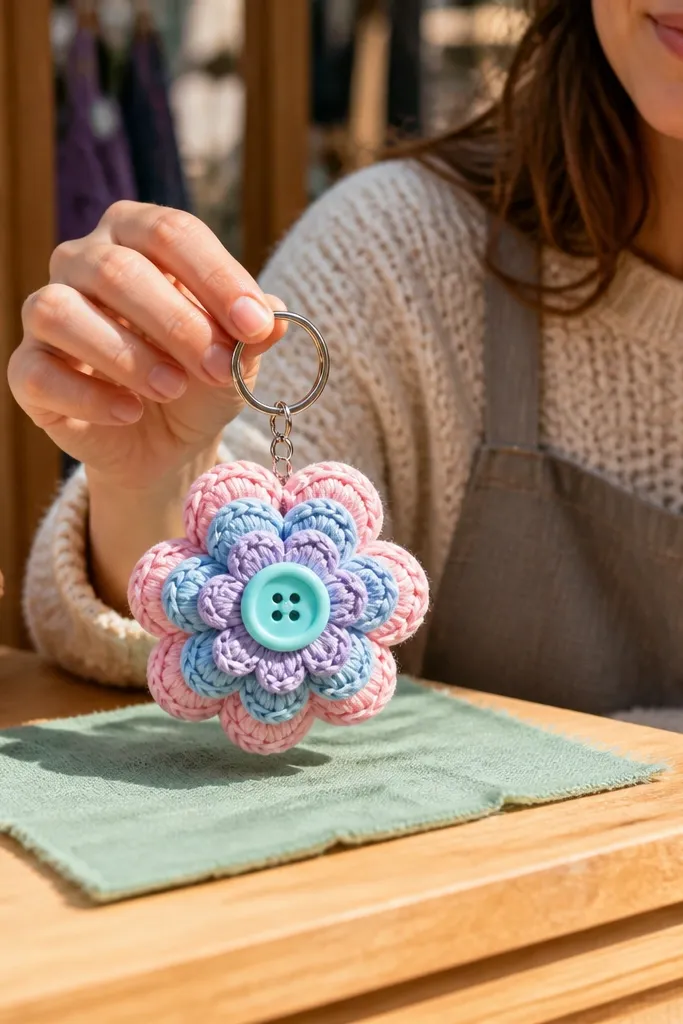
This is a bright, giftable keychain that looks polished even with simple construction. Layered petals create depth, and the button center adds a clean focal point that reads well in close photos. It’s also easy to scale: you can make multiple colorways quickly by repeating the same petal count. If you want a design that looks “craft store” without complicated shaping, this is it. Beginner-friendly with a time range of about 40-65 minutes.
Crochet 5-6 petals in your pastel colors using a simple petal stitch pattern, then stitch them around a flat circle base. Add the button center by sewing a small round button (or a crocheted circle) in the middle with tight thread-like yarn stitches. Attach a key loop by sewing a small strap to the back of the center circle before you close the back. Keep the petals slightly stiff by using a firm stitch and not overstuffing — the layered look comes from petal layers, not padding. Weave ends cleanly and trim so the back stays flat for attaching to hardware.
Pro tipUse a button with 2-4 holes and sew through the button holes twice — it won’t loosen from keyring jostling.
AvoidDon’t make petals too floppy or thin — they blur into a circle when photographed.
9. Shell Stitch Sea Turtle Keychain
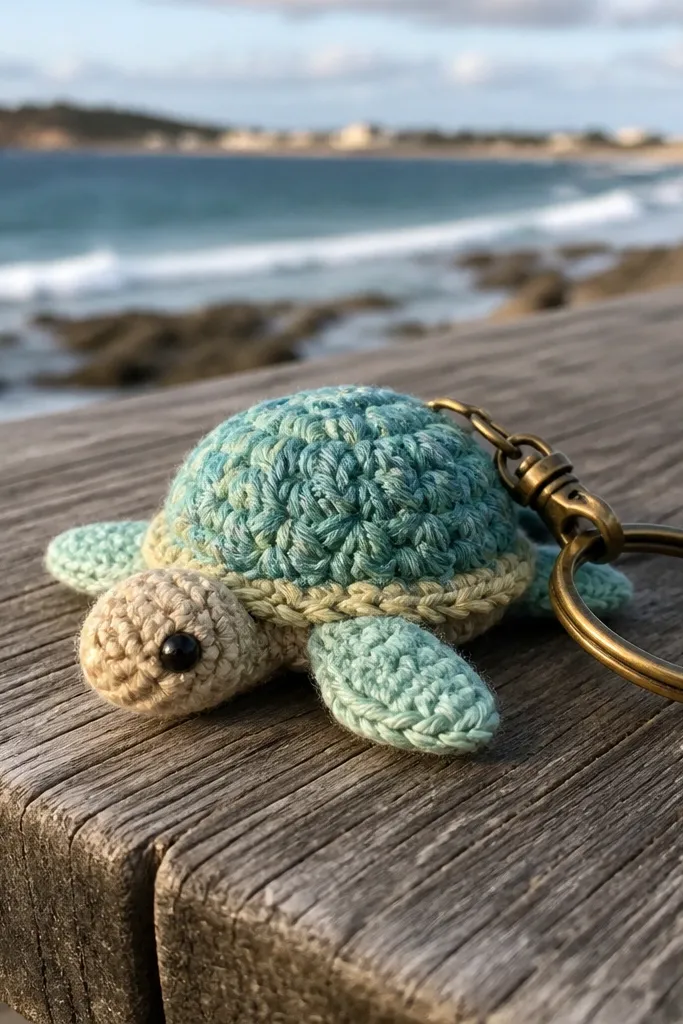
Texture sells here. The shell stitch gives you that bumpy, sea-inspired look that reads clearly from a distance, and the turtle silhouette is recognizable without needing lots of facial detail. Keep the flippers small and firm so the turtle doesn’t twist on the ring. This design does well because it’s not “just a cute animal face” — it has a pattern texture you can see fast in listings. Intermediate beginner level if you can follow stitch repeats; plan about 75-100 minutes per turtle.
Start with a turtle shell base in rounds using a shell-texture stitch repeat, keeping the stitch count consistent for an even dome. Crochet flippers as short oval pieces and sew them to the sides at the correct height so the turtle looks balanced. Add a head and small tail in the same yarn family, then stitch on a simple eye using a dark yarn. Attach a loop to the top of the shell by crocheting a short chain strap and sewing it securely into the shell seam. Finish by weaving ends and lightly shaping with your fingers while it dries if you steam block.
Pro tipUse a slightly smaller hook for the shell stitch rows so the texture stays crisp instead of airy.
AvoidDon’t overfill — stuffing makes the shell texture distort.
10. Mini Space Rocket Keychain with Contrast Window
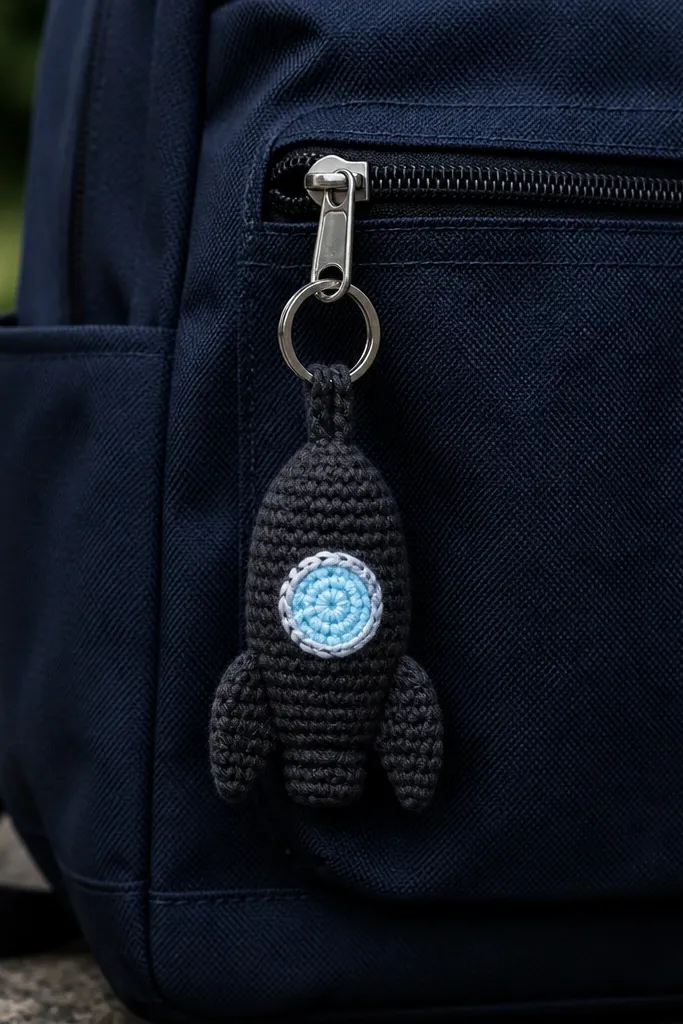
A rocket keychain is a clean shape with a built-in focal point: the window. The sold-fast look comes from strong contrast between the body and the window panel, plus a neat fin layout. Keep the rocket upright and firm so it hangs cleanly on a key ring. This is also a good choice for batch making because you can repeat the same rocket body and swap window colors. Beginner to intermediate; about 55-85 minutes depending on how tidy you stitch the fins.
Crochet the rocket body in a tight spiral or joined rounds using a dense stitch like half double crochet. Add the window as a separate small panel in a contrasting color, then sew it on centered and slightly inset using a simple whip stitch. Crochet two side fins and one bottom fin, then position them so the rocket stays balanced when clipped to a ring. Attach a key loop at the top by crocheting a chain strap and sewing it through the last round before you close the body. Weave ends and press the rocket flat with your hands so it holds the upright shape.
Pro tipFor crisp edges, use single crochet for the window panel and stitch it onto the body before you add any top details.
AvoidDon’t make the rocket too tall — tall keychains twist and look messy on photos.
11. Braided Yarn Tassel Keychain in Two Colors
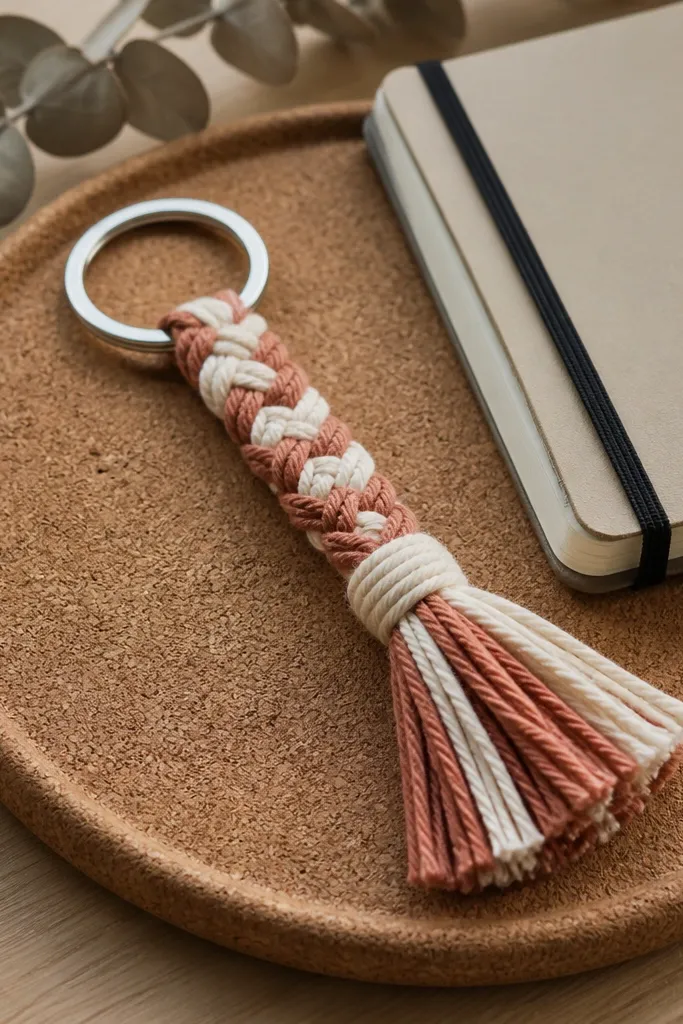
If you want something that looks expensive but is fast, tassels are the shortcut. A braided tassel reads instantly in photos because the strands create movement and highlights. Two-tone braids look intentional and take away the “homemade” vibe. You can attach the tassel to a metal split ring and skip complicated crochet shaping. This is beginner level, and you can make one in 20-35 minutes once you have a consistent strand length.
Cut 24-36 strands of yarn in two colors, each the same length (for a small keychain, start around 10-12 inches). Braid the strands tightly for 2-3 inches, then tie the braid top with a short yarn wrap and knot firmly. Crochet or knot a small loop cap at the top using a few rows of single crochet or a tight yarn wrap so the braid attaches neatly to the split ring. Thread the split ring through the loop cap or sew it by hand to the cap stitches. Trim the ends evenly with sharp scissors and fluff once.
Pro tipUse slightly thicker yarn for tassels so the braid looks full instead of thin and stringy.
AvoidDon’t skip trimming and fluffing — uneven ends make the keychain look sloppy fast.
12. Mint Checkerboard Bag Charm Keychain
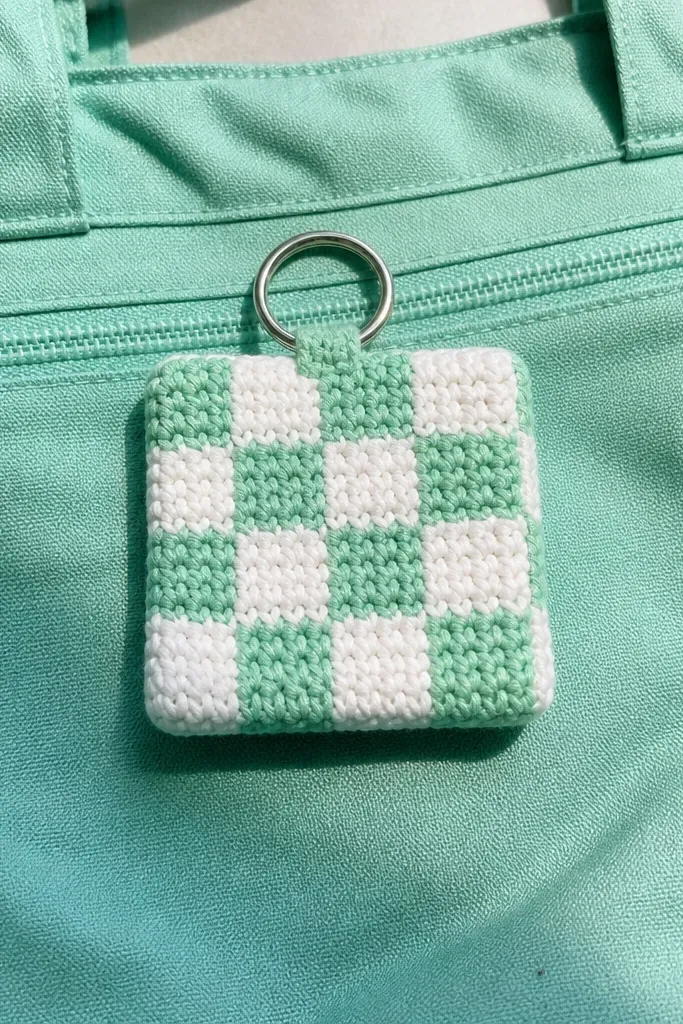
Checkerboard patterns look clean and structured, which is exactly what sells. The mint-and-white color combo gives a fresh look, and the repeated squares make it easy for buyers to understand the design instantly. This works as a keychain or bag charm, which widens who buys it. Keep the piece flat and firm so the squares don’t warp on the ring. Beginner-friendly if you can count stitches, and it’s usually 45-75 minutes per piece.
Crochet a small rectangle base in tight single crochet, using a checkerboard color plan with 2-3 stitches per square. Change colors at the end of each row or use planned join points so the pattern stays crisp. Build a border row in one color to frame the checkerboard and hide color-change bumps. Attach a lobster clasp by crocheting a side loop panel: crochet a short strap, then sew it to the back of the rectangle so the clasp sits flat. Weave in ends on the inside and trim close to prevent snagging.
Use stitch markers every 2-3 squares so you don’t drift and ruin the grid.
Don’t stretch the rectangle while working — grids warp when the base isn’t held steady.
13. Polar Bear with Scarf and Tiny Pom
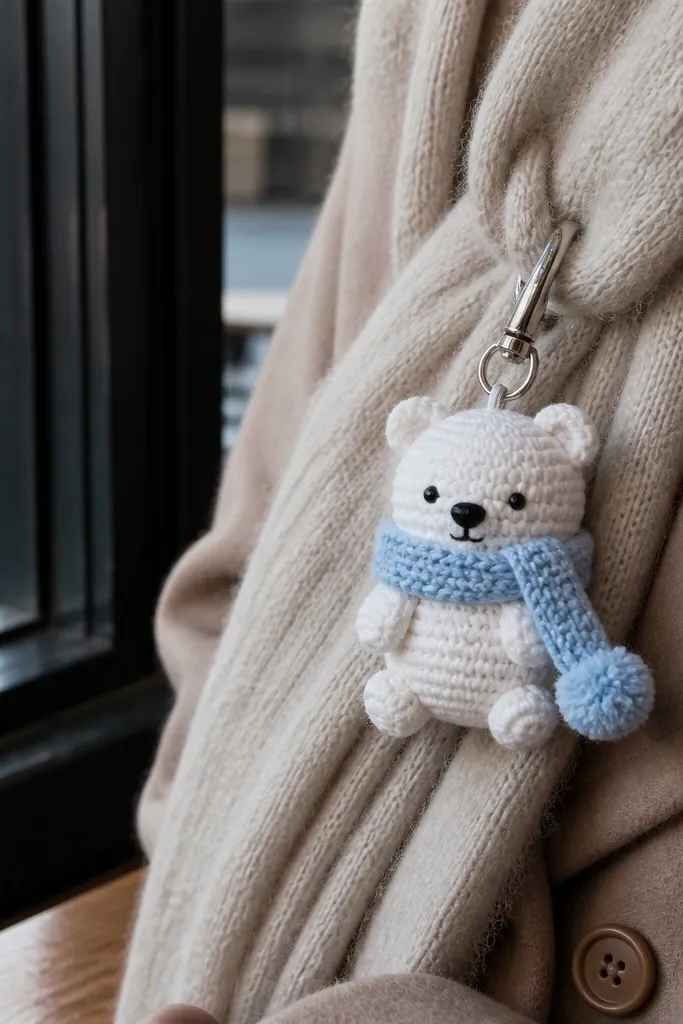
This one sells because it’s instantly “winter cute” without needing big accessories. The scarf gives you a second color that frames the face, and the tiny pom adds a playful detail that catches light. Keep the bear compact and firm so it doesn’t flop on a key ring. The look works in both bright and muted colorways, but gray scarf plus white bear is a strong seller. Beginner to intermediate depending on whether you surface stitch the face; plan about 60-90 minutes.
Crochet the bear body in white with tight rounds, leaving a small opening if you want minimal stuffing or keep it flat-backed. Create ears as small circles or triangles and sew them on high on the head. Crochet a scarf strip in gray, then fold it around the neck and sew in place; add a tiny pom at one end using yarn wrapped over a small fork or pom tool. Attach the key loop at the top of the head seam with a sewn-in strap. Weave in ends and secure knots so the scarf doesn’t loosen after handling.
Pro tipIf your scarf keeps twisting, sew it at two points on the front and one point on the back.
AvoidDon’t use long, fuzzy yarn for the bear — it hides the face and makes photos look blurry.
14. Grape Cluster Keychain with Textured Bumps
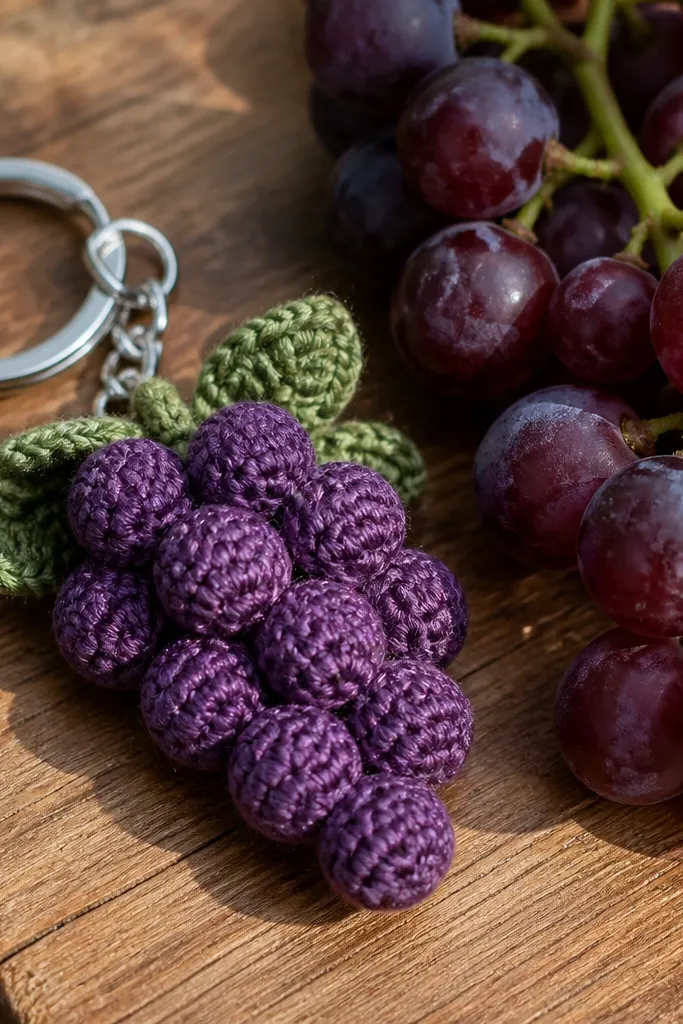
Grapes look good because the cluster shape reads as a group, not a single flat object. The texture comes from making each grape as a tight round with subtle bump stitches, then clustering them together. It’s photogenic because you get depth — little domes catch light. This design also hides small imperfections: if one grape is slightly off, the cluster still looks cohesive. Beginner to intermediate; time is about 70-100 minutes depending on grape size.
Make 5-7 mini grape rounds in purple using tight stitches like single crochet in the round, then keep them uniform in size. Sew or crochet them into a cluster on a small base so they sit together like a bunch. Add a green stem using a small chain and a few short stitches, then attach it at the top center. For the key attachment, sew a loop to the back of the cluster base or incorporate a loop while sewing the grapes together. Finish by weaving ends into the cluster so the back stays neat.
Pro tipUse a slightly variegated purple or add tiny darker stitches on each grape so the bumps look natural.
AvoidDon’t make grapes too big — a huge cluster looks heavy and flips around on the ring.
15. Rainbow Cloud Keychain with Puff Stitch
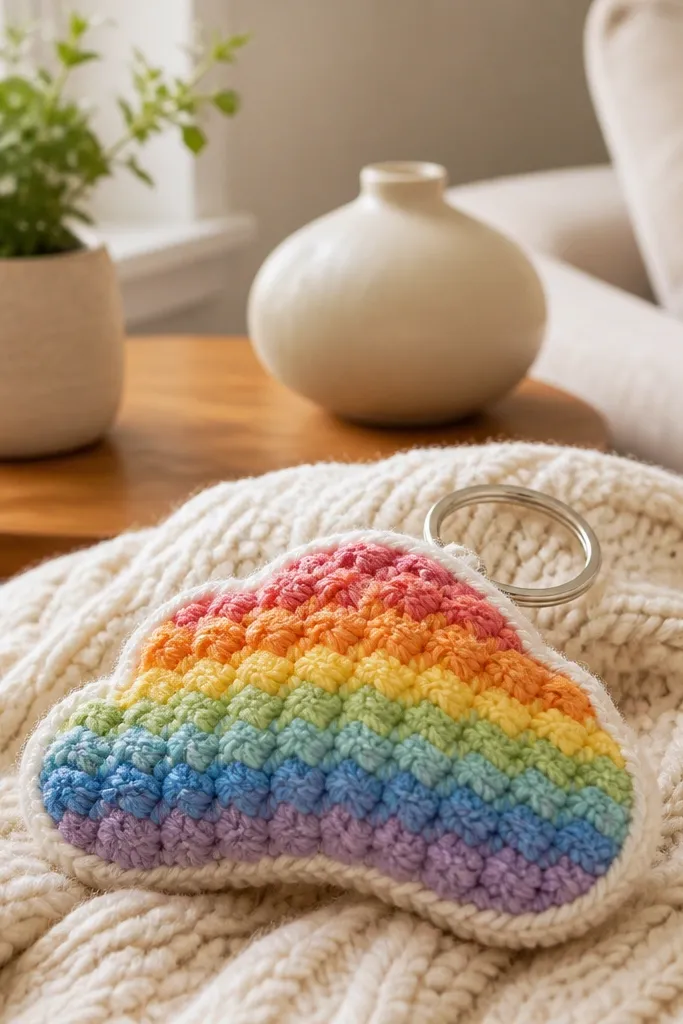
This is a soft-looking keychain that still photographs sharply because the puff stitch texture creates clear highlights. The rainbow base gives it a playful, cheerful look without turning into a cluttered pattern. Cloud shapes are also forgiving; small changes in curve still read as a cloud. It’s a strong seller because it looks like a mini wall decor piece, but it’s functional. Beginner to intermediate if you can do puff stitches; time is about 60-95 minutes.
Crochet a cloud base in white using a stitch pattern that forms rounded lobes, then switch to puff stitches for the top surface. Add a rainbow stripe line along the bottom edge by crocheting short segments in each color and joining cleanly between rows. Create a key loop by sewing a small strap at the top center of the cloud. Keep the piece firm by using a dense stitch base underneath the puffs so it holds its shape. Weave ends tightly and trim so the puffs stay defined.
Practice puff stitches on a scrap first — consistent puff size keeps the texture even across the cloud.
Don’t use too much stuffing — the puffs lose their lift and the cloud turns flat.



