
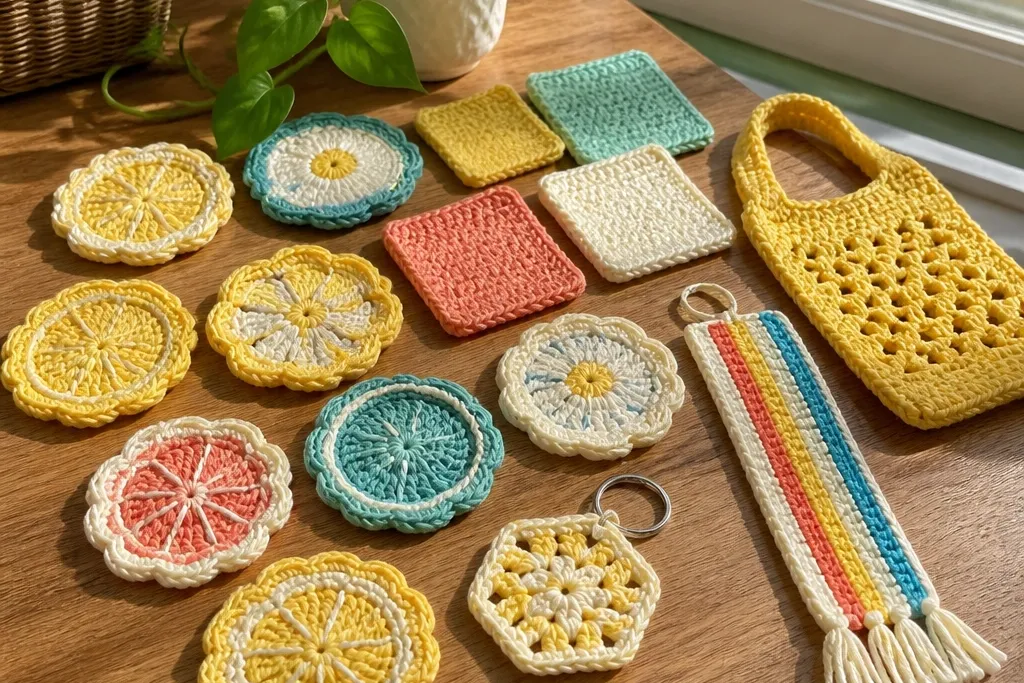
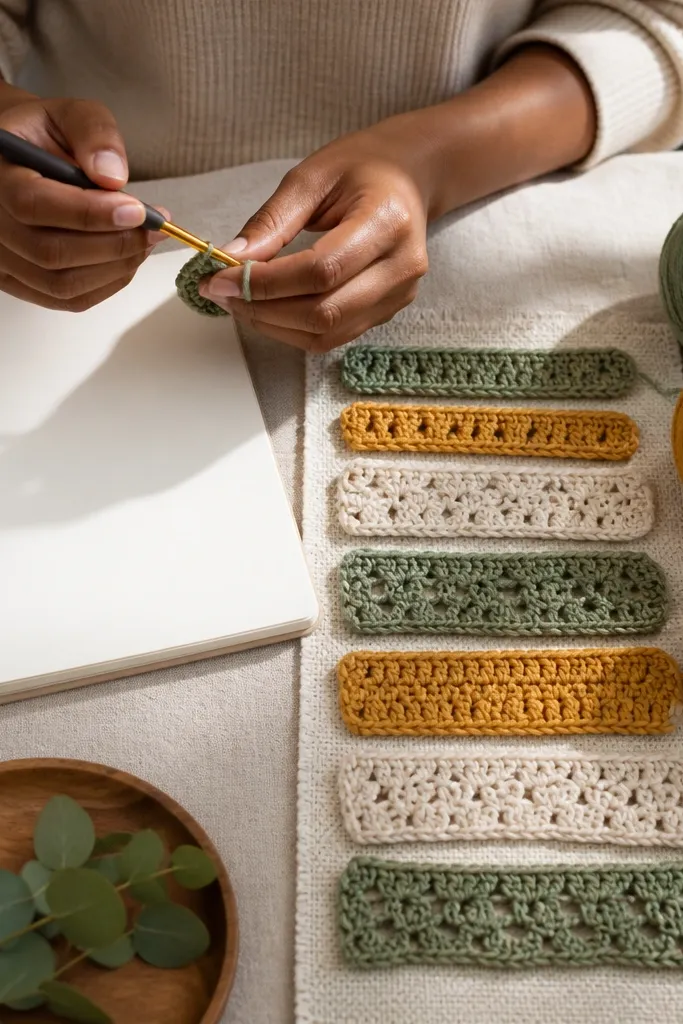
1. Scalloped Lemon Coasters (4-Pack Look)
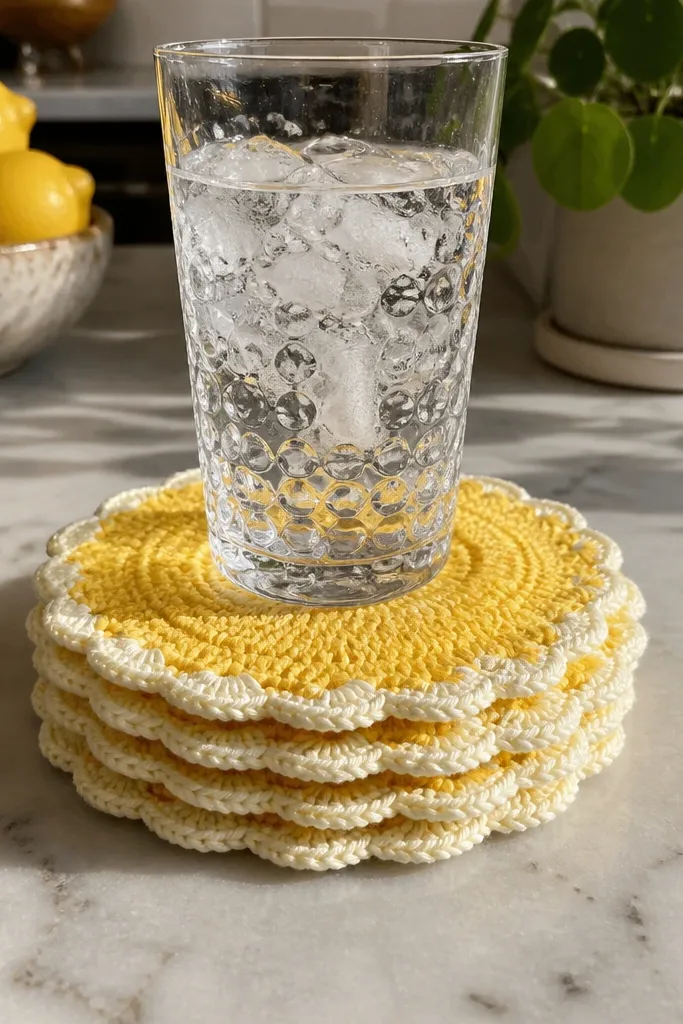
These coasters look bright and finished because the scallops create a repeating rhythm your eye catches instantly. They also protect surfaces without needing fancy materials — you’re basically making a thick, rounded ring that sits flat. Use cotton yarn so the texture stays crisp and the coaster doesn’t stretch out. Skill level is beginner-friendly: you’re building a looped shape and then adding a border that makes the edge look intentional in photos. Plan for about an hour total for all four if you work steadily.
Start by crocheting a small circle in yellow using single crochet, then increase evenly until you get a coaster that’s about 4 inches across. Stop the increases and work evenly for another round to thicken the center. Then add the scalloped edge by alternating double crochet and chain spaces around the perimeter, finishing with a clean white slip-stitch round. Finally, weave ends tight on the underside and block flat if your edges curl.
Make the scallops consistent by counting stitch groups with markers every quarter of the circle.
Don’t use acrylic — it softens and warps the edge after a few washes.
2. Rainbow Mini Bookmark With Picot Edges
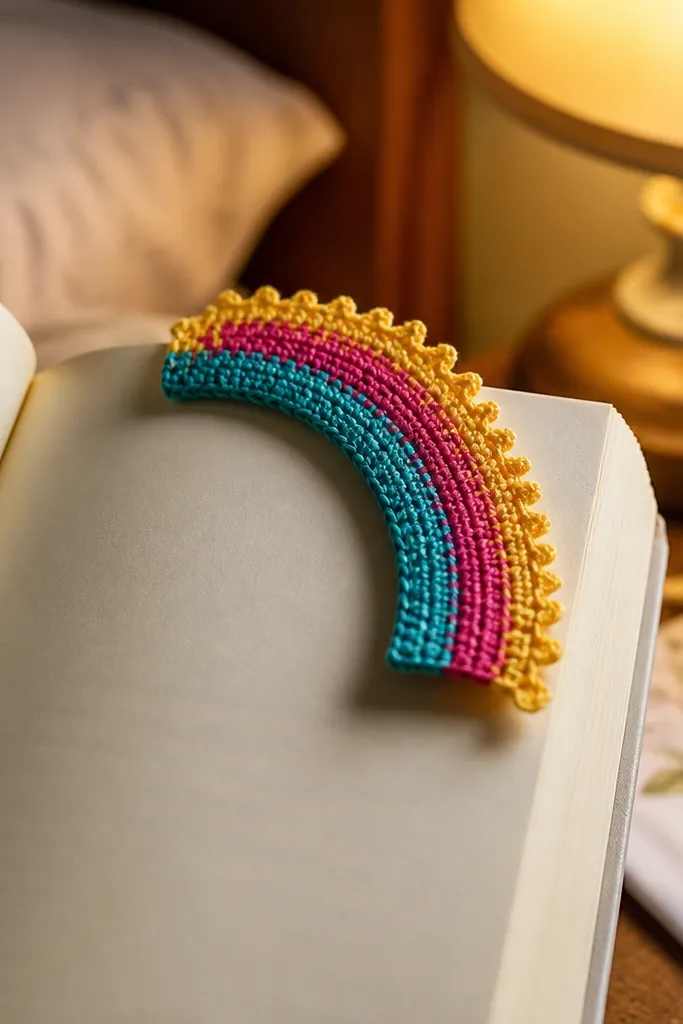
A bookmark is one of the fastest Quick crochet project ideas because it’s narrow, it doesn’t require complex shaping, and it photographs well on books. The picot edge is the visual trick: tiny loops add sparkle and make the design look store-bought. Use a smooth, medium yarn so the stitch lines stay straight — cotton or cotton-blend works great. This is a great project when you want something cute for gifts or your own shelf without spending hours on finishing.
Pro tipKeep your color changes crisp by leaving a short tail at the color switch and weaving it in right away.
Chain a length that matches your book height, usually 10-12 chains for a slim bookmark width, then work single crochet rows until it reaches about 6-7 inches long. Switch colors every 1-1.5 inches to create clean rainbow bands. On the final edge, add a picot border by working single crochet, then a chain 3 and slip stitch back into the first chain to form each picot. Finish by weaving ends and trimming any loose tails.
AvoidDon’t make the rows too loose — wide gaps make the bookmark look sloppy.
3. Hexagon Keychain With Solid Color Panels
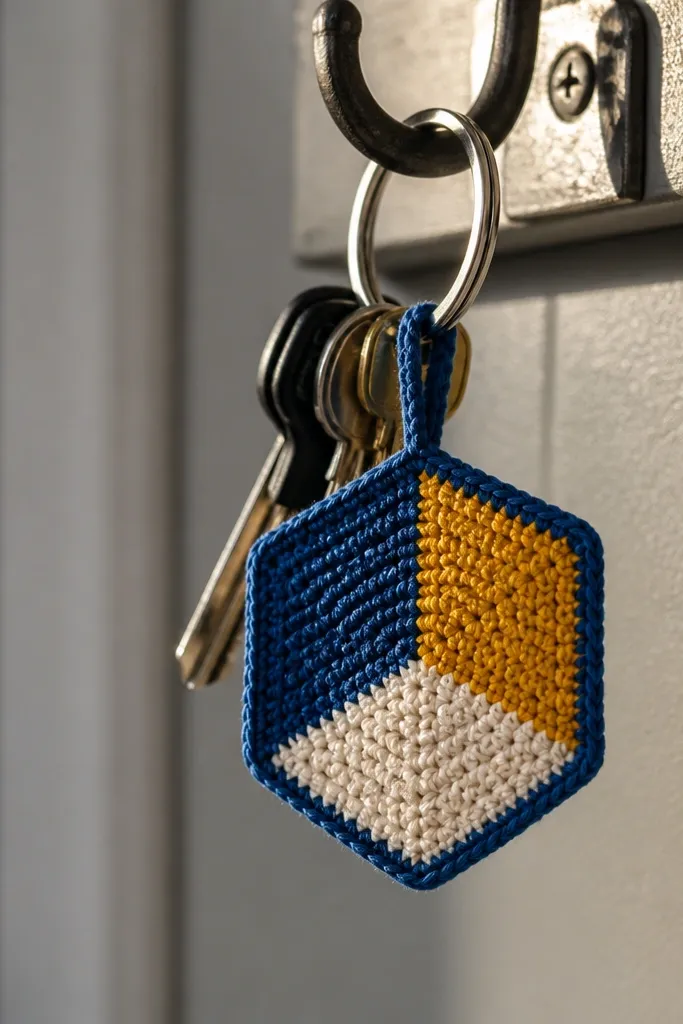
This keychain looks graphic because hexagons naturally create clean geometry. Solid color panels make the shape pop, and the flat front means it looks good even when it’s hanging in a cluttered photo. Use a sturdy yarn like cotton or a cotton-acrylic blend so it stays flat. It’s a quick build: you’re crocheting one flat hexagon and attaching a ring. Beginner to intermediate depending on how comfortable you are with joining rounds.
Pro tipMark the corner stitches with a stitch marker so your increases stay symmetrical.
Crochet a flat hexagon starting with a magic ring, then increase in a pattern that makes six corners (6 corner stitches total). Work until you reach about 2.5-3 inches across. Add color panels by switching yarn every round or every two rounds for sharp blocks. Finish with a border round in a contrasting color, then attach a split key ring using a loop at the top. Weave ends thoroughly so the keychain doesn’t loosen.
AvoidSkip the stretchy yarn — it makes hexagons curl and look uneven.
4. Mini Market Bag Pouch With Twisted Strap
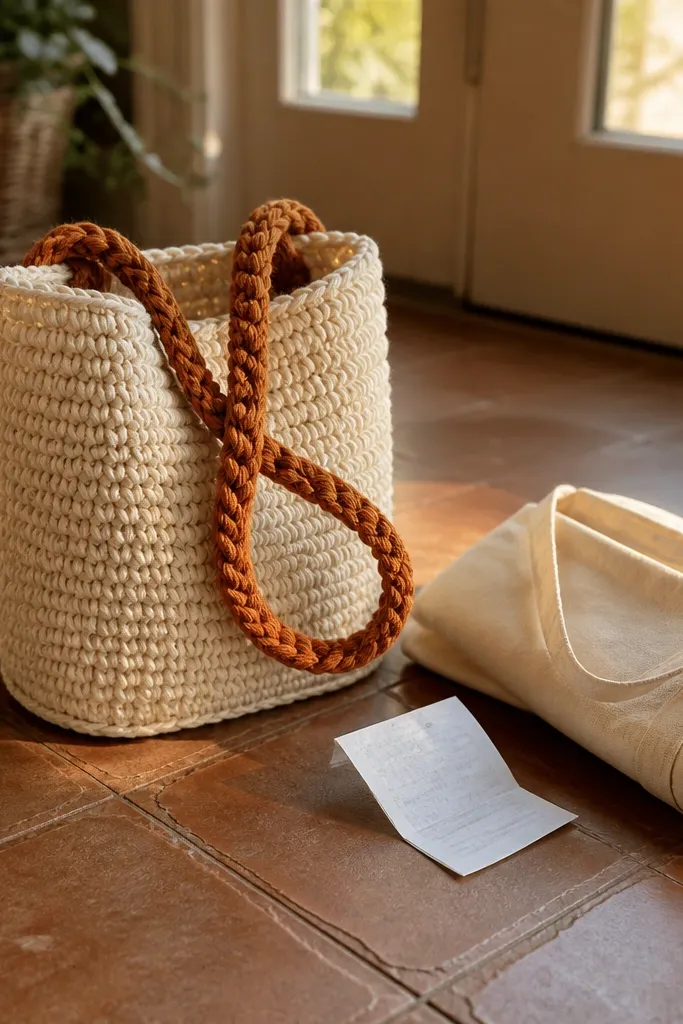
This mini bag looks styled because the strap has a twist that adds texture even when the body is simple. The pouch shape is also practical for quick errands and looks great in flat-lay photos. Choose a sturdy cotton yarn to keep the bag from collapsing. You’re working in rounds or short rows, then adding a strap — the project stays manageable and doesn’t sprawl. It’s best for crocheters who know basic stitches and can keep tension even.
Pro tipBlock the pouch before adding the strap so the edges line up in photos.
Start with a base panel in single crochet, working a rectangle about 10 inches wide and 6 inches tall, then fold and seam the sides to form a pouch. Build the walls by continuing in rounds or by working rows up from the base until the height reaches about 7-8 inches. For the strap, crochet a narrow strip and twist it before attaching, or crochet a strap with a rope-like texture using front post stitches. Attach strap ends securely with extra stitches and weave into the seam area for strength.
AvoidDon’t crochet a thin strap — use a thicker yarn or double-strand method.
5. Cozy Chunky Headband With Button Closure
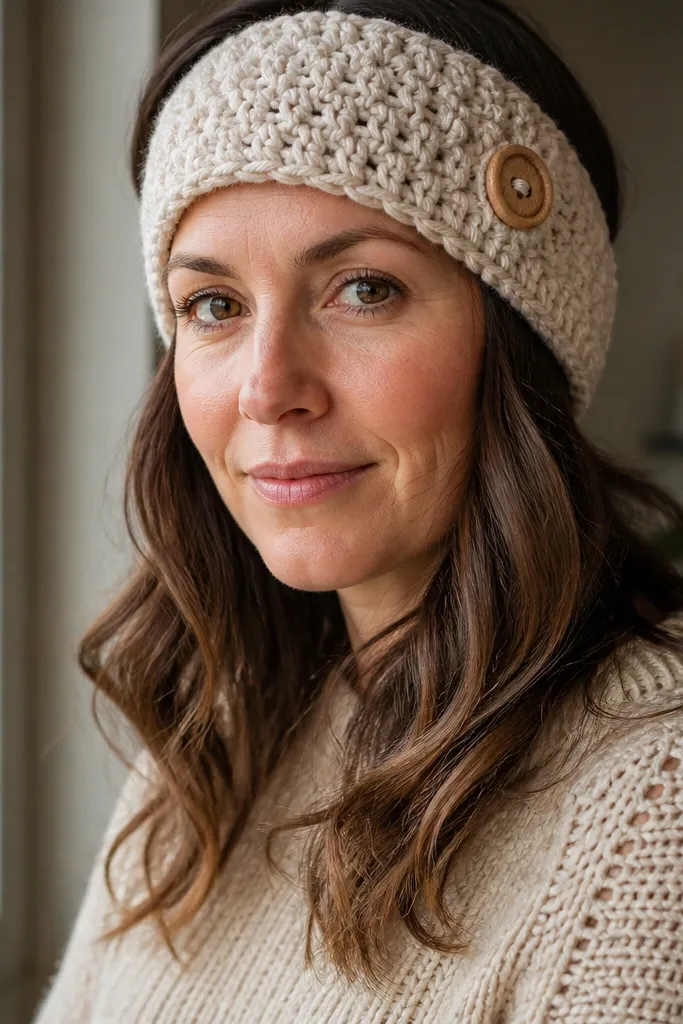
A headband is fast because it’s a single strip with minimal shaping, and it frames your face in photos. The chunky yarn makes it look cozy and intentional, even if you’re using a simple stitch pattern. A button closure lets you adjust the fit and makes the piece look styled rather than “made from a long rectangle.” Use a soft, medium-thick yarn and keep the stitch density high so it doesn’t flop.
Pro tipMake the band a touch shorter than your measurement — stretching smooths out the fit.
Chain a width that matches your head size, then work half double crochet rows until the band is about 2.5 inches long in a relaxed state. Work the last row with single crochet to stabilize the edge. Sew a button on one end and crochet a button loop on the other end using a few chain-stitch loops and slip stitches. Weave ends and test the fit on your head or a hat form so the button lands correctly.
AvoidDon’t leave the button loop too big; it makes the band slide.
6. Color-Blocked Crochet Phone Sleeve
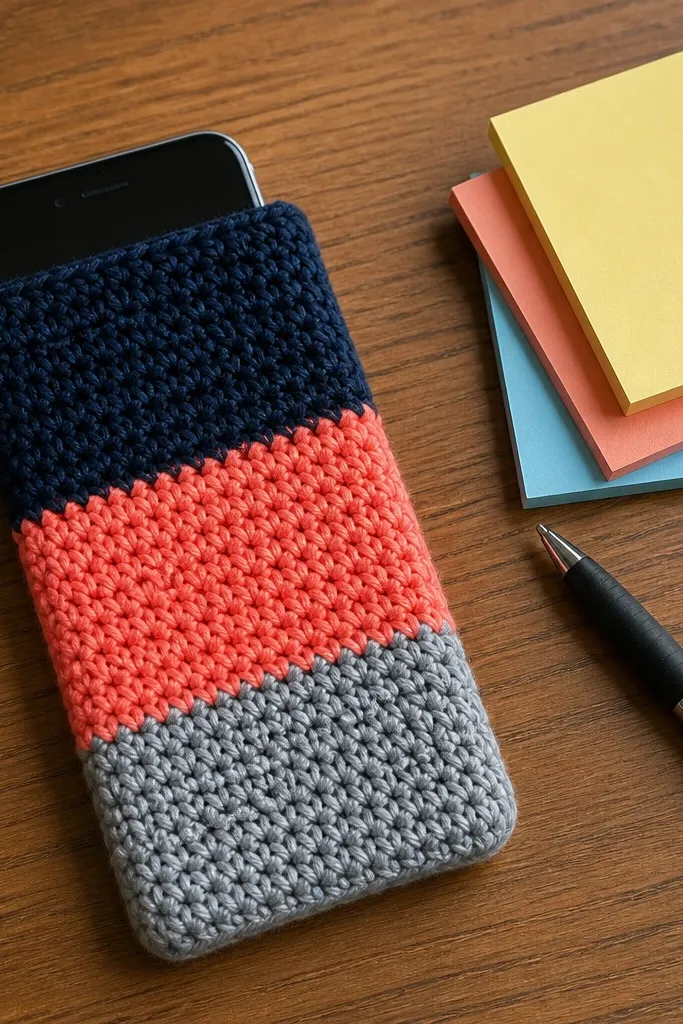
A phone sleeve is one of the most practical Quick crochet project ideas because it keeps your yarn scraps from feeling pointless and it’s easy to size. Color blocks make it look designed, and the snug fit makes it feel “finished” in use. Use worsted weight yarn and a tight stitch pattern so it grips without being stretchy. This project is great for beginners who can do single crochet and simple shaping for the flap.
Pro tipCheck fit mid-way by holding it around the phone — don’t wait until the end.
Measure your phone width and height, then crochet a rectangle in single crochet that matches those dimensions plus about 0.5 inch for overlap. Color-block by switching yarn every 0.75-1 inch horizontally. Seam the sides with mattress stitch so the join looks neat. Crochet a flap by continuing stitches across the top edge for about 2 inches, then add a border round to square it up. Add a snap or tie closure by stitching a small loop and using a button or elastic cord.
AvoidDon’t crochet with loose tension — loose fabric makes the sleeve look baggy.
7. Mod Dot Amigurumi Coaster (Round + Eyes)
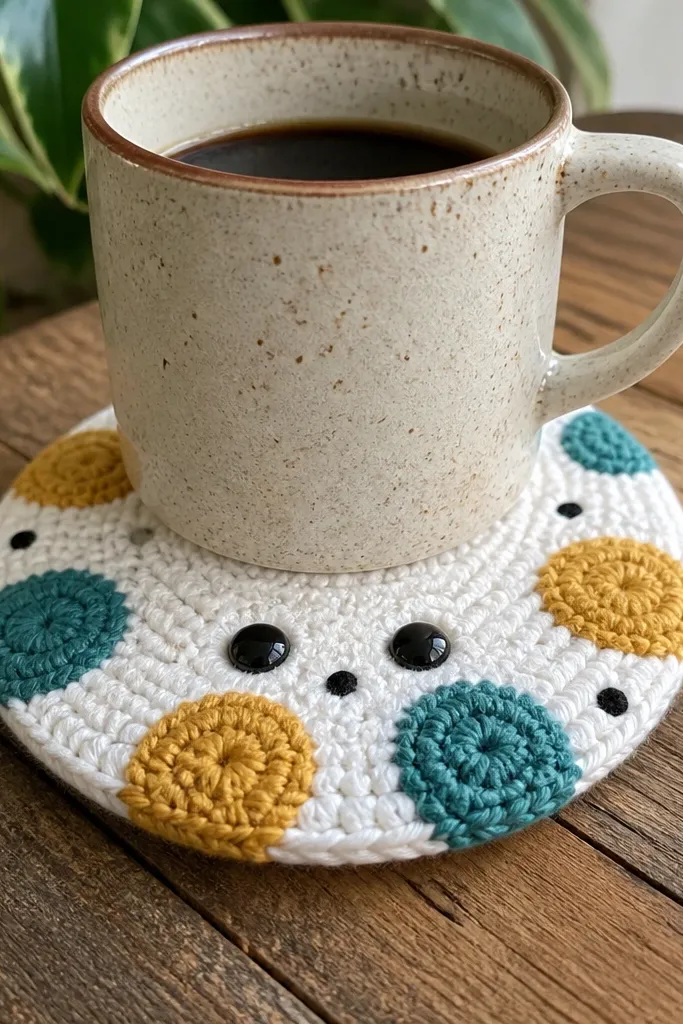
This coaster turns a simple round into a character by using dot details. The mod look is what makes it photogenic — the contrast is immediate, and it adds personality to a table without being bulky. You’re using small amounts of yarn, and the round base is quick. It’s beginner-friendly if you’re comfortable with working in continuous rounds. Great for desks, nightstands, and gifting.
Pro tipUse embroidery thread for the dots if your yarn is too bulky for clean little circles.
Start with a magic ring and crochet in continuous single crochet rounds, increasing evenly until you reach about 4 inches. Keep the wall height around 0.5-0.75 inch for a coaster that doesn’t flop. Add contrasting “dot” accents by stitching small French knots or crocheted circles onto the front after you finish the base. Sew on two small eyes using black yarn or small buttons secured with tight knots. Finish by weaving ends and flattening with light blocking.
AvoidDon’t place the eyes too close to the edge — it makes the face look off-center.
8. Waffle Stitch Washcloth in Two Colors
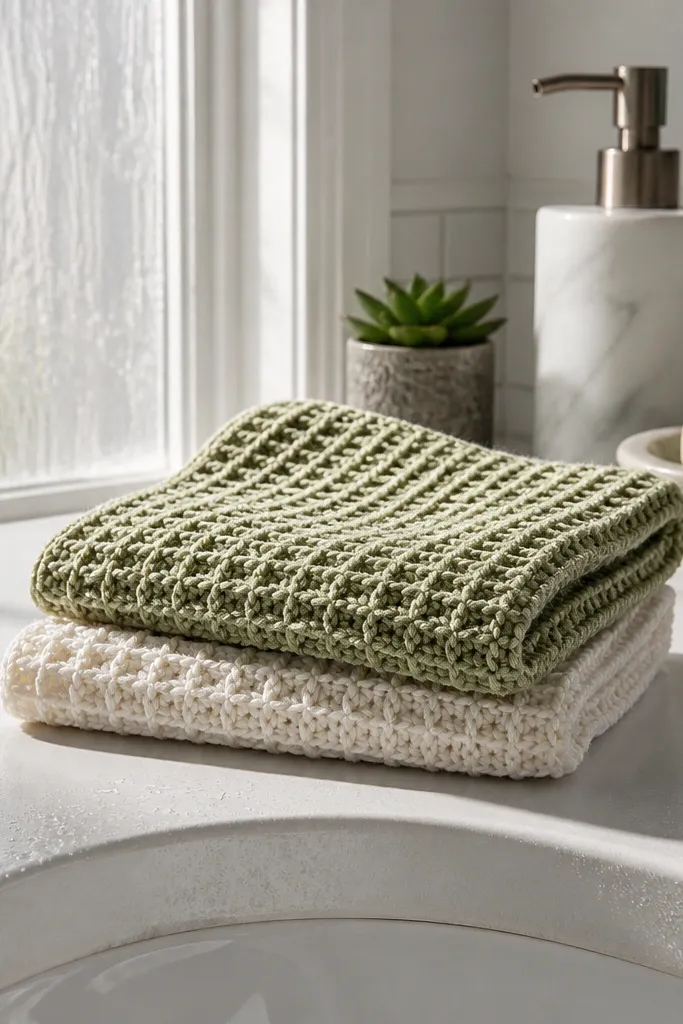
Washcloths are the definition of practical, but they look better than plain ones when the stitch texture is bold. The waffle stitch creates a grid that looks great under natural light and holds up in use. Two colors keep it modern and photogenic without needing complicated shaping. This is a great “quick” project because a washcloth size is small and the pattern repeats fast. Use cotton yarn so it stays absorbent and doesn’t stretch out.
Pro tipCount the waffle repeat units at the start of every row so the grid lines don’t drift.
Choose cotton category 4 yarn and start with a foundation chain that supports the waffle repeat, often around 25-35 chains for a standard washcloth. Work rows using the waffle stitch pattern, switching colors every 6-8 rows to create stripes or blocks. Keep your tension consistent so the grid stays even. When you hit your target height (about 8-10 inches), finish with a border round in single crochet. Weave ends and block lightly to flatten the texture.
AvoidDon’t skip the border — the edges curl if you leave them raw.
9. Scarfette Cowl With One-Skein Twist
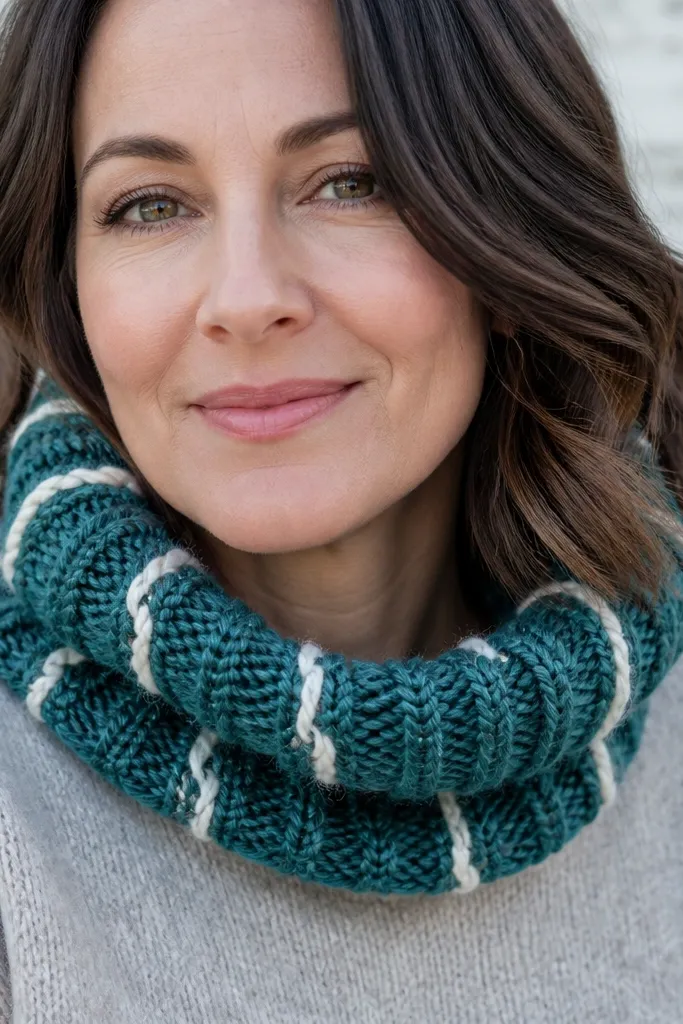
A scarfette cowl is quick because you’re making one loop that doesn’t require long yardage. The twisting rib look makes it look more complex than it is, which is exactly what you want for Quick crochet project ideas. Use a yarn with some body so the rib texture stands out in photos. This piece is flattering around the neck and makes an instant outfit upgrade. Skill level is beginner-friendly if you can work front/back post stitches or a simple twist technique.
Chain enough for a snug circumference, then join carefully to avoid twisting. Work in a rib-like pattern using front post/back post stitches for about 7-10 inches of height. For the twist look, alternate which post stitches you front-post on every other row so the texture shifts. Finish with a border round in single crochet to keep the edge from curling. Weave ends and steam gently or block lightly if the rib relaxes.
Mark the join point with a stitch marker — rib patterns show twists instantly.
Don’t use extremely slippery yarn; it makes post stitches slide and blur.
10. Starburst Granny Washcloth Squares (Set of 3)
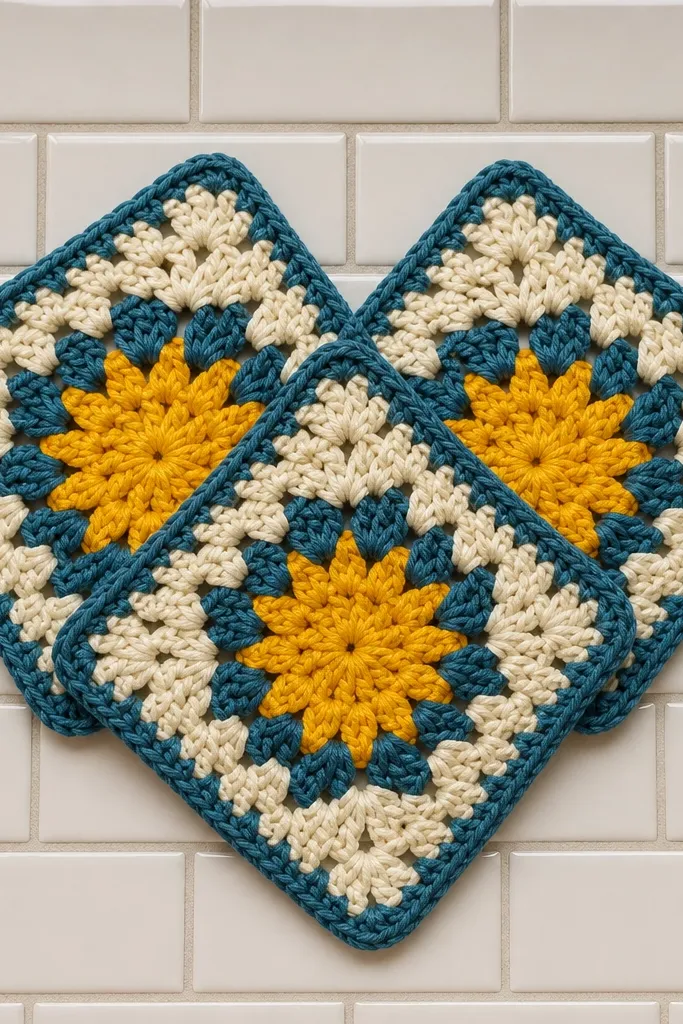
These squares look bold because the starburst center draws the eye and the granny edges frame it. As a set of three, they look coordinated on a counter without needing matching everything else. They’re quick because each square is small and the pattern repeats. Use cotton yarn and keep the color changes tight so the center stays crisp. If you know basic granny square construction, this is a smooth project.
Make three small granny squares using classic clusters, building from the center out until the square is about 6x6 inches. For a starburst look, keep the center rounds in a contrasting color and use a tighter cluster spacing at the beginning. After each square is done, add a simple border round to square up the edges. Block the squares flat and then weave ends. Arrange them in a set before gifting or using.
Use the same hook size for all three squares so the border lines match visually.
Don’t let the squares grow uneven — measure after the third round.
11. Chunky T-shirt Yarn Coaster Holder With Fringe
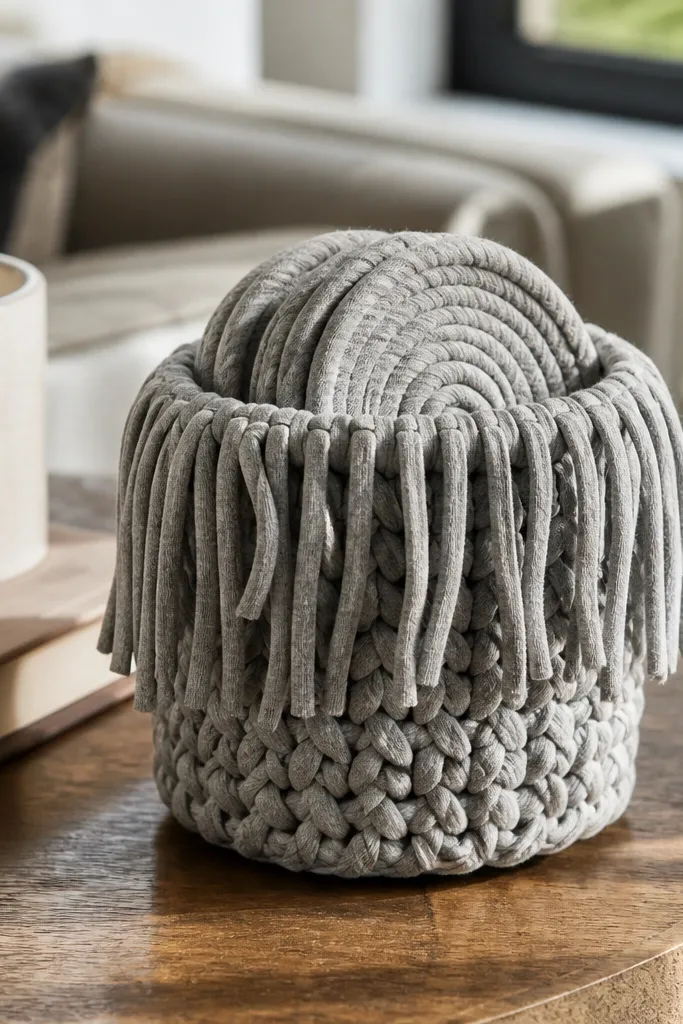
This project is visually satisfying because the fringe gives instant texture and movement in photos. It also solves a real problem: keeping coasters from sliding around. T-shirt yarn (plarn) makes the holder thick and quick to build, and it holds shape better than many craft yarns. Skill level is beginner: you’re building a round base and then working up the walls. It’s a great “use up scraps” project because you can mix colors and still look intentional.
Start with a tight magic ring and single crochet into t-shirt yarn or use your chosen stitch for plarn thickness. Increase until the base reaches about 5-6 inches across. Work upward in rounds until the walls are around 2 inches tall. Add fringe by cutting strips of plarn and tying them into evenly spaced points around the top edge. Trim fringe to an even length and press flat for photos.
Wear gloves if plarn is scratchy — it helps you keep tension consistent.
Don’t make the base too big without increasing wall height; it tips easily.
12. Floating Shelf Mug Cozy With Vertical Rib
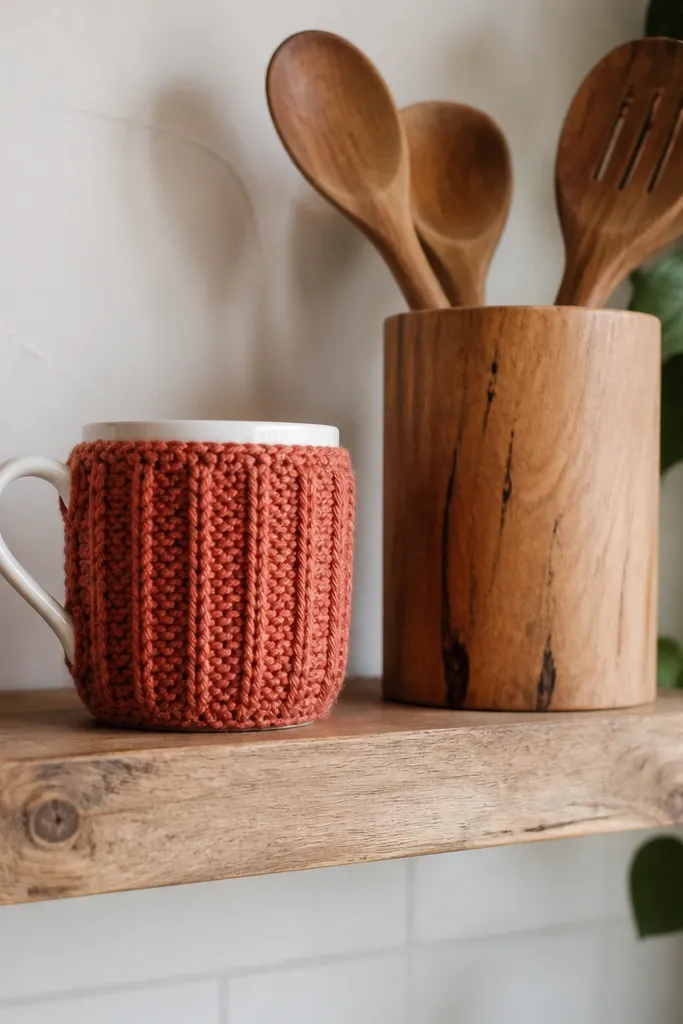
Vertical ribbing looks clean and modern, and it makes the cozy fit snugly around a mug. It’s a quick crochet project because mug cozies are a small circumference and you can finish in a short sitting. The rib texture also photographs well — it catches light in lines rather than flat color. Use medium yarn with good stitch definition so the ribs stay crisp. This is best for beginners who can do front/back post stitches or consistent front loop work.
Chain to fit the mug circumference and work a short test swatch by crocheting a row and measuring around the mug. Work vertical ribs using front/back post stitches or front loop/back loop alternation until the cozy reaches about 3-4 inches tall. Seam the sides neatly or work in the round if you prefer. Add a top edge border in single crochet to keep it from stretching. Weave ends on the inside so the outside stays smooth.
Make the first row slightly tight so the cozy grips without slipping.
Don’t skip the top edge — a raw edge curls and ruins the clean look.
13. Mini Flower Appliques for Bag Charms (6-Pack)
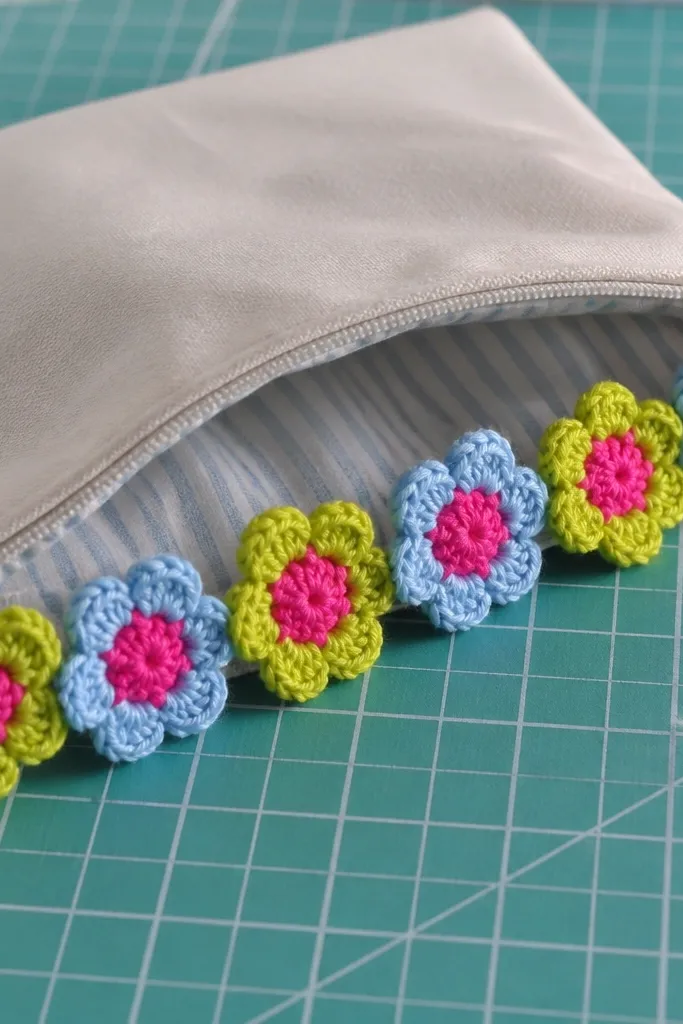
Small appliques are the fastest way to turn scraps into something aesthetic. They look like you put thought into your bag decor because each flower has a center pop and a petal shape that reads clearly in photos. Make a set of six and attach them to a zipper pouch, tote, or keychain ring. Use bright yarns with a contrasting center so the details don’t disappear. These are beginner-friendly and perfect for testing your stitch comfort.
Pro tipUse a tighter stitch for the center so it doesn’t spread when sewn on.
Crochet a small center circle in single crochet, then add petals by working a ring of clusters (like five double crochet groups) around the center. Make each flower about 1.5-2 inches across so they stay “charm sized.” Repeat for six flowers in different colors. Add a felt or yarn backing if you want them stiffer, then sew a loop or stitch-through attachment point on the back. Finish by weaving ends and attaching to a ring or bag zipper.
AvoidDon’t make petals too long; long petals flop and look messy.
14. Pegboard-Ready Crochet Coaster With Geometric Border
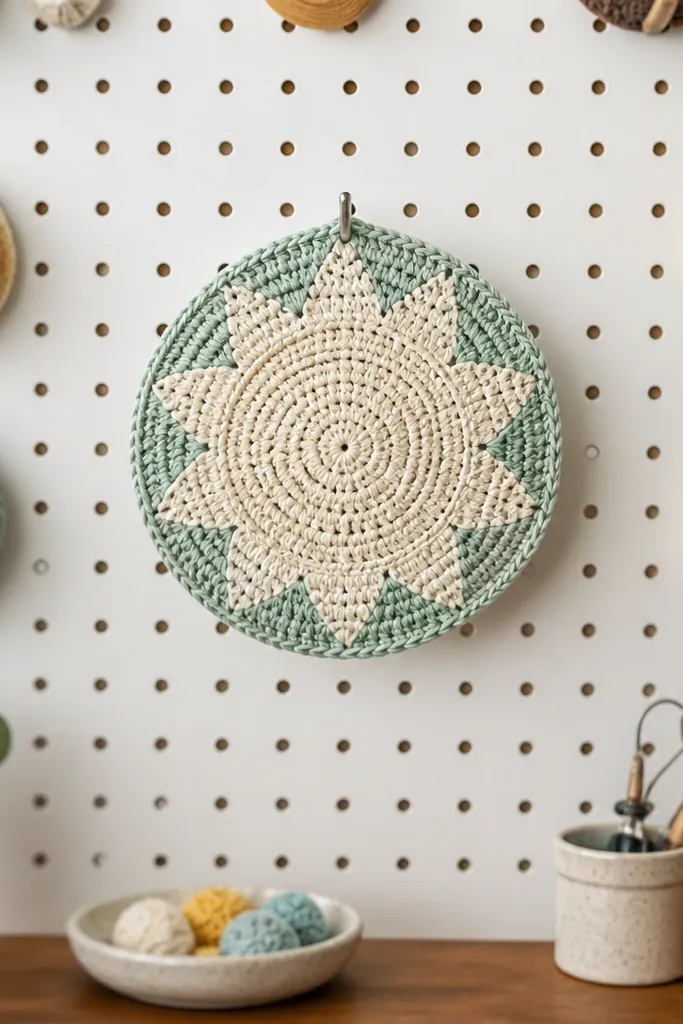
This coaster looks graphic because the border is geometric and clean, not just a simple round edge. It’s also practical for organizing: you can hang it as decor or keep it on a pegboard. The center stays simple so the border does the heavy visual work. Use cotton yarn and a tight hook so corners in the pattern look sharp. It’s a great Quick crochet project idea when you want something that looks modern and intentional.
Pro tipIf your border curls, add a light steam and re-pin it flat while it cools.
Start with a basic round in single crochet until you reach a coaster diameter around 4.25 inches. Keep the center plain for about 0.5 inch height. Then work a border round that alternates short stitches and chain spaces to create the geometric effect. Finish with a final slip-stitch round in a contrasting color to lock the border in place. Weave ends tightly and block so the border stays crisp.
AvoidDon’t overload the border with too many chain spaces; it weakens the edge.
15. Crochet Lace-Inspired Doily Square for Small Trays
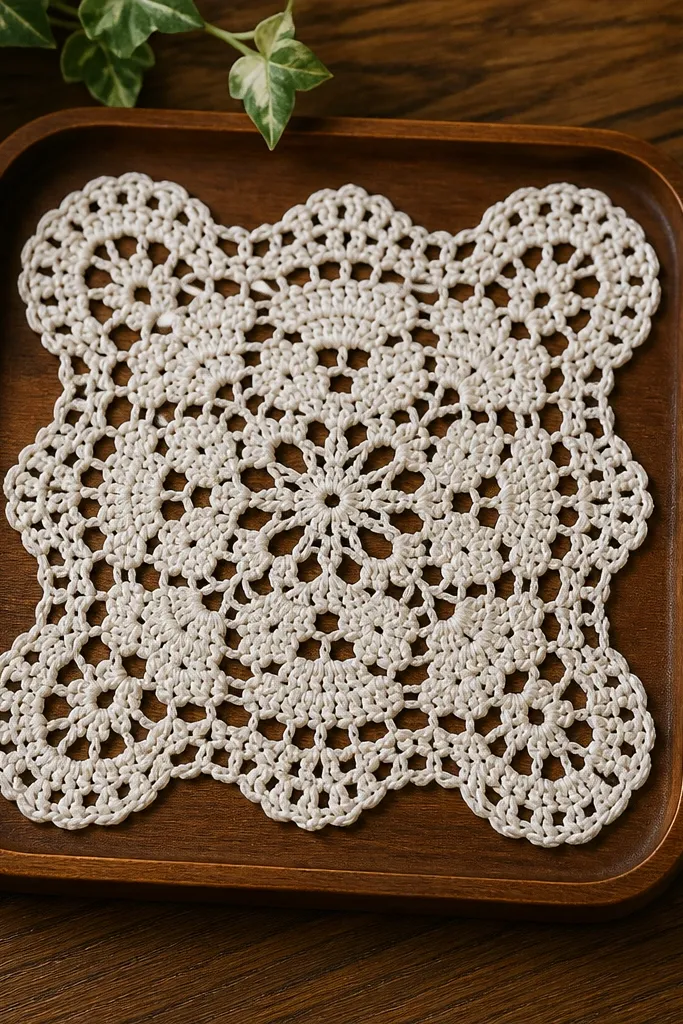
A small lace doily square makes any tray look styled, and it photographs beautifully because the negative space shows off the table surface. Keep it small so it’s truly quick — you’re making a square topper, not a full doily. The scalloped corners add a tailored look and keep the edges from looking raw. Use cotton yarn and a slightly smaller hook than you think you need for crisp lace definition. This is best for intermediate beginners who can manage chain-heavy lace patterns.
Work a square base using chain spaces and clusters to create an open lace pattern, aiming for about 6-8 inches per side. Build the pattern around a central ring and expand by increasing at the corners. When you reach your target size, add scalloped corners using a repeating chain and slip stitch sequence. Finish with a tight border round in a single crochet or picot style to frame the lace. Block flat and let it dry fully before using it on a tray.
Use blocking pins and a foam board; lace edges look 10x cleaner that way.
Don’t use bulky yarn for lace — the holes fill in and the lace look disappears.
16. Sunburst Coaster Roll-Up With Button Strap
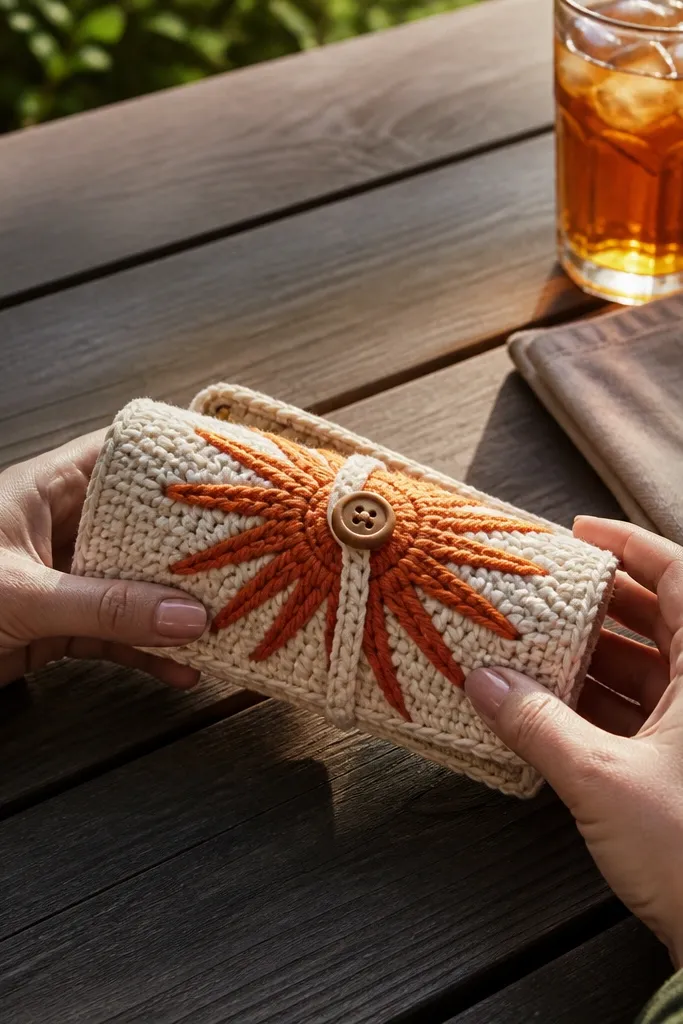
This is a coaster project that looks like a little accessory, not just a craft. The roll-up shape keeps it tidy, and the button strap makes the whole thing look intentional in photos. The sunburst texture gives motion and depth, so the shadows look good even in indoor light. Use cotton yarn for structure. It’s a quick crochet project because you’re making a small set and rolling it — no long seams, no complicated closures.
Pro tipStitch the button loop with a few extra stitches so it doesn’t stretch out under tension.
Crochet two identical coaster panels in a sunburst texture using alternating increases and textured stitches, each about 4 inches wide. Add a third panel if you want extra thickness or stitch them together to make one thicker roll piece. Create a long strap by crocheting a narrow strip about 8-10 inches long and fold it around the roll. Sew a button to one end and add a loop to the other. Roll the coasters around the strap and stitch the ends so it stays closed.
AvoidDon’t make the roll too tight — thick yarn needs a little give.
17. Crochet Mug Mat With Mini Star Appliques
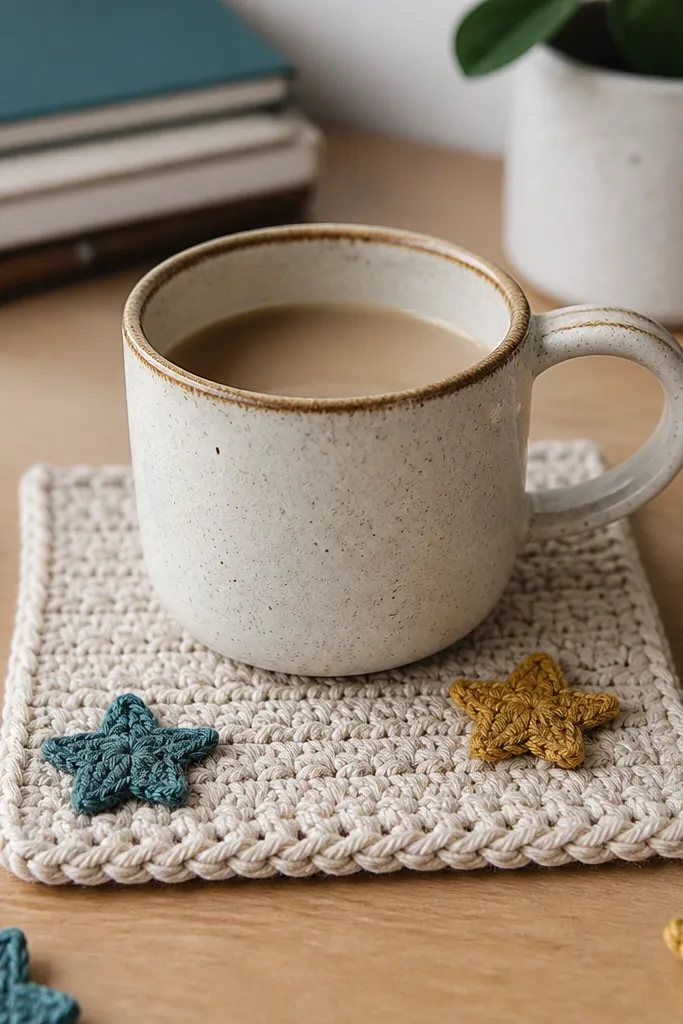
A mug mat is a small surface project that makes your desk or kitchen table look styled. The base can be simple, but the mini star appliques add a playful, photogenic detail. This works fast because the mat is small and the stars are quick to repeat. Use cotton yarn so the mat lays flat and doesn’t warp. If you can single crochet and attach motifs, you can finish this in an afternoon.
Pro tipPlace stars first with stitch markers so spacing looks even in photos.
Start with a square base by crocheting from the center outward with single crochet increases at the corners to form a square. Stop when the base reaches about 6-7 inches. Create mini stars by crocheting a small ring and working short pointy stitches around it, then repeat to make 4-6 stars. Sew stars onto the center area with matching thread or yarn. Add a thin border round to square the edges, then weave ends and block flat.
AvoidDon’t skip blocking — squares with open stitches look crooked when they dry.
18. Braided Crochet Rope Basket for Small Storage
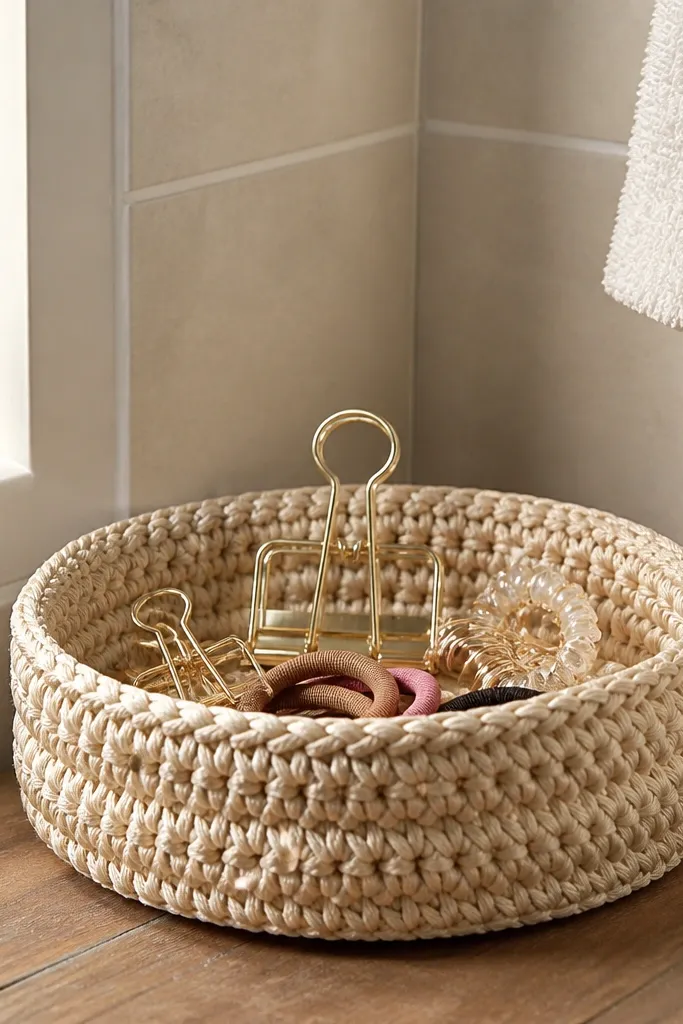
A rope basket looks expensive because the braided texture reads like home decor, not a craft. It’s a great Quick crochet project idea for small storage: desk clips, hair ties, or bathroom essentials. The thick yarn makes it quick and helps it hold shape. You get a photogenic rim and a structured base that stays upright on a shelf. This is best for crocheters who can handle continuous stitches and keep tension steady.
Pro tipKeep the rope thickness consistent — thin spots make the basket wobble.
Start by making a braided rope strip from three strands of yarn or rope-like crocheted chains, then crochet around it to build the base. Coil the rope into a spiral and secure each loop with tight single crochet so it doesn’t separate. Continue coiling upward until the basket is about 3-4 inches tall. Add a final rim round with single crochet to tidy the top edge. Weave ends inside the rim and tighten any gaps with a tapestry needle.
AvoidDon’t use a floppy yarn; the braid needs body to stand.
19. Crochet Beanie-Style Ear Warmer Headband (Wide Rib)
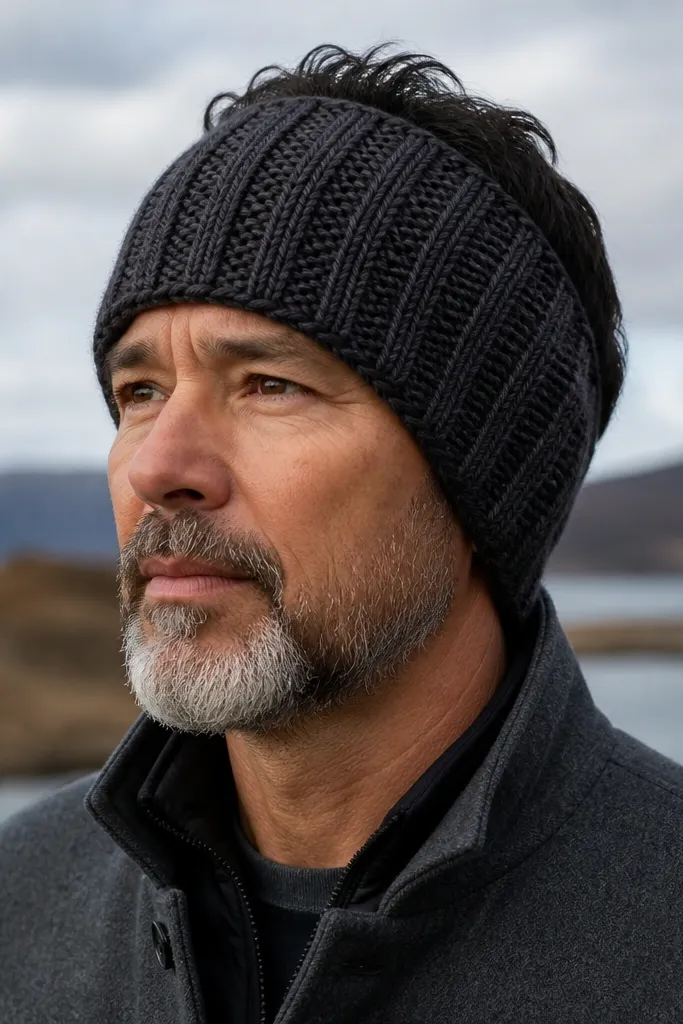
This ear warmer looks like a mini beanie because it has a wide rib and covers more of the ear area. It photographs well because the texture forms strong vertical lines and the width looks intentional. It’s still quick since you’re making a band, not a full hat. Use medium weight yarn and a rib stitch that creates elasticity so it fits without gaps. Great for beginner to intermediate crocheters who can manage ribbing and simple decreases at the ends.
Pro tipUse a slightly smaller hook for the rib rows so the band stays snug and doesn’t flare.
Chain to match head circumference minus about 1 inch for snugness. Work a wide rib using front/back post stitches for about 4-5 inches in height. Create shaping at the ends by decreasing a few stitches over the last 1-2 inches so the band wraps smoothly around the ears. Finish with a border round in single crochet or slip stitch to lock the edges. Weave ends tightly and block to keep the rib lines straight.
AvoidDon’t make the band too wide without adjusting yarn weight — it turns into a thick lump.
20. Tote Zipper Pull Cover With Tassel
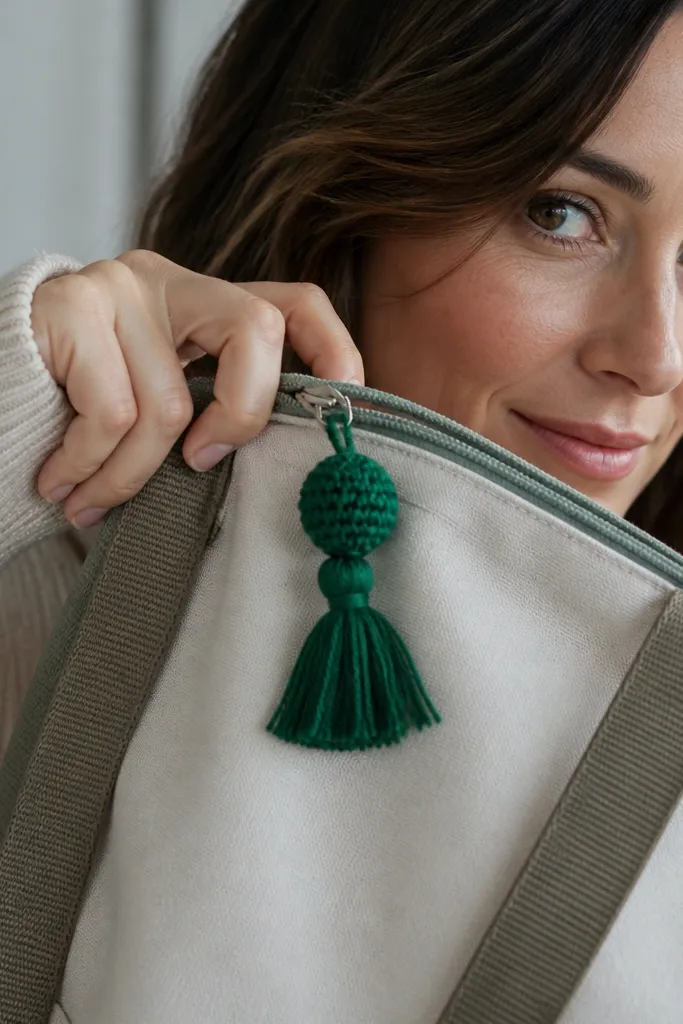
Zipper pulls are tiny, but they make a bag look finished, and they’re perfect for Quick crochet project ideas because they take minutes, not hours. The cover protects the zipper and hides the raw hardware in photos. A tassel adds movement and makes the detail feel intentional. Use a smooth yarn so it slides over the zipper pull without bunching. This is beginner-friendly and ideal for using leftover yarn balls.
Cut a tassel first by wrapping yarn around a small piece of cardboard, then tying and trimming. Crochet a small tube or oval cover that matches the size of your zipper pull, using single crochet for a tight fit. Seam the tube closed so the cover sits flat on the zipper. Attach tassel to the bottom center with a few tight stitches. Weave ends and test it by opening and closing the zipper a few times.
Make the cover slightly snug — if it’s loose, it slips and looks messy in photos.
Don’t use long stitches — bulky loops catch on the zipper track.



