
1. Cream + Soft Pink Rose Ball Bouquet
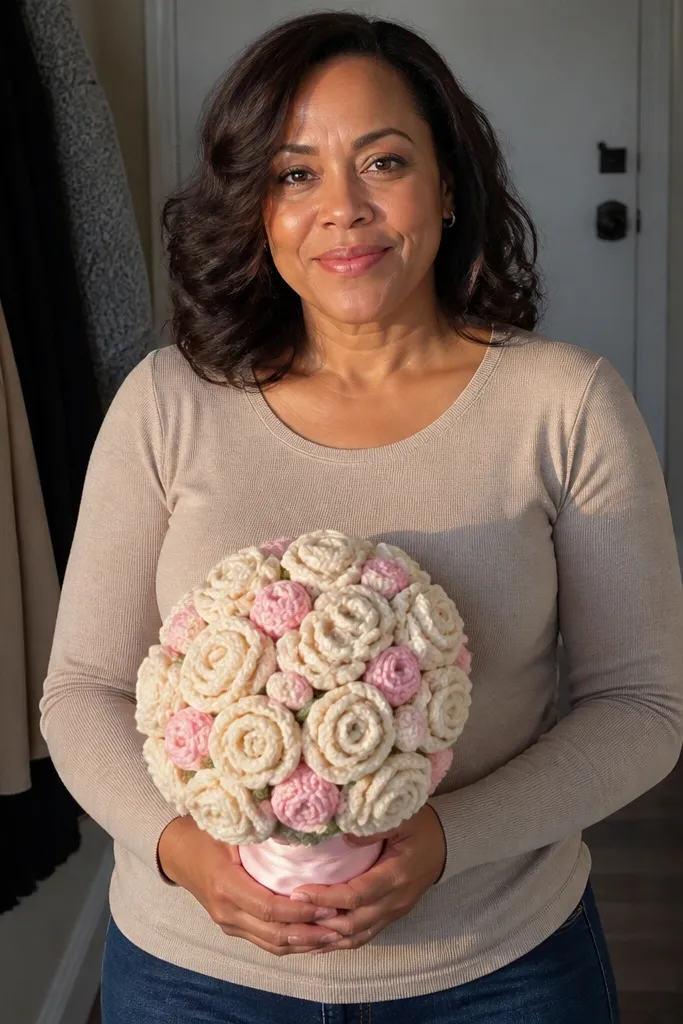
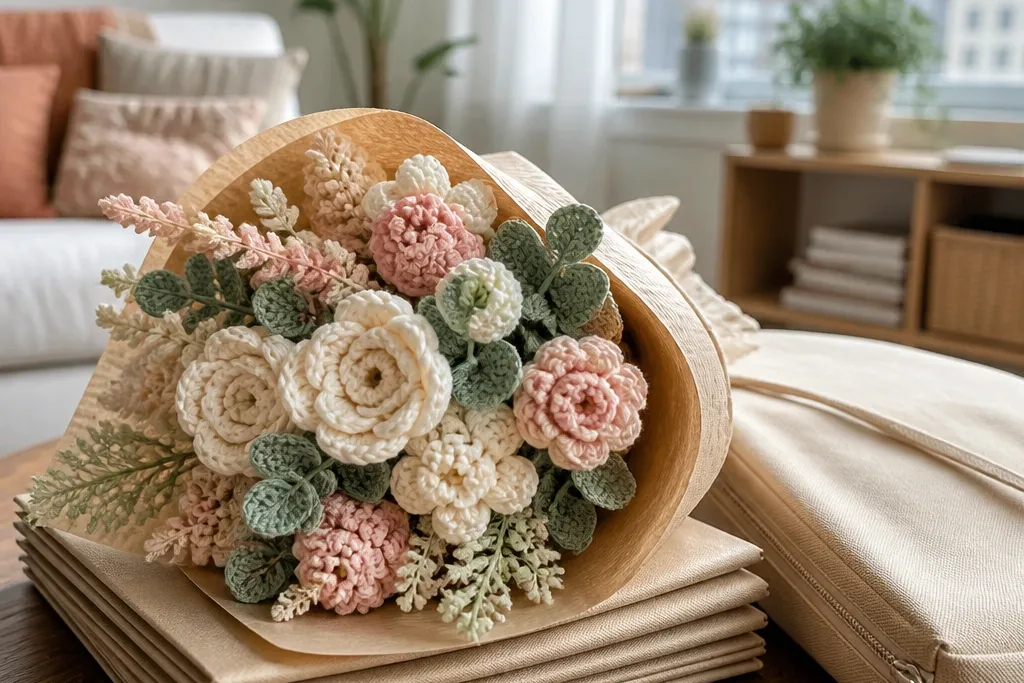
This is the cleanest renter-friendly crochet flower bouquet shape for gifting because it reads like a real bridal-style bouquet even when it’s made of yarn. The round “ball” cluster hides stem ends and makes the whole piece look intentional, not like separate flowers thrown together. Use cream roses plus soft pink buds so the colors blend without turning muddy in photos. Add tiny green crochet leaves tucked between blooms for structure and a more expensive look. Skill level is intermediate if you want neat rose spirals, but assembly is simple because you’re building one tight head.
Start by crocheting 8-12 mini roses in cream and 6-8 in soft pink, using the same yarn weight for consistent petal size. Make a base head from a 4-5 inch foam ball (or a tightly wrapped yarn-wrapped stuffing ball) and cover the surface with a layer of scrap yarn to hide gaps. Insert wire stems into each flower or stitch a wire “stem” to the back, then push stems into the foam ball at angles that point outward. Finish by weaving in 10-18 small leaf clusters around the edges and trimming stems so they’re hidden by the bouquet head.
Pro tipBefore assembly, block just the outer petals so the roses keep a rounded silhouette.
AvoidDon’t mix multiple yarn weights; it makes some roses look bigger and others look sloppy.
2. Deep Berry Ranunculus in a Gathered Wrap
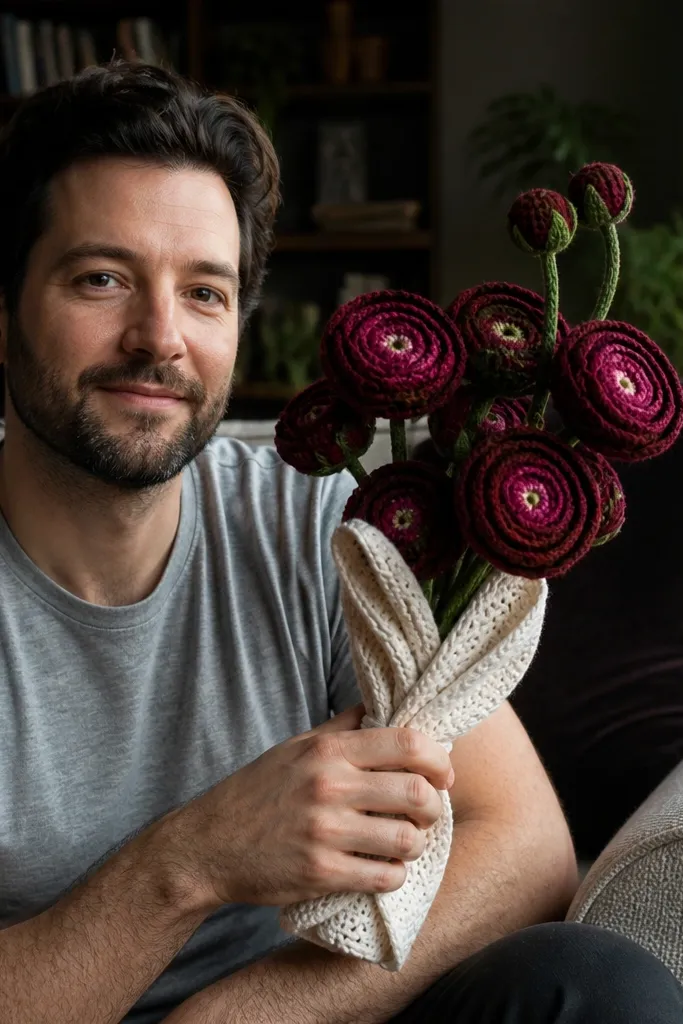
Ranunculus have a layered, slightly ruffled petal look, so they photograph beautifully even in a simple color palette. This idea uses deep berry blooms with a few wine-red buds so the bouquet looks full without needing tons of flowers. The gathered wrap look means the stems curve together, which makes it feel like a real gift bouquet rather than a pile. It’s perfect for renters because the stems can be tied around a removable bundle without adhesives. Expect medium time and a bit of petal-counting, but the end result is dramatic and very photogenic.
Crochet 10-14 ranunculus with berry yarn, plus 4-6 small buds in a slightly lighter wine shade. Build stems by twisting 18-22 gauge craft wire around a pipe cleaner, then attach by sewing or crocheting a small stem base onto the flower back. Gather all stems into a bundle and wrap with 1/2 inch floral tape starting at the top, then taper down to hide wire ends. Tie a removable ribbon band around the wrap to fake the look of florist finishing, and tuck two or three leaf sprigs into the ribbon folds.
Use a slightly tighter hook than the yarn label suggests for firmer petals.
Don’t leave long straight stems; straight wire shows and makes the bouquet look homemade.
3. Sunflower Bouquet with Mustard Centers and Black Tips
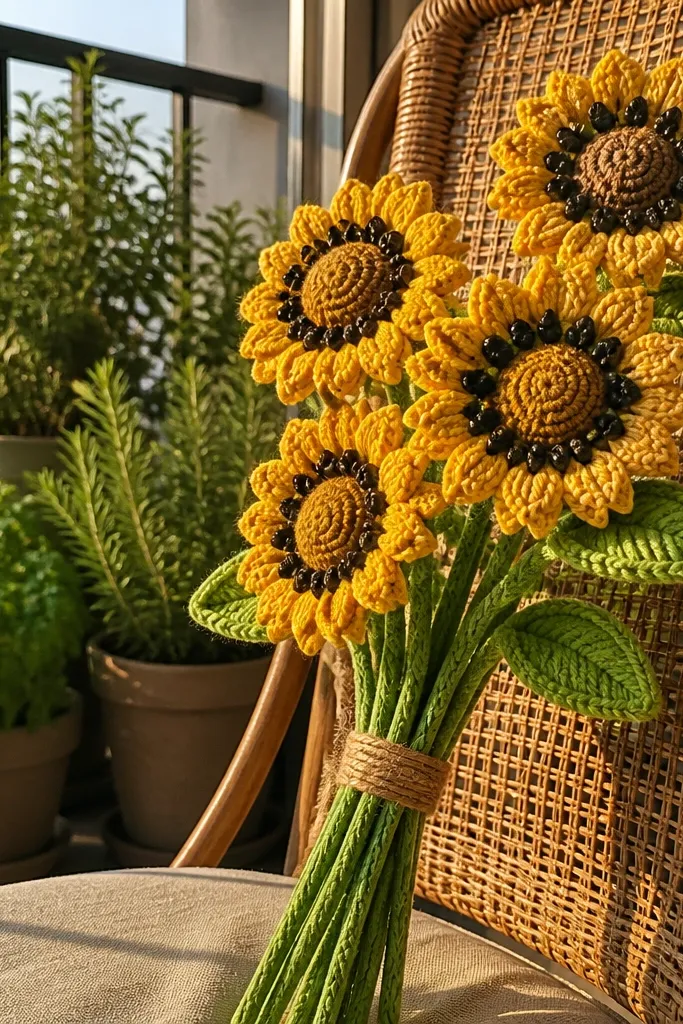
Sunflowers are the fastest way to get an instant “wow” photo because they have a strong shape and a bold color contrast. This renter-friendly crochet flower bouquet idea uses mustard centers with tiny black ring details so the flowers look dimensional. Keep the petals in two yellows: sunflower yellow and pale butter for depth. Add a few small daisylike fillers and simple leaf clusters so the bouquet doesn’t look like five big heads floating in space. It’s beginner-friendly if you stick to simple petal loops, and it assembles quickly because each flower is chunky and forgiving.
Make 5-7 sunflowers: crochet a tight round center in mustard, add a second darker ring in black yarn, then attach 12-18 petal loops around the edge. For each flower, sew a wire stem to the back center or crochet a small “plug” that hides the stem attachment point. Arrange the sunflowers at slightly different heights by bending wire stems before wrapping. Gather into a bouquet and wrap with twine or cloth ribbon around the stem bundle, then attach 8-12 leaf clusters around the sides.
Pro tipPetal loops look more realistic if you stagger their placement instead of evenly spacing every single one.
AvoidDon’t use only one yellow; flat color makes the petals blend together in photos.
4. Pastel Dahlia Cluster with Two-Color Petal Rows
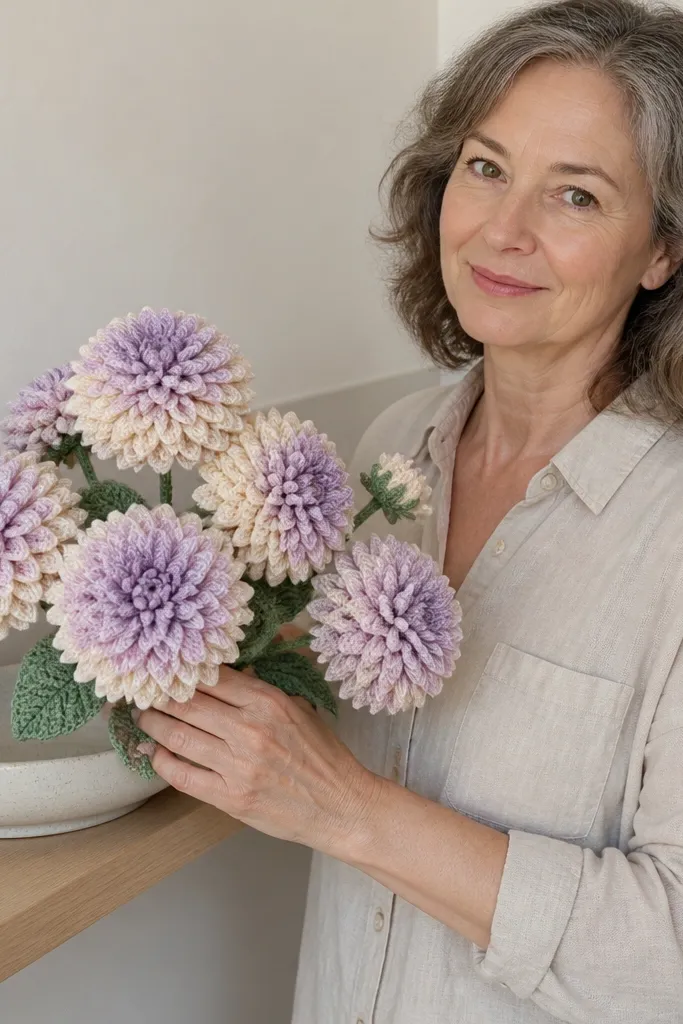
Dahlias look expensive because they’re made of repeating petal rows, and crochet can nail that texture with the right stitch choice. This bouquet uses two-color petal rows so each bloom has a soft ombre without complicated color changes. Pastels also look good in small rooms because they don’t overpower neutral walls. It’s a great renter-friendly crochet flower bouquet because the blooms are thick enough to hold their shape even if you pack them tightly. Skill level is intermediate due to petal repetition, but the assembly is straightforward.
Crochet 7-9 dahlias using two yarn tones per bloom: one base pastel and one lighter or darker accent. Build each dahlia with stacked petal rounds, then attach a firm round center using a tight stitch so it doesn’t sag. Sew or stitch a wire stem to the back, then position flowers in a loose cluster so petals overlap slightly. Wrap stems together with floral tape and add a few small filler blossoms or leaf sprigs to fill gaps between larger dahlias.
Pro tipKeep petal row counts consistent across all blooms so the bouquet looks cohesive.
AvoidDon’t block too aggressively; thin petals can warp if you stretch them hard.
5. White Calla Lily Bouquet with Smooth Stems
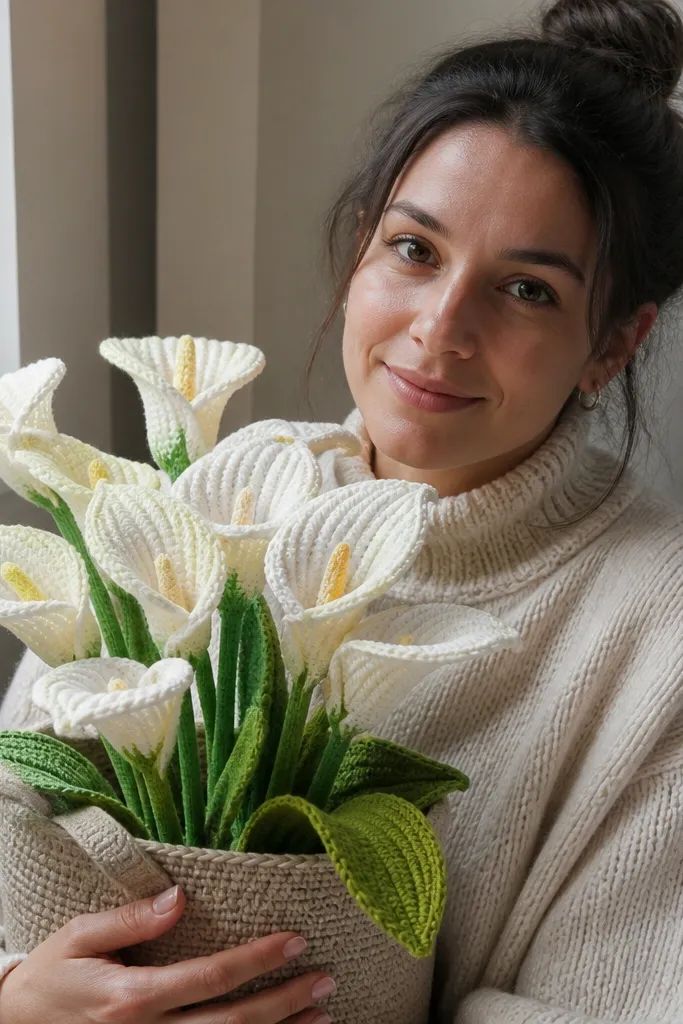
Calla lilies look sleek and modern, and that’s why this renter-friendly crochet flower bouquet works in tight apartments. The lily silhouette is long and clean, so it photographs well against plain backgrounds. Use white yarn plus a touch of pale yellow for the inside spadix so the flower has a lifelike “glow.” Because calla lilies don’t require tons of petals, they’re a time-saver and still look high-end. The skill level is beginner-to-intermediate, and the assembly looks polished if stems curve consistently.
Crochet 6-10 calla lilies: make a long petal tube shape, then fold and stitch the top opening so it curves. Create the spadix in pale yellow as a small tapered piece and stitch it inside the petal opening. Attach each lily to a wire stem and curve the stem using your fingers before wrapping. Gather stems into a bouquet, then wrap with ribbon and add 3-5 simple leaf strips made from a narrow crochet panel.
Pro tipCurve stems before you wrap the bouquet so you don’t fight the wire later.
AvoidDon’t choose fuzzy yarn; it hides the clean calla outline.
6. Blackberry Jam Blossoms with Sage Leaves
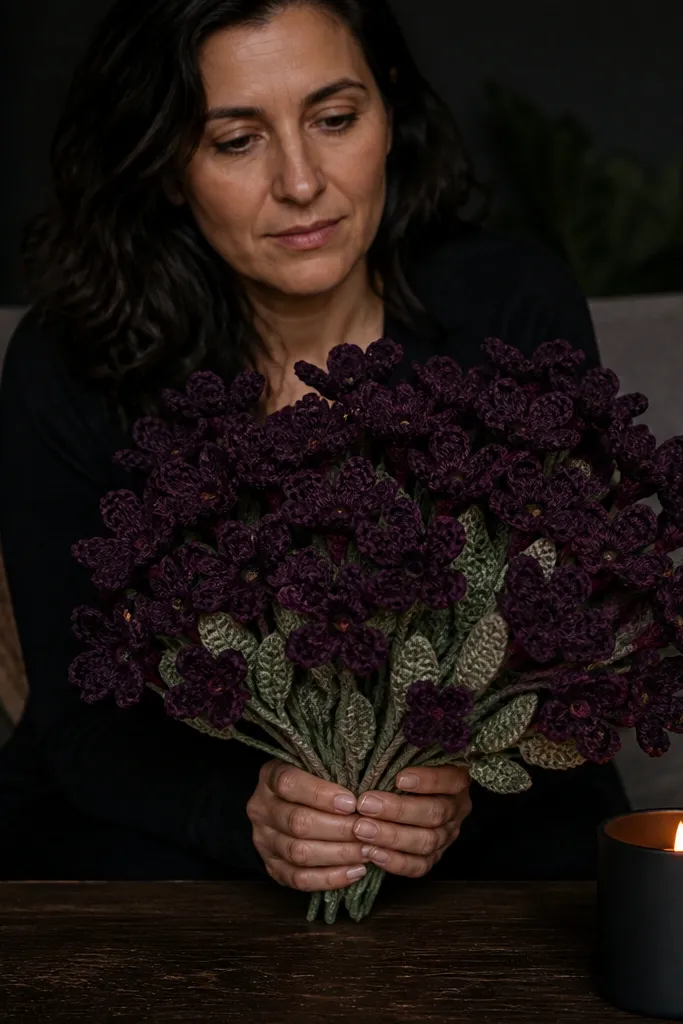
If you want a dark, moody bouquet that still reads cute, blackberry jam colors do it. This idea pairs deep purple blossoms with sage green leaves, which gives a natural contrast that looks great in photos without needing extra props. The blossoms are small but numerous, so the bouquet looks full even with a compact base. It’s renter-friendly because you can keep the stems short and still have a gift-ready shape. Skill level is intermediate since you’ll be making lots of small flowers, but each one is quick.
Crochet 20-28 small 5-petal blossoms in deep purple, plus 6-10 tiny buds in lighter plum for depth. Make sage leaves as simple leaf shapes with a slightly pointed tip and sew them into the gaps. Attach stems using short wire segments so each flower sits close to the bouquet head. Assemble into a compact dome by inserting stems into a small foam circle (about 4 inches) or tightly wrapped yarn ball, then wrap the base with fabric ribbon.
Use a small stitch marker to keep petal counts identical across all tiny blossoms.
Don’t overcrowd every gap; leave a little negative space so the leaves can show.
7. Blush Peony Bouquet with Layered Center Button
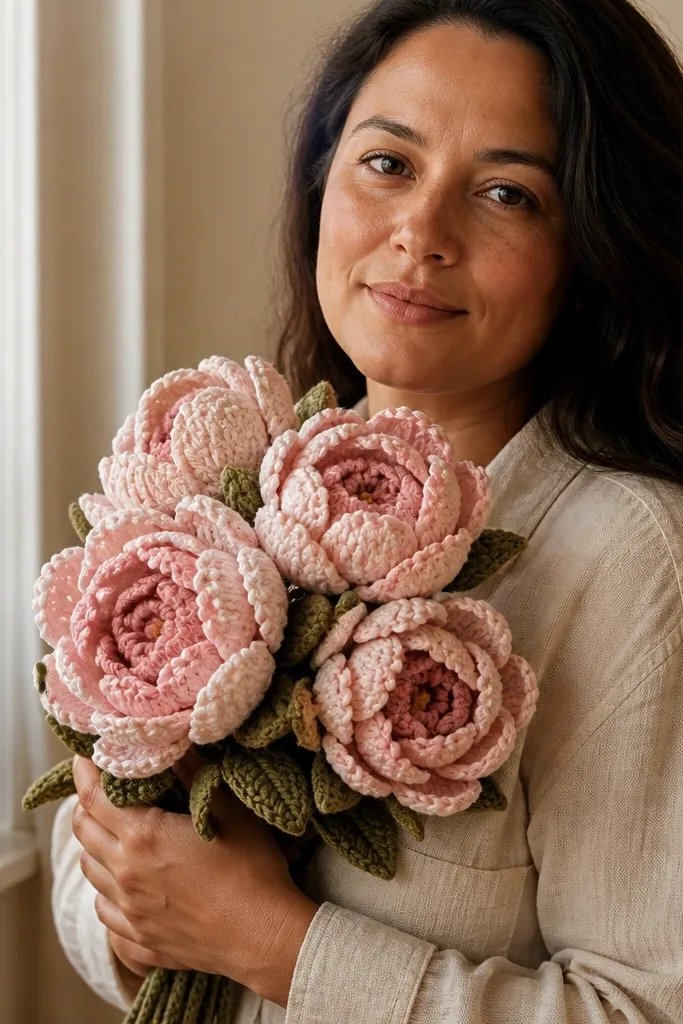
Peonies look like soft sculpted flowers, and crochet can mimic that by layering petals over a firm center. This renter-friendly crochet flower bouquet uses blush petals with a slightly darker blush “button” center so the flower has depth instead of looking flat. It’s photogenic against warm neutrals and also pops against gray or white walls. You can keep stems short and still get a bouquet head that looks lush. Skill level is intermediate because the petal layering takes time, but the results look gift-ready without complicated finishing.
Crochet 6-9 peonies: make a tight round base, then stitch petal layers around it in 2-3 sizes. Add a layered center by crocheting a small disc with slightly darker yarn, then attach it on top so it sits like a button. Sew wire stems to the back of each peony base and bend stems to angle outward. Assemble into a gathered bouquet by wrapping stems together and adding two or three leaf clusters behind the front flowers for framing.
Pro tipMake the center disc first; it sets the scale for how big the outer petals should be.
AvoidDon’t use floppy yarn for petals; it makes peonies slump.
8. Rainbow Micro Bloom Bouquet with White Backdrop

Micro blooms look adorable in small bouquets because you can pack lots of color into a compact head. This renter-friendly crochet flower bouquet uses tiny flowers in rainbow tones, then adds white filler blooms to keep it airy and photo-friendly. The white acts like visual breathing room, so the bouquet doesn’t turn into a busy clump. It’s also easy to gift because the color mix reads cheerful without needing a perfect match to a specific outfit. Skill level is beginner-to-intermediate, and assembly is quick once you’ve made the small flowers.
Crochet 30-40 micro flowers using 5-petal or simple loop styles in 6-7 colors, plus 10-14 white filler blooms. Attach wire stems to each flower with short wire pieces so they sit close together. Use a 5-inch yarn-wrapped foam ball or stuffing ball as the bouquet head, and insert stems from different angles to create a dome shape. Finish by adding a light layer of white filler around the top and sides, then wrap the stem bundle with ribbon.
Pro tipKeep flower sizes consistent by measuring finished diameters with a ruler before you assemble.
AvoidDon’t skip filler blooms; without them, the rainbow looks patchy.
9. Cornflower Blue Daisy Bouquet with Yellow Eye
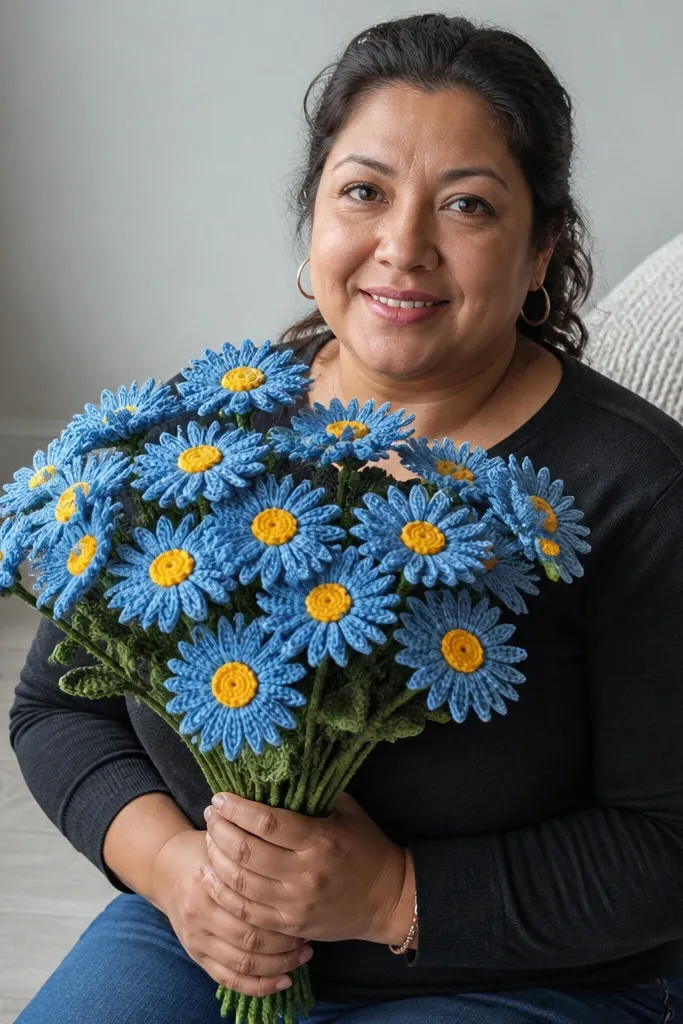
Cornflower blue daisies look crisp and clean, and that’s why they photograph so well. This bouquet pairs blue petals with a bright yellow center that gives a clear focal point in every picture. The daisy shape is beginner-friendly and still looks detailed because of the contrast. For renters, it’s easy to store because the bouquet can be made with short stems and packed flat under a lid box. The look is bright without being loud, so it works in kitchens, bedrooms, and entry nooks.
Crochet 10-14 daisies: make a yellow center round, then attach 16-24 blue petal loops around it. Stitch a wire stem to each flower back, then bend stems to create a slight fan shape. Gather stems into a bouquet and wrap with twine, leaving the flower heads visible and evenly spaced. Add 2-3 small leaf sprigs in a muted green to break up the blue and keep the bouquet from looking like a straight line.
Pro tipUse a darker blue for every other petal ring to add depth without extra yarn colors.
AvoidDon’t make petals too large; oversized petals hide the center and make the bouquet look flat.
10. Lavender Wand Bouquet with Long Stem Flowers
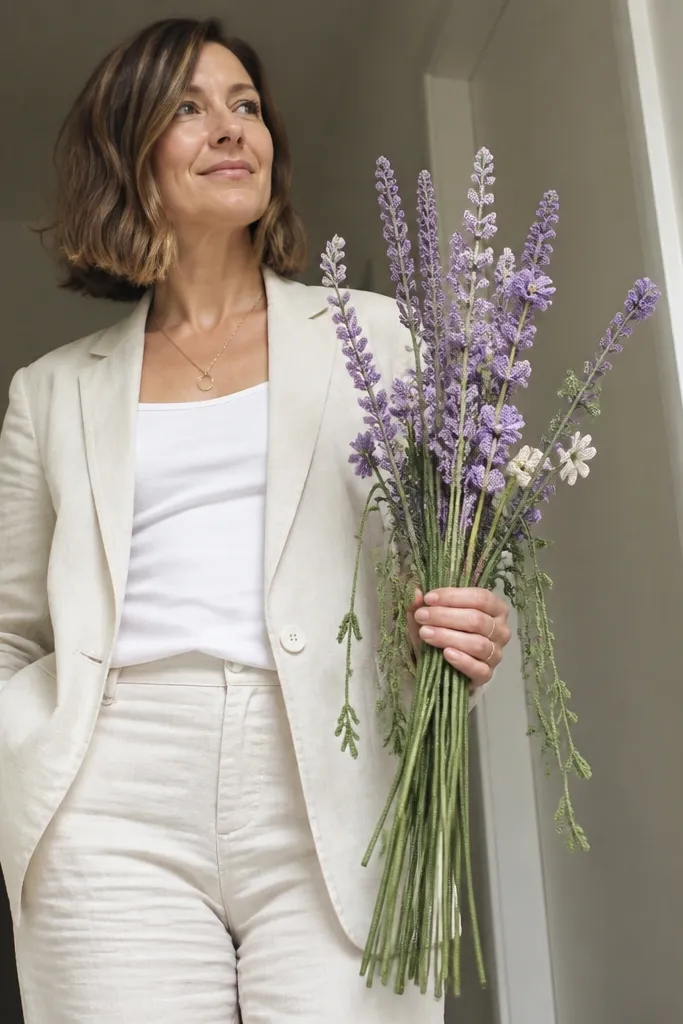
A wand-style bouquet looks modern and is very renter-friendly because it doesn’t need a bulky base. You keep flowers higher and stems longer, then let the bouquet drape slightly for a graceful photo silhouette. Lavender tones also look calm in daylight, and the long lines make the bouquet stand out even in small spaces. This design uses simple flower heads plus textured stitch detail, so it reads as “intentional” instead of random. Skill level is intermediate if you want neat stem lengths, but the crochet is straightforward.
Crochet 8-12 lavender flower heads using a small 5-6 petal pattern in lilac yarn with a tiny darker center. Attach each head to a 10-14 inch length of craft wire, then wrap wire with yarn or add a pipe cleaner core for grip. Arrange stems so they form one main arc, with the tallest flowers in the middle. Wrap the stem bundle with floral tape, then tie ribbon around the wrap point so the bouquet looks finished without adhesives.
Stagger heights by 1-2 inches so the bouquet has depth in photos.
Don’t make all stems the same length; it flattens the silhouette.
11. Terracotta + Cream Peony-like Blossoms
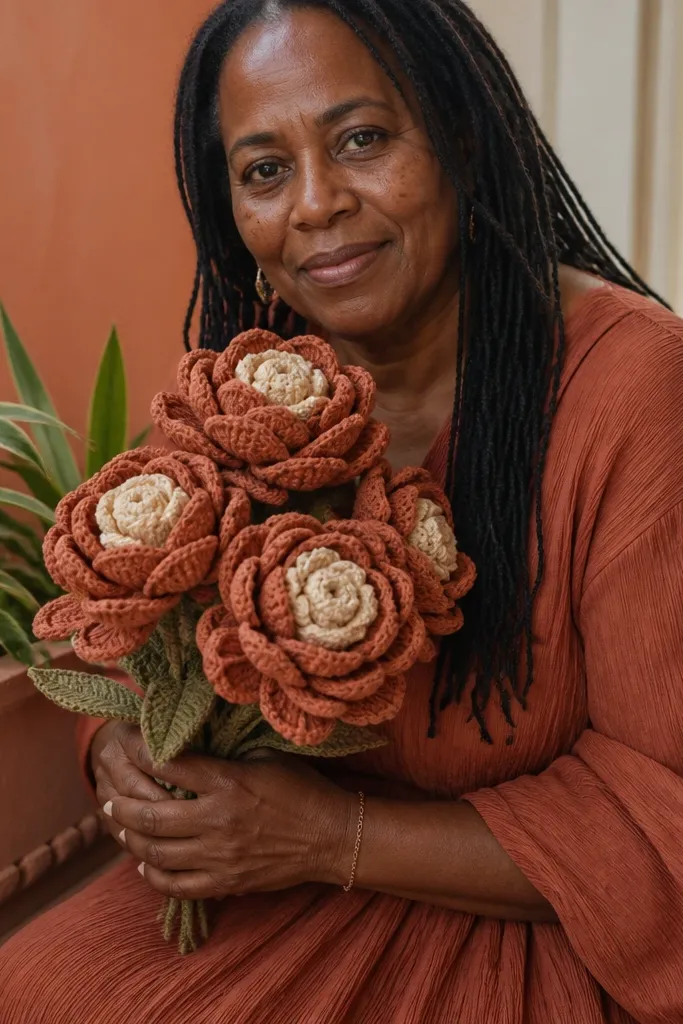
Terracotta and cream makes a bouquet that looks warm and expensive without going overly bright. This renter-friendly crochet flower bouquet uses peony-like layered petals but keeps the palette tight, so the flowers read as one set. The cream centers add contrast and keep the bloom from blending into the terracotta petals. It’s a great choice for gifts because it matches lots of home decor styles, especially neutral kitchens and beige walls. Skill level is intermediate because of petal layering, but you can reduce time by making fewer, larger blooms.
Crochet 7-10 large blossoms with terracotta petals and a cream center disc. Use 2-3 petal sizes so each flower looks layered, then stitch petals so they spiral slightly instead of sitting flat. Attach wire stems to the back of each flower and curve them slightly inward so the bouquet gathers. Wrap stems tightly with floral tape and add 4-6 small leaf clusters in a muted green or sage to balance the warm tones.
Pro tipIf your petals curl, lightly steam them and reshape before assembly.
AvoidDon’t add too many filler colors; terracotta gets muddy fast.
12. Teal Ocean Bloom Bouquet with White Foam Flowers
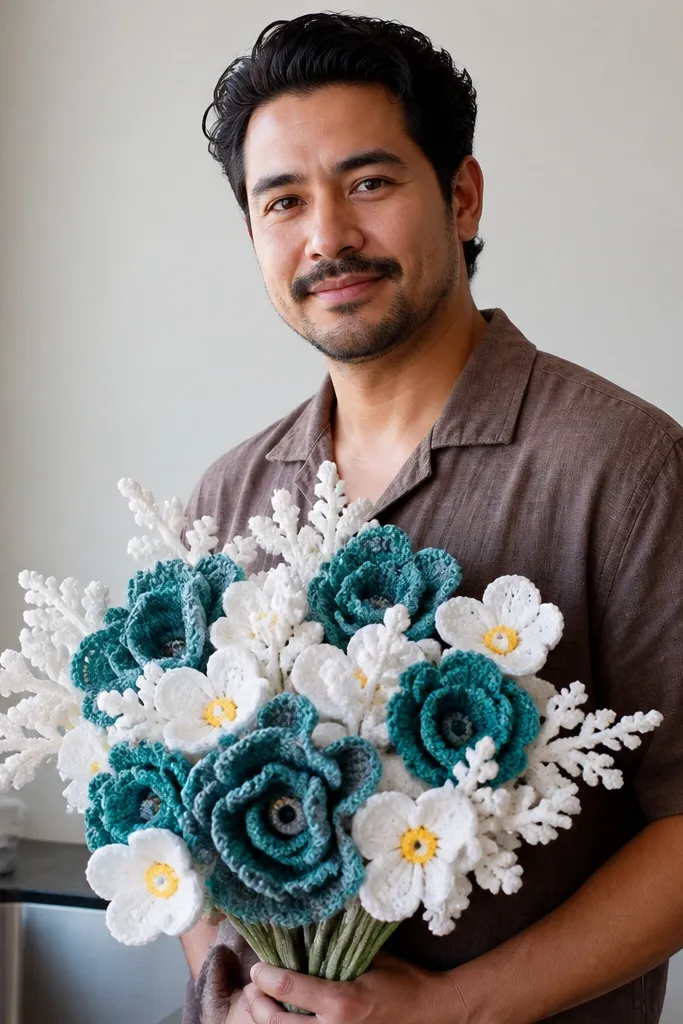
Teal and white gives a clean “ocean foam” look that’s super photogenic against light backgrounds. This renter-friendly crochet flower bouquet mixes teal blooms with white mini flowers that fill the gaps and make the bouquet look airy. The white filler also hides stem attachment points, which keeps the front view neat. It’s a strong option if you want a summer gift that still looks classy, not childish. Skill level is beginner-to-intermediate since the flowers can be made with simple petal shapes.
Crochet 8-12 teal flowers using either 5-petal loops or small layered petals, then make 12-18 white micro flowers for filler. Attach short wire stems to each piece so they can be inserted close together. Build a compact bouquet head with a 5-inch foam circle by inserting stems from behind and covering the top with filler blooms. Wrap the stem bundle and add a single ribbon color in a soft gray or white to keep it clean.
Use a slightly different teal shade for 1-2 flowers so the bouquet has depth instead of one flat color block.
Don’t let white filler dominate; the teal should be the main focus.
13. Gingerbread Spice Blossom Bouquet with Brown Sugar Centers
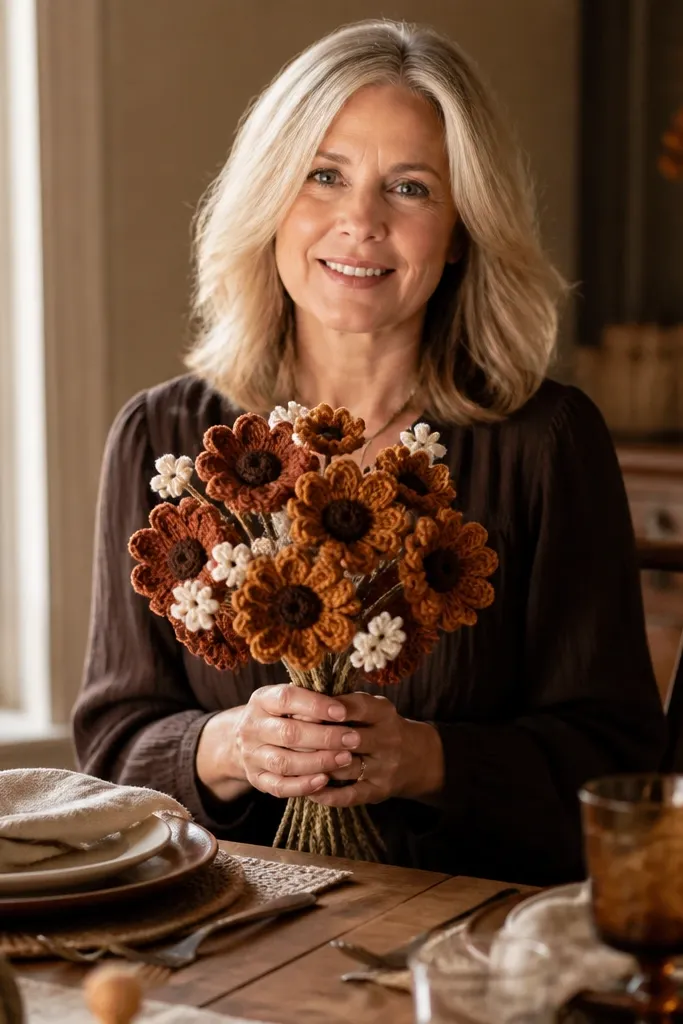
This bouquet looks like seasonal decor without being overly themed. Warm brown petals plus darker brown centers give a “gingerbread” aesthetic that photographs beautifully in fall and winter lighting. Add a few tiny cream flowers for contrast so it doesn’t look heavy. It’s renter-friendly because you can keep it compact and store it flat, and the colors hide minor imperfections in crochet. Skill level is beginner-friendly if you use simple flower shapes and focus on consistent stitch tension.
Crochet 10-16 spice-toned flowers using two yarn colors: warm brown for petals and a darker brown for centers. Make centers by crocheting tight rounds, then add a small stitched ring detail so the center looks textured. Attach short wire stems and insert into a small foam disc to create a dome. Finish by adding 6-10 cream micro blooms between the larger flowers and wrap stems with twine.
Match yarn dye lots when possible; spice colors show dye differences in photos.
Don’t use bright red accents; it fights the warm, cozy palette.
14. Pearl White Rosebud Bouquet with Tiny Green Sprigs
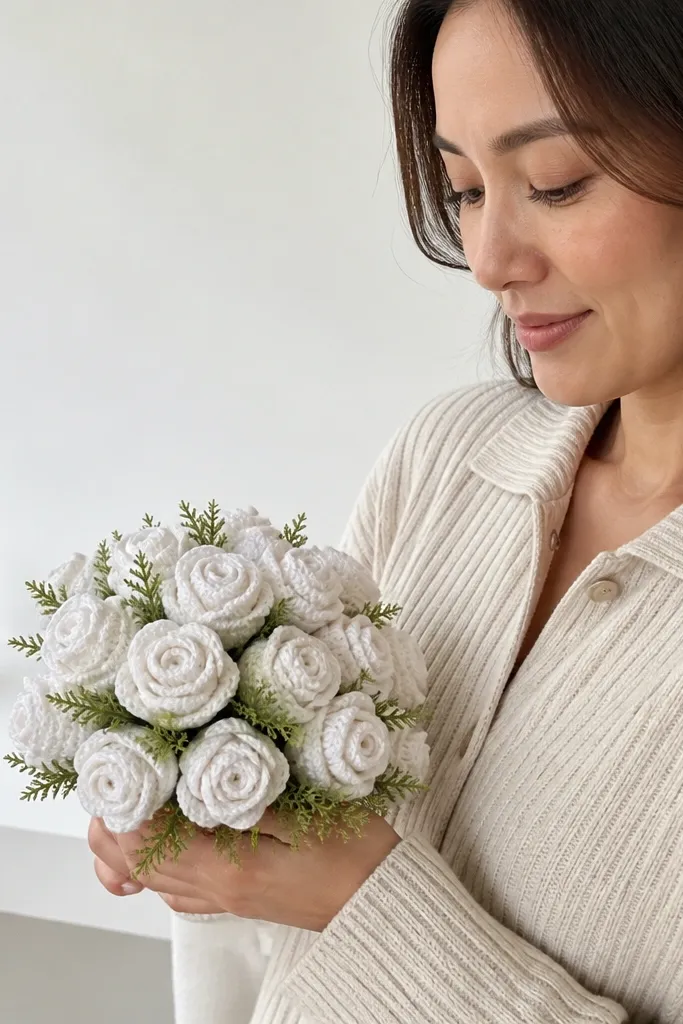
A pearl white bouquet is the go-to aesthetic for clean photos and minimalist spaces. This renter-friendly crochet flower bouquet relies on rosebuds instead of big open roses, so it stays compact and packable. Tiny green sprigs frame the white blooms and keep them from looking like plain yarn circles. Because the palette is mostly one color family, your stitches have to look neat — which this design rewards. Skill level is intermediate if you want tight rosebud spirals, but the assembly is simple because everything is small.
Crochet 18-24 pearl white rosebuds using a tight spiral pattern and keep each bud consistent in size. Make 10-14 tiny green sprigs from short leaf motifs, then sew them into the gaps between buds. Attach wire stems to each rosebud and insert into a yarn-wrapped foam head about 4 inches wide. Wrap stems and add one fabric ribbon band around the wrap point so the bouquet looks gift-ready.
Pro tipUse a slightly stiffer yarn for white so the buds keep their shape.
AvoidDon’t use very loose stitches; white shows unevenness immediately.
15. Bright Coral + Peach Bloom Bouquet with Ruffled Petals
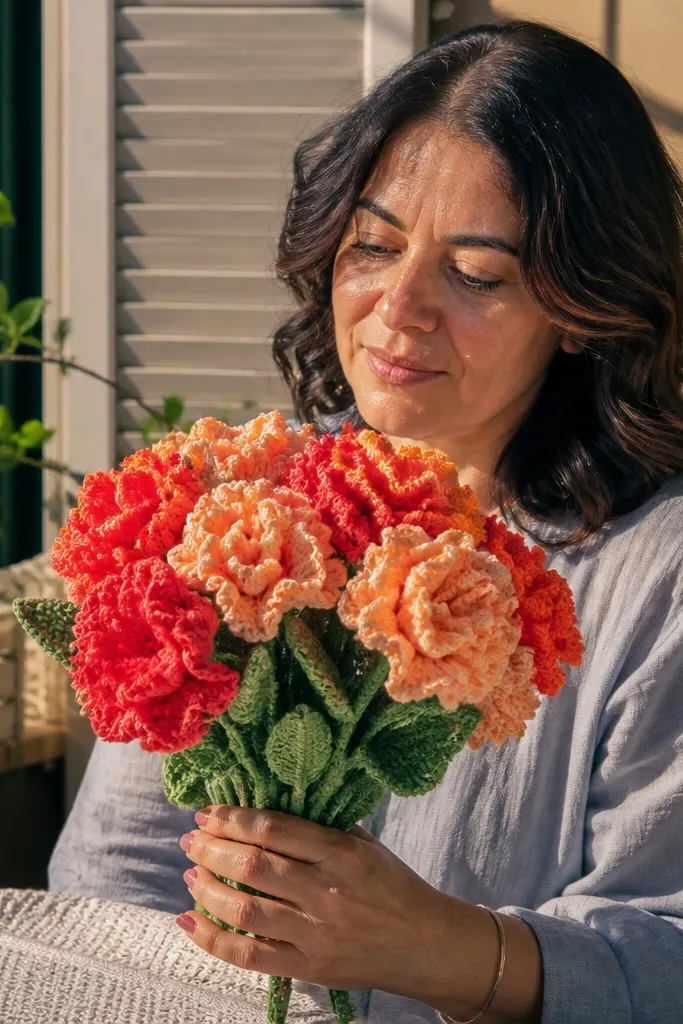
Ruffled petals make crochet look like it has motion, which is why coral and peach blooms feel so photogenic. This renter-friendly crochet flower bouquet uses alternating coral and peach flowers so the bouquet has a warm glow without needing many colors. Add a few small leaf accents in a muted green to keep the palette from becoming too sweet. It’s a great choice for birthdays and housewarming gifts because it looks cheerful and still looks polished. Skill level is intermediate because ruffles need consistent stitch shaping, but each flower is manageable.
Crochet 9-12 coral flowers with ruffled petals and 6-8 peach flowers with slightly smaller petal counts. Attach each flower to a wire stem, then bend stems so flowers fan outward from the center. Gather stems and wrap with floral tape, then tie a ribbon at the top of the wrap to hide any uneven stem lengths. Add leaf accents by sewing them behind the front flowers so they frame rather than clutter.
Ruffles look best when you keep the base round tight; don’t let the flower base widen too much.
Don’t add heavy beadwork; it makes storage and handling annoying.
16. Monochrome Sage Green Wildflower Bouquet

Monochrome sage looks calm and modern, and it’s a lifesaver for renters who want decor that doesn’t clash with everything. This renter-friendly crochet flower bouquet uses a mix of sage yarn shades, not different colors, so the bouquet stays cohesive. Include a few tiny star flowers and small daisy shapes so it doesn’t look like one repeated pattern. The monochrome palette also hides minor variations in crochet tension, which makes it forgiving for beginners. Skill level is beginner-to-intermediate because most flowers are simple, but you’ll want to pay attention to size variety.
Choose 3 sage shades: light sage, medium sage, and slightly darker olive. Crochet 12-16 small daisy-like flowers and 6-10 star or simple 5-petal blossoms, keeping each finished size within about 1/4 inch. Attach wire stems and insert into a 5-inch yarn-wrapped foam head, placing larger flowers at the top and medium ones around the sides. Wrap stems and add 3-5 larger leaf shapes to anchor the bouquet visually.
Pro tipMix stitch textures: one flower uses single crochet petals, another uses puff or bobble stitches for contrast.
AvoidDon’t use only one sage shade; it turns into a flat bundle in photos.
17. Black and Ivory Rose Bouquet with Satin Ribbon
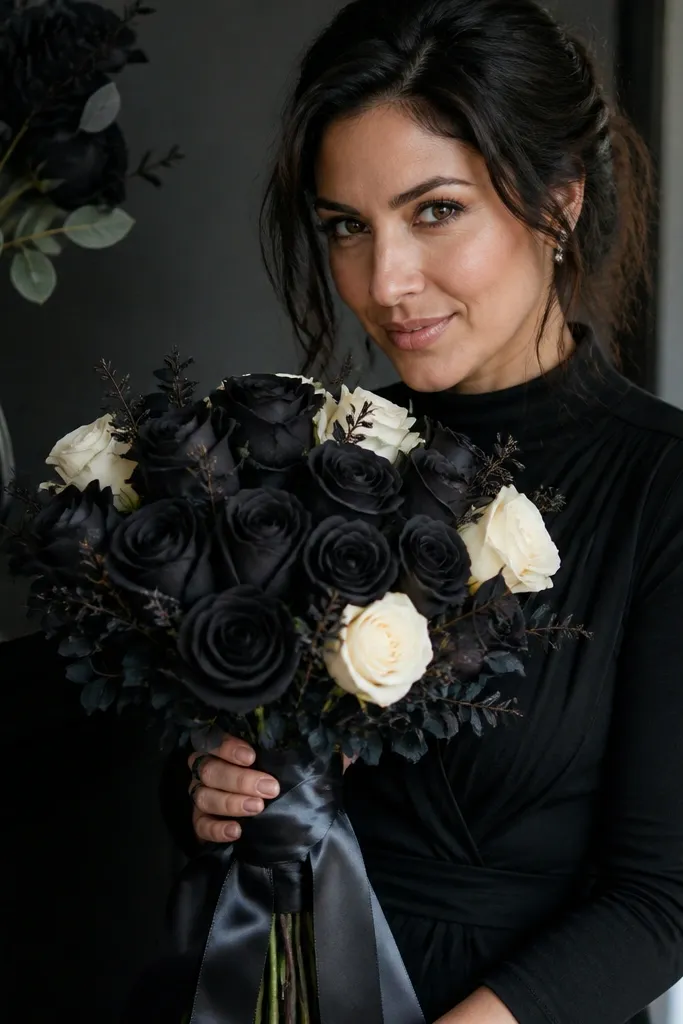
High-contrast black and ivory makes crochet look instantly styled. This renter-friendly crochet flower bouquet uses black roses as the main focus and ivory buds to soften the edges, which keeps it looking elegant rather than harsh. Satin ribbon wraps the stem bundle and gives that “store-bought” look without needing a vase. Because the colors are bold, the bouquet reads well even with simple flower shapes. Skill level is intermediate for neat rose construction, but the assembly is quick and the final look is very photogenic.
Crochet 7-10 black roses and 6-8 ivory buds in the same yarn weight. Add a small green leaf cluster in a dark gray-green to break the contrast. Attach wire stems to roses and buds, then build a gathered bouquet with taller roses in the back and ivory buds around the front. Wrap stems with floral tape, then cover the wrap with satin ribbon secured by a simple tie or hidden stitch.
Keep ribbon color consistent with leaf color, not with the yarn; it makes the bouquet look more intentional.
Don’t let rose petals overhang unevenly; black highlights messy edges.
18. White Daisy Chain Bouquet with Mini Pom Pom Centers
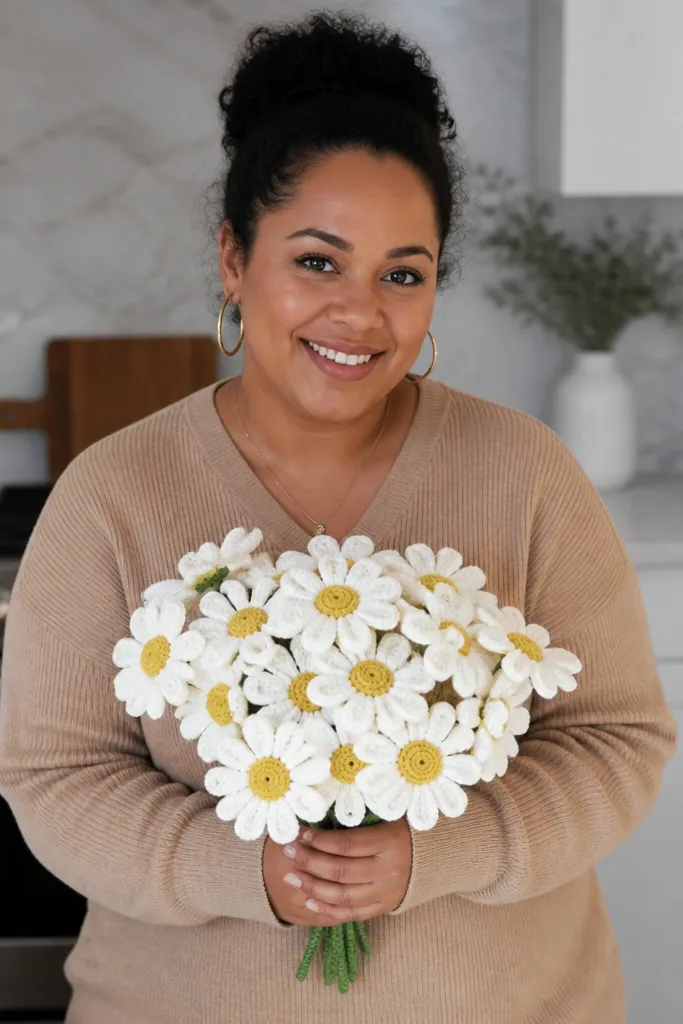
This bouquet looks like a fresh spring bunch because the flowers are bright white and evenly spaced. The mini centers add a soft, rounded texture that makes the crocheted petals feel more dimensional. It’s renter-friendly because you can keep stems short and store it flat, and the white palette looks clean in any room. The daisy chain style also makes assembly easier since the flowers naturally form a line-like cluster. Skill level is beginner-friendly: simple petals, quick centers, and minimal shaping.
Crochet 14-20 white daisies using simple petal loops and a tight center round. For the center, make small pom poms in a pale yellow or attach a tightly crocheted disc that looks fluffy. Attach wire stems and arrange flowers in a gentle oval cluster, then wrap stems together. Add 6-10 small leaf sprigs and tuck them between flowers so the bouquet doesn’t look like just a row of heads.
Pro tipIf your pom centers flatten, lightly re-fluff after they dry from blocking.
AvoidDon’t use cream yarn that’s too yellow; it can look dingy in daylight photos.
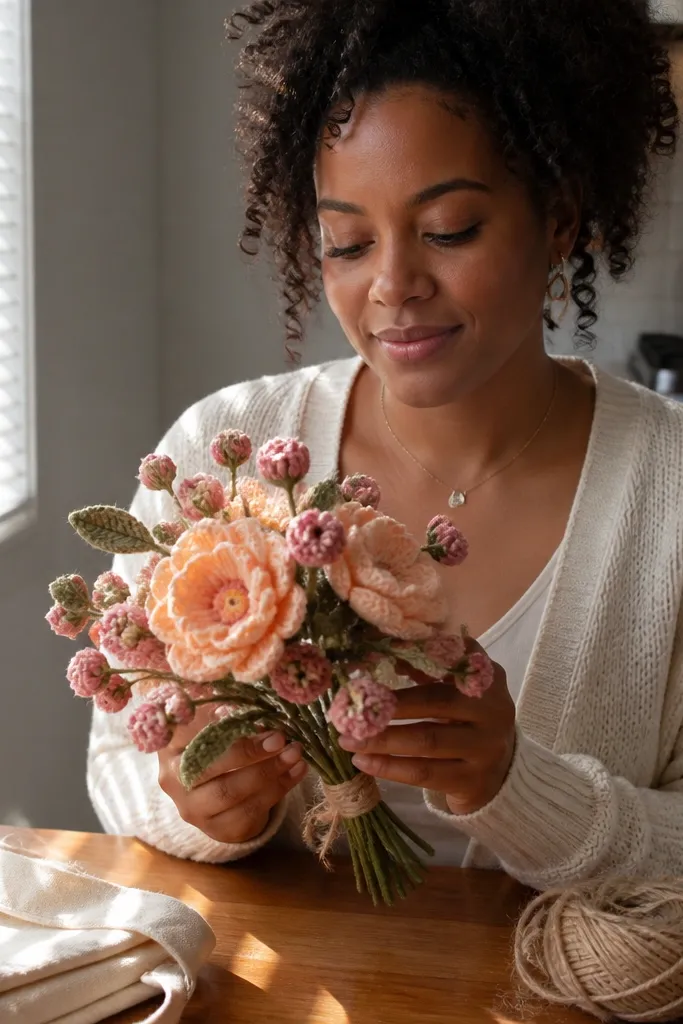
19. Peach Blossom Bouquet with Tiny Pink Buds
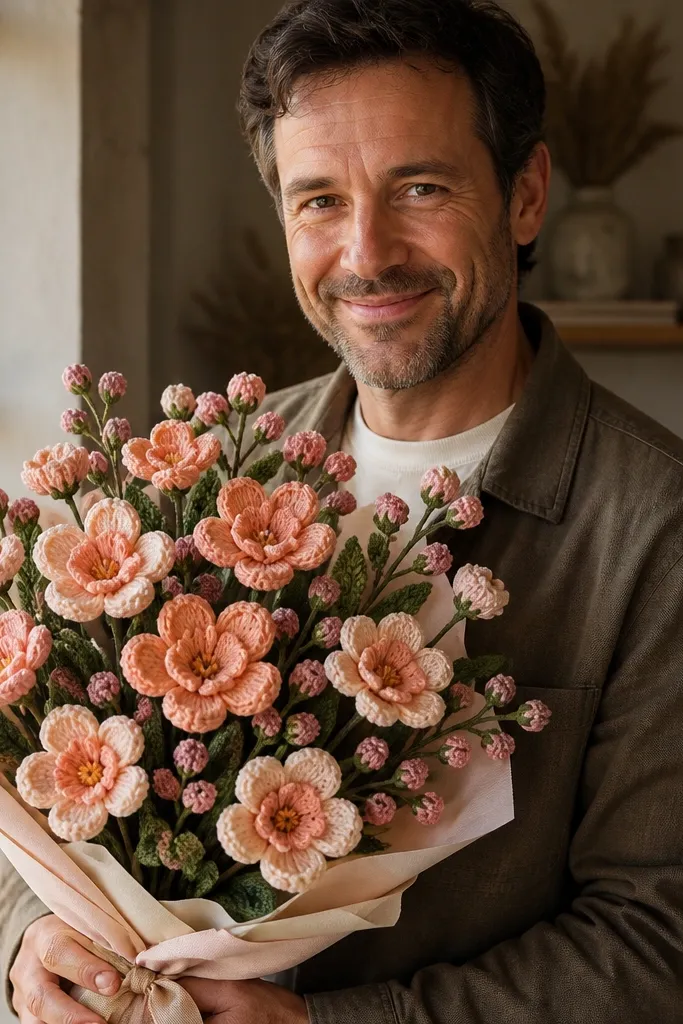
Peach blossom bouquets look sweet and modern when you keep petals soft and centers neat. This renter-friendly crochet flower bouquet mixes medium peach blossoms with tiny pink buds so it has a layered, natural feel. The color combo also flatters warm indoor lighting, which helps photos look good even when your apartment light is dim. It’s a great gift idea because peach and pink read as friendly without looking childish. Skill level is beginner-to-intermediate since blossoms can be simple, and assembly is fast because you’re repeating small units.
Crochet 10-12 medium peach blossoms with 5-7 petals and a tight center. Crochet 8-12 tiny pink buds using small spirals or rolled petal shapes. Attach stems and gather into a bouquet head by inserting stems into a 4-5 inch foam circle. Fill gaps with buds around the edges, then add a few small leaves to frame the front.
Pro tipKeep bud sizes consistent by using one exact stitch count for every bud.
AvoidDon’t place buds only on the top; spread them around the sides for a fuller look.
20. Seafoam Green + White Foam Flower Bouquet
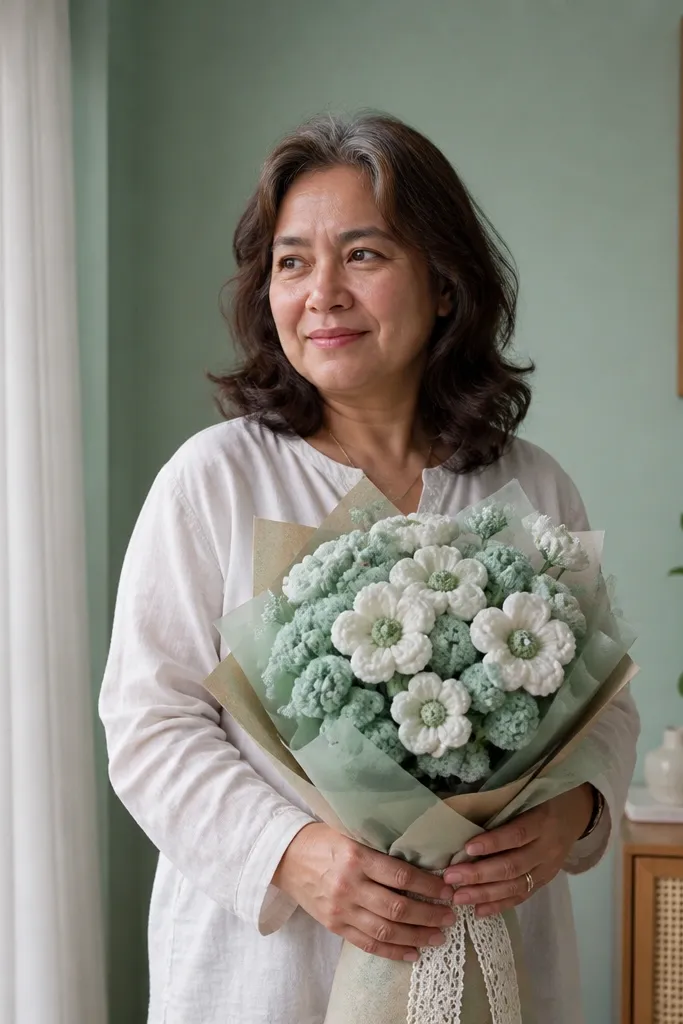
Seafoam green and white looks airy, and it’s one of the easiest palettes to style in photos because it matches almost any wall color. This renter-friendly crochet flower bouquet uses “foam flower” style blossoms with puffy texture so the yarn catches light and looks more three-dimensional. You’ll end up with a bouquet that looks soft and cloud-like without being messy. It’s beginner-friendly if you choose simple texture stitches and keep flower counts manageable. Assembly is the easy part: cluster and wrap, then adjust spacing until it looks balanced.
Crochet 10-14 seafoam puffy flowers using a textured petal pattern (like puff or bobble-based petals) and add white filler flowers in smaller sizes. Make wire stems and insert into a yarn-wrapped foam head about 5 inches wide. Place the largest seafoam flowers at the top and front, then layer white filler around edges to hide stem ends. Wrap stems with floral tape and cover with ribbon, then trim any wire that peeks out.
Pro tipTexture stitches look better when you block lightly so petals keep their bubble shape.
AvoidDon’t pack the bouquet too tightly; puffy stitches crush and flatten.
21. Pink Peony with Gold-Thread Center Ring
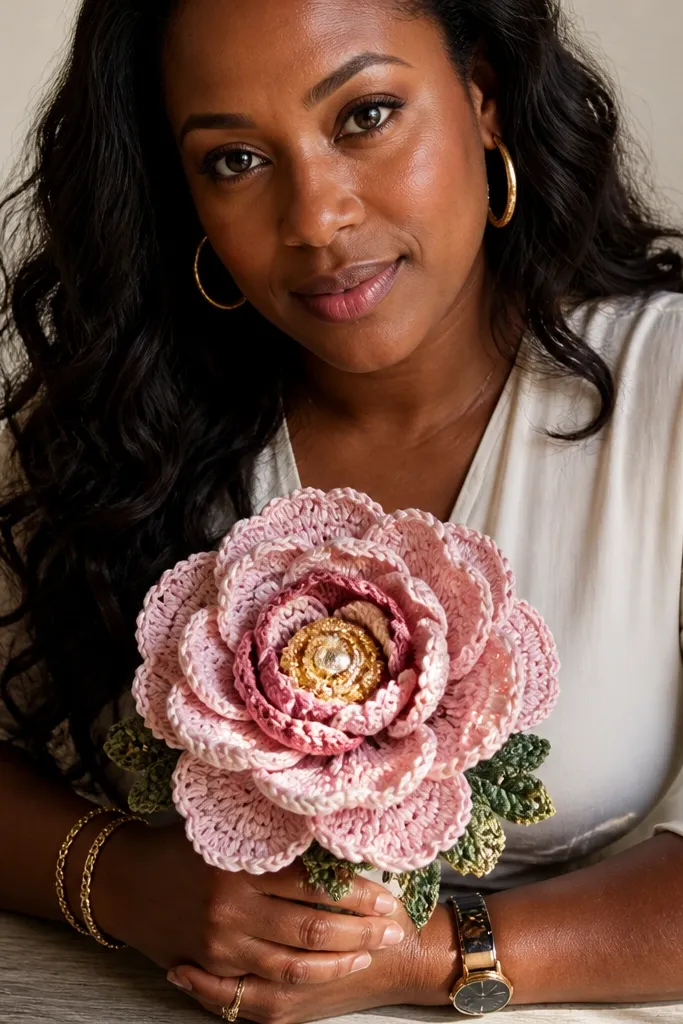
This bouquet is for people who want crochet flowers to look like they belong in a styled photo. The secret is a gold-toned center ring that catches light without needing beads everywhere. Use blush pink petals with a slightly deeper pink inner layer, then stitch a gold ring in the center to create a polished focal point. It’s renter-friendly because the bouquet can be made with short stems and packed flat, and the gold ring keeps it looking fancy even if your background is simple. Skill level is intermediate due to center finishing.
Crochet 6-8 peonies in blush pink with 2-3 petal sizes and a firm base disc. Stitch a deeper pink inner petal ring, then sew a gold-toned center ring using thin yarn or metallic thread, anchored at 4-6 points so it doesn’t slip. Attach wire stems to the back of each peony and bend stems to form a gentle gathered arc. Wrap stems and add 3-4 leaf clusters in muted green, then hide any knots under the leaf stitching.
Test the gold thread tension on a scrap first; too tight can pucker the center disc.
Don’t use heavy metallic thread across the whole flower; it warps the petals.
22. Marigold Garden Bouquet with Layered Center Swirl
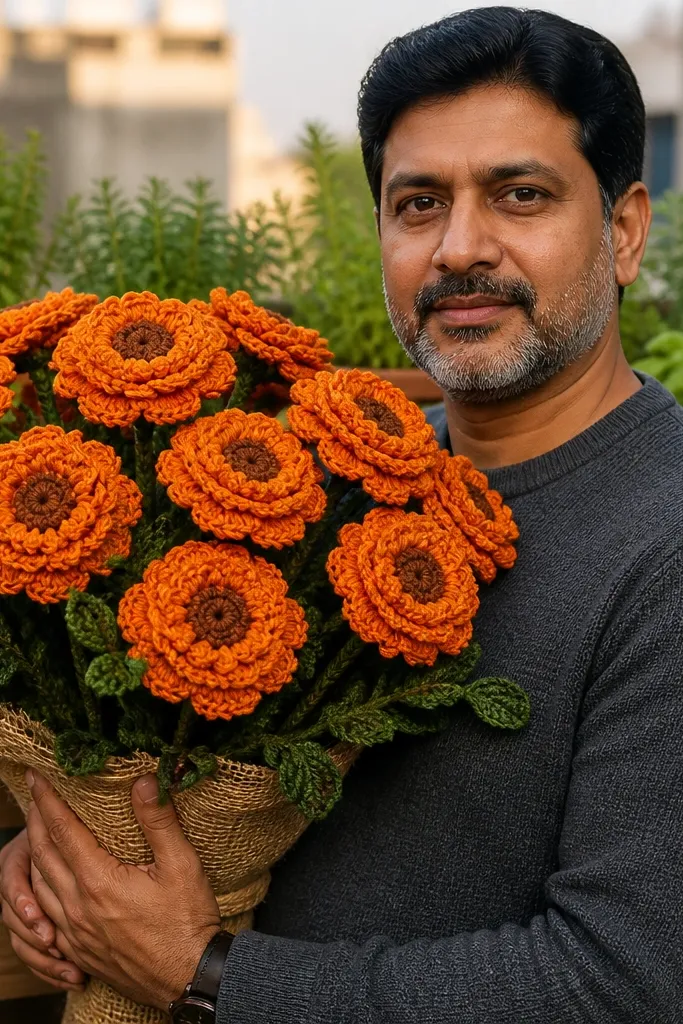
Marigolds bring that warm garden vibe, and the layered center swirl makes crochet look like real petals curling inward. This renter-friendly crochet flower bouquet uses marigold orange with a darker center so every bloom has depth. It’s very photogenic because the center swirl creates a natural focal point that shows even from a distance. Add a few small green leaves and keep stems short for storage. Skill level is intermediate because you’ll repeat the center swirl pattern, but the bouquet assembles quickly once you have your blooms.
Crochet 8-12 marigold flowers: orange outer petals in a layered ring, then a darker center swirl made from stacked small rounds or spiral stitches. Attach each flower to a wire stem, then arrange blooms in a tight bouquet head so centers face forward. Wrap stems with floral tape and cover with ribbon, leaving the front flowers slightly higher. Add 8-10 small leaf clusters around the sides to anchor the bouquet and hide stem joints.
If your center swirl is too flat, increase stitch density in the last round to keep it domed.
Don’t make every bloom face the exact same direction; slight angles look more natural.
23. Teal Rosebud Bouquet with Matching Crochet Wrap
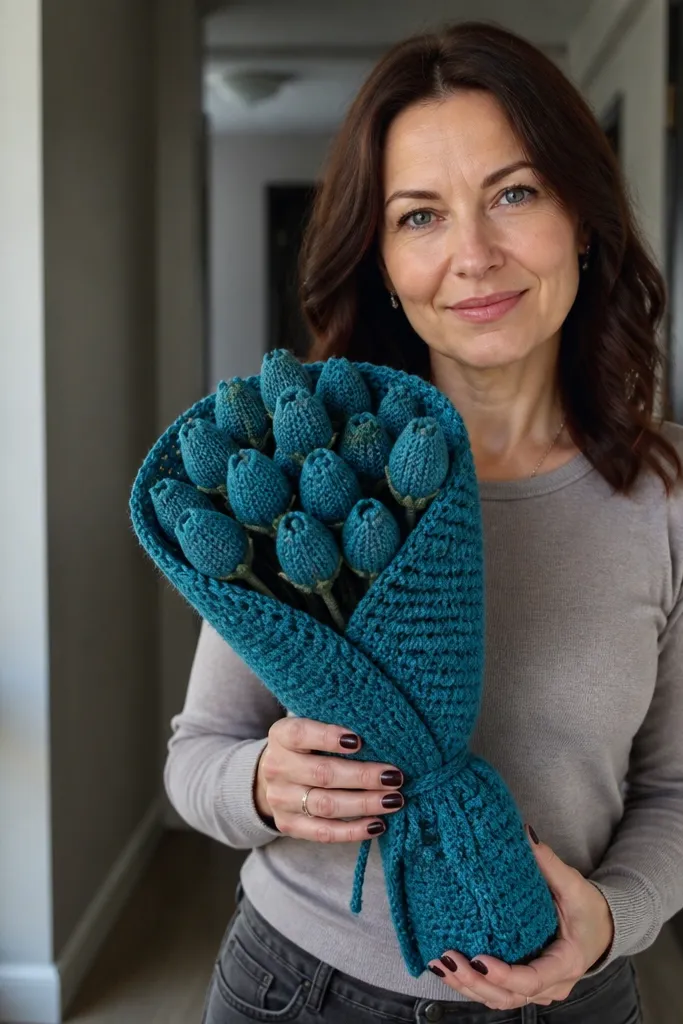
This bouquet looks styled because it uses a matching crochet wrap around the stems, not just ribbon. Teal rosebuds create a smooth, modern look, and the wrap hides wire ends while keeping the palette cohesive. It’s renter-friendly because you don’t need adhesives and you can store it flat once the flowers are packed. The crochet wrap also makes the bouquet feel sturdy when you hand it over as a gift. Skill level is intermediate: rosebuds plus a neat wrap, but it’s all repeatable work.
Crochet 18-24 teal rosebuds in a consistent spiral size. Attach each rosebud to a wire stem and gather stems into a tight bouquet head using a 4-5 inch foam or stuffing ball. Then crochet a long strip wrap in teal that fits around the stem bundle, and stitch it closed around the base. Finish by trimming stems so only the crochet wrap and the bouquet head show, then add 2-3 small leaf sprigs at the front.
Measure the stem bundle diameter after you gather; size the wrap to that measurement so it sits flat.
Don’t leave wire exposed under the wrap; it can snag fabric and ruin photos.
24. White + Blush Mixed Bouquet with Hidden Stem Knots
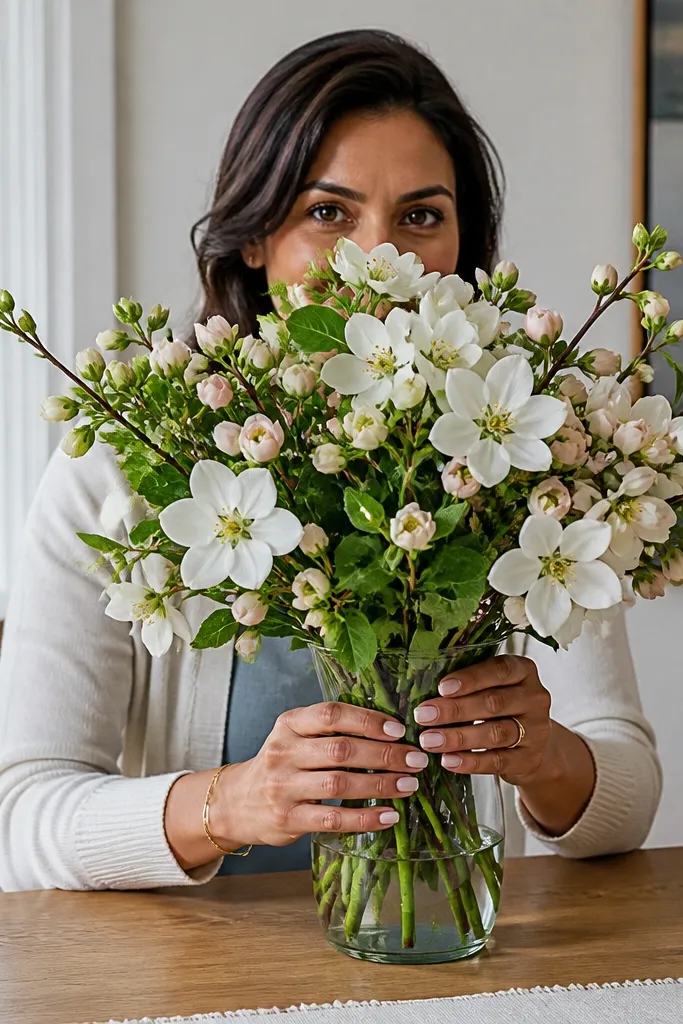
This is a practical aesthetic design: it’s built to hide the messy part of crochet assembly. Use a mix of white blossoms and blush buds, then cover every knot and stem junction with a “leaf collar” so the front looks clean. The renter-friendly crochet flower bouquet part is the short-stem setup, which makes it easy to store and easy to gift without a vase. It’s also forgiving if some flowers are slightly different sizes because the collar visually unifies the bouquet. Skill level is beginner-to-intermediate, since the main work is flower repetition and a tidy finishing collar.
Crochet 10-14 white flowers and 6-10 blush buds, keeping each finished size within about 1/2 inch. Attach wire stems and gather into a foam head about 5 inches wide, inserting stems at different angles. Create a leaf collar by crocheting or sewing a ring of small leaf shapes and pinning it over the base where stems meet. Wrap the stem bundle with a strip of fabric or ribbon, then tuck the collar so it covers knots and tape.
Pro tipMake the collar first and test the diameter on the foam head before you attach flowers.
AvoidDon’t place the collar too low; it should sit where stems meet so the front stays clean.
25. Red Velvet Bloom Bouquet with Black Leaf Detail
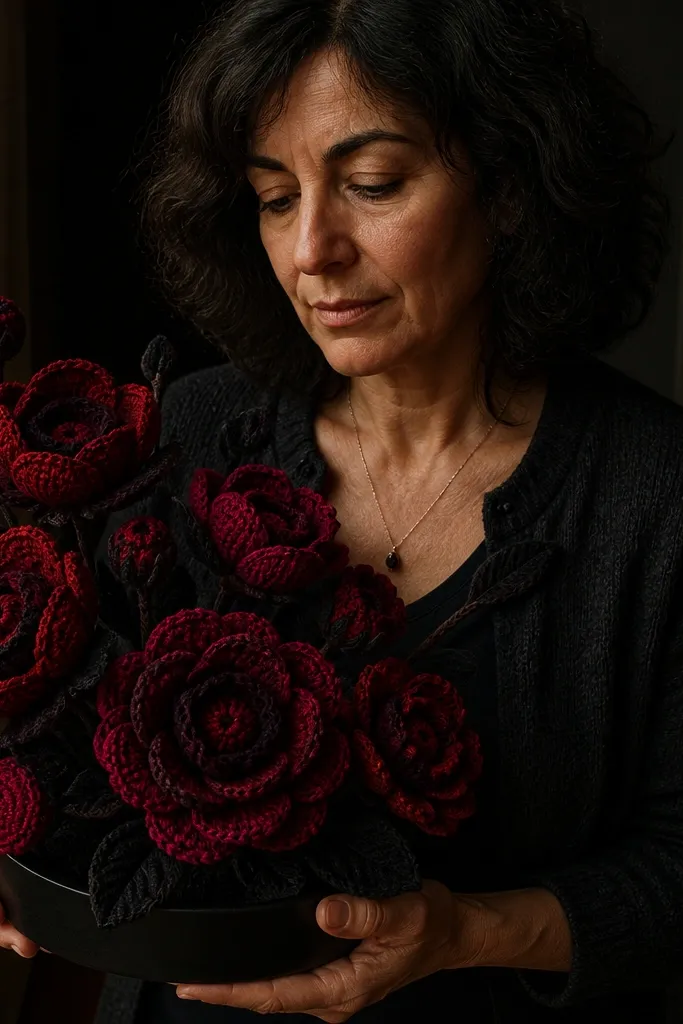
Velvety red crochet looks dramatic, and pairing it with black leaf detail makes the bouquet look styled instead of homemade. This renter-friendly crochet flower bouquet uses deep red blooms with a darker inner layer so each flower has depth. The black leaves add a graphic edge that stands out in photos, especially against beige, white, or light wood backgrounds. Keep the bouquet compact so it’s easy to store between gifts. Skill level is intermediate because you’ll do layered petals and consistent leaf shapes.
Crochet 9-12 deep red blooms with 2-layer petals and a tight center in a slightly darker red or brown-red. Make black leaf clusters using a simple pointed leaf motif, then sew leaves into gaps between flowers. Attach wire stems and arrange flowers in a gathered dome using a 4-5 inch foam head. Wrap stems and finish with a thin black ribbon band to hide the base and keep the look cohesive.
Pro tipIf your red yarn looks flat, switch to a slightly smaller hook for sharper petal edges.
AvoidDon’t use too many different reds; one main red plus one inner shade looks cleaner.



