
1. Color-Block Beginner Dishcloth Set
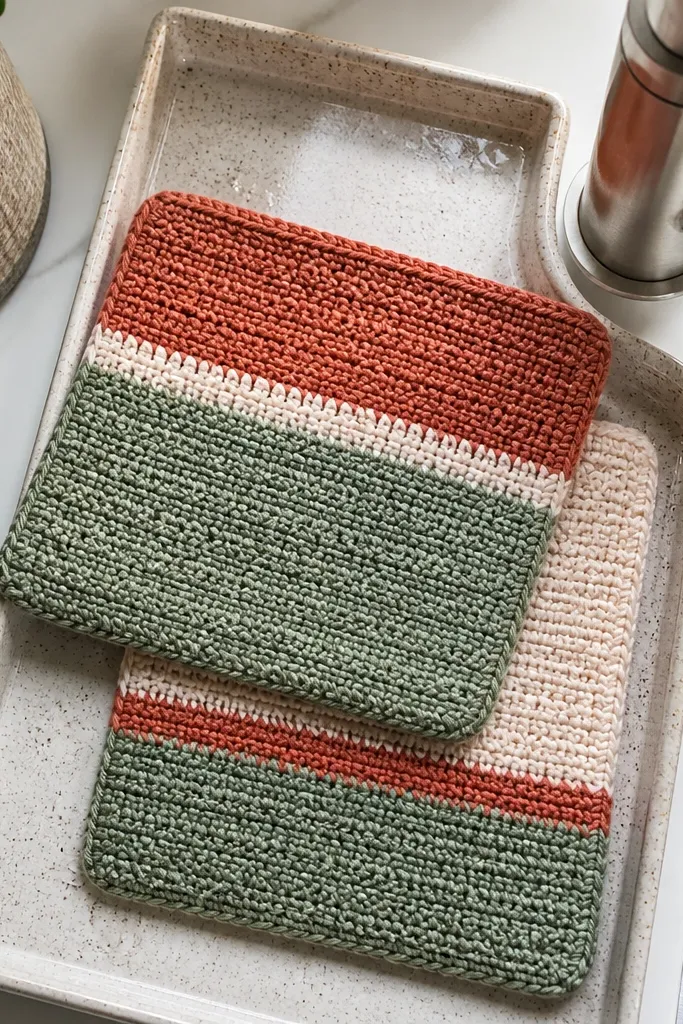
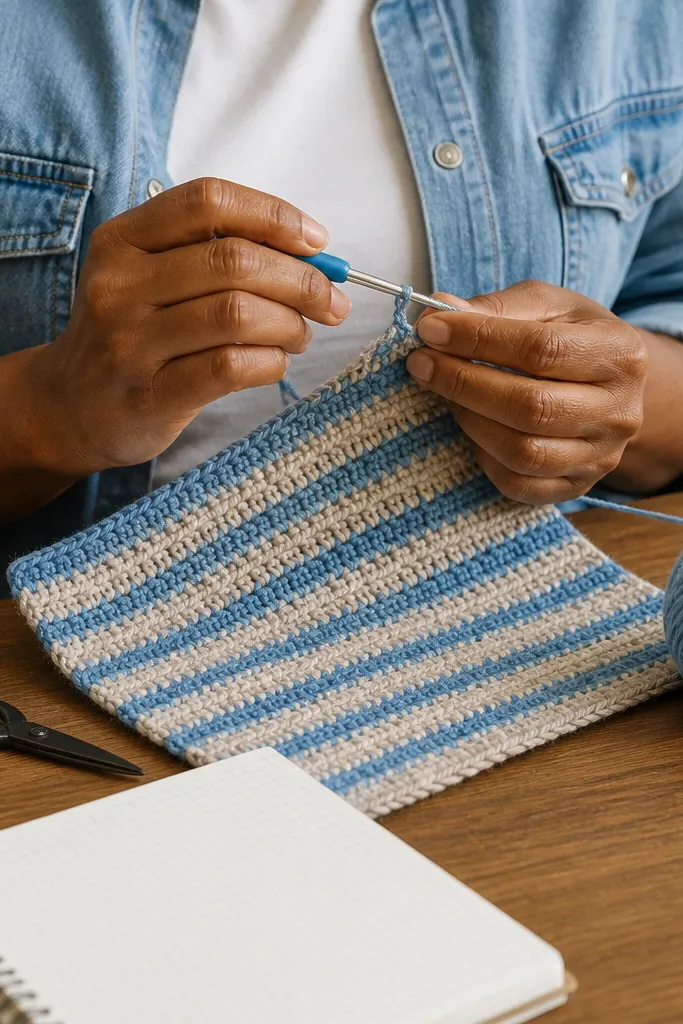
Dishcloths are the fastest way to get the “I can crochet” look because they show off straight edges and clean color changes. Use a simple stitch like half double crochet for solid texture that holds its shape in the sink. The color blocks make the project look designed even if your stitch tension varies a little. This is also a practical beginner win — you’ll finish quickly and you can reuse the same pattern without overthinking. Expect a piece that looks tidy on a counter and photographs well because the grid-like construction reads clearly.
1) Chain 31 for a 9-10 inch wide cloth (adjust by counting stitches in 1-inch increments). Work rows in half double crochet until you reach about 9 inches, changing colors every 2-3 inches. 2) Add a single crochet border around all sides for a crisp frame, then weave ends. 3) For a cleaner edge, block by pinning flat and misting lightly with water, then let dry fully.
Pro tipMark your color-change row on a sticky note so you don’t end up with uneven stripes.
AvoidDon’t skip the single crochet border — plain edges look wavy in photos.
2. Moss Stitch Coaster with Thick Border
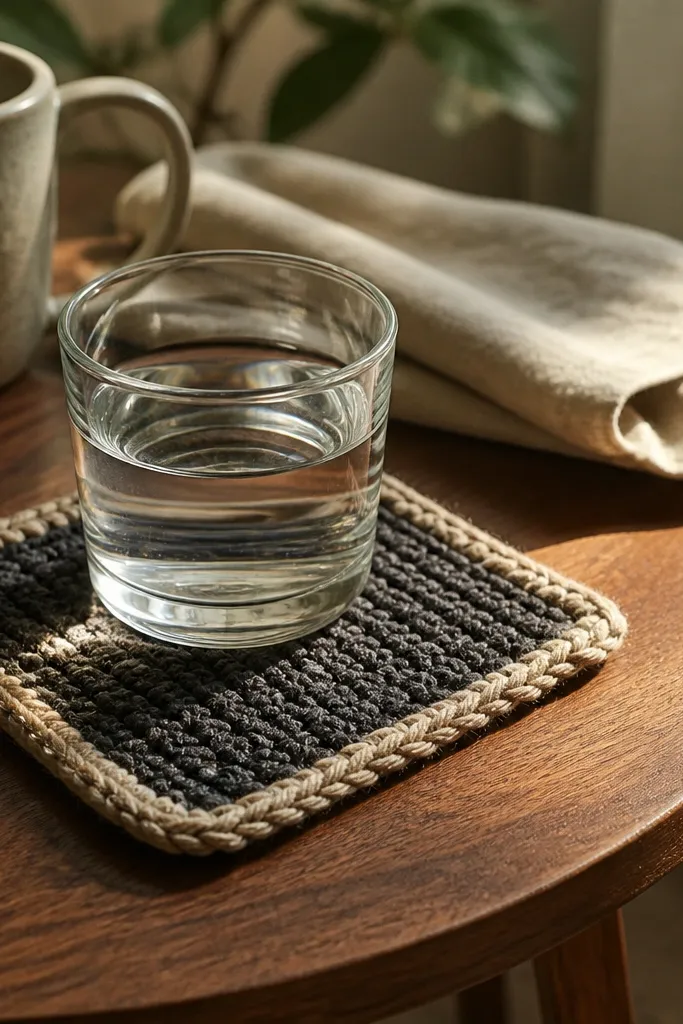
Moss stitch looks fancy because it creates a subtle, bumpy texture without requiring complicated patterns. Coasters are also an ideal beginner project because the shape is small and forgiving, and the finished piece sits flat for photos. A thicker border frames the texture so the coaster looks intentional rather than like a practice swatch. Use cotton yarn so it dries fast and holds its shape. This project gives you a clean read on your tension — gaps show less in moss stitch than in tighter stitches.
1) Start with a magic ring, then work 12 single crochet into the ring. Chain 1, then alternate single crochet and chain 1 in the ring to build the textured pattern, increasing at the start of each round until you reach about 4 inches across. 2) Finish with 1-2 rounds of single crochet for the thick border. 3) Weave ends tightly and block flat by misting and pinning the edge.
Keep chain-1 spacing consistent by counting the exact number of stitches each row.
Avoid thin, slippery yarn for coasters; it makes the texture look flat.
3. Two-Row Granny Square Potholder
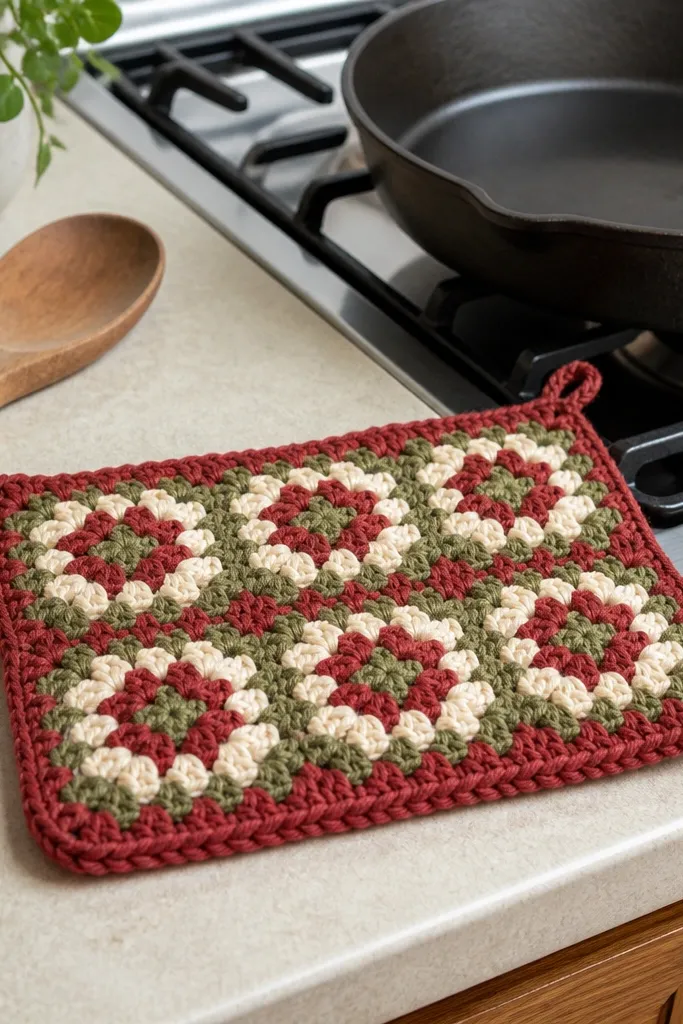
A potholder is where beginners can safely go bigger and still get a clean look. A simple granny square layout creates obvious structure — corners and edges guide your eye, so minor tension slips don’t ruin the whole piece. Choose cotton yarn and a tight stitch count so the fabric is dense enough to handle kitchen use. The result is thick, square, and photogenic with clear corner geometry. You also learn how to manage corners, which is the skill that unlocks a lot of future patterns.
1) Make a granny square using double crochet clusters: work 3 double crochet, chain 2, 3 double crochet in the corner spaces, repeating the corner pattern every corner. Build for two rounds, keeping each side equal length. 2) Add a border round in single crochet to square everything up and hide small corner gaps. 3) For thickness, crochet a second square and sew them together with a whip stitch around the edges.
Count your corner chain-2 spaces each round; that’s what keeps the square from turning into a diamond.
Don’t use acrylic for heat projects; it stretches and can melt if it gets too hot.
4. Striped Beginner Scarf in Half Double Crochet
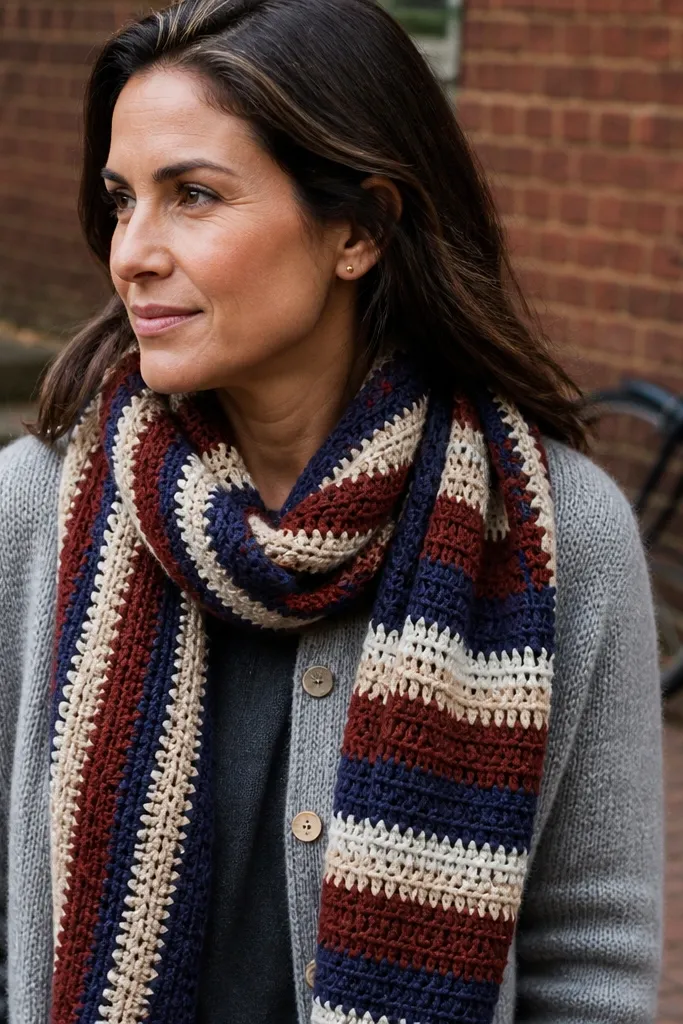
A scarf is a beginner-friendly confidence builder because the stitch rhythm is easy and the length gives you lots of “finished” progress. Half double crochet makes a dense fabric with visible ridges that look good in photos, especially with stripes. You can keep it simple: no shaping, no complicated stitch combinations, just clean color changes. The look is modern and graphic when you use 2-3 colors and repeat them in blocks. This project also teaches you how to keep your edges from curling.
1) Chain an odd number around 31-45 stitches depending on how wide you want it, then work half double crochet across each row. 2) Change colors every 6-10 rows to create bold stripes; keep your first and last stitch consistent each row. 3) Finish with a single crochet edge or a row of crab stitch for a neat, slightly scalloped look.
If your edges curl, add one extra border row in single crochet at the start and end of the scarf.
Don’t use neon colors with yarn that pills; it looks messy fast in indoor lighting.
5. Chunky Crochet Bookmark with Button Tab
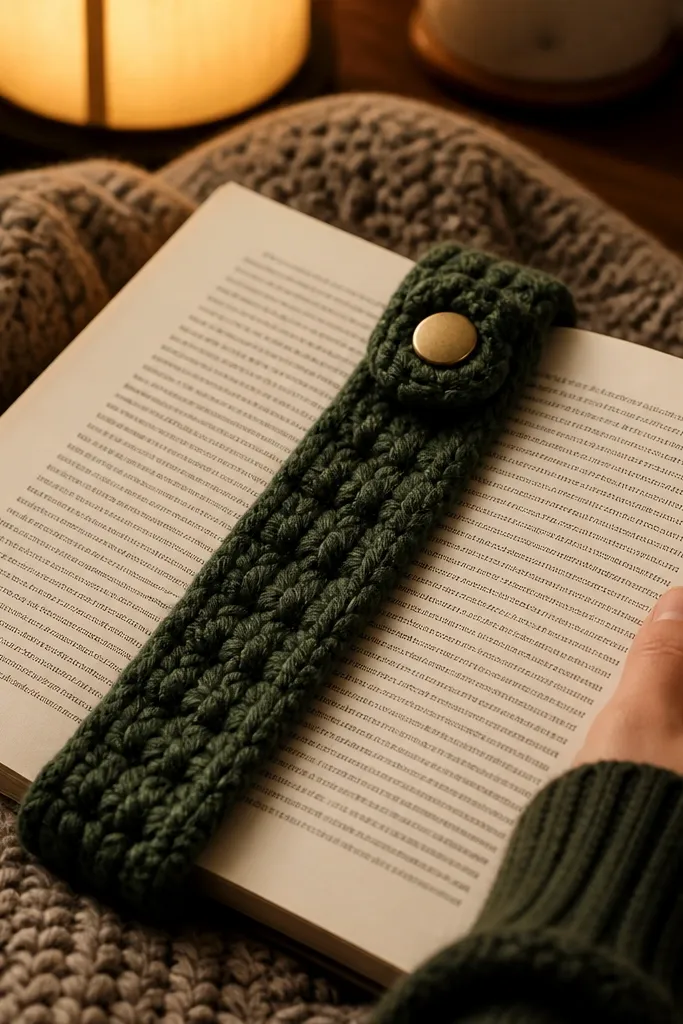
Bookmarks are small, but they look cute and polished because you can finish them quickly and add details. A chunky yarn and a simple rectangle shape make the texture pop, and the button tab keeps it from slipping out of the page. This is one of the best Simple crochet ideas for beginners because it trains you to crochet straight, then finish with a clean attachment. The tassel gives motion in photos without extra complicated skills. It also makes a great “I made this” gift.
1) Chain 14-18 stitches (depending on how wide you want it), then work single crochet rows until the bookmark reaches about 6 inches long. 2) Add a top tab by crocheting 10-12 stitches across a short section, then stitch a buttonhole with chain space. 3) Finish with a tassel made from 6-8 strands of yarn and tie it through the bottom row.
Use a larger button than you think; small buttons make the tab look fiddly.
Don’t skip weaving ends at the top tab; loose ends snag on pages.
6. Mini Market Bag with Easy Square Base
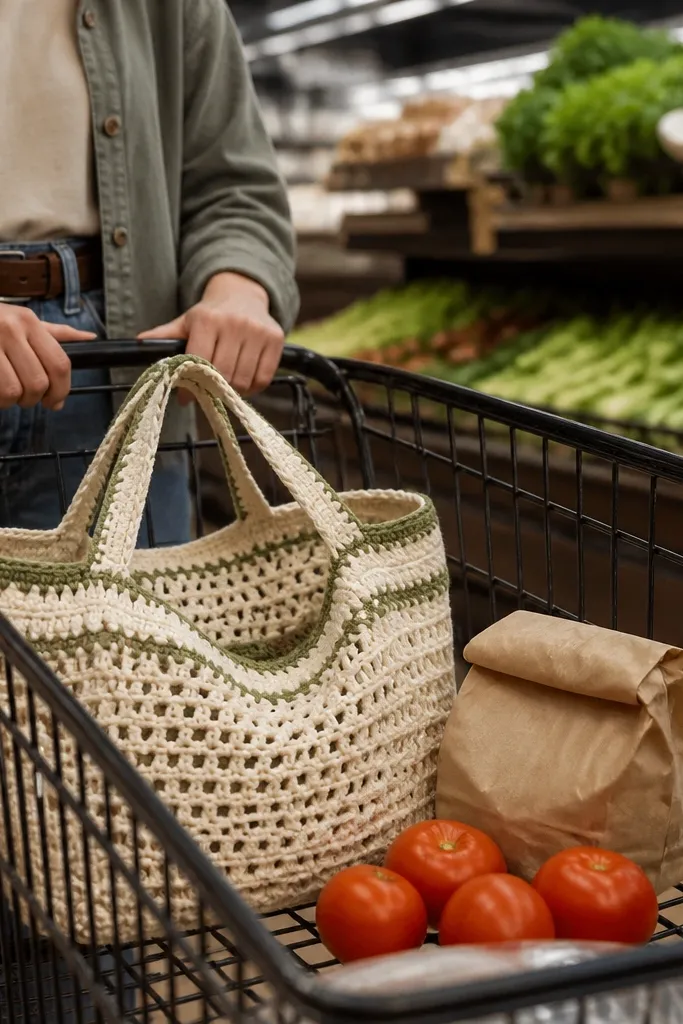
A mini market bag looks stylish because it has a functional shape and a breathable fabric. Starting with a square base keeps the construction simple, then you build up with a repeat that creates airy holes. This is photogenic because the negative space shows through the yarn and makes the bag feel lighter than it looks. Use cotton or cotton-linen blend for structure and a clean drape. You’ll also learn how to keep your sides even while increasing.
1) Crochet a square base in single crochet or half double crochet until it reaches about 10x10 inches, then begin working in rounds or continuous rows to build the sides. 2) Create a simple openwork pattern by alternating double crochet and chain spaces over a consistent stitch count. 3) Make handles from a chain foundation or by crocheting a strap strip, then sew securely with reinforcing stitches.
Reinforce handle seams with a second line of stitching through the yarn loops so it doesn’t stretch.
Don’t make it too tall on the first try; a bag that’s too big looks sloppy in photos.
7. Simple Crochet Headband with Button Closure
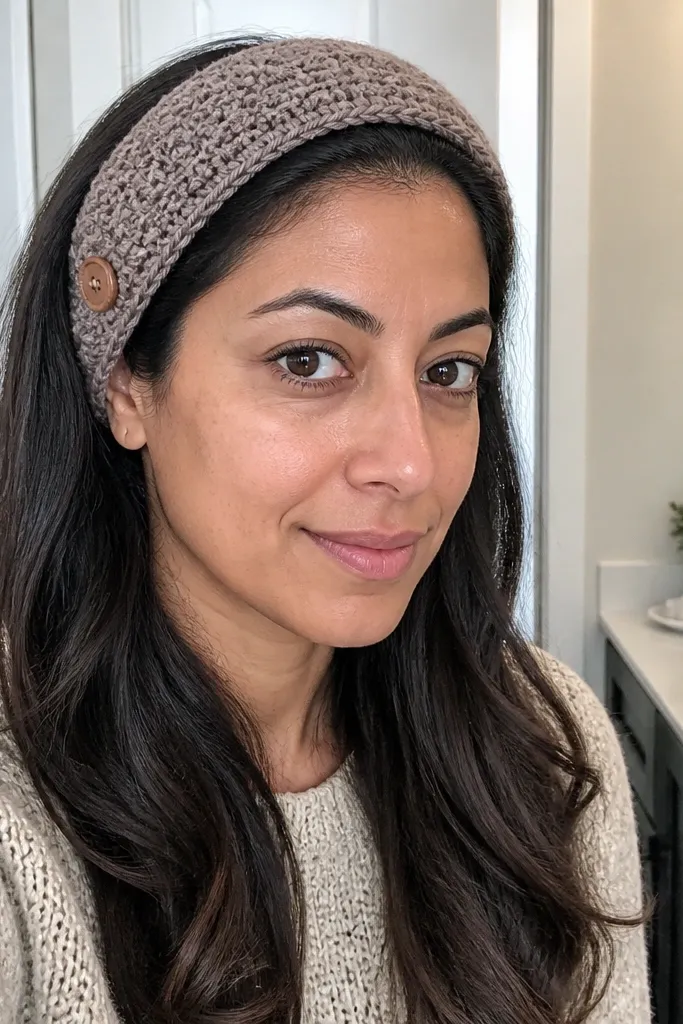
Headbands are a high-reward beginner project because they’re quick, wearable, and forgiving. A textured stitch band looks good on the head and in flat-lay photos, even when your stitches aren’t perfectly uniform. Button closures help you get the fit right without complicated shaping. This project teaches you how to measure for comfort and how to add a functional finishing detail. Use a soft yarn like acrylic-wool blend or cotton-acrylic for comfort and drape.
1) Chain 8-12 stitches and work single crochet rows until the band width matches your preference, then measure it against your head. 2) Crochet until it wraps comfortably, then add a buttonhole strip on one end and sew the button on the other. 3) Add a thin edge border around the top and bottom to keep it from curling.
Measure after every 3-4 rows; headbands change quickly with stitch tension.
Avoid overly stiff yarn; it makes the headband look boxy and uncomfortable.
8. Textured Basket Coaster or Desk Tray Base
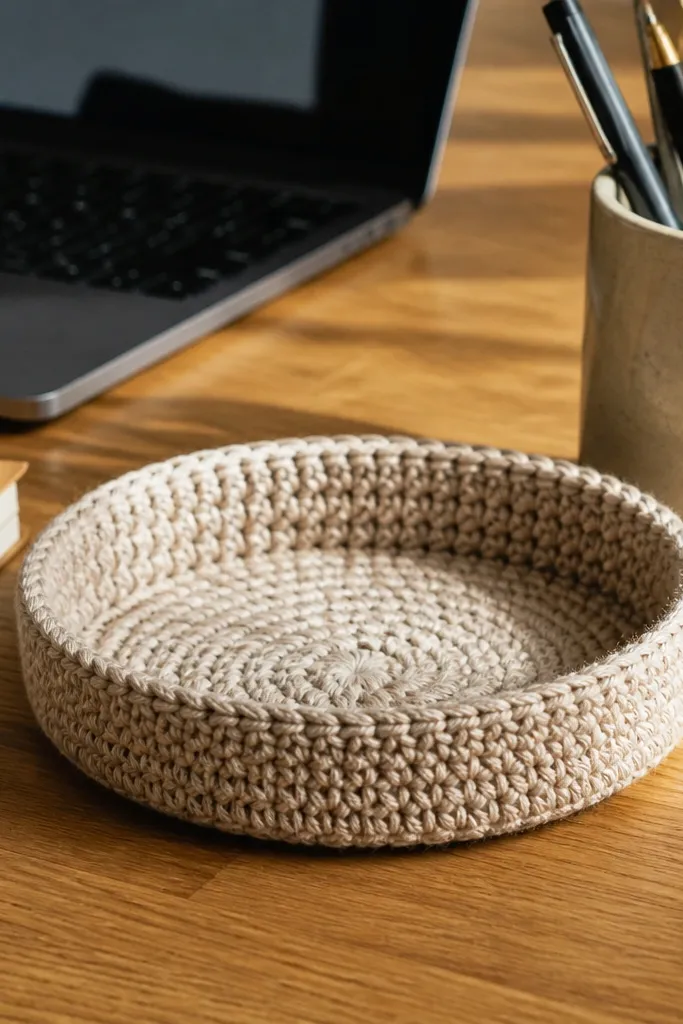
A small desk tray or basket base looks surprisingly high-end because it has depth and a rim. You’ll crochet a round base with a textured stitch like extended single crochet or front-post single crochet, then add a simple upright rim. This project is great for beginners who want something decorative but still manageable. The look is modern and minimal, especially in neutral colors. It also hides minor stitch unevenness better than flat coasters.
1) Start with a magic ring and work single crochet rounds, increasing to reach about 4-5 inches across. Switch to a textured stitch round once the base is wide enough to stand. 2) Build the rim by working more rounds without increasing, then finish with a round of single crochet in the back loops for a firm edge. 3) Block lightly and weave ends tightly to keep the rim from loosening.
Use a slightly thicker yarn than you think for the rim so it stays upright.
Don’t use super thin yarn; the rim collapses and looks unfinished.
9. Beginner Granny Stripe Runner (Rectangular Wall Decor)
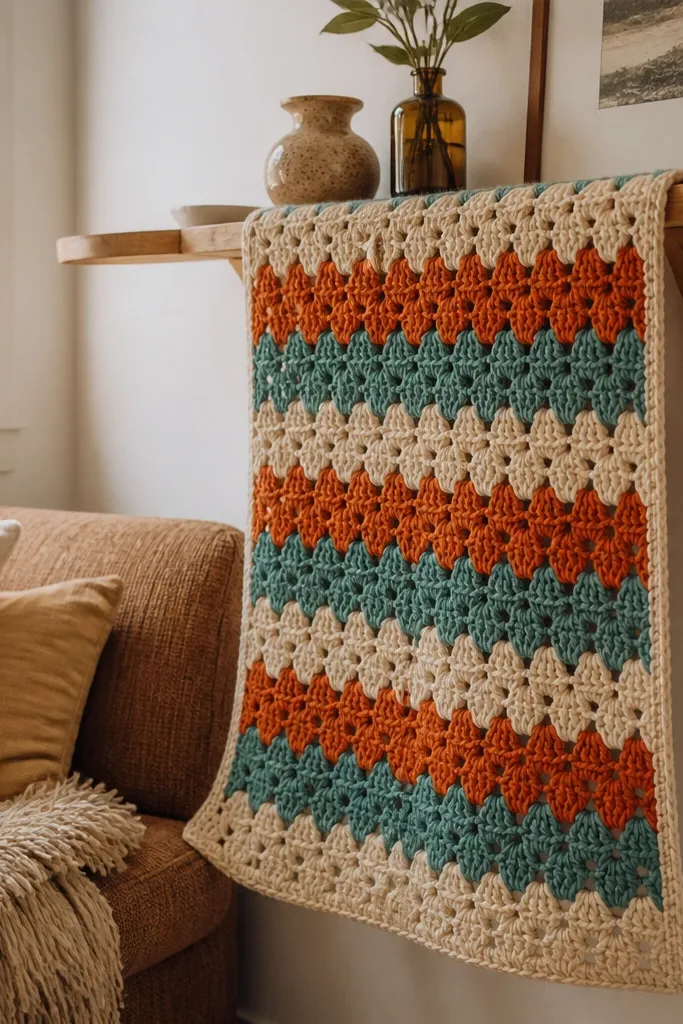
Granny stripes look great because they create bold horizontal movement with minimal shaping. A rectangular runner can hang on a wall, drape on a shelf, or sit on a table without needing perfect finishing. This is one of the Simple crochet ideas for beginners that stays photogenic because the pattern repeats clearly and the colors do the heavy lifting. It also teaches you how to manage long projects without losing your stitch count. Choose 3 colors max so the stripes look clean.
1) Work a strip of granny clusters in rows, keeping the same number of stitches for each color section. Use double crochet clusters with chain-1 or chain-2 spaces so the texture reads clearly. 2) Continue until you reach a rectangle around 10-14 inches wide and 24-36 inches long. 3) Finish with a single crochet border and weave ends on the back so the front stays tidy.
Pro tipKeep your color sections to an even number of rows so the stripe borders line up.
AvoidDon’t add too many colors; the pattern gets visually noisy fast.
10. Mini Amigurumi Keychain with Simple Body (No Complex Parts)
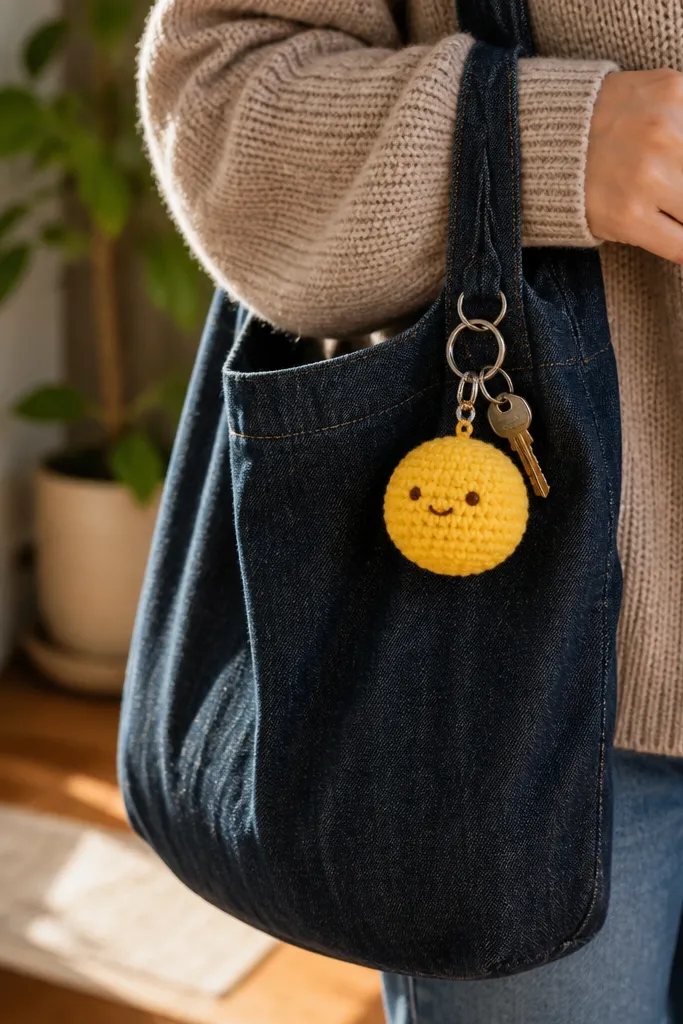
Amigurumi scares beginners, but you can get the cute look with a super simple shape: a round body and a face you embroider. Keychains are ideal because they’re small, so mistakes don’t take forever to fix. Use a tight stitch and dense yarn to keep stuffing from showing through. The result is a tiny, photo-friendly object that looks “finished” because the face and proportions matter more than complex parts. This project teaches basic rounds and how to keep circles from warping.
1) Crochet a tight magic-ring body in single crochet, decreasing to close at the top. Keep increases/decreases consistent so the sphere stays round. 2) Stuff lightly, then close and weave ends. 3) Add embroidered eyes and a small mouth using a tapestry needle, then attach a keychain ring with a sturdy yarn loop sewn into the top.
Use black embroidery thread for eyes; it looks cleaner than yarn eyes on small pieces.
Avoid loose stuffing; it makes the face sag and the body look lumpy.
11. Shell Stitch Baby Blanket Square Border
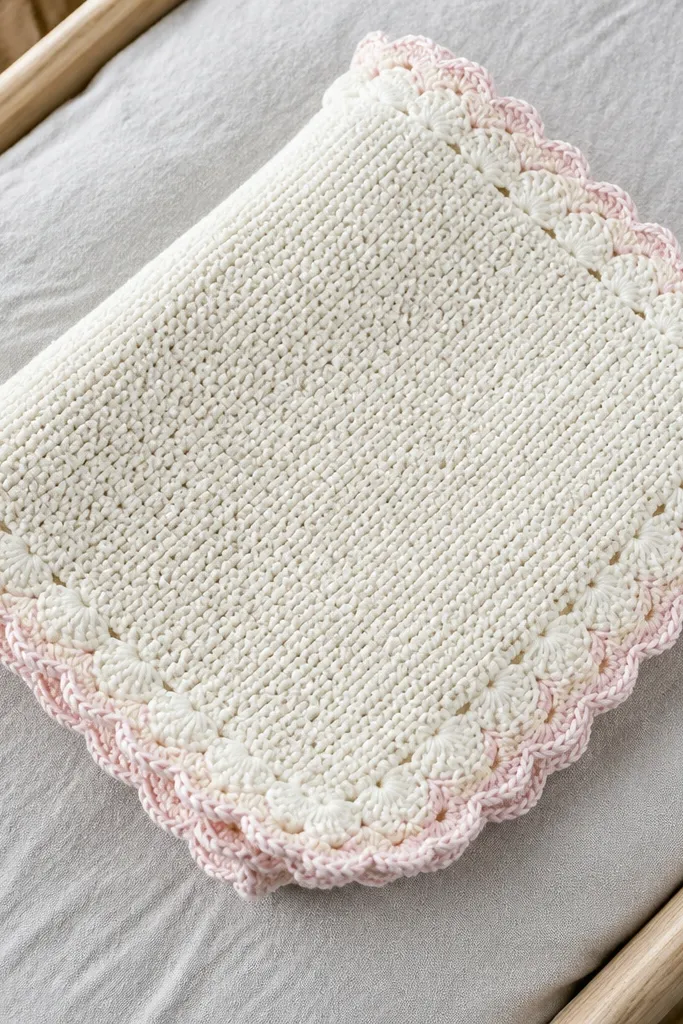
A shell border makes almost anything look adorable, and it’s a beginner-friendly way to get that “baby blanket” aesthetic. Instead of doing a full blanket pattern, you can start with a simple square base in single crochet or half double crochet, then add a scalloped shell edge. This gives you a photogenic frame that looks detailed without requiring lots of shaping. Choose soft yarn and keep the shell size consistent. The edge is where your work looks special, even if the center is simple.
1) Crochet a square base about 12-14 inches using single crochet or half double crochet, keeping stitch count consistent. 2) Work scalloped shells along the edge: for each shell, crochet multiple double crochets into a space, then skip a set number of stitches to create the scallop gap. 3) Finish with a final single crochet round to smooth out the scallops and lock the border down.
Pro tipCount shell repeats per side and keep them equal; uneven repeats show immediately in photos.
AvoidDon’t stretch the border while crocheting; scallops twist if you pull.
12. Cozy Crochet Head Scarf with Fringe Edge
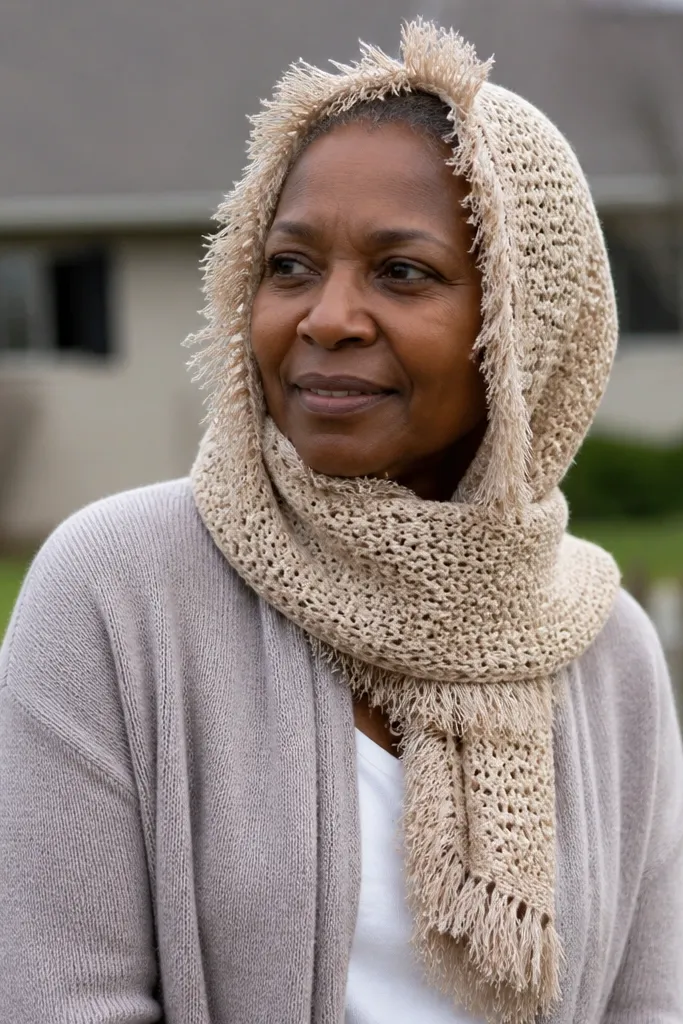
This head scarf looks styled because it uses a simple rectangle and a fringe finish, not complicated shaping. Fringe frames your face and creates movement in photos, which makes even basic stitches look intentional. Use a soft, slightly fuzzy yarn so the fringe catches light. The project is beginner-friendly because you mostly crochet length and then add fringe strands. It also teaches how to block a long rectangle so it lays flat instead of curling.
1) Chain 45-60 stitches for a rectangle wide enough to wrap, then work in half double crochet rows until you reach about 18-22 inches long. 2) Add fringe by cutting yarn strands about 6-8 inches and attaching them evenly along one long edge through the stitch loops. 3) Block flat by pinning and misting so the scarf drapes smoothly when worn.
Trim fringe after blocking; it keeps lengths even and makes the edge look crisp.
Avoid very slippery yarn for fringe; strands slide and look uneven.
13. Geometric Triangle Wall Hanging from Simple Squares
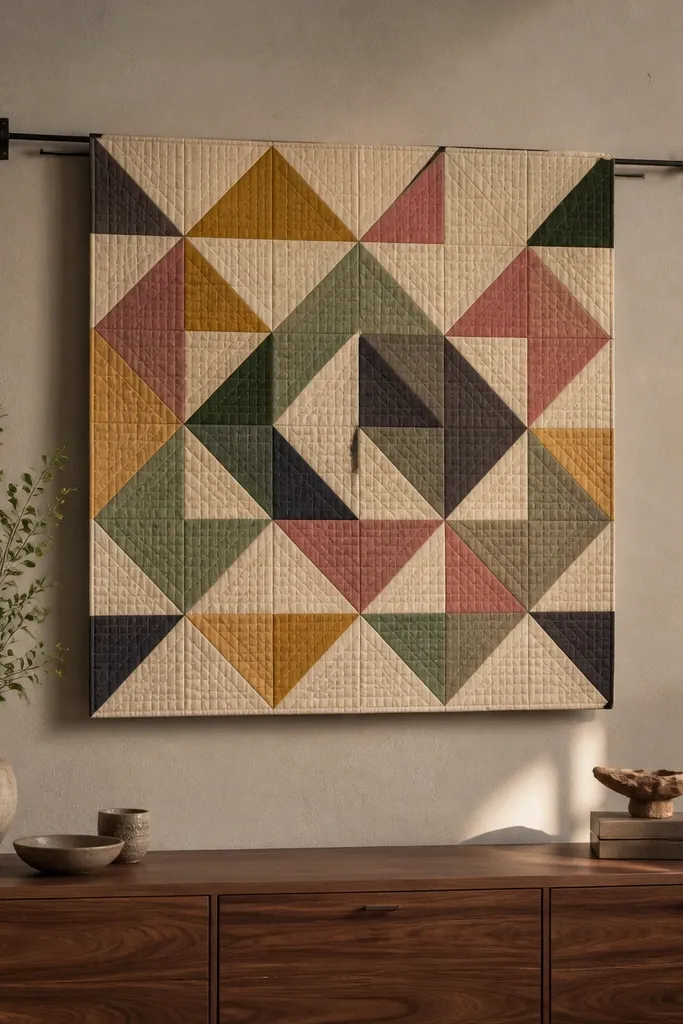
This wall hanging looks modern because the geometry is clean and the color placement is controlled. You build it from simple motifs — small squares — and then assemble them into triangle formations. That approach keeps the crochet part beginner-level while the final look is graphic and photogenic. Use 4-6 colors in muted tones for a calmer look, or do just two colors for a bold contrast. It’s also a great way to use up scrap yarn without making a messy project.
1) Make 9-12 small squares about 4-5 inches each using a simple stitch like single crochet or half double crochet. 2) Arrange squares into a triangle layout, then sew them together with a tapestry needle using mattress stitch for clean seams. 3) Add a border strip around the outside edges and hang with a simple dowel sleeve or yarn loop.
Pro tipLay every square on the floor first and take a quick photo; it helps you spot color imbalance before sewing.
AvoidDon’t rush assembly with mismatched square sizes; your triangle edges will wobble.
14. Crochet Phone Sleeve with Front Pocket
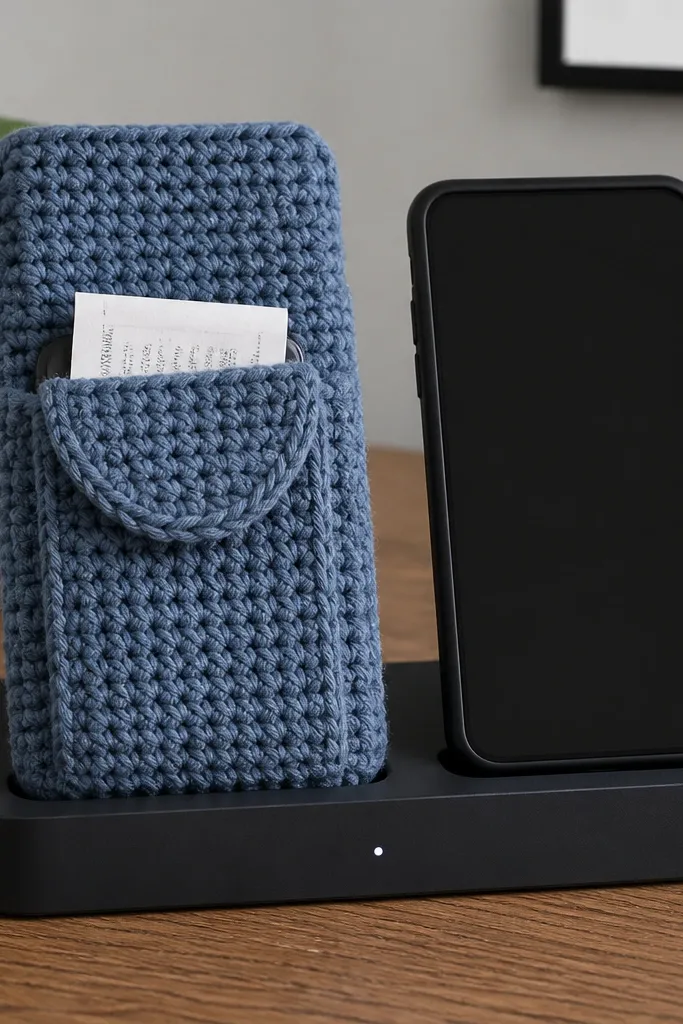
A phone sleeve is small enough to finish fast, but it looks useful and intentional because it fits a real object. The front pocket adds visual structure that makes the sleeve look like a designed accessory, not a random rectangle. Use medium-weight yarn and a firm stitch like single crochet for sturdy sides. This project is beginner-friendly because it’s basically a rectangle with a flap and a pocket panel. The final piece looks clean in flat-lay photos thanks to the slim profile and neat edges.
1) Measure your phone width and height. Chain enough for a rectangle that wraps around with about 1 inch of ease, then crochet in single crochet rows until it matches the phone height plus 1 inch. 2) Crochet a pocket panel by working a smaller rectangle on the front, then fold into place and stitch the sides. 3) Add a flap by continuing crochet upward on the pocket top edge, then finish with a border and a button or snap placement.
Use a piece of cardboard the size of your phone as a blocking form while you sew seams.
Don’t leave the pocket too shallow; a tiny pocket looks cute but won’t hold anything.
15. Simple Crochet Scrunchie with Ribbed Texture
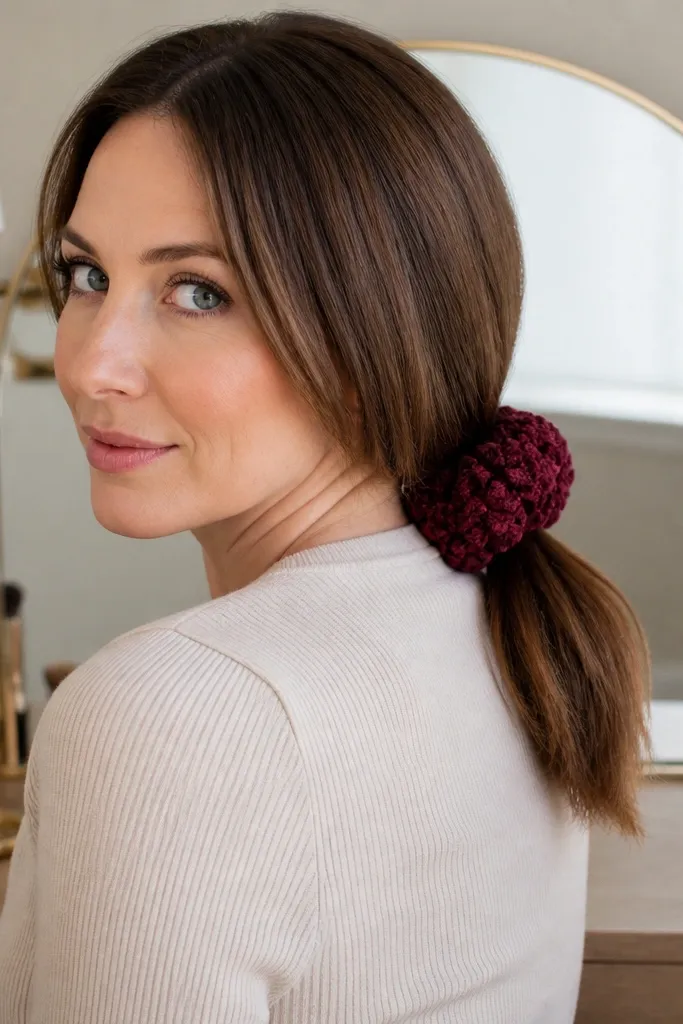
Scrunchies are an easy way to make crochet look trendy and wearable. A ribbed stitch makes the fabric stretch, so it holds hair without needing a complicated pattern. This is photogenic because the gathered texture looks soft and dimensional, especially in solid colors. Use a yarn with some stretch like cotton-acrylic blend, and crochet the fabric slightly tighter than you think for a smooth finish. Beginners like this project because the “shape” is built into the stitch repeat, not into tricky shaping.
1) Crochet a long strip using front post single crochet or a simple alternating stitch rib, then measure it around a hair tie. 2) Sew the ends together to form a ring, then stitch the crochet ring around the hair tie so it sits centered. 3) Add a small border round in single crochet to hide raw edges and make it look neat.
Use a hair tie that stays firm; stretchy ties make the crochet slip and look uneven.
Avoid loose stitches — they collapse and the scrunchie looks flat.



