
1. Giant Waffle Coaster Set in Two-Color Blocks
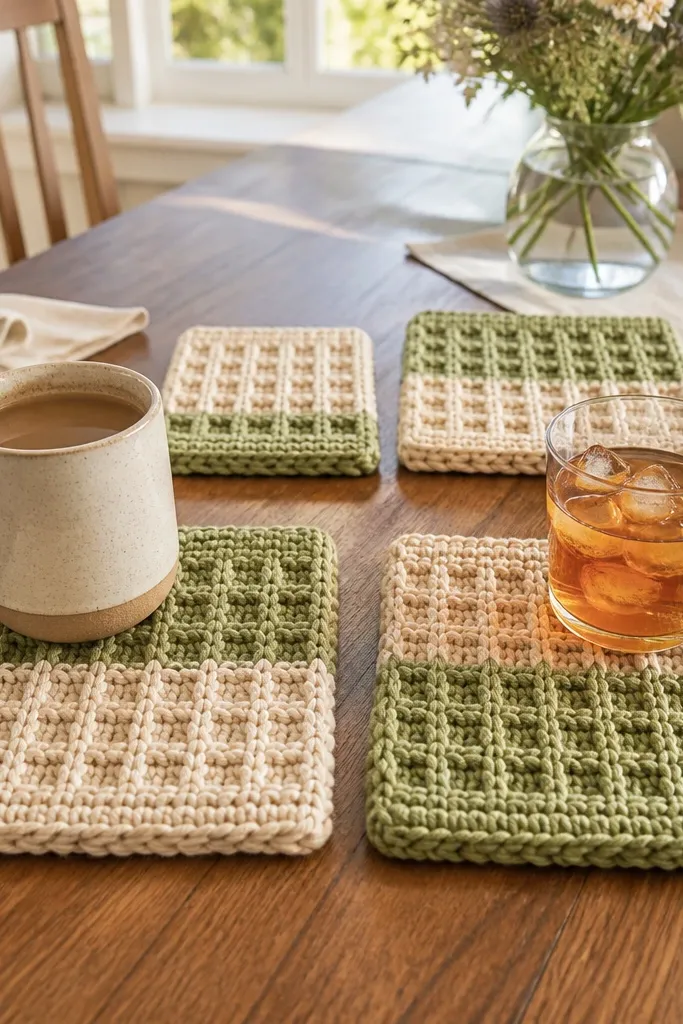
Coasters are one of the best Unique budget crochet ideas because they let you use bold yarn and show texture without needing complicated shaping. The waffle stitch creates raised grids that catch light and make even plain colors look designed. Go for two-color blocks so each coaster reads clearly as a set, not random scraps. These look great on a coffee table, bar cart, or nightstand and make a gift feel “put together” fast. Skill level is beginner-friendly, and the time is short enough that you can redo a coaster if your tension is off.
Start with worsted weight cotton or acrylic and a hook that matches the yarn label (usually 4.0-5.0 mm). Crochet a small base circle, then work the waffle stitch in rounds by alternating front-post and back-post crochet for the grid effect. Change colors every few rounds so each coaster shows a clear band, like cream base with a black rim. Finish by weaving in ends tightly and blocking flat under a damp cloth so the texture stays crisp.
Use a slightly stiffer yarn (cotton or acrylic with good stitch definition) so the waffle doesn’t collapse.
Don’t use very fuzzy yarn — the waffle grid turns into a blurry puff.
2. Chunky Granny Stripe Basket with a Stand-Up Rim
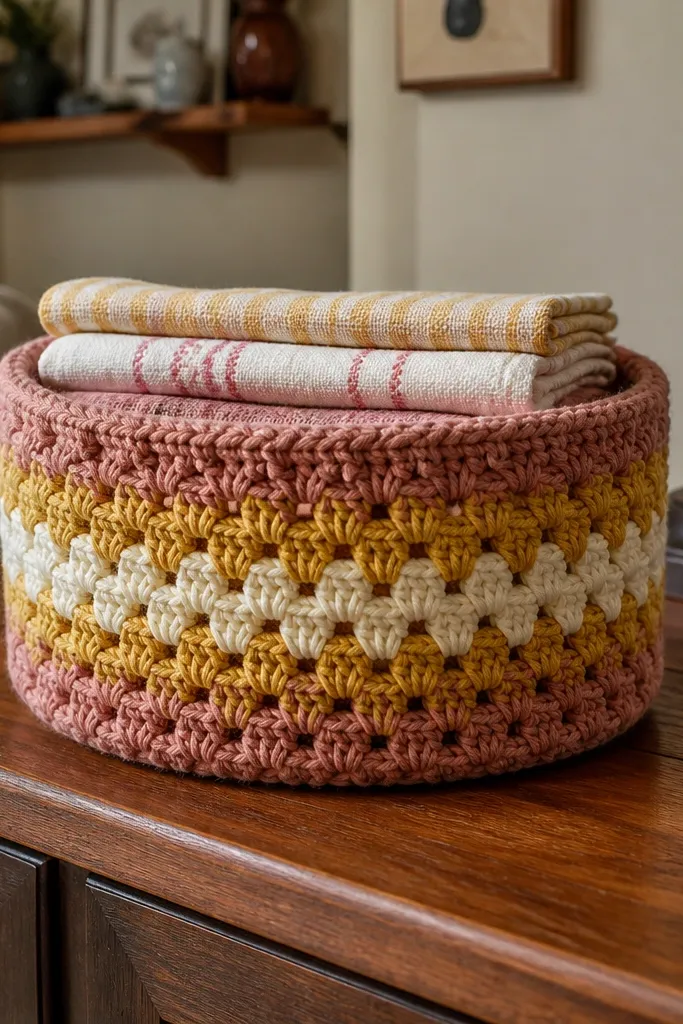
Choose chunky yarn and a 6.0-7.0 mm hook. Build a flat circle base using stitch clusters, then crochet up the sides in stripe rounds with consistent tension. For the rim, reinforce the top edge with a row of single crochet or slip stitch, then do one more round in a contrasting color to lock the shape. Weave in ends and stiffen if needed with a diluted fabric glue wash, then let it dry fully before loading it.
This basket nails the “looks store-bought” look because the rim stands up and the stripes give it structure. It’s also budget-smart: you can use leftover skeins and still get a strong color story. The classic granny stripe pattern looks playful, but the trick is working with tighter tension and adding a firm rim so it holds its shape. Use it for keys, yarn scraps, or bathroom odds and ends where you want a clean, organized visual. You’re building a functional container, not a decorative blob.
AvoidDon’t skip the rim reinforcement — without it, chunky baskets lean and look unfinished.
Pro tipIf your basket slouches, add a final reinforcement round in single crochet around the top edge.
3. Moss Stitch Hanging Plant Pocket in Color-Block Panels
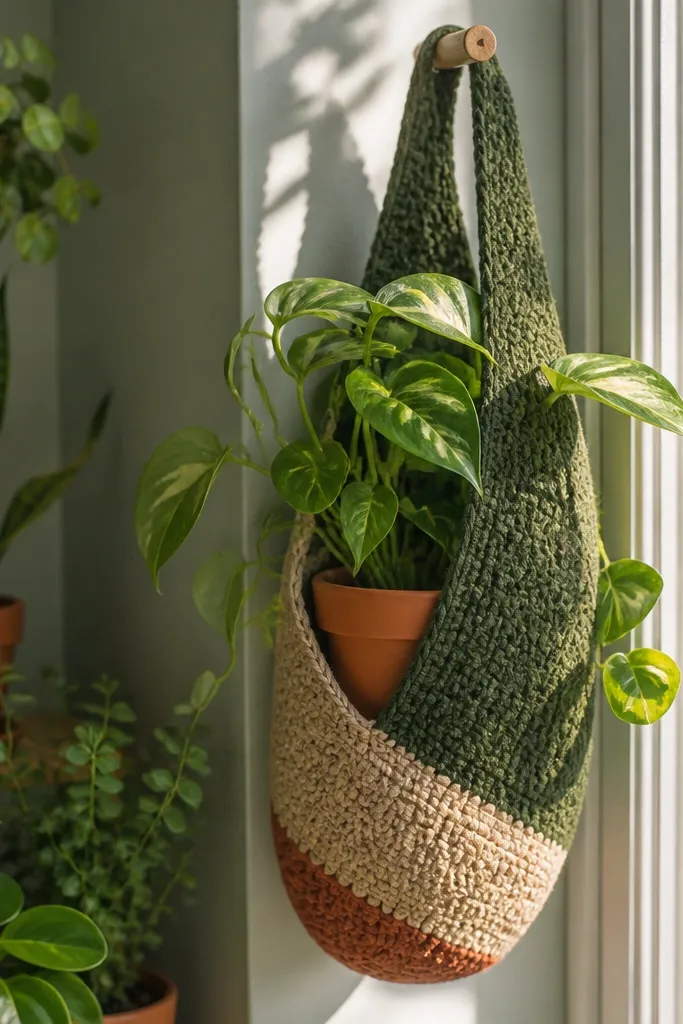
Start by making a rectangle panel in moss stitch, then join two panels side-by-side to form a pocket. Crochet a top channel for the hanger by chaining to your desired hanging length and working a sturdy border row across the top. Use a measuring tape to match the pocket to your pot diameter, then decrease the bottom slightly by reducing width on the last few moss-stitch rows. Finish with a simple strap or braided cord through the channel, then weave in ends tightly to prevent sagging.
This is one of the best Unique budget crochet ideas for making an outdoor or indoor corner look styled without buying decor. Moss stitch gives a dense, slightly pebbled texture that hides minor tension issues, which matters when you’re using budget yarn. The pocket shape grips a small pot or liner, and color-block panels make it look intentional even if your skeins aren’t matching. Hang it near a shelf, balcony rail, or plant stand for a clean vertical line that photographs well. It’s intermediate-light: the stitch is easy, but you need to keep the pocket sizing steady.
AvoidDon’t make the pocket too loose — floppy pockets look messy when the pot sits inside.
Pro tipUse cotton yarn for plant pockets — it holds shape better around moisture than super-soft acrylic.
4. Puff Stitch Keychain Charm with a Pearl-Trim Look
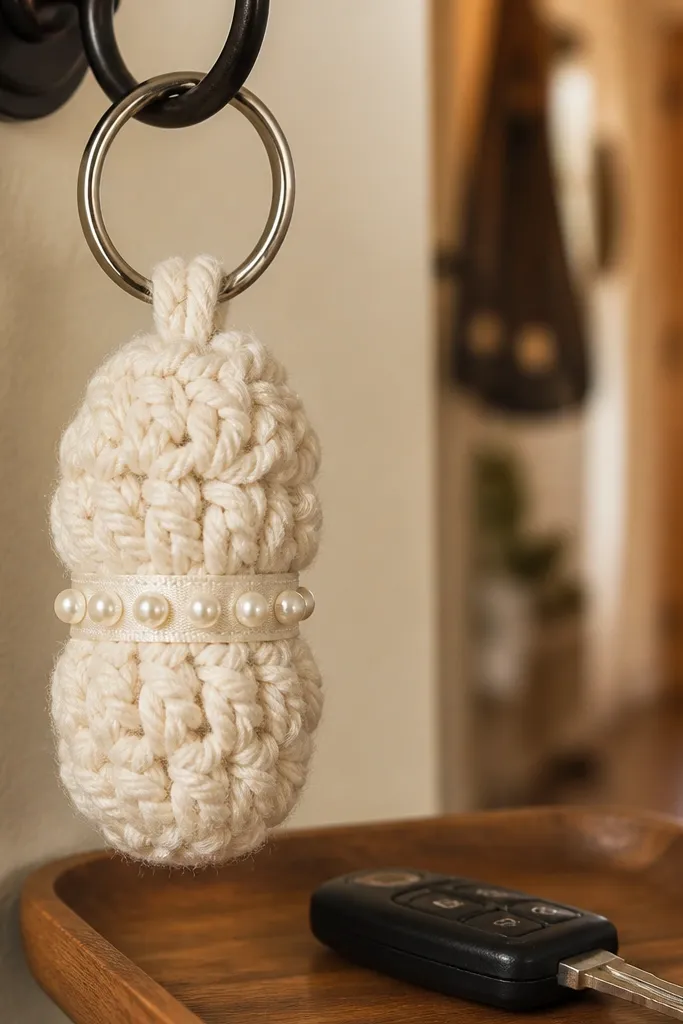
Start with a small base circle or oval using single crochet, then work puff stitch rows by crocheting clusters into the same stitch repeatedly. Keep the puff size consistent by using the same hook and yarn tension each time. Add a border row of single crochet around the edges, then stitch a thin trim line using beads or a strand of metallic thread. Finish with a sturdy key ring attachment by crocheting a small chain loop and securing it with a few extra single crochet stitches.
Small accessories are where budget crochet looks the most “designer” because details are the whole point. A puff stitch charm creates raised bumps that catch highlights, and a simple trim band makes it look like jewelry instead of craft. This is a quick project that uses very little yarn, so you can afford nicer-feeling accents like faux pearl beads or a metallic thread. Attach it to a zipper pull, bag handle, or keys. It’s beginner-friendly and fast enough to make several in one color run.
AvoidDon’t overstuff — too many puffs in a tiny piece makes it bulky and uneven.
Pro tipIf your puff stitches curl, steam-block lightly with a damp towel and let it dry flat.
5. Square-Grid Market Tote with Rope-Edge Handles
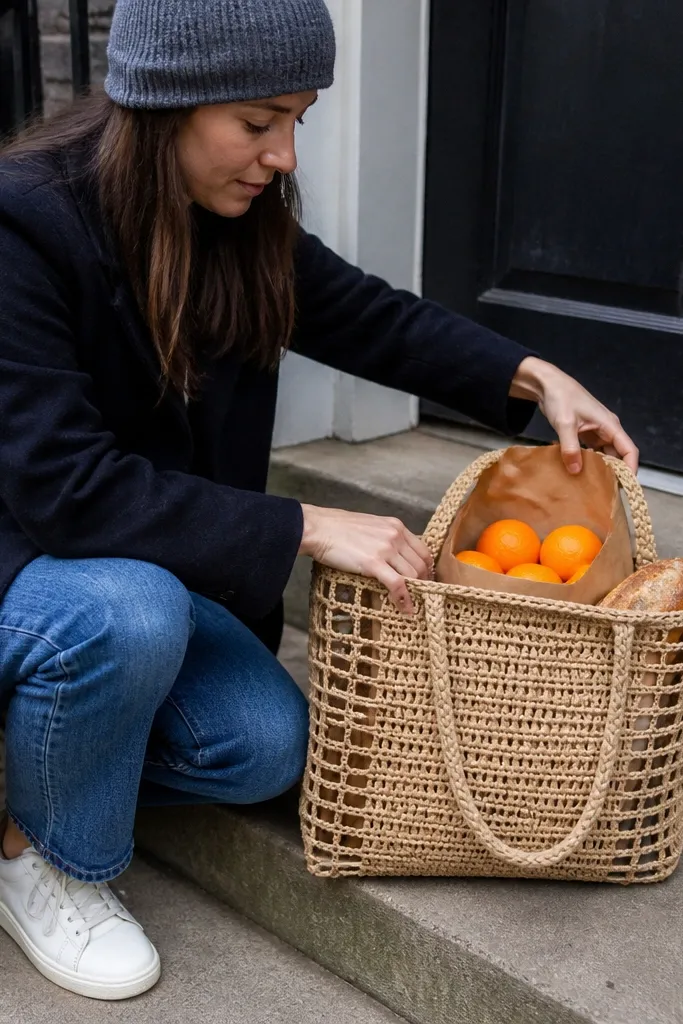
A market tote is one of the most photogenic Unique budget crochet ideas because the shape reads clearly in any lighting. The square-grid style looks neat, and it’s forgiving if your tension isn’t perfect. Rope-edge handles make the tote look intentional and sturdy without needing expensive leather. Use it for groceries, beach days, or farmers market runs where you want something that looks handmade but not fragile. This is a mid-skill build because you need to keep the handle attachment strong and even.
Use cotton rope yarn or a cotton blend that holds structure, plus a hook in the 4.5-5.5 mm range. Crochet a flat rectangle base in square-grid stitch, then seam and work in rounds until you reach your tote height. For handles, crochet two long strips in the same grid stitch, then reinforce the top attachment points by sewing them to the tote with a needle and matching yarn. Add a finishing round of single crochet around the top edge so it doesn’t stretch out.
To keep tote sides straight, measure width every few rows instead of trusting your eye.
Don’t use very stretchy yarn — the tote top will flare and look sloppy.
6. Sunburst Wall Hanging in Chunky Yarn with Fringe Weight
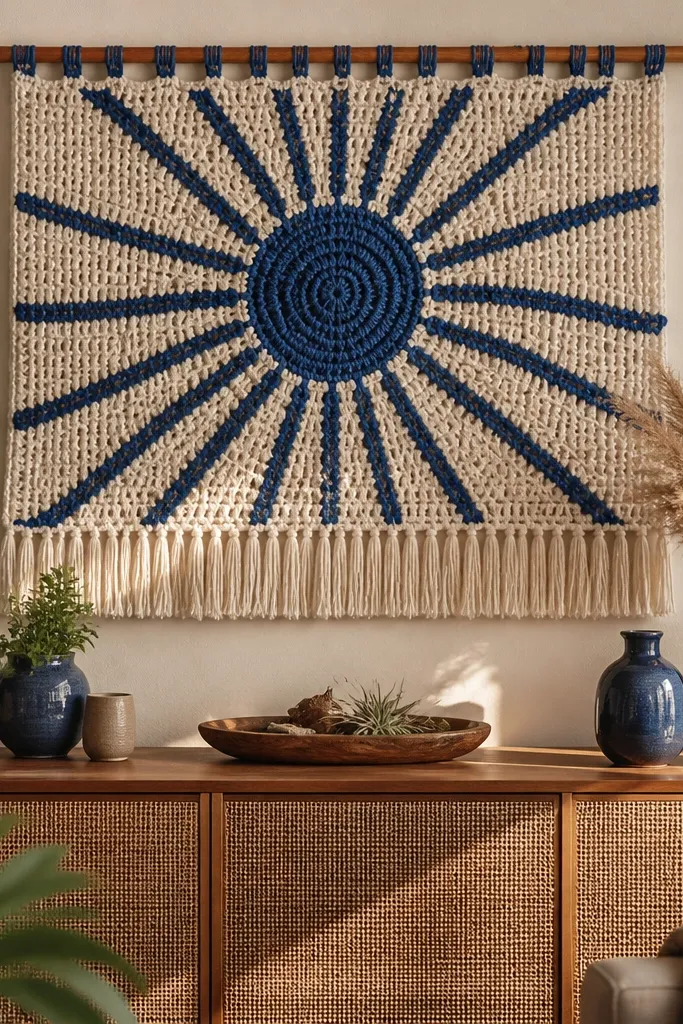
Pick chunky yarn in two or three colors and a hook around 7-9 mm. Start with a small center circle, then work repeated increases to form rays that widen outward. Switch colors in alternating bands for that “sun” look, then finish the outer edge with a sturdy border row like single crochet. Cut fringe strands to a consistent length, attach them evenly around the bottom edge, and block the piece flat before mounting.
Wall hangings are pure aesthetic payoff because they fill blank space instantly, and crochet texture shows up even from across the room. A sunburst shape is visually striking, and chunky yarn makes the rays look bold without needing fine stitches. Add fringe with a controlled weight so it hangs evenly, not like a messy mop. This project looks great in a hallway, above a console table, or on a nursery wall where you want warmth. Skill level is beginner to intermediate — the ray shape is simple repeats, but you need to keep counts consistent.
AvoidDon’t hang it before blocking — unblocked sunbursts warp and rays look crooked.
Pro tipWeigh fringe ends with a quick knot or a tiny dab of fabric glue so strands hang straight.
7. Cable-Look Headband with Faux Knit Texture
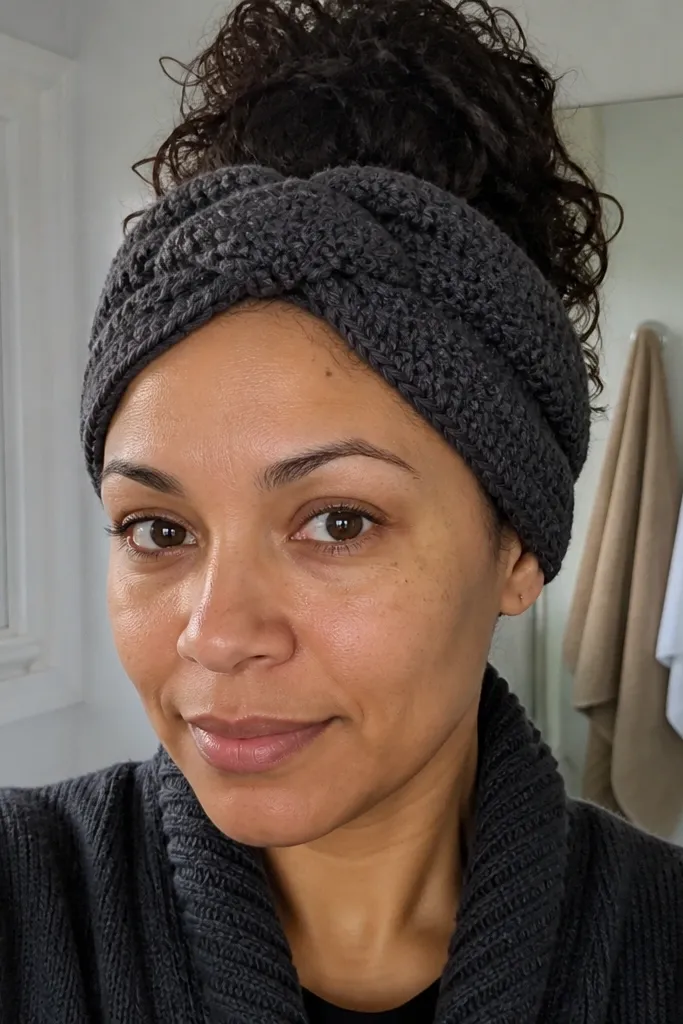
Use a medium weight yarn and hook around 4.5-5.5 mm. Make a foundation chain to fit your head circumference minus a small amount for stretch, then work a short length in ribbing using alternating front-post/back-post stitches. For the cable sections, repeat a set pattern of crossing front-post stitches by working them in a swapped order across a few rows. Finish with a clean edge border and sew the ends together firmly.
If you want Unique budget crochet ideas that look like knitted, the cable-look headband is the move. It’s made with front-post/back-post crochet so you get twisty texture without needing knitting needles. The headband also photographs well because it frames the face and shows texture clearly. Use a solid color like charcoal, cream, or deep green so the “cable” reads from a distance. This is a fast, practical accessory that works for everyday wear and gifts.
AvoidDon’t skip ribbing — plain rows make headbands flare and look cheap.
Pro tipCheck fit by wrapping it around your head before you commit to the final length — one extra row changes the look.
8. Color-Blocked Coiled Basket Trivet
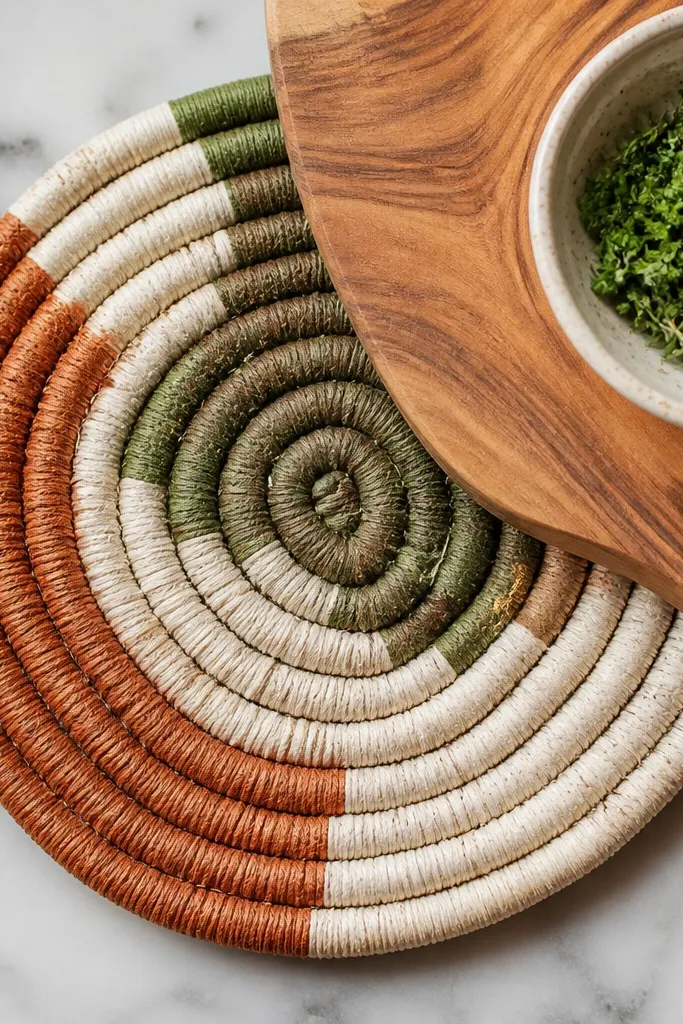
Use cotton yarn (or cut fabric strips for a thicker look) and a hook that matches the thickness. Start with a magic ring, then crochet tight single crochet rounds around to build the coil. Change colors every 2-3 rounds to form visible bands, keeping stitch tension even. Once you reach your desired diameter, stop and fasten off, then weave the tail through the last few stitches so it doesn’t pull loose.
A trivet is small enough to be budget-friendly but still photogenic, and it protects surfaces so you get real use. A coiled spiral with color blocks looks like modern home decor, especially in warm tones. This project is also forgiving because the spiral hides minor inconsistencies. It’s perfect for kitchen counters, coffee tables, and serving platters. Skill level is beginner — you’re working rounds, but you’ll want clean finishing so it lays flat.
AvoidDon’t crochet too loosely — loose coils ripple and don’t sit flat.
Pro tipIf your spiral puckers, make the next round one stitch larger and check again.
9. Half-Moon Market Bag with Double-Strap Handles
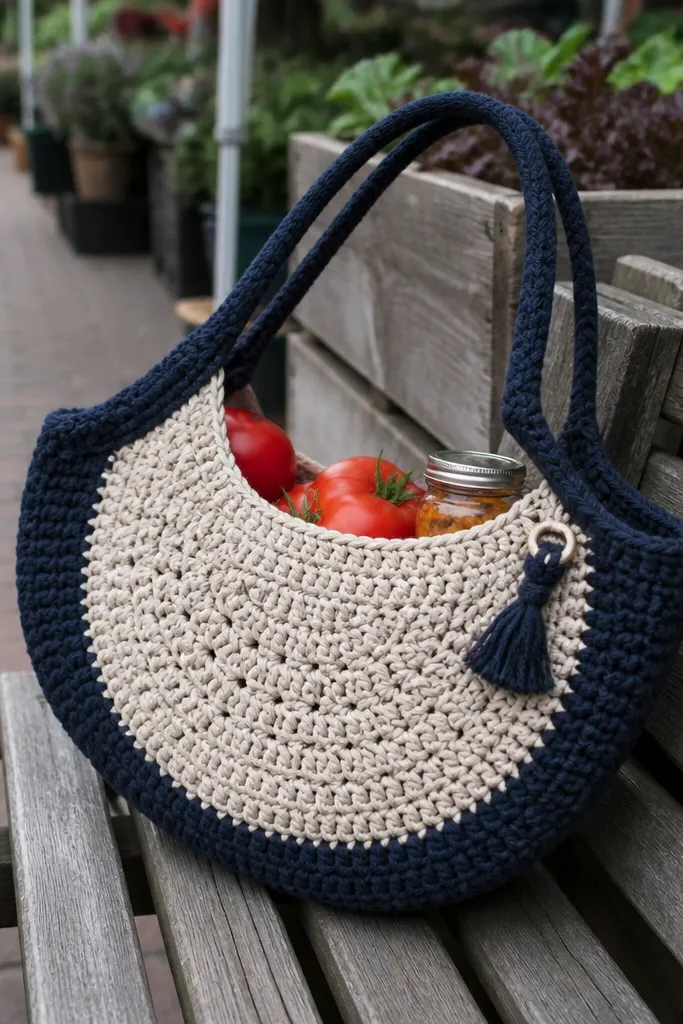
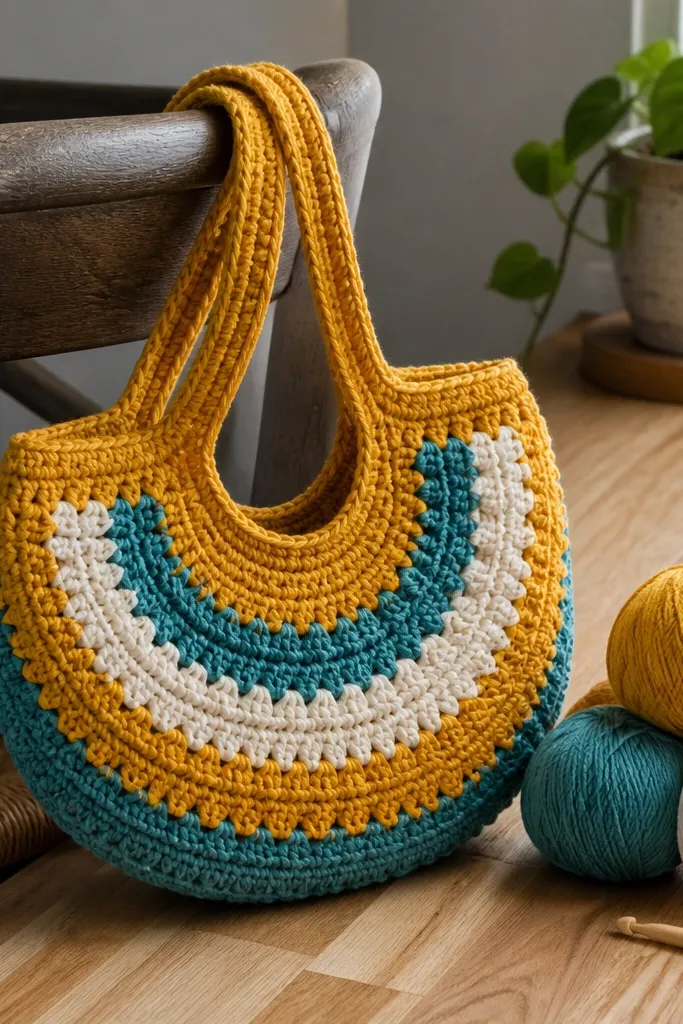
Half-moon shapes look styled because they’re different from the standard tote, and the curve reads beautifully in photos. A market bag also gives you a practical reason to practice shape control. The key to making it look good on a budget is using a stitch that stays firm — like single crochet or half-double crochet in tight rows. Double straps stop the bag from looking flimsy, especially with heavier contents. This is beginner to intermediate and takes a weekend if you’re using worsted weight.
Start by crocheting one side as a curved panel, then mirror it for the second panel. Join them along the sides, then work a top edging round with tight stitches to prevent stretching. For the straps, crochet two long, wide bands and attach them to the bag top corners with extra reinforcement stitches. Add an optional drawstring channel by leaving a few chain spaces in the top edge and weaving in a cord.
Use a slightly smaller hook than the yarn label suggests for firmer fabric that holds the half-moon shape.
Don’t attach straps with only a few stitches — weak attachment points show as sagging.
10. Crochet Faux-Fur Pom Pom Garland Using Yarn Scraps
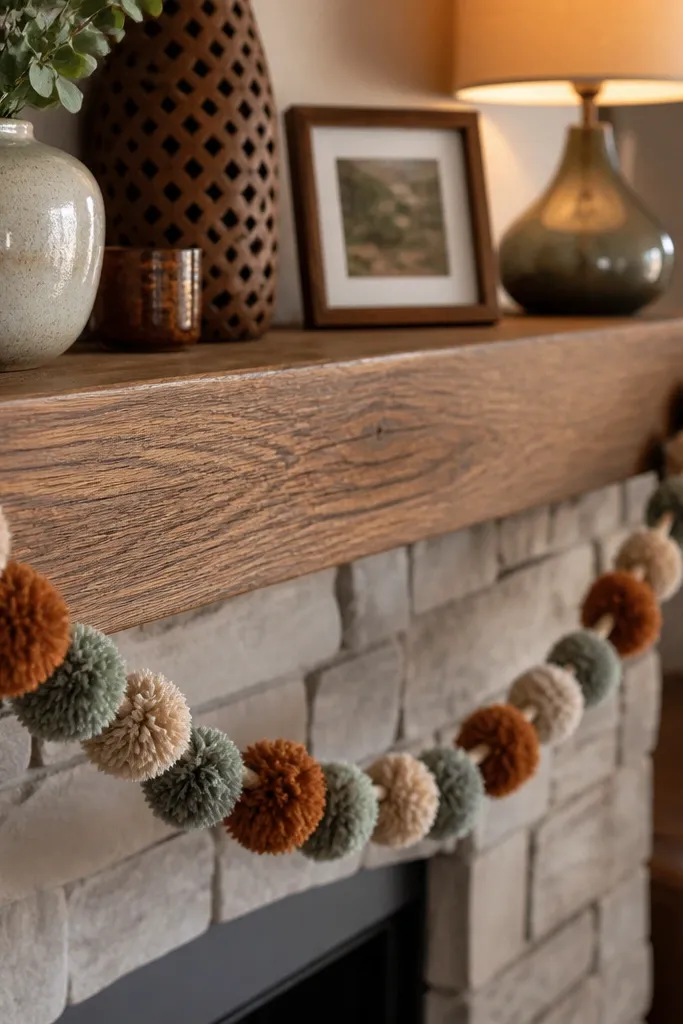
Make a set of mini pom-poms or puff balls in batches, using the same yarn thickness for uniform size. Thread them onto twine or a thin cord with a simple tie or stitch through the base. Space them evenly for a balanced drape, then add a short hanging loop at each end. If you want extra polish, finish the ends with two larger pom-poms so the garland doesn’t look cut off.
This garland looks plush and playful without buying expensive faux fur trim. The secret is using yarn scraps and making consistent mini pom-poms or puff balls, then stringing them so the texture reads as “soft” from a distance. It’s one of the easiest Unique budget crochet ideas to make look full and styled because volume does the heavy lifting. Hang it on a mantel, along a shelf edge, or as a photo backdrop. It’s beginner-friendly and fast, but you need to keep pom sizes consistent for a clean look.
AvoidDon’t mix yarn weights — the garland becomes uneven and visually messy.
Pro tipCut a paper template circle for the pom diameter so every one is the same size.
11. Braided Rope-Style Coaster Set in Single Stitch Rounds
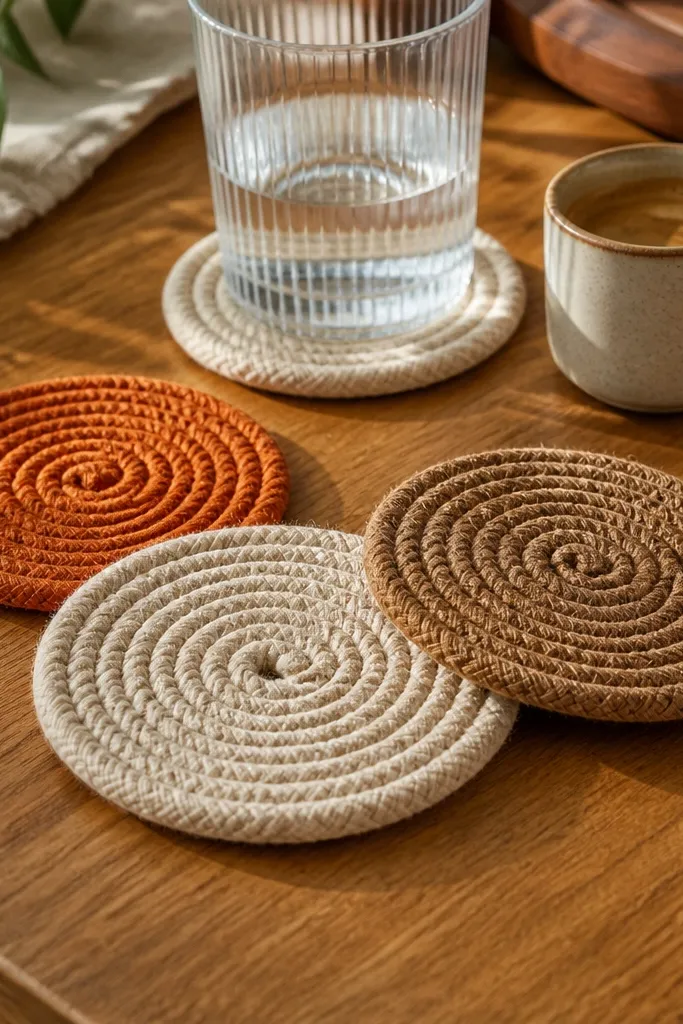
Use cotton yarn and a hook around 3.5-4.5 mm for tight fabric. Crochet a flat circle base in single crochet rounds, then start working a faux-braided effect by twisting the direction of your stitch placement each round. Change colors at the halfway point to create a rope band, then keep the final rounds tight so the coaster edge stays firm. Weave in ends on the underside and block flat with a damp cloth to remove curling.
Rope-style crochet looks expensive because it resembles braided cord, but you can build the look with tight, controlled stitch work. These coasters are photogenic because they show a raised, rope-like spiral that catches light. Use neutral colors like cream and tan, then add one contrasting color coaster for a styled set. They’re practical for daily use, and the project doesn’t require fancy shaping. Skill level is beginner — the technique is repetitive, and the results are clean if your tension is consistent.
AvoidDon’t use a hook too large — wide stitches flatten the braided look.
Pro tipKeep your tension firm by holding the working yarn slightly higher on your finger — it reduces slack.
12. Geometric Triangle Scarf with Edged Fringe
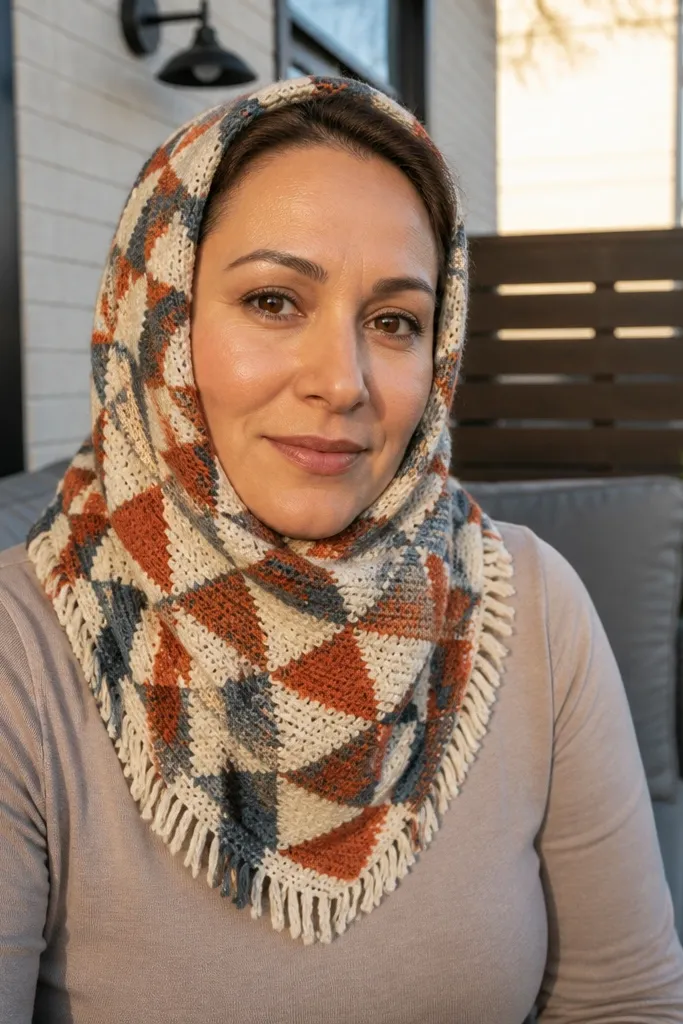
A geometric triangle scarf is a standout because it creates a strong silhouette in photos, not just a texture patch. Color blocks make it look intentional, and the fringe adds motion and framing around the face. This scarf also helps you use scrap yarn efficiently since triangle construction eats small leftovers. Pick two to three colors that look good together on a neutral outfit. Skill level is intermediate-light because you’re shaping triangles, but the stitches are straightforward.
Work from one point outward using a triangle growth chart based on increases at the sides each row. Choose worsted weight yarn for structure, and crochet in a stitch like half-double crochet so the fabric drapes without looking airy. Switch colors in clean bands by finishing the last stitch of a row in one color and starting the next row in the next color. When you reach your target width, bind off and add fringe by cutting equal strands and attaching them along the long edge.
Use a ruler to measure the triangle width — uneven growth shows up instantly in photos.
Don’t skip blocking — triangle scarves curl and fringe looks uneven.
13. Mini Amigurumi House Key Holder with Magnetic Closure
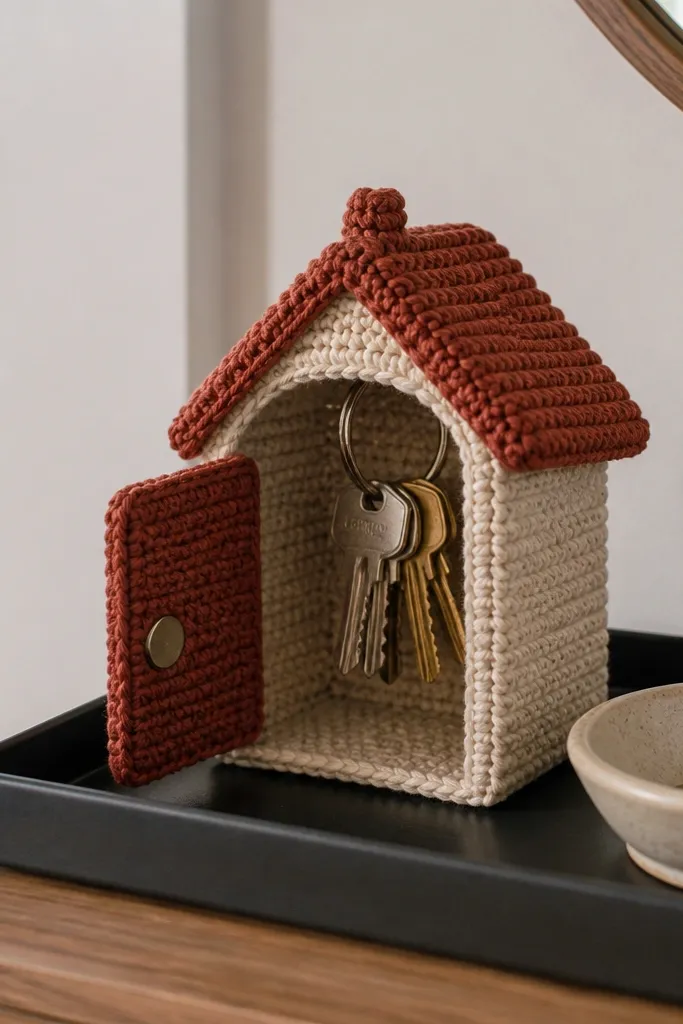
Amigurumi can look pricey, but mini key holders keep it budget-friendly because you make a small piece with big visual charm. A house shape is instantly recognizable, and a magnetic closure makes it feel practical, not just cute. The look is photogenic because the door detail gives depth, and the roof shape frames the whole object. This works on entryway walls, inside a closet, or near a front door where keys disappear. Skill level is intermediate because you need clean assembly and a tiny hardware install.
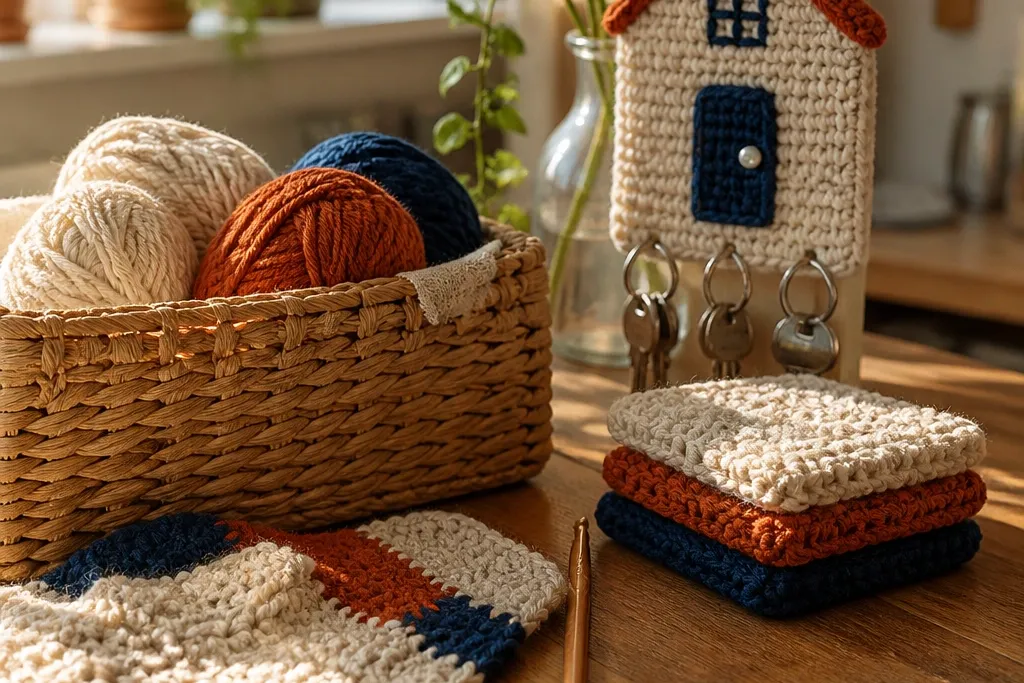
Crochet the house in separate parts: body, roof, and door flap using a tight stitch so the shape holds. Stuff lightly so it stays structured, then sew parts together with matching yarn. Install a small neodymium magnet pair by stitching the magnet into the door flap and lining up the counterpart on the body. Finish by adding a simple border around the door and weaving in ends securely before attaching it to a hook or wall plate.
Mark magnet alignment with a toothpick before sewing — it keeps the door from closing crooked.
Don’t use weak magnets — the door will swing open and ruin the look.
14. Lattice Sunburst Blanket Square with Border Frames
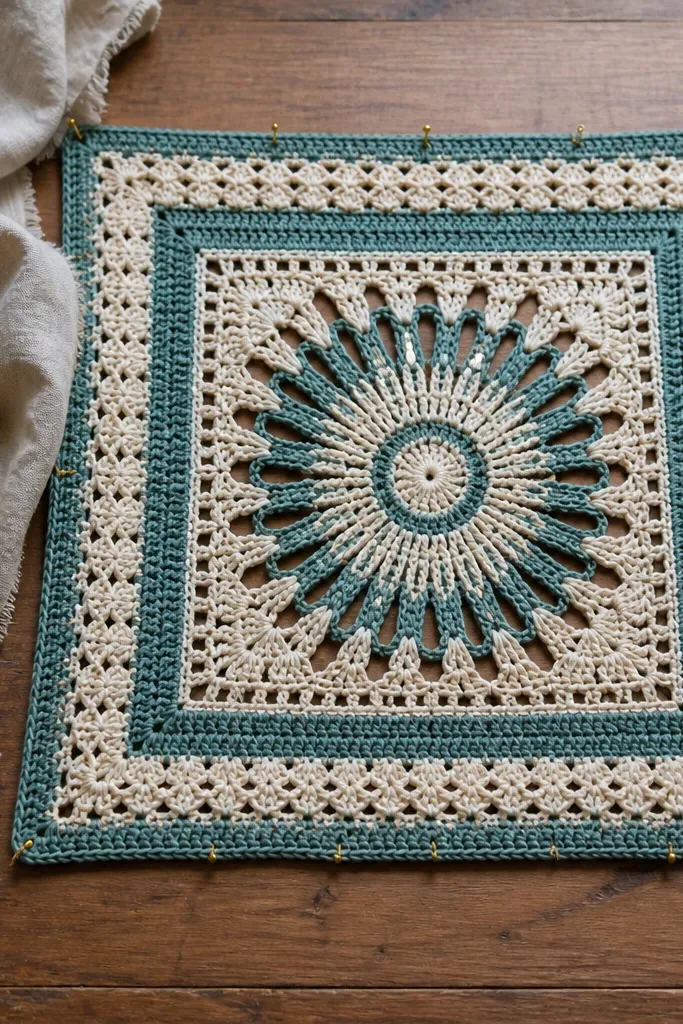
If you want Unique budget crochet ideas that look like designer throw pieces, start with a single blanket square that has a bold pattern rhythm. The lattice sunburst effect looks complex but is built from repeatable increments, and the framed border makes it look finished even if you stop at one square. You can turn squares into a mini wall throw, a stroller blanket, or build a larger blanket later. The aesthetic comes from contrast: a dark base with lighter rays reads crisp in photos. Skill level is intermediate because you need consistent counting for the lattice sections.
Start with a center circle or small square foundation, then work outward using increases to create rays. Add lattice by leaving controlled gaps and filling them with connecting stitches so the structure stays open but not floppy. Build a contrasting border frame around the square using single crochet or crab stitch for a clean edge. Block the finished square flat, then join additional squares with a simple slip-stitch seam if you expand the set.
Use stitch markers every 10 stitches for the lattice section — one missed count changes the whole symmetry.
Don’t stretch the square while blocking — lattice patterns should stay square, not elongated.
15. Spiral Lattice Wall Vase Cover in Thick Cotton
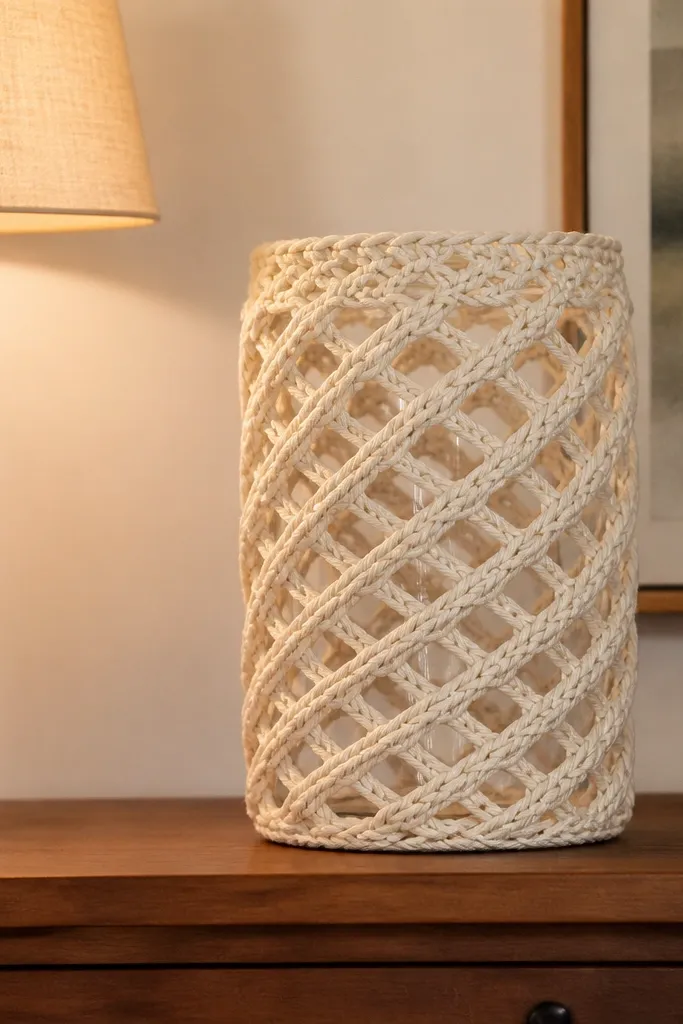
This is a wall piece that looks like modern lattice glass, but it’s made with yarn and patience. The spiral structure makes it read as “unique” from across the room, not like a standard doily. It also solves a common budget problem — you can cover an inexpensive jar or thrifted vase with crochet and make it look intentional. Use thick cotton so the openwork holds its shape and doesn’t collapse like soft acrylic can. The build is beginner-friendly if you can manage basic stitches, and it usually takes a weekend evening for one cover. It looks best in a kitchen, entryway, or bathroom where you want texture without clutter.
Pick a target container first so sizing is real — a small glass jar or vase that’s about 5 inches tall and 3 inches wide works great. Use 5.0 mm crochet hook and thick cotton yarn (about 125-200 yards per 100g) so the lattice stays crisp; you’ll also need a tapestry needle and stitch markers. Work a flat spiral base by crocheting a tight center ring, then increasing evenly each round until it matches the jar’s diameter; keep your increases consistent so the spiral doesn’t skew. From the last base round, switch to a lattice pattern using chain spaces and simple crosses, then keep spiraling upward until the cover fits over the jar with a snug gap for a little airflow. Finish by weaving in ends on the inside, lightly blocking the cover to flatten the spiral, and either slipping it over the jar or sewing a short hidden seam so it hangs straight on a wall hook.
Do a quick gauge test on a 4-inch spiral before you commit — thick cotton can vary a lot, and one wrong hook size changes the whole fit.
Don’t use slippery acrylic for the lattice — it stretches, and the spiral edges won’t hold their shape.



