
1. Navy Waffle Stitch Headband with Cream Button Loop
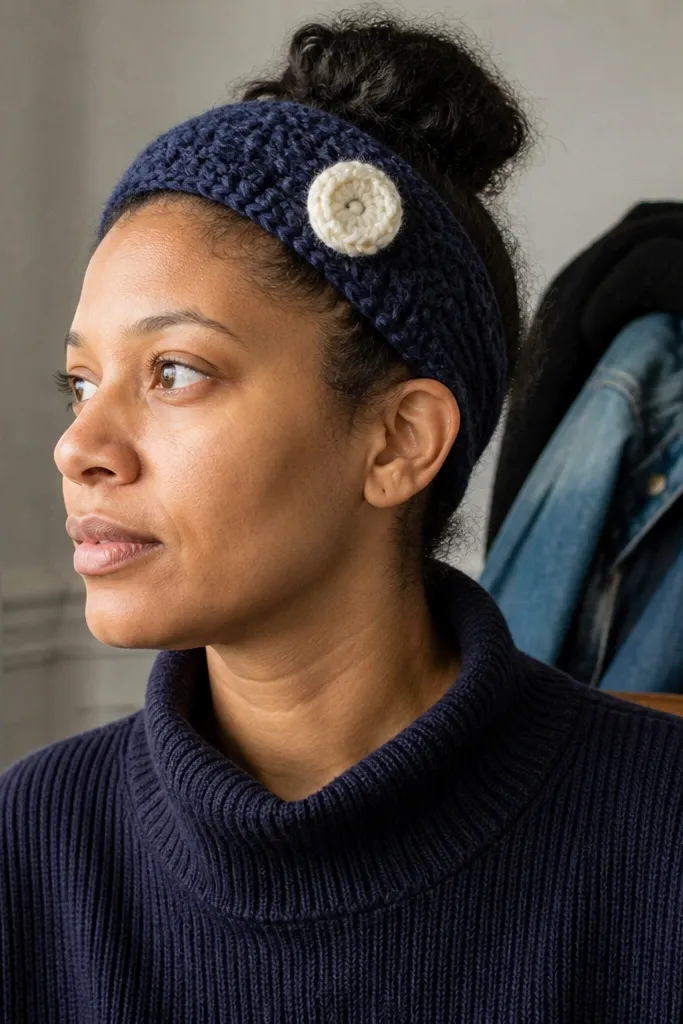
This headband hits the gorgeous sweet spot because the waffle stitch gives you a thick, photo-ready surface that doesn’t collapse. Navy reads clean and grown-up, and the cream button loop adds a small flash that looks styled with denim, black coats, and even casual dresses. It’s also practical: the structure holds hair back without needing pins, and the thickness makes it feel warm on cool mornings. Skill level is easy- to intermediate-crochet since the stitch repeat is straightforward, and you finish it quickly enough to make a second color pair the same day.
Start with worsted-weight navy yarn and a size H-8 or I-9 hook, then crochet a foundation chain long enough to fit snug across your forehead (measure from temple to temple). Work the waffle stitch pattern in rows until the band reaches your preferred height, usually 2.5 to 3.5 inches. Finish by slip stitching the ends together to form a loop, then add a single cream button loop: chain a small loop and secure it with a couple of stitches near one end. Sew the button in place on the opposite side so the headband holds without stretching out.
Block it lightly by misting and pinning flat for 15 minutes so the waffle texture looks crisp instead of wavy.
Don’t make the headband too wide — if it covers your whole hairline, it looks bulky in photos and feels heavy indoors.
2. Denim-to-Teal Colorblock Crochet Crossbody Pouch
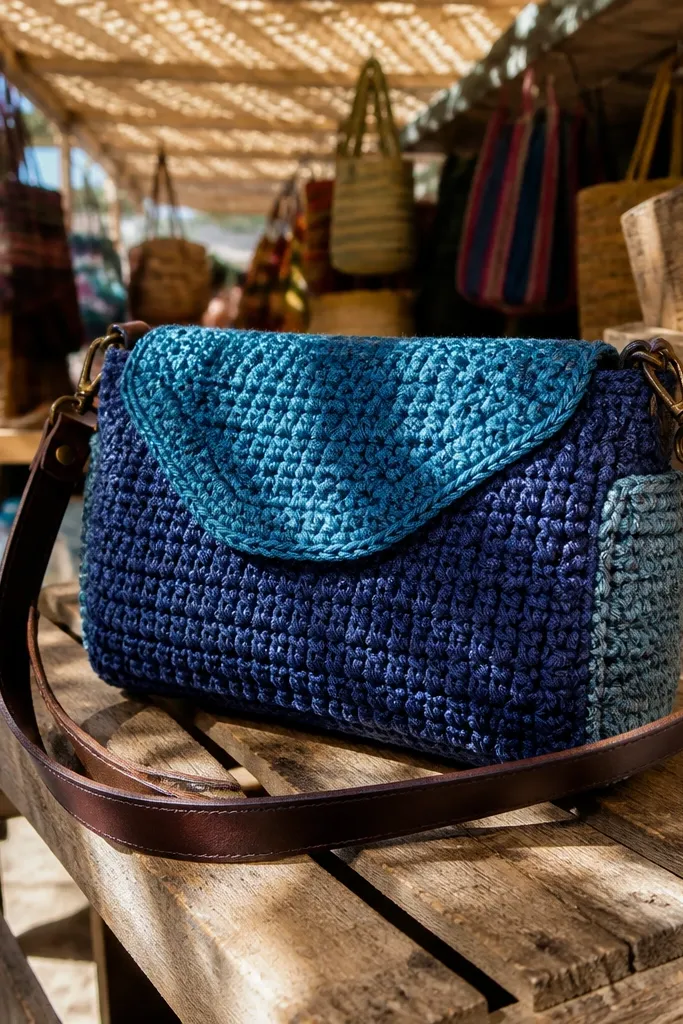
A crossbody pouch always looks intentional, and the colorblock is what makes it gorgeous. Use denim blue for the main body and teal for the flap or side panels so your accessory looks like a planned design, not a single flat rectangle. The pouch shape helps you carry small essentials without adding bulk, and the flap gives structure for photos. Choose cotton or cotton-blend yarn so the sides stand up and the stitch definition stays sharp. This is a beginner-friendly build because you’re making a few simple panels and assembling them cleanly.
Start with cotton DK yarn in denim blue and teal, and crochet a rectangle for the body about 10 inches wide and 8 inches tall. Add the colorblock by switching yarn colors at a clean row boundary, keeping your tension consistent. Crochet a separate flap piece about 10 inches wide and 3 inches tall, then attach it at the top edge with slip stitches. Add a strap: crochet a long chain and work a simple single-crochet strap, then sew it to the sides with reinforced stitches; finish with a button or small snap closure for a tidy look.
Use a stitch marker at each color change so the block lines stay straight in every row.
Skip loose strap stitching — if the strap is floppy, the whole pouch looks homemade and sags in pictures.
3. Cornflower Shell Scarf with Picot Border
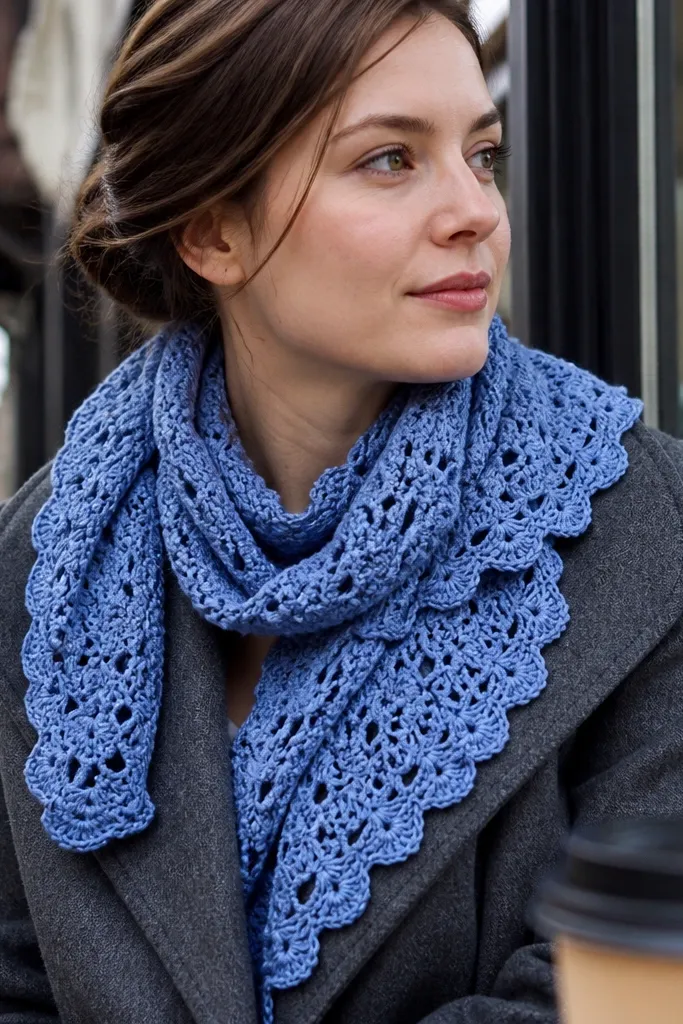
A shell scarf photographs beautifully because the fan shapes catch light as they curve. Cornflower blue is bright without being neon, and it pairs with cream knits, gray coats, and denim jackets. The picot border matters — it frames the scallops and makes the scarf look finished even when it’s casually draped. This project works year-round too: it’s airy enough for spring evenings and substantial enough for fall wind. You’ll get a clear, repeating pattern that’s relaxing, not fussy.
Use DK or worsted yarn in cornflower blue with a hook that gives you firm stitch definition (often a size 4.0 to 5.0 mm). Crochet a foundation chain in multiples that match your shell pattern, then work rows of shell stitches until the scarf reaches about 65 to 75 inches long. Add a picot border by working a row of single crochet, then tiny chain-3 picots spaced evenly, and secure with slip stitches. Finish the ends by weaving in tails tightly and adding a final slip-stitch ridge so the border doesn’t curl.
Lightly steam-block the scarf so the shells open up; the drape looks noticeably better for photos.
Don’t skip blocking — shell edges curl when yarn is relaxed, and that ruins the “gorgeous” outline.
4. Teal Cable Infinity Cowl with Buttoned Shoulder Tuck
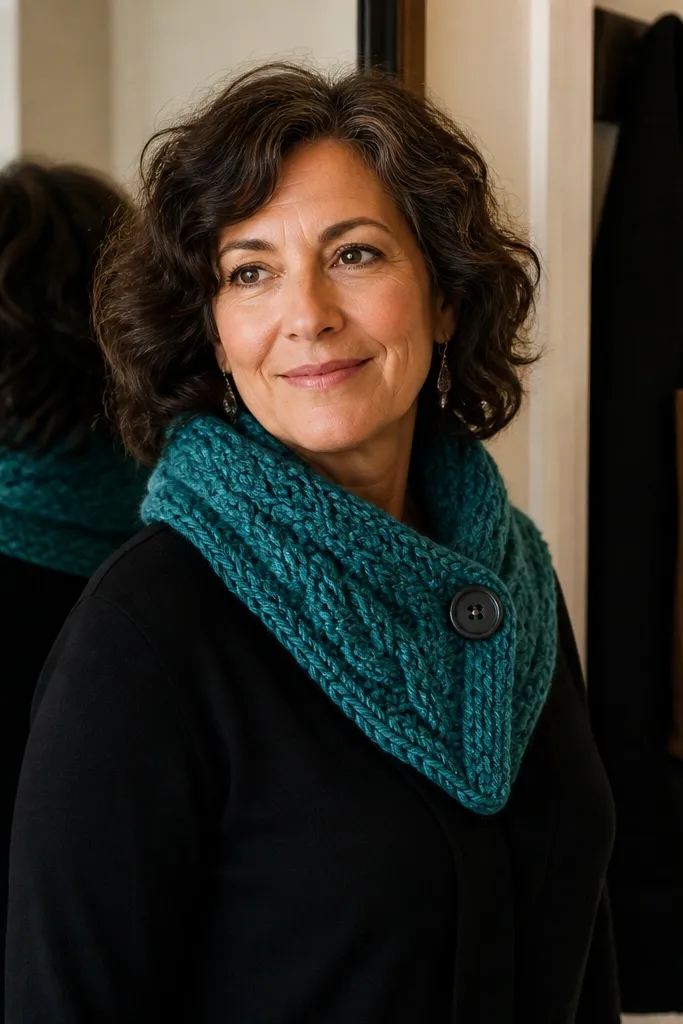
Cable texture makes this cowl look expensive. Teal reads modern and stands out against black, tan, and cream layers, and the infinity shape stays put without needing constant adjusting. The buttoned shoulder tuck is the styling trick: you can pull the front slightly and lock it with a button for a neat neckline in photos. This is intermediate crochet because cables take attention, but the pattern repeat is rhythmic once you get going. Time is reasonable for a cowl because you’re working in rounds or joined rounds, not endless scarf length.
Choose a wool blend or wool-acrylic blend in teal with worsted weight for crisp cable definition. Make a gauge swatch and then crochet a round foundation chain count that fits your head and neck — aim for about 22 to 24 inches around for a comfortable infinity. Work cable panels in a round using a cable needle or stitch holder, then finish with a few rounds of ribbing or tight single crochet to prevent curling. Add a buttoned tuck by creating a small loop on one side and sewing a button on the opposite side so the front can be pinned in place.
Track cable crossings with stitch markers — losing one row shifts the whole texture.
Avoid making the cowl too tight at the neck; tight cables pull and distort the stitch pattern.
5. Midnight Blue Crochet Scrunchie with Satin Ribbon Tie
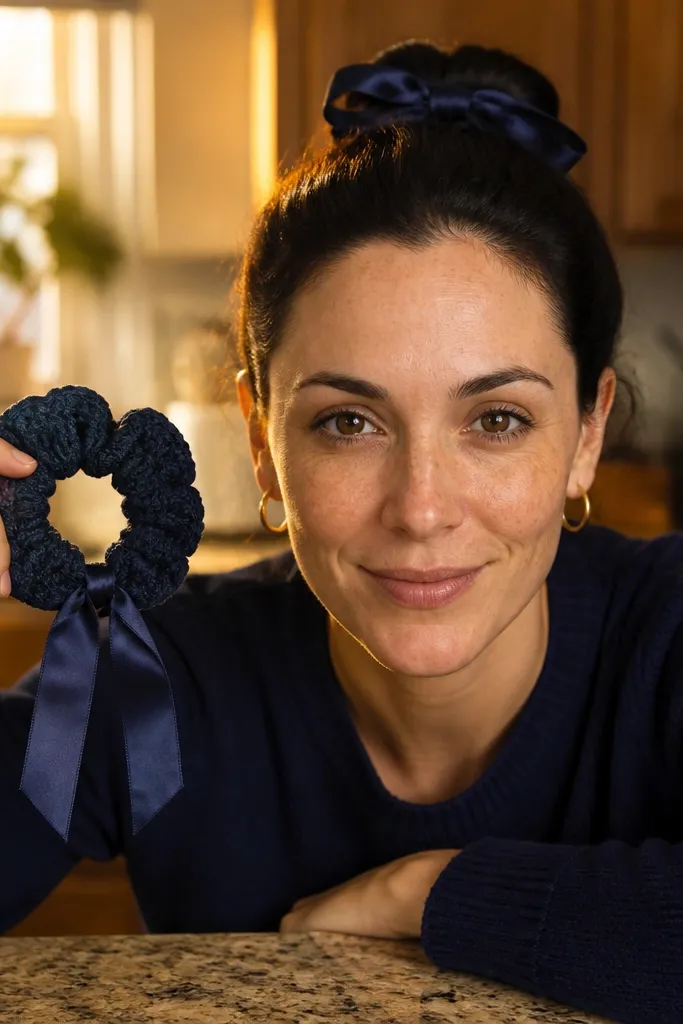
Scrunchies are small, fast accessories that still photograph well because they’re glossy and touchable. Midnight blue looks classy, and the satin ribbon tie adds that “styled” finish without adding bulk. Choose a stitch that looks smooth, like a tight single-crochet around elastic, so the scrunchie doesn’t look lumpy on camera. This is a quick weekend project and a great way to use leftover blue yarn. You also get a practical hair accessory that works across seasons: it holds hair in summer humidity and keeps flyaways down in winter.
Cut a piece of elastic that fits comfortably around your hair with slight tension, then crochet directly around it using tight single crochet stitches. Leave a small opening so you can insert the elastic ends, then close with slip stitches. For the ribbon tie, crochet a short chain and weave it through a few stitches near the top edge, or sew a small fabric casing and thread ribbon through it. Finish by hiding tails inside the stitch work and trimming ends cleanly so the scrunchie looks neat.
Use a narrow satin ribbon and keep the ends sealed with a quick trim-and-fray prevention so it stays crisp.
Don’t use a loose stitch — a loose scrunchie looks shaggy and loses the clean silhouette.
6. Sky Blue Lattice Market Bag with Leather-Style Handles
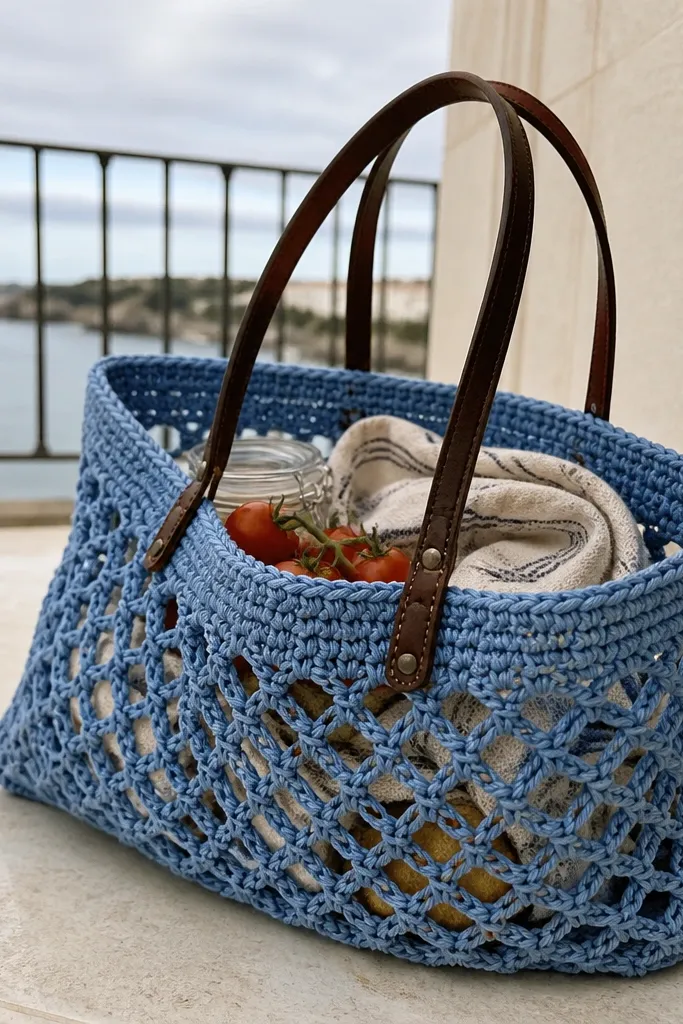
A market bag is one of the most photogenic crochet accessories because it has a big shape and open texture. Sky blue looks fresh in spring and still works in winter if you pair it with neutrals. The lattice pattern creates light-and-shadow depth, which is what makes it gorgeous in photos. For year-round use, you want a bag that holds its form: cotton or cotton-blend yarn plus a structured base. The handles are the styling upgrade — tan leather-style straps make the whole bag look store-bought.
Start with cotton DK yarn in sky blue and crochet a flat base using a circle or hexagon method until it reaches about 9 to 10 inches across. Build upward with lattice rows, keeping the stitch count consistent so the bag walls don’t flare. Add a reinforced top band with a row of single crochet and then a few rows of tighter stitches for handle stability. Attach handles using sturdy thread and reinforce with extra stitches through the top band; finish with a simple tie closure or drawstring channel if you want it more secure.
Pro tipMake the base a little heavier than you think — a structured bottom stops the bag from sagging on camera.
AvoidDon’t skip a top reinforcement band — without it, handles rip out after a few uses.
7. Royal Blue Boho Wrap Belt with Fringe Ends
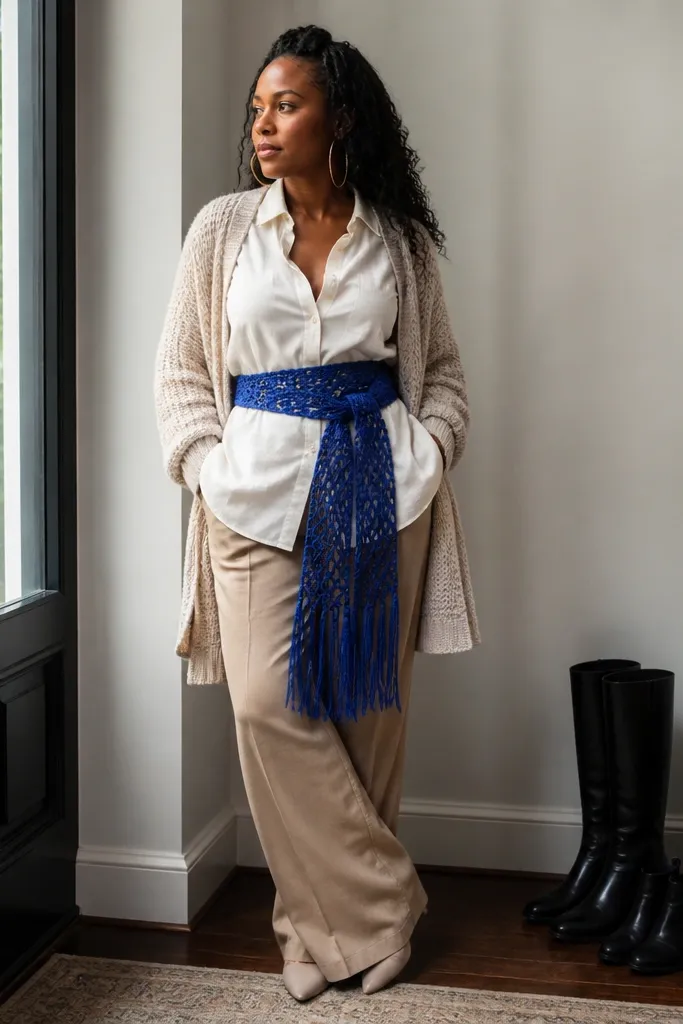
A wrap belt turns ordinary outfits into styled looks, and blue fringe is instantly eye-catching. Royal blue has enough depth to look rich without being dark, and the fringe adds movement in photos. This accessory is also practical: it’s a simple way to cinch cardigans, dresses, and oversized shirts. Crochet fringe is easy to adjust length, so you can tailor it to your height and outfit style. It’s a beginner-friendly build if you keep the belt width consistent and don’t overcomplicate the stitch pattern.
Choose worsted yarn in royal blue and a hook that gives a firm fabric, often a 5.0 mm. Crochet a strip about 4 inches wide and long enough to wrap plus tie — typically 72 to 90 inches depending on how high you like it. Add a simple stitch repeat like half double crochet rows so the belt doesn’t stretch too much. For fringe, cut yarn strands about 6 to 8 inches long, fold in half, and knot through the bottom edge at even intervals; trim to a clean line.
Pro tipUse a ruler to space fringe — uneven fringe reads sloppy fast in photos.
AvoidAvoid super-loose chains at the tie ends — they look stretched and wonky once worn.
8. Teal Rose Appliqué Keychain with Split-Ring Clip
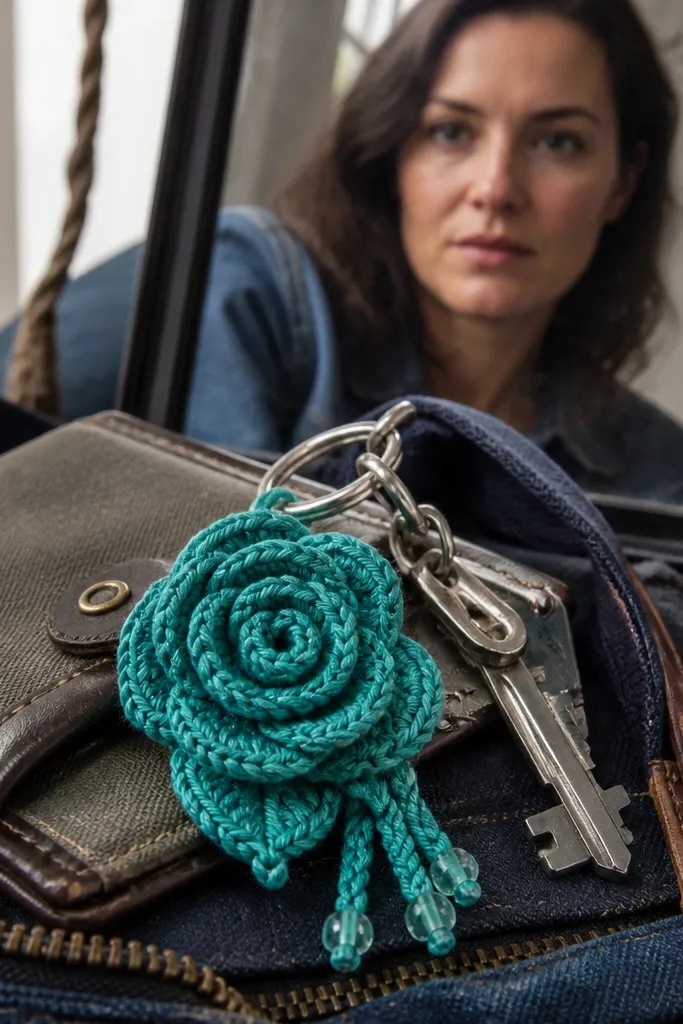
Small accessories can still look gorgeous, and a crochet rose keychain does it because it’s a clear silhouette. Teal adds a soft pop against keys, bags, and denim, and the rose shape gives instant visual interest even in cluttered shots. This one is fast, and it’s also a great way to use small yarn scraps without sacrificing the final look. If you want year-round crochet accessories ideas that don’t feel seasonal, this is it — it works on backpacks, tote bags, and key sets all year.
Pick DK yarn in teal and a hook around 3.5 to 4.5 mm for tight petals. Crochet a rose appliqué using small petal loops, then assemble by layering petals and stitching them down at the base. Add a small leaf or two if you want extra dimension, then attach a split ring or lobster clasp through the back center. Weave in tails tightly and secure with a knot; trim close so nothing snags.
Make the center slightly tighter than the outer petals; it keeps the rose shape crisp.
Don’t use a floppy stitch for petals — soft petals collapse and the rose stops reading as a rose.
9. Navy Crochet Coaster Set with Starburst Stitch
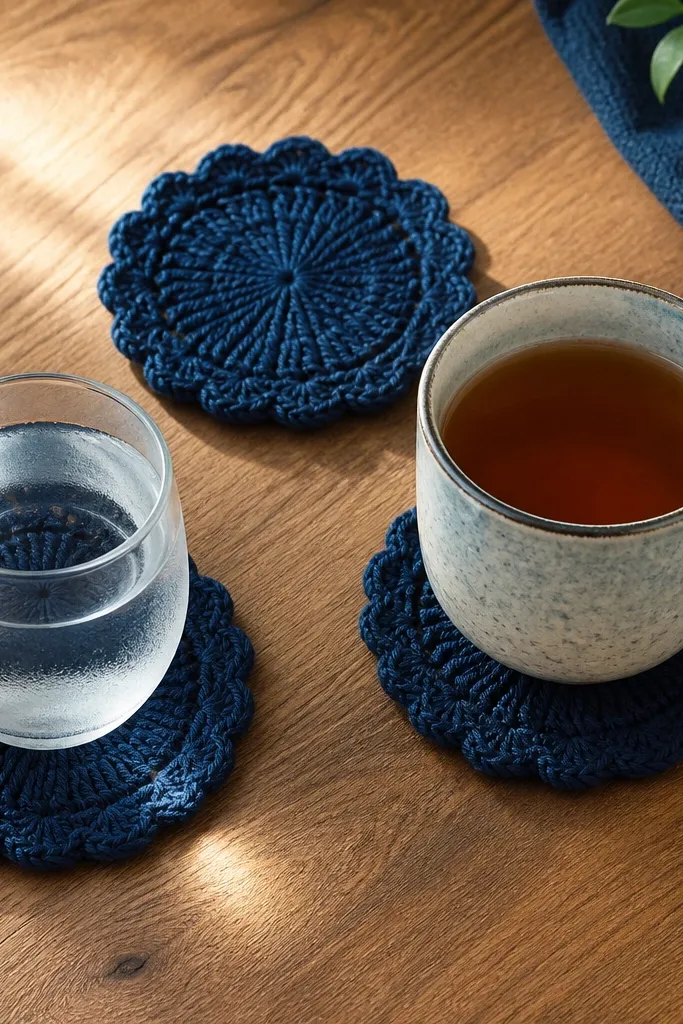
Coasters are an underrated place to go all-in on stitch beauty. Navy looks sharp on wood tables and light countertops, and a starburst stitch gives that “wow” texture without needing extra color. You’ll get a set that’s genuinely useful year-round, and it photographs well because the patterns sit flat and crisp. Use cotton yarn so the coasters don’t stretch and you can wipe them clean. Skill level is beginner-friendly because you repeat the same round pattern four times per coaster.
Use cotton yarn in navy and a hook that keeps stitches tight, usually 3.5 to 4.0 mm. Start with a magic ring and build rounds with starburst or puff-like clusters shaped evenly around the center. Continue until each coaster reaches about 4 inches across. Make four coasters, then add a final round of tight single crochet for a uniform edge. Block flat so the edges look straight.
Use a stiff cotton blend if you want the coasters to stay perfectly flat without curling.
Avoid acrylic for coasters — it holds shape poorly and can look fuzzy instead of crisp.
10. Cornflower Blue Granny Square Pouch with Zipper
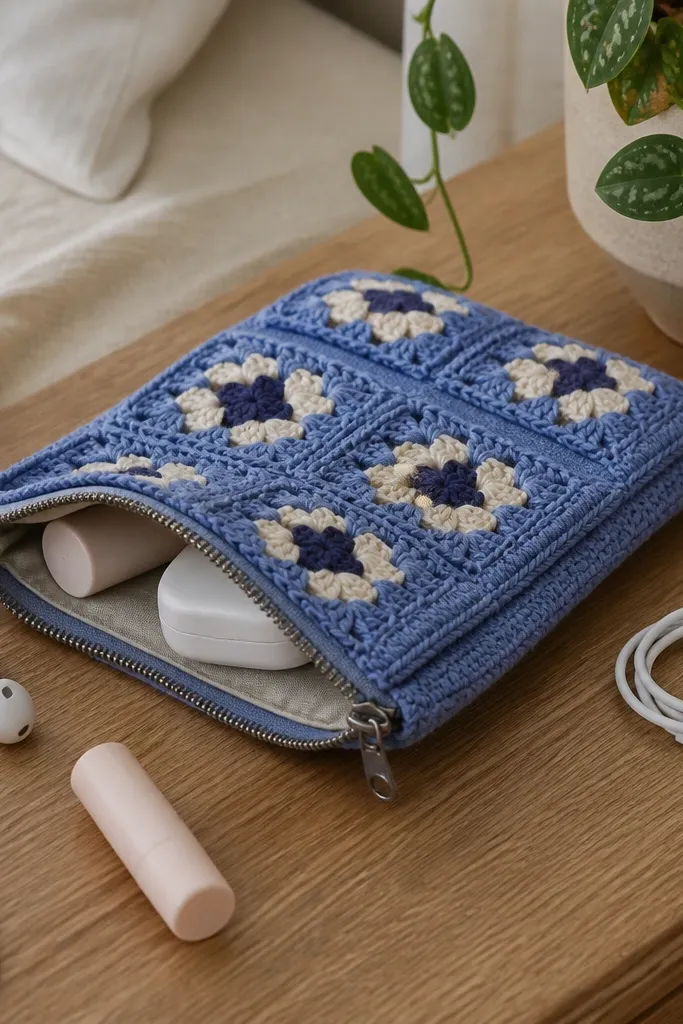
Granny square designs look gorgeous because they create a patchwork rhythm, even when you keep the color to one blue. This zipper pouch is also a year-round win: it holds lip balm, earbuds, or charging cables in any season. The key is finishing: a proper zipper makes it look polished instead of like a decorative cover. Choose a yarn that doesn’t stretch (cotton blend or acrylic DK with good stitch definition), and keep your squares consistent so the final shape looks clean. It’s intermediate because the zipper insertion takes care.
Crochet 12 to 16 granny squares in cornflower blue, aiming for squares around 3.5 inches each. Join them into a flat panel, then measure your panel against the zipper length — choose a zipper about 1 inch longer than the pouch width. Sew or crochet a lining panel and stitch the zipper between the outer crochet panel and lining, using pins to keep it straight. Add a top zipper tab if you want a clean pull loop, then finish by weaving in tails and reinforcing corners with a couple of stitches.
Press the zipper teeth area flat with your fingers while sewing so the crochet panel doesn’t pucker.
Don’t skip lining — crochet fabric alone stretches around the zipper and makes the pouch look uneven.
11. Teal Puff Stitch Fingerless Gloves with Rolled Cuff
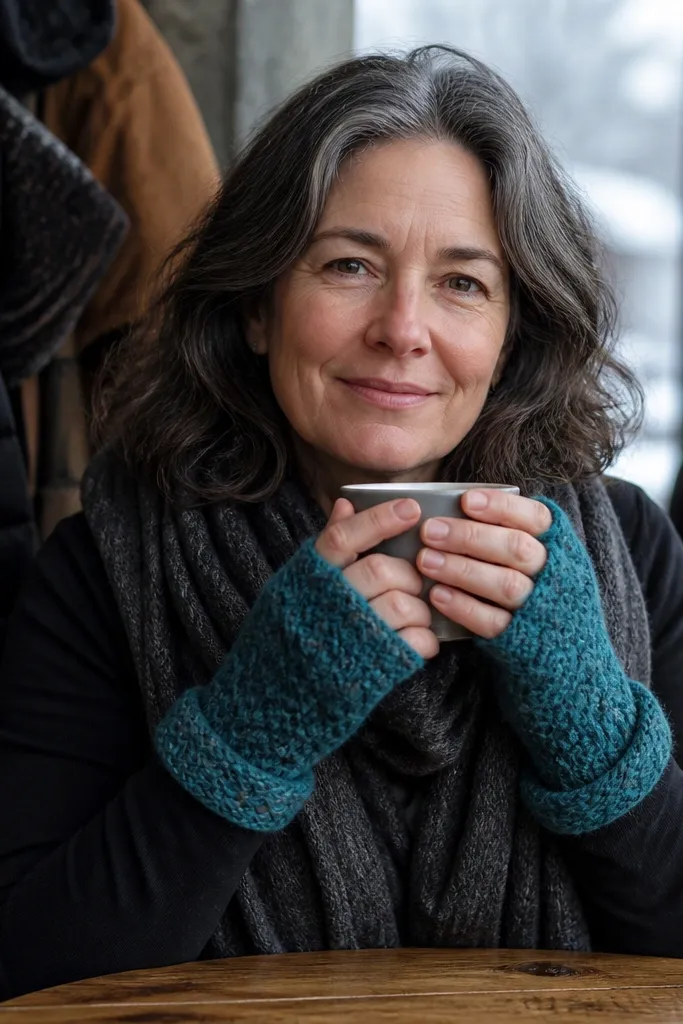
Fingerless gloves are the “in-between” accessory that stays useful year-round, and puff stitch makes them instantly photogenic. Teal gives a cool tone that pops against warm knits and neutral coats, while the rolled cuff keeps the edge tidy and comfortable. The puff stitches add texture without requiring complicated cables, so the gloves look rich even if you’re not an advanced crocheter. This project is best for intermediate beginners because you need shaping for the hand and a clean cuff finish. Time is reasonable if you make a gauge swatch and stick to it.
Use a wool blend or acrylic-wool mix in teal and a hook that makes tight puff definition, often 4.0 to 5.0 mm. Work a cuff first using a ribbing pattern or tight half double crochet so it rolls neatly; then shape the hand by increasing for the back of the hand and decreasing toward the palm. Leave openings for fingers, and make a thumb opening with a short chain bridge you crochet back into. Finish with a final rolled edge by crocheting a tight round at the cuff and sewing in any loose ends securely.
Count stitches for each finger opening twice — one missed stitch makes the glove look crooked.
Avoid very loose puff stitches — they trap gaps and the glove won’t look smooth on camera.
12. Midnight Blue Crochet Rose Lace Bookmark with Tassel
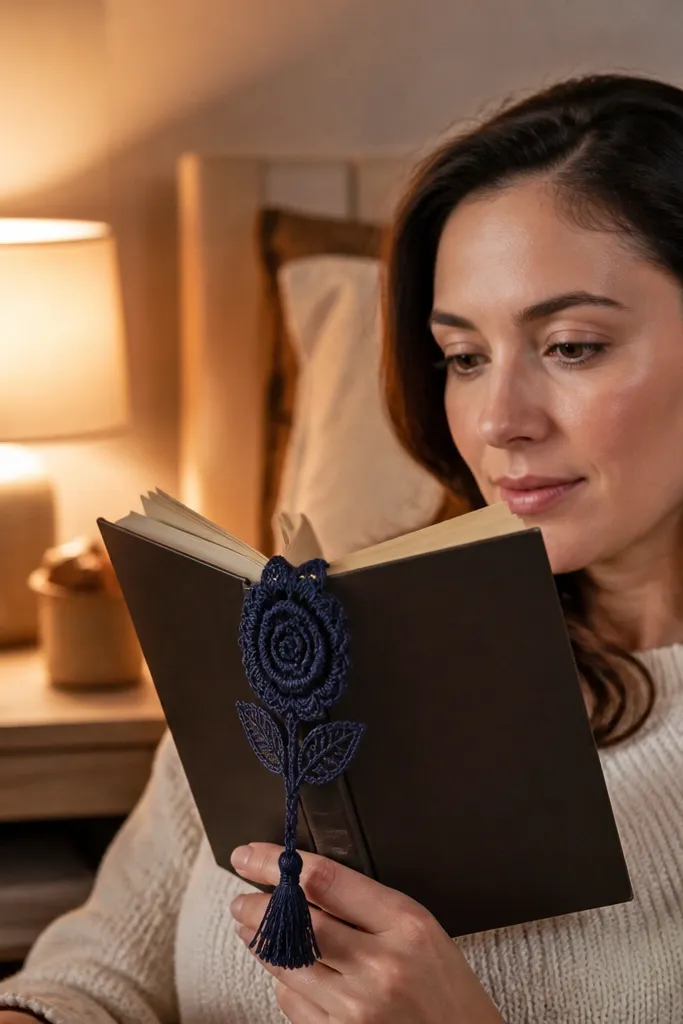
Bookmarks don’t get enough love, but they’re one of the easiest year-round crochet accessories ideas to keep in your bag. Midnight blue looks classy on any paper color, and a lace pattern with a small rose detail gives you that “pretty” factor without being bulky. The tassel adds movement, which looks great when you pull it out of a book. This is a small project that teaches you how to do fine edging and consistent spacing, and it makes a gift that feels thoughtful. Skill level is beginner with patience since lace stitches need steady tension.
Use DK or fingering yarn in midnight blue with a 2.5 to 3.5 mm hook for clean lace work. Crochet a long rectangle bookmark base about 7 inches tall and 2 inches wide, then add a lace border row using chain spaces and skips for an open pattern. Sew or crochet a small rose applique at the top center, then attach a tassel made from 6 to 8 strands about 3 inches long. Finish by blocking flat so the lace sits evenly.
Pro tipKeep your tension firm on chain spaces — loose chains make lace look stretched instead of delicate.
AvoidDon’t over-size the tassel — long tassels tangle and look messy in photos.
13. Sky Blue Shell Soap Saver Bag
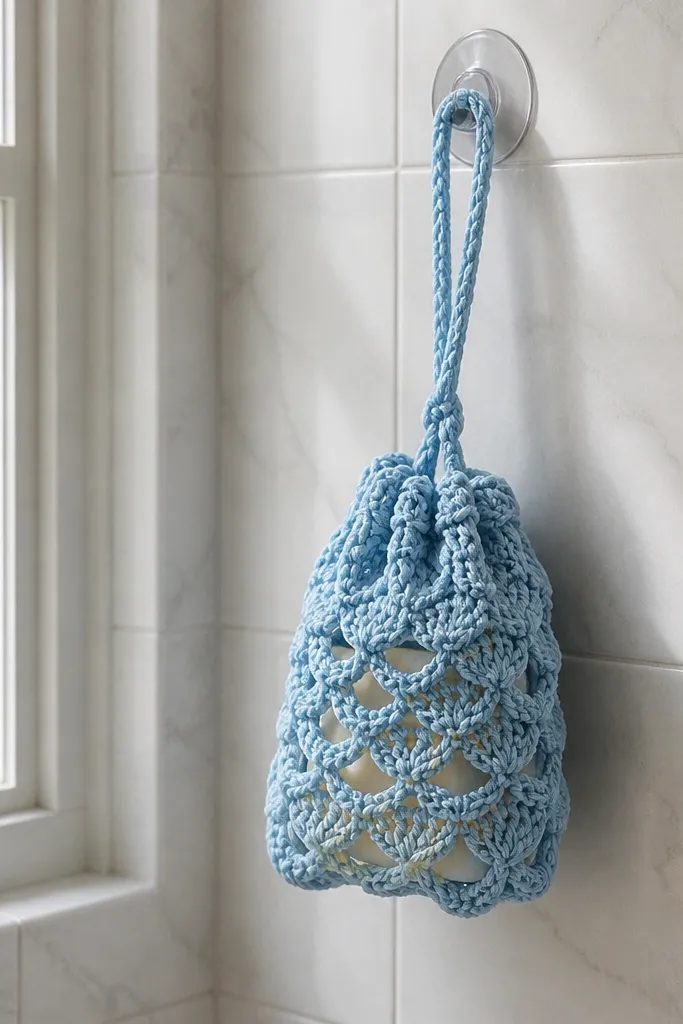
This is a small bathroom accessory that looks cute and works year-round. A sky blue shell stitch pattern gives you that airy, beachy feel, while the drawstring keeps the soap from turning mushy. It’s also a smart way to use cotton yarn that holds up in a humid environment. When you hang it, the bag shows off the stitch texture, so it’s photogenic even in a bathroom mirror shot. This project is beginner-friendly and teaches a useful technique: crocheting a functional drawstring channel.
Use cotton yarn in sky blue and a hook that gives a tight fabric, usually 3.0 to 4.0 mm. Crochet a small shell rectangle about 5 inches wide and 6 inches tall, then seam the sides to form a pouch. Create a drawstring channel at the top by working a row of chain spaces or by crocheting a row that leaves gaps, then weave in a cord made from chain and single crochet. Add a drawstring tie loop and secure ends so the cord doesn’t slip.
Pro tipMake the pouch slightly snug around the bar so it drains fast and the stitch pattern stays crisp.
AvoidAvoid fluffy yarn — it holds water and looks dull instead of clean and pretty.
14. Royal Blue Granny Stripe Table Runner Cuff
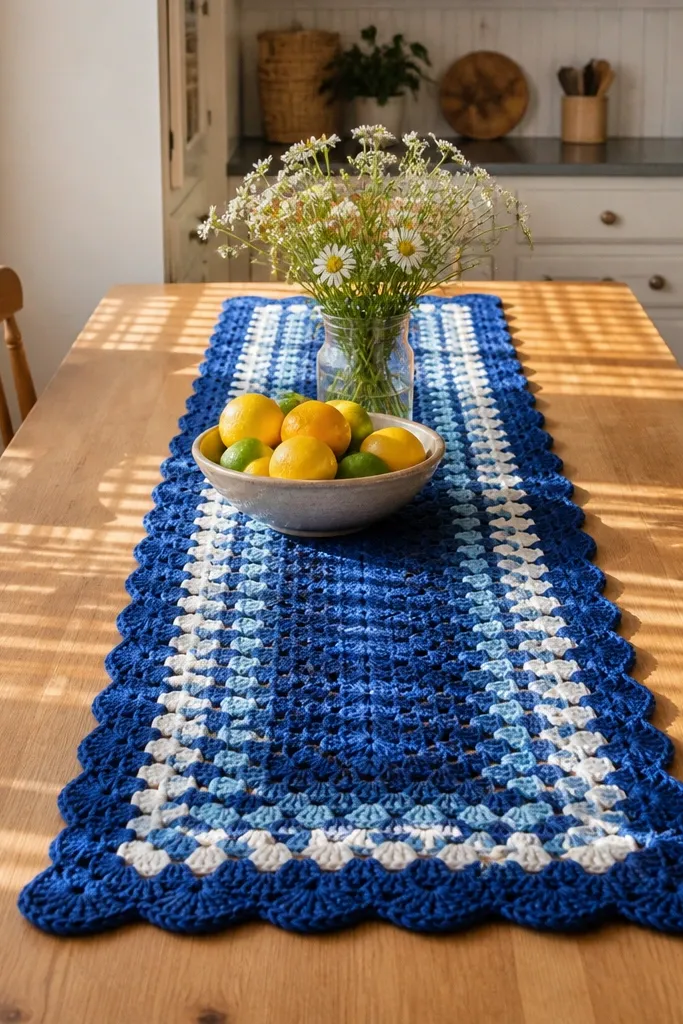
A table runner cuff might sound homey, but it looks gorgeous because it frames a surface like decor. Use royal blue granny stripes with a scalloped edge so the pattern reads clearly from across the room. This accessory works year-round because it’s not tied to holidays; it just adds texture to kitchens and dining tables in any season. The scallops also help the piece lie flat instead of curling, which matters for the look. Skill level is easy- to intermediate since you repeat stripes and finish with a border.
Pick worsted yarn in royal blue and a hook that gives firm granny stitch definition, often 5.0 to 6.0 mm. Crochet long granny stripe panels, then join them to your desired runner cuff length, usually around 36 to 48 inches. Add a scalloped border with a repeat like 3 double crochet into the space, then chain 1, skip 1, and repeat around the edge. Steam-block lightly so stripes sit straight and the scallops look even.
Pro tipKeep your stripe height consistent — inconsistent rows create wavy edges that show up fast in photos.
AvoidDon’t let the border be too tight — tight borders can pucker the granny stripes.
15. Cornflower Blue Crochet Waterfall Vest with Picot Edges
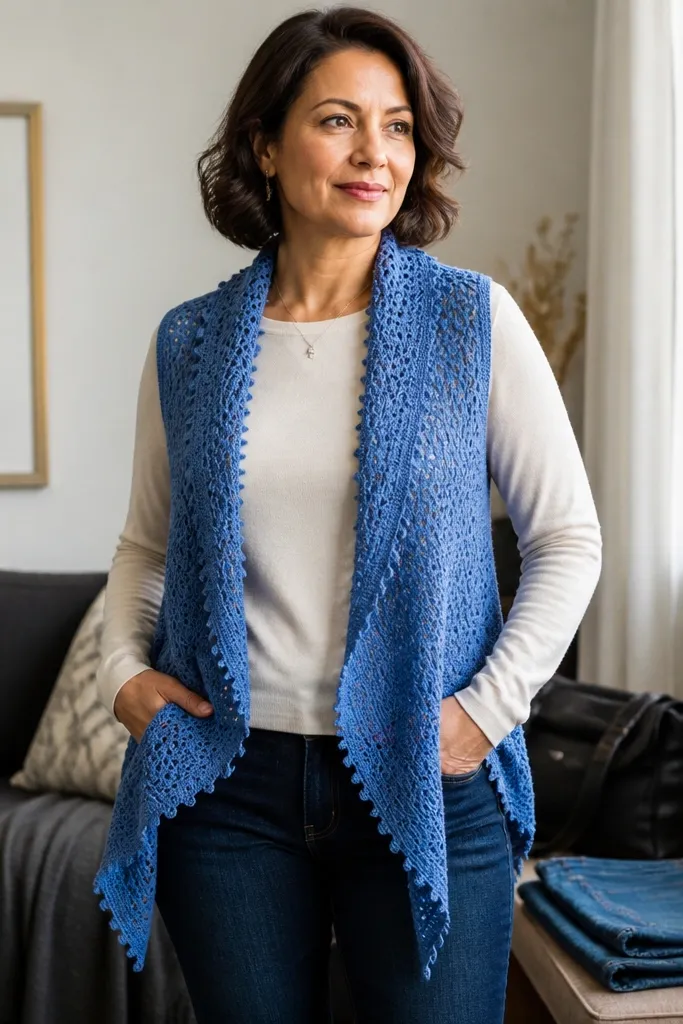
A waterfall vest is one of the best year-round crochet accessories ideas because it gives you movement without the bulk of a cardigan. The front panels drape open like a soft scarf, so it looks styled even with a plain tee. Cornflower blue makes it pop against denim, cream, and black, and the picot edge frames the whole piece so it photographs cleanly. This project also fixes a common crochet problem: stiff fronts. You’ll use a stitch pattern that stays airy and drapes, then finish with crisp edging so it still looks intentional. Skill level is easy-intermediate, and it takes about 6-10 hours depending on your row height and whether you want a longer drape.
Start by making a gauge swatch in your chosen stitch pattern (a light mesh or open shell works well) and measure how many stitches you get per 4 inches. For a one-size-to-most waterfall shape, crochet a back panel about 18-20 inches wide and 22-26 inches long, then make two front panels each about 12-14 inches wide and 22-26 inches long with a center “opening” that you’ll shape by skipping stitches every few rows. Add picot trim by crocheting a picot edge along the front opening and along the outer edge of each panel: chain 3, slip into the first chain, repeat at consistent intervals, then single crochet back along the edge to lock it in. Join front panels to the back at the shoulders, leaving the fronts open, and weave in ends with a tapestry needle so the picot edge lies flat. Block lightly by misting and pinning the picot trim so the points stay even and the drape looks smooth.
Pro tipUse a hook one size smaller for the picot trim than for the main fabric so the edge stays crisp and doesn’t curl.
AvoidAvoid crocheting the picot edge too loosely — it will ripple and ruin the waterfall shape in photos.



