
1. Central Vine with Thumb-Side Leaf Ladder
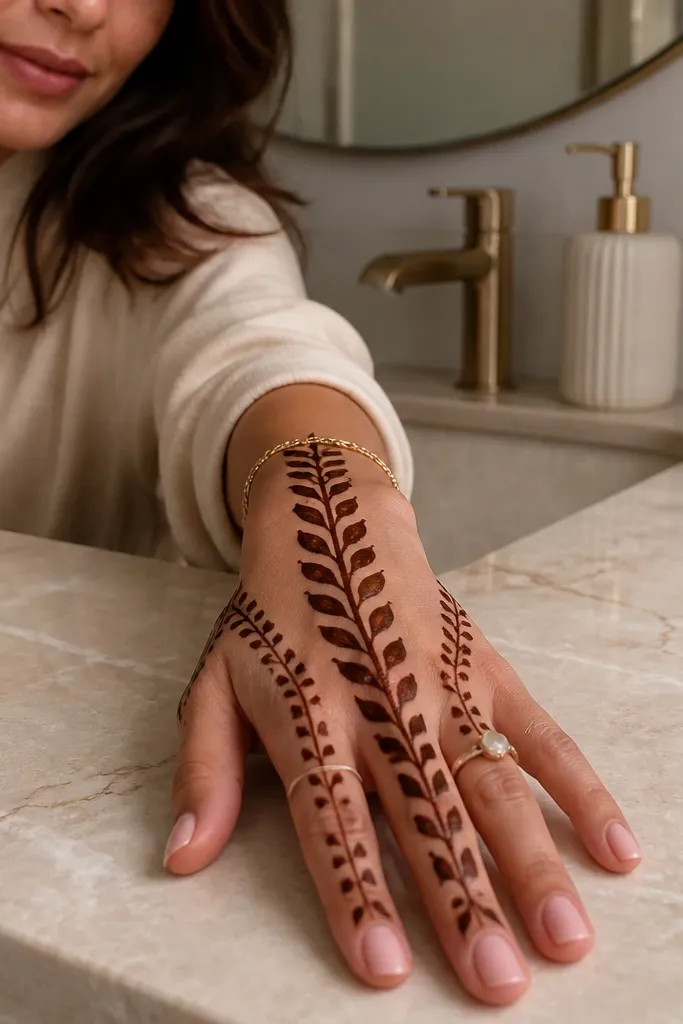
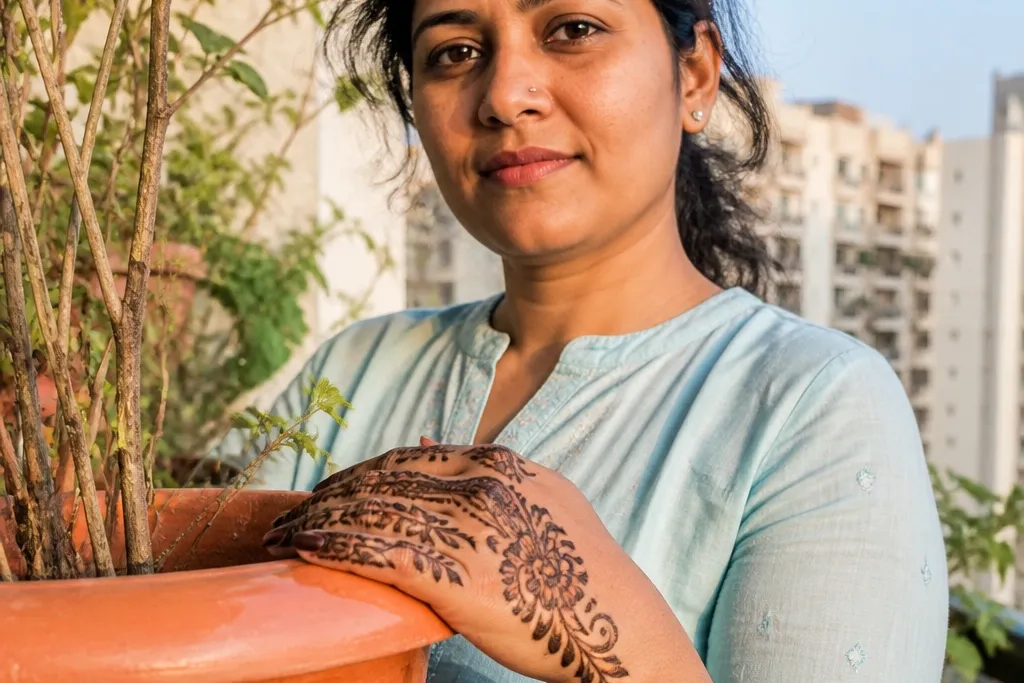
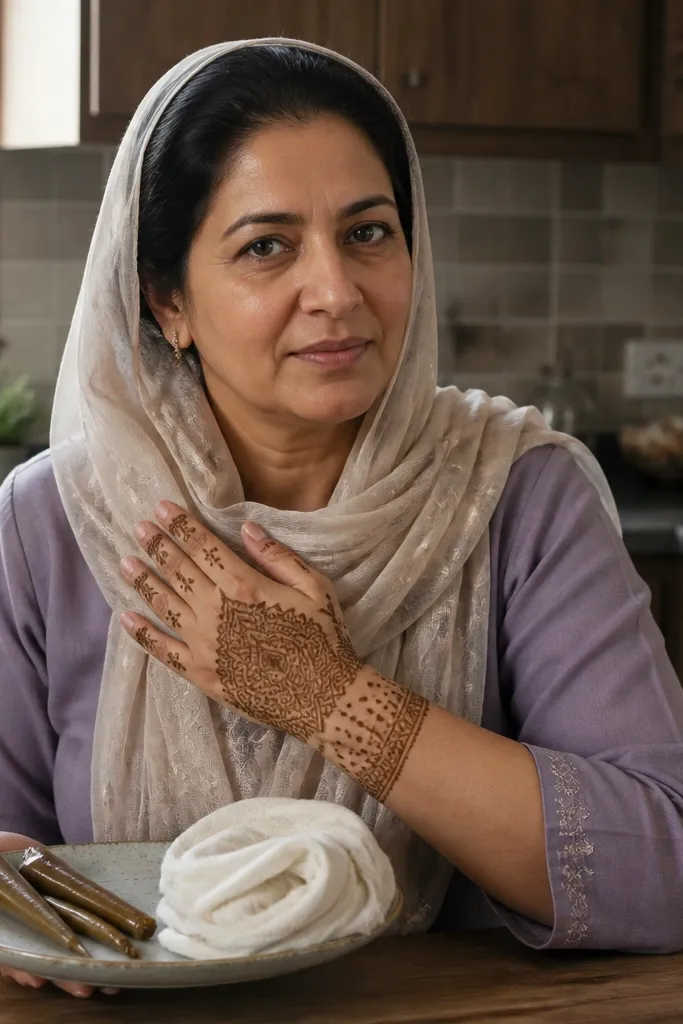
This design is the one I recommend when your back hand mehndi usually gets crowded. The central vine gives you a clear vertical rhythm, then the thumb-side leaf ladder creates a strong focal curve without weighing down the whole hand. Keep the vine slightly thicker than the side vines so it reads bold in photos. The leaf clusters are small and repeated, which makes the pattern look intentional even if your hand isn’t perfectly symmetrical. It’s beginner-friendly because you’re repeating one shape in different sizes, not inventing a new motif every few minutes.
Start by drawing a single vertical vine from the base of the fingers to the mid-wrist area. Then add 4 to 6 leaf units along the vine, keeping the leaf tips angled toward the thumb side. After that, place a thinner secondary vine on the opposite side with 2 to 3 tiny dots at the bends for sparkle. Finish by adding a thin wrist band with two lines and 3 small dot arches between them.
Pro tipIf your cone lines wobble, steady your wrist on a folded tissue and draw one continuous vine line before you stop.
AvoidDon’t fill every gap with paste — the design needs skin showing between leaf clusters.
2. Half-Moon Lace Frame Around the Back Hand
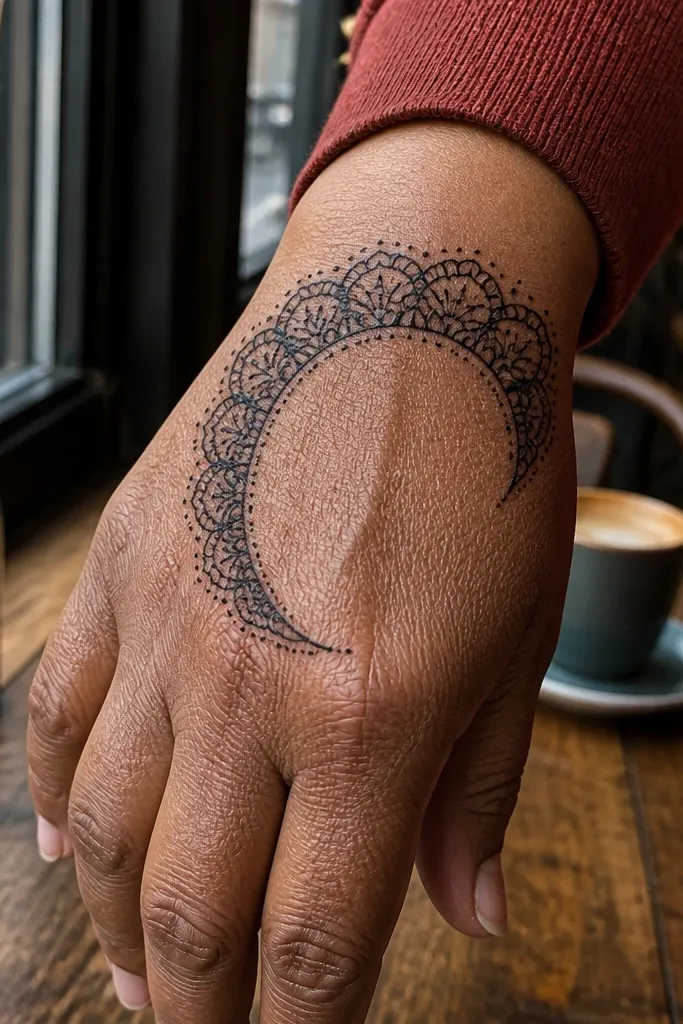
This is a clean, photogenic option when you want “aesthetic back hand mehndi designs” that look like lace. The half-moon frame outlines the back hand without covering the entire area, so it flatters the natural hand shape in photos. The trick is using tiny dot work inside the lace so the design looks delicate instead of heavy. It also hides minor unevenness because the border does the visual work. This one fits parties and festive events where you want something elegant but not time-consuming.
Begin by sketching a half-moon border that starts near the thumb base and curves toward the pinky base, stopping before the wrist. Then add two or three small scallop arches inside the border, spaced evenly. Next, connect the arches with thin vine lines and fill the open spaces with micro dots. Finish with a simple wrist line: draw a thin band across the wrist and add one row of tiny dots on top.
Use a toothpick to lightly guide spacing if your dots start to drift closer together.
Avoid wide, thick borders — they make the lace look like a block instead of airy frame.
3. Finger Base Rings with Open Center Star
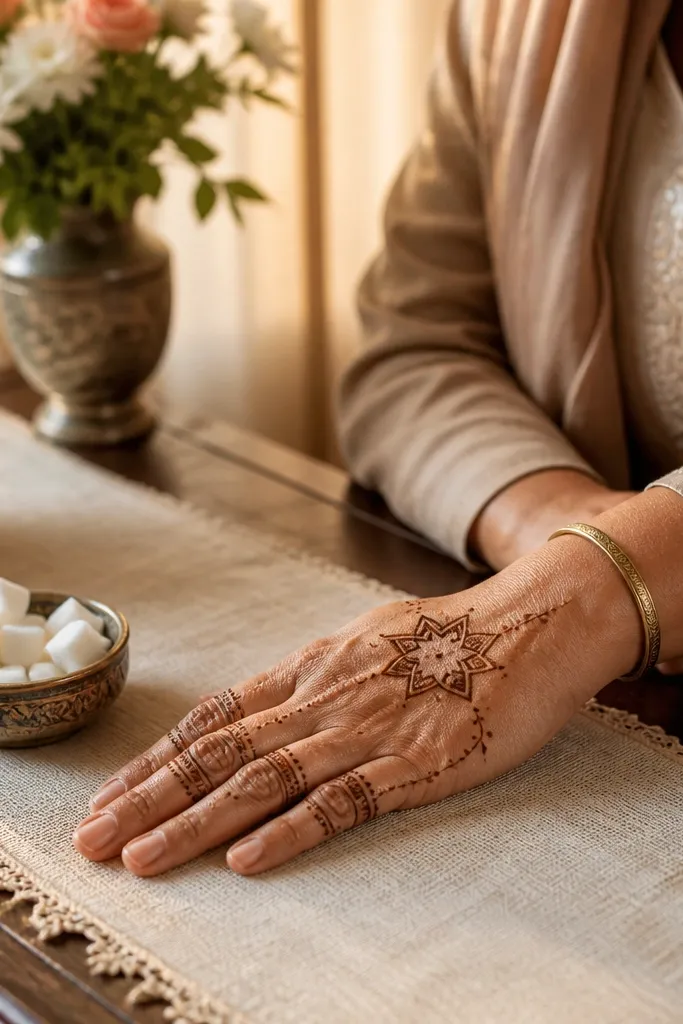
If you want a back hand design that looks balanced even when the fingers are relaxed, use finger base rings plus an open center star. The rings create a consistent pattern at the top where hands naturally show detail in photos. The center star acts like a clean focal point, and leaving the rest of the hand mostly open keeps everything looking modern. It’s also a great choice for shorter time because each ring motif is repeatable. You’ll get that “designed, not random” look quickly.
Start by placing 3 to 4 ring motifs at the base of the fingers, using a simple oval loop with a dot at each corner. Then draw a 5-point star in the center back-of-hand, keeping the star lines thin. Add thin vines from two star points that curve toward the rings. Finally, add a light wrist band with one central arch and two side dots to finish the flow.
Use a slightly thicker paste only for the ring outlines so the star stays airy.
Don’t overfill the star — keep it outlined and let skin show inside the star points.
4. Wrist Band + Diagonal Bow Vine

This pattern looks stylish because it uses diagonal movement instead of vertical symmetry. A wrist band anchors the design, while the diagonal bow vine pulls the eye across the back of the hand. The “bow” curls near the wrist add a soft, decorative touch that reads well in close-ups. It’s a strong pick when you want something that looks more designed than a basic vine. The spacing stays clean because the diagonal line limits how much you need to fill.
Draw a crisp wrist band first using two parallel lines across the wrist. Then sketch a diagonal vine that starts from the thumb side and travels toward the mid-back-of-hand. Add bow curls on the vine at 3 points by drawing two loops that meet at a small dot. Finish with 2 leaf sprigs on the diagonal vine, one above and one below the central bow curl.
Keep the diagonal vine thickness consistent; uneven thickness is what makes this design look messy.
Don’t place the bow curls too close together — 3 points looks intentional, 5 looks crowded.
5. Mehndi Feathers with Negative-Space Stem
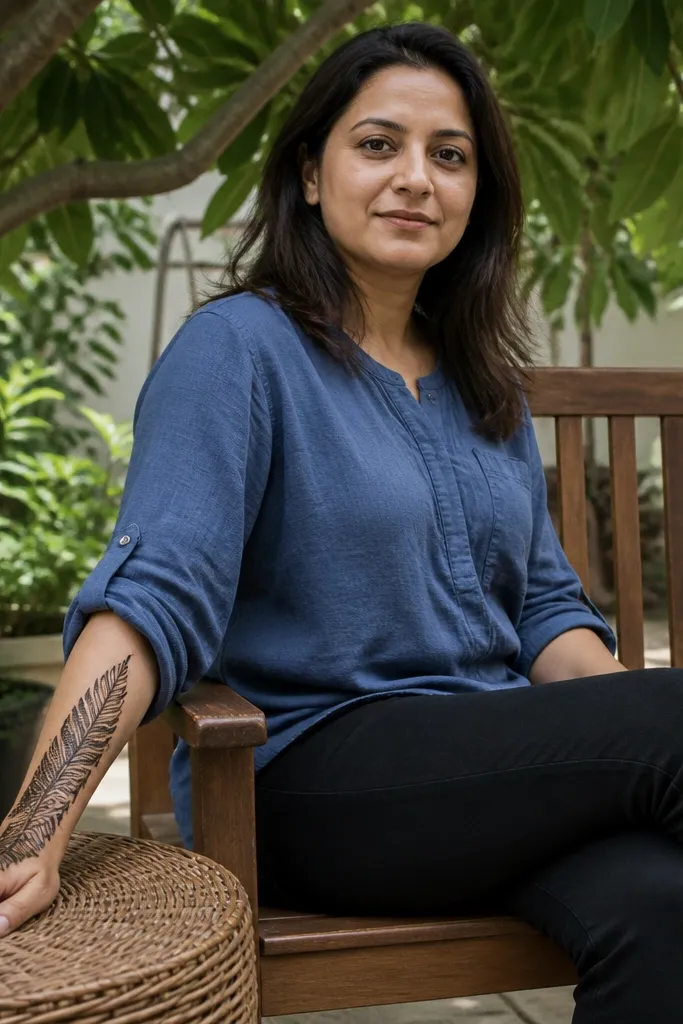
Feather motifs give you that airy, aesthetic back hand mehndi designs look without heavy shading. The negative-space stem keeps everything light and photo-friendly, especially because the feather slices naturally create contrast. This design suits people who want movement and elegance but don’t want a full lace cover. It’s also forgiving: even if one feather is slightly uneven, the repeated feather shape still reads cohesive. Expect a medium time commitment because you’ll repeat feather slices carefully.
Start with a single thin stem from the base of fingers down toward the wrist. Then draw 6 to 8 feather slices on one side of the stem, each slice as a curved teardrop with a pointed tip. Repeat on the other side with slightly smaller slices so the center stays open. Finally, add a thin wrist band with one row of tiny dots between two lines.
Pro tipBefore you commit, do one feather slice on paper to set the spacing and size you want.
AvoidAvoid filling every feather slice — leave the inside lines thin so the feathers don’t turn into a dark blob.
6. Geometric Blocks with Micro Dot Fill
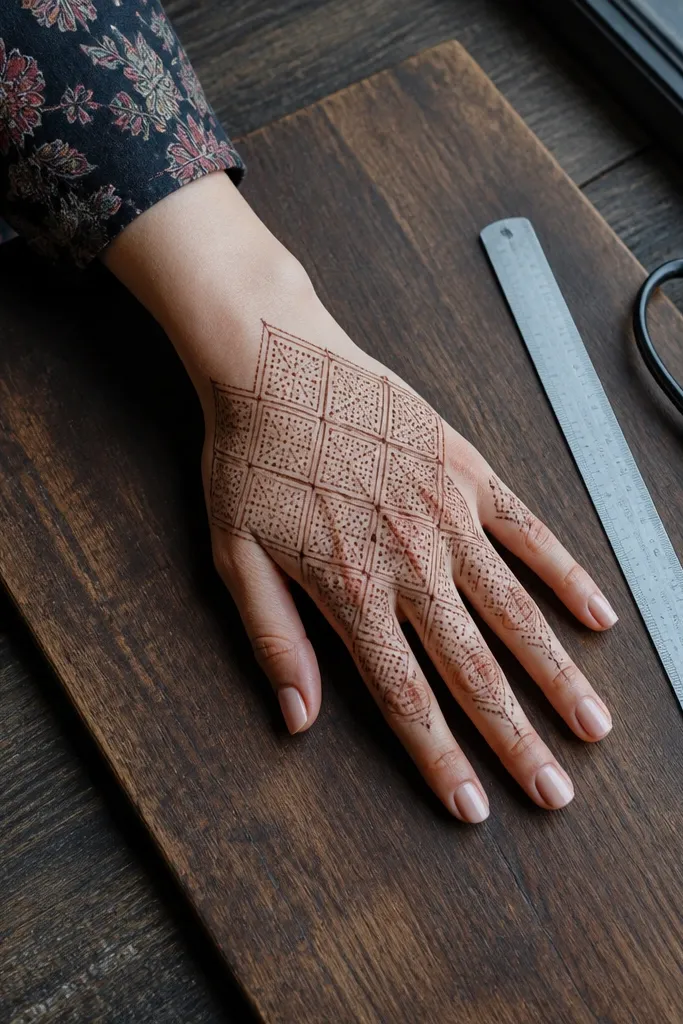
This one gives a modern, crisp look that photographs well because geometry holds shape. Outlined blocks keep your design readable, and micro dot fill adds texture without heavy coverage. It’s perfect for people who struggle with freehand vines because blocks are easier to repeat. You can keep it simple with 3 to 4 blocks and still look intentional. The negative space between blocks is what makes it aesthetic, not the number of motifs.
Sketch a grid-like layout: draw a light horizontal line across the mid-back-of-hand and a vertical line from finger base toward wrist. Then outline 3 large geometric blocks (triangles or rectangles) around the intersection. Fill each block with micro dots using a tight, consistent dot size. Finish by adding thin connecting lines between blocks and a simple wrist band of two lines.
Pro tipIf dots blur, squeeze less paste and draw slower — dot size is all about pressure control.
AvoidDon’t thicken the outlines everywhere; use thick lines only on the outer block edges.
7. Lotus Bud Cluster at Center
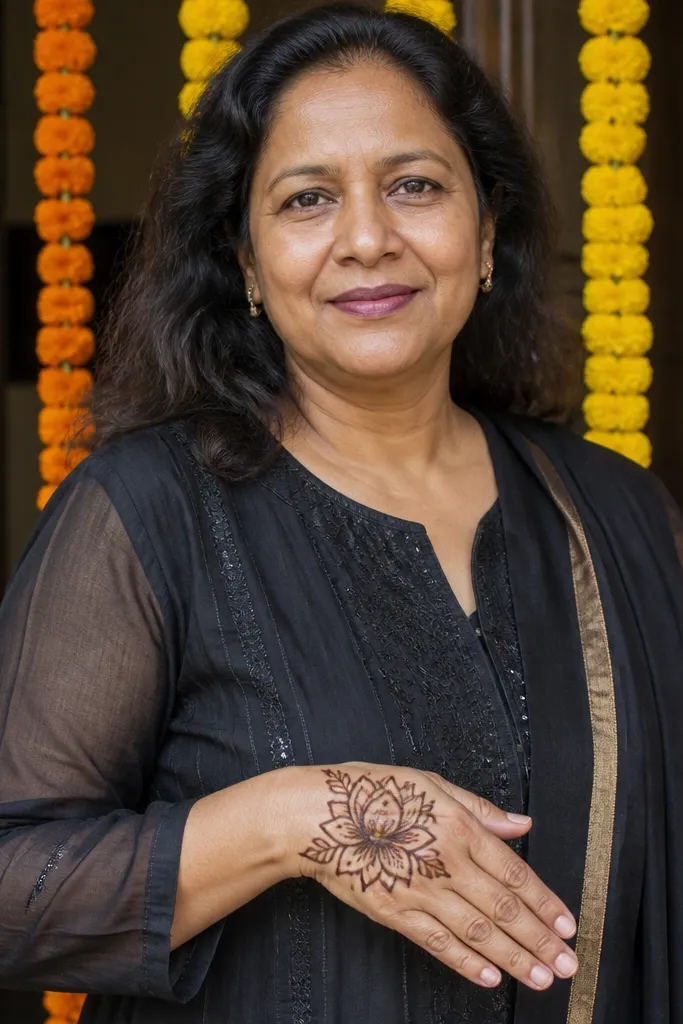
A lotus bud cluster is a reliable way to get a focal point that looks special without covering the whole hand. The center bud draws attention, while small surrounding leaves add texture and balance. This design is photogenic because the petals create natural layers and a clear silhouette. It suits festive wear, but it also works for bridesmaids who want something more delicate than full bridal coverage. Time is moderate because you’ll build petal layers in a repeatable pattern.
Start with a small circle in the center back-of-hand as the lotus core. Then draw 6 to 8 petal teardrops around it, each petal slightly overlapping the next. Add a second outer ring of petals with larger teardrops, keeping gaps so the core stays visible. Finally, place two side leaf clusters near the finger bases and add a thin wrist band with 3 dot arches.
Use a lighter hand on the outer petals so the center stays the darkest point visually.
Avoid making petals too uniform — slight size variation makes the lotus look real.
8. Twin Side Tendrils with Open Middle
This is the “clean and aesthetic” back hand design for people who hate heavy filling. Twin tendrils frame the hand, and the open middle keeps the look modern and breathable. The tendrils also create a flattering shape because they follow the hand’s natural curves. You’ll still get plenty of detail at the edges where photos catch light. It’s quick to execute once you’ve drawn one tendril pattern, since you just mirror it.
Draw a central guide line lightly from finger base to wrist. Then sketch two vines on either side of the guide, each vine starting near the thumb side and ending near the wrist band. Add leaf pairs along each vine at 4 points, keeping the leaves small and angled outward. Finish with a thin wrist band and two tiny dot clusters at the ends of the tendrils.
Pro tipMirror by measuring distances from the guide line, not by eye. Eye-mirroring is where people lose symmetry.
AvoidDon’t fill the open middle — if you add too much, you lose the aesthetic airy effect.
9. Back Hand Paisley Drops with Lace Weave
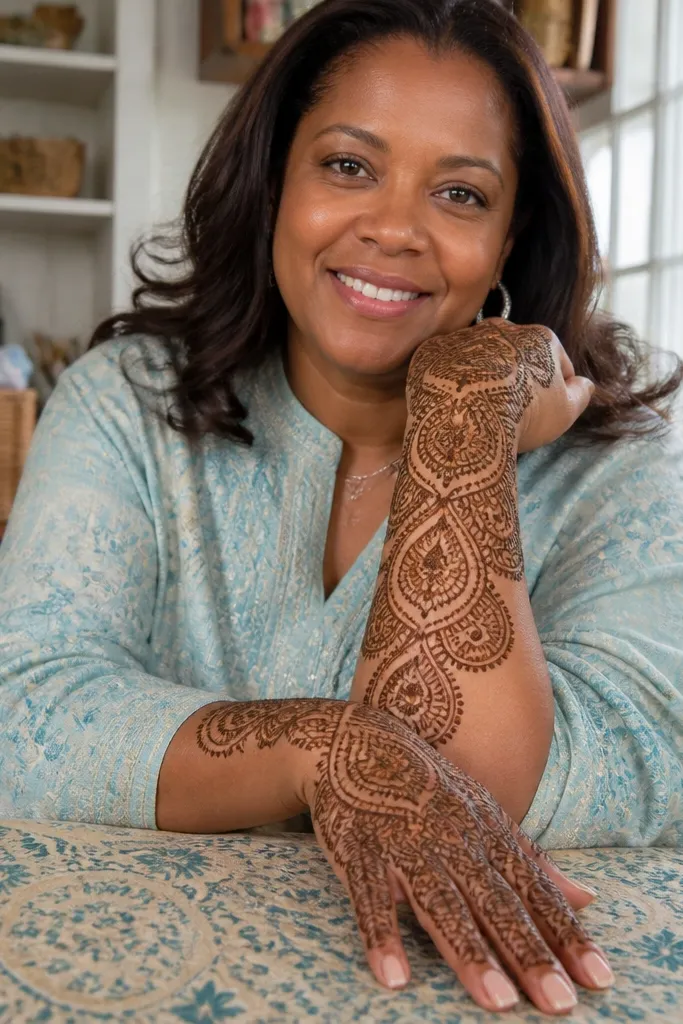
Paisley drops give you that classic mehndi language, but the lace weave makes it look fresh for photos. The trick is keeping the paisleys spaced so the weave lines show skin between them. This design is gorgeous for festivals because it looks detailed without needing a full sleeve. It’s also a good intermediate option because you’re combining two elements: drop shapes and thin connecting weave lines. Expect about 60-90 minutes depending on how small you make the paisleys.
Start by placing 3 paisley drops: one in the center and two on the sides, each with a teardrop outline and a small inner swirl. Then connect the tops and bottoms of the paisleys using thin curved lines like a loose net. Add micro dots at the weave intersections to make the pattern sparkle. Finish with a wrist band that has one central paisley half and two dot lines on each side.
Use one consistent paisley size. If one paisley grows too big, the weave stops looking balanced.
Avoid thick weave lines; thick connectors make the whole design look heavy.
10. Thumb-Cross Arrow Motif with Tiny Leaves

This design is playful and modern, built around a thumb-cross arrow motif that looks crisp in close-ups. The arrow gives you direction, and the tiny leaves around it soften the geometry. It’s perfect if your back hand mehndi ideas always look too floral or too vine-heavy. The pattern stays photogenic because the arrow lines are clean and the leaf sprigs are small, so the design reads as intentional. It’s also fast compared to full lace patterns.
Draw a small arrow shape near the thumb side of the back hand, pointing toward the center. Then add a second arrow line crossing it at the base, forming an X-like cross. Place 3 tiny leaf sprigs around the arrow — one above, one beside, one below — keeping them consistent in size. Finish with a thin wrist band and two dots near the wrist band ends.
Pro tipPractice the arrow point twice on scrap paper to get a sharp tip before you draw on your skin.
AvoidDon’t over-thicken the arrow. Thick arrows swallow the negative space and kill the clean look.
11. Finger Tip Dotwork with Open Arch Bridge
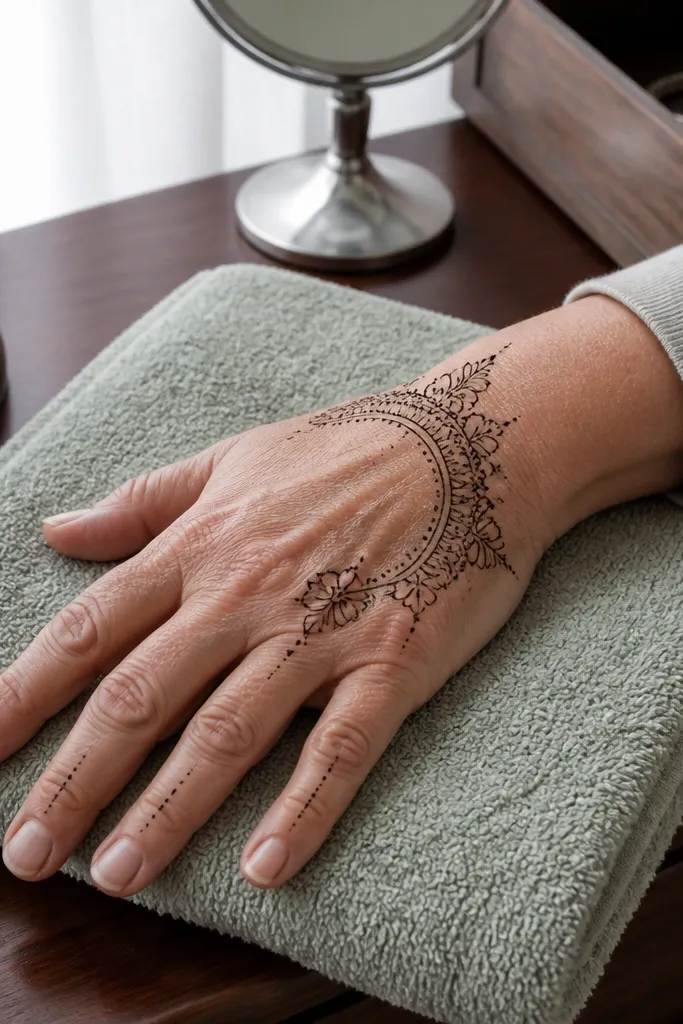
This is a delicate, aesthetic back hand mehndi design that focuses on the top area of the hand. Finger tip dotwork looks great in photos because it frames the fingers without covering them with heavy patterns. The open arch bridge connects motifs across the back hand, giving structure while keeping the center light. It’s a smart choice when you want something pretty but not loud. Time is short because dotwork is quick and repeatable.
Start by adding tiny dots at the base of each finger, about 3 dots per finger area. Then draw an open arch bridge across the back hand, from one side near the thumb base to the other near the pinky base, leaving the middle of the arch mostly skin. Add thin connecting lines from a couple dots to the arch so it looks tied in. Finish with a simple wrist line using two thin strokes and a small dot row in the center.
Use a slightly drier cone for dotwork so dots look crisp instead of smeared.
Don’t add too many arches. One strong arch looks clean; three makes it look tangled.
12. Wrist-to-Fingers Vine Cascade with Bead Dots
If you want the “flowy” look that still stays simple, go for a vine cascade. Starting at the wrist and moving up to the finger bases makes the design feel like it’s naturally growing. Bead dots along the vine add a polished, jewelry-like effect without heavy filling. This works for both short and longer sessions because you can stop once the cascade reaches the finger bases. The aesthetic comes from consistent line weight and tidy dot spacing.
Draw a thick vine line starting at the center of the wrist band and moving upward toward the finger bases. Add thin side offshoots every 8 to 10 mm, each offshoot ending in a small leaf or teardrop. Place bead dots along the main vine — aim for one bead every 12 to 15 mm. Finish by wrapping the vine ends into 2 to 3 small curls near the finger bases and add a thin wrist band around the starting point.
Keep your vine curve smooth. A jerky curve makes bead dots look random.
Avoid shading the whole design. Keep dots and outlines clean so the cascade stays airy.
13. Arabesque Corner Star with Side Petal Fans

This design looks upscale because it uses a star focal point anchored to one side, then balances it with petal fans. The corner star creates a strong diagonal visual, and the petal fans prevent the design from looking lopsided. It’s a good pick for photos because the star silhouette is easy to read even from a distance. You’ll also get a nice mix of sharp and soft shapes, which is what makes it feel “aesthetic,” not generic floral. Skill level is beginner to intermediate because the star is the only tricky shape.
Start by placing a small star near the center-top of the back hand, slightly toward the thumb side. Then draw two petal fans on the opposite side: 3 to 4 petals per fan, fanning outward from a thin base line. Connect the star to the fans using a short vine line with 3 to 4 bead dots. Finish with a wrist band that has one corner arc matching the star’s angle.
Pro tipFor the star, keep the points narrow. Wide points make it look like a flower instead of a star.
AvoidDon’t connect every petal with thick lines. Thin connections keep the design light.
14. Lace Grid Rectangle Over Back Hand
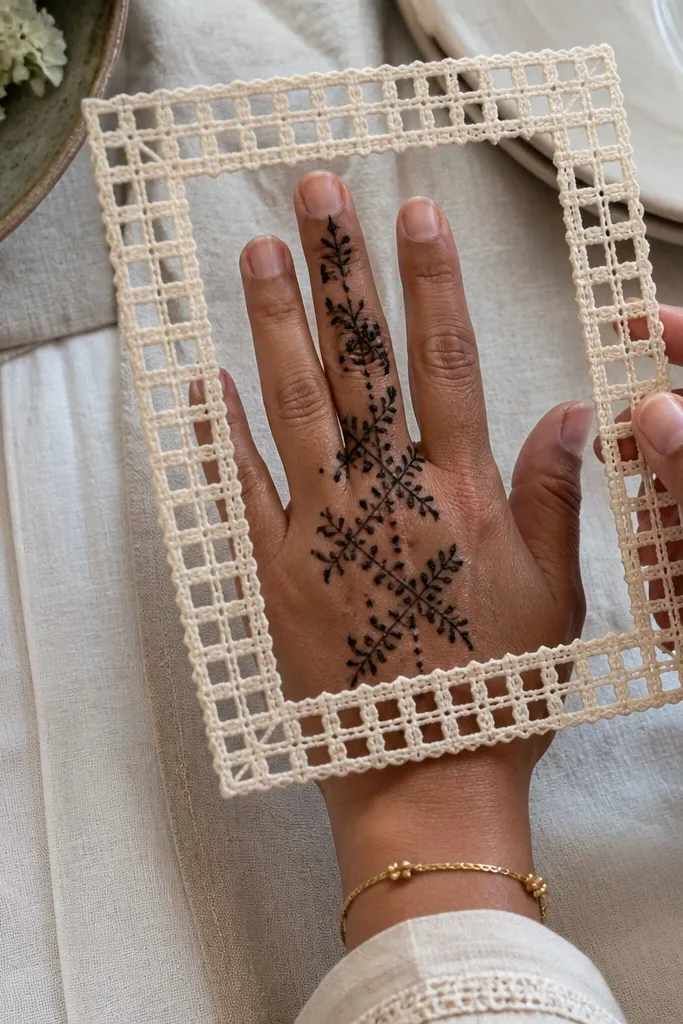
A lace grid rectangle is one of the most photogenic back hand layouts because it creates a framed “window” of mehndi. It looks neat even if your lines aren’t perfectly identical, because the grid structure does the organizing. Keep the rectangle slightly tilted so it follows the hand’s angle instead of looking like it was drawn straight across. Add fine connecting lines and micro dot corners for a delicate finish. This works for parties and festive dinners where you want your mehndi to look styled, not random.
Sketch a rectangle on the back hand, starting above the wrist and ending near the finger base. Draw a vertical center line inside the rectangle, then add 2 to 3 horizontal lines to create grid sections. Connect corners with thin vine loops and fill only the corner cells with micro dots. Finish with a thin wrist band that aligns with the rectangle’s bottom edge.
Tilt the rectangle by a few degrees toward the thumb side. That small tilt reads natural in photos.
Avoid filling the entire grid with dots — keep dots only at corners or small cells.
15. Bangle-Style Wrist Band with Side Spark Sprigs

This is a minimalist back hand design that still looks aesthetic because the wrist band is bold and the side sprigs add detail. Instead of covering the whole back hand, you focus on the wrist and let the sprigs reach upward just enough to frame the hand. It’s perfect when you want something clean for everyday festivals or when you’re short on time. The bangle effect comes from double lines and tiny dot accents that look like jewelry. It’s also a great choice if your skin tends to stain unevenly — fewer filled areas mean fewer surprises.
Start by drawing a double-line bangle across the wrist with a small gap between the lines. Add small dot clusters on the top line at 3 points and tiny leaf tips between them. Then draw two side sprigs: one toward the thumb side and one toward the pinky side, each sprig made of a thin vine with 3 tiny leaves. Finish by adding 1 to 2 micro dots near where the sprigs end on the back hand.
Let the bangle lines be slightly thicker than the sprigs. It gives clear hierarchy in photos.
Don’t extend the sprigs too far into the center. Keep them near the sides for a clean look.



