1. Wrist Vine + Three Paisleys
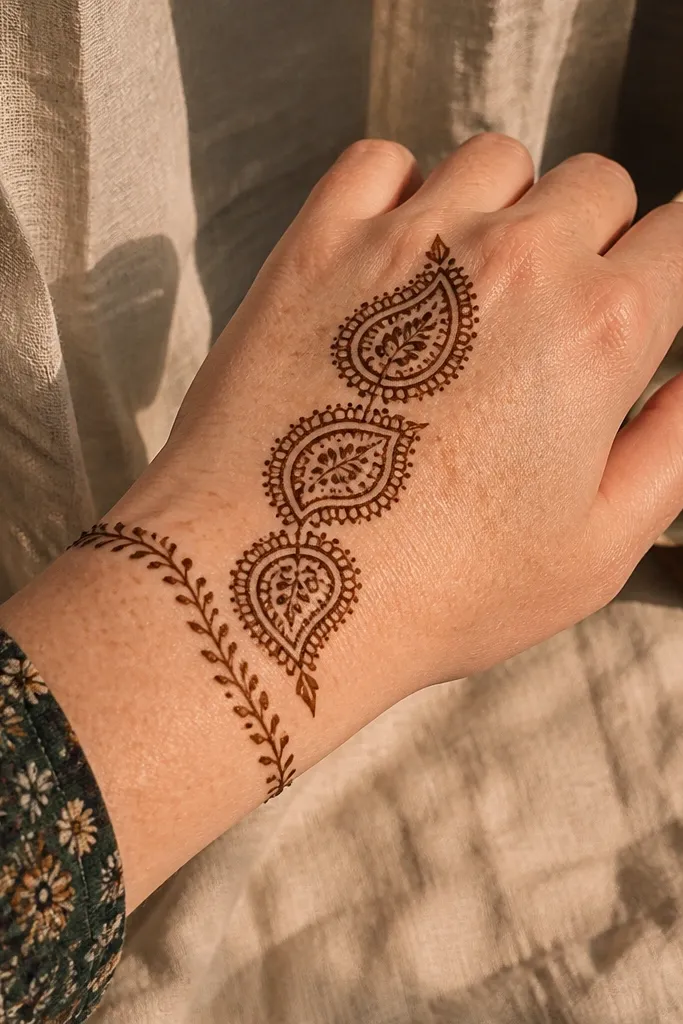
This is the beginner-friendly design I keep coming back to because it looks composed even if your lines wobble. A thin vine band across the wrist gives you a strong base, then three paisleys placed in a row create a clear focal point. The paisleys read well in photos because they have an obvious top and bottom, so your eye knows where the pattern is going. It’s also fast: you’re repeating one shape with the same spacing. Do it on the back of the hand for an easy, clean look that doesn’t crowd your fingers.
Start by drawing a straight-ish band across the wrist using a thin line with small leaf ticks every 6-8 mm. Then add three paisleys in the center of the back hand — one larger in the middle, two slightly smaller on the sides. Finish by connecting each paisley tail to the wrist vine with one short curved line so everything feels linked. Let it dry fully before you touch anything.
Keep paisley widths consistent by using the same number of dots in the inner swirl each time.
Don’t fill the paisleys solid; leave skin gaps so the design looks airy and sharp.
2. Finger Arch Trio with Tiny Dots
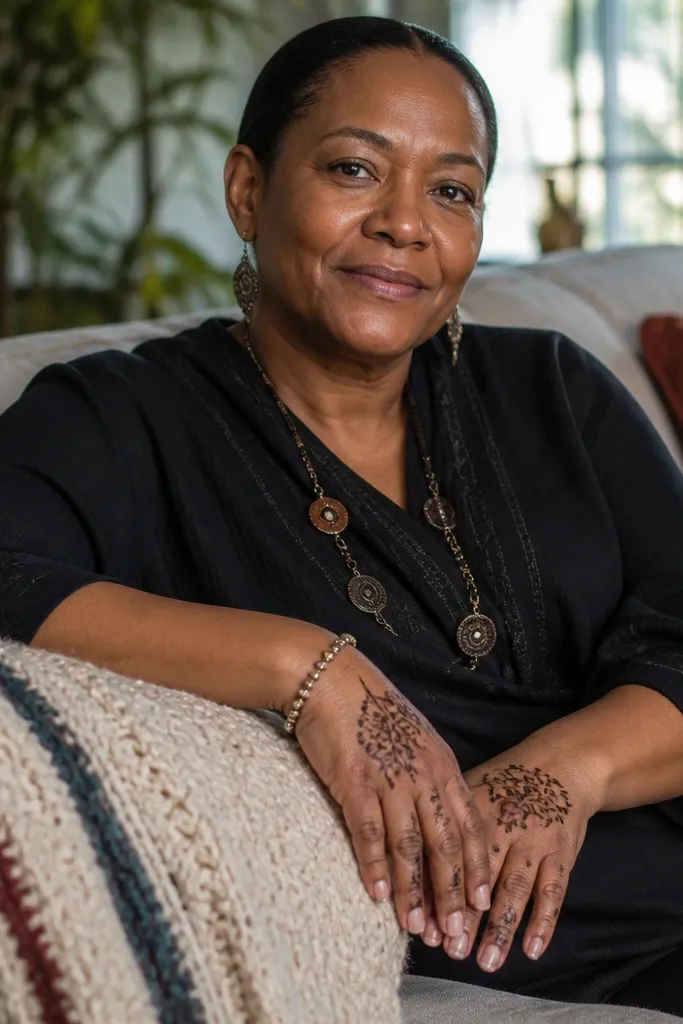
If you want your mehndi to look “done” without covering the whole hand, this one is a lifesaver. The finger arches create a frame that naturally makes hands look longer in photos. Tiny dot clusters between knuckles add texture without forcing you to draw big flowers. The symmetry is forgiving because you’re working with simple arcs that you can mirror across fingers. This design also suits short sessions because you can stop after the arches and still get a complete look.
Pro tipUse dot spacing as your guide — keep dots about the same distance apart each time.
Sketch three arch lines over the finger bases on the back of the hand, one for each of the middle fingers. Place small dot clusters (3-5 dots) at the peaks of each arch and add one dot at each side of the arch line. Connect the arches back toward the center with a single thin curved line. Finally, add a micro dot border along the outer edge of the arches.
AvoidDon’t make the arches too thick or they turn into smudgy blobs on camera.
3. Half-Moon Wrist Fan
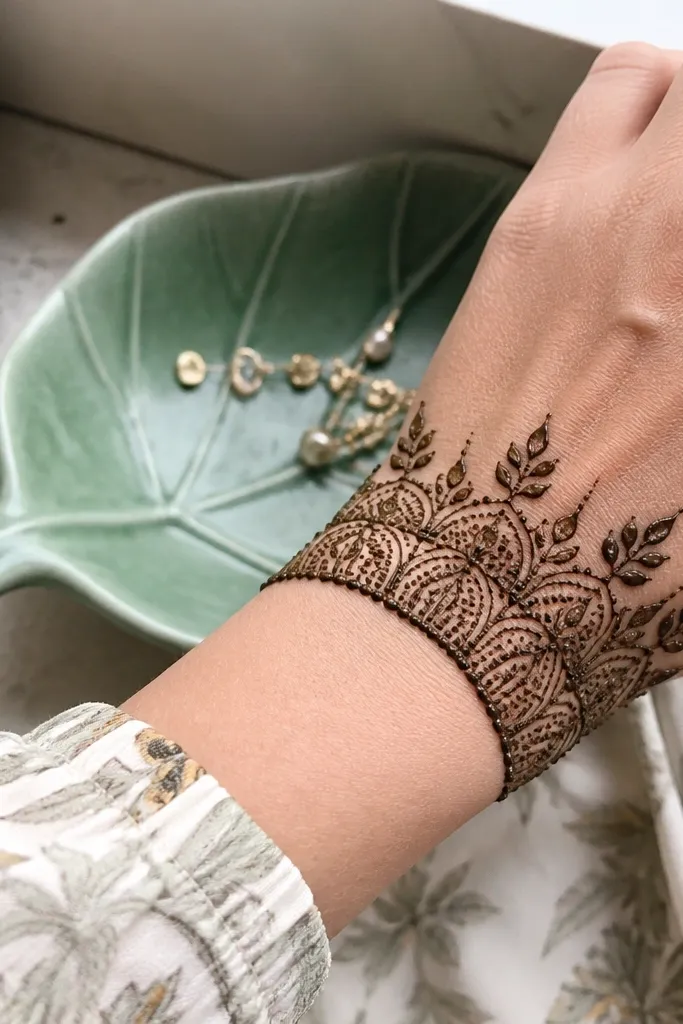
This design looks elegant without being hard because the shape is already decided for you. A half-moon fan from the wrist spreads outward with leaf tips, so even a beginner gets a clear, photogenic curve. The dot work between leaves adds contrast and keeps the pattern from looking flat. It’s also great for events where you want the mehndi to show clearly but don’t want heavy coverage. Do it on the wrist and lower back of hand for a clean, seasonal look.
Pro tipIf your curve looks shaky, draw light pencil guide dots first for spacing, then ink over them.
Draw a curved half-moon outline starting at the wrist crease and sweeping toward the outer edge of the hand. Fill it with 8-12 leaf tips by drawing short teardrops along the curve, each one pointing outward. Add a dot between every two leaves, then connect the base of each leaf to the wrist line with a short stem line. Let it dry and avoid moving your wrist until it sets.
AvoidSkip overfilling — too many leaves makes the fan look busy instead of crisp.
4. Back-Hand Grid with Micro Diamonds
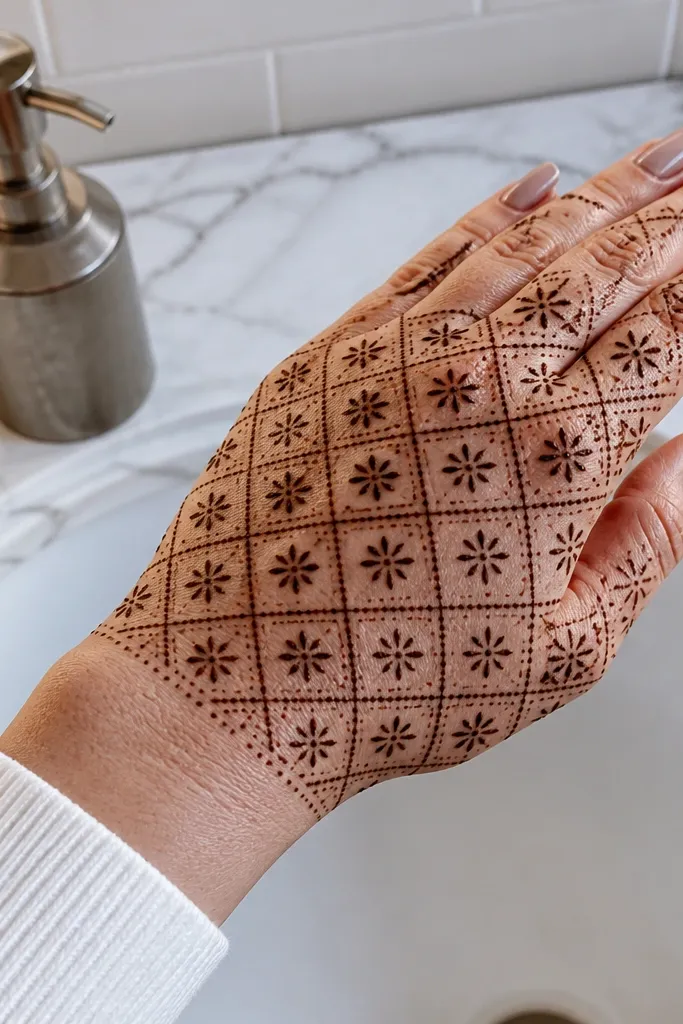
Grids are the fastest way to make beginner mehndi look “planned.” This design uses a simple grid on the back of the hand, then fills each cell with tiny diamond shapes so the whole piece looks neat. The diamonds keep the pattern readable in close-up photos because they create consistent edges. You’re not relying on perfect freehand flowers — you’re repeating a construction. It’s a great choice for a busy holiday day because it still looks structured even when you rush.
Start with a central vertical line from wrist to knuckle area, then add two horizontal bands — one mid-hand and one near the finger bases. Create a light grid by drawing short connecting lines between bands. In each grid cell, draw a micro diamond outline and close it with a dot at the center. Finish by adding a thin border line around the grid area.
Keep diamonds the same size by counting the same number of strokes per cell.
Don’t press too hard with the cone on the grid lines; thick lines kill the clean look.
5. Simple Lotus on the Back of the Hand
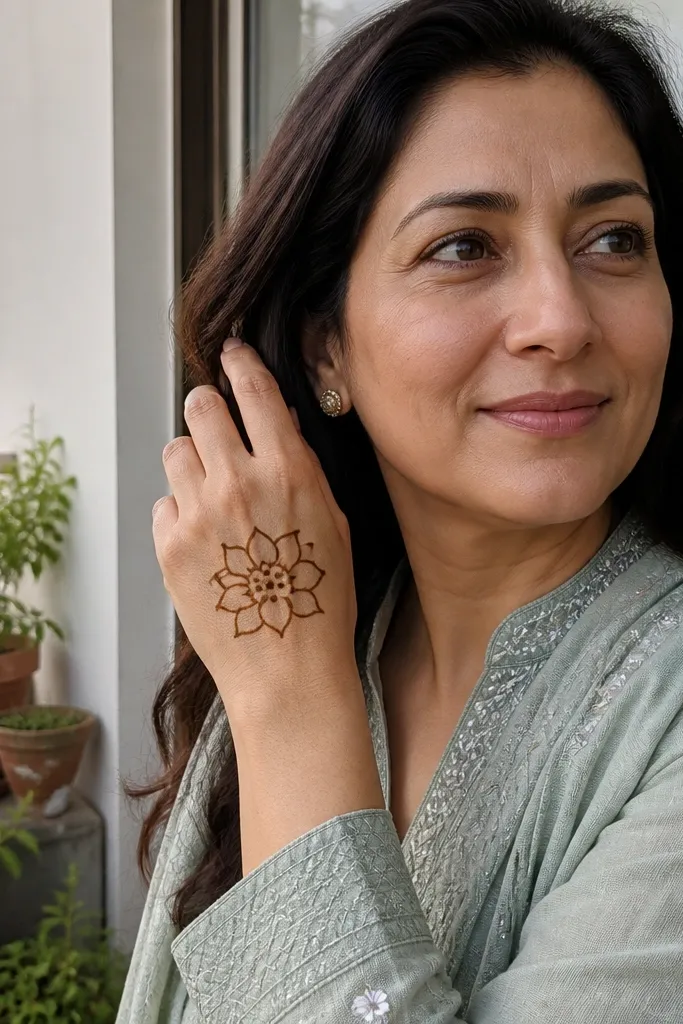
A single lotus is one of the best “anchor” designs for beginners because it gives you a focal point to build around. Draw a lotus with 6-8 petals, keep the petals thin, and add a dot cluster in the center. Then leave space on the sides so your hand doesn’t look overcrowded. This works beautifully for seasonal looks because the lotus reads festive without needing heavy filigree. If you want something that looks intentional in one glance, this is the move.
Pro tipUse the same petal size for all petals — one mismatch makes the lotus look off.
Draw a small circle in the center of the back of the hand. Around it, draw 6-8 thin teardrop petals that touch at their bases but leave skin gaps between petals. Add a dot and tiny curved strokes in the center circle to make it look layered. Finish by adding two short leaf vines on each side of the lotus, pointing toward the wrist.
AvoidDon’t fill the petals solid; outline-only keeps the lotus airy and photogenic.
6. Straight-Line Bracelet with Side Arches
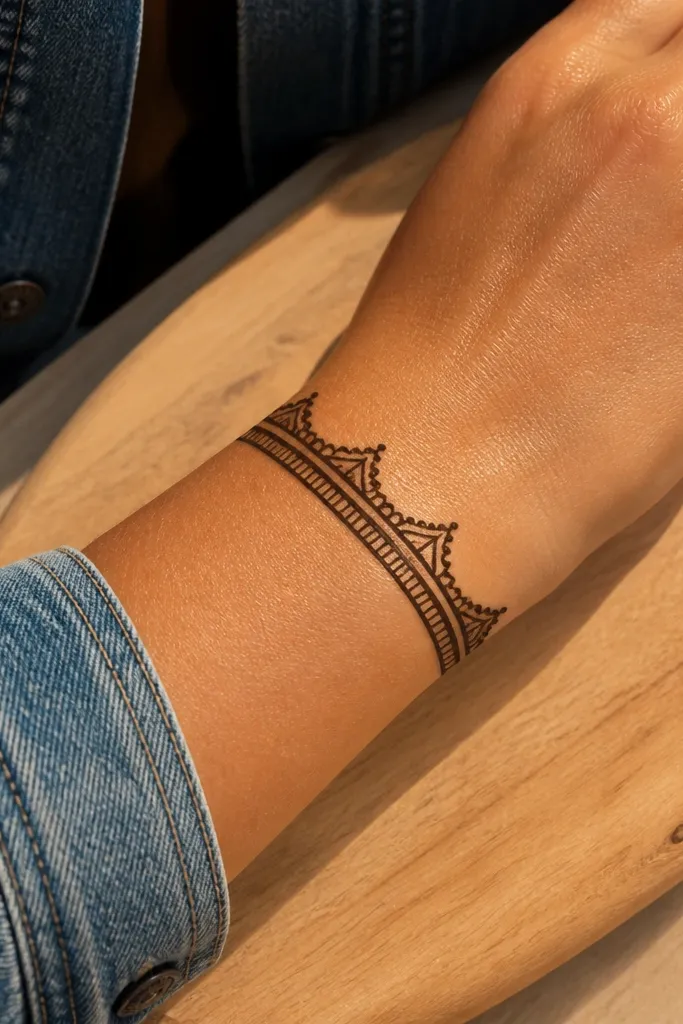
This is a clean, modern design that still looks festive. The straight bracelet band gives a sharp edge, and the side arches create movement without requiring big artistic skills. It’s perfect for people who want mehndi that doesn’t get too floral and still looks good in photos. The contrast between the solid band line and airy arches makes the pattern readable. You can do it in one short sitting and still get a full-looking wrist area.
Pro tipKeep the bracelet band gap consistent; it’s what makes the design look neat.
Start by drawing a straight band across the wrist using two parallel lines with a small gap between them. Fill the band line gap with tiny dots or short dashes every 5-7 mm. On the outer side of the band, add 3-4 small arches that reach toward the back of the hand. Connect each arch to the bracelet with one thin curved line so it looks attached.
AvoidDon’t add too many arches — 3-4 is enough to keep it balanced.
7. Teardrop Border on Fingers
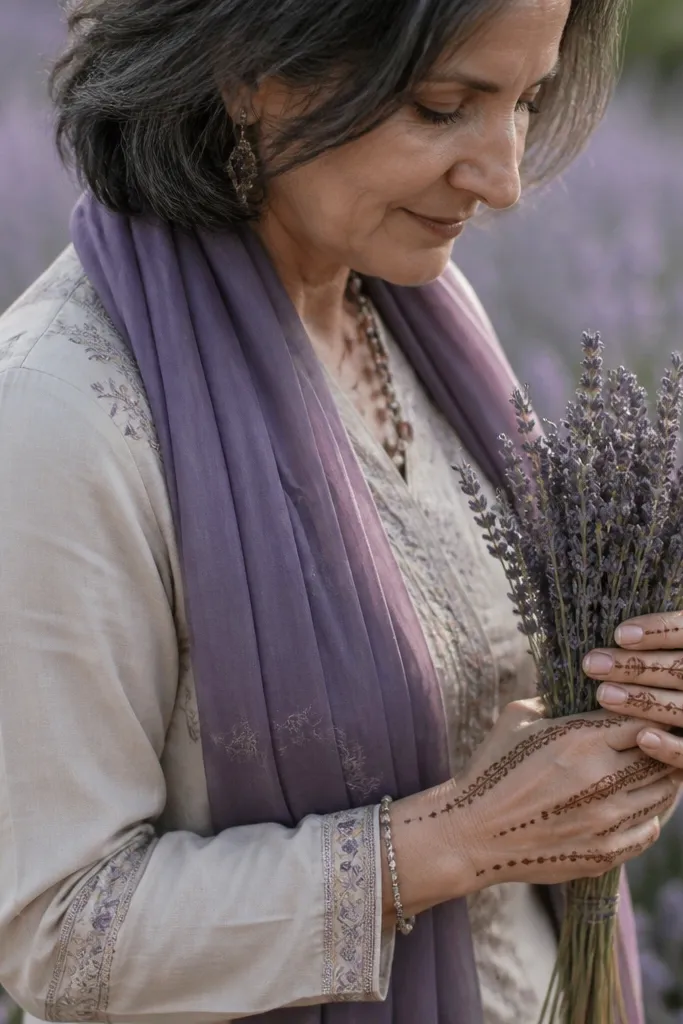
This design frames your fingers, which is exactly what makes simple mehndi look dramatic. A teardrop border along the sides creates a lace-like effect without filling the entire finger. Small dots near the knuckles add sparkle and help the pattern read clearly at different angles. It’s also easy to scale: you can do it on one or two fingers for minimal coverage or repeat on all fingers for more impact. Great for holiday season because it looks delicate but still festive.
Outline the sides of each finger on the back of the hand with a thin line that follows the finger length. Every 8-10 mm, add a small teardrop facing outward from the line. Place 1-2 dot clusters near the knuckle area to break up the spacing. Finish by connecting the teardrop border to a tiny central line near the finger base.
Draw the border first, then add teardrops one by one so spacing stays even.
Don’t overfill the finger sides; the negative space is what makes it look delicate.
8. Tiny Flower Chain Across Knuckles
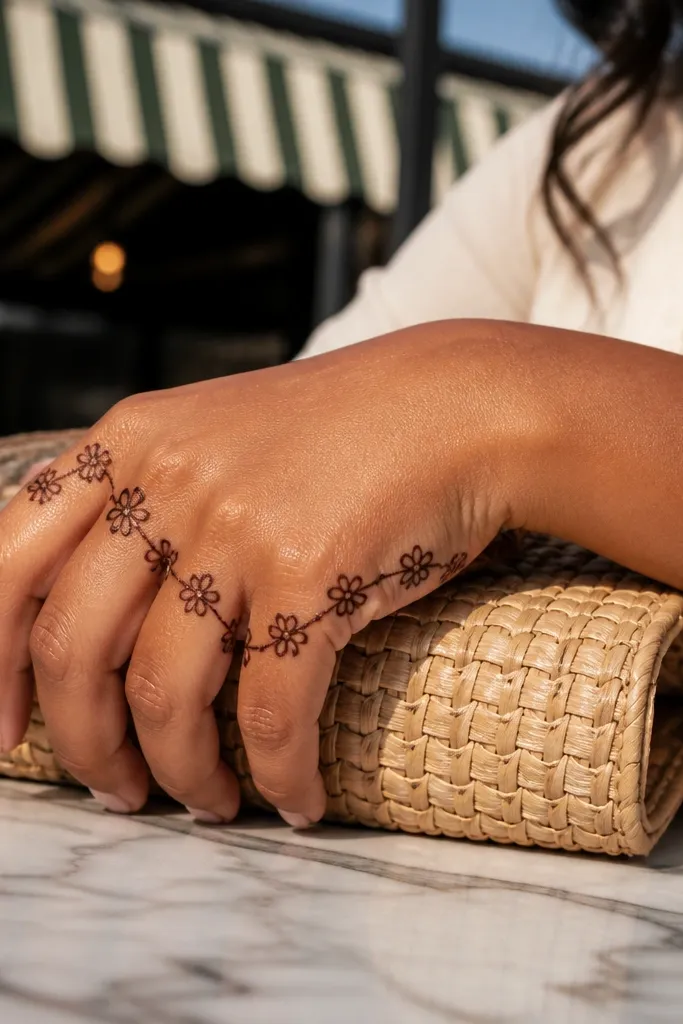
If you want a pattern that looks busy in a good way but stays beginner-friendly, use a flower chain. Tiny flowers in a row create a rhythm across the knuckles, and the connecting lines tie it together. This design looks great on short nails and makes the hand look more decorated without heavy coverage. It also photographs well because the flowers are small, clear shapes with consistent centers. Great for holiday parties where you want a neat, eye-catching hand.
Pro tipUse the same petal count for every flower — 5 petals keeps it uniform.
Draw a thin horizontal line across the knuckle area where you want the chain to sit. Add tiny 5-petal flowers along the line, spacing each flower about one finger-width apart. Put a dot in the center of every flower, then connect adjacent flowers with a small curved line. Finish by adding two or three extra dots above and below the chain for contrast.
AvoidSkip large leaves in this design; they make it harder and blur the chain.
9. Ring Finger Oval with Dot Halo
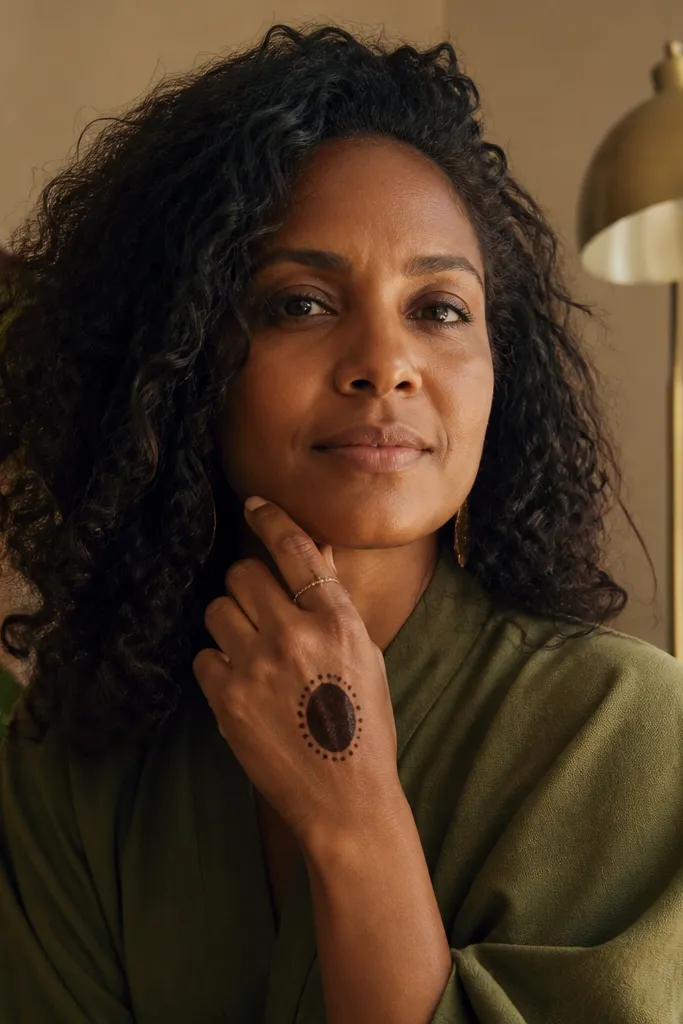
This is a simple “jewelry” design that makes the finger look styled. The oval sits like a ring centerpiece, and the dot halo around it creates a clean glow effect in photos. Because it’s only one shape, beginners can focus on line consistency instead of covering the whole hand. It looks great for seasonal celebrations because it gives a festive feel without needing a full bridal-style layout. Pair it with a light wrist band and you’ll still look polished.
Pro tipKeep the oval outline thin; thicker outlines make the halo look messy.
On the back of the ring finger, draw a vertical oval about 2-3 cm tall using a thin line. Add a dot halo by placing small dots around the oval edge, keeping the dots evenly spaced. Connect the oval to the finger base with one short curved line. Fill the oval center with 3-5 tiny dots or a small swirl, then let it dry.
AvoidDon’t let the dot halo touch the oval line everywhere — keep a slight gap for a crisp ring look.
10. Diagonal Vine with Three Leaves
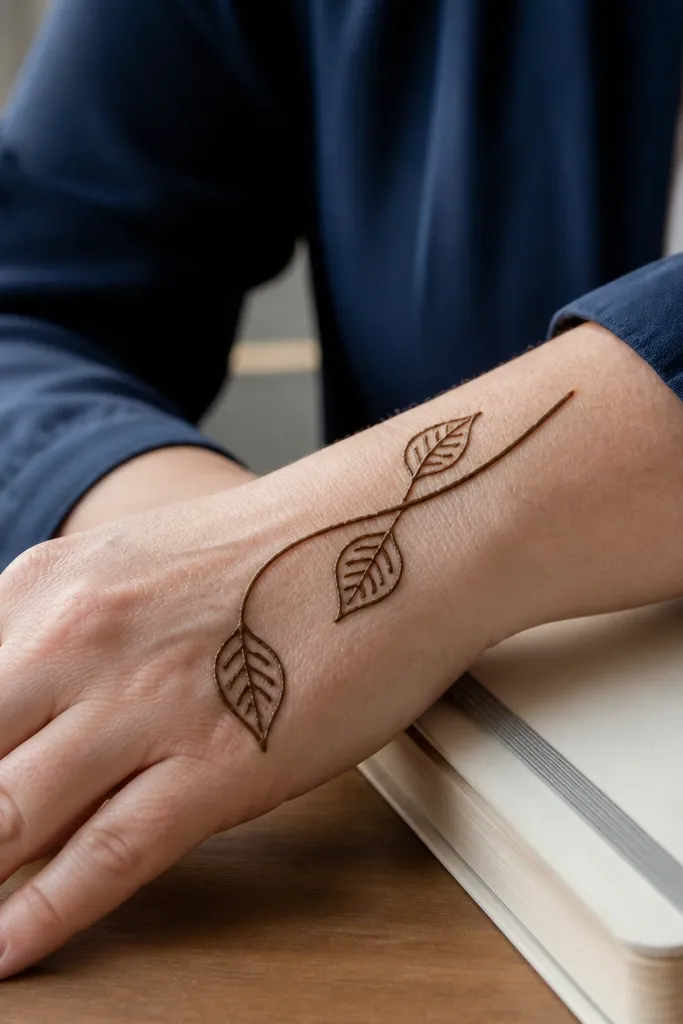
Diagonal patterns look styled because they break the straight lines of your hand. This design uses one diagonal vine that runs from the wrist toward the center of the back hand, then adds three leaves spaced along the vine. The leaves are simple teardrops with a center stem, so you don’t need advanced floral skills. Dots between leaves add contrast and make the vine feel fuller. It’s a great option when you want something photogenic but still quick and clean.
Draw a diagonal line from the wrist crease toward the middle of the back hand, slightly curved to match your hand shape. At three points along the line, draw leaf teardrops — each leaf should have a center line. Add 2-3 dots between leaves to fill the gaps. Finish by adding one short connecting line from the vine to the finger base area.
Match leaf sizes to the spacing — bigger leaves go with wider spacing.
Don’t add extra vines; one diagonal line is the whole point of keeping it simple.
11. Paisley Stack on the Center Back
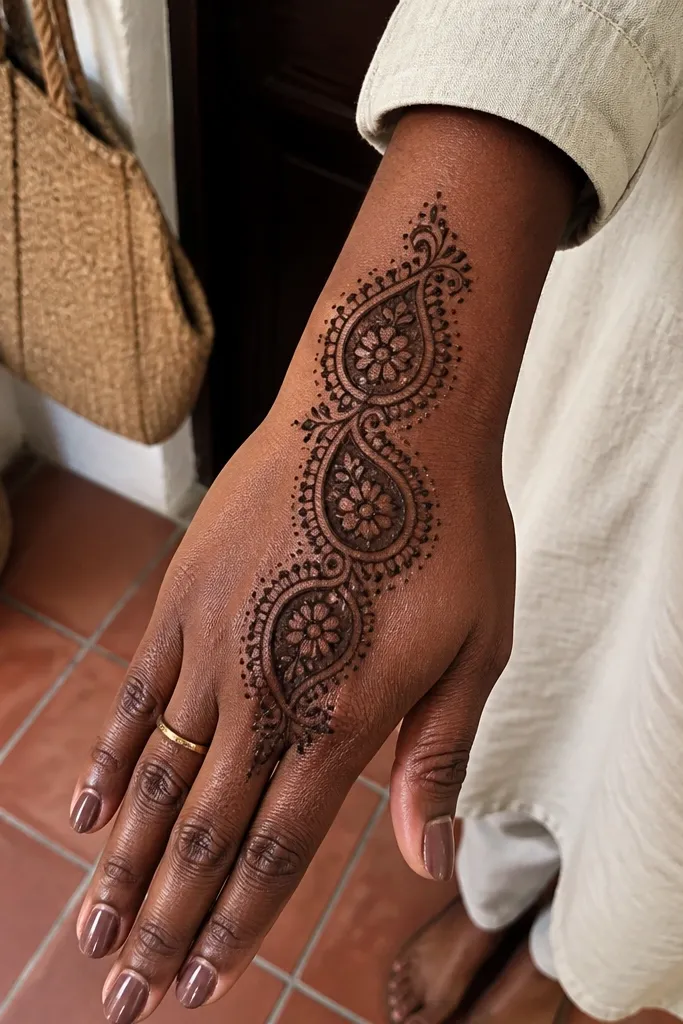
This is a bold, photo-friendly design because it stacks a clear motif in the center. Three paisleys aligned vertically create a strong focal line from wrist to knuckles. The dotted accents around the paisleys prevent the center from looking flat. Beginners like this because you’re repeating one shape with a predictable placement. It also works well for holiday season because the paisley look reads festive without needing heavy filigree.
Start at the wrist area by drawing the first paisley in the center of the back hand, keeping it medium-sized. Add the second paisley above it, slightly smaller, and a third paisley at the top near the finger base. Place 3-4 dots around each paisley — one on each side and one near the top swirl. Add a thin vine connection line between paisley tails so the stack looks intentional.
Use a tiny dot at the start point of each paisley so your placement stays centered.
Don’t rush the paisley inner swirl; uneven swirls make the whole stack look shaky.
12. Minimal Sunburst Wrist
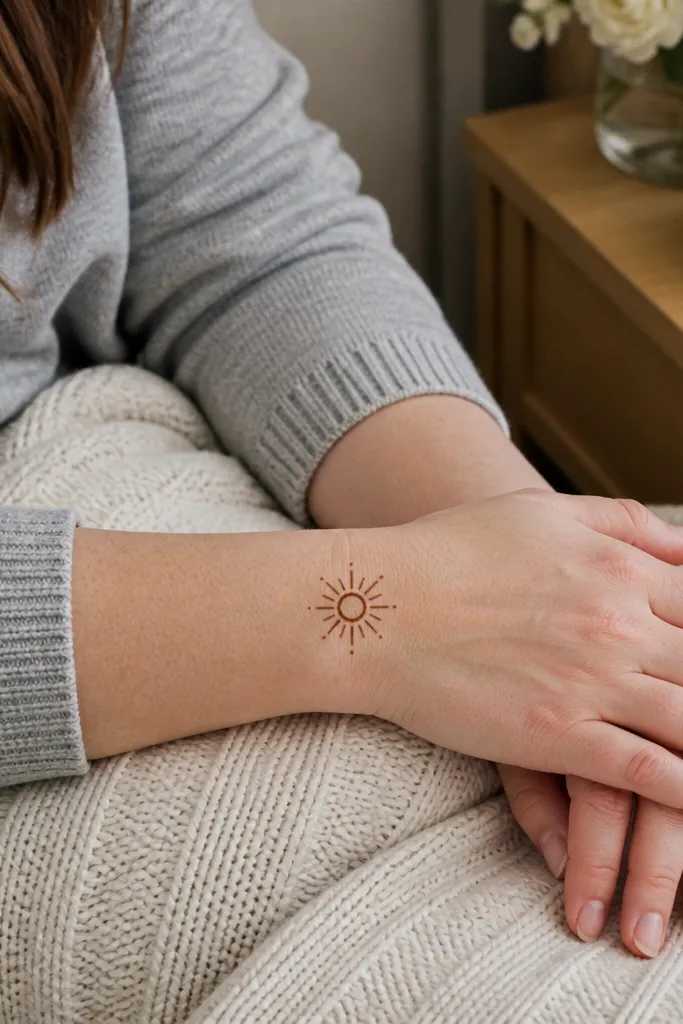
Sunburst designs look festive fast because the rays create instant energy in photos. This one stays simple: a small center circle with short rays around it, plus dots near the ray bases. It’s ideal for beginners because you’re drawing repeated straight-ish strokes rather than complex curves. Keep it on the wrist and a small portion of the back hand so it doesn’t crowd your fingers. Great for holiday events where you want something cheerful and clean.
Pro tipIf rays look uneven, count them out loud while drawing so you don’t skip one side.
Draw a small circle on the wrist center line. Add 10-14 rays around it using short lines that angle outward. Place a dot at the base of every other ray, then connect the outer tips with a faint curved line to form a soft ring. Finish by adding two small curved strokes on each side of the sunburst.
AvoidAvoid long rays that reach the knuckles; they make the design feel uncontrolled.
13. Crescent Moon Side Panels
This design makes a simple hand look fancy because it uses framing. Two crescent moons on the sides of the back hand create a symmetrical panel look, while a thin border line keeps it neat. The center can stay lighter, so you don’t feel pressured to fill every gap. It’s also forgiving for beginners because crescent shapes are easier than freehand flowers. Photogenic? Yes — the side panels catch light and read clearly from a distance.
Pro tipKeep the crescent opening facing the center for instant symmetry.
Draw a thin vertical line in the center of the back hand as your placement guide. On both sides, draw a crescent moon shape — thick outline but leave a gap inside each crescent so it looks airy. Add 3-4 dots along the inner curve of each crescent. Finish by drawing a thin curved border line around the panel area near the wrist and finger bases.
AvoidDon’t fill the crescent completely; the empty inner space is what makes it look clean.
14. Dotty Corner Mandala
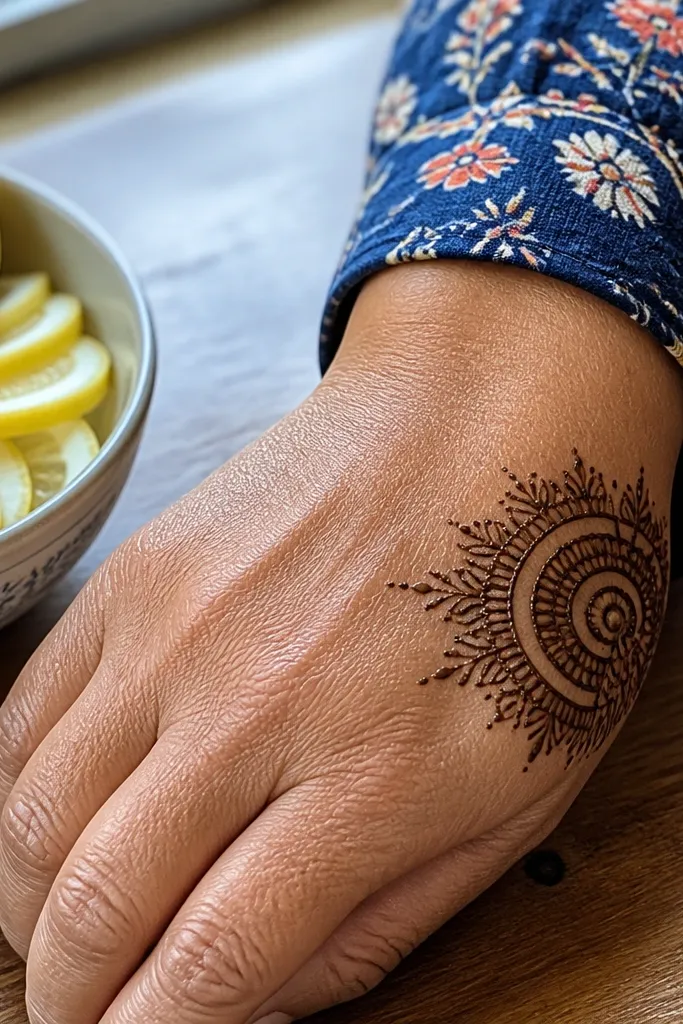
If you like something cute but not heavy, a corner mandala is the answer. Instead of filling the whole hand, you place a small mandala in one corner of the back hand and repeat tiny loops and dots around it. This keeps the design beginner-friendly and makes it look intentional because the placement is clear. The dot work gives texture and helps the mehndi look darker in photos as it dries. Perfect for holiday season because it reads festive without taking over your whole hand.
Pick one corner of the back hand near the thumb side. Draw a tiny circle and surround it with 8-10 small loops like teardrops pointing outward. Add dots between loops, then add a second small circle inside the first with a dot in the center. Finish by connecting the outer loops to a short curved line that fades toward the wrist.
Use small loop sizes consistently — it keeps the mandala from looking lopsided.
Don’t place the mandala too close to the wrist crease; it smears more easily there.
15. Simple Chevron Bracelet
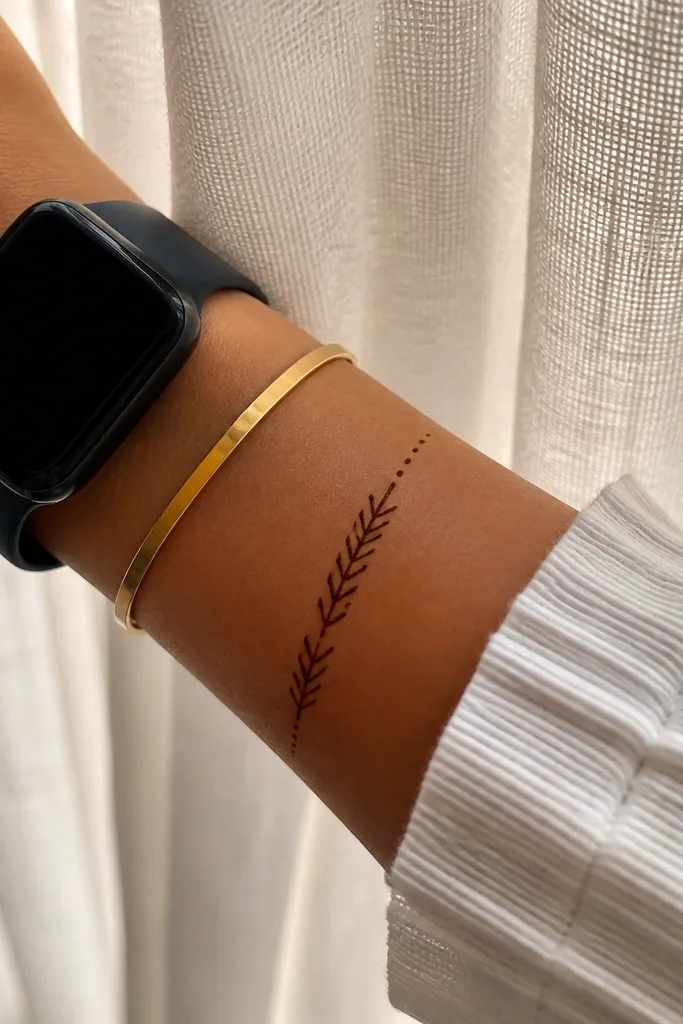
Chevron looks sharp and graphic, which is why it’s so photogenic. This design uses a wrist bracelet made of small V shapes, then adds thin side lines and a few dots for balance. It’s a good choice when you want a seasonal look that isn’t floral. Beginners can handle chevrons because the pattern repeats in a straightforward rhythm. Keep it on the wrist and upper back hand so the lines stay clean.
Pro tipMark the bracelet strip width first; chevrons look best when the strip is consistent.
Draw two parallel lines across the wrist to create a bracelet strip. Fill the strip with chevrons by drawing repeating V shapes — each V should touch the next. Add a dot at the center of every second chevron, then draw two thin vertical lines at each end of the bracelet. Finish by connecting the bracelet ends to the back hand with short curved lines.
AvoidSkip thick outlining around each V; it makes chevrons look muddy.
16. One-Row Flower Fan Across Back Hand
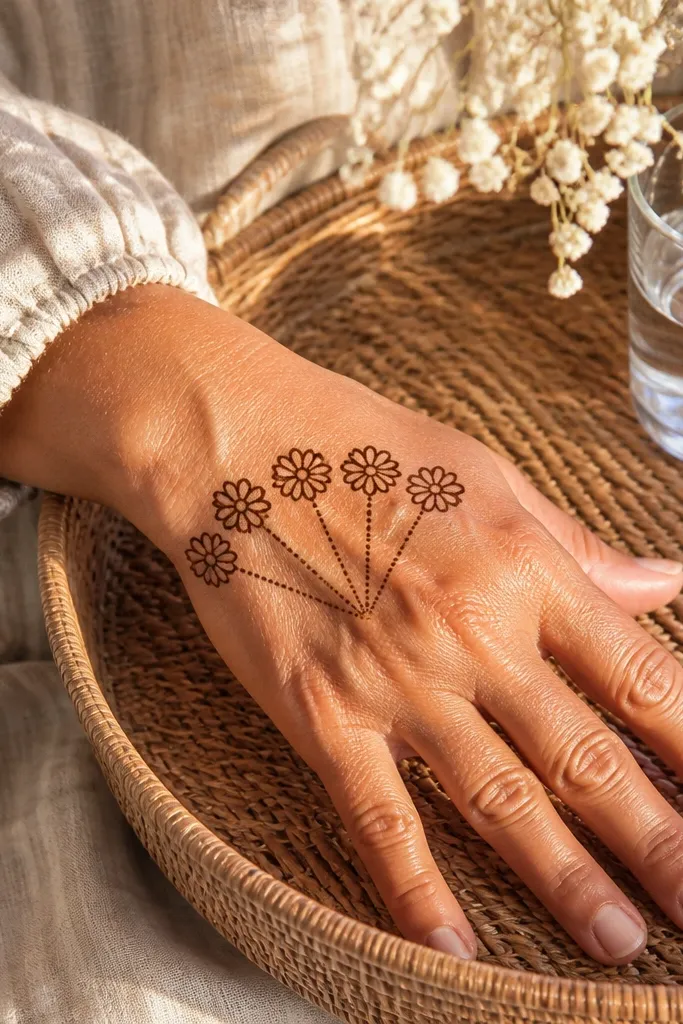
A one-row flower fan gives you a full-looking hand without the stress of filling everything. You draw small flowers in a curved line that fans from the wrist toward the finger bases. Each flower has a simple center and thin petals, so it’s beginner-friendly and fast. Dotted stems between flowers make the pattern feel connected. It’s an easy way to get a holiday-season floral look that still stays neat in close-up photos.
Start at the wrist with a curved guide line pointing toward the ring and middle finger base areas. Place a small 5-petal flower on the guide line, then repeat every 1.5-2 cm along the curve. Draw a thin stem line connecting each flower, and put 2-3 dots along the stem. Finish by adding a tiny border line around the flower row ends.
Keep the flower size consistent across the row — don’t let the last one get smaller.
Don’t add leaves between flowers; it clutters the clean fan shape.
17. Knuckle Triangle Fill with Dots
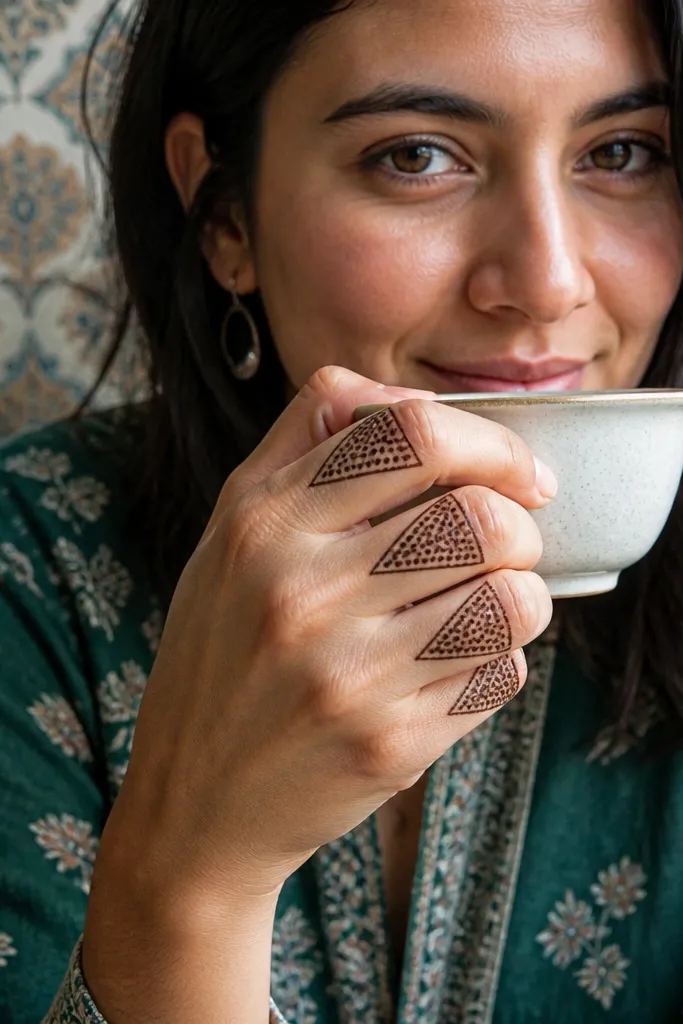
This design makes knuckles look decorated without covering the whole finger. Triangles placed on each knuckle look bold and graphic, and the dot fill inside each triangle gives texture. It’s great for beginners because triangles are easy to repeat and correct. The result is a clean, structured look that reads well in photos, especially with holiday lighting. If you want simple mehndi that looks intentional and not random, this is a strong pick.
On the back of the hand, choose 3-4 knuckle points and mark them lightly. Draw a triangle on each knuckle using thin lines, with the triangle base near the finger base and the point toward the center of the hand. Fill each triangle with tiny dots — 8-12 dots per triangle depending on size. Connect triangles with a thin curved line so the knuckle section looks grouped.
Use the same triangle height each time so the set looks coordinated.
Don’t overfill triangles with thick paste; dot fill should stay light and airy.
18. Mini Leaf Line Around the Wrist
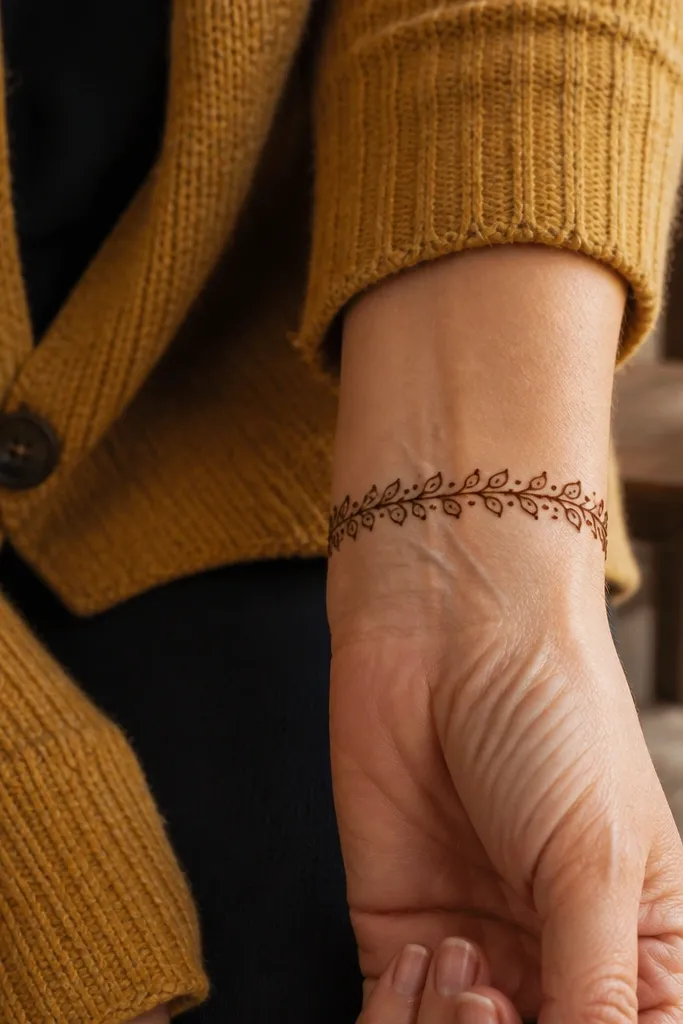
This one is for people who want a simple wrist look that still photographs like a full design. The repeating mini leaves around a thin wrist line create a border effect that makes the hand look framed. It’s easy to keep symmetrical because you’re repeating the same teardrop leaf. Add a few dots between leaves and you get contrast without clutter. Perfect for short sessions and for times when you want mehndi that doesn’t interfere with jewelry.
Pro tipIf your leaves tilt, fix it by rotating your cone angle instead of forcing the wrist line.
Draw a single thin curved line around the wrist crease like a bracelet outline. Repeat small leaf teardrops along the line, each leaf pointing outward from the center. Place one dot between every two leaves. Finally, add a tiny double line at the ends of the bracelet so it looks finished, not cut off.
AvoidDon’t make the leaves too big; mini scale is what keeps it clean.
19. Butterfly Wing Outline on Side of Hand
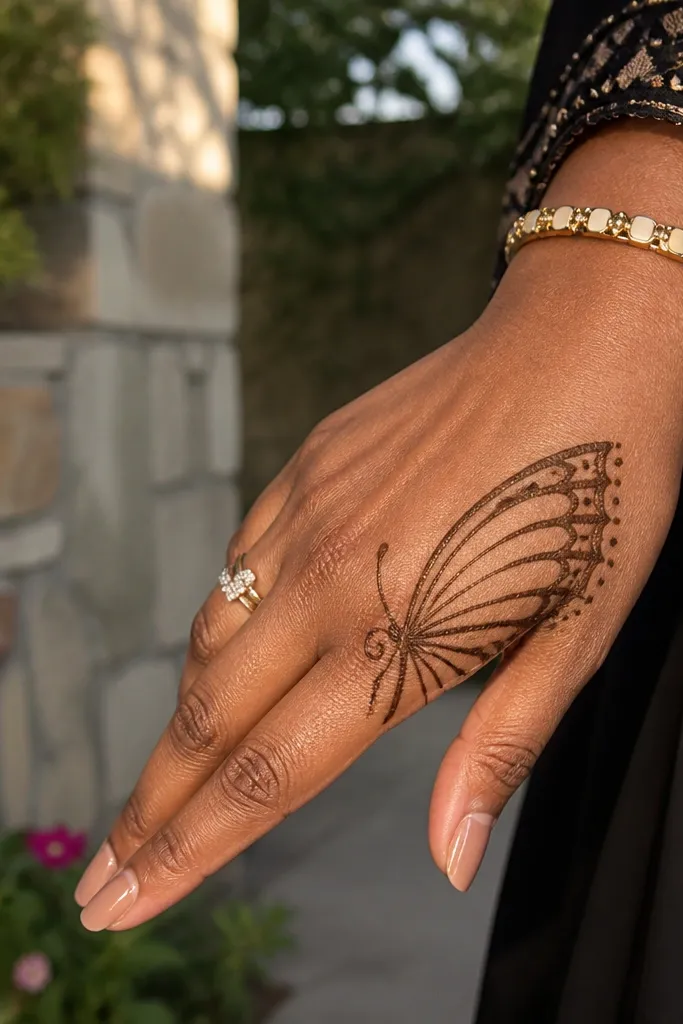
Butterfly wing outlines look cute and festive without needing a full butterfly body. Place the wings on the side of the back hand so they frame the hand shape. Keep the wings as outlines with inner curved lines, then add dots near the wing tips for sparkle. This is beginner-friendly because you’re working in mirrored halves — start one wing, then copy it for the other. It’s a great holiday option when you want something playful but still photogenic.
Pro tipUse the same number of inner curved lines on both wings for instant symmetry.
Draw a vertical center line on the side of the back hand as a guide. On one side, draw a wing outline with a rounded outer edge and a tapered inner edge, then add 3-4 curved inner lines parallel to the outline. Mirror the same wing on the other side. Finish by adding a small dot cluster at the top tips and one tiny body line in the center.
AvoidDon’t fill the wings solid; outline-only makes the butterfly look crisp.
20. Oval Frame with Corner Flourishes
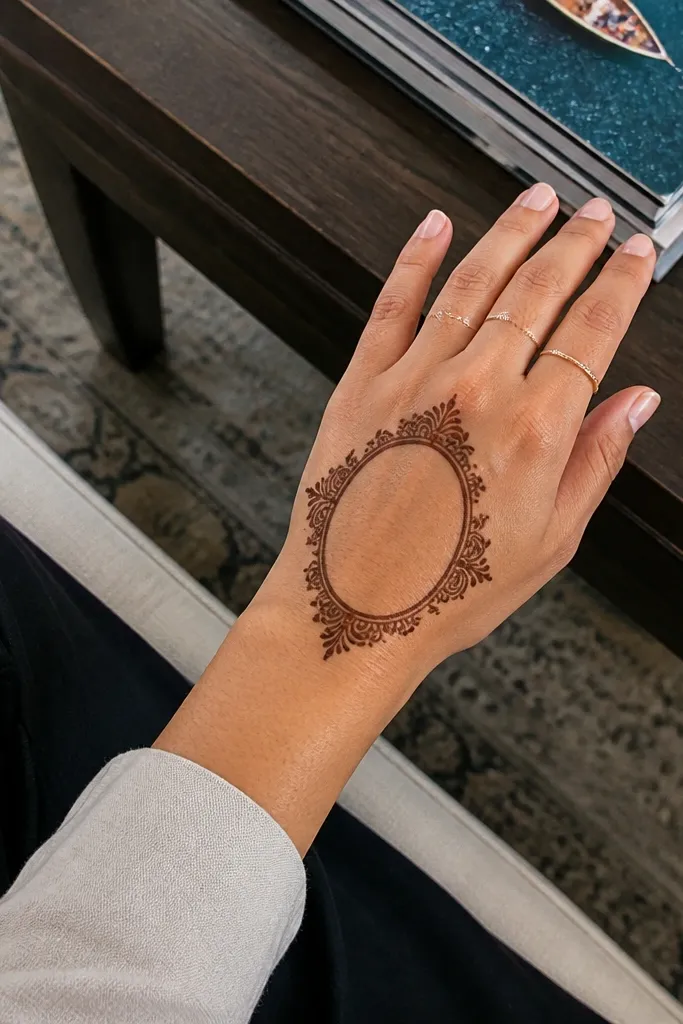
This design makes the back of the hand look styled because it puts a picture frame around a simple center. The oval outline is easy to draw with a steady hand, and the corner flourishes add decorative detail without requiring complex filling. The center stays light, so your mehndi won’t look heavy or messy. It also photographs nicely because the frame creates a clear shape that stands out against skin. Great for beginners who want a neat, holiday-appropriate look.
Pro tipIf your oval wobbles, trace over the outline once more after it dries for 30-60 seconds.
Start by drawing an oval frame on the back hand, roughly centered between wrist and finger bases. Keep the oval outline thin and leave a 1-2 cm gap from surrounding finger lines. In each corner of the oval, add a small swirl flourish made of two short curves and a dot. Add one tiny dot in the center of the oval and connect it to each corner with a short line.
AvoidDon’t overcrowd the center; the frame needs breathing room to look clean.
21. Simple Bracelet + Crosshatch Fingers
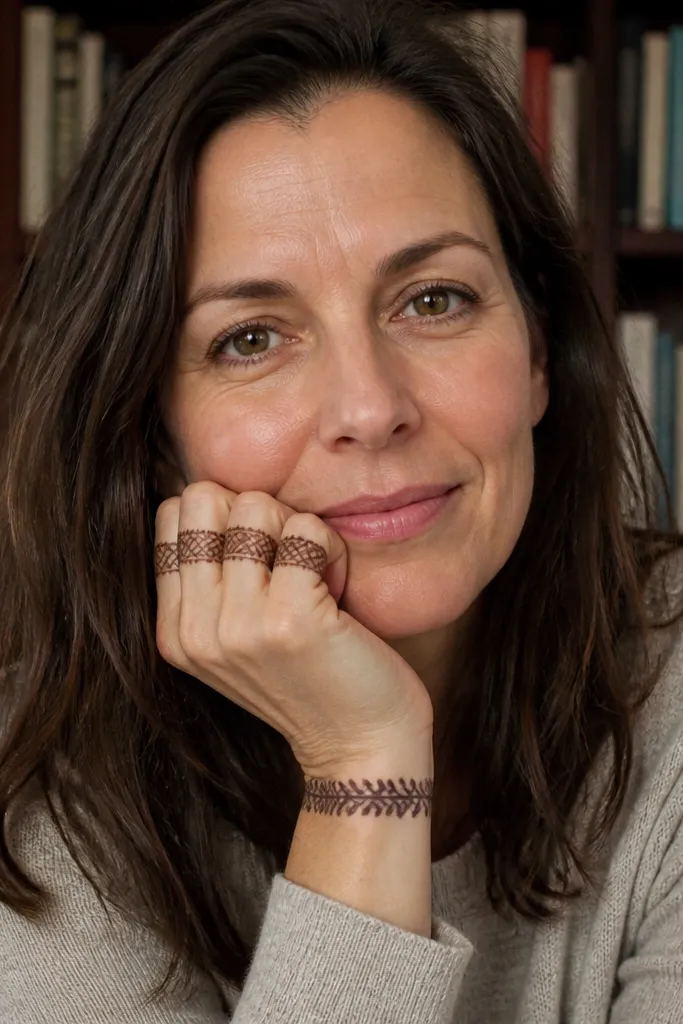
Crosshatch lines look surprisingly fancy even when they’re simple. Pair a clean wrist bracelet with 2-3 crosshatch sections across the finger bases, and your hand looks decorated without full coverage. The crosshatch texture is photogenic because it creates dark stripes that show contrast as the henna dries. This is a good choice for seasonal parties because it reads bold and modern. Beginners can do it because you’re placing straight-ish strokes in a repeat pattern.
Pro tipKeep crosshatch sections the same width so your fingers look balanced.
Draw a bracelet band around the wrist with two parallel lines and fill the gap with tiny dots or dashes. On the back of the hand near the finger bases, draw 2-3 horizontal lines across the same finger section. Then cross those lines with short vertical strokes to form a small crosshatch grid. Finish by adding a dot at each intersection on the outer edge to make it look intentional.
AvoidDon’t extend crosshatch down the full length of the fingers; it gets messy fast.
22. Single Circle Mandala on Thumb Side
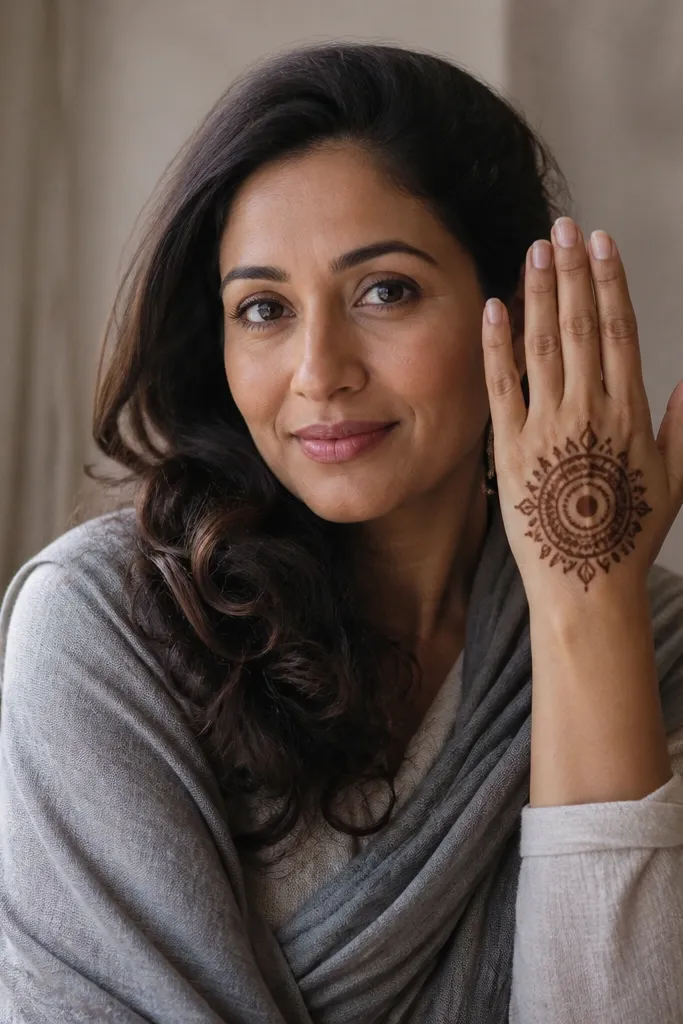
A single circle mandala on the thumb side looks like a statement piece while staying simple. The thumb-side placement makes it easy to keep the lines steady and visible, and the circular symmetry makes it look planned. Use small petal shapes around the circle and keep the center dot detailed. This design is great for beginners because you only need one repeat structure — ring of petals. It also works well for holiday season because circles feel festive and clean.
Pro tipCount petals as you go — 10 or 12 — so you don’t end up with a lopsided ring.
Draw a medium circle on the thumb-side of the back hand. Around the circle, add 10-12 tiny petal teardrops pointing outward, each one touching the next at the base. Place a small dot cluster in the center and add 2-3 tiny curved lines radiating outward. Finish by adding a thin curved line from the mandala edge toward the wrist to connect it to the rest of the hand.
AvoidDon’t make petals too thick; thick petals turn into a dark blob.
23. Three Dots + Curved Line Bracelet
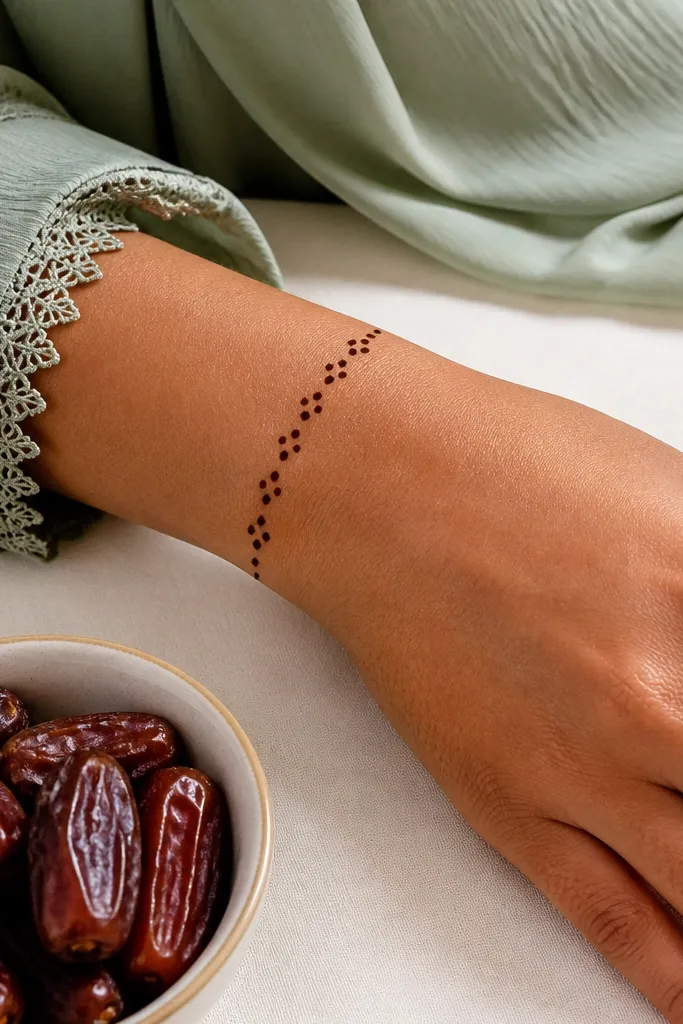
This is the simplest look that still looks designed. A thin curved bracelet line with repeated three-dot clusters creates a rhythm that reads like a pattern, not random dots. It’s perfect when your paste is running late or you want something minimal but still pretty for holiday get-togethers. The center of the hand stays open, so your mehndi looks clean and your skin shows through. This one is also a great “starter design” before you tackle bigger motifs.
Pro tipUse a ruler edge or a stiff card as a guide for the bracelet curve if your wrist line keeps wobbling.
Draw a thin curved line across the wrist where you want the bracelet. At three evenly spaced points along the line, add clusters of exactly three dots in a small triangle. Connect each dot cluster to the bracelet line with two short curved strokes. Finish by adding one tiny dot at each end of the bracelet so it looks finished.
AvoidDon’t spread the dot clusters too far apart; keep spacing even for the pattern look.
24. Wrist to Finger Ladder Pattern
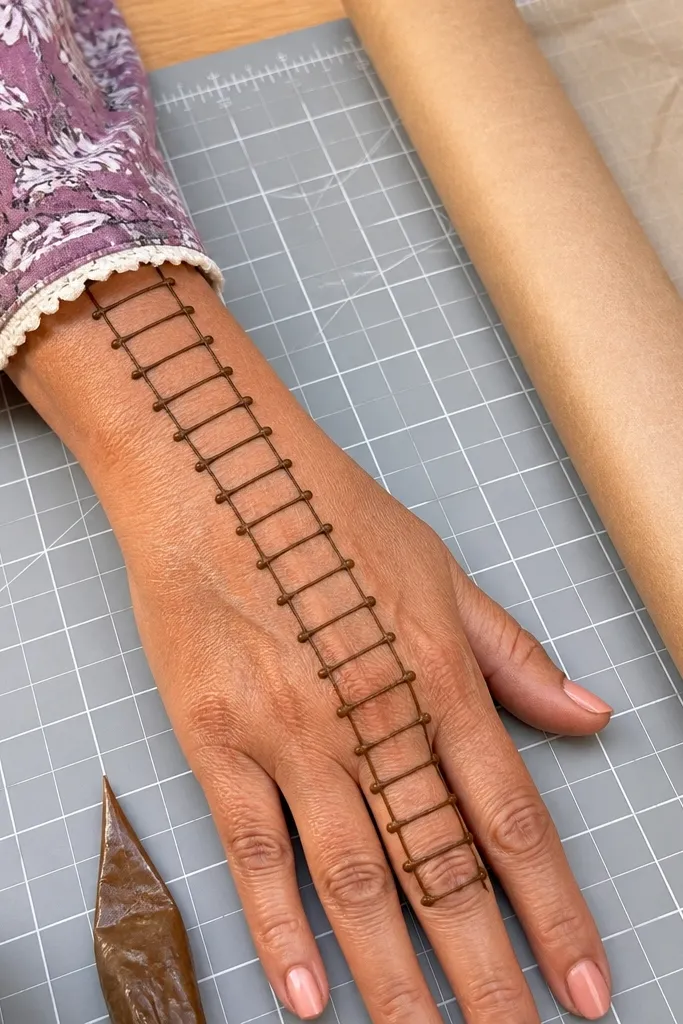
Ladder patterns look neat and modern, and they hide beginner mistakes because the structure is rigid. You draw vertical ladder bars from the wrist toward the finger base, then connect them with short horizontal rungs. Add tiny dots at rung ends to make it look intentional. This design stays light, so it won’t smear as much as heavy fill. Great for seasonal looks when you want something graphic and clean rather than floral.
Pro tipKeep rungs short so the ladder stays airy and doesn’t block your finger movement.
Start with a vertical guide line in the center of the back hand. Draw 3-4 vertical bars from wrist toward finger base, spacing them evenly about 8-12 mm apart. Add horizontal rungs between the vertical bars at two levels — mid-hand and near finger base. Place a dot at each rung end where it meets a vertical bar, then let it dry fully.
AvoidAvoid thick vertical bars; thinner bars keep the ladder crisp.
25. Leafy Corner Frame with Open Center
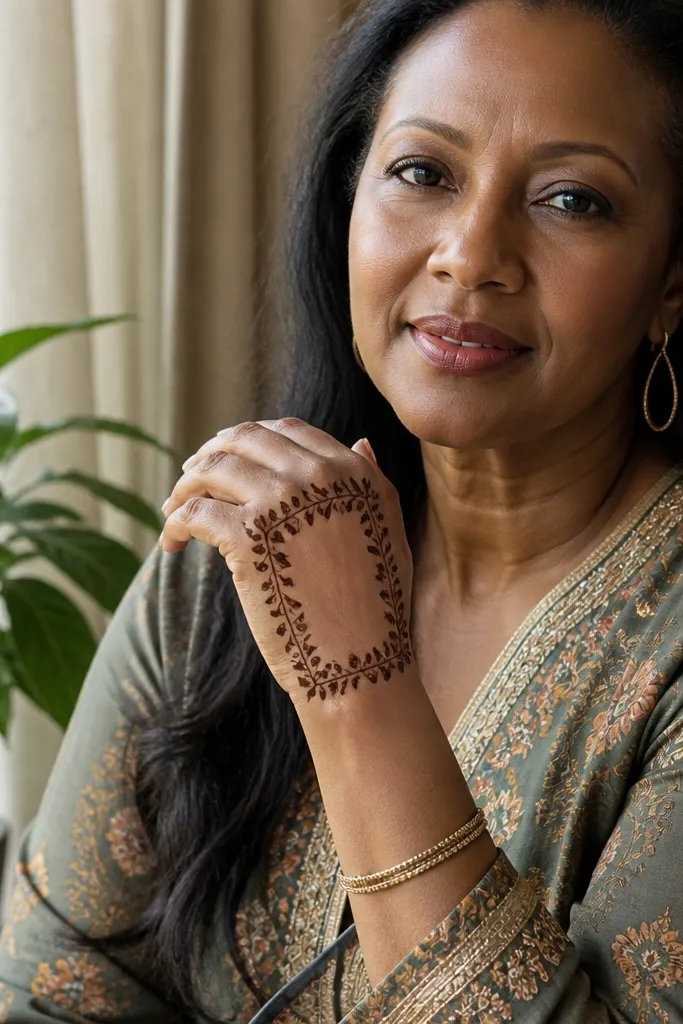
This is a smart beginner choice because it looks full while leaving the hardest area empty. You frame only the corners of the back hand with leaf vines, then keep the center open. That open center makes the design feel breathable and makes photos look clean instead of crowded. The leaf vines are simple teardrops on a thin stem, so they repeat easily. It’s perfect for holiday parties where you want a defined design but don’t want to fill every inch of skin.
Pro tipMatch leaf count in both corners — that’s what makes it look symmetrical, not random.
Draw a thin curved stem in the top corner of the back hand and add 4-6 leaf teardrops along it. Repeat a matching stem in the bottom corner, keeping the same leaf spacing. Connect the two corner stems with a thin line that stops before the center, leaving an open middle area. Add 1-2 dot clusters near each corner to balance the frame.
AvoidDon’t connect the corners through the center; the open middle is the look.