
1. Knuckle Ladder with Tiny Dots
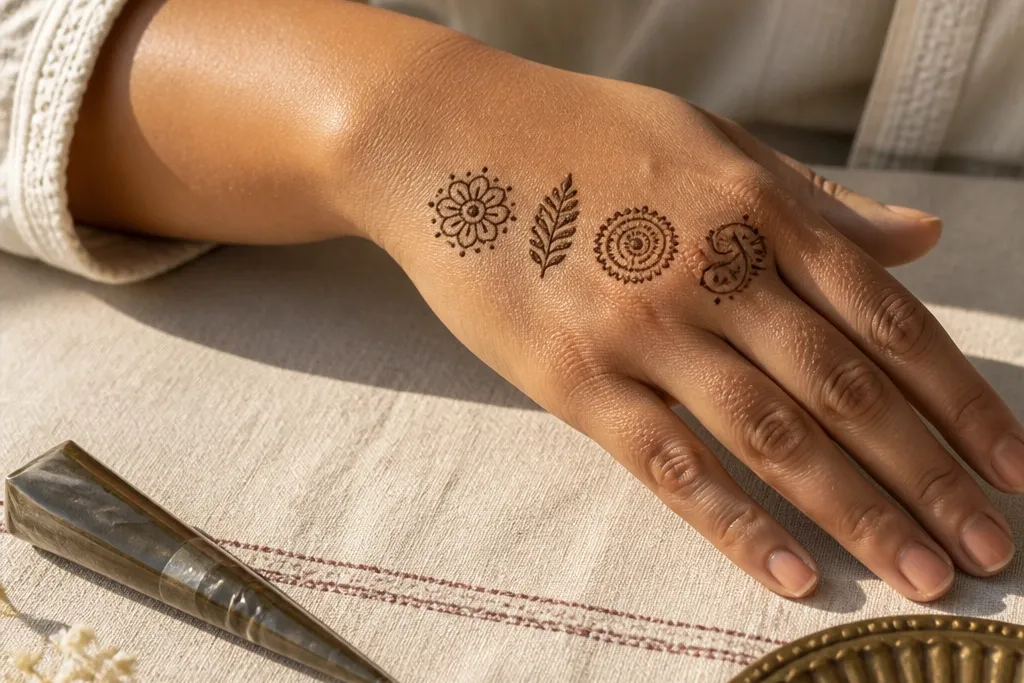
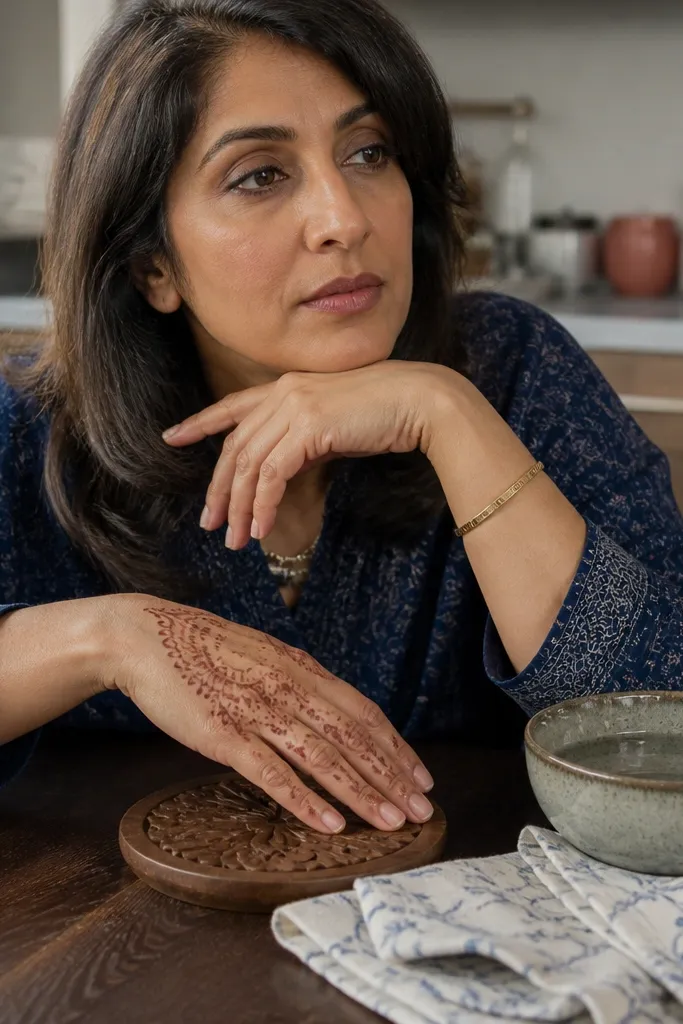
This design looks clean because it treats the knuckles like a grid. Three parallel “ladder” bands run across the knuckle area, and tiny dots sit between them so the pattern reads even if your line thickness varies. The outer edge gets one small curved flourish that points toward the wrist, keeping the whole hand from looking flat. It’s great for first-timers because you can practice straight spacing on the knuckles before you move to the wrist curve. Expect it to take about 15-25 minutes and it photographs well with any skin tone because the lines stay light and readable.
Start by drawing a guide line across the top of the hand at knuckle height, then place three short horizontal ladder bands from the index side to the little-finger side. Add 1-2 dot clusters between each band — keep dots no larger than a sesame seed. Finish with a single curved line from the outer edge down toward the wrist, then add two tiny dots at the end of the curve for balance. Let the paste dry slightly between sections if your cone tends to smear.
Pro tipUse a cone hole small enough that you can draw a line without stopping; pauses create blobs.
AvoidDon’t fill the ladder bands — leave the skin showing so the pattern stays airy.
2. Center Vertical Half-Moon Path
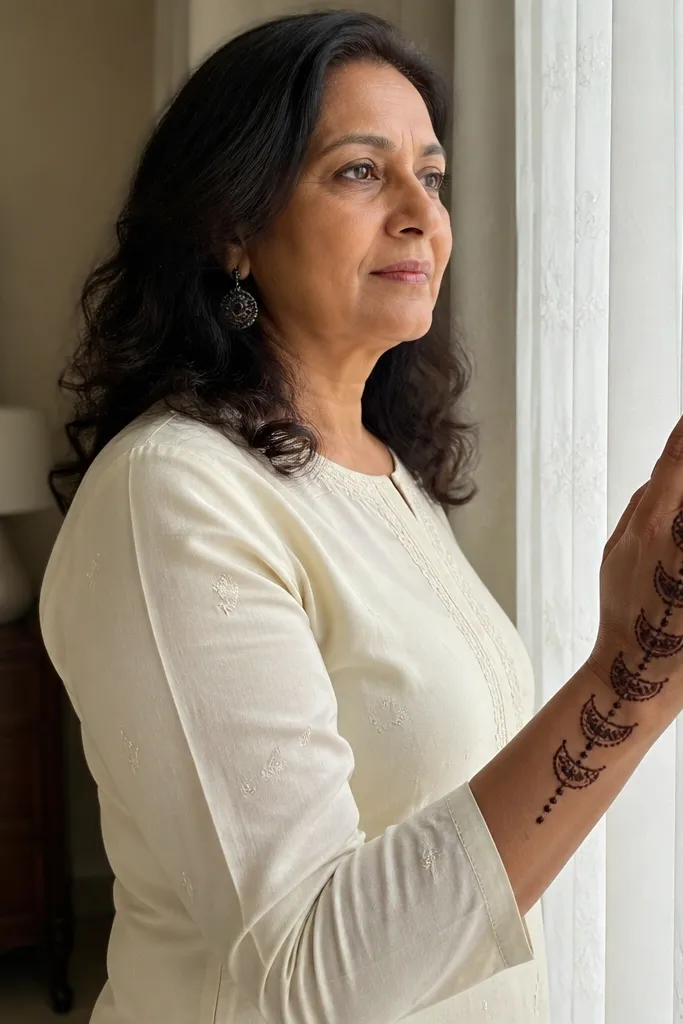
A single center path makes the back of the hand look longer and more elegant, without needing heavy filling. This one uses repeating half-moons stacked along a vertical line, with dots near the knuckles to connect the shapes visually. Because the motifs are the same size, your design stays symmetrical even if one side is slightly stronger. It also works well for short nails and small hands since the pattern doesn’t crowd the fingers. It’s a dependable pick for quick events because you can finish it in one continuous flow in under 20 minutes.
Draw a thin vertical guideline from just above the wrist to the center of the knuckles. Then add half-moons along the line — each half-moon should sit slightly to one side, alternating left and right so it looks rhythmic. Add a small dot at the top of each half-moon for crispness, and place two tiny dots near the knuckle area to anchor the pattern. Finally, trace a very thin curved line at the wrist end to close the design.
Pro tipKeep your half-moons all the same “opening” direction; consistent openings make it look intentional in photos.
AvoidSkip thick outlines on the half-moons — thick paste makes the negative space disappear.
3. Side Paisley Swoop (One Motif Only)
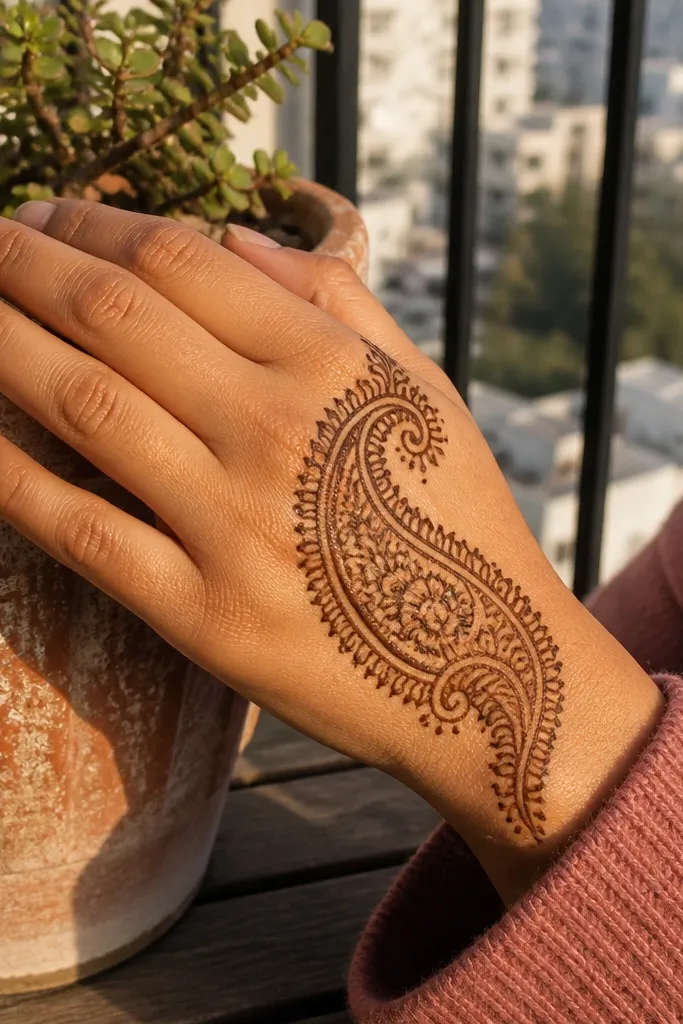
This design is photogenic because it places one clear hero motif on the outer edge. A single paisley swoop curves from the knuckle area down toward the wrist, with micro-dots filling the gaps. The rest of the hand stays mostly clean, so your pattern looks high-end instead of busy. It’s also forgiving for uneven paste because the paisley outline gives structure; even if dots vary a little, the overall curve reads well. This is a good choice when you want something simple but still special for a festival or dinner.
Start on the outer side of the knuckles with a thin teardrop outline, then extend it into a paisley curve that travels diagonally toward the wrist. Add 2-3 internal lines inside the paisley, keeping them thin and evenly spaced. Place small dots along the outer curve and one dot at the paisley tip. Finish with a light curved line across the wrist edge to frame the motif.
Pro tipIf your paisley looks too wide, reduce the base width and keep the tip pointy; it reads sharper on camera.
AvoidDon’t add extra motifs near the center — one hero curve is the whole point.
4. Finger Outline with Open Star in Center
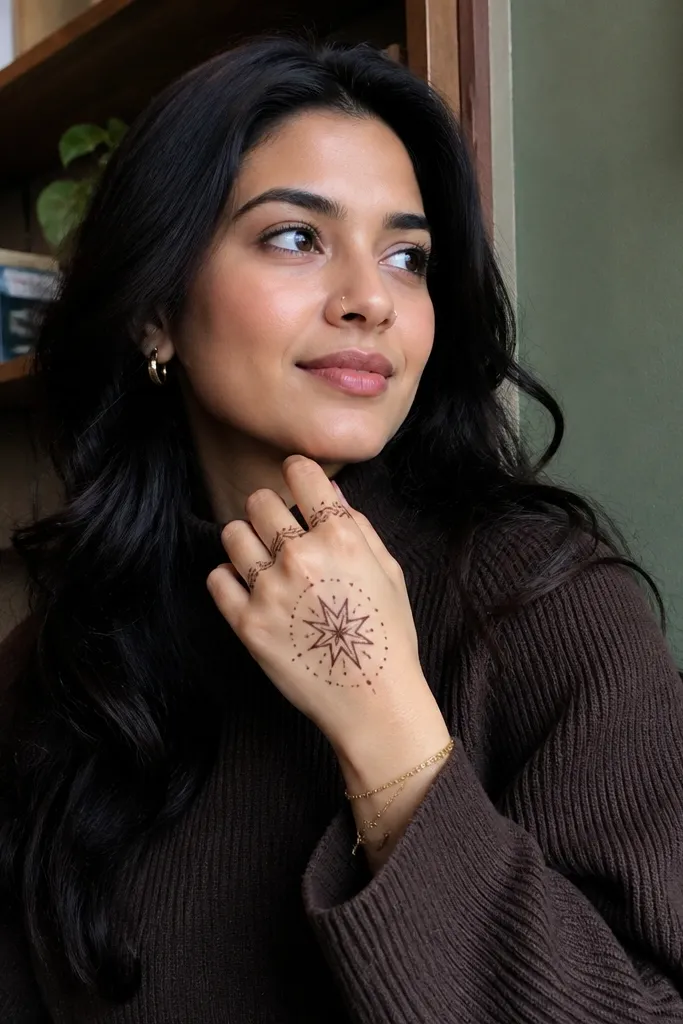
This one flatters the hand because it frames the finger bases without covering the fingers. Thin outlines sit at the base of the fingers, and the center of the back hand has a small open star. The star adds a graphic look that still feels mehndi because of the dot accents around it. Since everything stays light, it’s ideal if you want clean photos and don’t want heavy dark areas. It’s also fast because you’re repeating just two elements: finger-base outlines and the star.
Draw a thin arc at the base of each visible finger, starting from the index side and moving across. Connect the arcs with a light curved line across the center of the back hand. In the center, draw a simple open star using five thin strokes that touch at points, leaving the inside mostly skin. Add dots at each star point and a tiny dot trail along the finger-base arcs.
Keep the star about the size of a pea in the center so it doesn’t overpower the finger outlines.
Avoid filling the star — the open center is what keeps it airy.
5. Wrist Fan with Minimal Back Fill
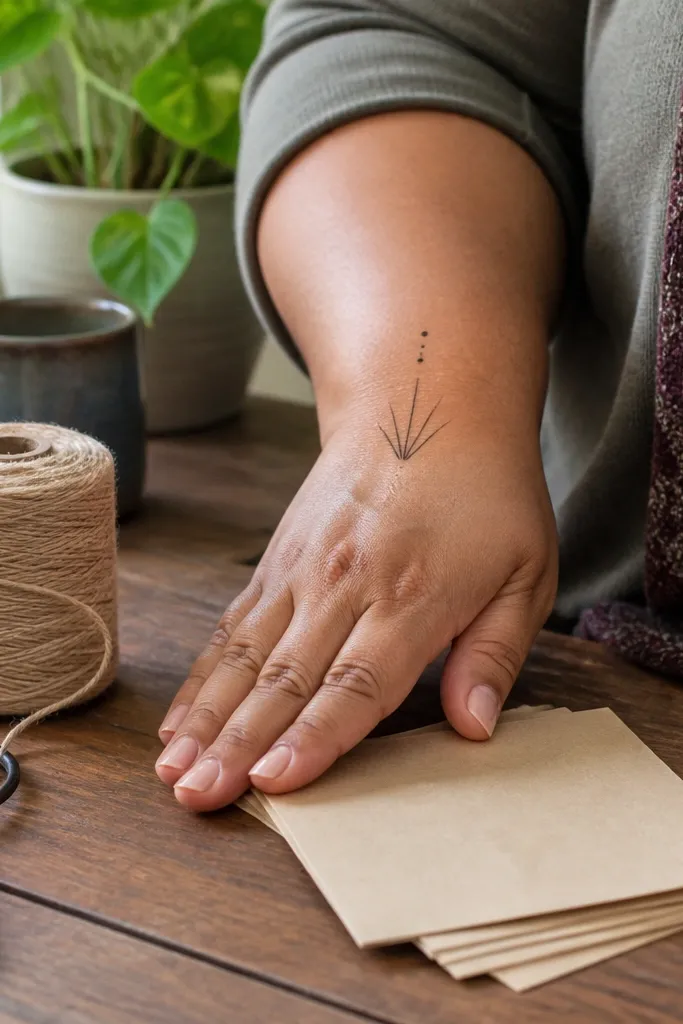
If you want a design that looks balanced even when the back of the hand is bare, this wrist fan does the job. The fan sits near the wrist with three thin rays, and it sends two dot trails upward toward the knuckles. The back hand doesn’t get crowded, so your photo looks clean and intentional. It’s great for quick DIY sessions because the fan is simple geometry and the dots do most of the visual work. You’ll get a polished look without needing fancy leaf filling.
Start at the wrist with a curved base line, then draw three thin rays upward like a handheld fan. At the end of each ray, add a tiny dot cluster of 3-5 dots. From the base line, draw two thin dot trails that curve toward the center of the back hand. Close the design with one short horizontal line at knuckle height so the dot trails look anchored.
Pro tipUse a straightedge for the wrist base curve lightly, then remove it before the paste sets to avoid smudges.
AvoidDon’t extend the fan too high — keep it mostly wrist-focused for that clean look.
6. Two-Leaf Corner Frame
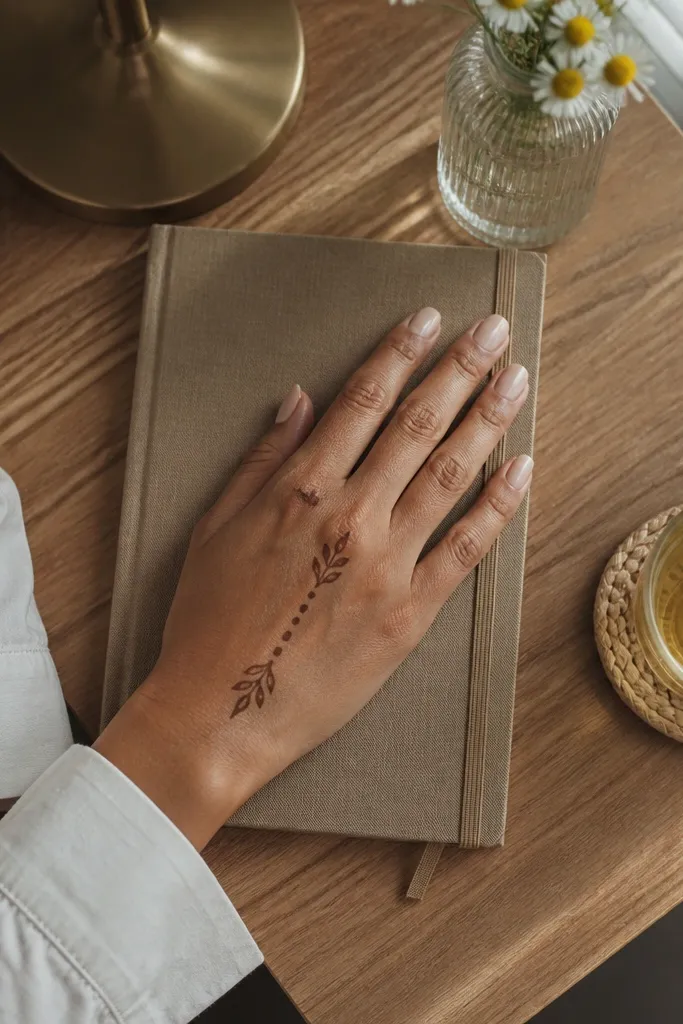
This is a smart simple frame idea because it uses the outer corner of the hand as the focal point. Two small leaf shapes sit like bookends along a diagonal line, and dots fill the space between them. The rest of the back hand stays clean, which keeps the design readable and not heavy. It also works if you’re still learning consistency, since leaf outlines give you a clear shape to repeat. Expect a crisp, “designed” look in about 20 minutes.
Draw a thin diagonal line from the outer knuckle area to the wrist corner. Add one small leaf at the upper end of the diagonal and a matching leaf at the lower end, both facing inward. Add 2-3 internal line strokes inside each leaf — keep them short. Place dots along the diagonal between leaves, then add one tiny curved line at the wrist corner to finish the frame.
Pro tipMake leaf tips slightly thinner than the base; it makes the whole frame look sharper.
AvoidSkip thick leaf fill — outlines and dots are enough for this style.
7. Knuckle Dots with Micro-Arches
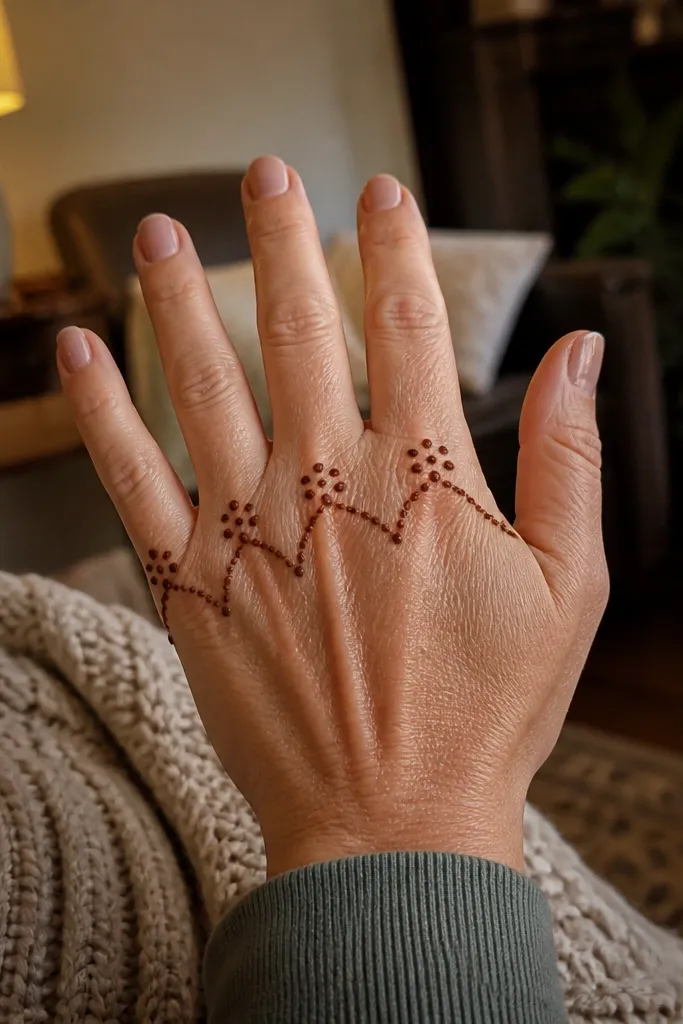
This one is all about texture without clutter. Each knuckle gets a dot cluster, and tiny arch lines connect clusters in a smooth rhythm. Because arches are short and repetitive, you can keep spacing consistent even if your hand shakes a little. It’s also a great option if your mehndi tends to spread, because dots survive spreading better than big filled shapes. The finished look is airy, neat, and perfect for everyday festive wear or a low-effort party look.
Place dot clusters on each knuckle in a row, using 4-6 dots per cluster. Connect each cluster with a short micro-arch line that curves upward slightly. Keep the arches the same length so the pattern looks like a designed chain, not random marks. Finish with two tiny dots near the wrist center and one short horizontal line to ground the pattern.
Let dot clusters dry 1-2 minutes before drawing arches so the arches don’t melt into the dots.
Don’t draw long arches across the whole hand; short arches keep it clean.
8. Diagonal Grid with One Center Diamond
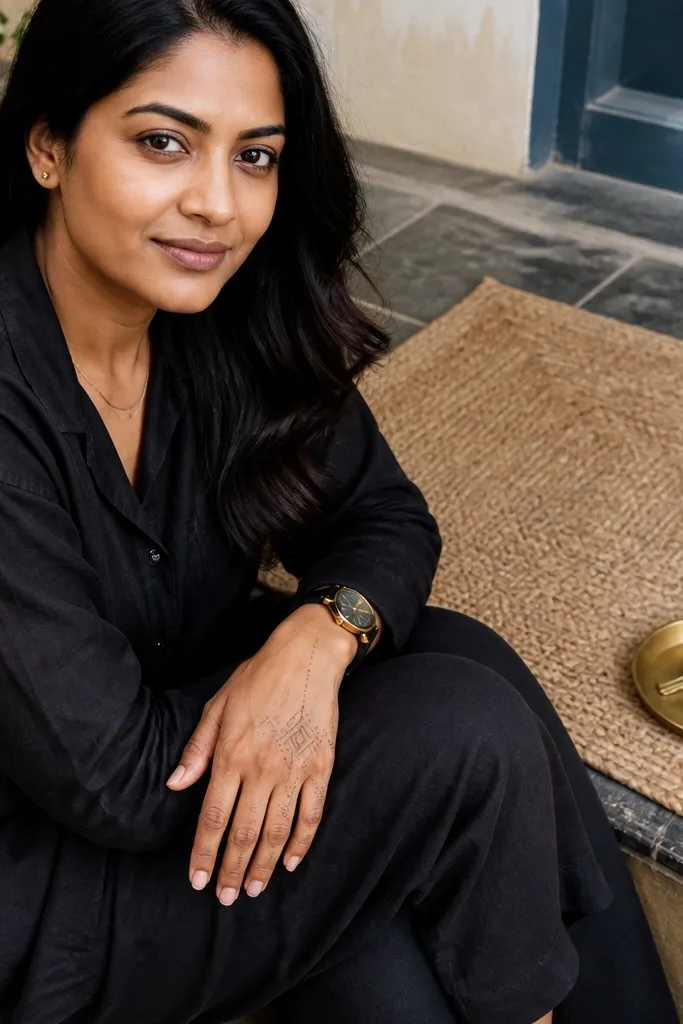
This design looks modern because it uses grid logic, but it stays mehndi with dots at intersections. A diagonal lattice fills the back-hand space lightly, and one diamond sits in the center to give structure. The lattice is simple line work, so it’s easier than it looks. It’s a strong choice for people who want something photogenic and not overly floral. It also balances well with jewelry because the lines give a crisp frame around rings and bangles.
Draw a diagonal guideline from the outer knuckle side to the inner wrist side. Sketch a light grid by adding short parallel lines across the guideline — aim for 3-4 diagonal strips. At the center, draw a diamond outline using four thin strokes, leaving it open inside. Add dots where the diagonal strips cross around the diamond, then add one dot at each diamond corner.
If your lattice gets messy, reduce to 3 strips instead of 4 — fewer lines look cleaner on camera.
Avoid closing the lattice with thick lines; thin lines keep the modern airy look.
9. Open Peony Corner + Dot Trail
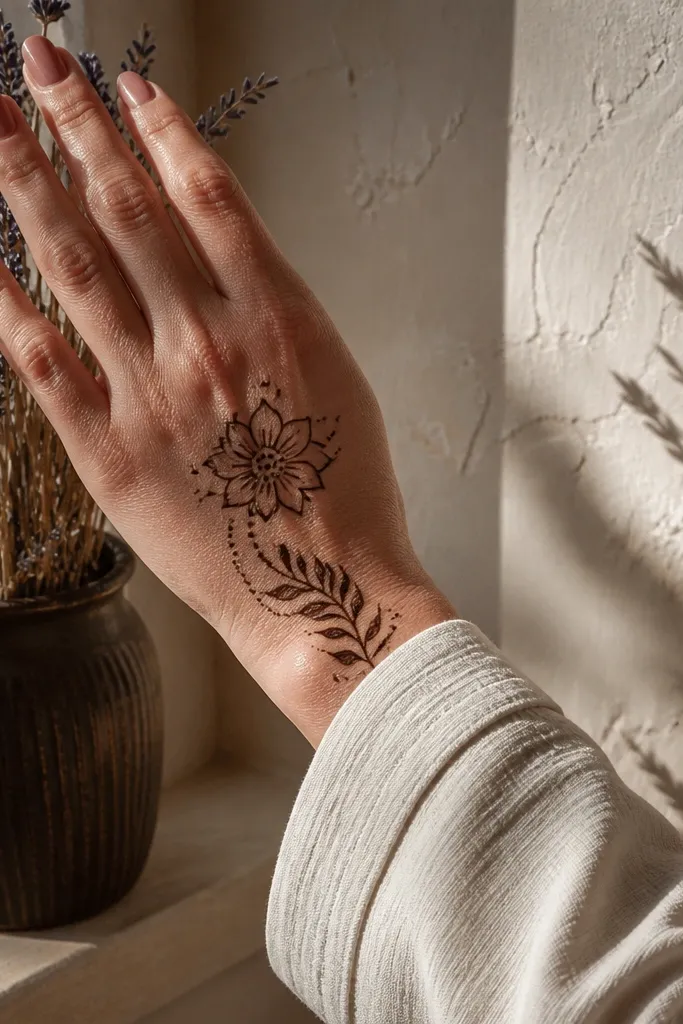
A peony-style motif looks pretty even in a simple version because petals create natural symmetry. This one keeps the peony small and open, so you don’t need heavy filling. The motif sits on the outer edge of the back hand, and a dot trail guides the eye down to the wrist. It’s a great pick when you want floral energy without spending time on dense leaf work. The shape reads well in photos because petal outlines catch the light as the stain darkens.
Start with a small circle outline near the outer edge of the back hand at knuckle height. Draw 5-6 open petal arcs around the circle, keeping the arcs thin and slightly separated. Add a dot at the base of each petal arc. From the bottom of the peony, draw a gentle dot trail diagonally toward the wrist, ending with one curved line at the wrist edge.
Pro tipKeep the petal arcs slightly uneven in size by a millimeter or two — it looks hand-drawn, not mechanical.
AvoidDon’t fill the circle; an open peony stays lighter and more photogenic.
10. Half-Circle Wrist Band with Two Stars
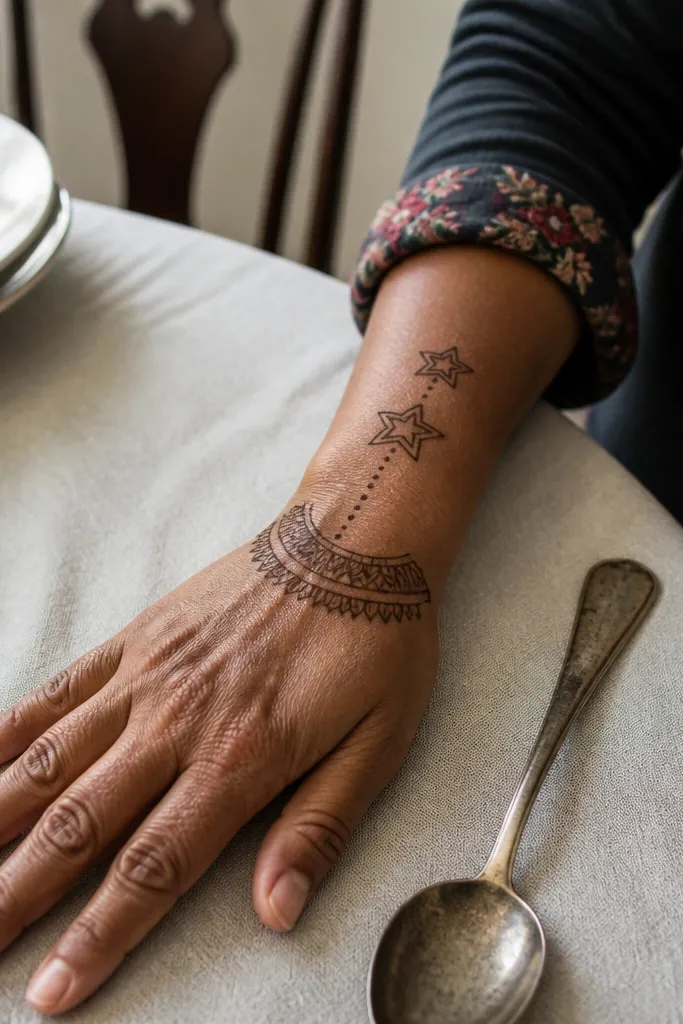
This design is clean and graphic, which is why it looks good in photos. A half-circle band sits at the wrist, and two small stars appear above it on the back hand. The stars are open outlines, so they don’t turn into blobs when the paste dries. The dot accents connect the band to the stars, keeping the pattern cohesive. It’s ideal for short timelines because you only need three elements — band, stars, dots — and you can repeat them quickly.
Draw a half-circle band across the wrist — start at the outer wrist corner, curve across, and end at the inner corner. Above the band, place two open five-point stars spaced evenly, keeping them small. Add dots along the top edge of the band and one dot under each star to link them visually. Finish with two short curved lines on either side of the band to frame it.
Pro tipUse the same star size for both stars; mismatched stars are the fastest way to make a simple design look off.
AvoidAvoid thick star outlines; thin outlines keep the star shape readable.
11. Ring of Dots Around a Center Oval
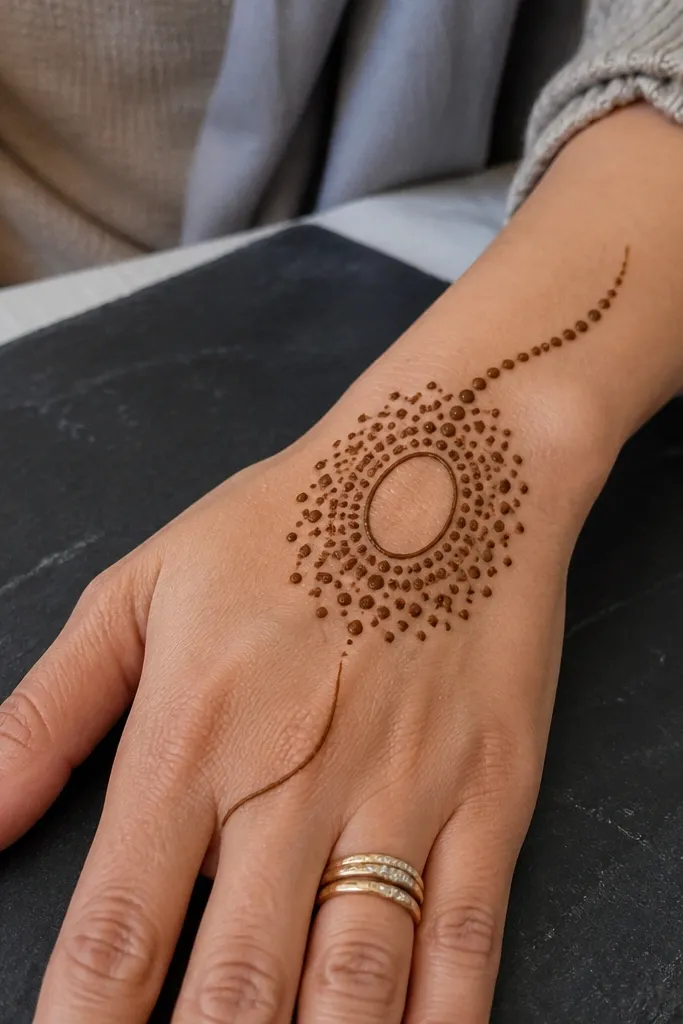
This is one of the prettiest simple back-hand designs because it feels balanced without covering much skin. The center oval is outlined lightly, and a ring of dots surrounds it like a halo. A thin curved line extends from the oval toward the wrist, giving you movement. It’s perfect if you want something minimal but still decorative for festivals or casual parties. Because it’s mostly outlines and dots, it’s beginner-friendly and stays photogenic even if your paste spreads slightly.
Draw a thin oval in the center of the back hand at knuckle height, leaving a small gap between oval and any dots. Around the oval, place a ring of dots — keep dot spacing even so the halo looks clean. Draw a thin curved line from the lower side of the oval down toward the wrist, then add 3-4 dots along that curve. Add two tiny dots near the wrist end to close the shape.
Make the oval slightly wider than tall; it looks more natural on the hand’s shape.
Don’t overcrowd the dot ring — too many dots turns it into a dark circle.
12. Three-Cluster Floral Linework
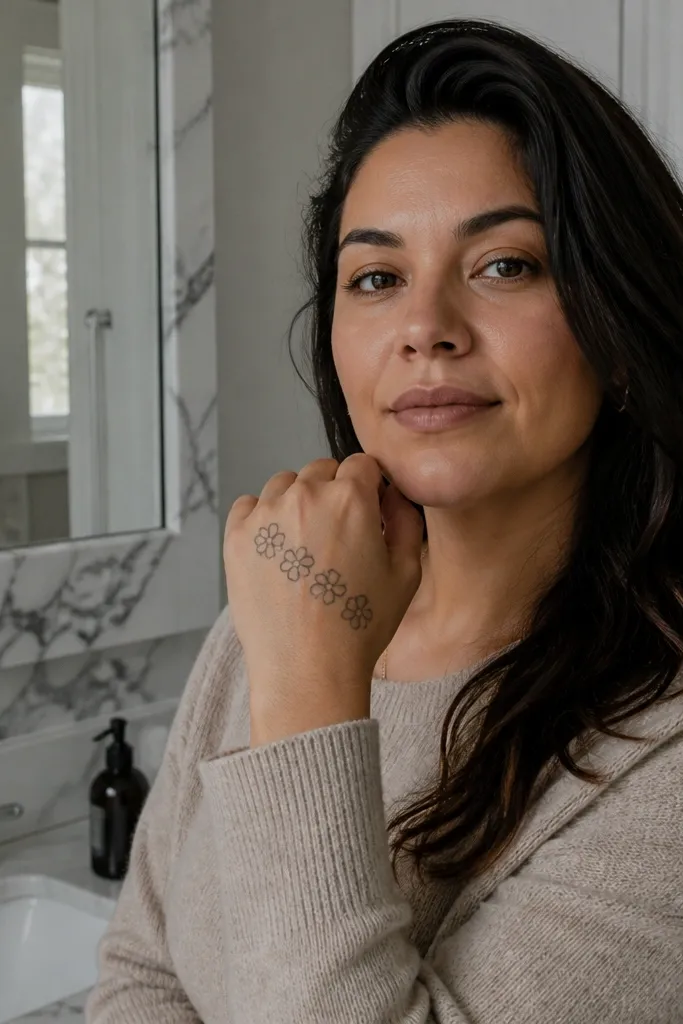
Instead of one big floral, this uses three small clusters that sit in a line. Each cluster has minimal petal outlines and a dot center, which keeps it simple but still clearly “mehndi floral.” The clusters are spaced so the design breathes, and the repetition makes it look intentional. It’s a strong choice for people who want a floral look but don’t want to spend time filling leaves. The finished pattern looks especially good with bangles and rings because the clusters frame your jewelry rather than hiding it.
Start with the first small flower cluster near the knuckles, then place a second cluster in the center back hand, and the third cluster toward the outer edge. For each cluster, draw 5-6 thin petal arcs around a central dot, leaving the inside open. Connect the clusters with a thin line that lightly curves between them, then add one dot at each connection point. Finish with a tiny curved flourish near the wrist from the last cluster.
Keep petal arcs short; long petals start to look messy when the hand moves.
Don’t add extra leaf fills between clusters — linework only keeps it crisp.
13. Micro Paisley Bracelet Across Knuckles
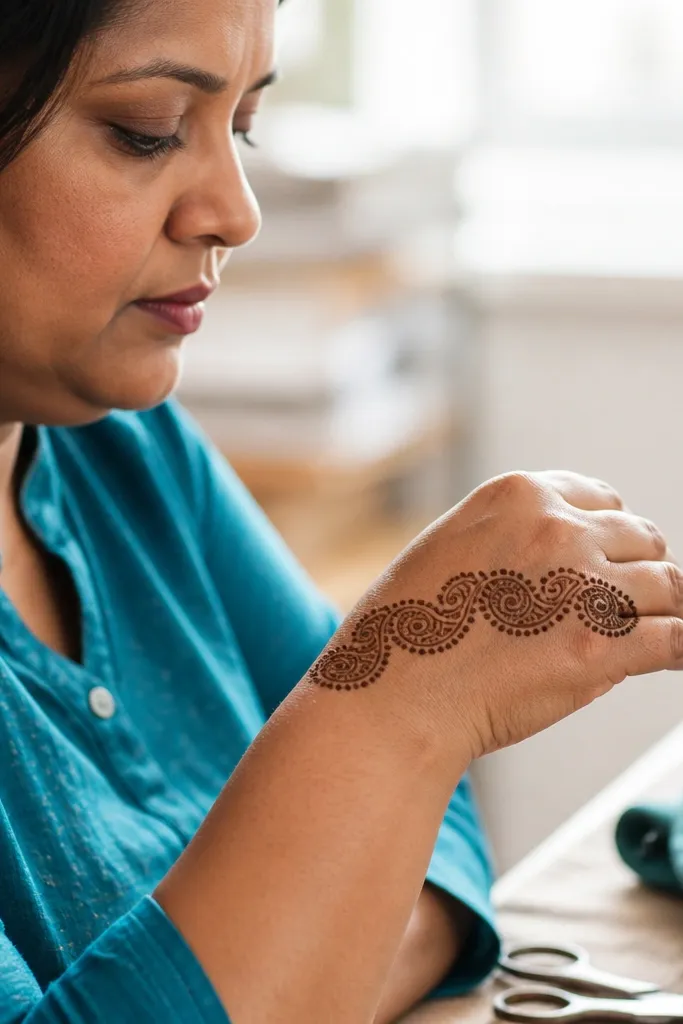
This design mimics a bracelet, but it sits on the back of the hand where it looks balanced. You get a chain of micro paisleys across the knuckles, and dots fill the tiny gaps so the chain looks continuous. The paisleys are small enough that you don’t need dense filling, which keeps the pattern light and quick. It’s a great pick when you want something festive-looking without covering the fingers. Photos come out sharp because the paisley outlines stay distinct.
Draw a thin curved line across the knuckle area, like the top edge of a bracelet. On that line, add micro paisley outlines one after another, each paisley no wider than a fingernail width. Place 1-2 dots between paisleys to keep spacing consistent. Finish by adding a short vertical line from the center paisley down toward the start of the wrist area, then add a tiny dot at the end.
If your paisleys keep wobbling, draw them first as teardrops, then add the inner curve — it stabilizes the shape.
Avoid thickening the middle paisley; the chain should look even.
14. Wrist-to-Center Vine with Three Leaves
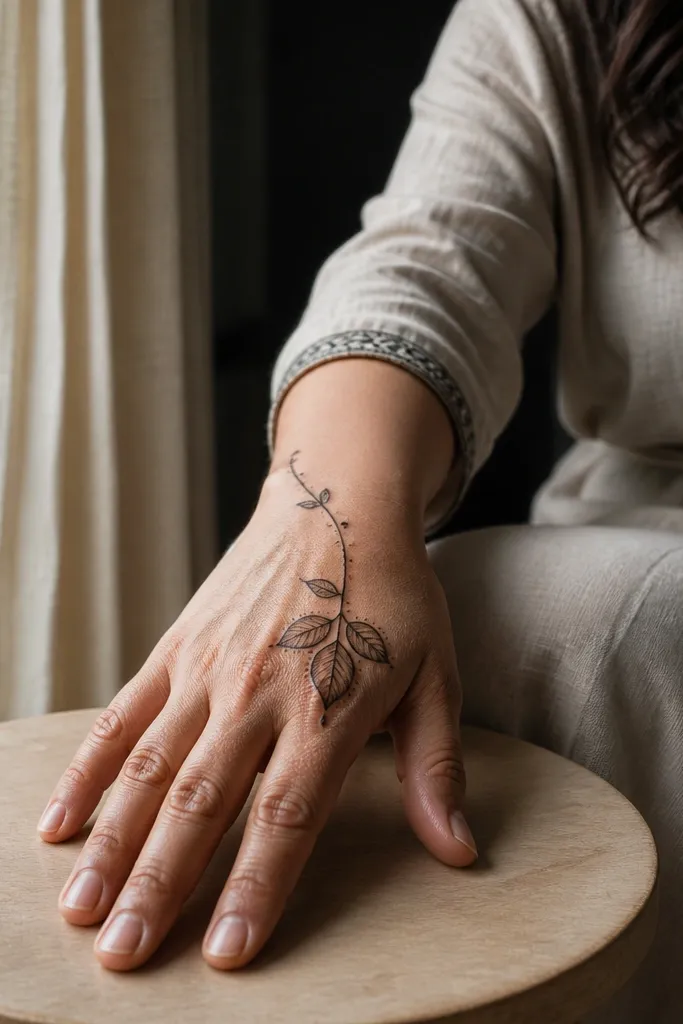
A vine line gives you movement, and three small leaves keep it simple. The vine starts at the wrist, curves toward the center of the back hand, and ends with a leaf trio that creates a focal point. This design looks clean because the vine is thin and the leaves are outlined with only a few internal strokes. It’s also beginner-friendly since you only need to repeat one leaf shape three times. If you want something that looks “done” but still light enough for everyday, this is the one.
Start at the wrist with a thin curved line that arcs upward toward the center of the back hand. Add three leaves along the vine: one near the bottom, one in the middle, and one near the top, each facing outward slightly. Outline each leaf and add 2-3 short internal strokes, leaving the leaf interior mostly open. Add small dots at the vine turns and finish with one tiny curved line near the top leaf to close the design.
Keep leaf stems narrow; wide stems make simple vines look bulky.
Don’t add extra leaves beyond three — it stops being “simple” fast.
15. Open Feather Motif on Outer Edge
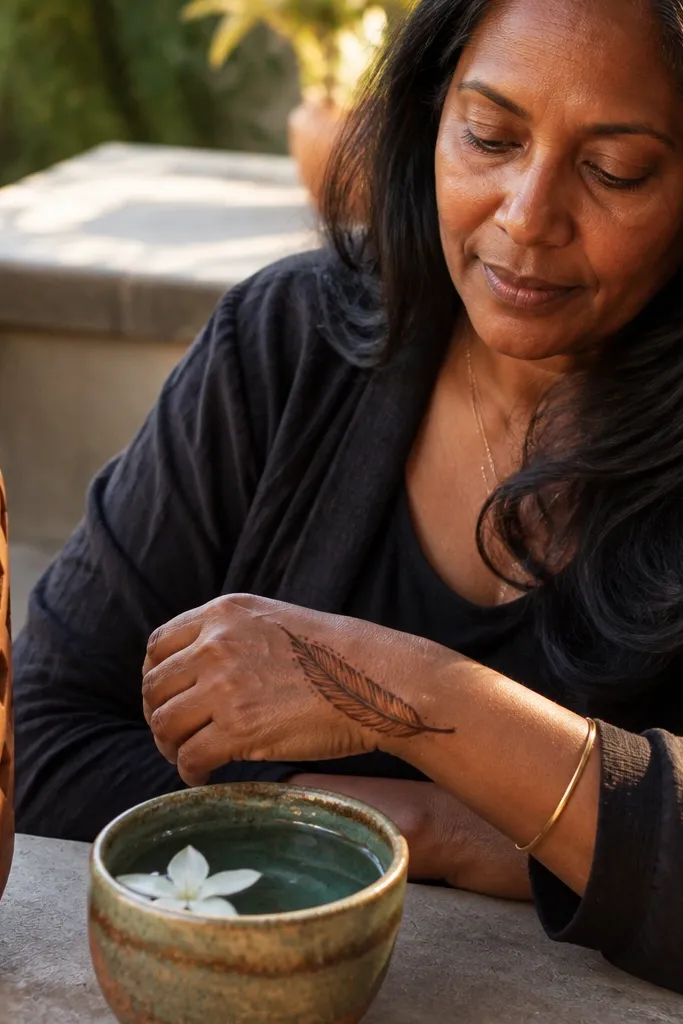
Feather motifs look elegant without requiring heavy fill, and the outer edge placement makes it feel intentional. This design uses an open feather outline with thin bar lines that taper toward the tip. Dots at the ends of the bars keep it mehndi-like and prevent the feather from looking like a sketch. It’s photogenic because the feather’s taper creates a natural visual line from knuckles down to wrist. This one is a good choice for someone who wants a statement shape but still prefers simple line work.
Draw a vertical feather outline on the outer back of the hand — start with a narrow top point near knuckles and widen slightly toward the wrist. Add 6-8 thin bar lines on either side of a center stem, tapering shorter toward the tip. Leave the feather interior open so it stays light. Add a dot at the end of each bar line, then finish with a small curved flourish at the wrist end.
Make the bar lines slightly curved, not straight; it makes the feather look softer.
Avoid filling the feather spine — thick center lines make it look muddy.



