
1. Wrist Cuff With Three Teardrop Clusters

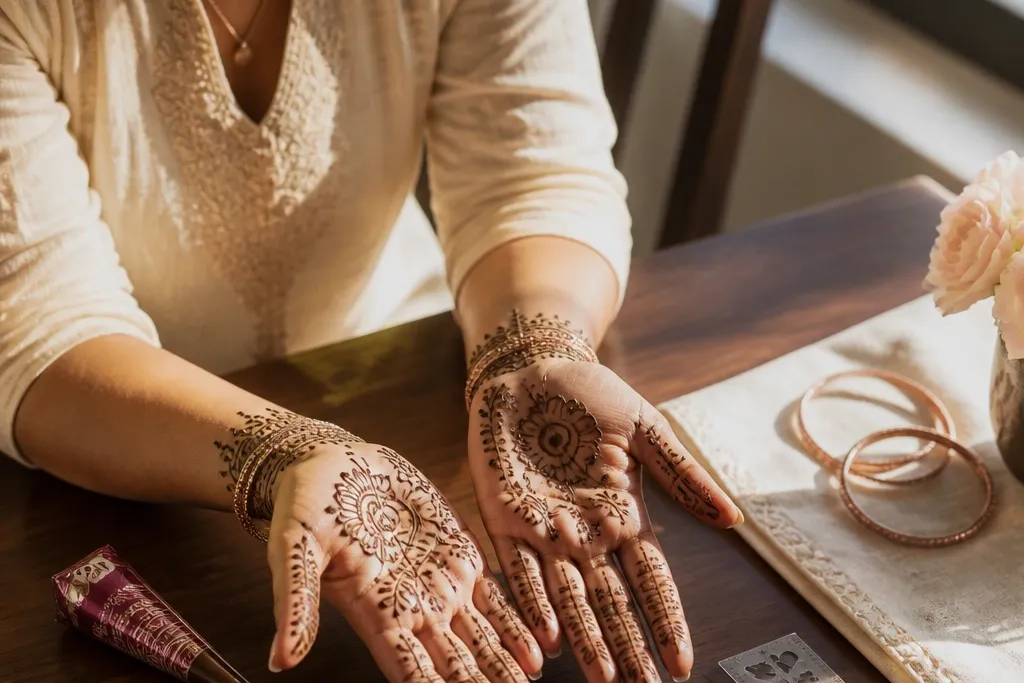
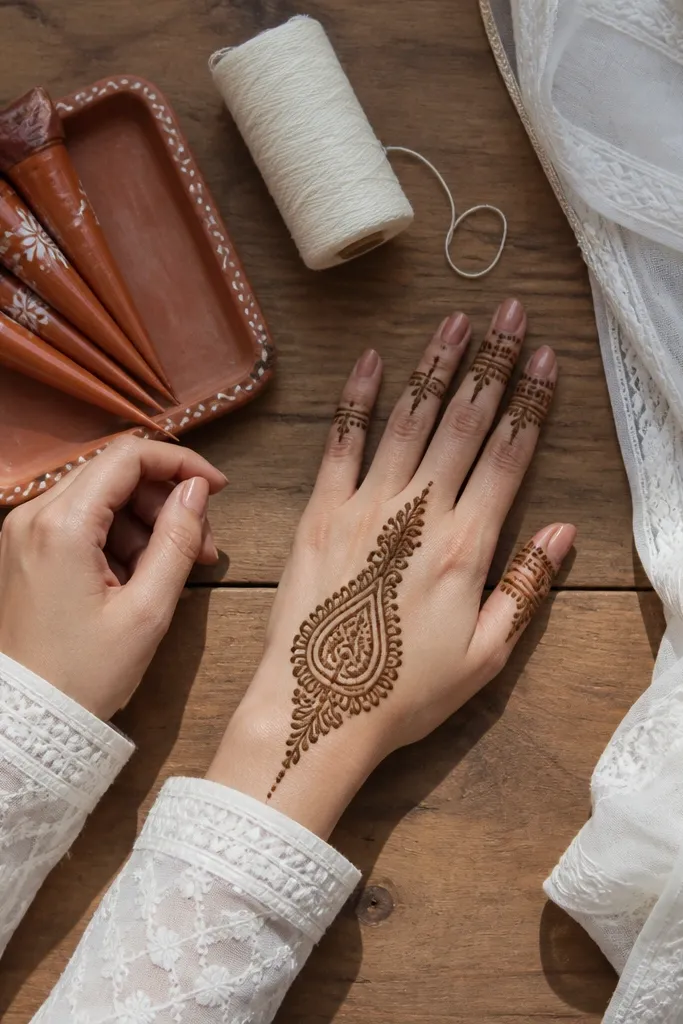
This design looks bridal because the wrist cuff is dense and structured, while the rest stays light. You get a clear focal point at the cuff with three teardrop clusters that read well in photos even from a distance. The vine up the back of the hand is thin and controlled, so it doesn’t overwhelm your fingers. It’s beginner-friendly because teardrops are forgiving, and the pattern repeats in a way your hand can memorize. Plan on 45-60 minutes for one hand, and it works best for brides who want something clean under bangles.
Start by drawing a bracelet-shaped cuff around the wrist using two parallel lines with small gaps between them. Add three teardrop clusters across the cuff — one centered and two flanking it — each cluster made from 5-7 teardrops pointing inward. Then draw a single vertical vine from the center of the cuff toward the middle of the back of the hand, with 4-6 small leaves along it. Finish by adding a tiny dot at each leaf tip so the line looks intentional.
Use a ruler or a straight edge for the first cuff outline so both sides match in height.
Don’t fill the cuff with solid blocks; use dot-fill and short strokes so it stays crisp.
2. Finger Bands With a Single Center Paisley
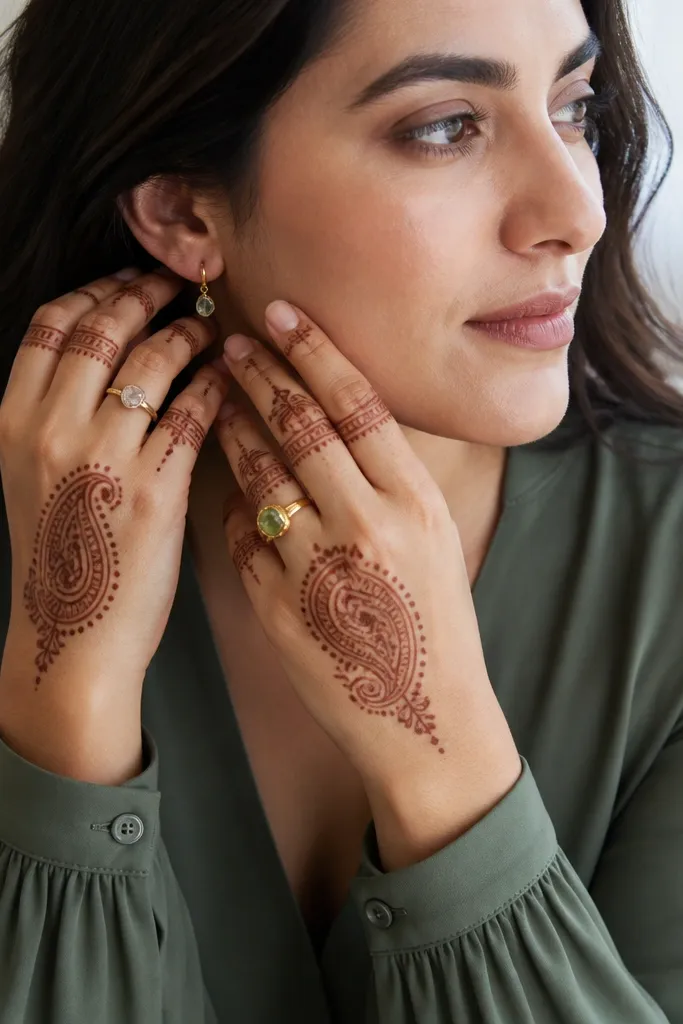
This is the easiest “looks like you tried” bridal layout because it anchors everything to one bold paisley. Finger bands make the hands look finished, and the single paisley gives you that bridal focal point without needing lots of tiny motifs. The negative space between bands keeps it photogenic instead of cluttered. If you’re nervous about drawing complex flowers, paisley is your friend — it’s one continuous shape that you can outline slowly. This design is great for short sessions and for brides who want their mehndi to look neat in close-ups.
Begin with thin bands across each finger starting just below the finger joint line — aim for 1.5-2 cm wide bands on the back of the fingers. Leave the thumb with a smaller band or just a vine tip near the base. Draw one medium paisley in the center of the back of the hand, with the top pointing upward toward the wrist. Fill the paisley interior using small dots and a few short curved strokes, then connect the paisley bottom to the wrist with a light vine line.
If your paisley feels lopsided, draw it first as a light outline, then darken only the outer curve.
Avoid overlapping bands across the same finger joint; the spacing makes it look expensive.
3. Half-Moon Wrist Net and Straight Vine
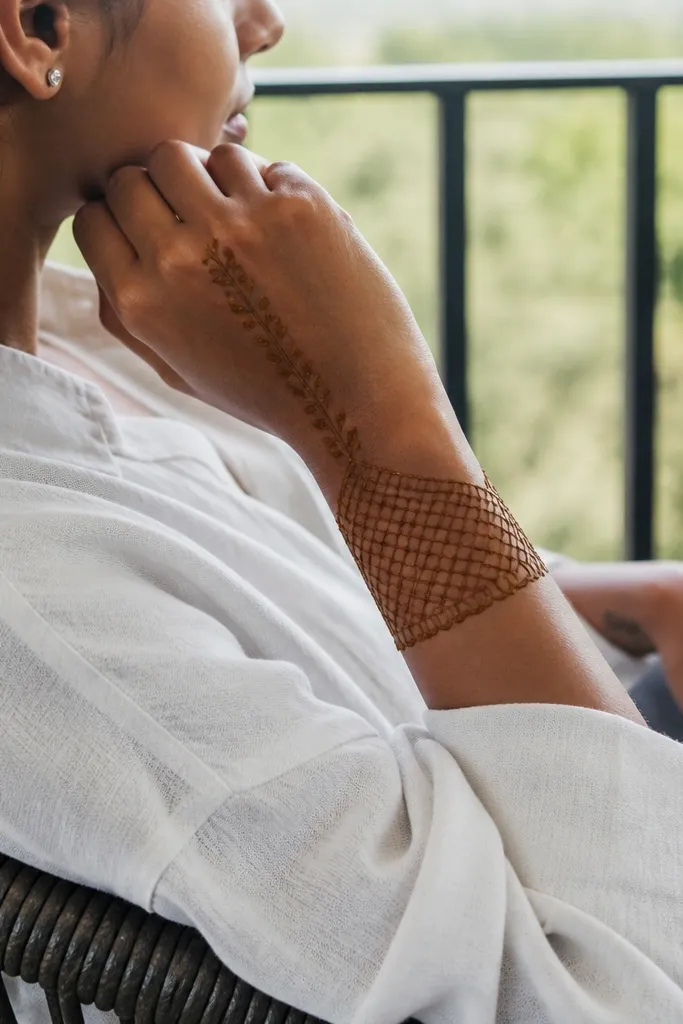
This design is photogenic because it gives you texture without heavy filling. The half-moon net at the wrist reads like lace, and the straight vine keeps the whole look clean and modern. Beginners can pull it off because the net is made from repeated tiny squares or diamonds, not delicate petals. The straight vine also gives you a reliable axis, so your motifs don’t drift. It’s a smart pick when you want bridal mehndi that looks neat in bright daylight and under flash photos.
Draw a half-moon around the wrist using a thick outer arc line, then add a second arc inside it to frame the net area. Fill the half-moon with small diamond shapes: make one dot, draw two short lines to form a diamond, then repeat in a grid. Next, draw a straight vertical vine from the center of the half-moon up the back of the hand with 5-7 small leaves. Finish with tiny dot clusters at the base of the vine where it meets the cuff.
Use consistent diamond size by counting 3 diamonds across the width of your cuff, then repeat the same count upward.
Don’t make the net too dense; leave small gaps so the lace effect shows.
4. Minimal Rosebud Corner on Back of Hand
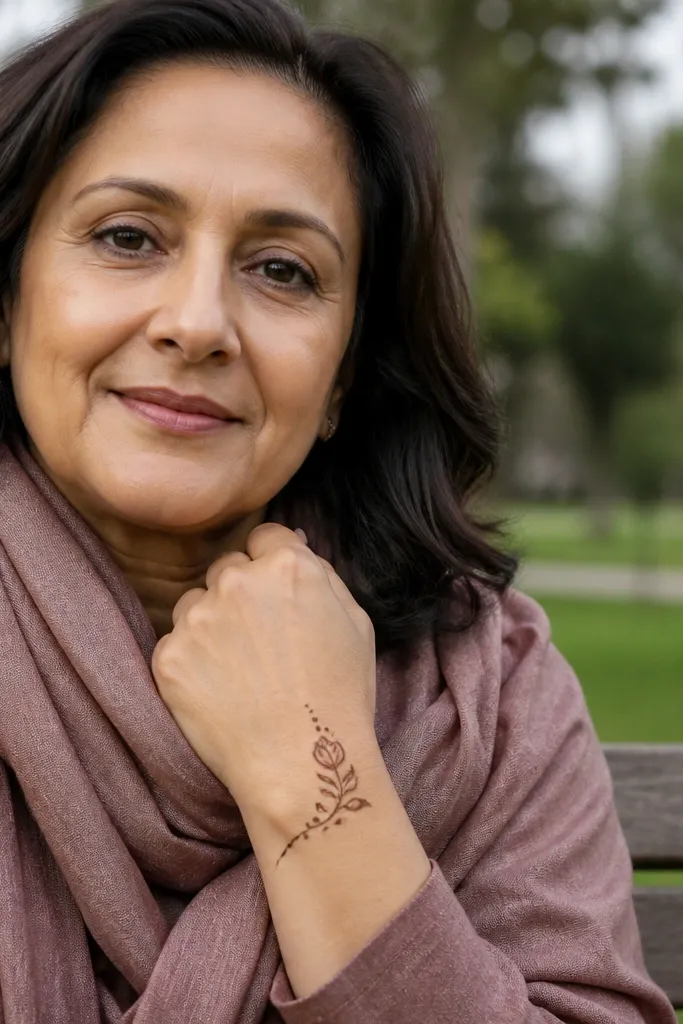
This is for brides who want bridal mehndi but hate “busy” patterns. A single rosebud corner motif looks intentional and stylish, especially when paired with a simple vine border. The design uses a few controlled petal shapes plus dots, so you get a floral look without doing a full flower bouquet. It photographs well because the motif sits where the camera naturally focuses when hands are raised. Plan about 30-45 minutes for one hand, and it suits minimal jewelry days.
Start by drawing a thin vine border along the outer edge of the back of the hand, from the wrist toward the top corner near the index side. Place one rosebud at the upper corner: draw a small spiral center, then add 5-6 petal loops around it. Add 2-3 tiny leaves along the vine near the rosebud, each leaf filled with dot shading. Finish with a small dot trail between the rosebud and the vine to connect the elements visually.
Keep the rosebud small and crisp; bigger petals can blur if your paste line is thick.
Don’t add extra flowers everywhere; one strong motif beats five weak ones.
5. Three-Line Ladder With Dot Fill
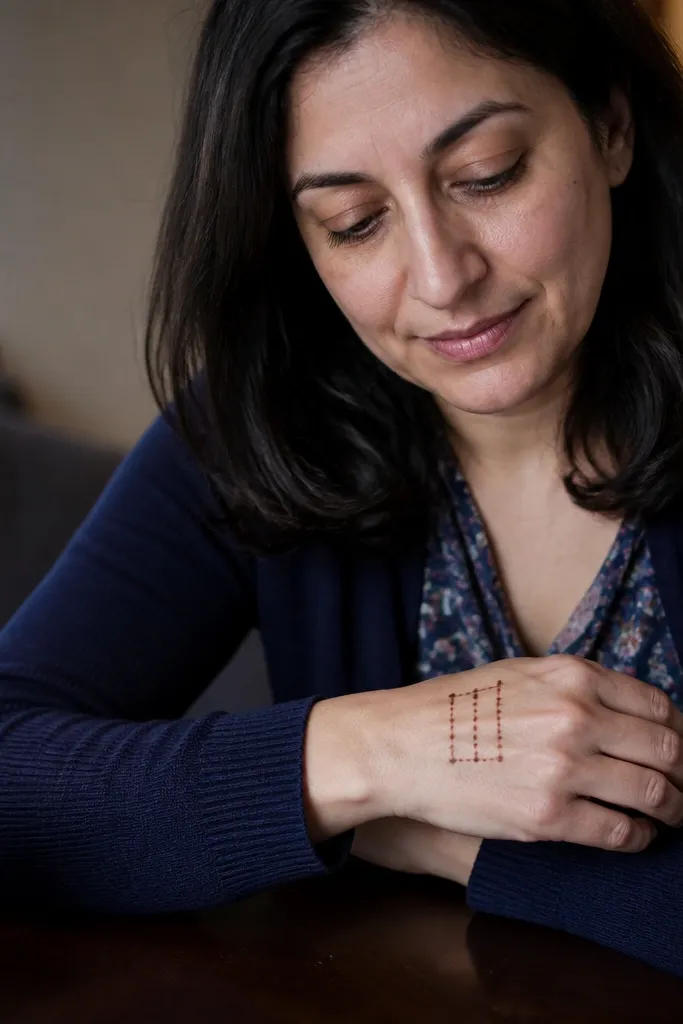
This design is surprisingly bridal because it creates a clean geometric rhythm. The “ladder” lines give structure, while dot fill adds softness so it doesn’t look harsh. It’s beginner-friendly because geometry is easier than curves, and you can repeat the same spacing across the hand. It also looks great in photos where hands overlap, since the pattern stays readable. If you want something simple that still looks designed, this is the one.
Draw three parallel vertical lines starting at the wrist and extending toward the middle of the back of the hand — keep them evenly spaced. Connect the lines with short horizontal rungs every 1-1.5 cm, forming ladder steps. Add dot fill in the spaces between rungs using a tight grid of small dots. Finish by adding a thin wrist band line at the base and a tiny vine curl at the top end of the center vertical line.
Mark your spacing lightly with a dot guide before outlining so your ladders stay straight.
Avoid rushing the dot fill; uneven dot size makes the whole pattern look messy.
6. Paisley Chain Across Fingers and Wrist
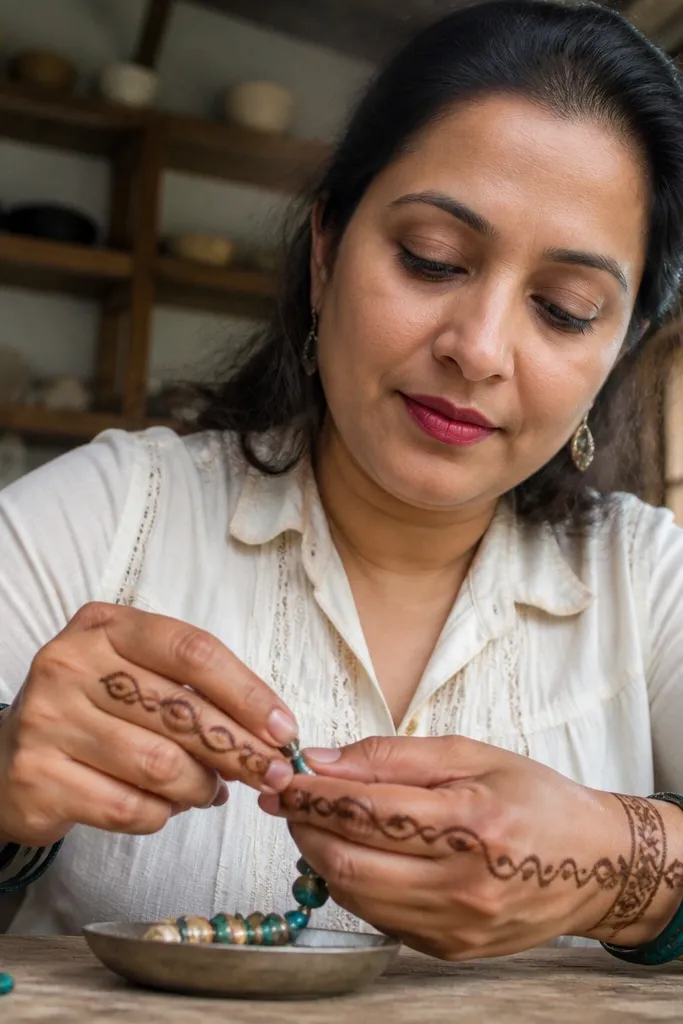
This one looks gorgeous because the repetition reads like bridal jewelry. Small paisleys across the fingers create texture without requiring heavy floral work, and a matching wrist border makes the pattern feel complete. Beginners can handle paisleys because each one is a mini outline, not a complex flower. The chain style also keeps your fingers looking uniform, which is what photos demand. It takes about 50-70 minutes for one hand, depending on how many paisleys you place.
Start with a thin wrist border band — a single curved line with small dot bumps along it. Then draw a small paisley chain across the back of the fingers: place 1 paisley on the index side of each finger and connect them with thin vine lines. Keep the paisleys about the same size so the chain looks intentional. Add tiny dots inside each paisley near the center, then fill the outer curve with 3-4 short curved strokes.
Pro tipUse a consistent paisley height by counting 6-7 teardrop-like bumps in the outline each time.
AvoidDon’t make the paisleys too large; they’ll crowd the fingers and blur.
7. Wrist Vine With Three Leaf Clusters
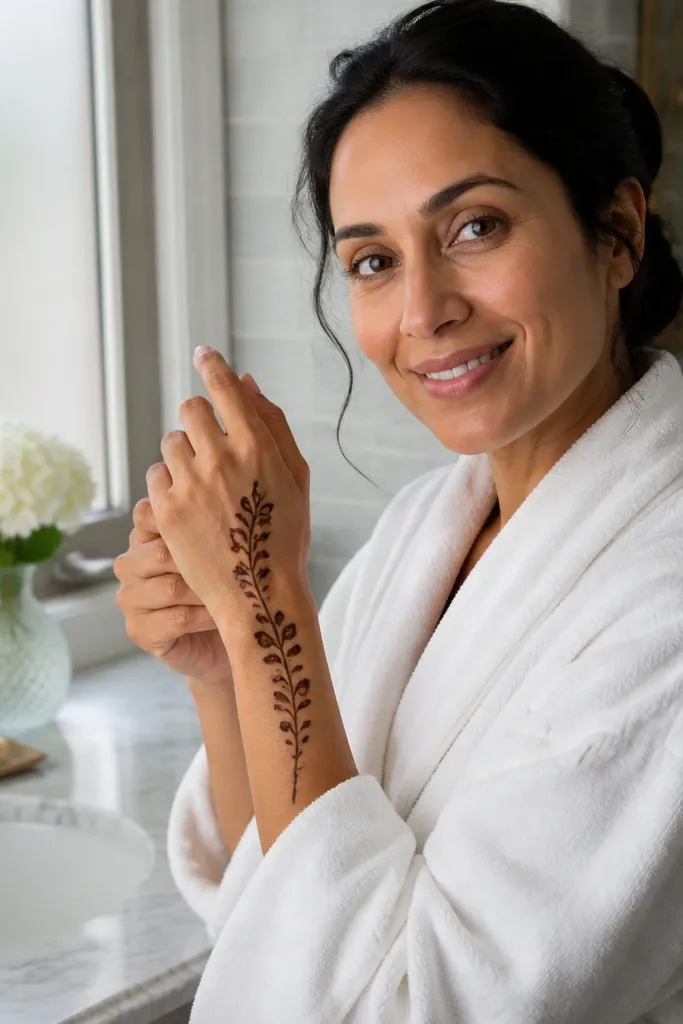
If you want simple bridal mehndi that still looks delicate, this is the cleanest option. The design focuses on a main vine with three leaf clusters, so you’re not trying to decorate every inch. The leaves are easy to draw using a teardrop outline with a center vein line, and the dot accents make it look finished. This is also a good choice if you’re working with a thicker cone, because the pattern has fewer tiny gaps to manage. It suits brides who want an airy look that doesn’t feel heavy.
Begin with a simple wrist band made from two thin curved lines with a few dots between them. Draw one vine line from the center of the wrist up the back of the hand, then create three leaf clusters along the vine. Each leaf cluster should have 2-3 leaves: draw leaf outlines as teardrops, add a central line, then dot-fill the base. Finish by tying the vine to the wrist with a small curl on the left and right edges.
Make your leaf centers first as a straight line, then outline the teardrop — it keeps leaves symmetrical.
Avoid thickening the vine too much; it should look fine, not bold.
8. Geometric Corner Frame With Side Dots
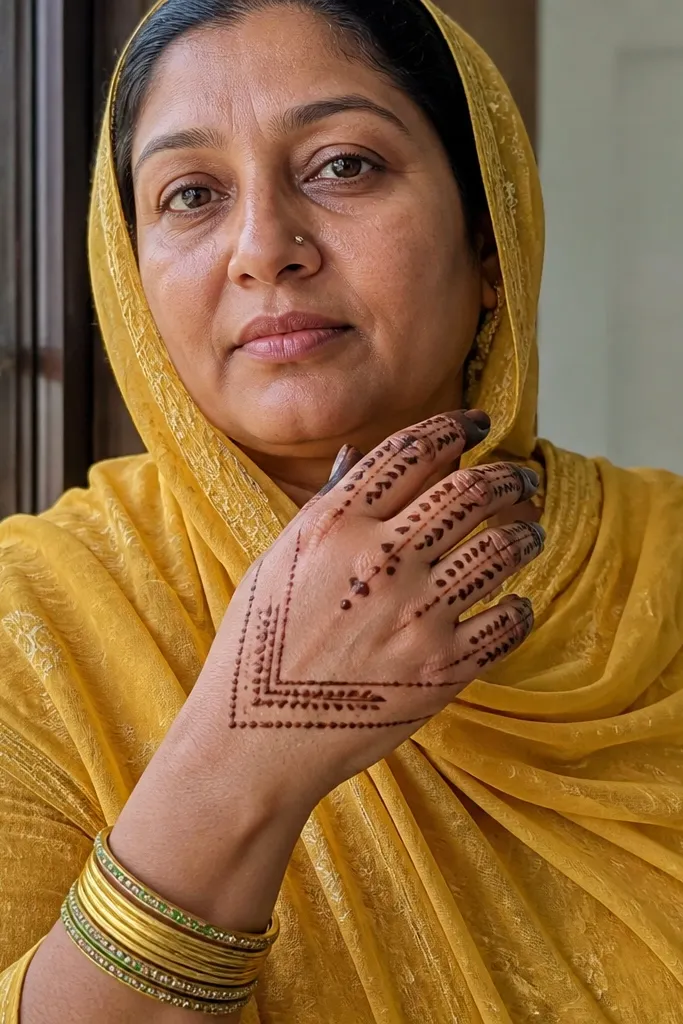
This design looks modern and bridal because it frames the hand like a pattern border. The corner frame gives structure, while side dots add softness and movement. It’s beginner-friendly because you’re drawing straight lines and small shapes, not detailed petals. Photographs love this because it stays readable even when the hand is angled. It also works well for brides who want mehndi that looks clean with both traditional and modern outfits.
Draw a rectangular-ish frame starting at the wrist and stopping before the fingers — keep it open on the inner edge so it doesn’t box the hand. Add a corner flourish at the top outer edge using two short diagonal lines and a small teardrop node. Place dot clusters along the frame edges: 5-7 dots per cluster, spaced evenly. Finally, draw a thin vertical vine line in the middle of the framed area and add one small leaf at the midpoint.
Keep your frame lines the same thickness by tracing the first line once, then darkening only the parts that look lighter.
Don’t fill the entire framed area; negative space is what makes it look bridal.
9. Shaded Teardrop Ladder With Wrist Start
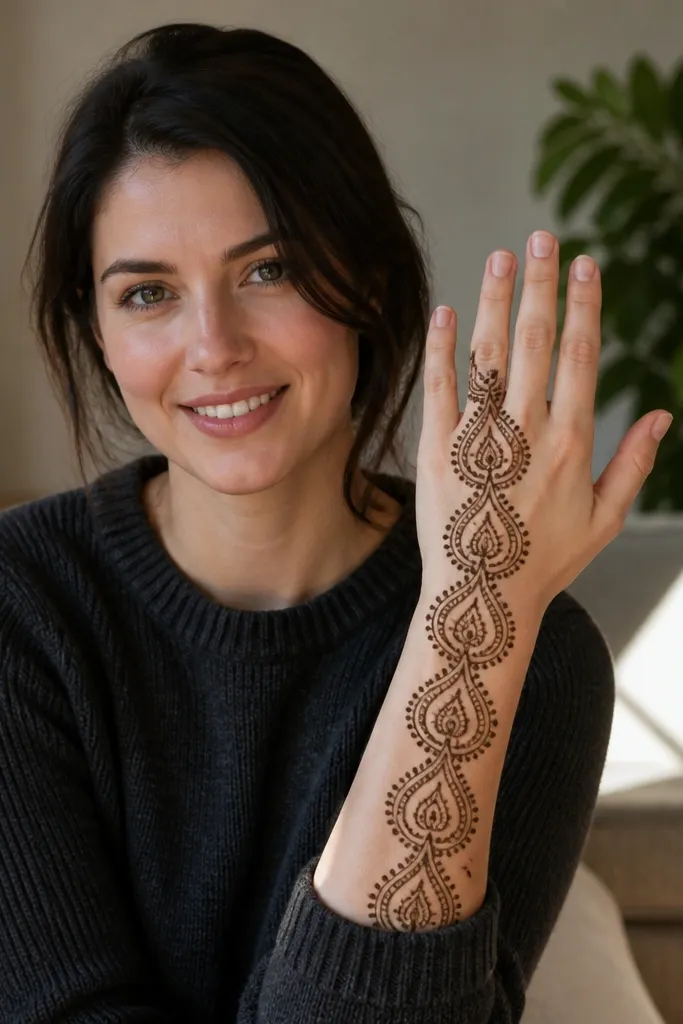
This design gives you a bridal gradient effect without complicated shading. The teardrop ladder starts at the wrist cuff, then climbs upward with teardrops that have dot centers and light side strokes. It looks polished because each teardrop is consistent and aligned along one central path. It’s also forgiving for beginners: even if one teardrop is slightly off, the repeated ladder still reads clean. Ideal for brides who want something classic but not overly floral.
Start with a wrist band as a single curved line, then add a second line slightly above it to create a narrow cuff strip. Draw a central vertical guide line, then place teardrops along it like steps — 7-10 teardrops total. For each teardrop, outline it first, add a dot in the center, then add 2-3 short strokes on the sides to create a light shaded look. Finish by adding a tiny curl at the top teardrop and two dots at the bottom where it meets the cuff.
Keep teardrops the same height by using one finger width as your spacing measure.
Avoid heavy solid filling in the teardrops; it darkens unevenly in photos.
10. Two-Finger Vine With Tiny Buds
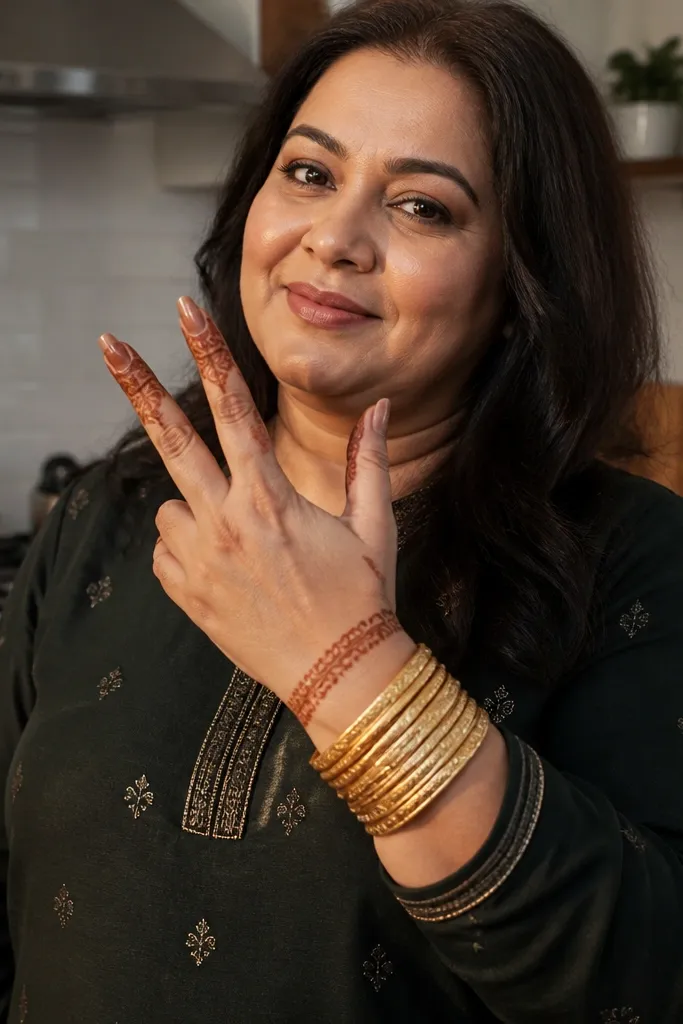
This is the “quiet but gorgeous” option. Instead of covering every finger, it focuses on two fingers with a vine and tiny buds, then balances it with a simple wrist band. The result looks intentional and bridal, especially if you’re wearing statement bangles that already draw attention to the wrist. Beginners will like it because buds are just small teardrops with dot fill. It’s also easy to adjust — add or remove one bud based on how much paste you have.
Draw a thin wrist band with a slightly thicker outer line and a few dots inside. Choose two adjacent fingers (usually index and middle) and draw a vertical vine line from the base of the fingers down to the wrist. Add tiny bud shapes along the vine: each bud is one teardrop outline with a dot center. Connect the vine to the wrist with a small leaf near the cuff, then add one short diagonal line to frame the side of the hand.
If your vine line breaks, don’t restart. Overlap the broken section by 1 cm so it looks like a natural curve.
Don’t extend the vine across all fingers; it makes simple designs look accidental.
11. Rosette Cluster at the Wrist Edge
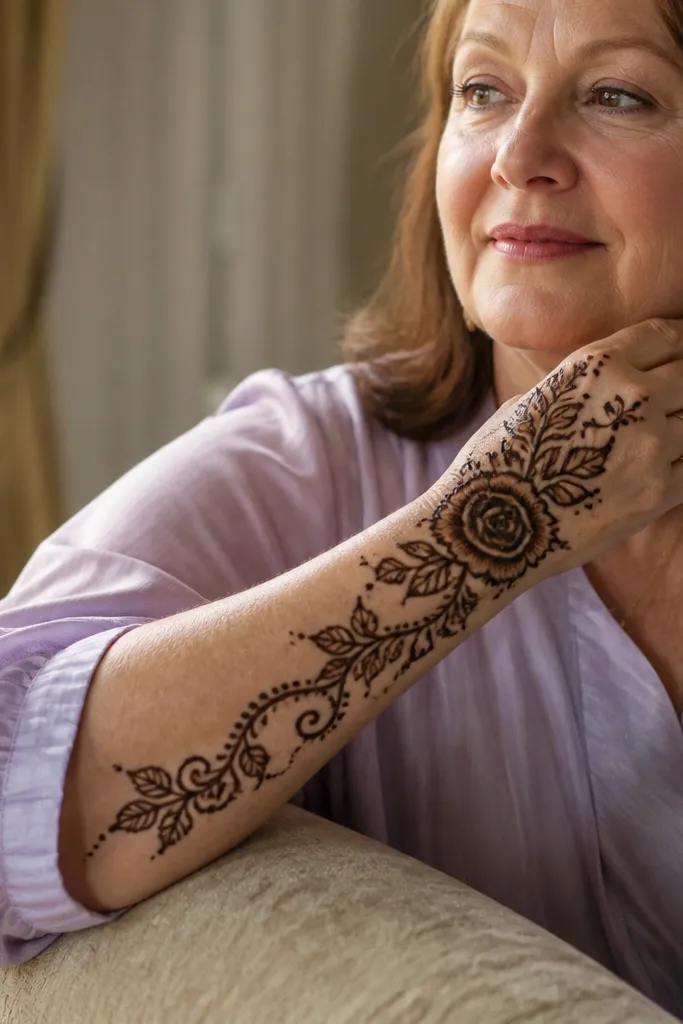
A rosette cluster looks bridal because it creates a textured flower feel using only repeated loops. This design places the rosette at the wrist edge where bracelets sit, so it looks layered even when it’s simple. The connecting vine keeps your hand from looking like separate stickers — everything flows from cuff to center. It’s beginner-friendly because a rosette is made from 6-8 loops around a dot, repeated in one spot. It’s also great for brides who want a softer look that still photographs well.
Start with a narrow wrist cuff line — two parallel curves with a small space between them. At the outer wrist edge, draw a rosette cluster: one center dot, then 6-8 loops around it like petals made from teardrop loops. Add two small side buds below the rosette using teardrop outlines with dot fill. Draw a thin vine line from the base of the rosette up toward the back of the hand, with 3-4 tiny leaves.
Make loops consistent by keeping the same loop size and spacing around the center dot.
Avoid large rosettes; they blur if your paste line is thick.
12. Back-of-Hand Center Star With Dotted Rays
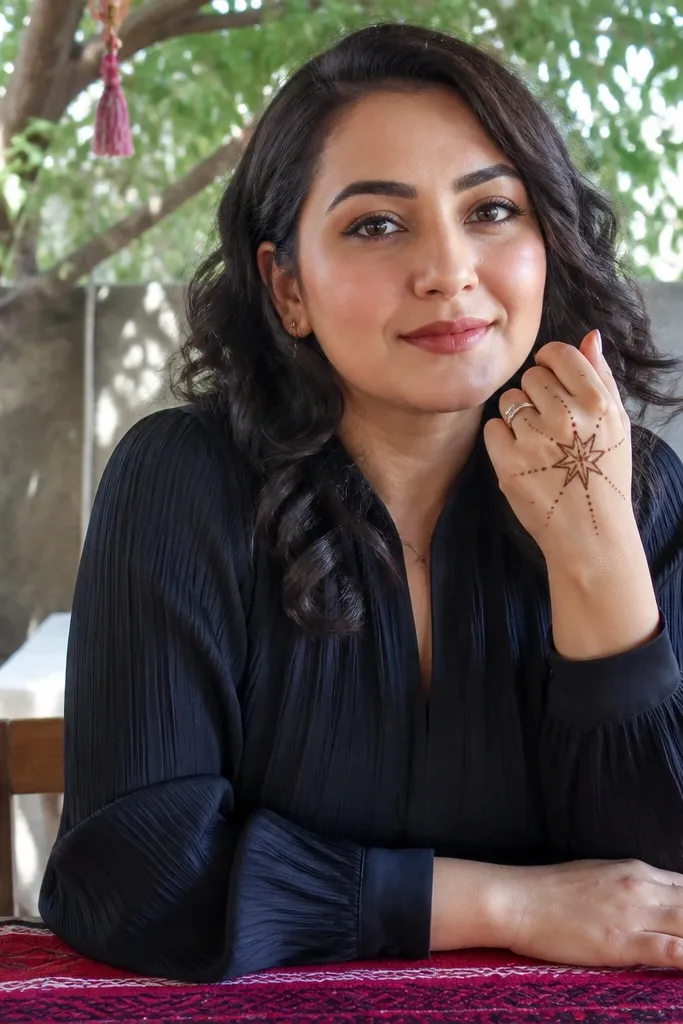
This is a clean bridal design that reads instantly in photos. A center star creates a strong focal point, and dotted rays add movement without needing full shading. Beginners can do it because the star is just straight lines and controlled points, then you fill with dots rather than complex patterns. It’s a great choice if you want something different from paisley and flowers but still bridal. Expect 35-55 minutes for one hand.
Draw a thin wrist border line, then mark the center of the back of the hand with a small dot. Create a star outline using 5 points, keeping the lines thin. Add dotted rays: from the center, draw short curved arcs filled with dots so they radiate outward. Finish with two small curved leaf shapes near the star points closest to the wrist, and connect them with tiny vine lines.
If your star points look uneven, adjust by adding dots at the points to visually balance them.
Don’t overfill the rays with too many dots; it turns into a dark disc.
13. Checkerboard Finger Bands With Dot Corners
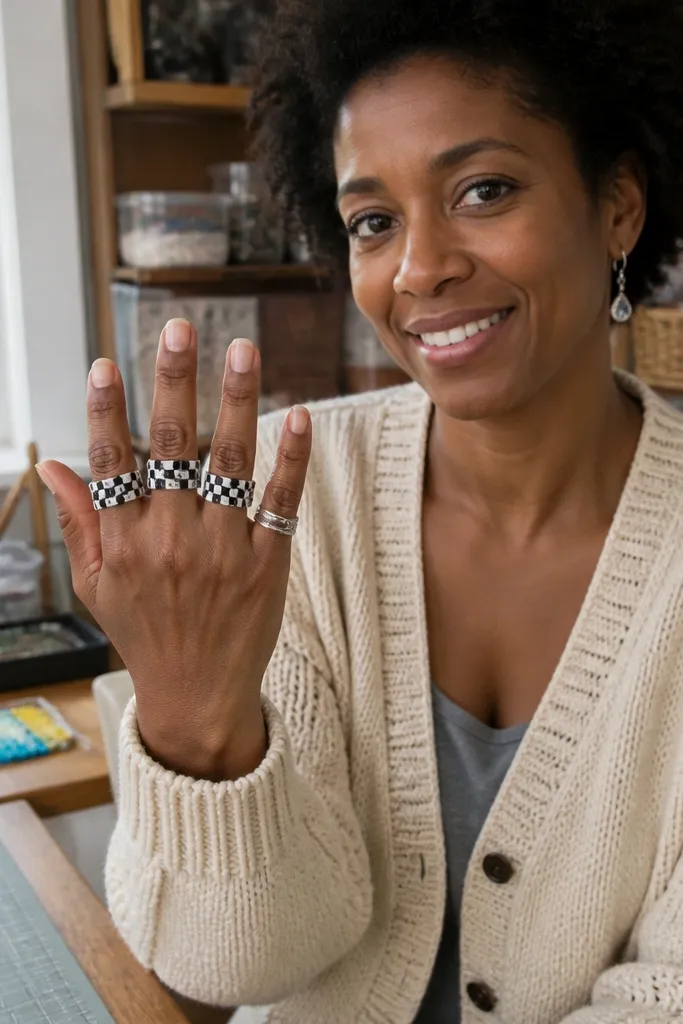
Checkerboard patterns look bridal because they’re structured and clean. This design uses finger bands with small checker cells, then adds dot corners so it feels decorative, not plain. It’s beginner-friendly because you repeat one tiny shape over and over, which reduces decision fatigue. It also looks great with rings since the finger band pattern sits right where jewelry catches light. If you want a modern bridal mehndi that still feels traditional, this is a strong pick.
Start with a wrist cuff made from two thin parallel lines and a few dots between them. On each finger, draw a band 1-2 cm wide, then fill it with a checkerboard: make a grid of small squares using dots at corners and short line segments. Leave a few squares empty to keep it airy. Add dot corners at the outer edges of each band so the pattern looks intentional even if your grid is slightly off.
Use your cone tip to tap dots at grid intersections first, then connect with short lines.
Avoid making the squares too large; large cells look blocky and messy when they stain.
14. Vine + Tiny Flowers Along the Outer Hand Edge

This design looks gorgeous because it creates a border effect along the outer edge of the hand. Tiny five-petal flowers are simple motifs, and when you space them evenly along a vine, the result looks delicate and bridal. It’s beginner-safe because each flower is just an outline of 5 teardrop petals around a dot. The inner hand stays mostly open, so the pattern doesn’t crowd your fingers. Great for brides who want a feminine look without heavy filling.
Draw a thin vine that starts at the wrist and runs along the outer edge toward the pinky side. Add tiny flowers on the vine: each flower has 5 petal loops around a center dot. Place flowers about 1-1.5 cm apart so they don’t merge. Finish with two leaf shapes between flowers and a small dot chain near the wrist cuff.
Keep flower petals slightly different in size by 1-2 mm so it looks hand-drawn, not printed.
Don’t pack flowers too tightly at the top; spacing keeps it airy in photos.
15. Wrist Cuff + Side Paisley Lines on Fingers
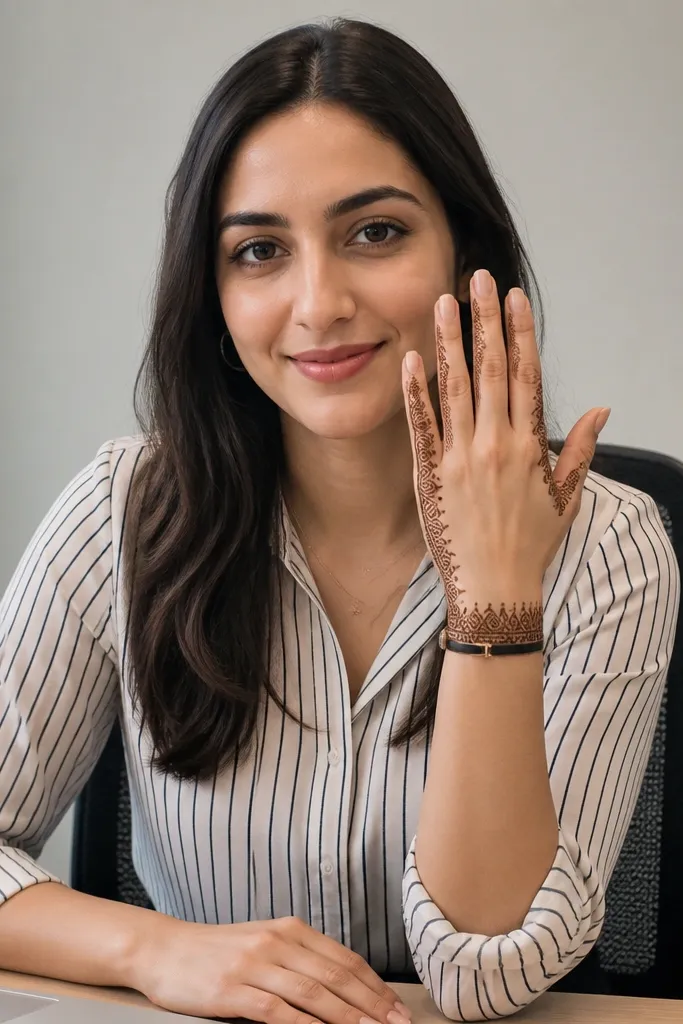
This one is a smart bridal trick: it uses paisleys only on the sides of the fingers, so your center hand stays clean. Side placement makes the design look longer and more elegant, and it hides small unevenness because the pattern follows finger contours. Beginners can do it because you’re repeating one paisley shape in a line, not building full coverage. It photographs well even when hands are relaxed, since the lines are visible from many angles. Plan 40-65 minutes per hand.
Start with a wrist cuff made from two parallel lines and a row of small dots along the outer edge. On the back of the fingers, draw a thin vertical line down each finger side (index through ring usually), then add a small paisley on each finger side line — 3-4 paisleys total per hand. Outline each paisley, then fill the center with 2-3 dots and a short curved stroke. Finish by connecting the lowest paisley on each side to the wrist cuff with a thin vine.
Pro tipIf your paisley outline looks shaky, darken only the outer curve and keep the interior minimal.
AvoidAvoid putting paisleys directly across finger joints; it makes the lines look broken after staining.
16. Center Mandala Without Full Filling
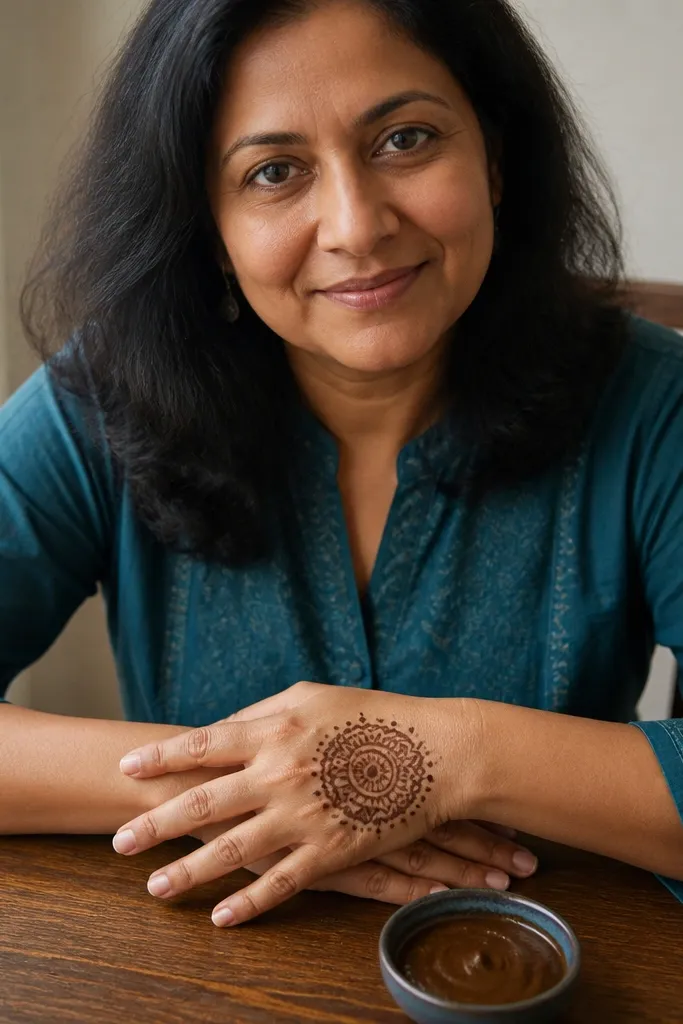
A full mandala can be intimidating, so this version is intentionally sparse but still reads bridal. You draw a small center mandala with outer dots and then keep the rest open, so the design stays light and photogenic. The trick is that mandala symmetry makes it look “done” even with minimal motifs. Beginners can focus on 1-2 rings and dotted spokes instead of dozens of tiny petals. It’s ideal for brides who want a focal center and don’t need full hand coverage.
Draw a wrist border line, then place a center dot on the back of the hand. Create a small mandala ring around it: one circle of teardrop petals facing outward, then a second ring made of short curved arcs. Add dotted spokes from the center to the outer ring using small dots placed at equal intervals. Keep the area between rings mostly empty, then add one thin vine line from the mandala edge down toward the wrist.
Use dot spokes to correct symmetry — if one side is off, add one extra dot to balance visually.
Don’t fill the mandala solid; sparse fill makes the stain look even instead of blotchy.
17. Diagonal Vines With Alternating Dots and Leaves
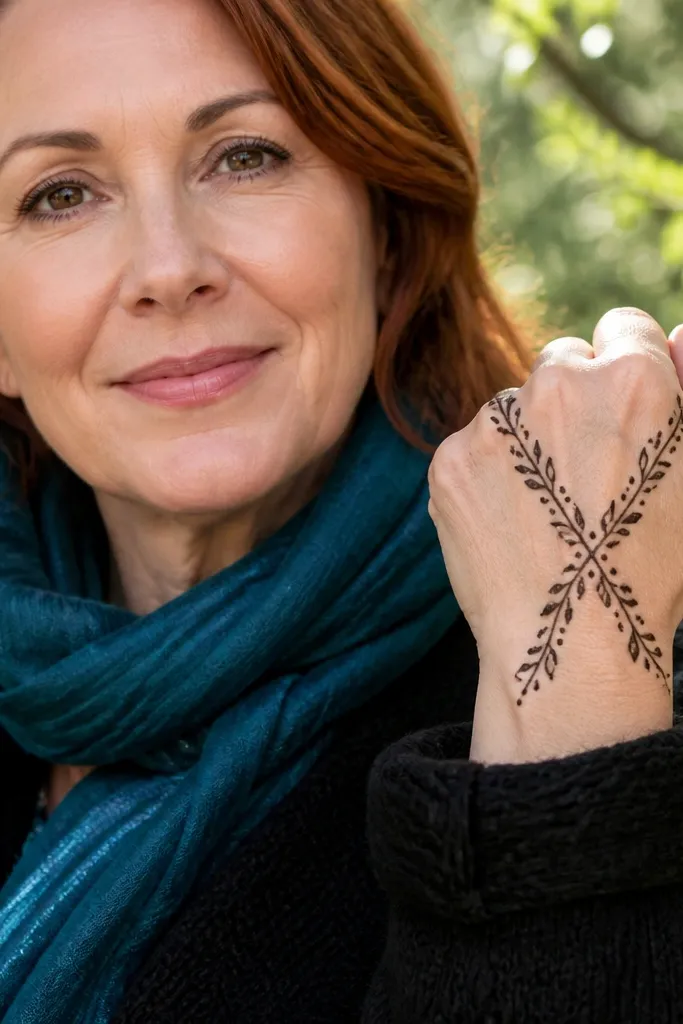
Diagonal movement makes simple mehndi look dynamic. This design uses two diagonal vines that cross at the center, then alternates leaf shapes with dot clusters. It’s beginner-friendly because you repeat one vine pattern and you don’t need to fill large areas. The crossing point creates a natural focal spot, and the negative space keeps it clean. It works well for photos because diagonal lines look sharp even when the hand is slightly turned.
Start with a thin wrist cuff line and a few dots on the outer edge. Draw one diagonal vine from the wrist toward the thumb side of the back of the hand, then draw a second diagonal vine from the wrist toward the pinky side so they cross near the center. Along each vine, alternate a leaf (teardrop outline with a center line) and a dot cluster (4-6 dots). Finish by adding tiny connecting curls around the crossing point so it looks intentional, not accidental.
Pro tipKeep leaf outlines narrow and pointed; wide leaves can blur into blobs after staining.
AvoidDon’t cross vines too low near the wrist; it can look like two separate lines instead of one design.
18. Lace Border Wrist With Minimal Finger Tips
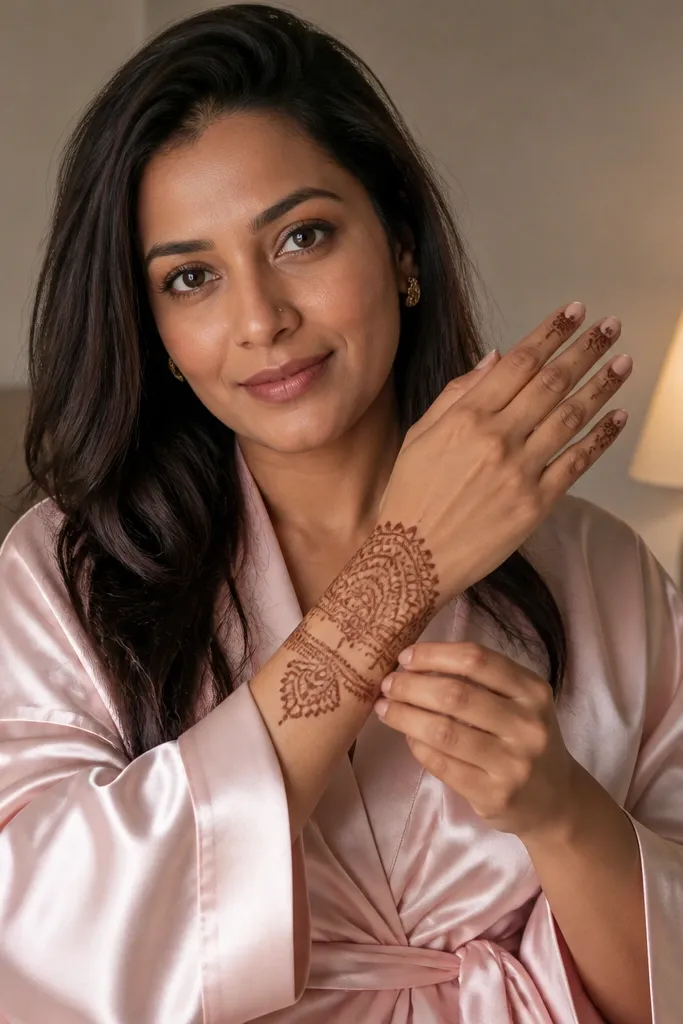
This is a bridal look that stays light and graceful. A lace border at the wrist gives you that traditional finish, while minimal finger tips keep the overall design from feeling heavy. Beginners can handle lace borders because it’s just repeated arches and dots, not complex flower clusters. The open center makes the hand look clean, and finger tips add a sweet detail that shows in close-up photos when hands are raised. Great for brides who want mehndi that doesn’t compete with jewelry.
Draw a wrist cuff frame with two parallel lines. Fill the outer edge with lace arches: make small curved arches along the border, and place a dot at the base of each arch. For finger tips, add a tiny motif at each fingertip base on the back of the finger — a single leaf or a 3-dot cluster. Connect the finger tips back to the wrist cuff using thin vine lines that run along the sides of the fingers.
If your lace arches look uneven, make them smaller and more frequent rather than larger and fewer.
Avoid covering the whole back of the hand; the empty center is what makes it look airy.
19. Small Heart Motif With Dot Halo on Back of Hand

Hearts look romantic, and this one still reads bridal because it’s placed in the center and surrounded by a dotted halo. The heart is easy for beginners because you only need two curved lobes and a pointed base, then you can keep the fill minimal. The halo gives structure and makes the motif stand out in photos. Pair it with thin vine lines and tiny leaves so it doesn’t look like a random doodle. This design is also good for brides who want a cute detail without full coverage.
Start with a simple wrist border line and then draw a thin vertical vine toward the center of the back of the hand. Place a small heart outline in the center, keeping the heart height about 2.5-3 cm. Add a dot halo around the heart: a ring of dots spaced evenly, with 18-24 dots total depending on your size. Fill the heart interior with 6-10 dots and 2 short curved strokes near the center. Finish by adding one tiny leaf on each side of the vine near the heart.
Pro tipKeep the heart outline thin; thick outlines stain darker and can make the heart look heavy.
AvoidDon’t add extra hearts around the hand; one centered heart looks intentional.
20. Wrist Band + Back-Hand Flower Bud Line
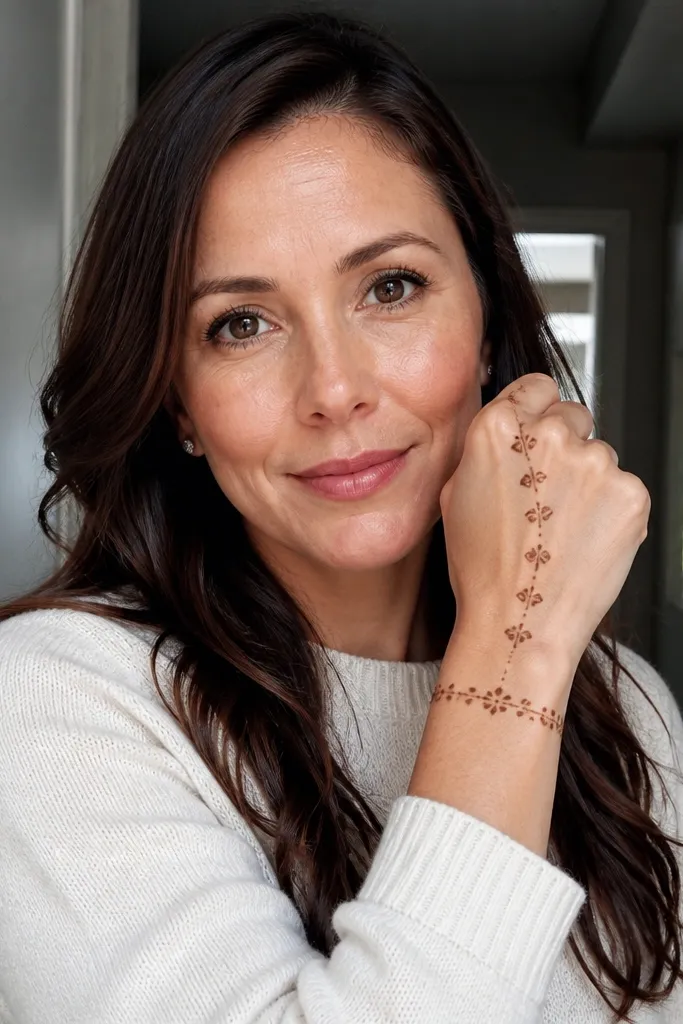
This design looks bridal because it turns a simple strip of motifs into a bridal “trail.” The wrist band sets the frame, and a line of small flower buds climbs upward, giving you a sense of direction. Flower buds are beginner-friendly: each bud is a small teardrop cluster around a dot. You get a photogenic pattern without filling the entire hand. It’s a good choice for brides who want something simple that still looks like a planned design, especially when the hand is photographed from above.
Begin with a wrist band made from two parallel lines and a row of dots inside the band. Draw a single curved line from the center of the wrist toward the middle of the back of the hand. Along that line, place 6-8 flower buds: each bud uses 3-5 petal outlines around a center dot, with minimal dot fill. Add 2-3 tiny leaves between buds and connect the lowest bud back to the wrist band with a short vine curl.
Pro tipKeep buds the same size by using the same petal count on every bud.
AvoidAvoid big petal shapes; small buds look sharper after staining.



