
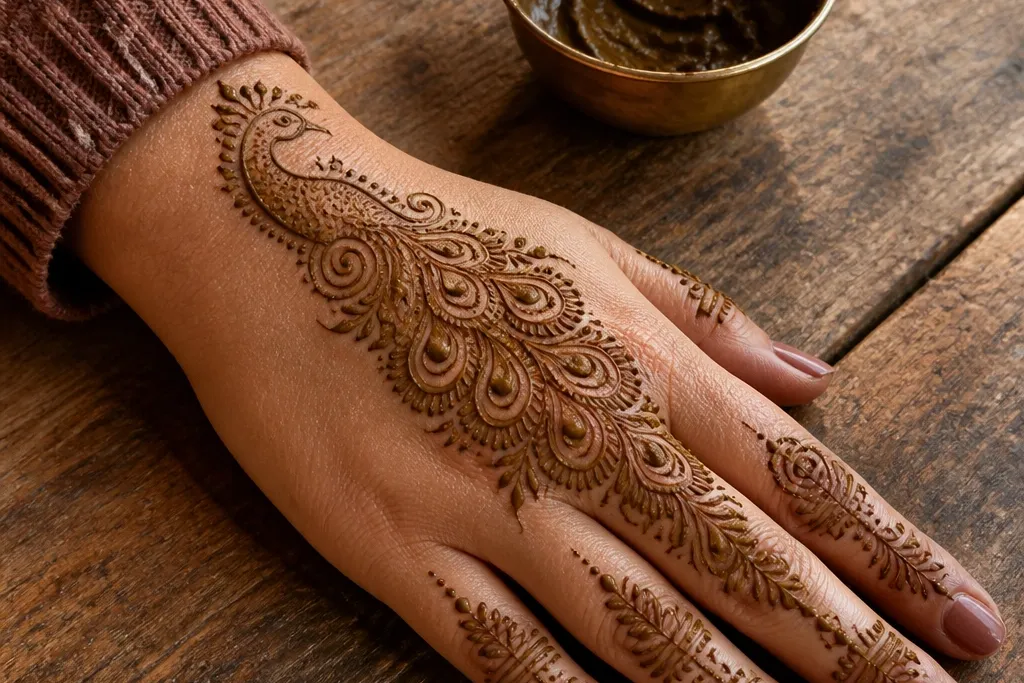
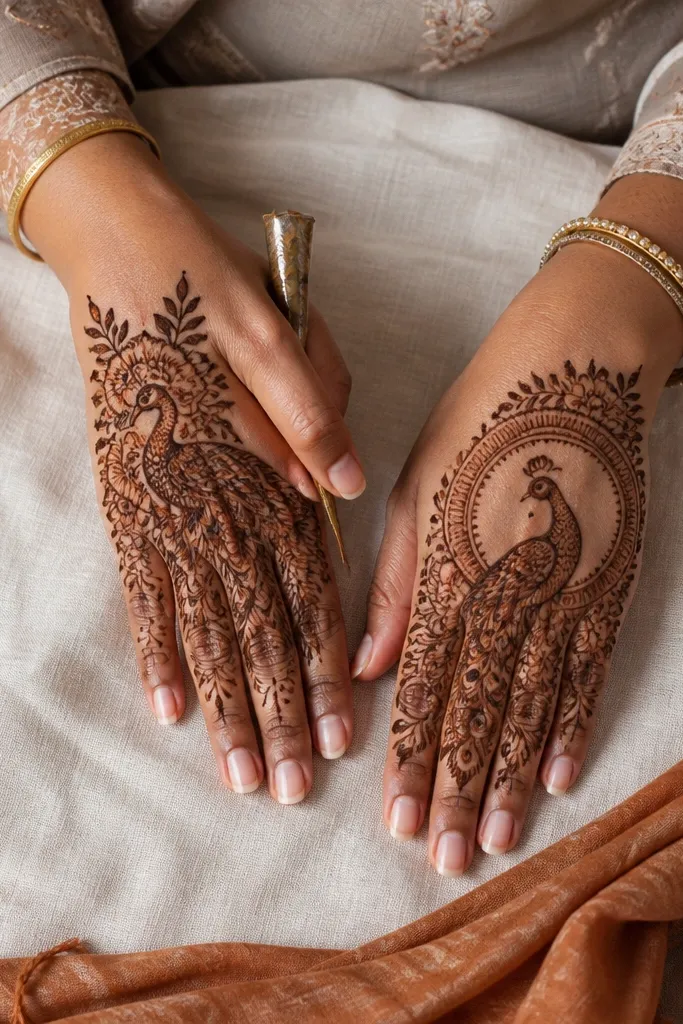
1. Classic Peacock Fan with Wrist Band
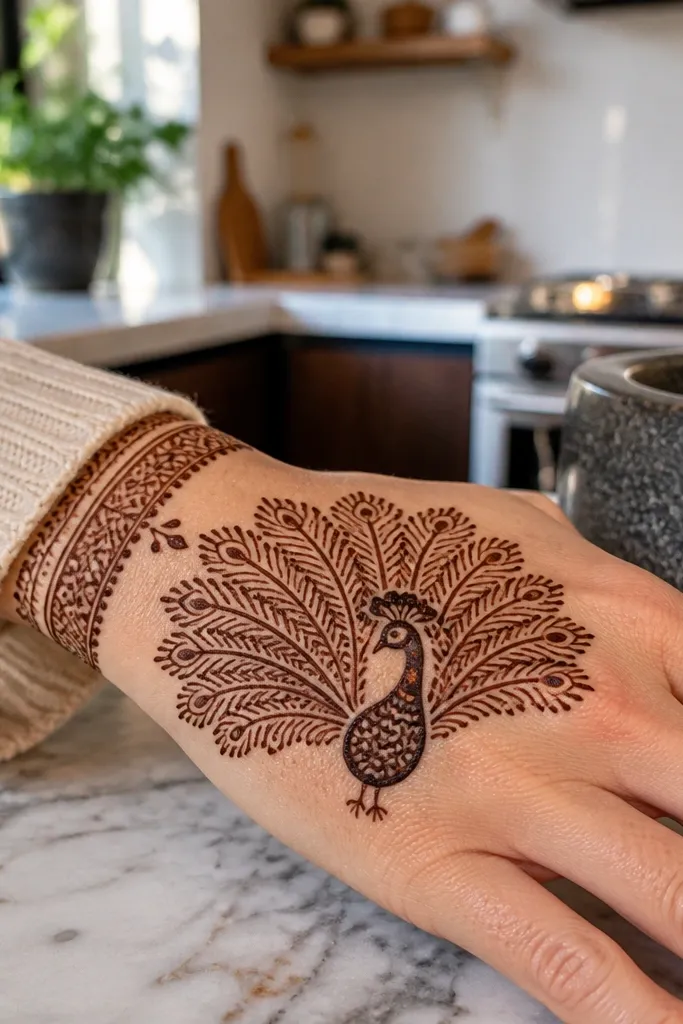
This is the peacock back-hand layout that photographs cleanly because the tail fan has a clear left-to-right spread. The wrist band gives you a crisp top edge, then the peacock body sits centered so the design doesn’t drift toward one side. The feathers are repeated in a consistent arc, each one separated by a small skin gap so the pattern stays airy. It’s a great choice if you want maximum peacock look without covering every inch of the hand. Skill level is beginner-friendly for the outline, but you’ll need steady hands for the feather repetition.
Start by drawing a curved wrist band across the wrist crease with small dots on the inner edge. Next, place a vertical “spine” line from the wrist toward the middle knuckle, then sketch the peacock body as a teardrop shape on that spine. Finally, build the tail fan: draw an arc of 7 to 9 feather stems branching from the body, then add eye dots in each feather center and connect them with a thin lace border.
Pro tipMark feather positions with 9 light guide dots first, then fill between them so your fan stays even.
AvoidDon’t overfill the feather centers — heavy blotting makes the fan look like one dark mass.
2. Peacock Neck S-Curve with Feather Rail
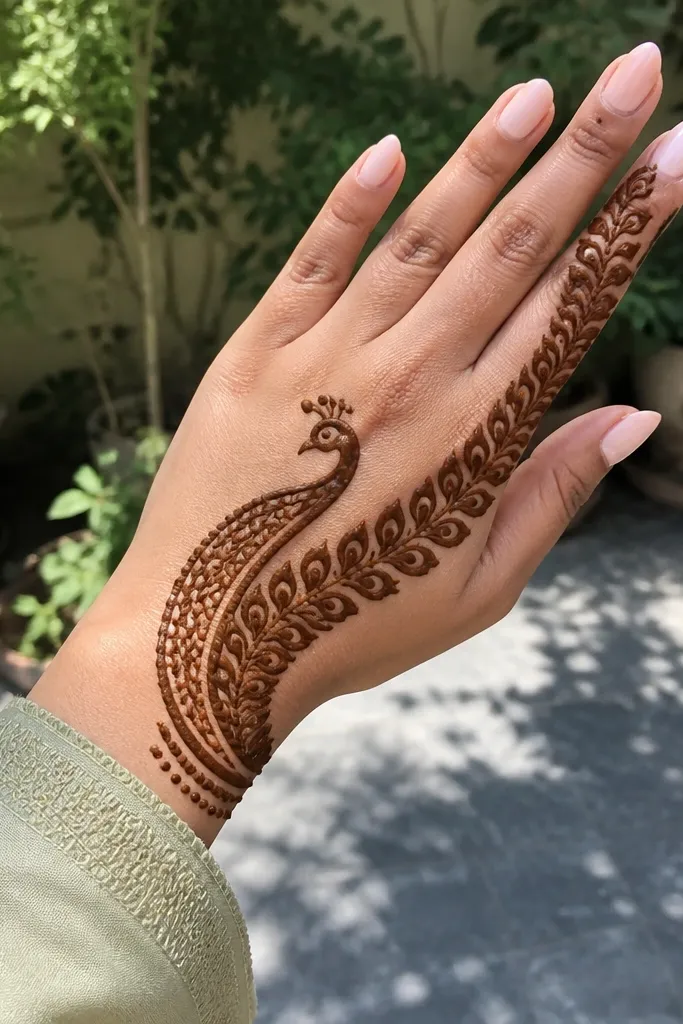
This one looks elegant because it uses an S-curve neck that visually pulls the eye upward. Instead of a huge tail fan, the design uses a “feather rail” — a line of repeating feather motifs that runs diagonally across the back hand. The central body stays small, so the overall look is lighter and less crowded. It’s ideal if you have a smaller hand or you want the peacock to read clearly without taking over the whole back. The look is also forgiving because the diagonal rail hides minor asymmetry.
Draw a diagonal guide line from the wrist toward the index knuckle. Place the peacock body as a small oval on the guide line, then sketch an S-shaped neck that curves toward the ring finger side. Build the feather rail by repeating tiny feather ovals along the diagonal, adding a single dot “eye” inside each. Finish by adding a thin border around the outer edge of the hand with micro curls.
Use a slightly thicker line for the neck outline so it stays readable even if the fine lace fades a bit.
Avoid placing the feather rail too close to the knuckles — it makes the design feel cramped.
3. Tail Fan Only with Knuckle Lace
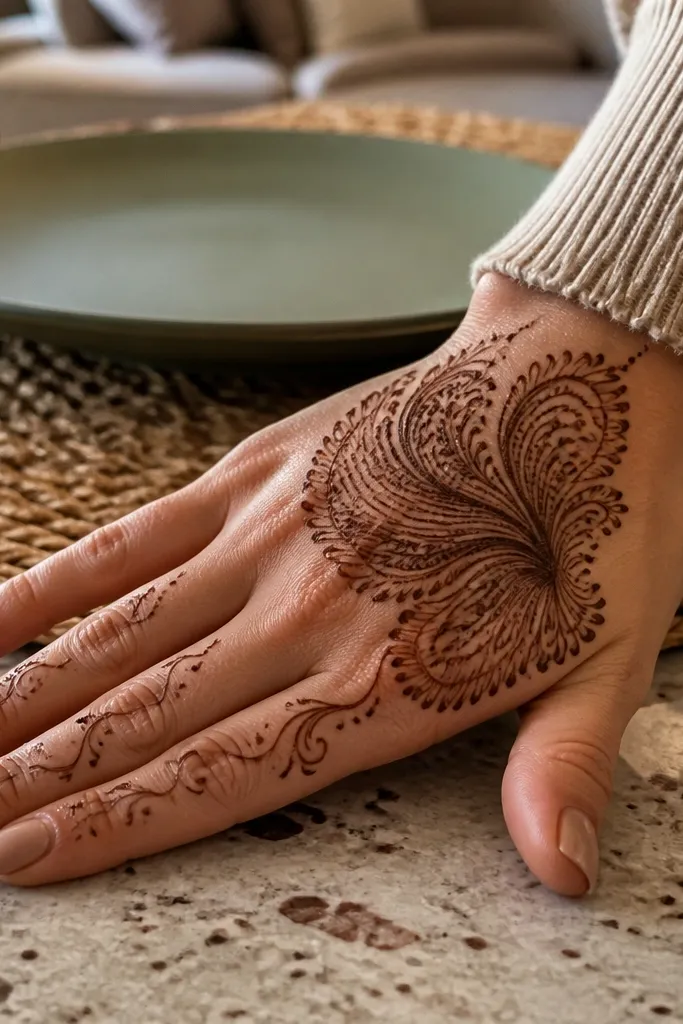
If you love peacock style but hate full coverage, this is the best back-hand balance: tail fan dominates, knuckles get lace. The tail fan spreads from mid-hand toward the wrist, while the knuckle area uses thin chain-like curls. The result is very photogenic because the negative space between lace and feathers keeps the hand looking refined. It’s also a good plan for events where you’re wearing a bracelet — the wrist area stays clean enough to show jewelry. You’ll spend most of your time on the feather arc and the lace connectors.
Start with the tail fan base: draw a curved line near the wrist crease and place the peacock body at its center. Sketch 8 feather stems outward in a broad arc, with each feather ending in a pointed tip and a small eye dot. For knuckles, add a lace grid: draw a thin horizontal band across each knuckle and connect them with short curls. Finish with a few micro dots along the outer border so the lace looks intentional, not random.
Keep lace lines very thin. Thick lace next to feather tips makes everything blur together.
Don’t extend feather stems to every knuckle — keep the fan mid-hand so the lace has space.
4. Double Feather Columns with Center Peacock
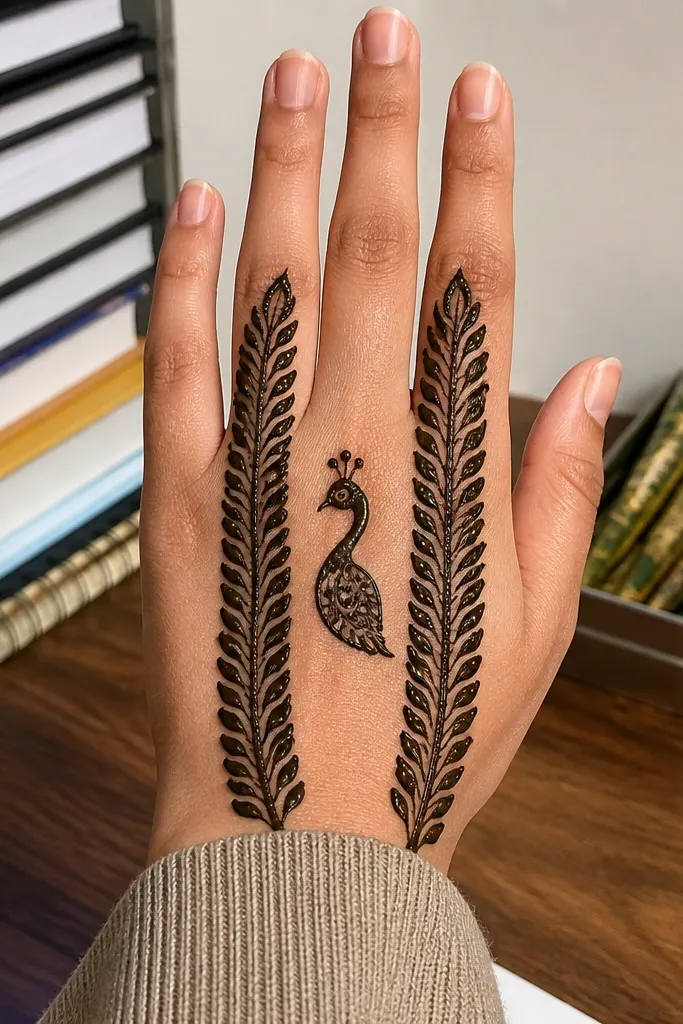
This design looks modern because it uses two clean vertical feather columns instead of one wide fan. The center peacock body stays small and sharp, while the columns create a balanced structure. It’s a strong choice if you want symmetry and you’re working with limited time — you can repeat the feather shape down each side. The photo effect is crisp because the columns form “rails” that frame the body. It’s also great for those who find peacock designs too wide for their back hand.
Draw a vertical center spine from the wrist to the middle knuckle. Place the peacock body at the center as a teardrop with a small circular eye dot. Then create two feather columns: on each side of the spine, draw 6 to 7 feather shapes stacked vertically, each with a teardrop base and a central dot. Connect the top ends to the wrist band with a thin border line and add micro curls at the sides for finish.
Pro tipUse a consistent feather height by measuring with your cone tip — same length each time keeps the columns straight.
AvoidAvoid uneven spacing between the two columns. If one side is tighter, the symmetry breaks fast in photos.
5. Peacock Eye Dot Mandala Back Hand
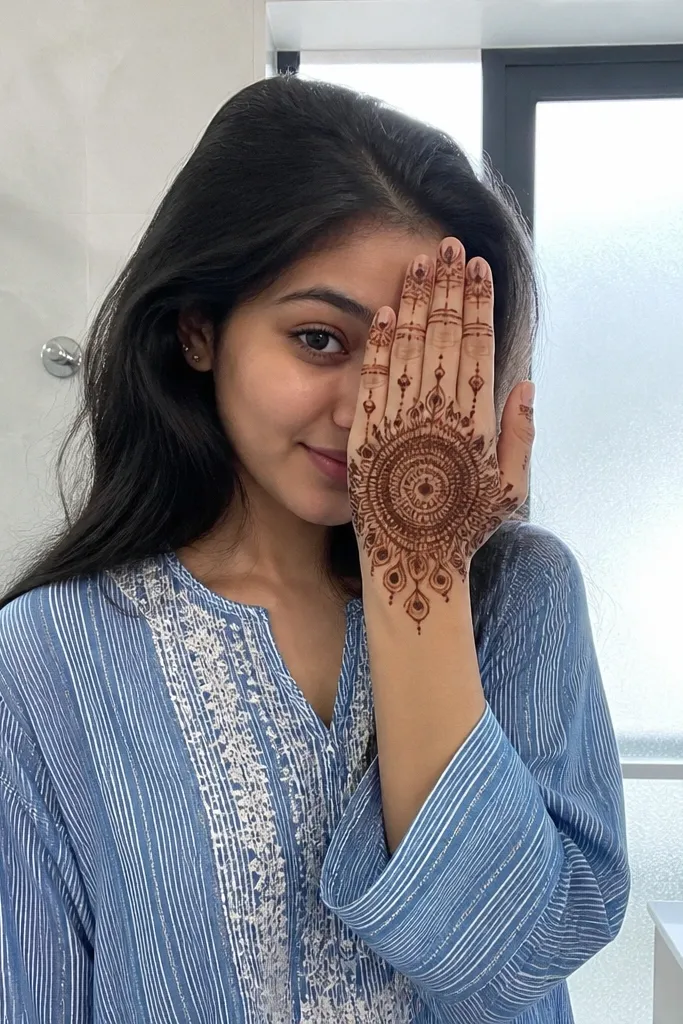
This peacock variation reads like a mandala because the feather eyes become a radial pattern. The center is a circular motif with layered dots and small loops, then the peacock feathers radiate outward in a controlled fan. It’s striking because the “eye dots” are repeated and aligned, so the design looks intentional rather than decorative. This is a good option if you want something more artistic than the classic fan. Expect a medium time commitment due to the center mandala details.
Start by drawing a tight circle at the center of the back hand, near the middle knuckle. Fill the circle with layered dots and tiny teardrops like a flower ring. Next, draw 7 to 10 feather arcs radiating from the circle, each arc ending in a pointed tip with a central eye dot. Add a thin lace border along the outer edge of the hand to keep everything framed.
Keep the center circle slightly smaller than you think. A big center makes the feathers look crowded.
Don’t make feather tips too long — long tips overlap and the radial look collapses.
6. Wrist to Knuckle Peacock Ladder
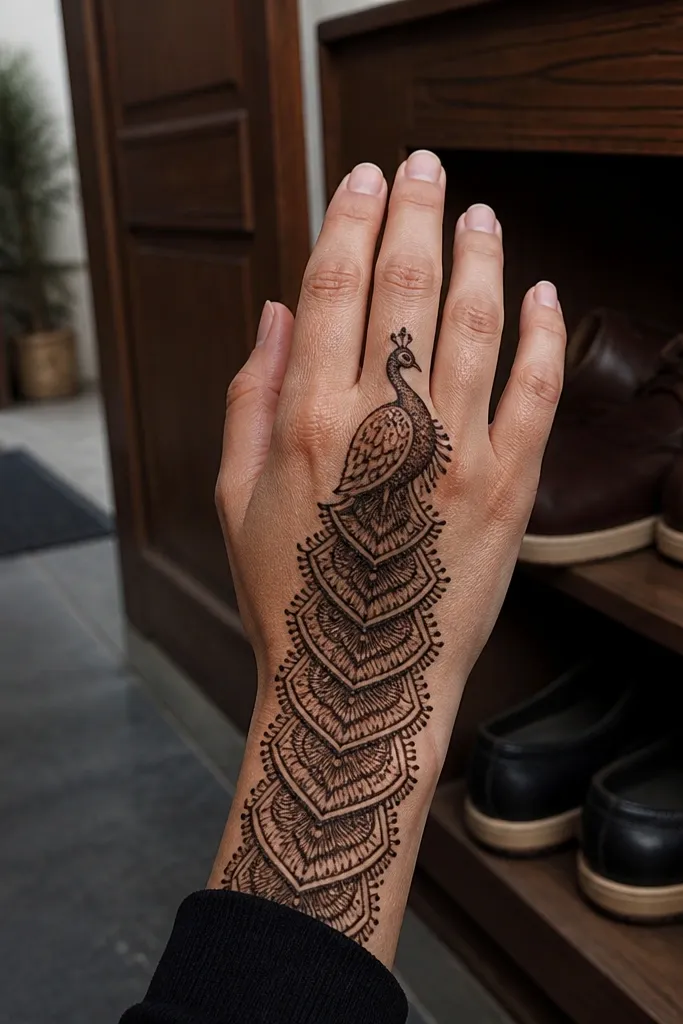
The ladder structure makes this peacock design look neat even if you’re not super skilled with freehand. You get a vertical rhythm from wrist to knuckles, with repeating feather blocks that read like a staircase. The central body is placed at the upper mid-hand so the design feels lifted. This is perfect for back hands where you want visible peacock elements but also want your knuckle area to stay clean. It also looks great under bangles because the wrist section is bold and clear.
Draw a wrist band line, then split the hand into two vertical halves with a faint guide line. Place the peacock body near the upper half, then create a “ladder” by drawing repeating feather blocks on each side of the spine. Each feather block has a small pointed tip and a single eye dot. Connect the ladder blocks with thin horizontal lines that stop before the outer edge so you keep negative space.
Use short horizontal connectors. Long connectors fill too much skin and flatten the ladder look.
Avoid thick outlines on every block — too much thickness makes the pattern heavy.
7. Peacock Tail Fan with Floral Border
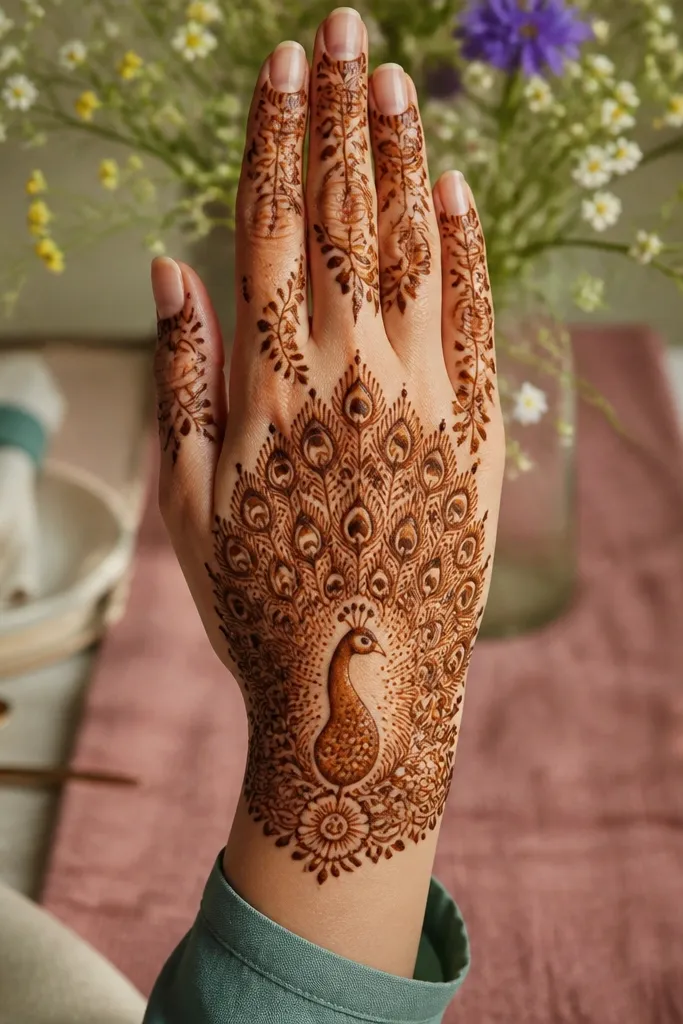
This one wins for aesthetics because it blends peacock feathers with floral edging. The tail fan stays the main event, but the outer border uses small blossoms and buds that make the design look finished. The floral border also helps hide small placement mistakes since it creates a consistent frame. It’s a great pick for festive events where you want the mehndi to look like a complete set, not a single motif. Skill level is intermediate because the border needs consistent spacing.
Start with the wrist band and draw the peacock body centered on a spine line. Build the tail fan with 8 feather stems, each with a central eye dot and a thin inner curve. Then add the floral border: around the outer edge, draw alternating small buds and blossoms, each connected with micro curls. Finish by adding a few dots between feathers and floral motifs so the transition looks smooth.
Keep floral buds smaller than feather eyes. If the buds match the eye size, the peacock loses focus.
Don’t let the floral border touch the feather tips. Keep a thin skin gap for separation.
8. Peacock Body Teardrop with Feather Fringe
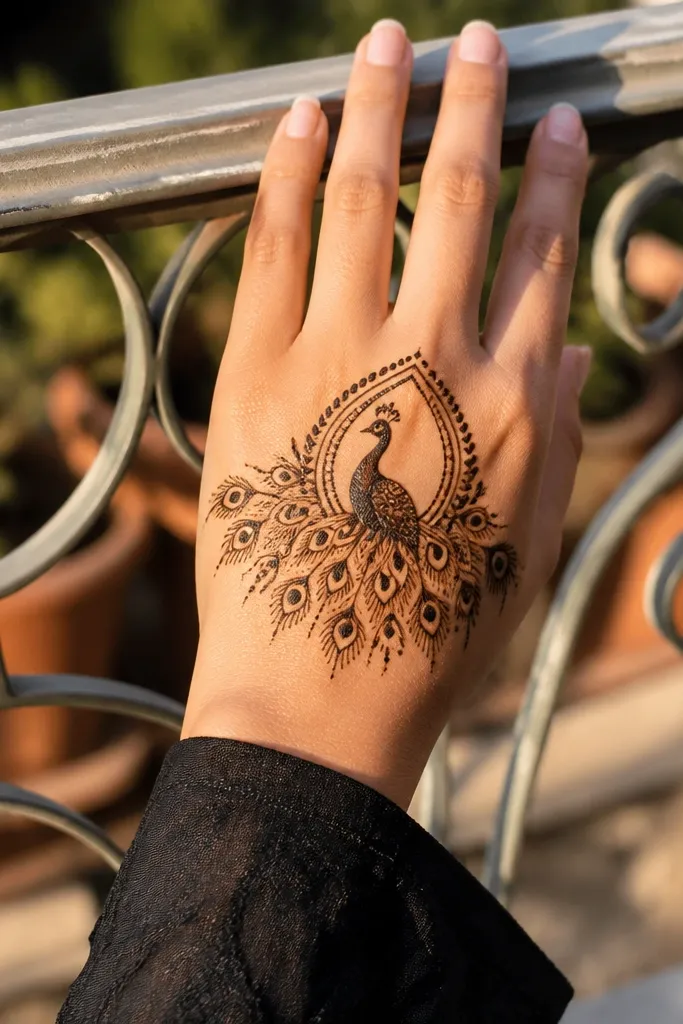
This design focuses on a clean peacock body shape, then adds a feather fringe that frames it like a curtain. The fringe sits across the center of the back hand, so the motif looks balanced and doesn’t sprawl. It’s photogenic because the teardrop body gives a strong focal point, while the fringe provides movement without clutter. Choose this if you want peacock style but don’t want a full tail fan. It’s also easier to execute because the fringe is a repeat pattern with fewer arcs.
Draw a teardrop peacock body centered on the back hand, with a small circular eye dot inside the upper third. Add a short neck curve above the body and a tail base line below it. Now create the feather fringe: draw 10 to 12 small feather shapes along a horizontal curve across the mid-hand, each feather angled slightly upward. Connect the fringe to the wrist and knuckles with thin micro curls and dots.
Pro tipAngle every feather the same direction. Consistency makes the fringe look intentional in photos.
AvoidAvoid random feather sizes. Mix in only if you keep the center feather the largest.
9. Peacock in a Side Crescent Frame
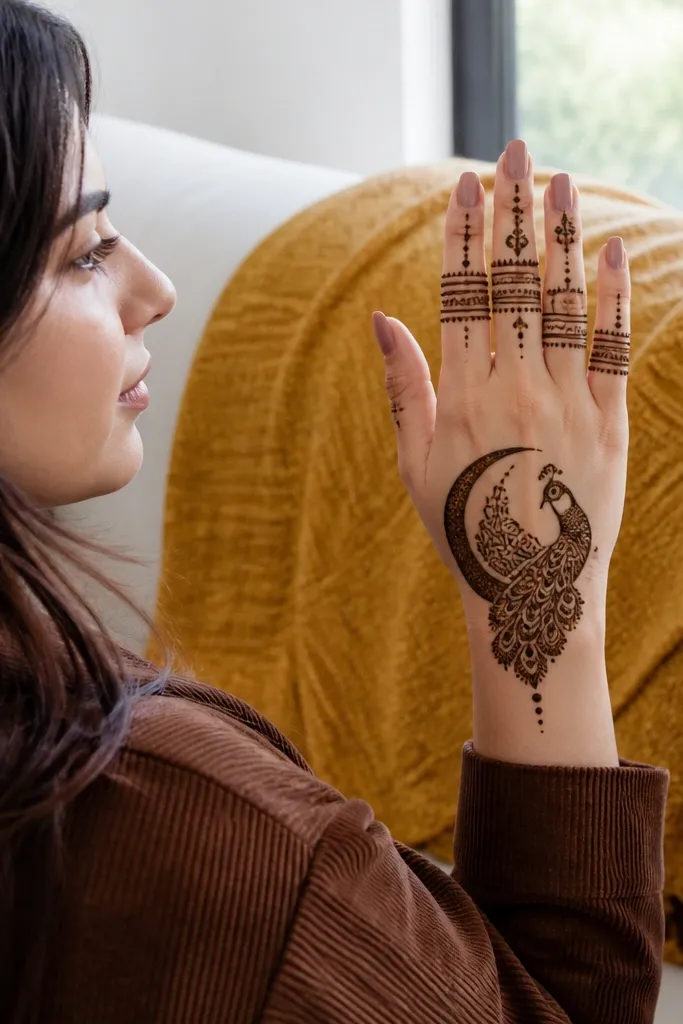
This peacock style looks different because the tail fan sits inside a crescent frame instead of spreading freely. The crescent guides your placement and makes the design look like it belongs to one clean composition. It’s great if your back hand has asymmetry or if one side of your knuckles is harder to line up — the frame hides it. The peacock body is smaller, while the tail feathers do the work. It’s a solid choice for medium skill level and a faster session than full lace coverage.
Draw a crescent arc starting near the wrist crease and ending near the outer knuckle side. Place the peacock body at the inner edge of the crescent so the neck points toward the center of the hand. Build the tail fan along the crescent arc with 7 to 8 feather stems, each feather ending in a pointed tip with an eye dot. Add a thin inner border line following the crescent edge to seal the frame.
Start the crescent first. Everything else looks better when the frame is accurate.
Don’t make the crescent too tight. A tight arc makes feathers overlap and blur.
10. Peacock Feather Mandala Half-Hand
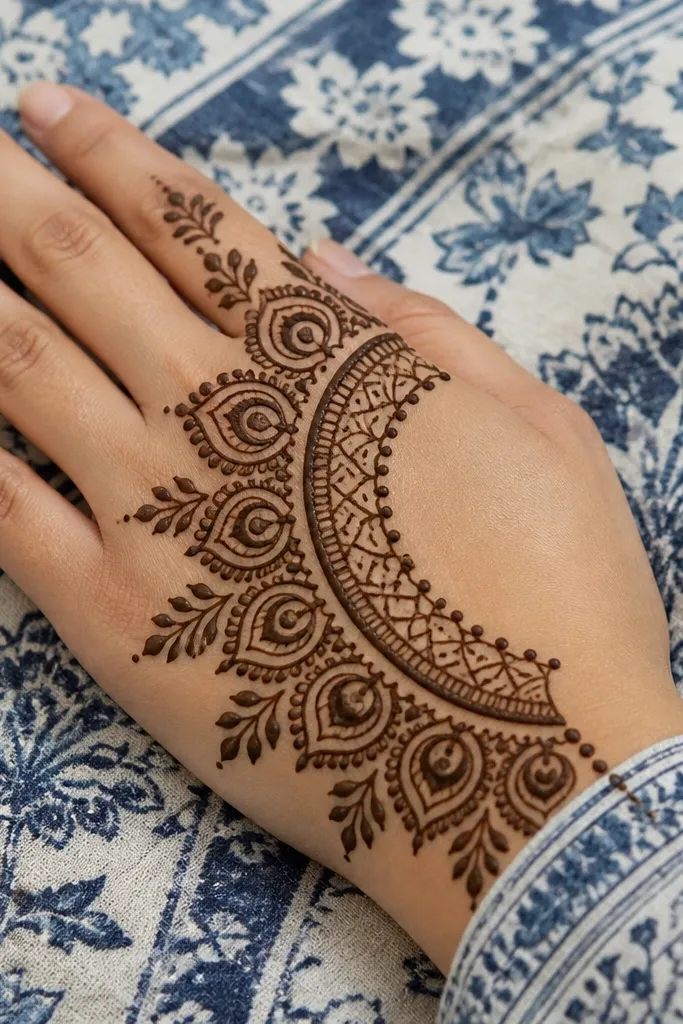
Half-hand mandala layouts look extra photogenic because they use negative space like design material. The peacock feathers form a half-circle mandala, usually on the outer side of the back hand, while the inner side stays lighter. This creates a strong silhouette that stands out in photos and pairs well with rings or a watch. The peacock body sits at the curve center, which helps the eyes read the motif instantly. It’s intermediate because the feather arcs must match each other.
Draw a half-circle arc from the wrist crease to the outer knuckle area. Place the peacock body at the midpoint of the arc, then build feather arcs outward with 8 to 10 feathers. Each feather gets an eye dot and a thin inner line to separate it. Finish by adding a light lace scatter near the edge of the half-circle, keeping it thin and airy so the mandala remains the focus.
Pro tipCount feathers out loud while you draw. It prevents accidental extra repeats that ruin the symmetry.
AvoidAvoid filling the inner half with extra curls. It kills the half-hand contrast.
11. Peacock Tail Fan with Geometric Fill Background
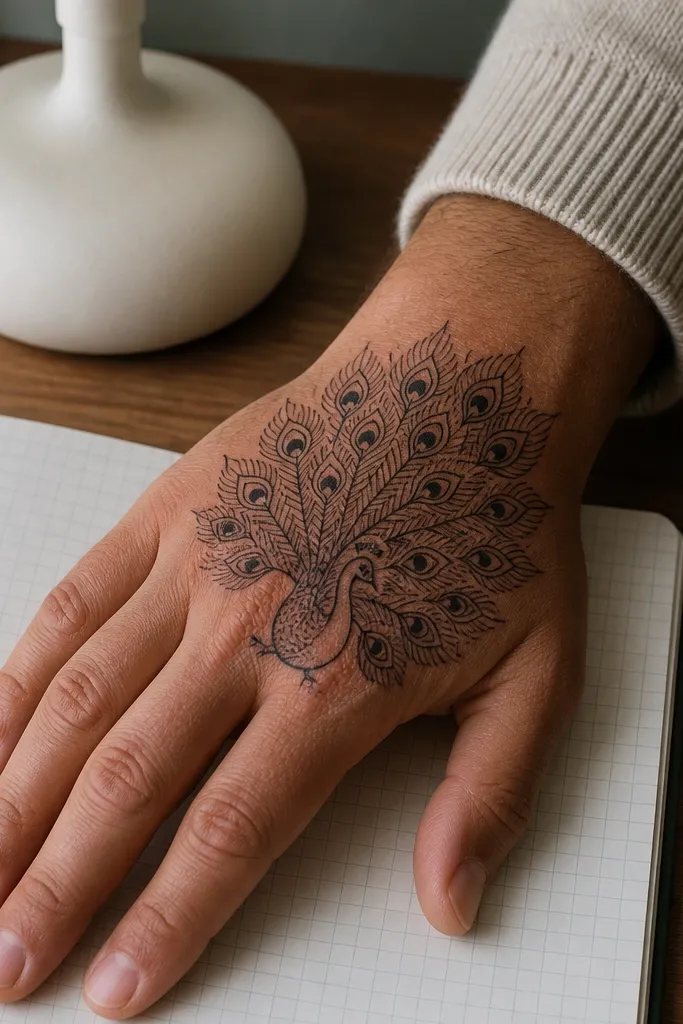
This is for when you want peacock style but also want a design that looks “done” even if the stain is lighter. The tail fan stays crisp, and the background uses tiny geometric dots and short lines so the hand has texture without becoming fully dark. The contrast between open feather strokes and dotted background makes the peacock read clearly. It’s a great option for people who find plain peacock fans a little too simple. Skill level is intermediate because you need control over dot density.
Start with a classic tail fan layout: wrist band, centered body, 8 feather stems with eye dots. Then add background texture only in the spaces between feathers using tiny triangles or dot clusters. Keep the geometric fill light so it doesn’t turn into a solid block as it stains. Finish with a thin outer border line and micro curls at the wrist corners.
Use a dot spacing of about 3-4 mm between clusters. Too close makes it turn muddy when it darkens.
Don’t add background fill on top of feather outlines — it blurs the feather edges.
12. Peacock Neck and Belly with Knuckle Scrolls
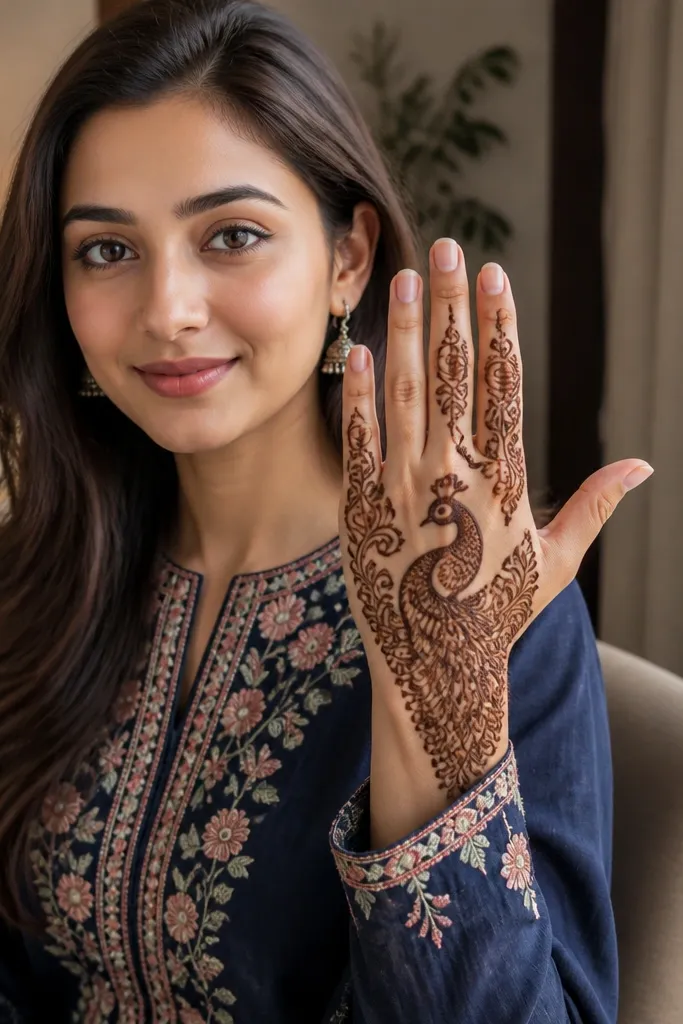
This design makes the peacock feel alive because it uses a visible neck and belly curve, plus scroll work around the knuckles. The peacock body is placed slightly closer to the wrist, then the neck curves upward toward the index side. Knuckle scrolls create a halo effect that frames the center motif. It’s great if you want a peacock design that doesn’t rely on a wide tail fan. The look is photogenic because scrolls catch the light and the negative space keeps it clean. Skill level is beginner-to-intermediate.
Draw a curved neck line starting at the peacock body and ending near the index knuckle area. Sketch the peacock belly as a teardrop or oval with an eye dot inside. Around each knuckle, draw a small scroll band using curved S-shapes, connecting them with thin lines that stop before the outer border. Add a small tail base line near the wrist and a few mini feathers pointing outward for a peacock hint.
Pro tipKeep scroll bands slightly uneven in size. Perfectly identical scrolls look mechanical on skin.
AvoidAvoid putting scrolls too thick — thick scrolls overlap and hide the knuckle shape.
13. Peacock Tail Fan with Double Border Lace
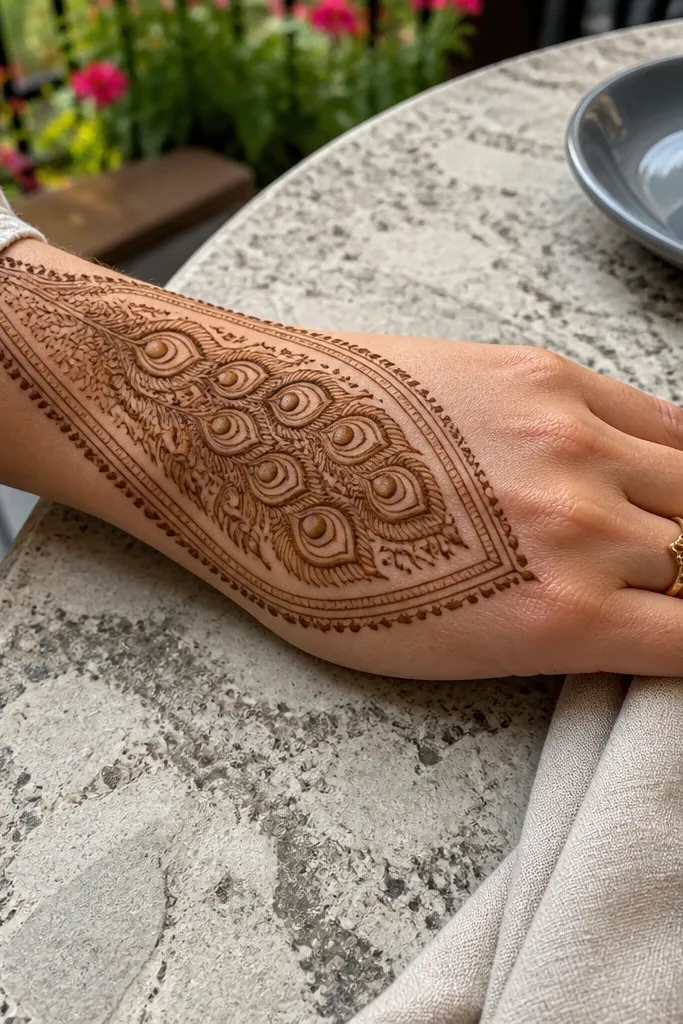
Double border lace makes this peacock design look high-end because it creates a layered frame around the motif. The tail fan stays the focus, but the two thin border lines give a “stitched” finish. This also helps the design photograph well because the edges stay defined even if the stain fades in some spots. It’s a good pick for formal nights, and it pairs nicely with a bracelet since the wrist band is bold. Skill level is intermediate because border alignment matters.
Start with the peacock foundation: wrist band, centered body, and a fan of 8 feathers with eye dots. Then draw the outer lace border as a thin line following the back-hand contour, leaving a narrow skin gap from the feather tips. Add a second border inside it with micro curls and dots. Finish by reinforcing only the border lines with slightly thicker strokes so they hold their shape as it dries.
Pro tipLet the outline dry a bit before you do the second border. It reduces smudging where borders cross feathers.
AvoidDon’t make both borders equally thick. One thick border turns the frame heavy.
14. Peacock Fan with Paisley Teardrop Connectors
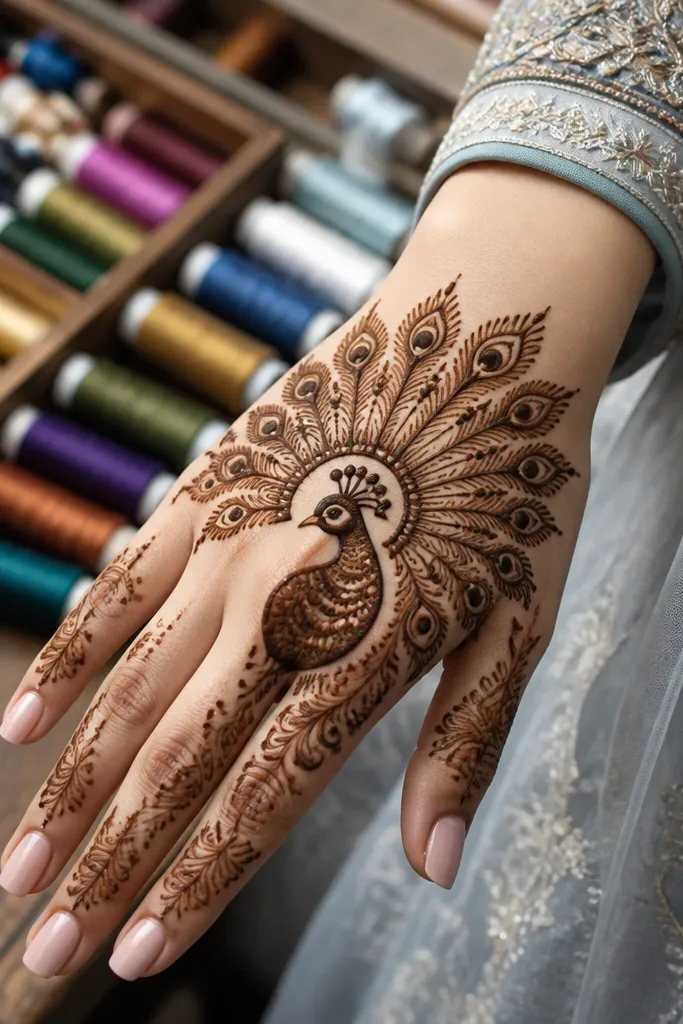
Paisley teardrop connectors are what make this peacock fan look delicate instead of plain. The tail fan uses repeated feathers, and between the feathers you place paisley teardrops that act like bridges. Those bridges prevent the design from looking like separate pieces stuck on. The result is airy and flowing, with a clear peacock silhouette. It’s a strong choice when you want something softer for daytime functions. Skill level is intermediate because the connector shapes must match each other.
Draw the wrist band and center body first. Create the tail fan with 9 feathers in an arc, each feather with an eye dot and a thin inner line. Between adjacent feathers, add paisley teardrop connectors: start from the feather base, curve outward, then taper back in. Finish with a light lace line around the outer edge using tiny curls.
Keep connector teardrops half the height of the feathers. If they’re too tall, the fan loses its shape.
Avoid placing connectors at random angles. Align them so they all curve in the same direction.
15. Peacock Feather Triangle Grid
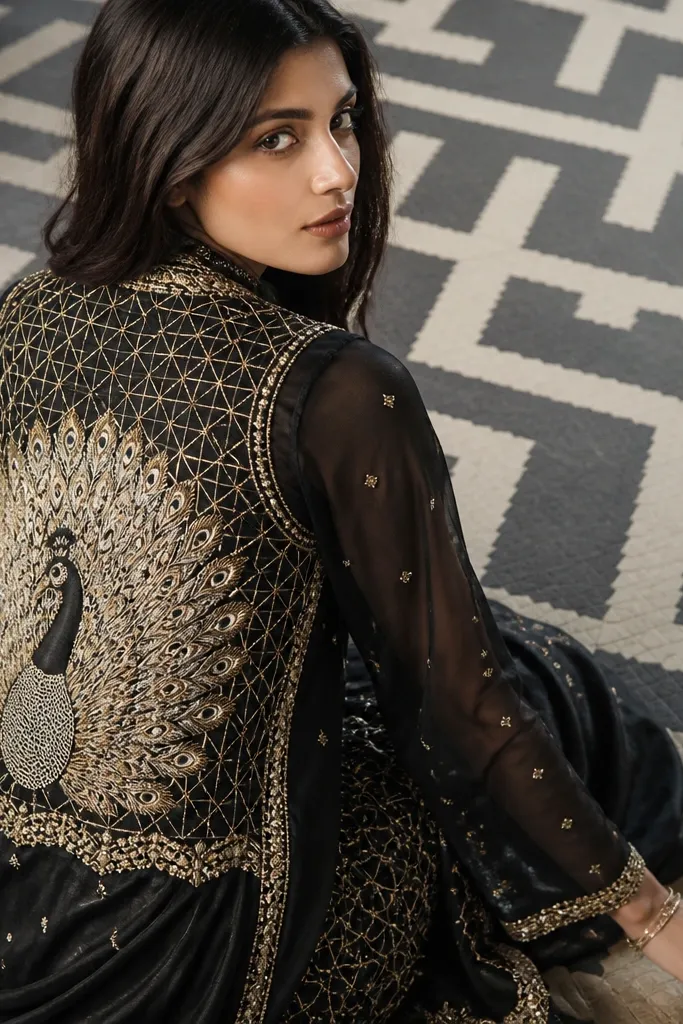
This design looks striking because it combines peacock feathers with a triangle grid texture. The triangle grid gives structure to the negative space, so the peacock tail reads as a highlight on top. It’s a great option for people who want a modern mehndi look without losing the peacock identity. Photographically, the grid adds contrast — even if the stain is lighter, the layout still looks defined. Skill level is intermediate because grid lines must stay straight.
Start by sketching a triangle grid on the back hand using light straight lines and small dots where lines meet. Place the peacock body at the top center, then draw a tail fan of 7 to 8 feathers that sit over the grid, with eye dots in each feather. Keep feather outlines clean and avoid filling over the entire grid. Finish by tracing the outer edge of the design with a thin border line so the grid doesn’t look unfinished.
Use a ruler for 1-2 key grid lines. You don’t need a full ruler grid, just anchor lines that keep symmetry.
Don’t darken the whole grid. Keep it light so the feathers remain the subject.
16. Peacock Tail Fan with Tiny Star Burst
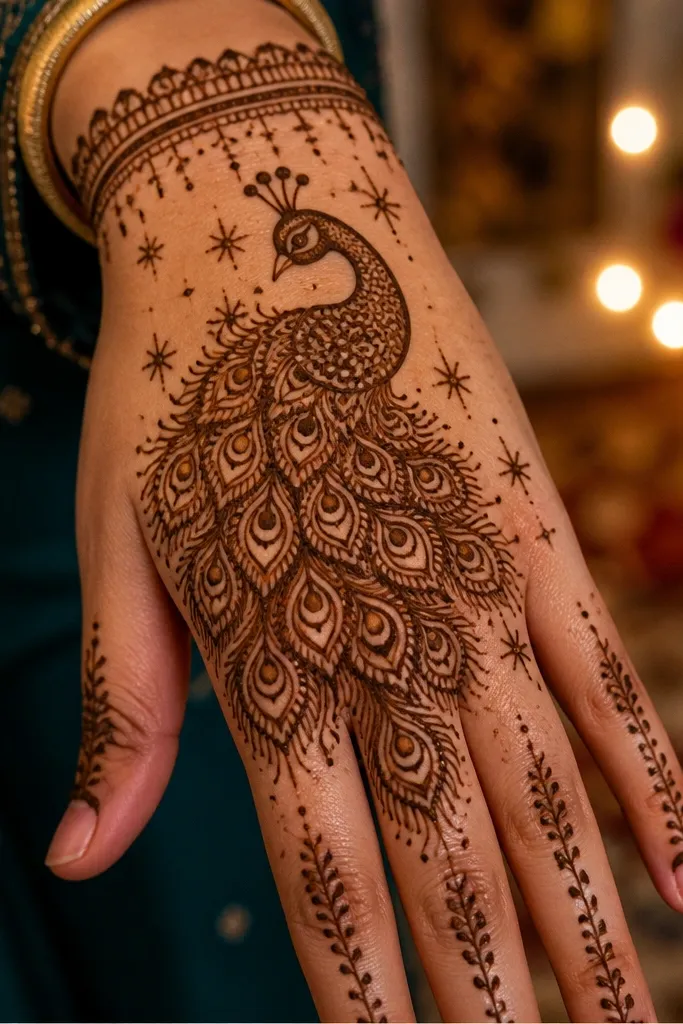
Tiny star bursts add sparkle without needing glitter or extra accessories. This peacock fan uses a standard feather arc, then adds small star shapes near the wrist band and around the body to create a “festival” feel. The star bursts also help break up large empty areas, which means your design still looks full even with negative space. It’s an excellent choice for seasonal and holiday events because it reads playful in photos. Skill level is beginner-to-intermediate; stars are quick once you get the shape right.
Draw a wrist band with small dots, then place the peacock body centered above the band. Build the tail fan with 8 feathers, each with an eye dot and a thin inner curve. Around the body and along the inner edge of the wrist band, add 10 to 14 tiny star bursts using 5-point star outlines filled lightly. Finish with a thin outer border line and a few micro curls that connect stars to feathers.
Pro tipMake the stars smaller than the feather eye dots so the peacock still wins the focal point.
AvoidAvoid adding too many stars across the tail. Too many sparkles turns it into clutter.
17. Peacock Fan with Raised Dot Shading
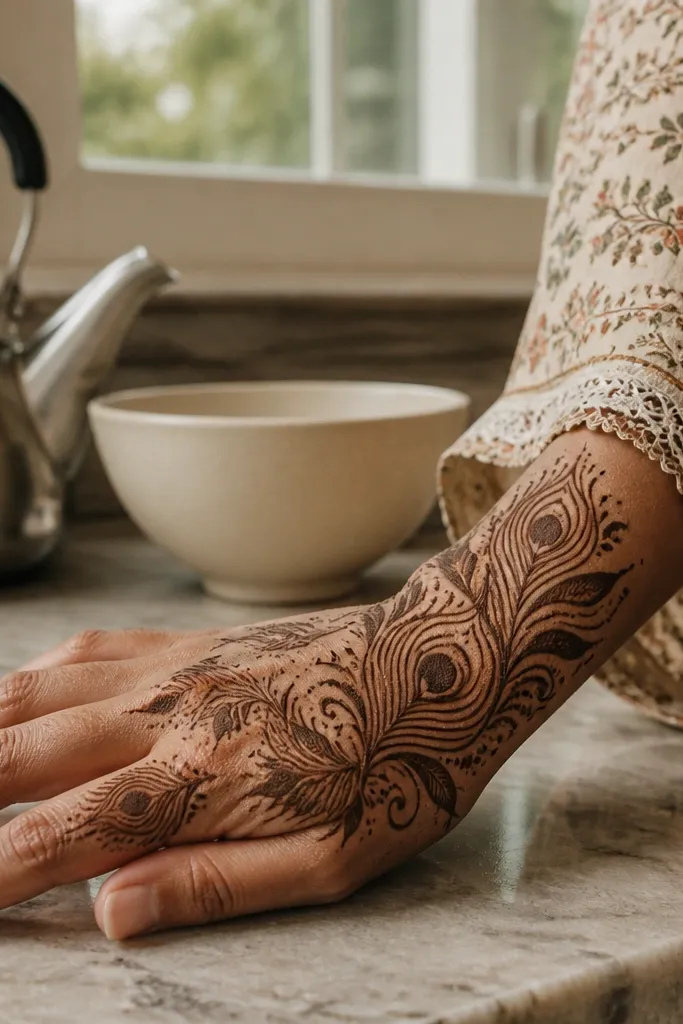
Raised dot shading is how you get texture that looks good even when the stain isn’t super dark. Instead of filling feathers solid, you add dot shading inside select feather sections. That means your peacock still looks airy, but it has depth. The design is photogenic because the dots create a speckled highlight effect, especially under warm light. This is a smart option if you know your mehndi stain usually comes out lighter. Skill level is intermediate since dot placement needs consistency.
Start with a classic tail fan: wrist band, centered body, 8 feathers with eye dots. For shading, pick every other feather and add a row of raised dots along the inner curve of the feather, leaving the outer outline clean. Add a few dot clusters near the body to connect the motif. Finish with a thin lace border at the outer edge using micro curls and small dots.
Pro tipUse slightly smaller dots for shading than your eye dots. It keeps the feather eye crisp.
AvoidDon’t shade every feather. Alternating shading gives depth without making the whole fan heavy.
18. Peacock Tail Fan with Cut-Out Negative Space Feathers
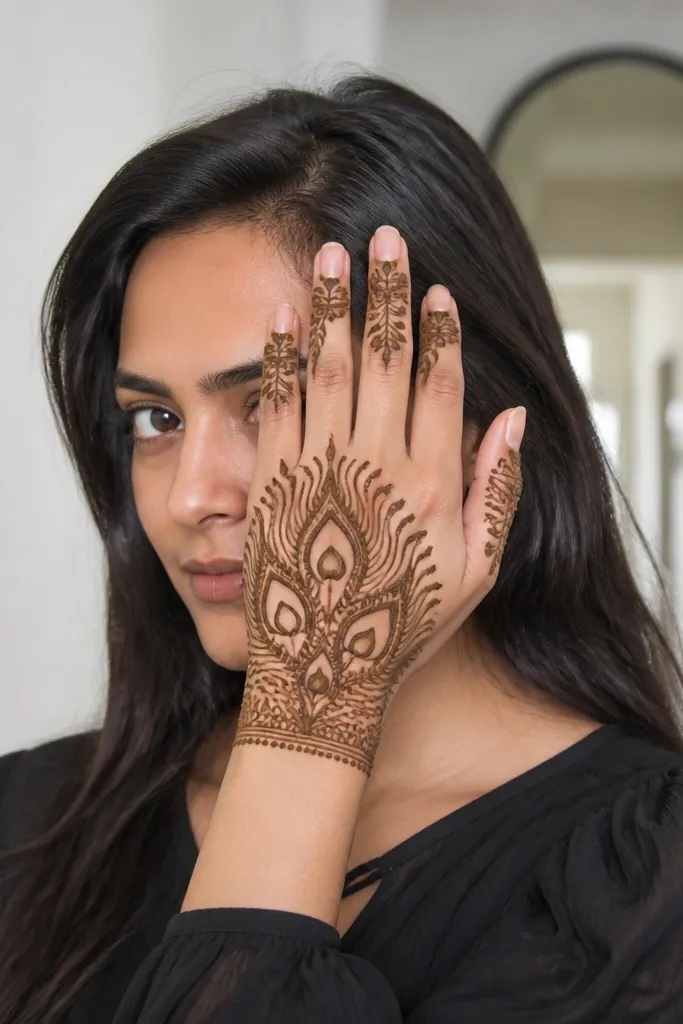
This design is all about clean cut-out negative space inside each feather. The peacock still looks bold because the outlines are crisp, but the interior gaps create a lace-like look. It’s the best pick if you want a lighter, more breathable mehndi that still reads as detailed. Photographs well because the empty spaces stay visible as the stain develops. Skill level is intermediate because you must keep interior gaps open while drawing outlines.
Draw the wrist band and centered peacock body on a spine line. Build the tail fan with 9 feathers, outlining each feather shape and adding an eye dot at the center. Inside each feather outline, leave a narrow cut-out channel by drawing a second inner outline that stops short of the eye dot area. Connect feathers with a thin outer border line and add micro curls only at the feather tips.
Pro tipBefore you start filling, practice on paper cones once. Keeping cut-out gaps consistent is the whole trick.
AvoidAvoid going back to thicken the interior outlines later. It closes the cut-out gaps and ruins the lace effect.
19. Peacock Fan with Side Leaf Stack and Central Flower
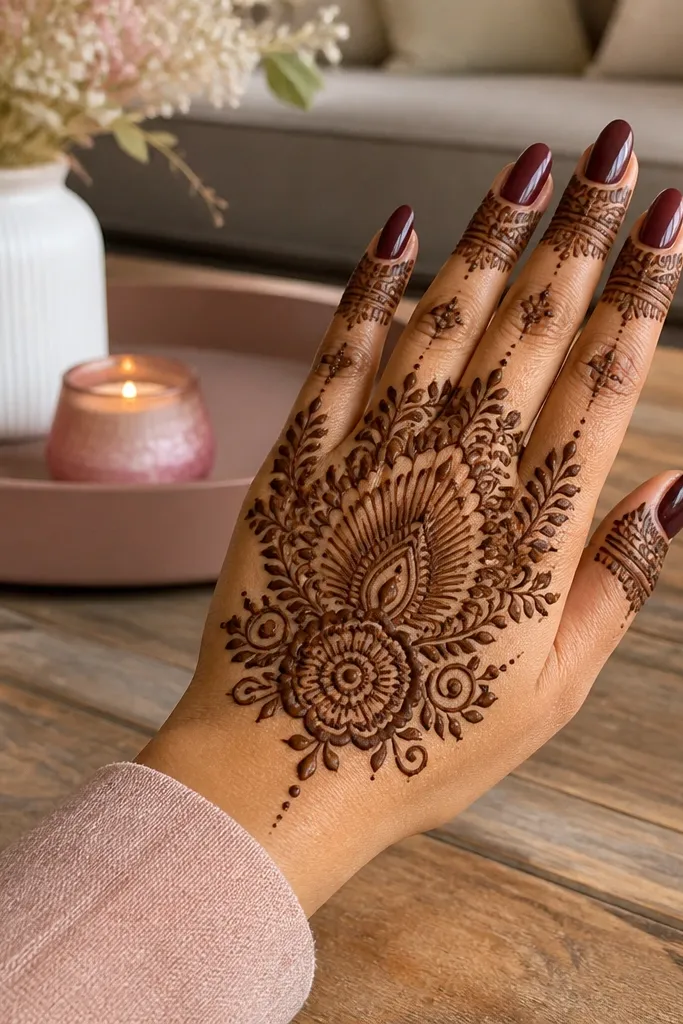
This one looks layered and festive because the peacock fan is paired with stacked leaf shapes on both sides and a central flower. The leaves act like shoulders, giving the design volume without covering the whole hand. The central flower gives you a clear anchor, so the peacock body doesn’t feel isolated. It’s a great choice when you want a “full composition” look while still keeping the peacock as the main motif. Skill level is intermediate because leaf stacks need matching heights.
Start with a central flower at mid-hand, then draw the peacock body as a teardrop sitting just above the flower. Build the tail fan with 8 feathers radiating outward from the body. On both sides of the central area, add leaf stacks: 3 to 4 leaves on each side, each leaf slightly overlapping the next. Finish with a thin wrist band and a delicate outer border that ties leaves to feather tips.
Match leaf stack heights by using the knuckle line as a visual ruler. It keeps the composition balanced.
Avoid too many overlapping leaves. If the stacks get dense, they steal focus from the peacock fan.
20. Peacock Feather Spine with Center Rose and Wing Ribbons
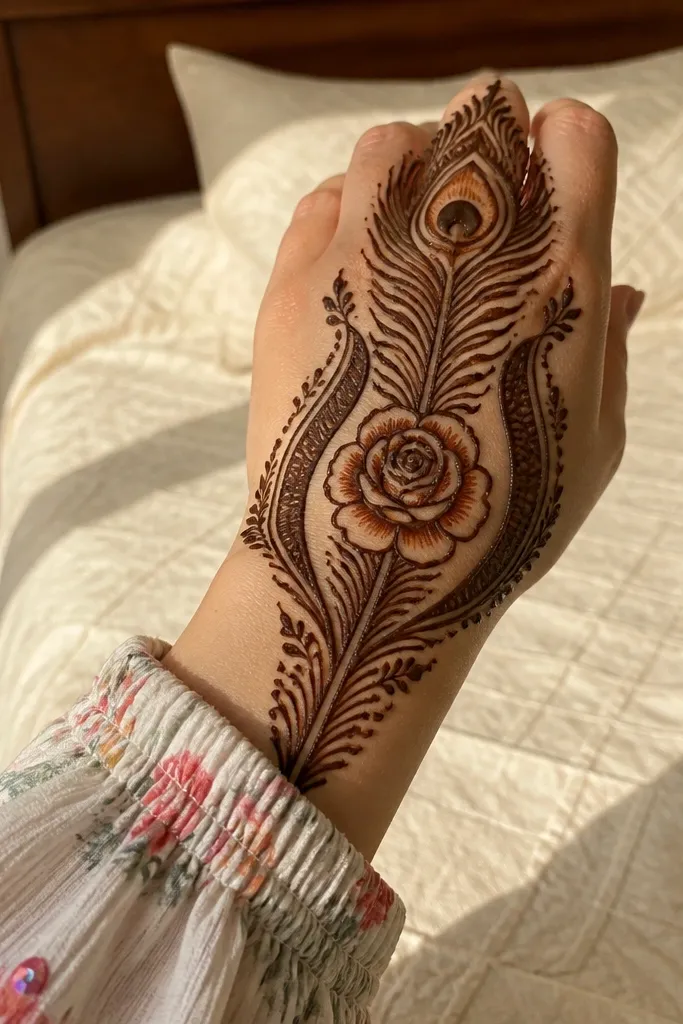
This design fixes the main problem with most peacock back-hand mehndi — the pattern looks flat because the peacock lines don’t create a strong vertical spine. The peacock feather spine gives you one dominant axis from wrist to knuckles, then the center rose keeps it balanced and photogenic from every angle. Wing ribbons on both sides add movement without cluttering the hand, so it still reads as peacock. It looks great for medium to dark stains because the center rose holds the eye and the feather tips can be left slightly thinner for contrast. Skill level is beginner-to-intermediate: you’re mainly repeating feather teardrops and adding one rose center. Time is about 60 to 90 minutes on the back of one hand if your paste lines are steady.
Step 1: Draw a straight guide line from the wrist crease to the middle of the back of the hand, then mark 5 to 7 feather points along it. Each feather is a narrow teardrop with the tip pointing upward, and you connect them with a thin center stem so the whole thing looks like one spine. Step 2: At the mid-point (around the center of the hand), build a rose using 6 to 8 tight petals around a small dot, then outline the rose with a slightly thicker outer petal ring. Step 3: Create wing ribbons by adding two parallel curved lines on the left and right of the spine, then fill between them with short featherettes that point outward toward the side of the hand. Finish by adding tiny dots at the ribbon edges and a light leaf at the wrist end so the whole layout feels anchored.
Use a thinner cone for the spine and feather stems, then switch to a slightly thicker cone only for the rose outline so the center pops in photos. Let the rose outline dry 2-3 minutes before you fill inside so the petals stay crisp.
Don’t start with heavy paste on the spine — it swells and turns your feather tips into blobs.



