
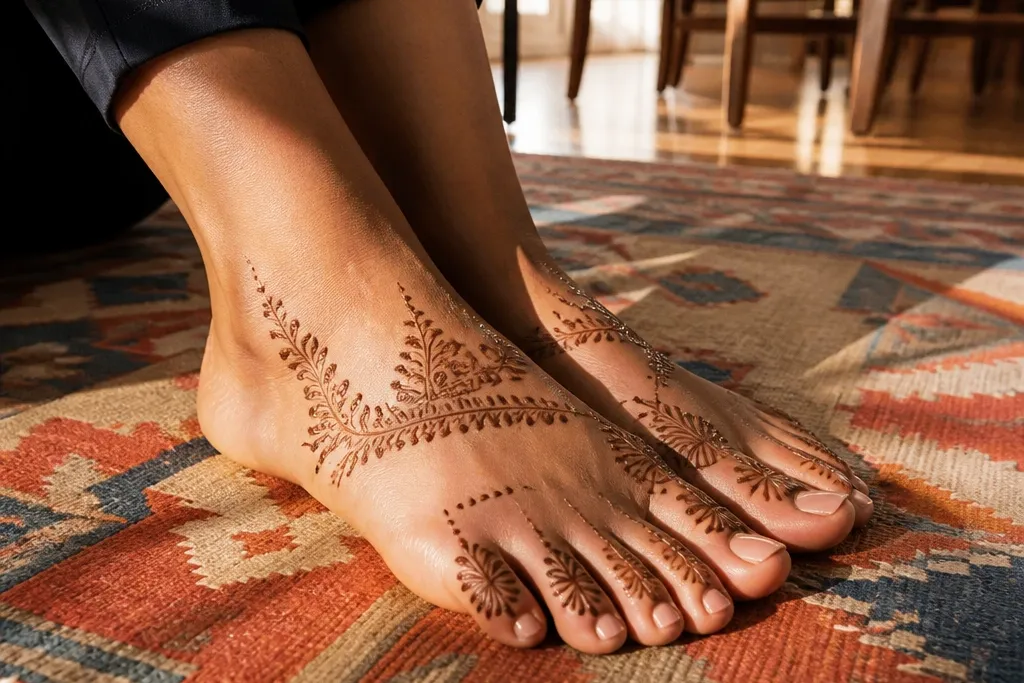
1. Toe Fan with Arch Band and Tiny Ankle Dots

This is the cleanest simple foot design when you want a “done” look without filling every inch. The toe fan gives you instant detail where the eye naturally goes, and the arch band adds a smooth horizontal frame. The tiny ankle dot clusters keep it festive without turning into a heavy pattern. It works for holiday sandals because you see the arch band clearly, and it looks balanced even if your lines aren’t perfectly thick.
Start by outlining five short strokes that radiate from the base of the toes — make them fan-shaped, not long. Then draw a thin band across the arch with three to five mini loops inside it. Finish with three dot clusters on the outer ankle, spaced like a small triangle. Let the paste dry until it feels firm before moving your foot.
Use a slightly thicker cone tip for the fan lines, then switch to a finer tip for the arch band so it stays crisp.
Don’t fill the toes with big leaves if you want sharp edges — small strokes hold better on feet.
2. Single Center Vine Down the Foot
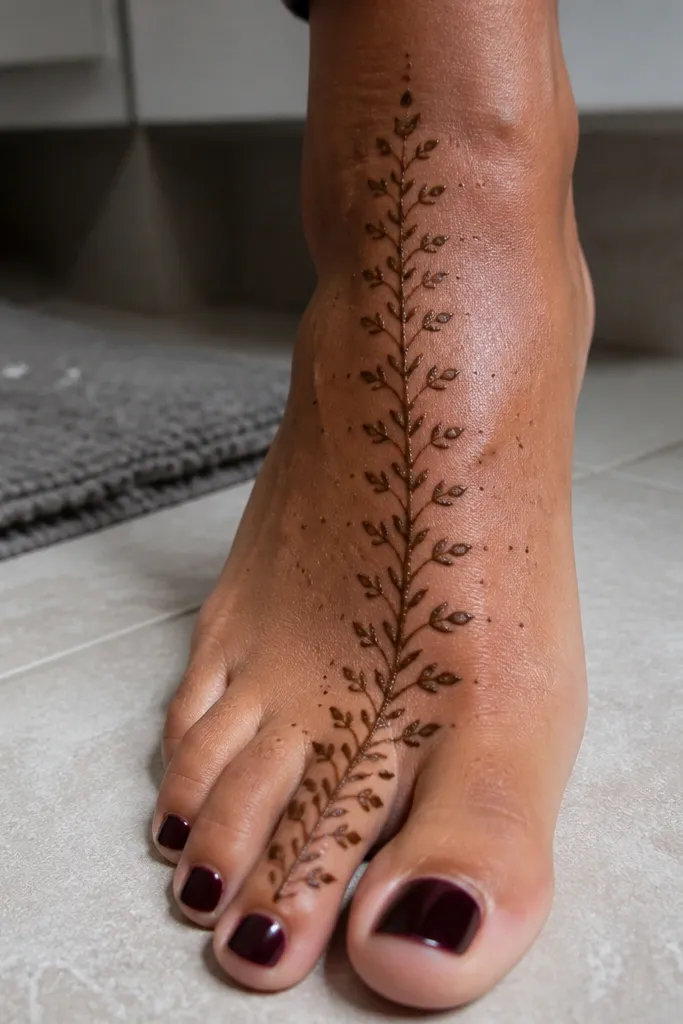
Draw a straight guide line from the center of the toe base to the ankle cuff. Add small leaf shapes on alternating sides, each leaf about the width of your pinky nail line. Add a few dots between leaves to break up the skin and reduce smudge risk. Finish with a thin cuff line at the ankle, then stop — no extra filling.
If you want simple but elegant-looking, a single center vine is the move. It creates a vertical rhythm that flatters the foot shape and gives you a clear focal point in photos. The leaves are small and repeated, so you get symmetry without complex spacing. Keep the sides light with dots, and your design won’t look overcrowded on a small surface.
AvoidAvoid adding side vines — two extra lines usually make feet mehndi look busy fast.
Pro tipMark your center guide with a tiny dot first so your vine stays straight even if you pause mid-application.
3. Arch Mandala Mini Wheel

This design gives you the “wow” look without covering the whole foot. The mini mandala on the arch reads like a complete pattern even when the rest stays simple. Because it’s centered, it hides minor asymmetry and still looks intentional in photos. It’s perfect for festive outfits where you want one strong element — not a full-body mehndi situation.
Start with a small circle on the arch, about the size of a large coin. Add one ring of tiny dots around it, then place short petal strokes outward to form a mini wheel. Add a thin border line around the mandala, leaving skin between border and toe area. For the toes, add only dot tips on the two outer toes and a single dot at the big toe base.
For clean mandala edges, pause and let the first ring dry for 2-3 minutes before adding petals.
Don’t shade the whole mandala — heavy fill makes the center blur on feet.
4. Toe Rings with Two Horizontal Bands
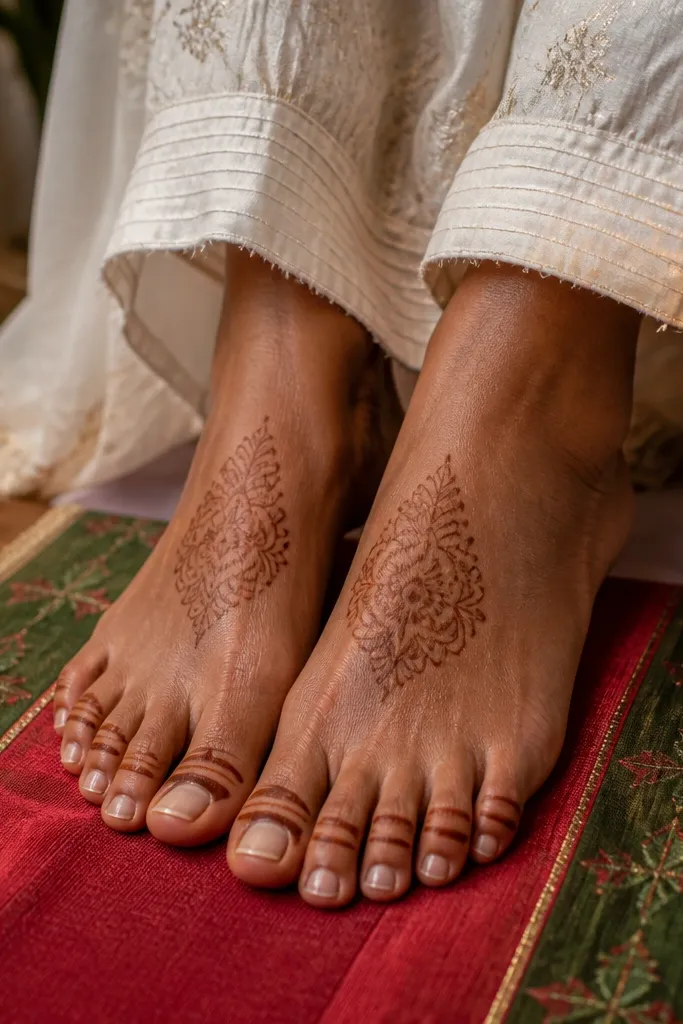
Toe rings look playful and polished, especially for holiday dinners where your feet show a bit. Two horizontal bands give structure and make the design look symmetrical even if your toe work isn’t perfect. This pattern also stays light enough that it doesn’t crack as easily while drying. It’s a strong choice when you want a “simple but styled” look.
Begin by drawing tiny oval rings around each toe base, starting with the big toe then matching the rest. Keep each ring open slightly so it doesn’t look like clumsy blobs. Next, draw two thin lines across the top of the foot — one near the arch, one closer to the ankle. Add small dot breaks between the rings and bands so the design breathes.
Keep ring size consistent by using your cone tip as a measuring guide — same width each time.
Don’t connect every toe ring to the bands — separation keeps it neat.
5. Leaf Border Cuff with Minimal Top Fill
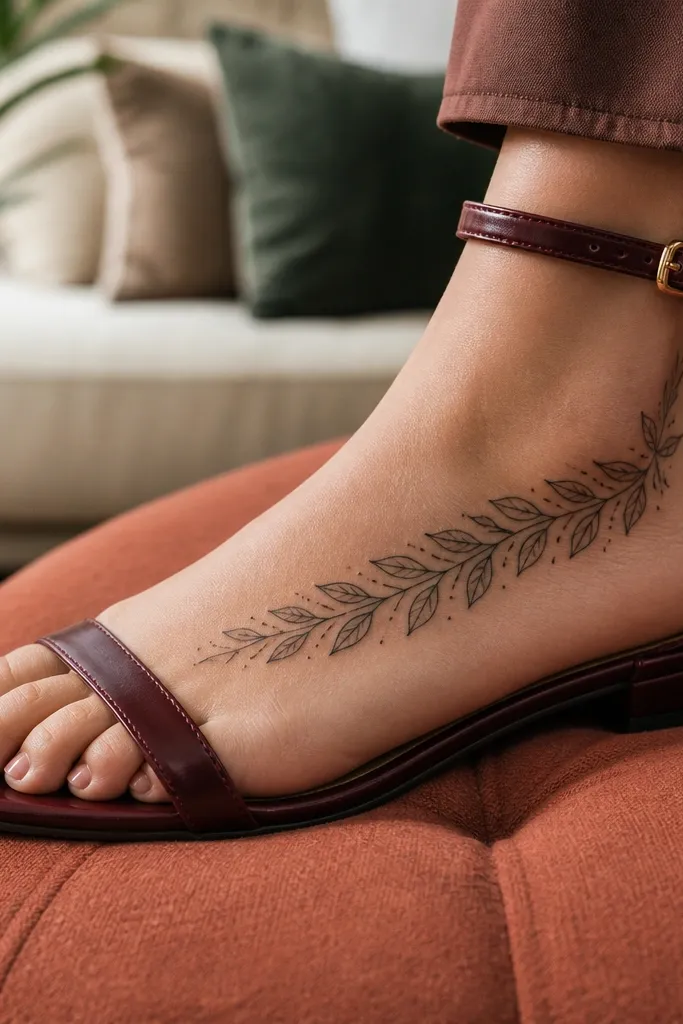
This design is all about the ankle cuff. A leaf border frames the foot in a way that looks intentional even if the top is minimal. It’s great if you want something holiday-friendly but still quick — you spend most of your time on one strong edge. The minimal top fill keeps the pattern from smearing when you move your toes.
Draw a thin line cuff around the ankle, then add small leaf shapes sticking upward from that line. Make each leaf the same height and alternate left-right so the cuff looks even. On the top of the foot, add only a short arch line with 6-8 dots spaced along it. Stop there; don’t try to add extra vines.
If your leaves blur, press the cone lightly and lift straight up — don’t drag.
Avoid heavy shading in the cuff — it darkens unevenly on ankle skin.
6. Dotted Grid with a Single Corner Flower
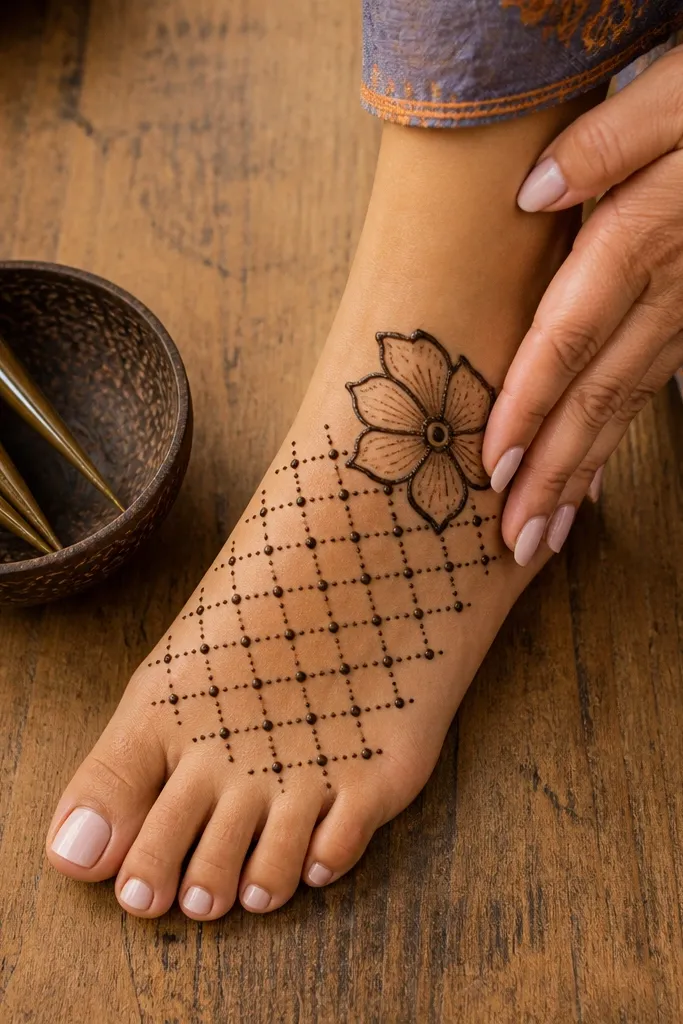
Start by placing a few guide dots across the top of the foot in a loose grid, leaving blank space between rows. Then connect nothing — just keep the dots evenly spaced. Add one corner flower near the ankle by drawing five small petals around a dot center. Finish with a short curved line that follows the foot edge, made of 6-8 dots.
This is a smart simple design when you want something different from vines and bands. The dotted grid gives texture and makes the mehndi look “finished” without dense lines. One flower in the top corner creates a clear focal point and keeps it photogenic. It also works well for short sessions because dot work is faster than detailed leaves.
AvoidDon’t overfill the grid — too many dots makes feet mehndi look muddy.
Pro tipUse a ruler-like spacing habit: keep dots the same distance apart by counting cone lifts per row.
7. Center Diamond with Side Micro Leaves

A center diamond is visually strong and still easy to execute. It gives you a clean geometric look that reads well in photos, especially against open-toe sandals. The side micro leaves add softness without turning the design into a full fill. This pattern also hides small alignment issues because the diamond anchors your symmetry.
Draw a diamond in the center of the foot top, tall and narrow, with four clean line sides. Inside the diamond, add a second smaller diamond outline or just a dot at the center. On both sides, place 3-4 micro leaf strokes that point toward the diamond. Add a thin ankle line cuff, then keep the rest blank.
Let the diamond outline dry before adding the inner line so it doesn’t smear.
Avoid thickening the diamond edges — heavy lines spread on foot skin.
8. Three-Petal Arch Bouquet

This is the sweet-spot design for “simple but pretty.” The three-petal bouquet sits on the arch, so it’s visible and flattering from the front. Small dots around it add sparkle without needing heavy shading. It’s also friendly for beginners because you can repeat the same petal shape three times and stop.
Start with a curved base line across the arch like a shallow smile. Place three petal shapes on top of the curve — each petal is an oval teardrop pointing outward. Add a dot cluster at the center of the bouquet. Finish with a thin border line around the arch area, leaving space between border and bouquet.
Keep petals the same size by tracing one petal shape mentally and repeating it exactly.
Don’t add extra flowers across the toes — one bouquet reads cleaner.
9. Toe Crosshatch with Arch Curve

Outline each toe with a light base line, then add 2-3 diagonal hatch lines across each toe from base to tip. Keep the hatches parallel and evenly spaced. Then draw one long curved line across the arch that follows the foot contour. Add a single dot near the ankle cuff as the final accent.
Crosshatch on toes looks edgy and detailed while staying manageable. The trick is to keep it confined to the toe area, then use one sweeping arch curve to balance it. This gives you a modern look that still feels festive because of the crisp geometry. It’s great if you want something different from florals.
AvoidAvoid crosshatching the entire top of the foot — it turns heavy and smudgy.
Pro tipFor clean hatches, squeeze a steadier cone and keep your wrist locked — diagonal lines wobble fast on feet.
10. Ankle Cuff Ladder Pattern with Toe Tips

This is a holiday-friendly design that looks neat even when it’s minimal. The ladder cuff pattern is easy to repeat and looks sharp in photos because it creates consistent vertical rhythm. Toe tips keep it cute without making you fill the whole toe area. It’s a good choice when you want a quick design that still looks deliberate.
Draw a thin ankle cuff line. Inside it, create a ladder pattern: two vertical lines with short horizontal rungs connecting them, repeated around the ankle. Keep it to 6-8 rung sections total. For toe tips, add a tiny dot or short dash at the tip of the big toe and one outer toe.
Make the ladder rungs shorter than the vertical lines so the cuff doesn’t look chunky.
Don’t make the ladder too wide — narrow cuffs look cleaner on small ankles.
11. Peacock Feather on the Outer Foot
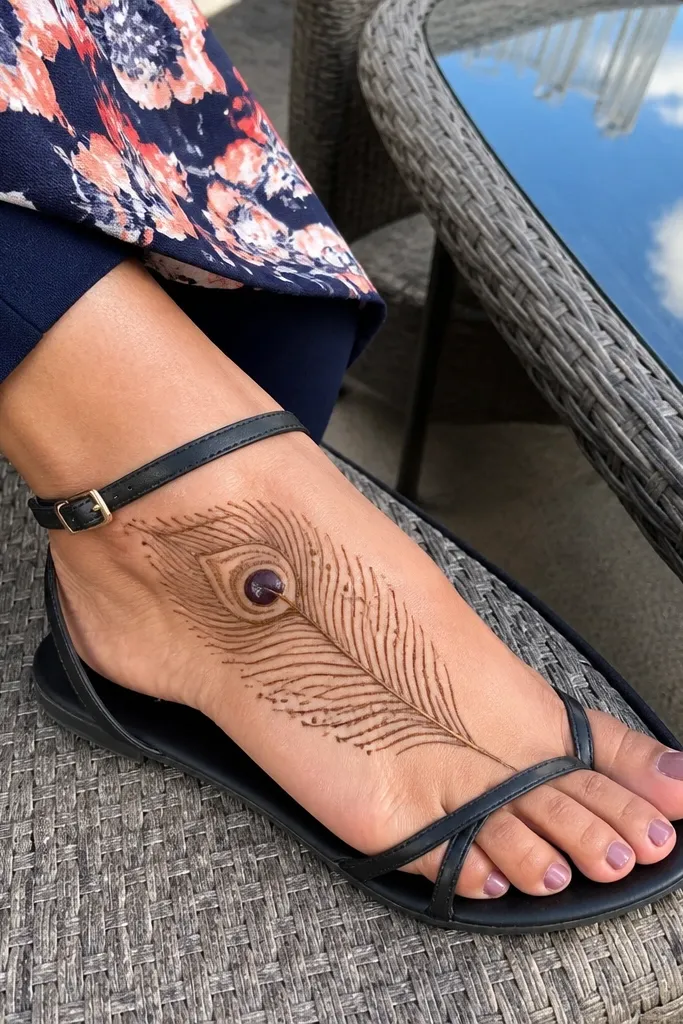
A single peacock feather is the simplest way to get a “festive” feel without covering the whole foot. Place it on the outer side of the top foot so it shows clearly when you flex or sit. The feather eye dots add a playful pop, and the rest can stay light. This design is a strong pick for seasonal events where you want a statement but still clean lines.
Start with a central feather stem line from mid-outer foot toward the ankle. Add curved barbs on both sides, each barb ending with a small dot or tiny oval eye. Keep the feather to about the length of your palm from thumb to wrist crease — small enough to avoid crowding. Add a thin base line near the ankle to anchor it, then stop.
Use dot eyes instead of filled circles — they dry darker and look sharper.
Avoid adding extra feathers — one feather looks intentional, two looks busy.
12. Half-Mandala on the Arch with Side Dots
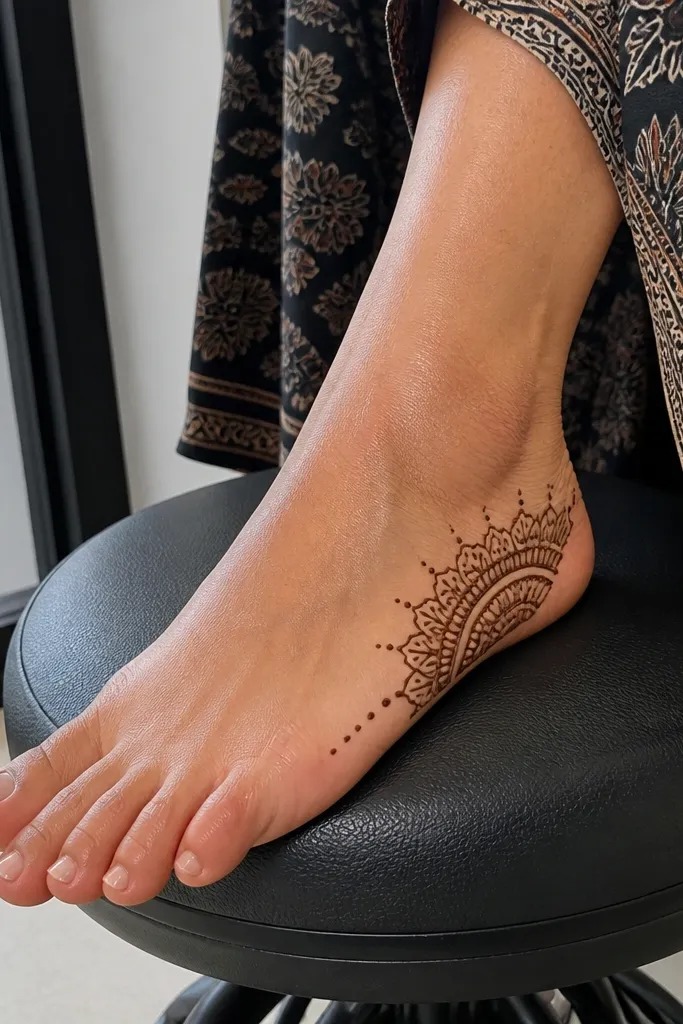
Draw a curved half circle on the arch, like a C-shape border. Inside it, place small petal strokes along the border, and add a dot center. On the outer side of the arch, add 8-10 dots in a gentle curve. Finish with a thin line that connects the dots back to the mandala edge.
Half-mandala designs are a cheat code for symmetry. You get the mandala look but only on one side of the arch, so your lines don’t have to match perfectly across the foot. It also looks great for open-toe looks because the pattern sits right where the light hits. Keep the side dots minimal so the half-mandala stays the star.
AvoidAvoid thick shading in the petal interiors — it smears when the foot flexes.
Pro tipStop at the halfway point and don’t try to complete a full circle — half-mandala stays cleaner on feet.
13. Circular Toe Medallion with Thin Outer Ring

This design focuses on the front of the foot, which makes it look “styled” even if you only see a small portion of your mehndi in photos. A circular medallion near the big toe creates a focal point that reads clearly. The thin outer ring keeps it light and modern. It’s also easier to do than toe fans because you’re working in one small circle area.
Place a small dot at the base of the big toe, then draw a circle around it about the size of a small button. Add a ring of tiny teardrop petals around the circle, one petal per quarter turn. Draw a second thin outer ring just outside the petals. Add 6-8 dots along the ring, then keep the rest of the foot blank or add one short arch line.
If your circle gets wobbly, trace it twice with light pressure instead of trying to erase.
Don’t crowd the medallion with too many petal shapes — 8-12 looks best.
14. Minimal Side Vines with One Center Dot

Draw a short center dot on the arch area. Then draw two thin vine lines starting near the toe base and curving toward the ankle, one on each side. Add 2-3 tiny leaves per vine, keeping them small and spaced. Finish with a thin cuff line at the ankle and a few dots at the vine ends.
This is for people who want a “barely there but still pretty” foot mehndi. Two minimal side vines frame the foot without forcing you into heavy filling. One center dot and a simple ankle line finish the look so it doesn’t feel unfinished. It’s photogenic because the lines are clean and there’s lots of negative space.
AvoidAvoid adding cross-links between the vines — open framing looks cleaner.
Pro tipUse a slightly thinner cone for the vines so they stay delicate and don’t blur into thick lines.
15. Festive Border Stripes with Micro Flowers
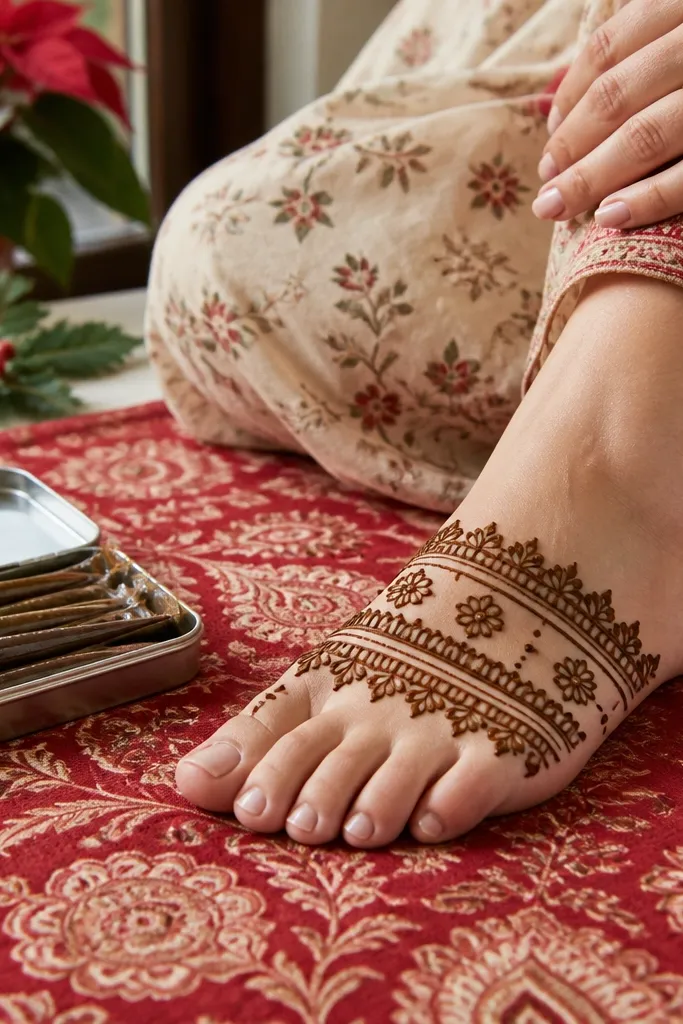
Draw two parallel thin lines across the top of the foot, one near the arch and one toward the ankle. Between the lines, place tiny micro flowers — each flower is 5 small petals around a dot center. Add one micro flower near the toe base and one near the ankle cuff. Finish by adding small dot tips on the outer toes.
Border stripes make simple mehndi look intentional and festive, especially for holiday photos where your foot is partially visible. Micro flowers add charm without taking over the surface. The stripes give structure and keep the design readable even if your toe lines are a little uneven. This one works well when you want a fuller look but still want it to be simple.
AvoidDon’t stretch the stripes too wide — narrow stripes look sharper on feet.
Pro tipKeep micro flowers the same size by counting cone lifts: 5 petals means 5 equal strokes.



