
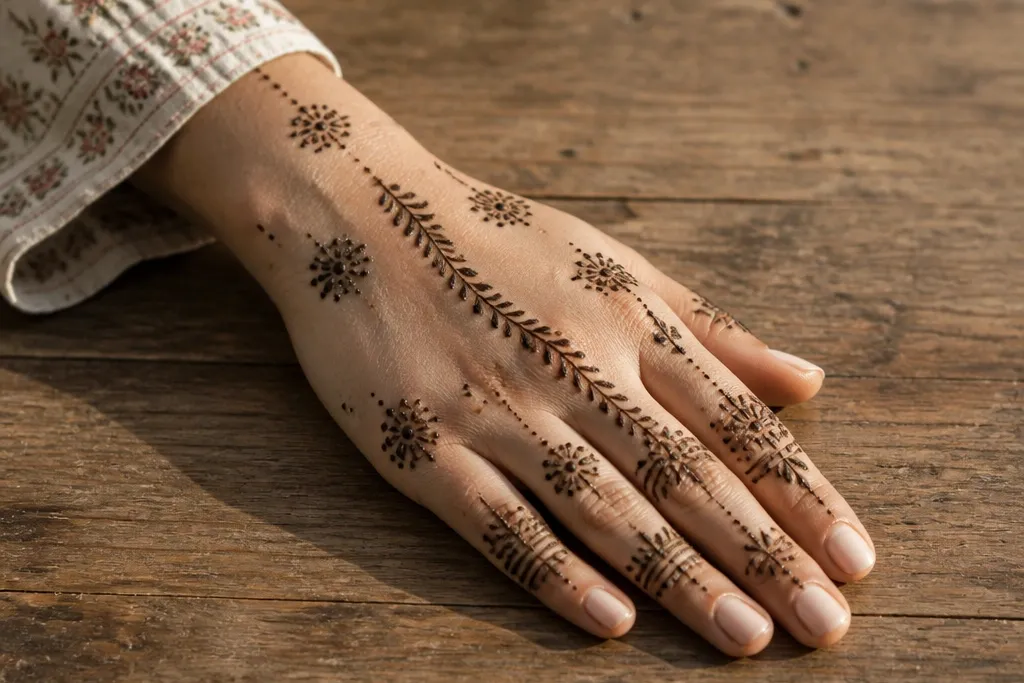

1. Wrist Chain Links with Center Teardrop
This design looks polished because it has a crisp structure: a repeating wrist band plus one large center teardrop that anchors the whole hand. The chain links give a neat, “jewelry” feel without needing heavy filling, so it stays budget-friendly and fast. The center teardrop draws the eye upward and makes the hand look longer in photos. It’s also forgiving if your lines aren’t perfectly identical, because the symmetry is built into the chain pattern, not tiny details.
Start by drawing a slim bracelet band at the wrist using small oval links — link, gap, link — with consistent spacing. Connect the band to the back-center using two curved strokes that meet at a single teardrop outline. Fill the teardrop with light stippling dots, not full heavy shading, so it dries clean. Finish by adding 3-5 tiny dots around the teardrop tip and a short leaf curl at the base.
Pro tipUse slightly thicker paste for the wrist band so it stains darker and reads clearly in photos.
AvoidAvoid fully filling the teardrop solid black — it turns flat and loses shape.
2. Diagonal Vine Ladder Across Back Hand
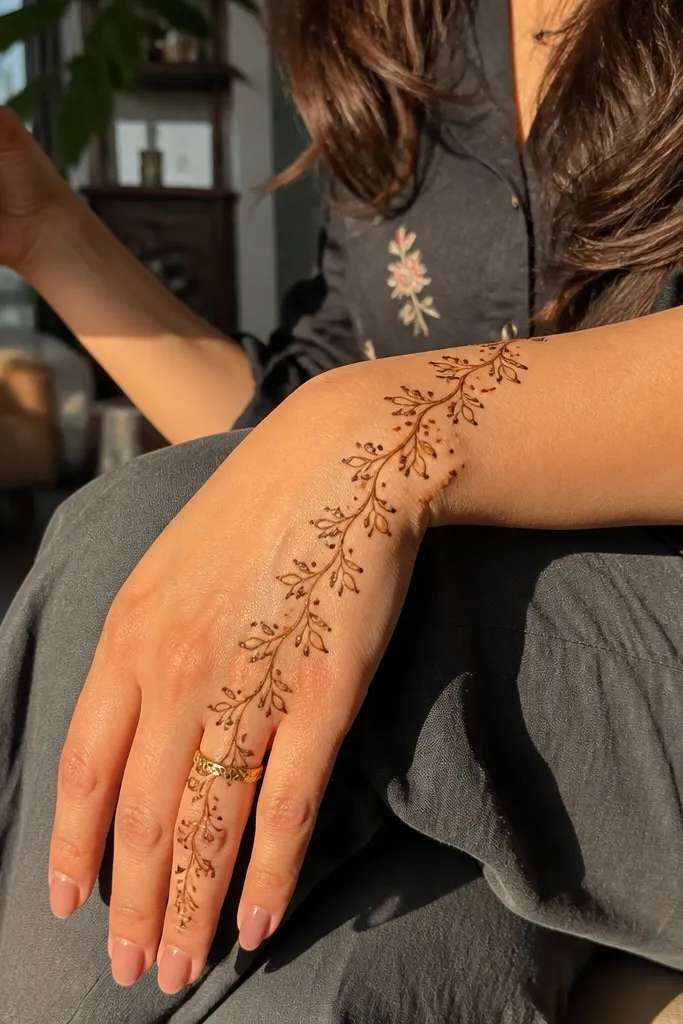
A diagonal vine ladder is the easiest way to make a back-hand mehndi look intentional. The diagonal flow creates movement, so even a simple vine-and-leaf pattern looks elegant in motion and still images. You don’t need dense filling; the leaf steps do the visual work. This one also works well for beginners because each “rung” is a repeatable unit you can keep consistent.
Draw a long diagonal line from the outer wrist toward the center of the back hand, keeping it smooth. Add small leaf pairs along the line like ladder rungs — two teardrops facing opposite directions — leaving small gaps between each leaf set. At the knuckle area, add a mini fan of three dots and one leaf to stop the design cleanly. Finally, trace a thin outline around the last leaf cluster to make the end look finished.
Pro tipKeep leaf sizes within 6-8 mm; if they grow too much, the diagonal loses balance.
AvoidDon’t start the diagonal too high on the wrist or it will crowd the knuckles.
3. Knuckle Scallop Frame with Tiny Dots
This one is photogenic because it frames the knuckles like a lace border. The scallops create a strong outline, while the tiny dots add sparkle without requiring complex filling. It’s a great choice when you want a clean look that doesn’t go too far up the fingers. On back hands, scallops also mask uneven paste thickness because the border lines carry the design.
Start at the base of the fingers on the back of the hand and draw a curved scallop row — half-moon bumps across the top edge. Add a second scallop row below it, slightly smaller, leaving a thin open gap between the two rows. Fill the gaps with 1-2 dot clusters, then connect the frame to the wrist using a single curved stem line. Finish with two tiny leaf curls on each side of the stem.
Pro tipDot clusters look sharper when you place them in groups of 3, not singles all over.
AvoidAvoid drawing scallops over the same line twice — it thickens and smears as it dries.
4. Back-Hand Sunburst with Short Rays
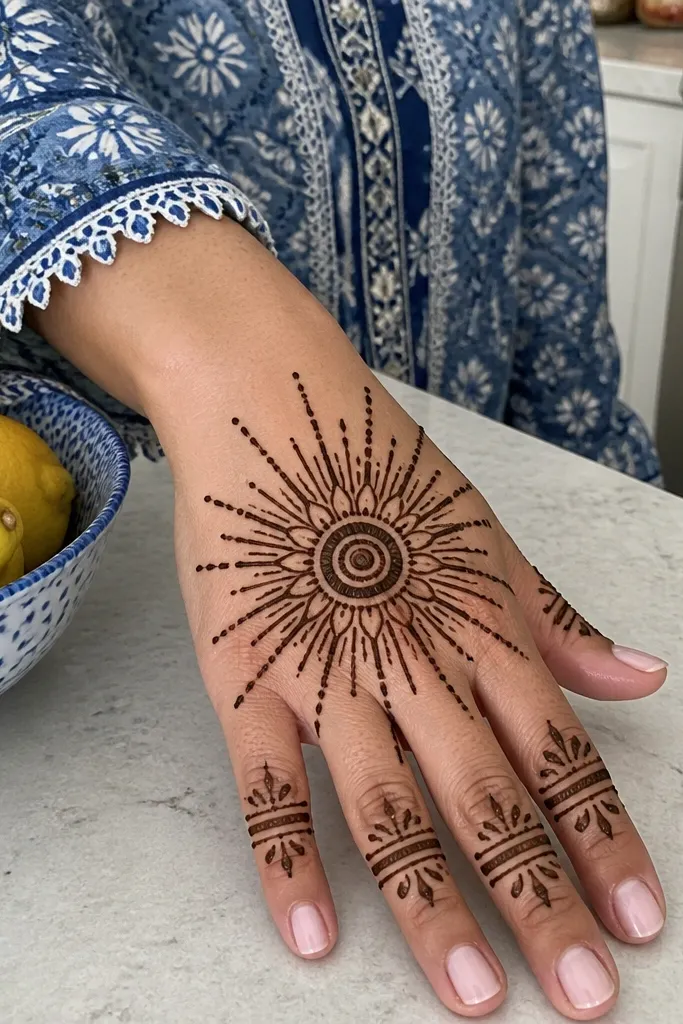
Sunburst designs look bold on back hands because they read like a single graphic. You’re not trying to cover the whole hand; you’re placing one clear center motif. Short rays keep the pattern budget-friendly and prevent the “busy” look that happens when rays get too long. It also works beautifully with thick outlines because the rays become crisp shapes after staining.
Draw a circle in the center of the back hand, about the width of two fingers. Inside the circle, add a small spiral or clustered dots to form the “core.” Then draw 12-14 short rays outward — each ray is a narrow leaf or rounded triangle, spaced evenly. Add a thin outer circle around the rays to frame everything.
If your cone line is shaky, practice 5 rays on paper first. Consistency matters more than perfection.
Don’t extend rays all the way to the wrist; it makes the center look cramped.
5. Wrist Lotus Band with Two Side Leaves
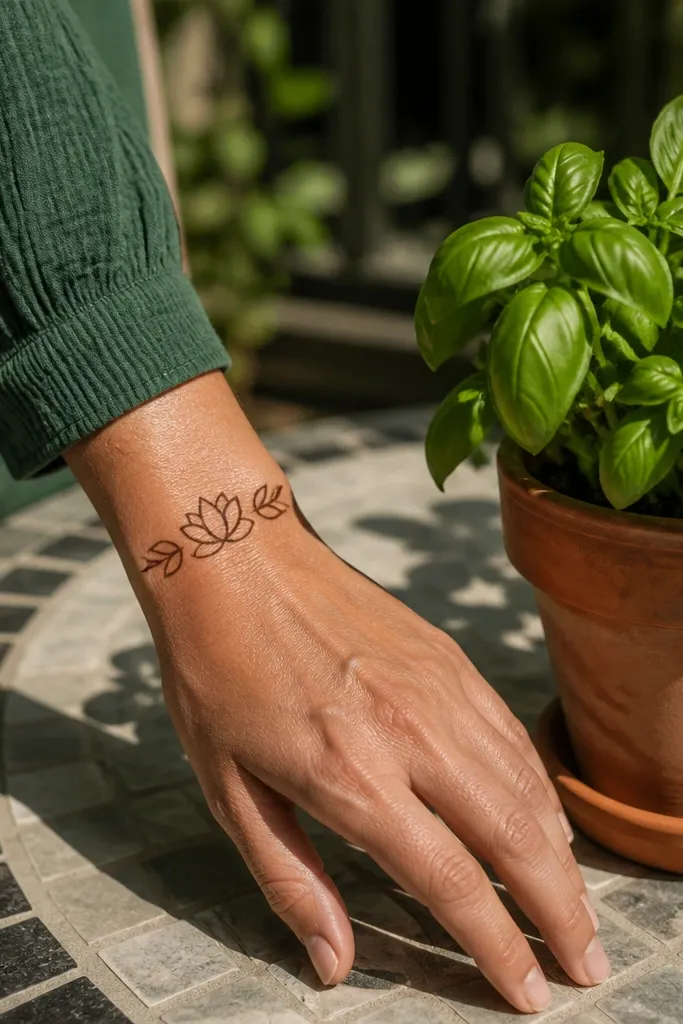
A lotus band is a classic back-hand look, but you can keep it cheap and modern by limiting the number of petals. The wrist is perfect for a band because it’s a natural horizontal frame. Two side leaves give the design balance without stuffing the whole hand. This is a good pick for shorter sessions because the band does the heavy lifting.
Draw a horizontal bracelet band at the wrist and place 3 lotus blooms inside it — one center, two side blooms. Each lotus has 5-7 petals outlined only, then lightly dotted in the petal centers. From the outer petals, extend two slim leaf strokes toward the back-hand center, stopping before the knuckles. Finish with small dot clusters under each bloom to connect the band to the leaves.
Outline petals first, then dot only the center — it stains darker and stays cleaner.
Avoid too many petals per lotus. More lines means more smudging on a cheap cone.
6. Three-Step Paisley Cluster (Center + Sides)
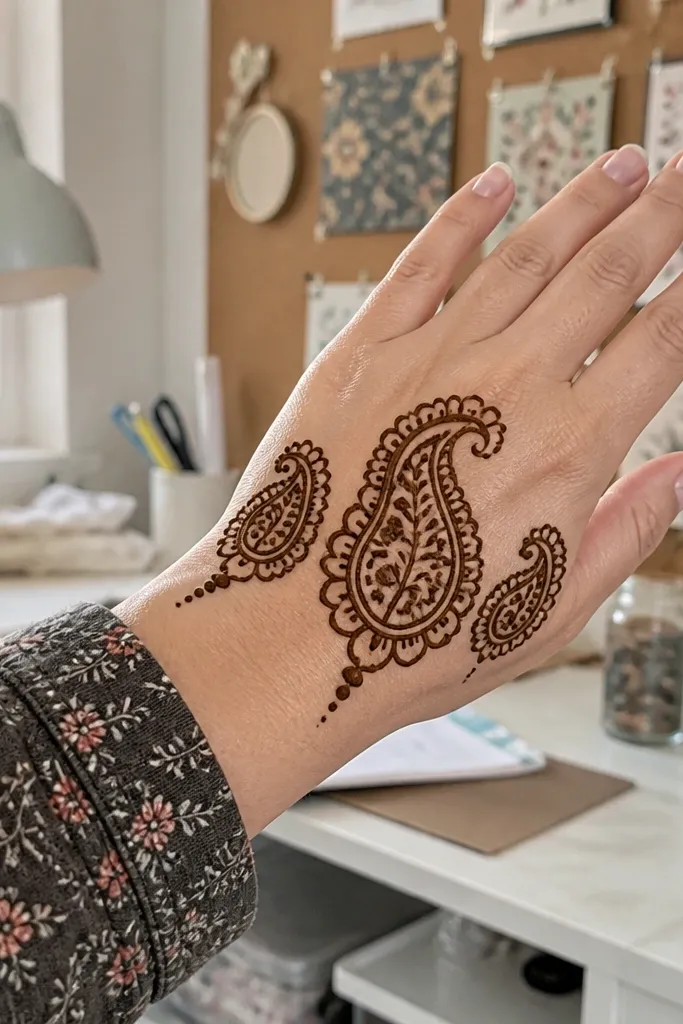
Paisley clusters look expensive because they create a layered silhouette, even when you’re not filling everything. This design uses three paisleys arranged so the center one is largest and the side ones are smaller, which gives you that “designed” look. Dot connectors keep the flow smooth and prevent empty gaps. It’s also great for back hands because paisley naturally follows the hand’s curve.
Start by sketching three vertical paisleys: center paisley is about 2.5-3 cm tall, side paisleys about 1.8-2.2 cm. Outline them first, then fill only the inner teardrop with light dots — skip full shading. Connect the tops of the paisleys with a thin curved line, then add 5-7 tiny dots along that curve. Finish by adding two short leaf curls at the ends of the side paisleys.
Pro tipMake the center paisley slightly tilted. Straight-on paisleys look flat in photos.
AvoidDon’t crowd paisleys too close. Leave a small gap so each one stays readable.
7. Finger-Top Arch with Back Center Star
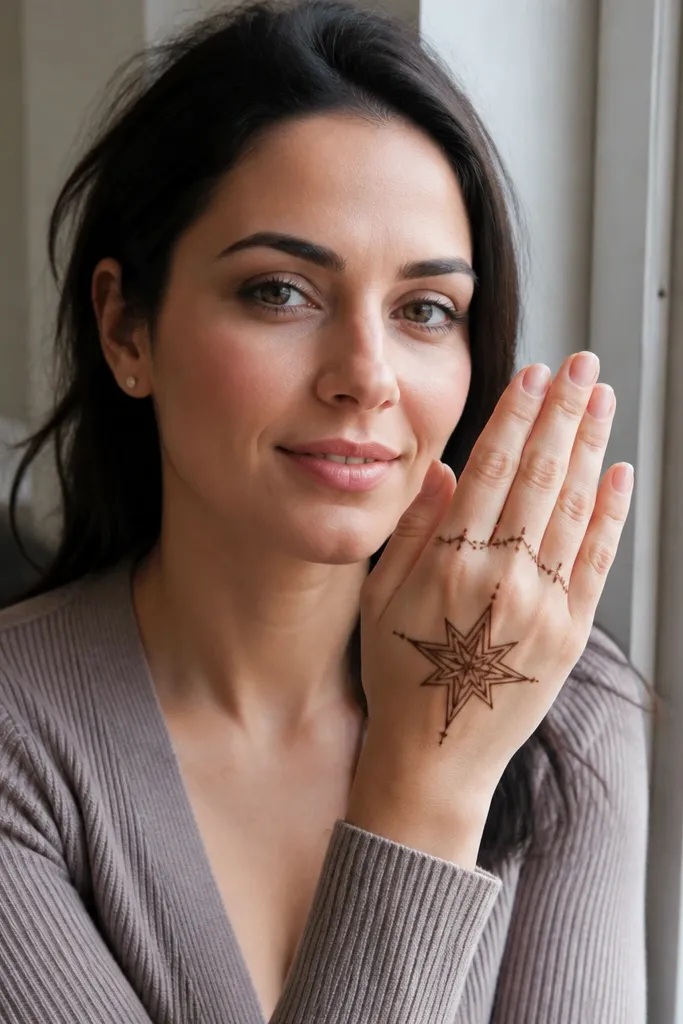
This is a clean, modern back-hand design because it combines a gentle arch near the finger bases with one sharp star in the middle. The star gives you a strong photogenic shape, while the arch keeps the top edge framed. It also works well if you have limited time because you’re drawing fewer elements with clear geometry. The look stays neat even if your stain is lighter in some spots.
Draw an arch line across the back of the hand near the base of the fingers. On the arch, add small teardrop bumps pointing upward like a row of petals. In the center of the back hand, draw a 5-point star outline — keep the points rounded, not sharp. Add small dot clusters at each star point and a thin ring around the star.
Pro tipFor the star, outline first then go back once. Over-tracing makes it too thick and muddy.
AvoidAvoid adding extra doodles around the star. One statement shape is the whole point here.
8. Rope Border Wrist Band with Hollow Leaves
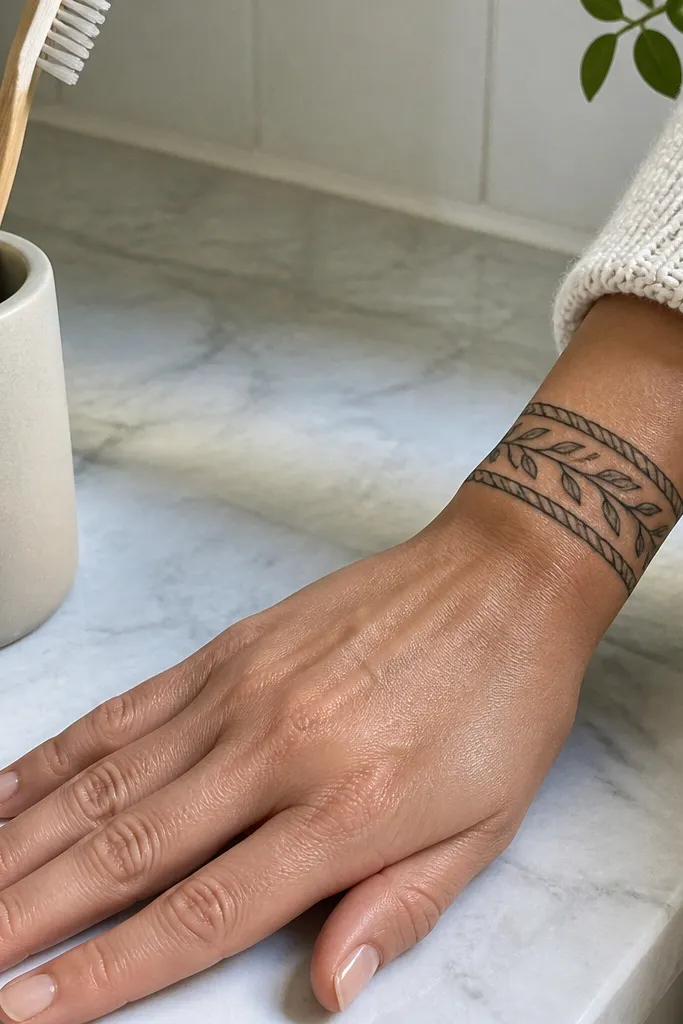
Rope borders look high-end because they create a textured frame without heavy filling. This design uses a double rope border at the wrist, then adds hollow leaf outlines that point toward the center. Hollow leaves are budget-friendly because you only draw the outline and skip full shading. The result is crisp, airy, and very readable in photos.
Start with a thin bracelet band at the wrist, then draw a double rope border: two parallel wavy lines with small twists along them. Inside the band, draw 4-6 leaf outlines — each leaf is an elongated teardrop with a center line. Leave the leaves hollow (no full fill), and connect the leaf bases to the rope border with a short curve. Finish by adding 1-2 dot clusters between leaves.
Pro tipKeep the rope twists small and consistent; big twists look uneven on a short wrist band.
AvoidDon’t thicken the rope border more than the leaf outlines or it will overpower the design.
9. Lace Net Panel with One Bold Corner
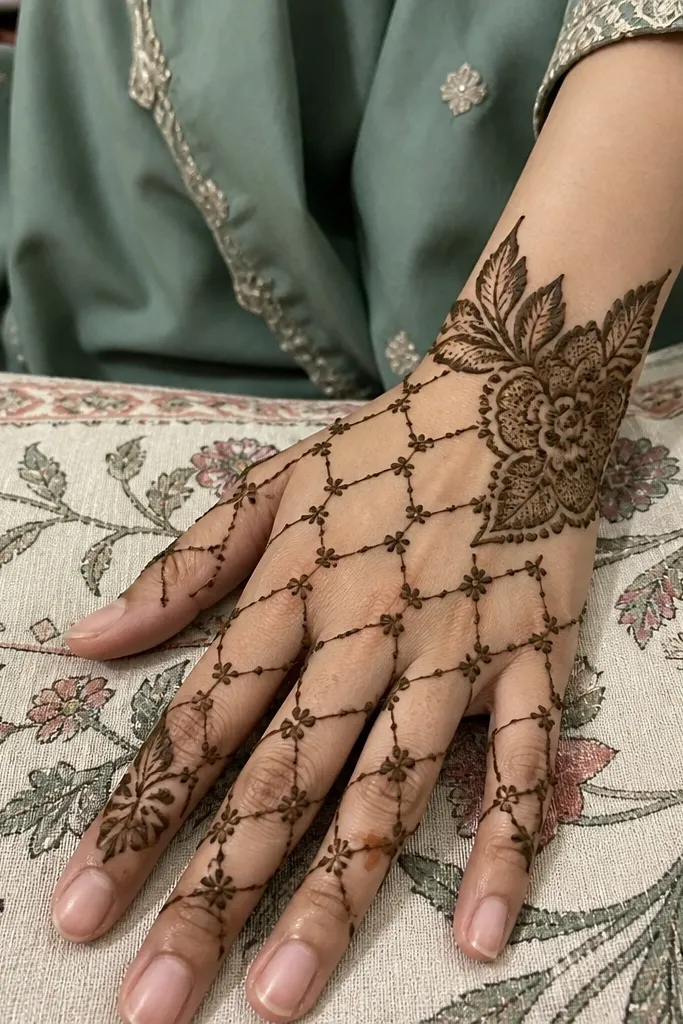
A lace net panel is a great way to cover space without going dense. You draw open “cells” with thin lines, so the skin still shows through and the mehndi doesn’t turn heavy. The bold corner leaf cluster gives it structure, so it looks intentional instead of like random lines. This one is perfect for festivals where you want a full look but you’re working with a basic cone and limited time.
Draw a simple rectangular-ish frame on the back of the hand, angled slightly upward toward the fingers. Inside, create a net by drawing diagonal lines and crossing them with short horizontal connectors, keeping the cells about 8-10 mm wide. In one corner of the frame, replace the net with a larger leaf cluster — 3 leaves radiating outward. Add tiny dots only at the net intersections near the leaf cluster.
Stop the net 1 cm before the wrist so the design breathes and stains evenly.
Avoid filling every net cell solid. Keep it open for clean lace contrast.
10. Bird Wing Feather Fan
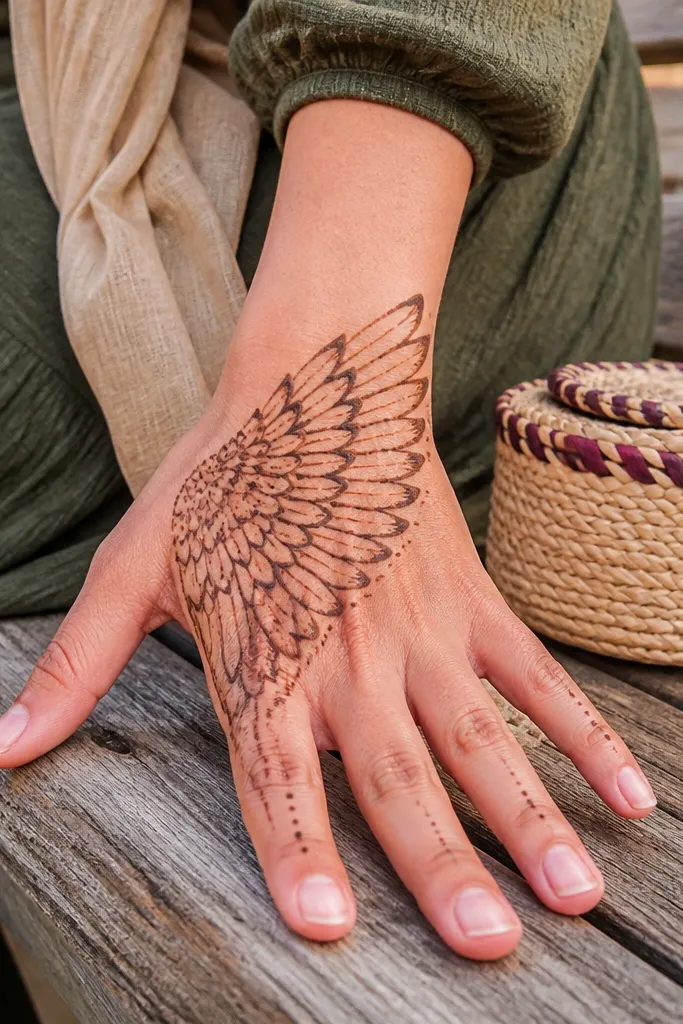
Feather fans look striking on the back of the hand because they create a wide, sweeping shape. The key is to keep feathers short and layered, like a wing, so it looks full without being crowded. You get a strong aesthetic even with a simple outline and a few dot accents. This is also a forgiving pattern when your paste flow varies, because the layered feathers hide minor unevenness.
Start with a curved base line from the inner wrist toward the center back hand. Draw 7-9 feathers along that curve — each feather is a narrow leaf outline with a center line. Overlap each feather slightly so the fan looks dense at the top. Add 2-3 dot rows between feathers for sparkle, then finish with one longer feather pointing toward the knuckles.
Pro tipKeep feather spacing tight near the base and wider near the tip for a natural gradient look.
AvoidAvoid making every feather the same size. A fan needs one or two slightly larger feathers.
11. Half-Moon Mirror Border (Wrist + Top)
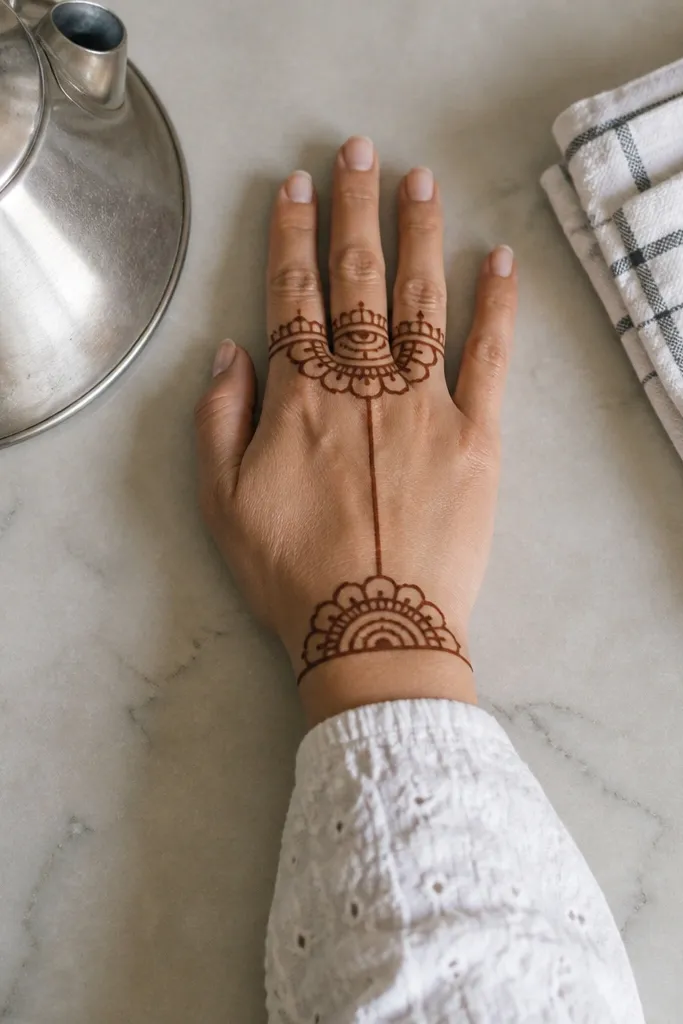
Mirror borders look clean and designed, especially when both ends match. This design places one half-moon border at the wrist and another near the finger bases, then connects them with a simple central line. It’s budget-friendly because it uses repeating shapes and minimal filling. The symmetry makes it photogenic even if your lines are thin.
Draw a half-moon bracelet at the wrist: small U-shapes facing down, repeated in a row. Near the finger bases, draw a second half-moon row facing upward. Connect the center of the two borders with a thin vertical line, then add two curved side lines that create a gentle frame. Add dots along the vertical line at 1 cm intervals.
Use a ruler or straightedge lightly for the central line so the symmetry stays crisp.
Don’t connect the borders with a thick blob. Thin lines keep it airy and photo-friendly.
12. Minimal Mandala Dot Core with Side Runners
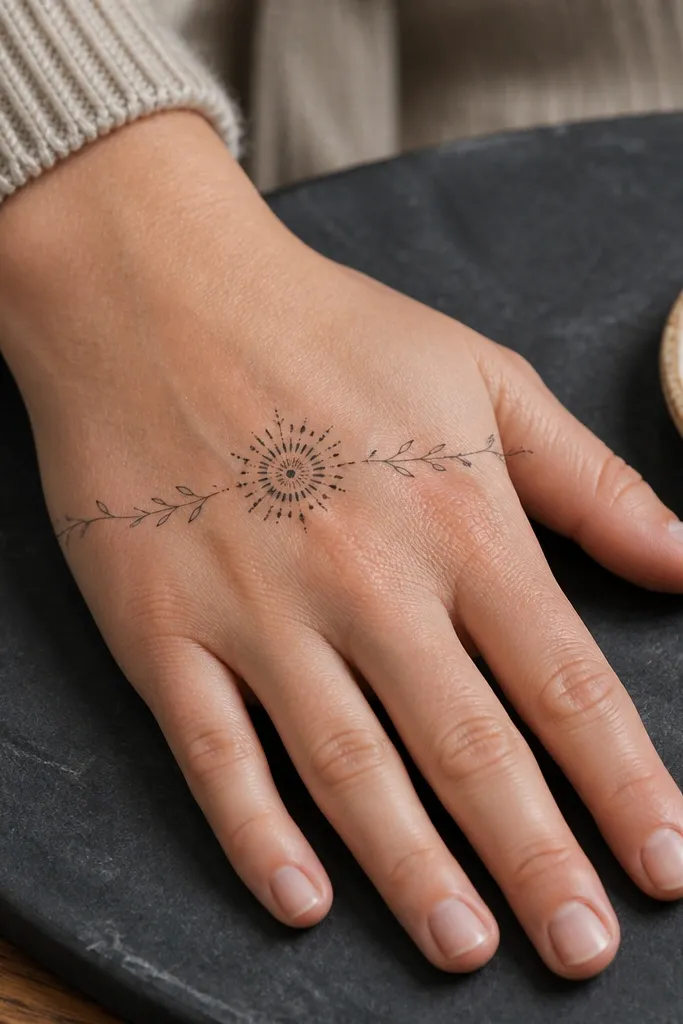
This is the “less paste, better look” design. You place a small mandala dot core in the center, then run two thin vine lines outward to the sides. The center dot work gives visual impact without heavy filling, and the side runners add structure so the hand doesn’t look empty. It’s also fast, because dot mandalas are easier than full floral panels.
Start with a small circle in the center and fill it with concentric dots — 5 dots in the first ring, 8 in the next, then stop. From the left and right sides of the circle, draw two thin runner lines that curve toward the wrist and stop before the knuckles. Add tiny leaf teardrops along the runners at 1-1.5 cm spacing. Finish with one small leaf cluster at the outer ends of the runners.
Pro tipPress the cone only lightly for dots. Heavy pressure makes blobs that look messy on dot mandalas.
AvoidAvoid turning the runners into full vines. Thin runners keep the look modern.
13. Wrist-to-Knuckle Geometric Blocks
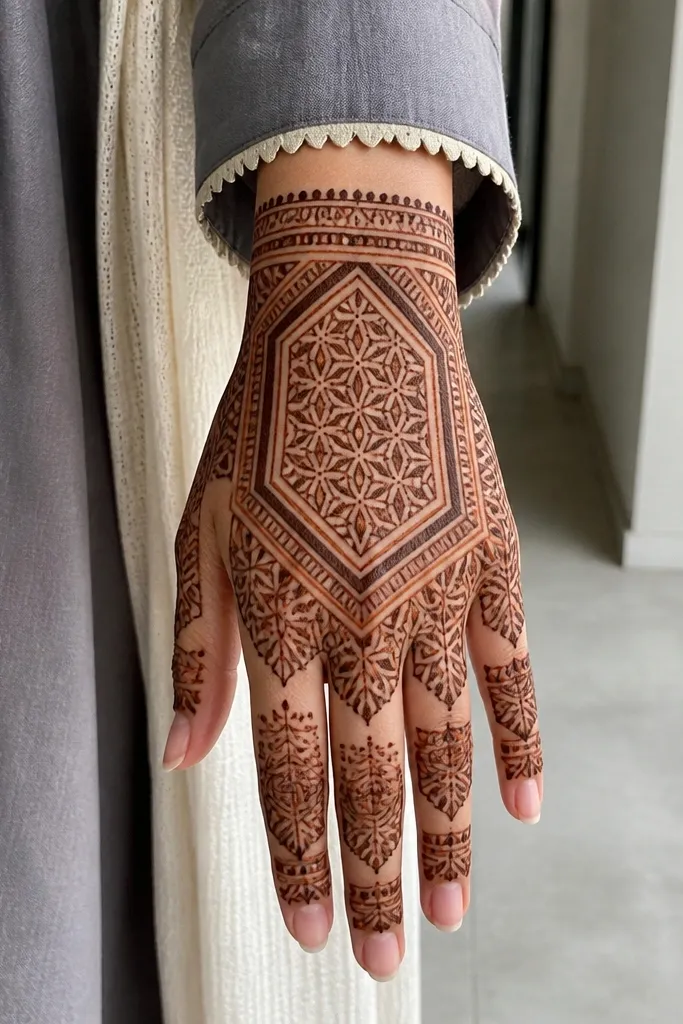
Geometric blocks are the best option when you want a bold, graphic look without shading. The clean angles read well on camera, and you can keep the pattern budget-friendly by using outlines only. This design also hides uneven stain because the borders create crisp edges even when some areas lighten. It’s a strong pick for holiday outfits where you want something that looks like jewelry.
Draw a thin bracelet band at the wrist with alternating small squares and triangles. From the center of that band, create a column of 3 stacked rectangles toward the knuckles, each rectangle about 1.2-1.5 cm tall. Connect the rectangles with diagonal lines to form a zig-zag grid. Add a single larger triangle in the center column and dot its corners for sparkle.
Pro tipKeep all angles sharp and consistent. A steady hand on angles looks better than curved “almost-right” shapes.
AvoidDon’t overfill the blocks. Outlines and corner dots look cleaner than solid shading.
14. Rosebud Corner Cluster with Outline Fill
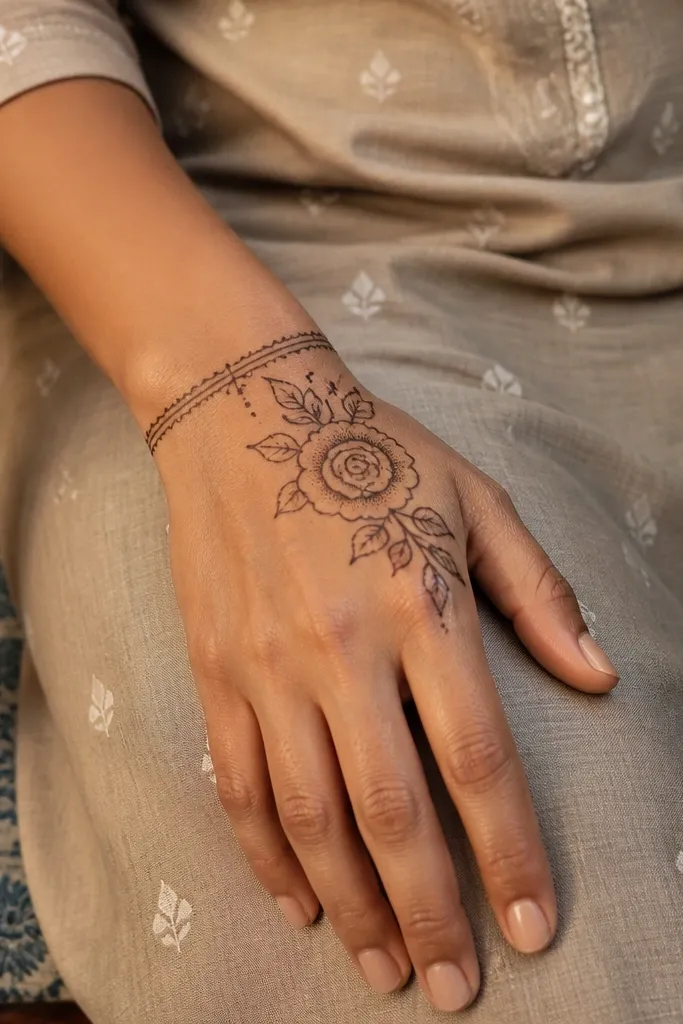
Corner clusters are perfect for back hands because they add drama without covering everything. This design uses a rosebud cluster in one upper corner, then balances it with a simple wrist band. The rosebud petals are outlined with light dot fill, which keeps the look classy and prevents the stain from turning too dark. It’s also great for people who want a “statement” but don’t want finger-heavy mehndi.
Start with a thin wrist band across the back of the hand. In the upper outer corner, draw two rosebuds: one bigger rosebud and one smaller beside it, both with 5-6 petal outlines. Connect the rosebuds with a curved leaf stem that stops before the center of the hand. Fill the rosebud centers with 6-10 tiny dots, then add one small leaf curl at the bottom of the cluster.
Pro tipIf your rosebud petals wobble, make them slightly rounded. Rounded petals read better in photos than sharp point petals.
AvoidAvoid spreading the cluster across the whole hand. One corner is what makes it look intentional.
15. Wavy Bar Band with Micro Leaves
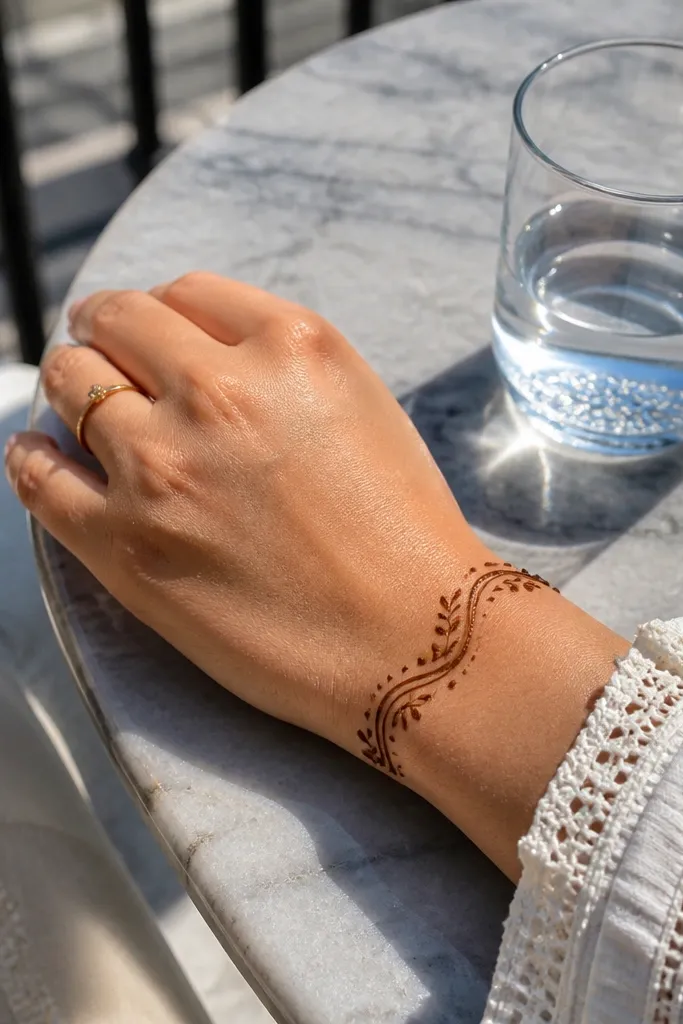
This one looks airy and pretty because it uses a wavy bar as the main element and micro leaves as the accents. You get a “holiday jewelry” vibe without dense filling. The wavy bar gives a smooth curve that flatters the wrist area, and the micro leaves create texture without clutter. It also works well when you need something neat that still shows up in low light.
Draw a wavy bracelet band at the wrist using a repeating wave pattern, spacing peaks about 8-10 mm apart. From each wave peak, extend a micro leaf outline downward toward the back center — keep each leaf under 1 cm. Add tiny dots between every two leaves to connect the pattern. Finish with a thin curved line across the bottom of the band to lock the composition.
Pro tipMake the micro leaves slightly angled the same direction so the pattern reads as one flow.
AvoidDon’t place too many micro leaves in one spot. It turns into a dark patch.
16. Center Knot with Teardrop Fringe
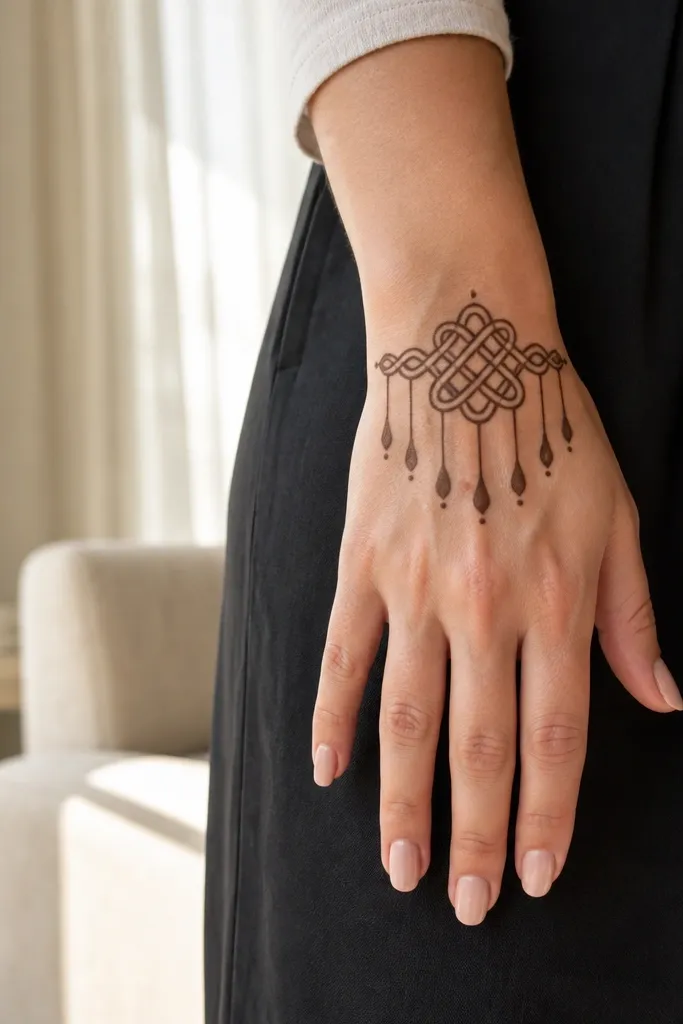
A center knot is a strong visual anchor, and the teardrop fringe adds movement. It looks like a hanging ornament, which is why it’s so photogenic on the back of the hand. You’re not filling the whole hand; you’re creating a focal point with a simple fringe line. This is also beginner-friendly because the fringe uses repeatable teardrops.
Draw a small knot in the center: two overlapping loops with a hollow center. From the knot bottom, draw a gentle curved line and attach 8-10 teardrops along it, each teardrop pointing downward. Outline the teardrops and add a few dots inside each teardrop for texture. Add a thin horizontal line across the top of the knot to frame it, then stop.
Keep teardrop height consistent. Fringe looks best when it forms a tidy “row.”
Avoid drawing the fringe too long toward the fingers. It should land around the wrist area.
17. Back Hand Triangle Ladder (Wrist to Center)
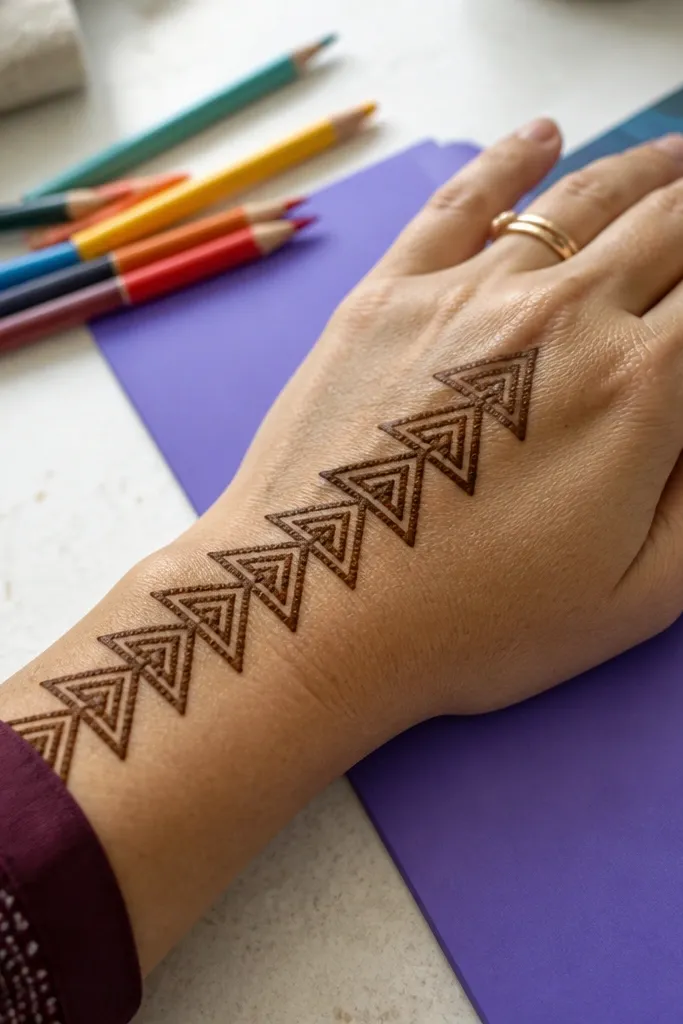
Triangle ladders look bold and holiday-ready because the shapes are graphic and easy to read. This design creates a tall diagonal structure without needing lots of lines across the whole hand. Each triangle is a repeat unit, so it stays budget-friendly and quick. The ladder also helps you avoid messy spacing since the triangles naturally create their own boundaries.
Start at the wrist with a row of 4 small triangles touching at their bases, pointing upward. From the center of that row, draw a second row of 3 larger triangles pointing upward, slightly offset to create a ladder effect. Continue with a final row of 2 triangles toward the center of the back hand. Outline the outer edges of the ladder with one thin line and add 3 dots at the top triangle corners.
Pro tipUse the same triangle base width every row. That consistency makes the ladder look expensive.
AvoidDon’t fill triangles fully. Outline + corner dots keeps it clean and stain-friendly.
18. Wrist Peony Buds with Open Petals
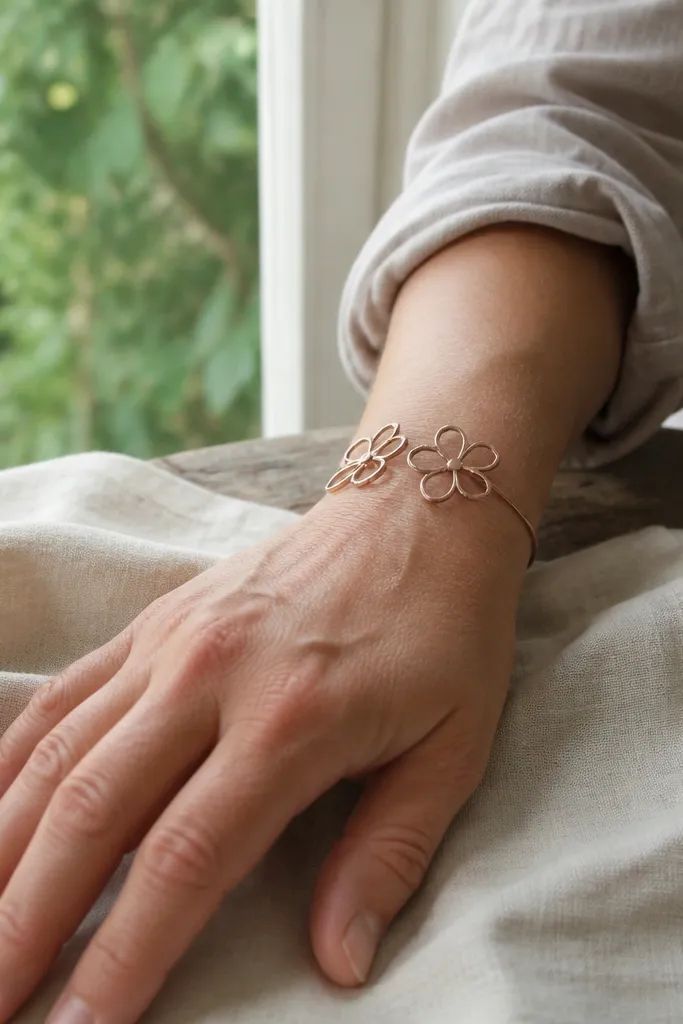
Peony buds at the wrist look soft and pretty, even with minimal work. The trick is using open petals — outline only — so the design looks airy and doesn’t turn heavy. Buds along the wrist give you a strong horizontal band, while dot centers add the “finished” look. This is a good pick for budget cheap back hand mehndi designs because it’s mostly linework.
Draw a thin bracelet band at the wrist. Place 3 peony buds on top of the band: left, center, right. Each bud has 6-8 open petals outlined in a circle shape, with only the center filled with 8-12 dots. Add two small leaf curls on each side of the center bud to connect to the wrist band. Finish with a light dot trail between buds.
Pro tipKeep petal outlines slightly separated. Touching petals turn into one dark blob.
AvoidAvoid solid shading inside petals. Open petals are what keep the design photogenic.
19. Mini Mandala Ring Around Center Dot
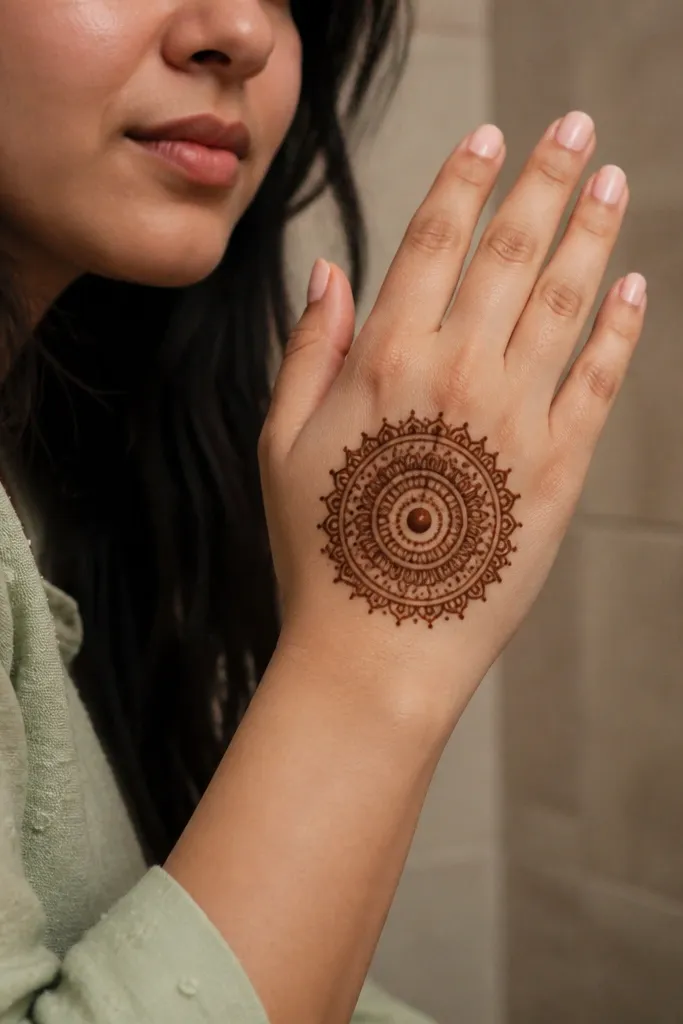
A mini mandala ring looks cute and high-contrast on the back of the hand because it’s compact and symmetrical. You get a decorative halo effect without covering the entire hand. The ring reads clearly even if your stain is uneven, since the outer loop creates a clear boundary. This design is fast for holiday nights when you want something neat but not time-consuming.
Place one central dot in the middle of the back hand. Draw a ring around it using 10-12 small petal loops, each loop touching the ring. Add one smaller ring inside the first ring with 8 dots evenly spaced. Finish by adding 4 tiny teardrops at the cardinal points (top, bottom, left, right) and a thin outline around the outer ring.
Pro tipUse even spacing for the petal loops. Uneven spacing is what makes mandalas look messy.
AvoidAvoid drawing extra rings beyond two. Too many rings crowd a small back-hand area.
20. Wrist-to-Knuckle Leaf Arches with Open Centers
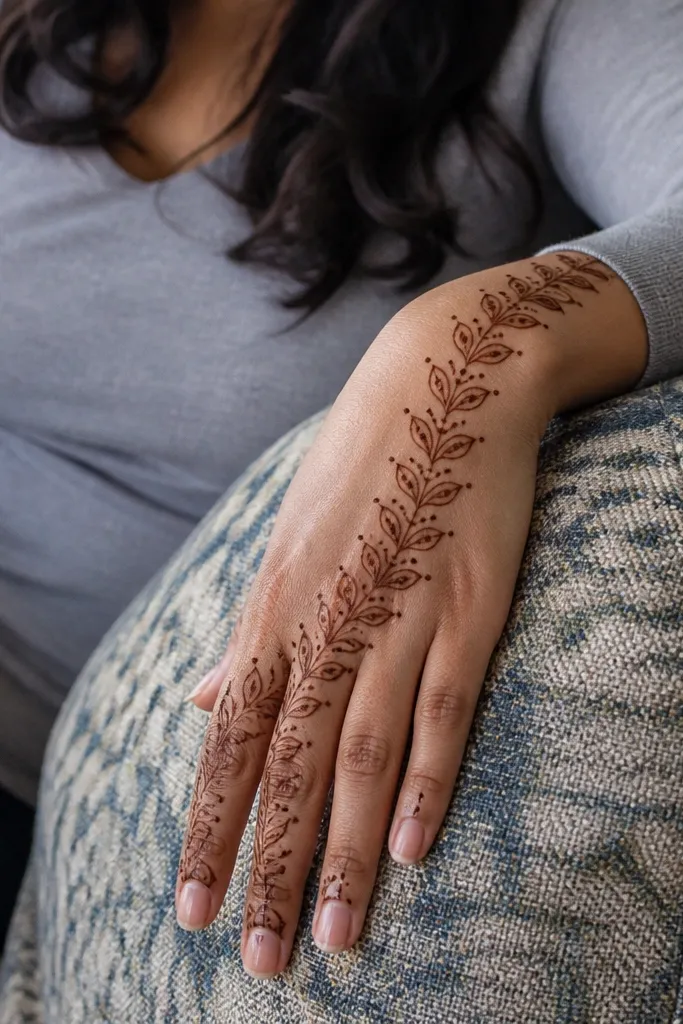
Leaf arches are one of the best budget cheap back hand mehndi designs because they create a full look using simple repetition. The arches also follow the natural curve of the back of the hand, so it flatters fingers and knuckles. By leaving centers open, you keep contrast and avoid the heavy, muddy look. It’s a good choice for people who want something feminine but clean.
Draw a bracelet band at the wrist with a thin line and 2-3 dot clusters. From the band, draw three leaf arches that curve upward toward the knuckles, each arch made of an elongated teardrop outline. Leave the arch centers empty and only outline the leaves with a center line. Connect the arches at the top with a thin zig-zag line and add tiny dots at the zig-zag turns.
Pro tipMake the middle arch slightly taller than the side arches. That gives the design a natural focal point.
AvoidAvoid adding full leaf filling. Outline-only keeps stain cleaner and photos sharper.



