
1. Single Center Spine with Two Finger Loops
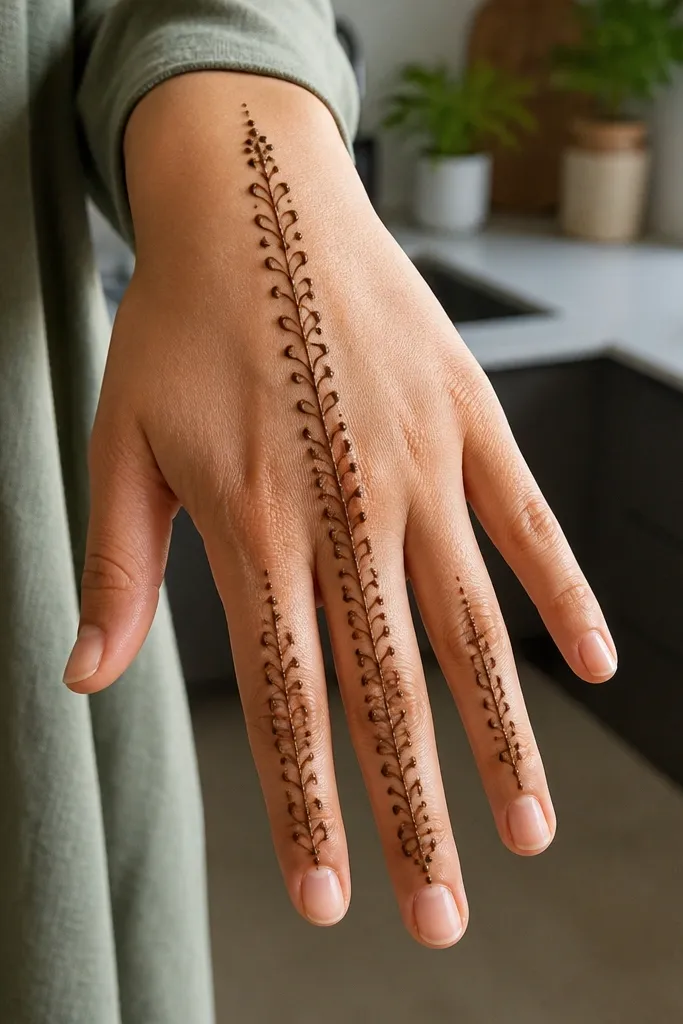
This one is the cleanest “simple Arabic” look because it reads clearly even with minimal work. Draw a straight center spine from the wrist crease up to the middle finger knuckle, then add matching loops on the index and ring fingers. Keep the side skin open — don’t fill the entire hand — so the line looks sharp and intentional. It suits small hands and also works when you have limited time because it finishes fast and still looks designed. For photos, the vertical line makes the hand look longer and more graceful.
Start by marking a light center guide with a henna-safe pencil or by eye alignment (center of the hand between index and middle fingers). Then draw one continuous spine: wrist crease to middle knuckle, using thin lines and small upward hooks at the top. Finish by adding two small loop motifs — one on the index knuckle area and one mirrored on the ring knuckle — with tiny connecting dots.
If your line wobbles, pause and let the cone stop moving; restarting creates thicker bumps that show in close-up photos.
Avoid covering the whole palm — it turns a simple spine into a heavy block.
2. Wrist Chain Border with Center Dot Ladder
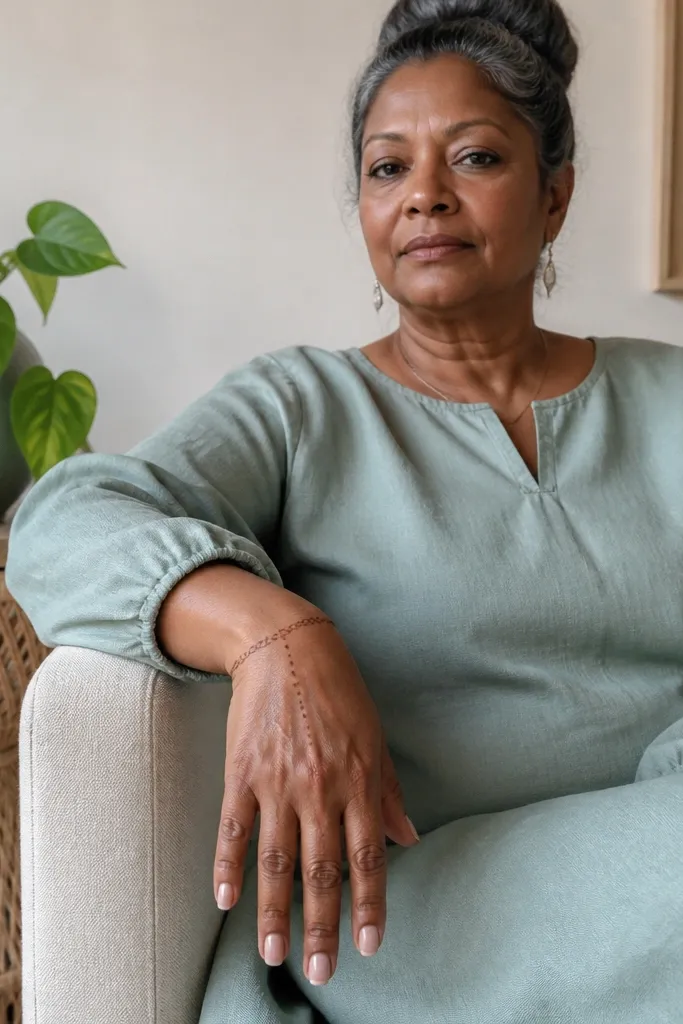
A wrist chain border gives you instant Arabic vibe without needing a full pattern. The center dot ladder adds a gentle rhythm that looks balanced on the front hand. This design is great for beginners because it repeats a simple shape: tiny chain links at the wrist, then dots spaced evenly up the center. Leave the rest of the hand mostly bare so the border looks crisp. It photographs well on both short and long nails because the dots sit right where the camera focuses.
First draw a thin chain border around the wrist line, leaving a small gap at the center so the next element stands out. Then create the center dot ladder: place dots along the center spine at equal spacing from wrist to middle finger knuckle. Connect every third dot with a short thin line so it looks like a ladder, not a random sprinkle. Add two or three small dots on each side of the ladder near the knuckles for symmetry.
Use the same pressure for every dot; if some dots are bigger, the ladder looks uneven.
Avoid putting dots too close together — it turns into a smudge.
3. Thumb Outer Vine with Two Leaflets
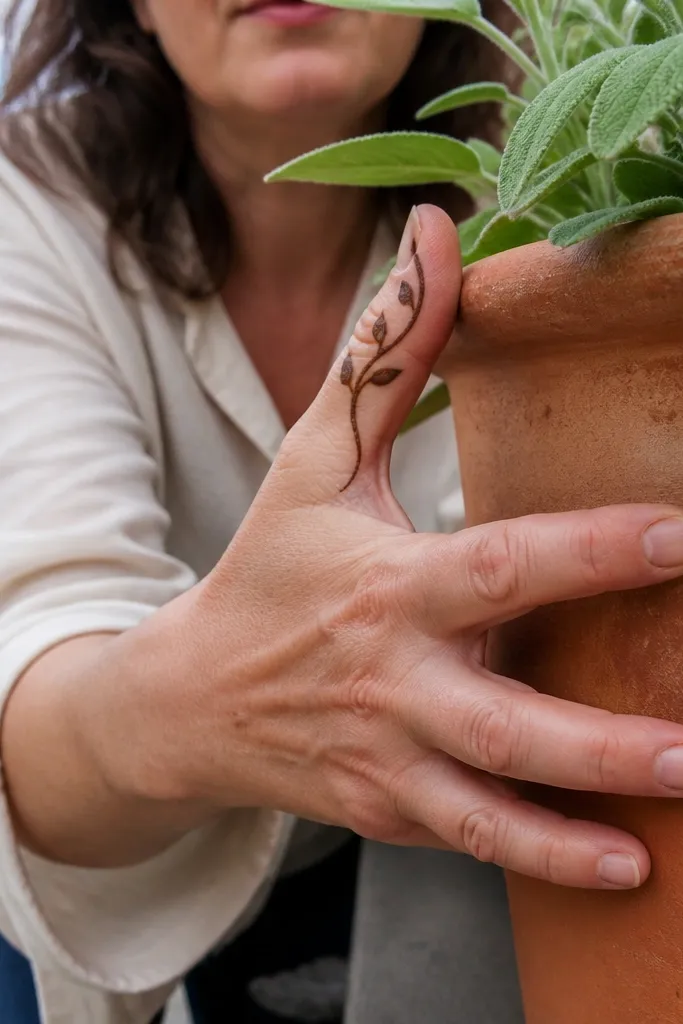
Start at the wrist outer edge and draw a thin curved vine toward the thumb knuckle. Add two leaflets along the vine — one around mid-hand and one closer to the thumb base — keeping them small and pointed. Then add a tiny row of dots along the vine for a clean Arabic finish. Finish by extending the vine slightly past the thumb knuckle with a short hook line.
This design uses the thumb-side outer edge, which is where front-hand Arabic mehndi looks the most elegant. A single vine curve gives movement, and two leaflets keep it from looking too plain. It’s also a good choice if your fingers are short or you don’t want heavy coverage on the knuckles. The outer placement makes your hand look structured in photos because the pattern frames the thumb area. It’s quick, but it still looks styled.
AvoidAvoid crossing the vine over the center of the hand — it removes the clean front-hand framing.
Pro tipKeep leaflets narrow; wide leaf shapes make a simple design look bulky.
4. Knuckle Grid with Open Diamonds
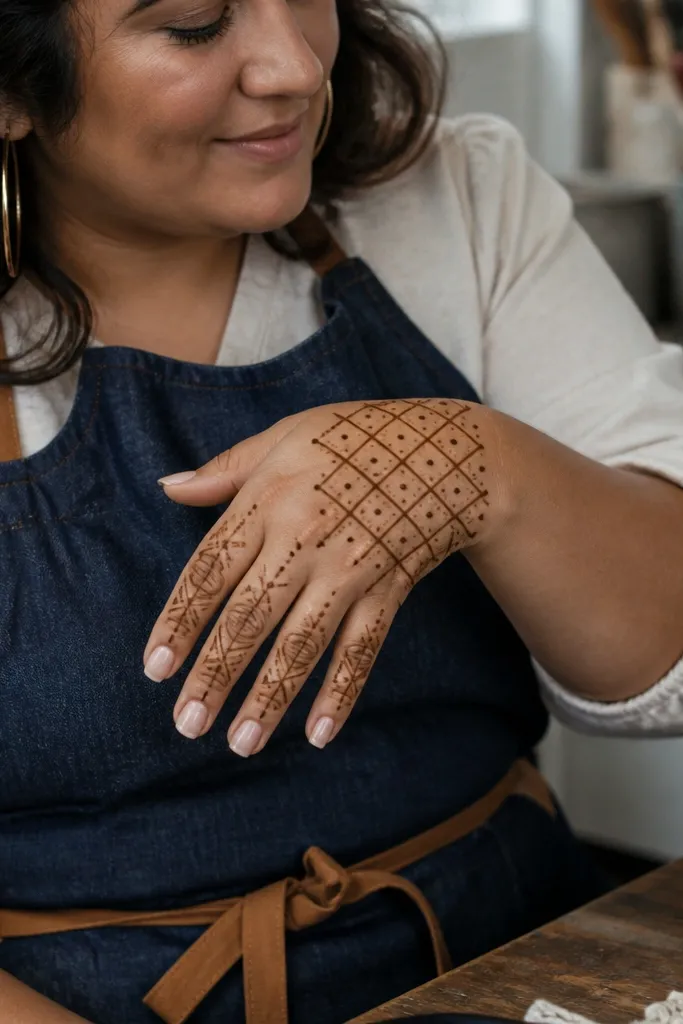
Knuckle work is where simple Arabic designs can look expensive without filling the whole hand. This pattern uses a grid of thin lines across the knuckles and inserts open diamond shapes so you get texture without heaviness. It’s a strong option for people who want a neat, geometric look rather than floral vines. The open diamonds create negative space, so the mehndi still looks breathable and crisp. In photos, the diamonds catch light and make the hand look sharply patterned.
Begin at the index and ring knuckles with a horizontal thin line across each knuckle area, leaving gaps between fingers. Then draw vertical lines from those horizontals down slightly toward the center of the hand. Insert open diamonds by drawing two crossing thin lines inside each gap, but do not fill them. Add tiny dot corners at the diamond tips to keep edges clean.
Use a ruler-like eye for spacing: diamonds look best when each one is the same size across the hand.
Avoid filling diamonds solid — open ones keep the Arabic look clean.
5. Finger Caps with a Single Arc Bridge

Start by drawing a thin horizontal cap line across the base of each finger, focusing on the front knuckle area. Then connect the cap ends with a short curve so each cap looks like a shallow “U.” Add dots at the cap corners for an Arabic finish. Finally, draw one clean arc bridge between the index and middle finger caps, and stop it before it reaches the center of the palm.
Finger caps look detailed but they’re simple to execute. You draw a small cap on each finger knuckle area, then add one arc bridge across two fingers to connect the composition. This gives you a designed look without needing to fill every finger with heavy patterns. It also helps your design stay cohesive when you’re working quickly. The arc bridge makes the front hand look organized, especially in close-up photos on event days.
AvoidAvoid adding multiple bridges — too many arcs make a simple layout feel busy.
Pro tipKeep cap heights consistent; if one cap is taller, the whole look feels off.
6. Wrist to Middle Finger Ladder Lines
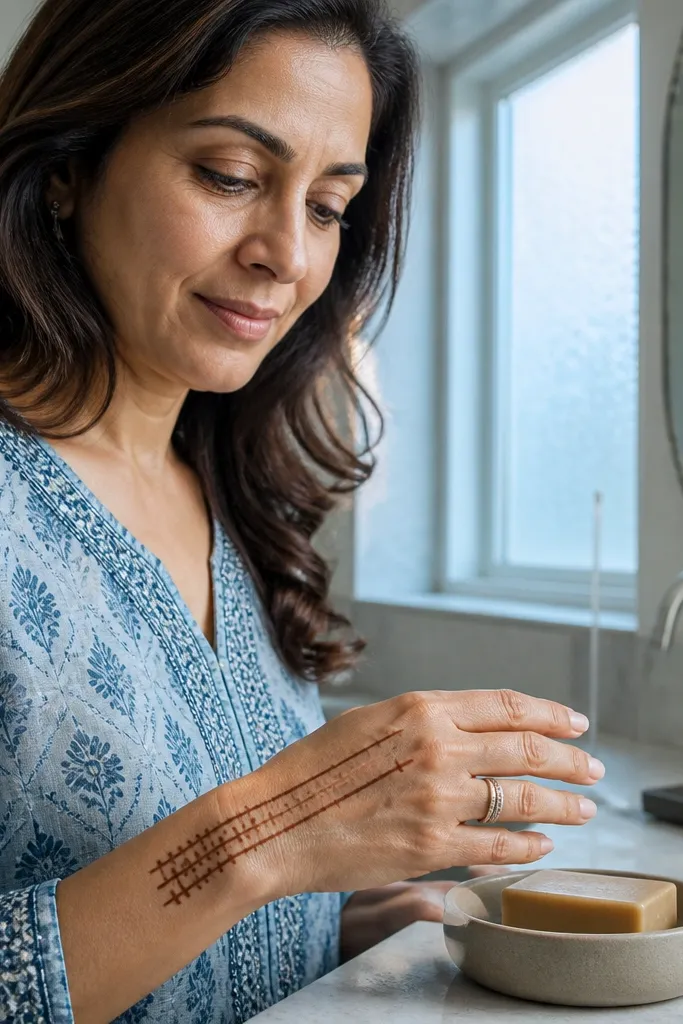
This is a straight-up Arabic line design that looks crisp and modern in photos. Three ladder lines give structure, and because they run vertically, the hand looks longer. It’s ideal when you want minimal coverage but still want the “front hand mehndi” look people expect. The ladder pattern also hides small mistakes because the repeated steps keep the design consistent. If you’re worried about balance, this one is hard to mess up.
Draw a thin center spine from wrist crease to middle finger knuckle. Then add two parallel ladder lines on both sides, spaced evenly. For each ladder line, create short cross steps every 8-10 mm so the pattern reads as ladder rungs. Finish at the knuckle with a small hook at the top of each side ladder line and a dot at the center spine tip.
Mark spacing with tiny dot guides first; it prevents uneven rung sizes.
Avoid making the lines thick — ladder designs need thin strokes to look airy.
7. Outer Edge Half-Moon with Micro Dots
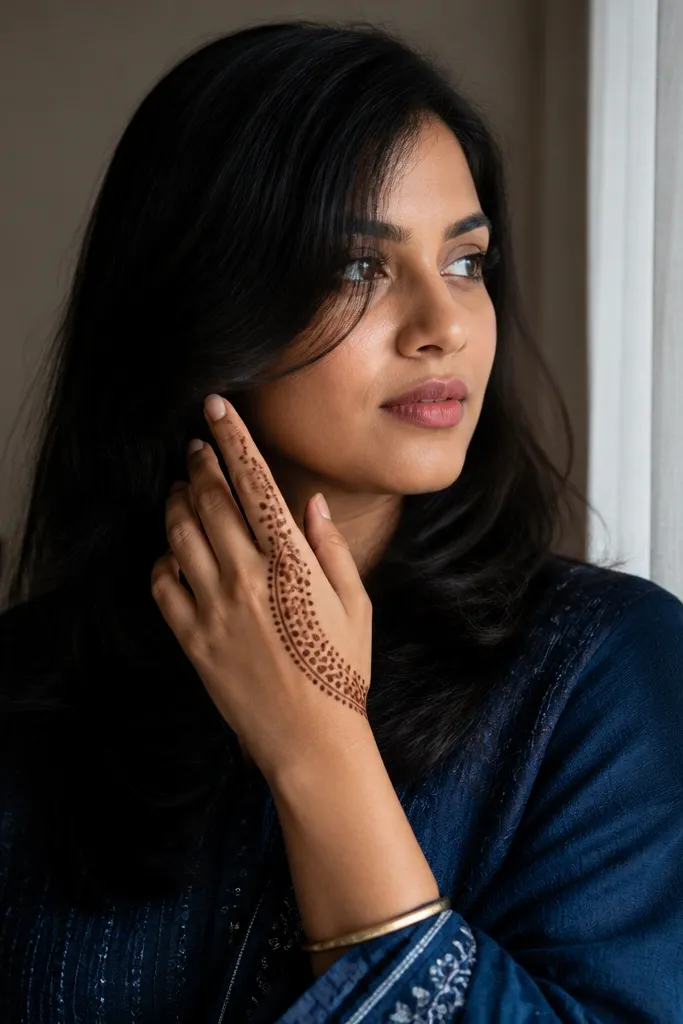
Half-moon motifs instantly read as Arabic when they sit on the outer edge of the front hand. This one uses a single arc, then fills it with micro dots instead of heavy ink. It’s light enough for daily wear, but it still looks photo-ready because the arc frames the hand. The micro dots create texture that looks dark and even after stain. It also works well if you want to avoid finger-to-palm coverage.
Start at the wrist outer edge and draw a clean half-moon arc up toward the thumb knuckle area, keeping it thin. Then add micro dots along the arc line, placing dots close enough that the arc looks textured but not clogged. Add two tiny dot clusters — one near the bottom of the arc and one near the top. Finish by adding a short vertical line segment down from the arc midpoint to connect the motif to the hand’s center.
Use a pin-like dot size; if dots get too big, the arc becomes a blob.
Avoid drawing the half-moon too wide across the palm — it loses the outer-edge framing.
8. Three Finger Floral Teardrops (No Palm Fill)
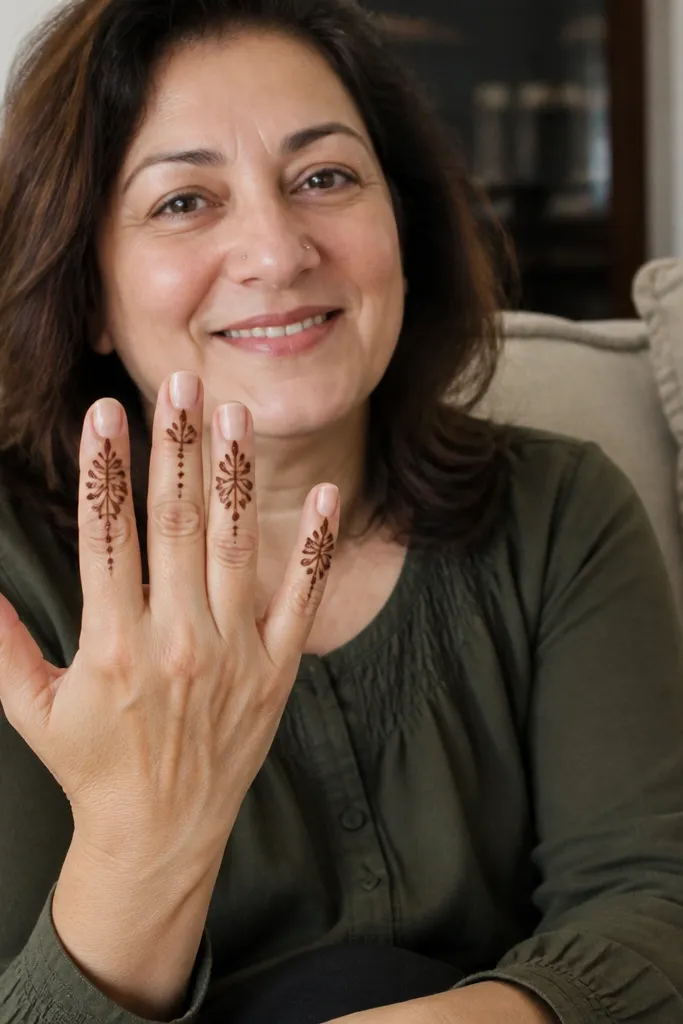
Teardrop floral motifs look delicate, and you can keep them simple by placing them only on three fingers. This design keeps the palm open, so your hand still looks breathable and clean. The trick is to use thin stems and small teardrops with open centers rather than filling everything. The result looks feminine and Arabic without needing a full bridal-style layout. It’s also a great option if you’re working with short time because you repeat the same motif on three fingers.
Draw a thin stem line from each selected finger’s knuckle upward for about 2-3 cm. At the top section, draw one teardrop motif with a pointed tip and keep it open inside (no filling). Add a second smaller teardrop below the first on each finger. Connect stems to knuckle area with a few tiny dots so the motif looks intentional.
Keep teardrops the same height across fingers; mismatched sizes show immediately in photos.
Avoid filling teardrops solid — it makes a simple design look heavy.
9. Center Diamond Stack with Side Micro Dots
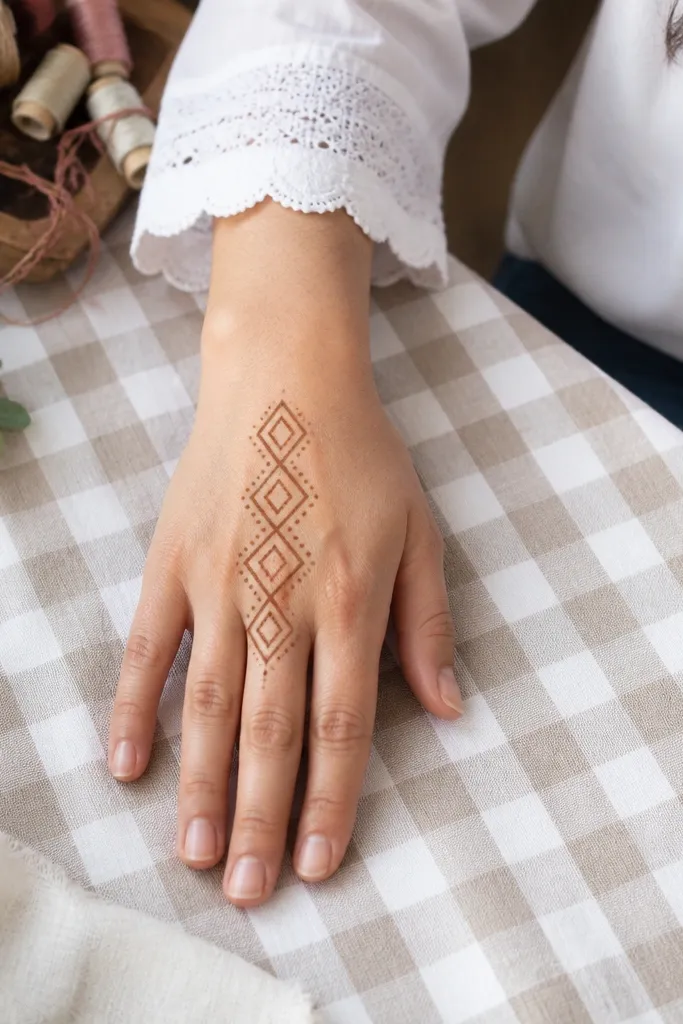
Start at the wrist crease with a single open diamond outline centered between index and middle fingers. Draw the next diamond above it, slightly smaller or the same size, maintaining equal spacing. Continue until you reach the middle knuckle area. Place micro dots on both sides of each diamond — two dots per side — aligned with the diamond corners. Add one final dot at the top center to close the pattern.
Open diamonds are the fastest way to get Arabic geometry without overthinking. This design stacks diamonds down the center of the front hand, then adds micro dots on both sides to give it that polished finish. It works especially well for medium coverage because it looks complete even if you stop at the middle of the hand. The diamond stack also keeps your spacing under control since each diamond has a clear size. Photos look crisp because the lines are repetitive and symmetrical.
AvoidAvoid changing diamond sizes halfway through — it breaks the symmetry.
Pro tipIf your diamonds tilt, reset: redraw only the top diamond and stop; the eye catches the last one most.
10. Wrist Flower Burst with Two Petal Lines
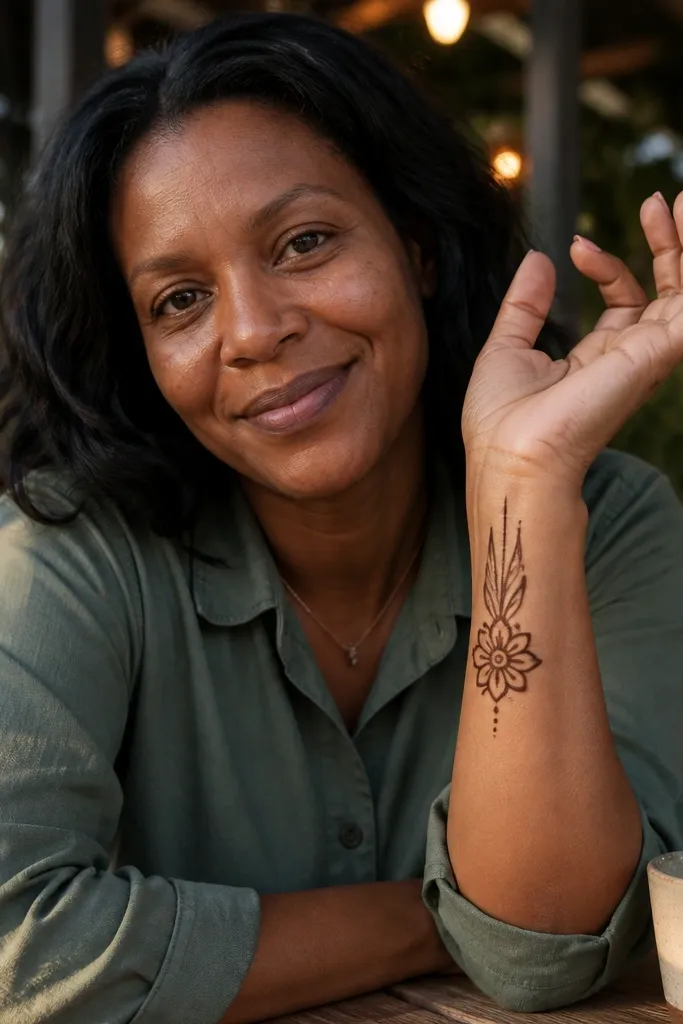
A wrist flower burst is classic Arabic and it looks great even when your hand design is minimal. This version stays simple by using one small flower plus two long petal-like lines that guide the eye up the hand. Because the heavy part is at the wrist, you avoid crowding the fingers. It’s photogenic because the burst creates a focal point, and the petal lines keep everything flowing. It suits parties, Eid, and everyday festive looks where you want a clean front-hand pattern.
Draw a small circle at the wrist center line. Add 5-6 short teardrop petals around it, but leave the middle open. From two opposite petals, extend thin lines upward toward the index and ring knuckles, each line ending in a tiny hook. Add micro dots along the extended lines at intervals of 1-1.5 cm. Stop the design at knuckles; don’t continue into the palm.
Keep petals short and tight; long petals make it look like you tried to do a full hand and ran out of time.
Avoid thickening the flower circle — it makes the focal point look muddy after stain.
11. Finger Knuckle Stripes with One Corner Vine
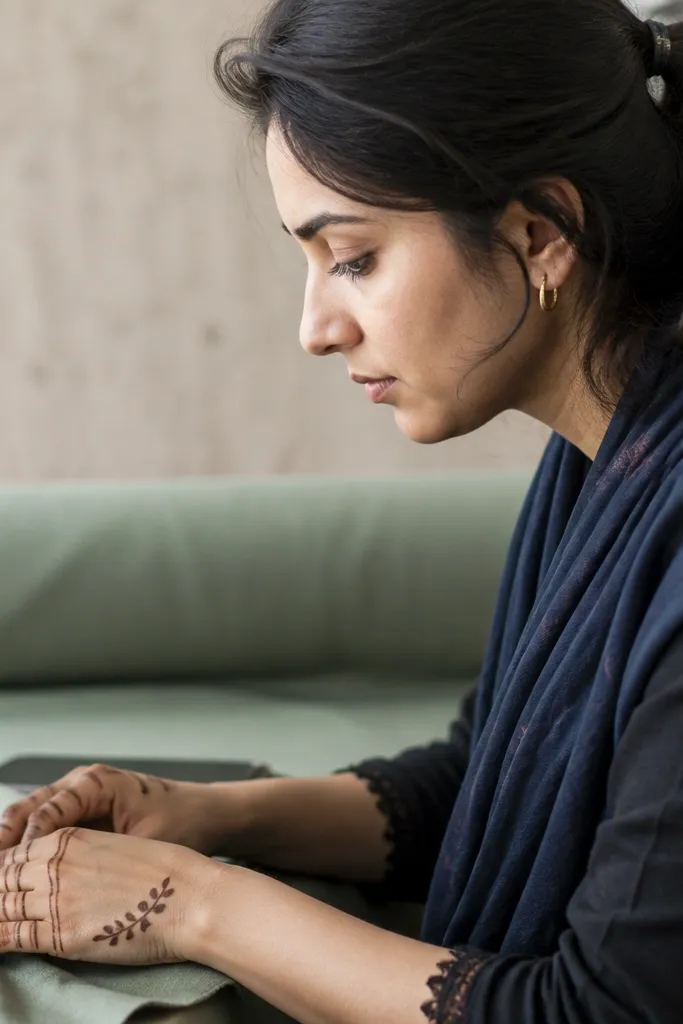
Stripes on knuckles give a clean, graphic look that still reads as mehndi. Pair that with one corner vine on the thumb side and you get a balanced Arabic feel without a full pattern. This is good if you want your fingers to look neat and uniform. The vine corner adds personality while the stripes keep the design controlled. In photos, stripes create strong contrast and make the design look intentional.
Draw one thin horizontal line across each front knuckle area (index to pinky), keeping spacing even between fingers. Add a second parallel line on only the index and ring knuckles to create variation, not full double lines on all fingers. Then draw a small vine starting from the wrist outer edge and curving toward the thumb knuckle corner. Add 2 tiny leaves on the vine, then stop before it reaches the center of the hand.
Use a light touch for stripes; if they’re too dark during application, the stain can look uneven.
Avoid adding vines on both sides — that turns a simple look into a busy one.
12. Palm Center Dot Medallion (Small and Open)
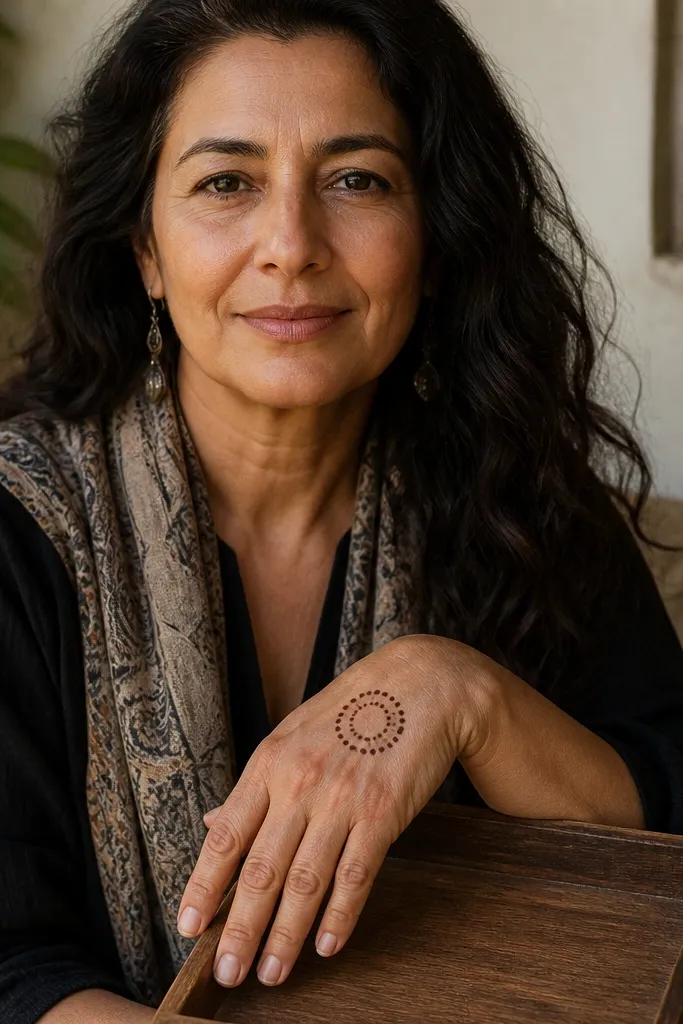
This design gives a medallion look without needing to fill the palm. It’s centered on the front hand and stays small so it doesn’t crowd the fingers. The dotted ring makes it look decorative, while the open center keeps the pattern airy. It’s a strong option for Arabic-inspired minimalists because it looks “complete” from the front. After stain, the dotted ring usually darkens nicely and creates a clear focal point in photos.
Mark the center of your hand between the middle and ring fingers, slightly below the knuckles. Draw a small open circle outline there. Add a dotted ring around the outline by placing dots evenly along the circle. Place 4-6 tiny dots in the center to form a simple starburst. Connect the medallion to the wrist with two thin lines that stop at the wrist crease.
Keep the medallion diameter around 1.5-2 cm so it stays readable on camera.
Avoid making the medallion too big — it steals space from the finger area.
13. Side Band Pattern with Tiny Corner Arcs
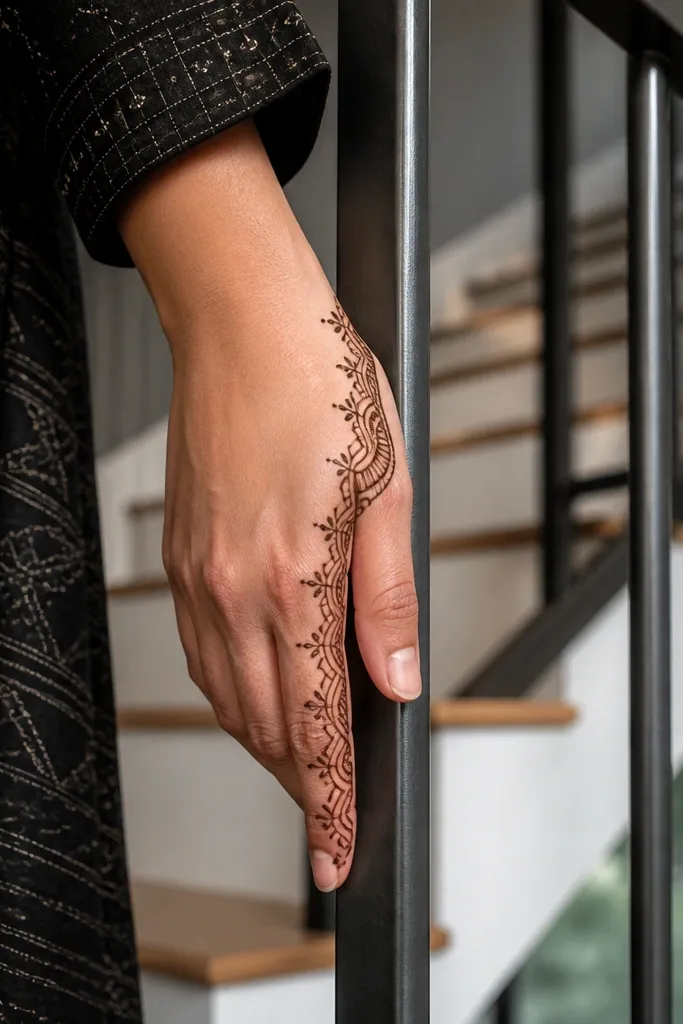
Draw a thin vertical line band starting at the wrist outer edge and running toward the base of the thumb side of the hand. Create corner arcs by drawing tiny “C” shapes that face inward at 1-1.5 cm intervals along the band. Add a dot at each arc’s open end so every arc looks finished. Finish with one larger arc at the top near the thumb knuckle, then stop.
Side band designs make the front hand look longer and slimmer because they stay along the edge. This one uses a single vertical band with small corner arcs, then stops before the palm gets cluttered. It’s excellent for small hands or when you want minimal coverage that still looks structured. The corner arcs create a rhythm that feels Arabic without needing dense fill. It’s also beginner-friendly because you repeat the same arc shape down the band.
AvoidAvoid crossing the band into the palm center — it ruins the slimming edge effect.
Pro tipIf arcs look inconsistent, draw dots first along the band, then connect each dot with a short C-curve.
14. Index-to-Pinky Micro Chain Across Knuckles
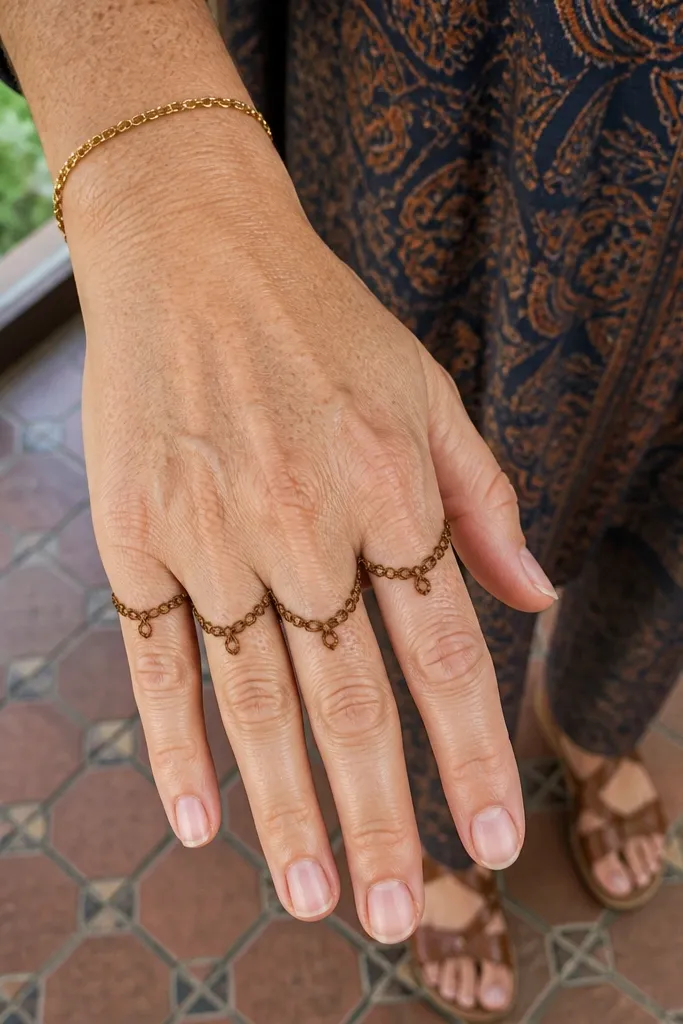
Micro chain motifs are one of the easiest ways to get an Arabic look that still stays simple. This design spreads across the knuckles, so it looks detailed even though you’re only doing one repeated pattern. The chain creates a neat frame around the finger bases, and it photographs well because each small link catches contrast after drying. It’s a good choice when you want coverage but don’t want to commit to a full hand. Keep it thin and repetitive for the best result.
Start at the index knuckle with a tiny chain link pattern drawn in a straight line across the front knuckle bases. Continue link-by-link to the pinky knuckle, keeping the chain thickness consistent. Add one small diagonal connector line between the index and middle chain sections for a slight Arabic twist. Finish by adding two dots at the end of the chain near the pinky outer edge.
Use a slightly smaller cone opening for micro chains; thick links look like scribbles.
Avoid making links uneven in size — the chain becomes messy fast.
15. Wrist Chevron Band with Center Split
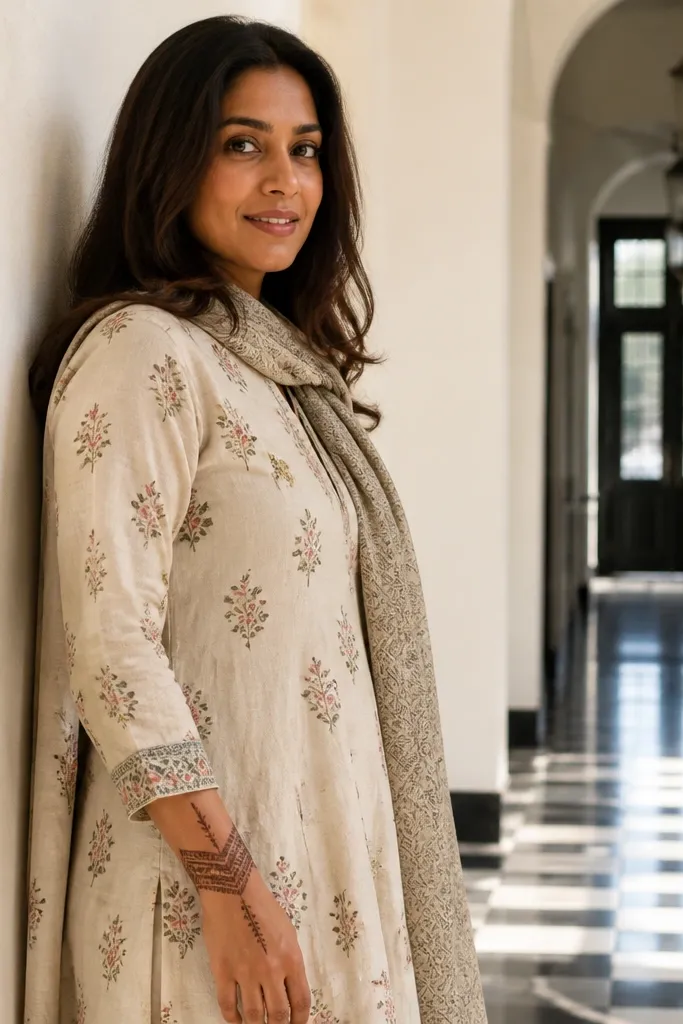
Chevron bands look bold and clean, and you can keep them simple by placing them only around the wrist. Then add a center split line up the hand so the design continues without filling the palm. This combination looks modern Arabic and still reads traditional because of the chevron rhythm. It’s a great option when you want something that shows up clearly in photos even with light stain. The chevrons create strong contrast at the wrist.
Draw a chevron band around the wrist using small V shapes, keeping the zigzag height around 4-6 mm. Leave a narrow gap at the center of the chevron band. From that gap, draw a split center line: one line goes toward the index knuckle and the other toward the middle knuckle, both thin and parallel. Add one small dot at each end of the split lines. Stop everything at knuckles for a clean front-hand finish.
Do chevrons in one steady motion; restarting mid-zigzag creates thick corners.
Avoid wrapping chevrons too far up the hand — they start to fight the finger area.
16. Two Finger Halo Rings with One Center Spike
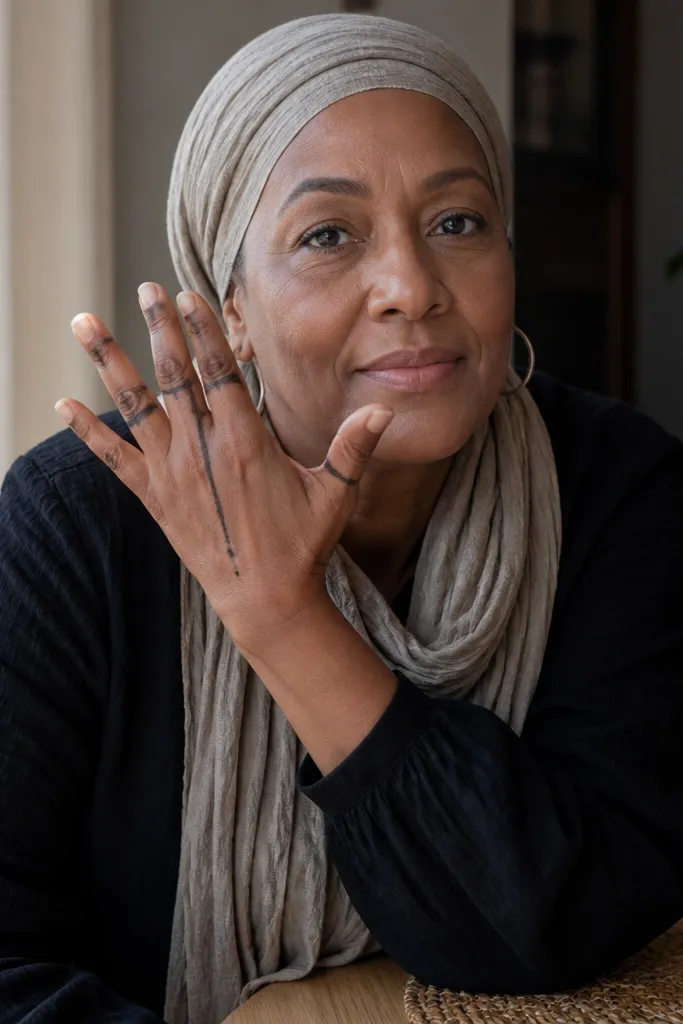
Halo rings look delicate and intentional when you place them on only two fingers. Pair that with one center spike line down the middle of the hand for a balanced Arabic feel. This design is perfect when you want something photogenic but not heavy. The rings create strong shapes that stand out even if you keep the rest minimal. After stain, the ring edges look crisp and give that “clean mehandi” vibe.
Choose two fingers — index and ring for the front-hand look. Draw a thin ring around the knuckle area on each finger, leaving a tiny gap so it doesn’t look like a solid circle. Then draw one center spike line from wrist crease to the middle finger knuckle. Add 3-4 tiny dots along the spike line spaced evenly. Finish by connecting the spike to the two rings with short diagonal lines that stop at the ring edges.
Leave a small gap in each halo ring; solid rings can look like marker circles after stain.
Avoid putting halos on all fingers — it stops being simple and starts looking cluttered.
17. Thumb Loop Gate with Three Side Dots
Start at the wrist outer edge and draw two thin vertical lines that rise toward the thumb knuckle, about 1 cm apart. Connect the top of the two lines with a curved loop, leaving the middle open. Add three dots along the outside of the gate — one near the wrist, one mid-hand, one near the thumb knuckle. Finish by adding a short curved hook line at the bottom of one vertical side to make it look Arabic, not plain geometry.
A thumb loop gate is a simple Arabic motif that frames the thumb side without heavy coverage. The “gate” shape — like two vertical lines with a curved top — looks tidy and decorative, while three side dots give it a finishing touch. This design works for people who want mehndi that looks pretty but doesn’t cover the whole hand. In photos, the gate shape is easy to read and the dots add contrast. It’s also quick enough for last-minute events.
AvoidAvoid thick vertical lines — the gate should look airy.
Pro tipKeep the gate curve smooth; jagged curves happen when the cone tip drags.
18. Micro Starburst on Center Knuckle
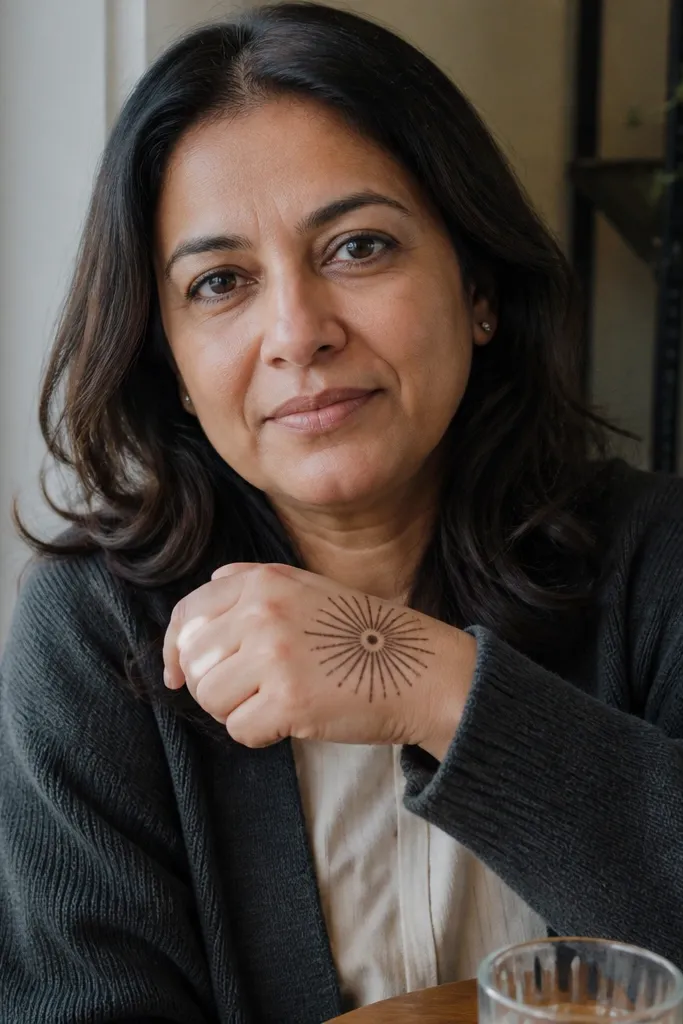
Starburst motifs look cute and modern, and they’re surprisingly simple when you keep them tiny. Place it on the center knuckle area so it reads clearly from the front. This design works well if you want a minimal Arabic look that still has a focal point. The key is to use thin rays and leave space between them so the starburst doesn’t turn into a dark blob. It’s also a good choice for people who want a design that looks good even with short nails.
Draw a small dot at the center of the middle finger knuckle area. From that dot, draw 6-8 thin rays radiating outward like a small star, stopping at about 6-8 mm length. Add a tiny ring around the dot using a thin circle outline, leaving small breaks so it doesn’t fill in. Add two diagonal connector lines from the starburst toward the index and ring knuckles. Stop there and keep the rest of the hand bare.
If your star rays are uneven, redraw only the longest one — uneven length shows more than uneven thickness.
Avoid filling the center — open center keeps the pattern clean after stain.
19. Wrist-to-Knuckle Curved Ribbon Lines

Curved ribbon lines give a soft Arabic movement without needing floral fill. This design uses two or three ribbon curves that run from the wrist crease up toward the knuckles, then ends with small dot accents. It’s a great option if straight lines feel too harsh for your hand shape. Because the curves are controlled, it looks neat and photogenic. After stain, the ribbon edges darken and the dots add sparkle-like contrast in photos.
Draw the first ribbon curve starting at the wrist crease and arcing toward the index knuckle area, keeping the line thin. Add a second parallel ribbon curve slightly to the side, ending near the ring knuckle. Place tiny dots along the ribbon curves at intervals of 1 cm. Finish by adding a small hook at the top end of each ribbon and a final dot at the wrist base to tie the design together.
Use one ribbon curve per side of the center; more curves make it look accidental.
Avoid thickening the curve at the midpoint — it creates a heavy band.
20. Three-Layer Border on Outer Wrist
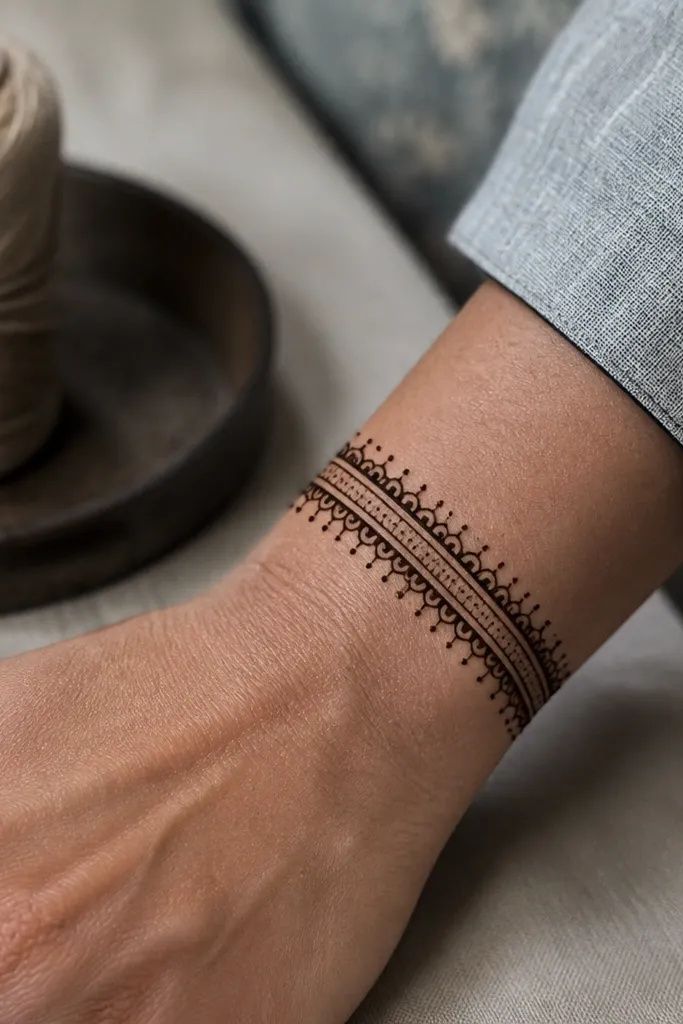
This one is all about border work. Three thin layers on the outer wrist edge create a stacked Arabic look, and the dots between layers keep it airy. You don’t need to fill the palm, so it stays simple while still looking designed. It’s ideal for short sessions because it focuses on one area and repeats a clean structure. In photos, stacked borders show up clearly even if the stain is lighter because the lines are separate.
Draw the first thin border line along the outer wrist edge, following the wrist curve. Add a second parallel border about 3-4 mm inside it, then a third border another 3-4 mm inside the second. Fill the gap between layers with tiny dots — one dot every 6-8 mm. Finish by adding a small upward curve at the center outer wrist to connect the border to the hand.
Keep borders parallel — if one layer tilts, the whole stacked effect looks off.
Avoid spacing dots too far apart; it makes gaps look like breaks rather than design.



