
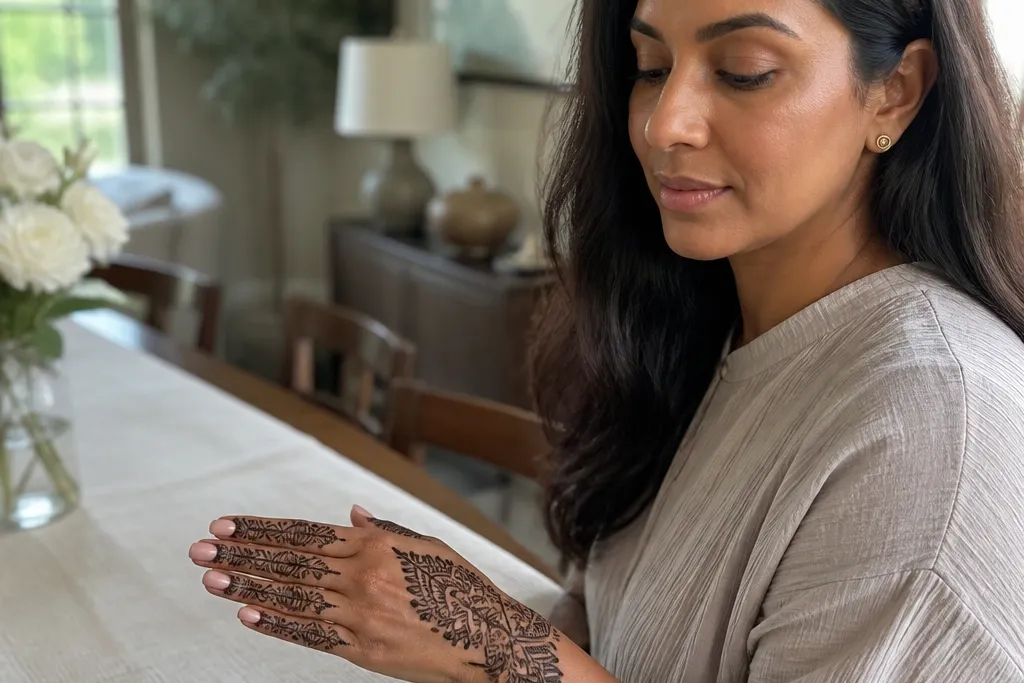
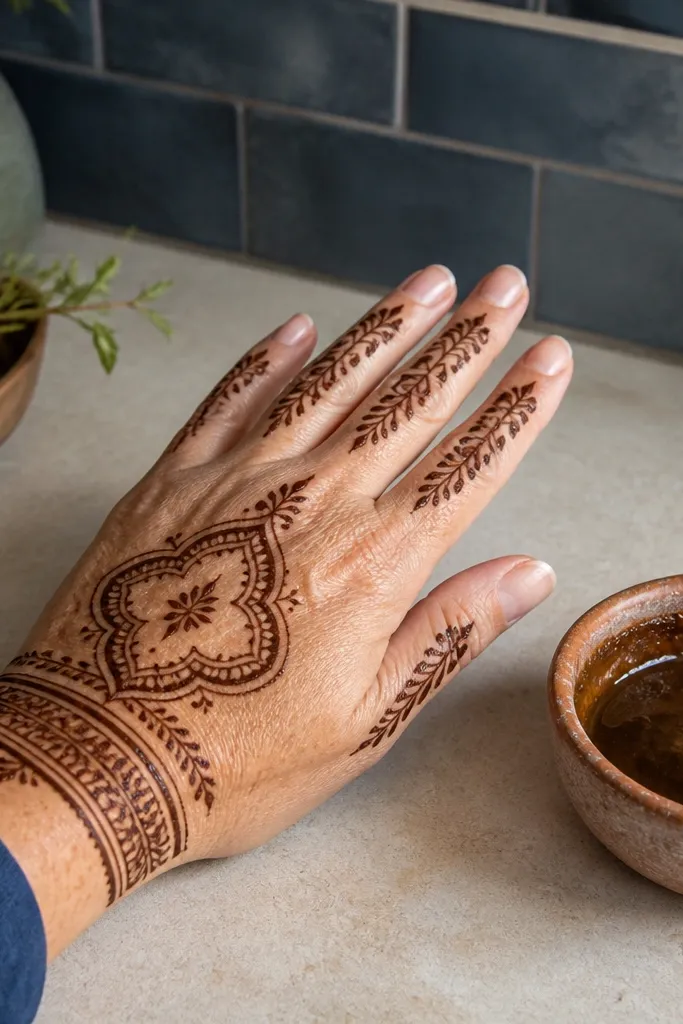
1. Wrist Band Ladder With Center Vine
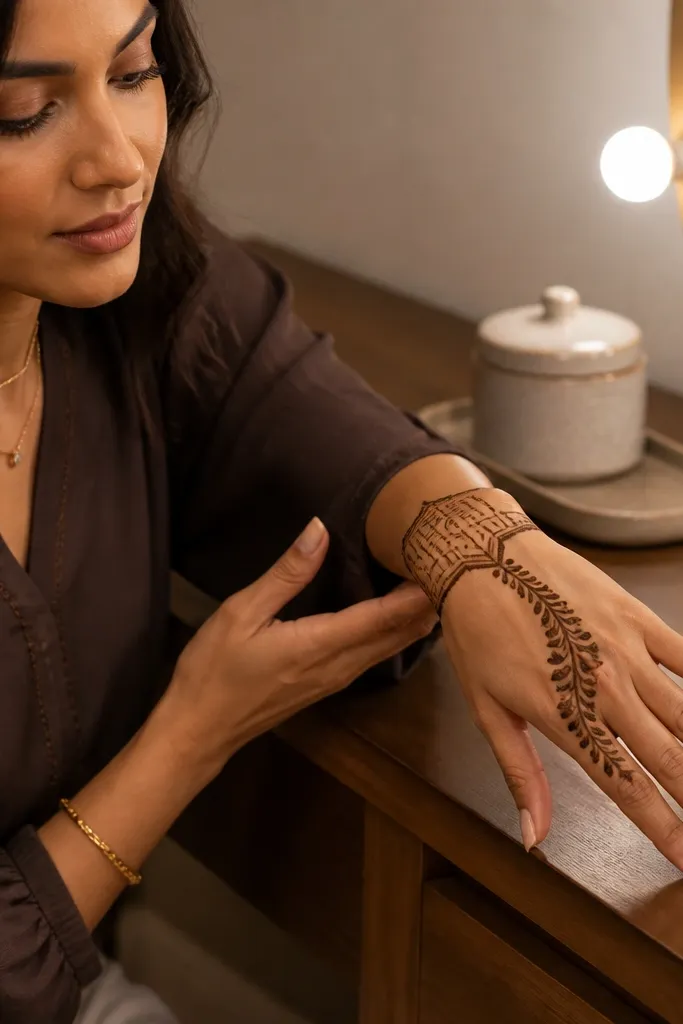
This design stuns because it creates a clear vertical rhythm. The wrist band has stepped “ladder” segments that catch light and make the hand look structured. A single center vine climbs toward the index and middle knuckles, with small comma leaves on both sides so the pattern stays airy. It looks sharp on medium and long hands because it guides the eye straight up instead of spreading across the whole palm-side shape.
Start by drawing a smooth band across the wrist crease with repeating stepped blocks, leaving equal gaps between each block. Next, add a central vertical vine from the top of the band toward the space between the index and middle knuckles, keeping the line thickness even. Finally, mirror small leaf commas on both sides of the vine, then add tiny dots inside the gaps to connect the wrist band to the knuckle area.
Use a light hand when adding comma leaves; press less for the leaves and more for the main vine.
Avoid thickening the vine as you go up — it makes the center feel swollen and kills the Arabic look.
2. Thumb Web Fan With Two-Tier Petals
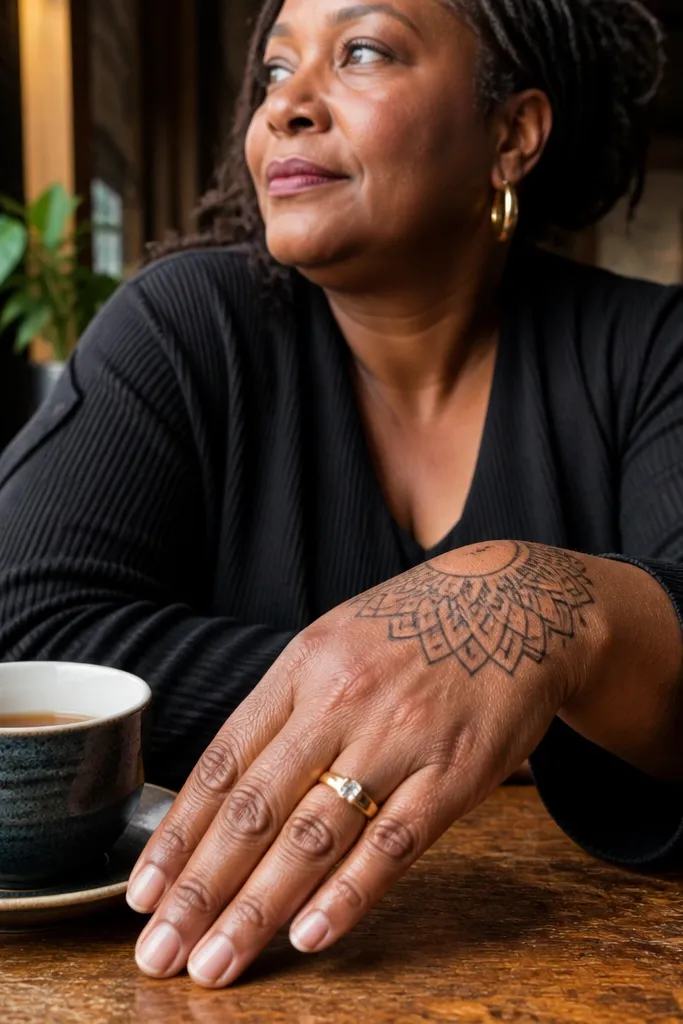
The thumb web is where back hand designs either look elegant or look cramped. This one uses a fan motif that sits right at that junction, with two tiers of petals that open toward the knuckles. Because the fan is shaped like a semicircle, it corrects the common problem of designs that pinch at the thumb side. It also photographs well because the petal edges form a clear silhouette even when the shade varies after drying.
Begin with a curved outline in the thumb web area, like a shallow half-moon, then fill it with two rows of petal loops. Add a thin vine that runs from the base of the fan down into the wrist band on the outer side. Finish by connecting the fan tips to the index and middle knuckle area with three small dots and short comma strokes so the design looks intentional, not stuck on.
Mark the thumb web boundary with two tiny dots first; that keeps the fan from drifting inward.
Avoid drawing the fan too wide — if it crosses the thumb base, it looks heavy and takes over the whole back hand.
3. Floating Medallion Over Index Knuckle
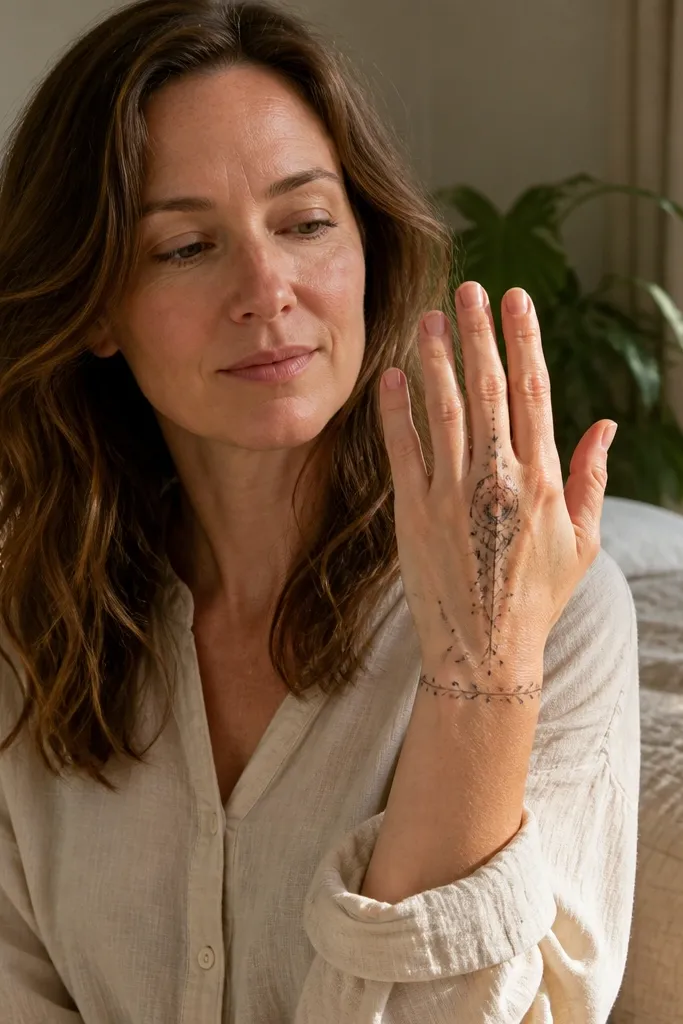
A medallion that sits above the index knuckle makes the back of the hand read balanced. The trick is “floating” — keep a visible gap between the medallion and the wrist band so the design breathes. Around the medallion, use thin vine curls and micro dots instead of thick fills, so the center stays crisp. This style suits people who want a clean, high-contrast look that still feels Arabic because the medallion pattern stays geometric and controlled.
Draw a wrist band first, then stop it before the center gap where the medallion will hang. Create a circular or oval medallion above the index knuckle using an outer loop and inner geometric cells. Add two curved vines from the medallion corners down toward the wrist band edges, leaving space in the middle. Finish with small dot clusters around the medallion to frame it without filling the whole back hand.
Keep the medallion diameter about the width of your index knuckle — too big crowds the fingers.
Avoid filling the entire medallion with thick paste — it darkens unevenly and blurs the pattern.
4. Ribbed Cuff With Side Scrolls
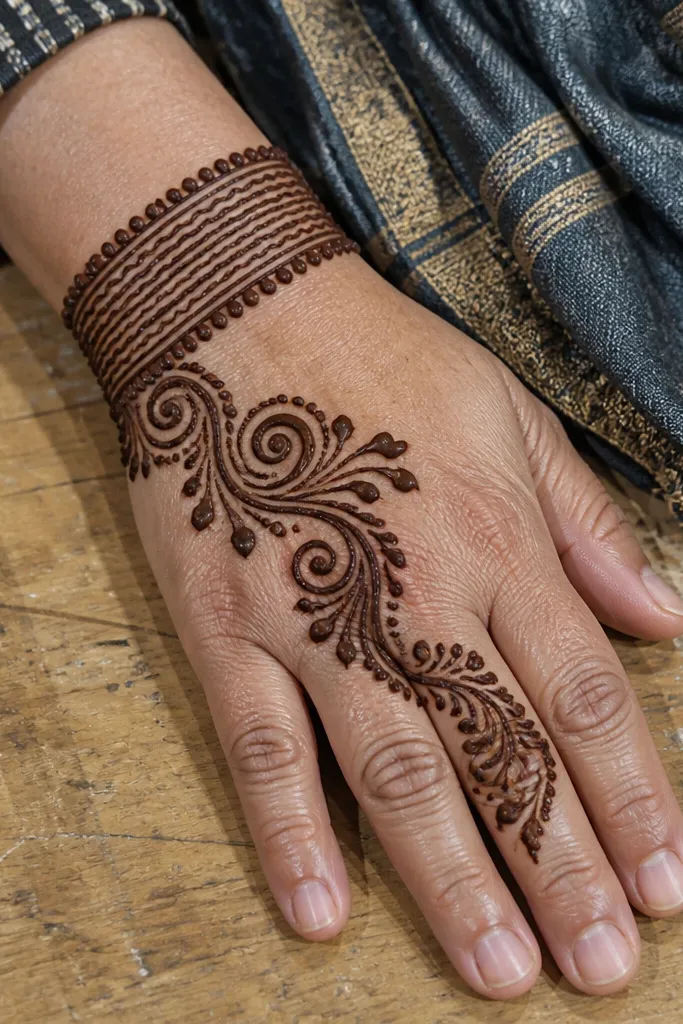
This one looks polished because the cuff has texture. The ribbed band gives you a consistent pattern line, like stacked waves, and that texture keeps the wrist area from looking flat. Side scrolls reach toward the ring finger and outer knuckles, but they stop short so the fingers stay airy. It’s a strong choice for shorter hands because the scrolls add motion without spreading too far across the knuckles.
Start with a ribbed cuff across the wrist using parallel curved lines stacked closely, then outline the cuff edge with a slightly thicker line. Add two side scrolls: one toward the ring finger knuckle and one toward the pinky outer edge, each made from a thick outline with thin inner curls. Connect each scroll to the cuff with 3-4 comma leaves spaced evenly. Finish by adding tiny dots along the scroll inner curves for the Arabic sparkle effect.
Do the ribbed cuff first, then let it set 2-3 minutes before you add scrolls so the lines don’t smear.
Avoid making scrolls too long — if they reach the finger tips, the back hand looks overworked.
5. Knuckle Lattice With Open Palm-Side Space
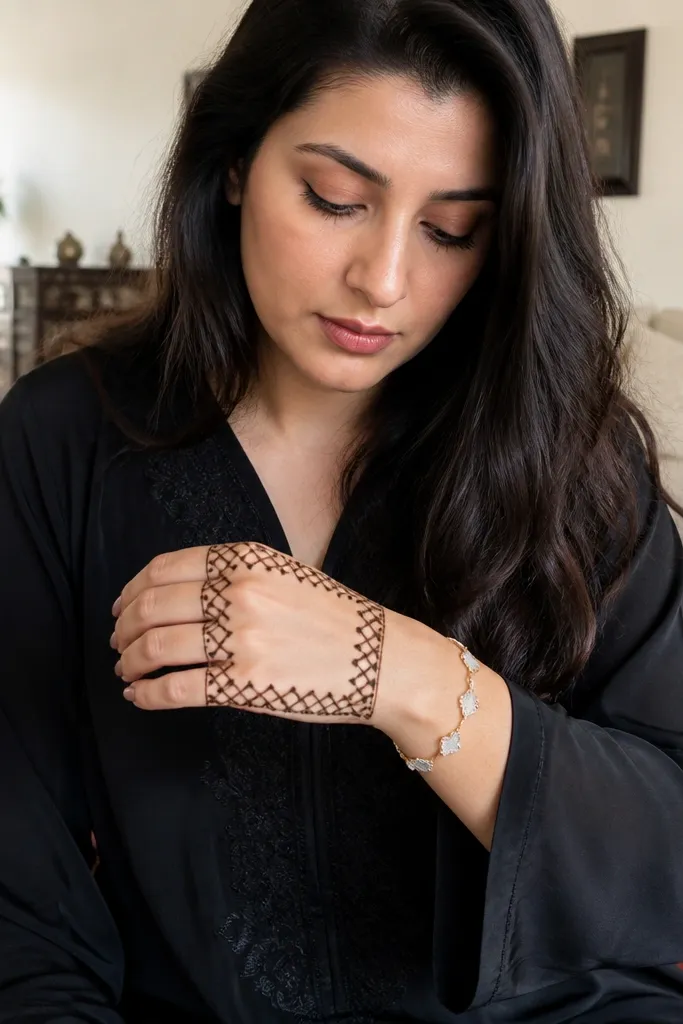
Lattice designs stun when they keep negative space. This layout builds a grid across the knuckle area only, with open space in the center of the back hand so the pattern stays readable. Arabic lattice looks best when the “cells” are consistent in size and the lines are even thickness. It’s a great option if you want a structured look without covering your entire hand.
Begin by drawing a light guide line across the middle of the back hand, then outline a rectangle area over the knuckles. Fill that rectangle with a lattice: vertical lines first, then connect them with horizontal lines at equal spacing. Add small dot separators where lines intersect to keep the grid sharp. Finish by keeping the wrist band simple — a thin bracelet line — so the knuckle lattice becomes the hero.
Use a ruler or a straight edge for the first lattice row; your spacing locks in after that.
Avoid letting the lattice spill onto the finger gaps — it merges and turns into one dark patch.
6. Double Vine Halo Around Fingers
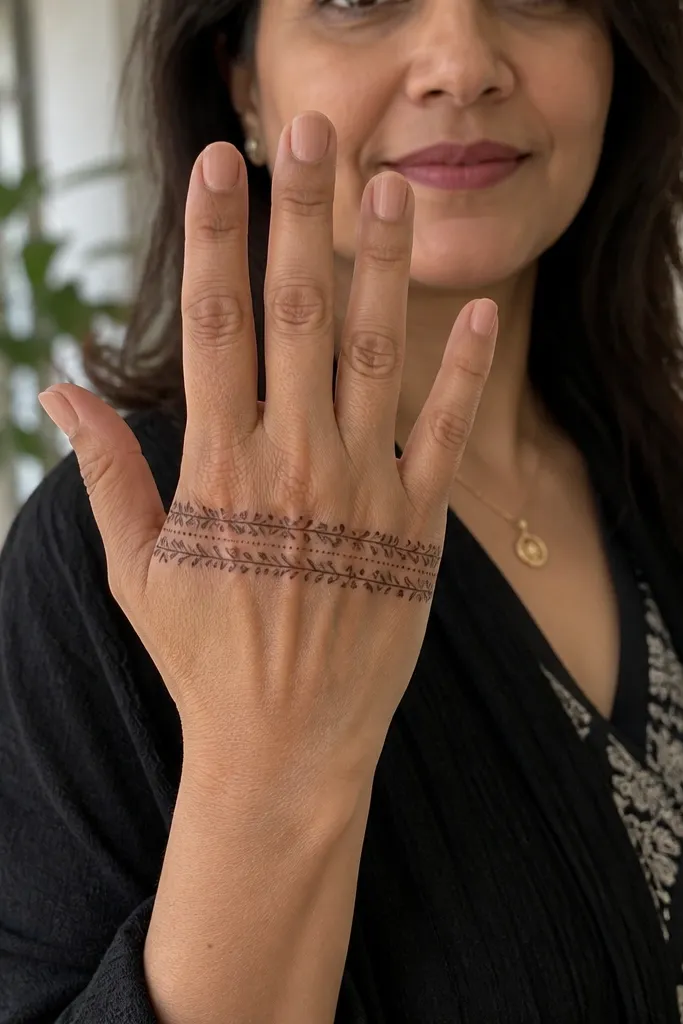
This design looks like a halo because it frames the finger base without covering the entire finger. Two vines run parallel — one closer to the knuckles and one slightly outward — creating a clean boundary line. Between the vines, use short leaf commas and micro dots so it stays Arabic, not floral. It’s also forgiving: if your hand shape is uneven, the double boundary still makes the pattern look intentional.
Start with a thin wrist line, then draw two curved vines that arc from the outer wrist up toward the finger base area. Keep the inner vine closer to the knuckles and the outer vine toward the back-hand edge. Connect vines with short leaf commas spaced about a finger-width apart. Add a few tiny dot clusters between the vines, then stop — do not fill down the center.
Keep the inner vine slightly thinner than the outer vine for a more “finished” look.
Avoid crossing vines too close to the thumb side — it makes the halo look lopsided.
7. Geometric Hourglass Center
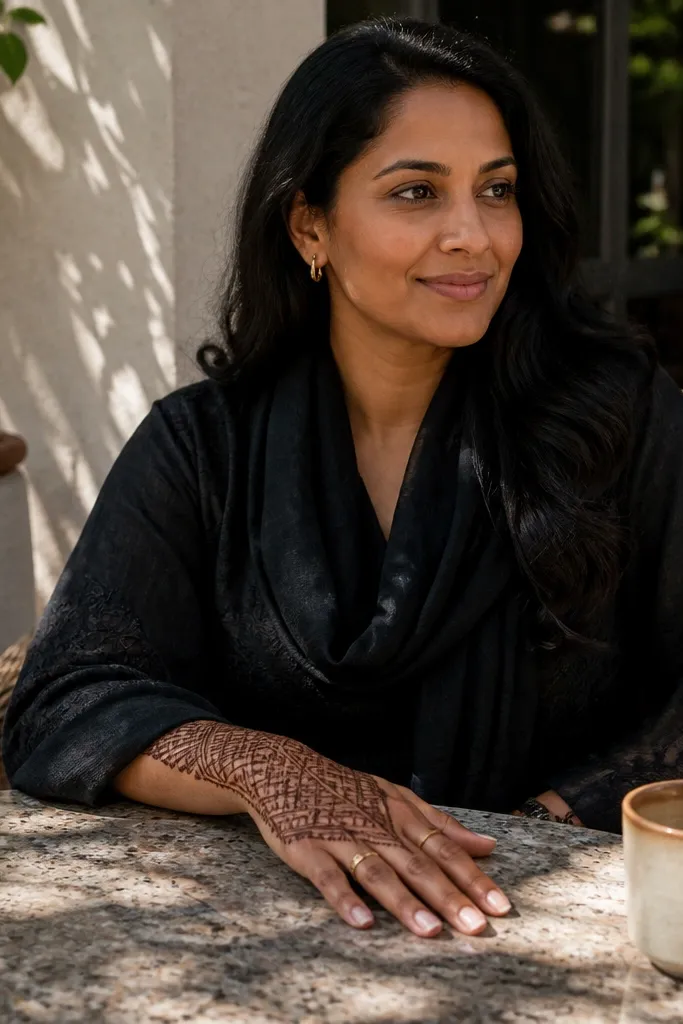
Hourglass geometry is a strong Arabic look because it creates a natural focal point. The center narrows, so the back hand appears longer and cleaner. Use a bold outline for the hourglass shape, then fill it with tiny geometric cells rather than thick paste. This is a great choice for bridesmaids or anyone who wants a dramatic center without heavy finger coverage.
Draw a simple hourglass outline in the center of the back hand, starting just above the wrist band and ending near the index-middle knuckle space. Fill the top and bottom portions with small diamond or square cells using thin lines. Add two short vines at the sides that taper outward toward the wrist band ends. Finish by placing dot clusters at the hourglass corners to connect the geometry to the surrounding vines.
Pro tipKeep the hourglass height about 2/3 of your back-hand length for the most flattering proportions.
AvoidAvoid thick solid fills inside the hourglass — it blurs the diamonds after drying.
8. Crescent Vine With Micro Dots Trail
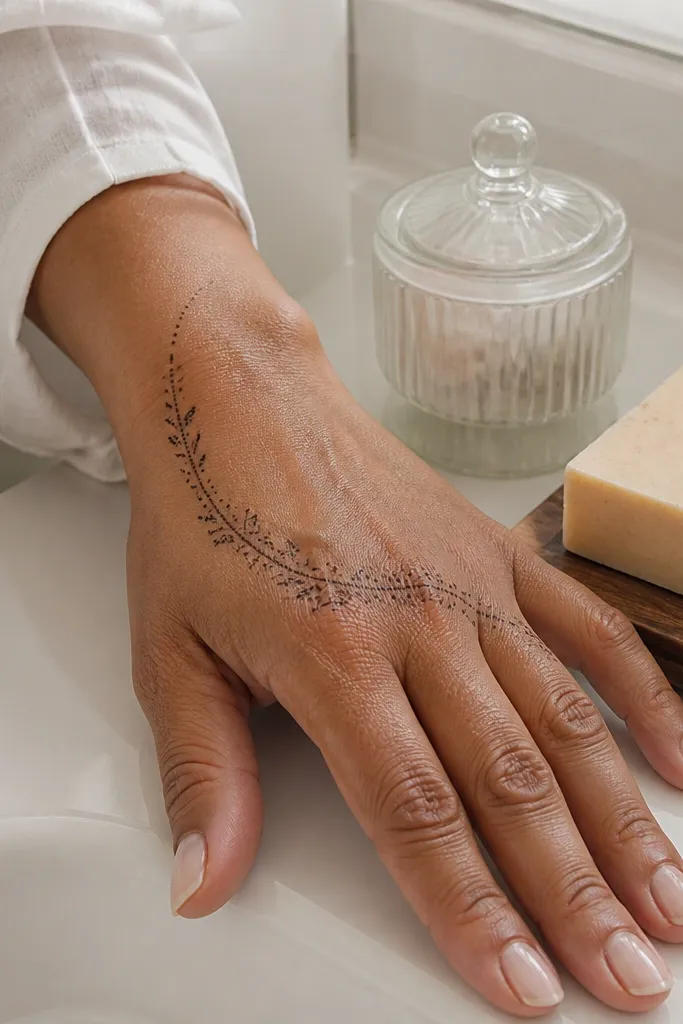
This design feels light but still looks intentional. A crescent vine starts at the wrist outer edge, curves across the back hand, and ends near the middle knuckles. The micro dot trail is what makes it look Arabic rather than plain line art. It’s ideal for people who want a back hand design that looks good even if you don’t want full coverage.
Outline a crescent vine with a thick outer line, then add thin inner curls along the curve. Starting at the vine’s midpoint, drag a small dot trail along both sides of the vine, keeping the dots evenly spaced. Add two or three comma leaves at the end of the vine near the knuckle area. Finish with a simple bracelet line at the wrist to anchor the curve.
Dot trails look best when dots are uniform — slow your hand speed and keep pressure steady.
Avoid uneven dot spacing — it makes the curve look shaky in photos.
9. Outer Edge Vine Frames Only
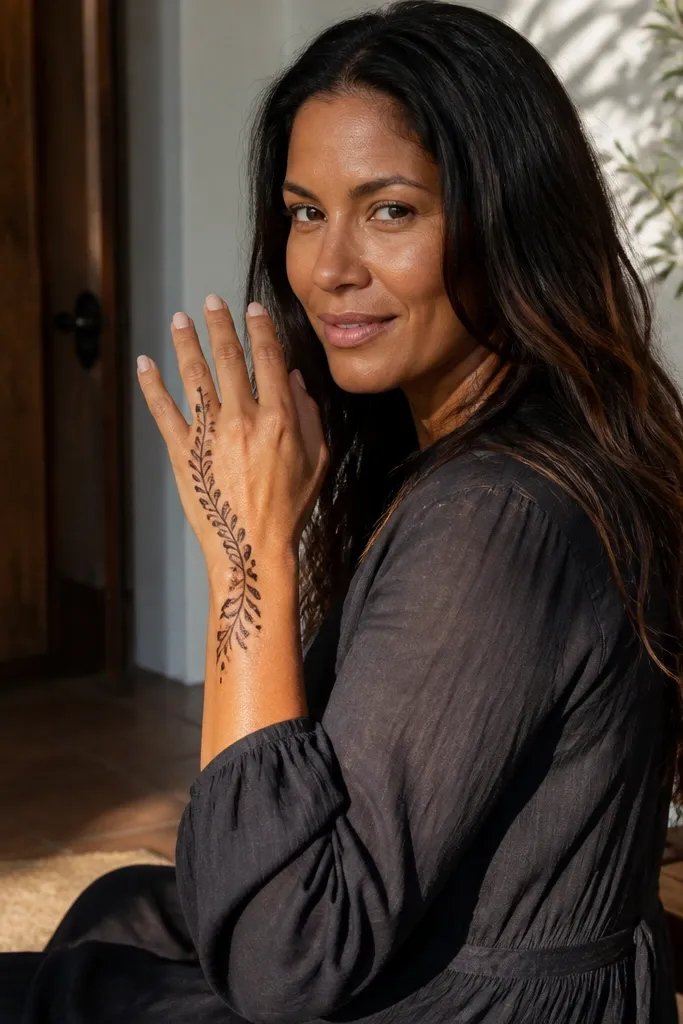
If you’ve ever seen a back hand mehndi that looks messy, it’s often because it tries to fill the whole hand. This one fixes that by framing only the outer edge and leaving the center mostly open. The vines run from wrist to outer knuckle, with small leaf commas and dots that stop before the fingers. The open center keeps contrast high, so even if your paste stain varies, the pattern stays readable.
Start with a thin wrist bracelet line. Draw a continuous vine along the outer edge of the back hand, curving gently to match your knuckle shape. Add leaf commas pointing inward at intervals, then add a small dot cluster between each leaf. Keep the center area empty — only add a micro vine near the base of the thumb web if you want extra balance.
Use a single continuous line for the outer edge vine — it looks smoother than starting and stopping.
Avoid adding filler to the center — it turns a clean frame into a dark patch.
10. Thumb Side Arch With Three Stars
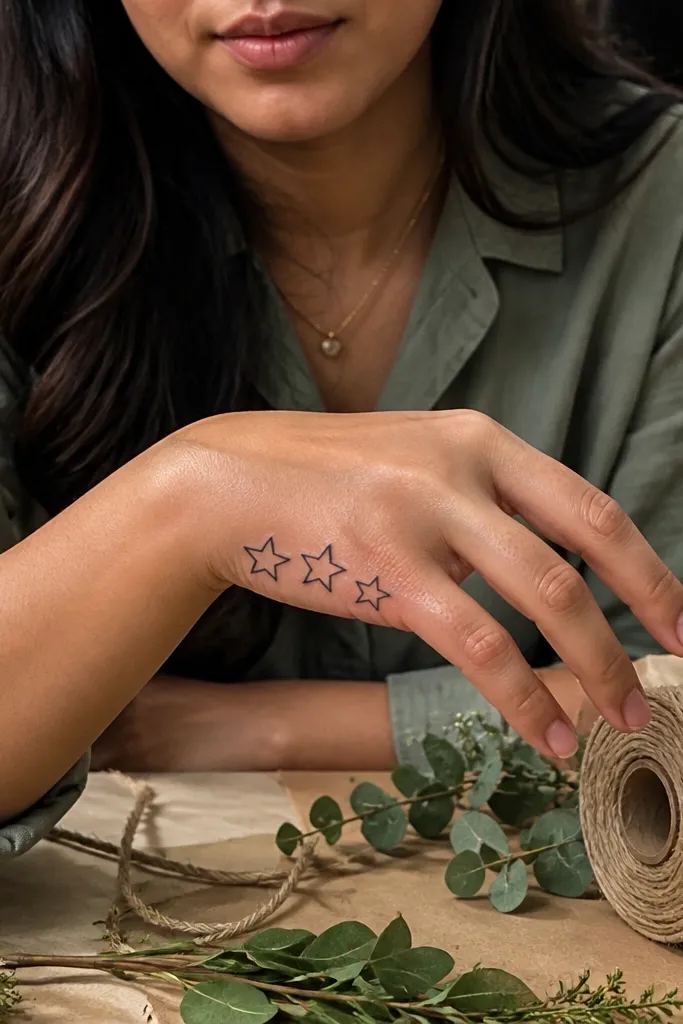
Stars look crisp on the back hand because the space is flatter than the palm. This design uses an arch near the thumb side, then places three star-like motifs along the arch line, each with a thin outline and minimal fill. The arch anchors the thumb area, while the stars create a rhythmic sparkle that photographs well from the side angle. It’s a good fit for short-to-medium backs of the hand where large medallions can feel too heavy.
Draw a curved arch from the wrist outer edge toward the thumb web area. Outline three star shapes along the arch, with one star closer to the thumb web, one in the middle, and one toward the index knuckle. Connect the stars with short vine lines and tiny dots. Add a thin bracelet band at the wrist so the arch doesn’t float.
Keep star points sharp — overfilling the star center rounds the shape after drying.
Avoid placing stars too close together — each needs breathing space to stay readable.
11. Arabic Scroll Columns Between Fingers
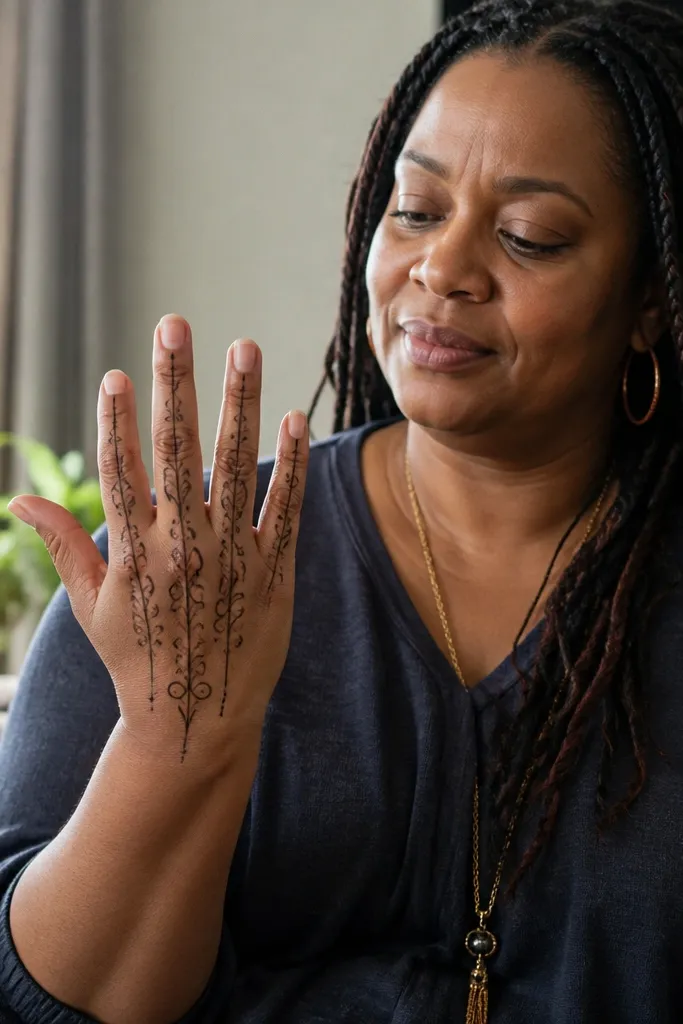
This is a “finger-gap” design that makes the back hand look tidy. Instead of covering the whole knuckle area, you build vertical scroll columns in the spaces between fingers. Arabic scrolls look best when they are tall and narrow, with thin inner curls and dot accents. The result is a clean look that still feels detailed, and it helps if you want mehndi that doesn’t smear across finger lines.
Start with a wrist band made of small repeating curved blocks. Then draw three vertical columns from just above the wrist band toward the knuckle area, each column centered in a finger gap. Build each column with a thick outer scroll line and thin inner curls, then add 2-3 dots near the curls. Finish by outlining the outer edges of the column area with a thin vine line to make the grouping feel intentional.
Pro tipLet the columns stop at the knuckle base, not the finger mid — that keeps the back hand sharp.
AvoidAvoid making columns too wide — they merge and blur into one dark mass.
12. Peacock Feather Fan On Outer Back Hand
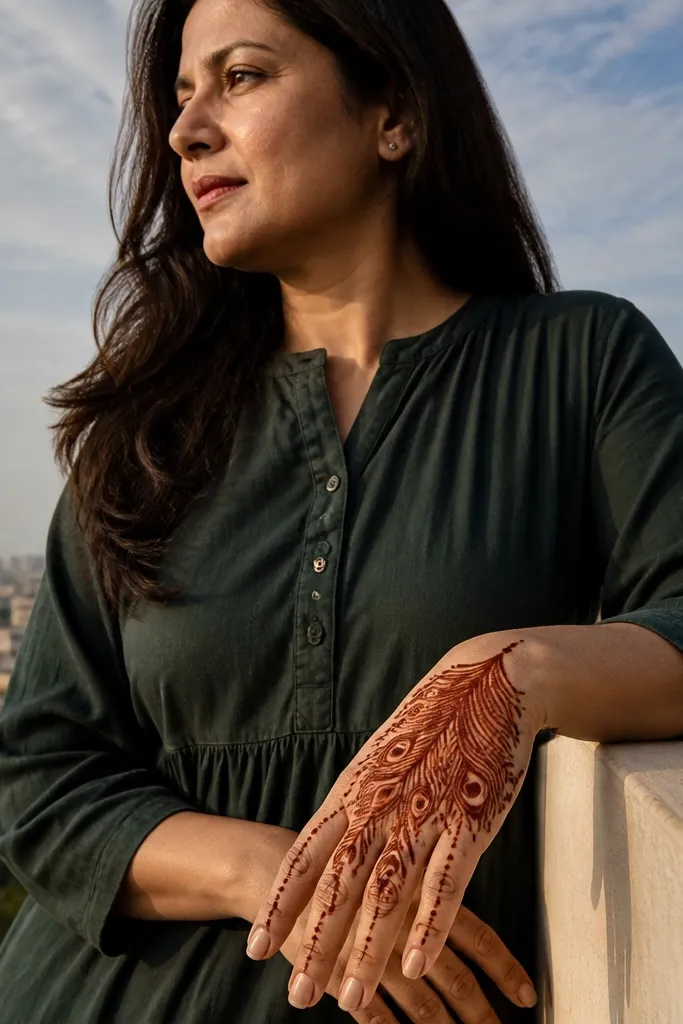
Peacock feather fans look dramatic because they create layered edges. Place the fan on the outer back hand so the feather “barbs” arc outward and catch light. Use a thick central stem and thinner barbs that taper, then add small dot eyes near the barb tips. This design is photogenic from multiple angles because it has depth from the layered feather shapes.
Draw a central stem line starting at the wrist outer edge and curving upward. From the stem, add layered feather barbs on both sides, each barb made from a thin outline plus a few inner dots. Keep barb spacing even so the fan looks balanced. Finish by adding a simple bracelet band at the wrist and a thin vine that connects the feather base to the outer edge.
Pro tipUse fewer barbs at first, then add more only where the fan looks too empty.
AvoidAvoid thick paste on every barb — it makes the feather look like a single solid shape.
13. Circular Frame With Split Center
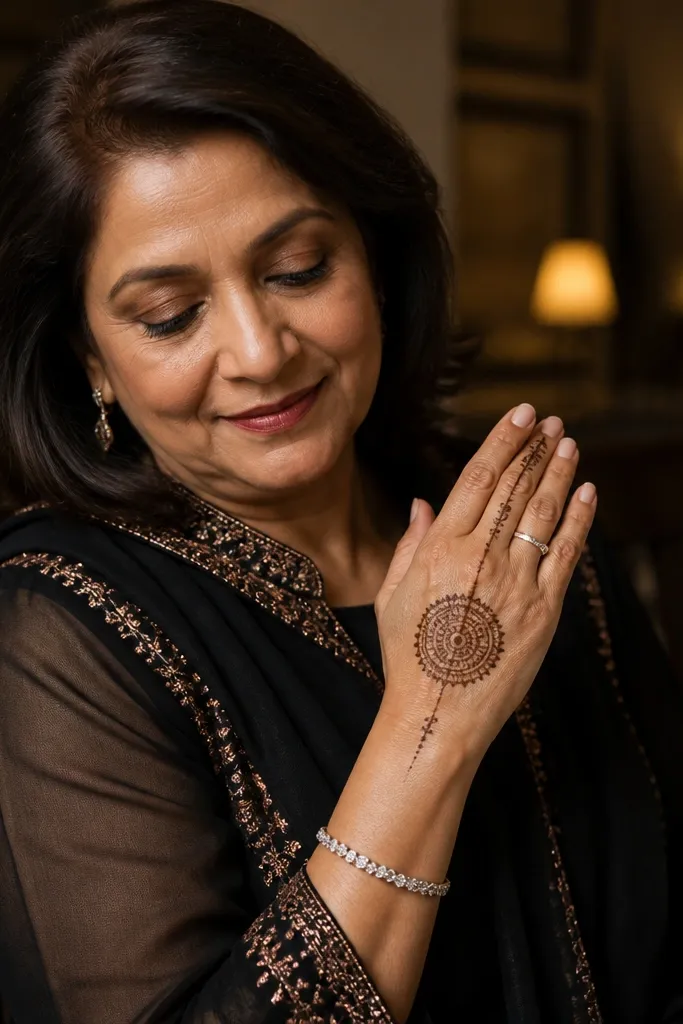
A circular frame gives you instant structure, and the split center keeps it from looking heavy. The frame sits near the upper back hand, while a split opening runs down the center line toward the knuckles. This makes the design look modern while staying Arabic through the use of dots and geometric fill inside the frame. It’s a smart pick for anyone who wants a standout back hand without covering every inch.
Start with a wrist band that is thin and consistent. Draw a partial circle or oval frame above the middle of the back hand, leaving a clear gap in the center line. Fill the frame with small diamond or triangle cells using thin paste. Add two short vines that run from the frame corners down toward the knuckle area, then connect with dots.
Pro tipKeep the frame outline slightly thicker than the inside cells for clean contrast.
AvoidAvoid closing the split center — the open gap is what makes the design look sharp.
14. Ring Finger Bouquet Halo
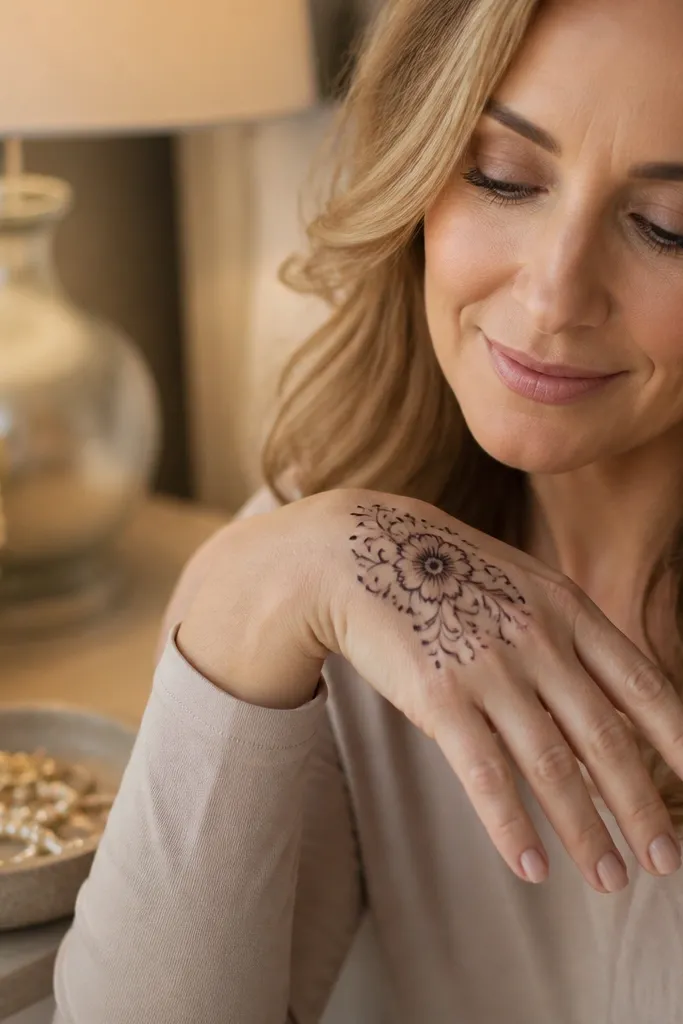
This design places the “weight” near the ring finger so the hand looks balanced when you photograph from the side. A bouquet-like cluster sits above the ring knuckle, then thin vines spread out like a halo but stop before reaching the thumb base. Use small dot fillers and thin leaf commas so the cluster stays crisp. It’s a great choice for parties and events where you want one strong focal point.
Begin with a wrist bracelet line, then outline a small bouquet cluster above the ring finger knuckle. Build the cluster with 6-8 rounded loops around a center dot, then add tiny leaves between the loops. Draw a halo vine that arcs around the cluster and connects to the outer edge near the pinky side. Finish by adding 2-3 dot bridges between the halo and the wrist band to lock the layout.
Pro tipKeep bouquet size smaller than you think — smaller clusters look more expensive after drying.
AvoidAvoid filling the cluster solid — thin cell lines give better stain depth without blur.
15. Chevron Wrist To Knuckle Arches
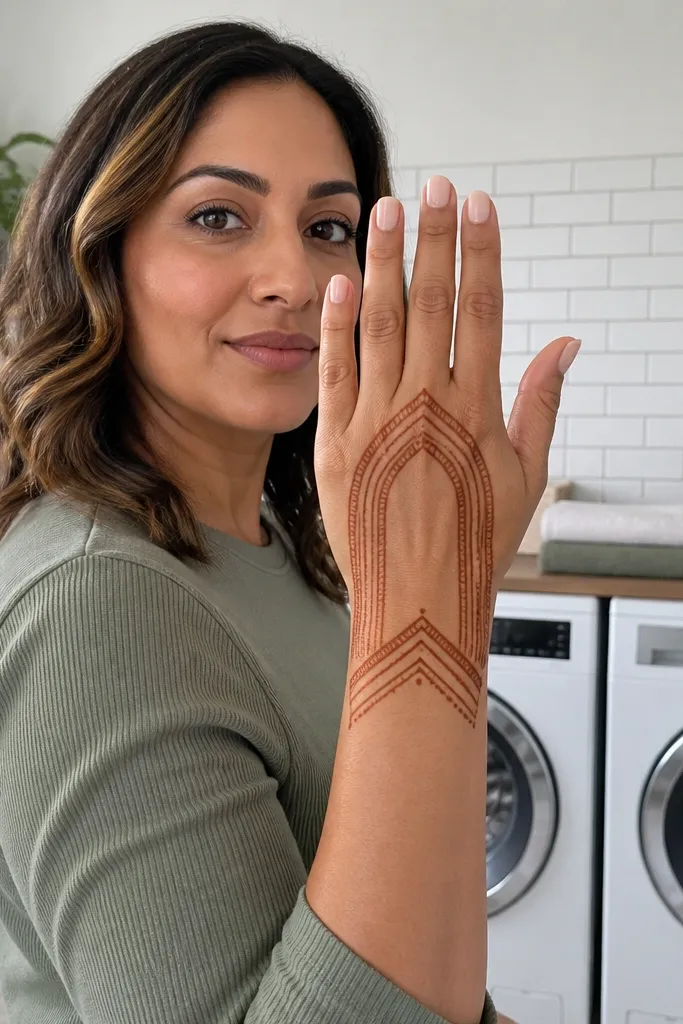
Chevron patterns read clean and geometric in photos. Here, the wrist has a chevron band, and from it you build arches that reach up toward the knuckles in three tidy lanes. The arches create a “ladder” feel but with softer edges, which is why it looks graceful rather than stiff. This works especially well for people who want a strong Arabic look without medallions.
Draw a chevron band across the wrist using alternating V shapes, with consistent spacing. Above the band, create three arches: one toward index, one toward middle, one toward ring or pinky depending on your preference. Each arch should have a thick outline and thin inner zig-zag fill. Connect the arch bases to the chevron band with a couple of dots so the pattern feels connected.
Pro tipMake the chevrons crisp by keeping the V tips sharp and not overfilling the lines.
AvoidAvoid uneven arch heights — if one arch is much taller, the design looks unbalanced.
16. Arabic Vine Border With Center Negative Space Flower
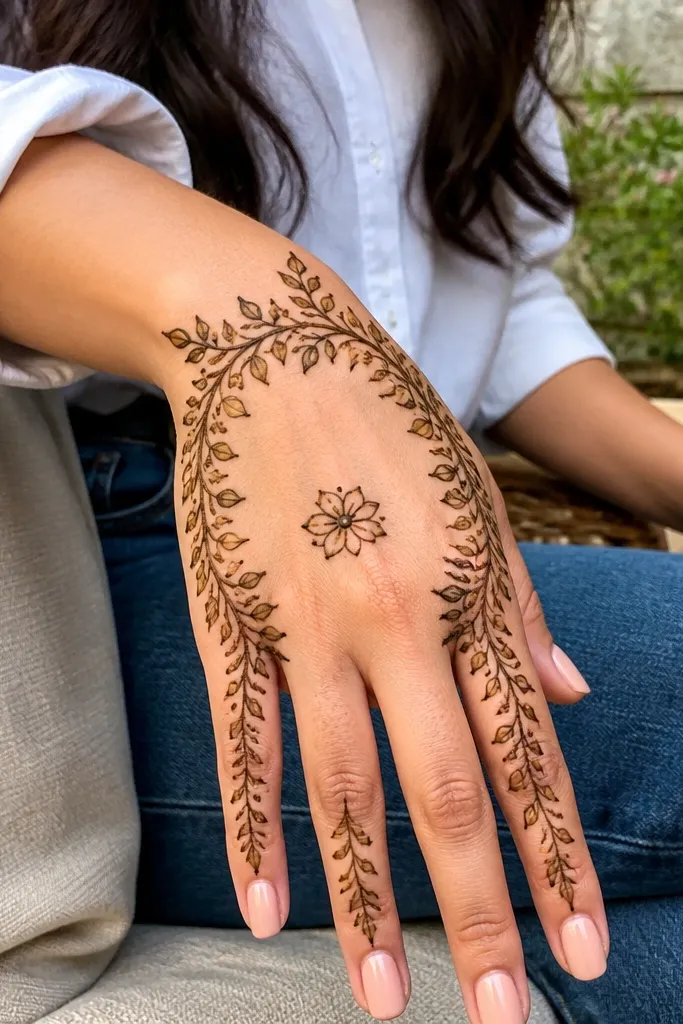
Negative-space flowers look premium because they rely on contrast. This design uses a vine border around the back-hand area and keeps the center mostly open, then places a small flower outline in the empty middle. The border vines are made of thick outlines plus thin inner curls, so the stain reads as clean lines. It’s a strong option for people who get overwhelmed by full-coverage patterns.
Start with a wrist band and outline a rough border shape around the back hand, stopping before the finger tips. Build the border with continuous vines and comma leaves so the edges stay consistent. In the center, draw a small flower outline without filling it heavily — use thin petals and a dot center. Finish by adding a few stray dots along the border corners to tie the center motif to the frame.
Use light pressure for the flower outline so it stays thin and crisp after drying.
Avoid filling the center flower with thick paste — it removes the negative space effect.
17. Split Wrist Bracelet With Outer Scroll Chains
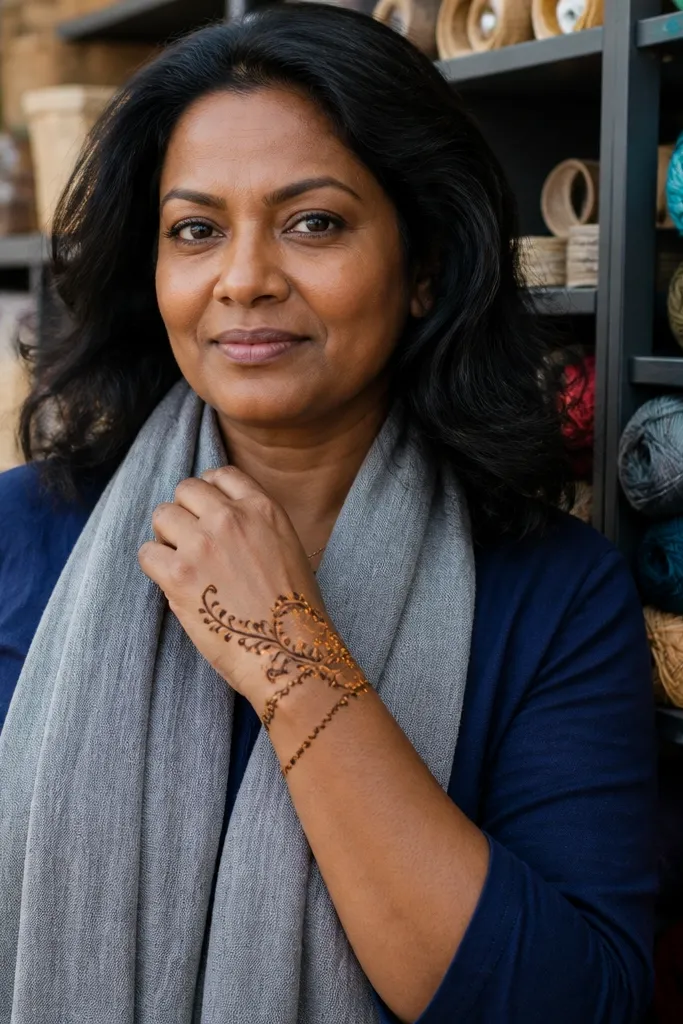
Split bracelet designs look modern because they create two levels at the wrist. This one has a bracelet line that breaks into two bands, then outer scroll chains climb upward along the outer edge. The chain effect comes from repeated small loops connected by thin lines. It looks clean when your paste stain is uneven because the motif repetition keeps it readable.
Draw two separate bracelet bands across the wrist crease with a small gap between them. From the outer edge of the upper bracelet, draw a chain of small scroll loops connected by thin lines, moving upward toward the index and middle knuckles. Add tiny dots inside some loops for Arabic texture. Finish by outlining the outer edge with one thin vine line so the chain looks framed.
Pro tipKeep loop sizes consistent — chain patterns look best when each loop matches the next.
AvoidAvoid skipping the gap between the two bracelets — without it, the design looks flat.
18. Central Geometric Diamond Stack
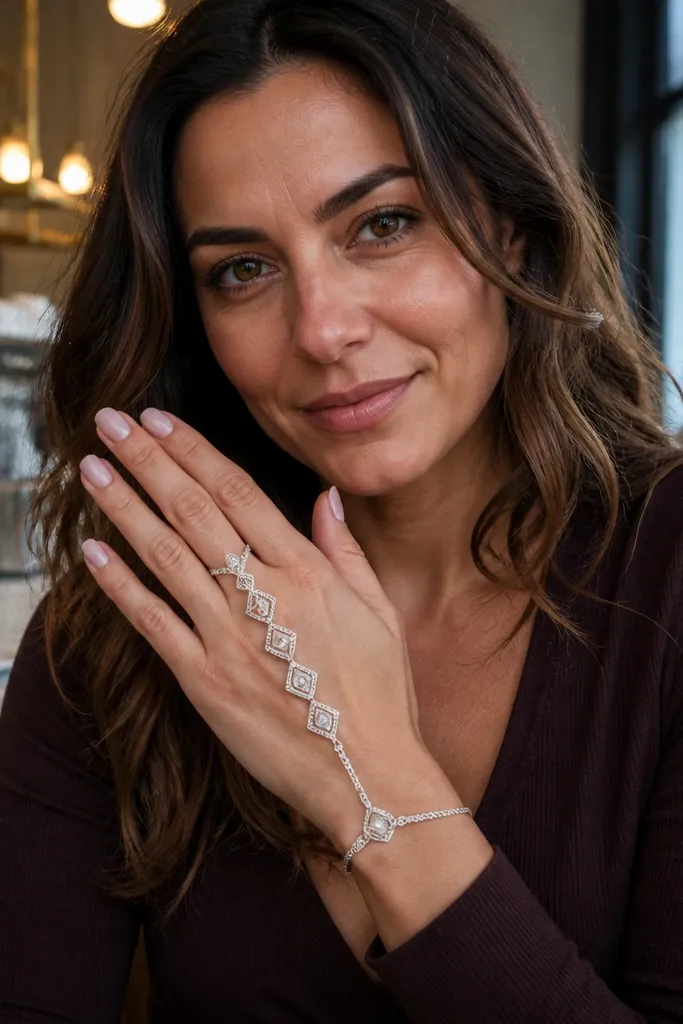
A diamond stack makes the back hand look structured and symmetrical fast. The center stack is built with geometric diamonds that get smaller as they approach the knuckles, so the hand looks longer. Thin side vines connect the diamond stack to the wrist band, but they don’t fill the whole hand. This design is great for clean, high-contrast results because the lines are separated and the geometry doesn’t smear into a blob.
Start with a wrist band, then draw a vertical center line. Place an upside-down diamond near the center of the back hand, then stack more diamonds above and below, shrinking the size each time. Connect the diamonds using thin line edges, not thick fill. Add two side vines that run from the diamond stack down to the wrist band ends, with small dot accents where the vines meet the stack.
Pro tipIf diamonds start to look crooked, pause and redraw the center line first before adding more shapes.
AvoidAvoid thick outlines on every diamond — too much thickness makes edges merge after drying.
19. Finger Base Orbit Dots
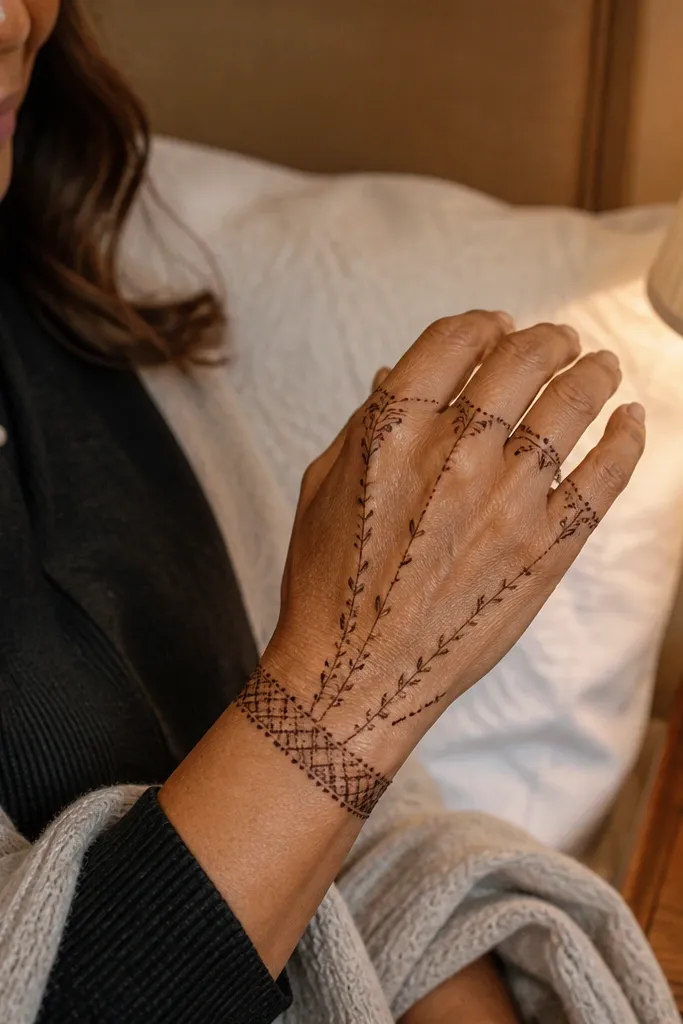
Orbit dot rings are a clean way to add detail without heavy coverage. Each finger base gets a partial ring of dots, then a thin vine links the rings back to the wrist band. The Arabic look comes from the dot rhythm and the small comma leaves that fill the gaps between rings. This is a good choice when you want a back hand design that feels airy and modern while staying very readable in photos.
Draw a wrist bracelet line first. For each finger base on the back hand (index through ring or pinky depending on your comfort), place a partial arc of dots, like a broken halo. Connect the arcs using a thin vine line that curves across the knuckle area. Finish by adding 1-2 comma leaves between two dot arcs so the pattern looks like it was designed, not random dots.
Keep dot size uniform by squeezing the cone with steady pressure for the whole arc.
Avoid placing dot arcs too close to each other — overlapping arcs blur into a dark band.
20. Wrist Bloom Medallion With Side Filigree
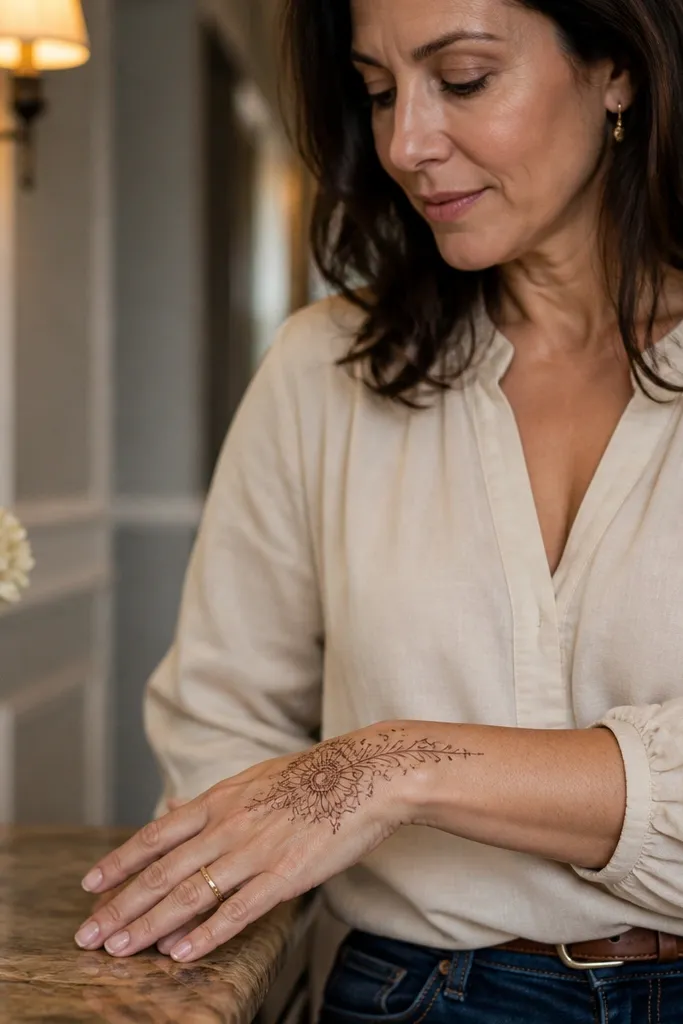
This design is built from a smaller medallion at the wrist, then filigree vines lift the look upward. A wrist bloom reads elegant because it frames the hand from the bottom, and side filigree adds detail without crowding the knuckles. Use thin filigree curls and dots rather than thick fills, so the pattern stays light and Arabic. This one is especially flattering when you want the mehndi to show on movement, like waving your hand during events.
Start with a dense but small medallion at the wrist center using an oval outline and inner geometric cells. Add a thin bracelet line around it so the bloom looks anchored. On both sides, draw filigree vines that curve upward toward the index and pinky knuckles, each with comma leaves and micro dots. Keep the center area open so the wrist bloom stands out as the main focal point.
Pro tipUse a smaller cone opening for filigree curls so the lines stay delicate.
AvoidAvoid spreading the wrist medallion too large — it steals attention from the rest of the design.
21. Outer Lattice Veil Over Knuckles
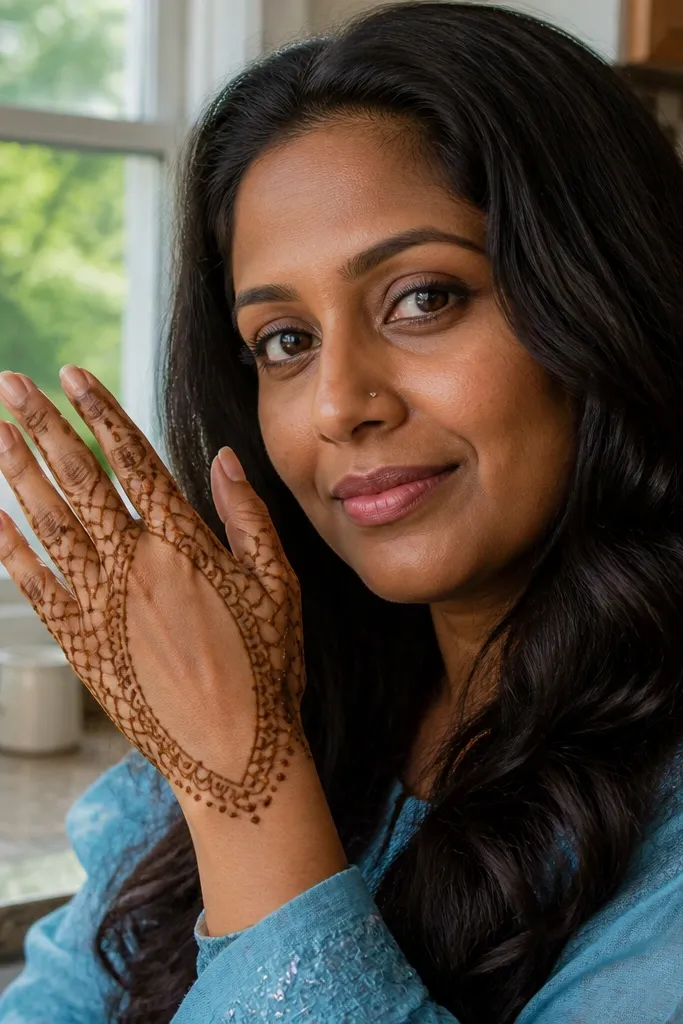
An outer lattice veil is a smart way to cover the knuckles while keeping the center open. The lattice sits more on the sides of the knuckle area, like a veil, so it adds texture without turning the whole back of the hand dark. Arabic veil designs look best when the lattice cells are consistent and the border is outlined clearly. This one is excellent for people who want a fuller look but don’t want finger gaps covered.
Draw a thin border line around the knuckle area, leaving the center of the back hand open. Fill only the outer sides with lattice cells using vertical and horizontal strokes. Outline the lattice border with a slightly thicker line so the grid stays visible after drying. Add a simple vine runner from the wrist band toward the outer edge to connect the veil to the base.
Pro tipOutline after filling, not before, if your lines tend to wobble; it cleans the edges.
AvoidAvoid lattice on the center — it looks like a stain spill instead of an intentional Arabic veil.
22. Three-Layer Arch From Wrist To Thumb
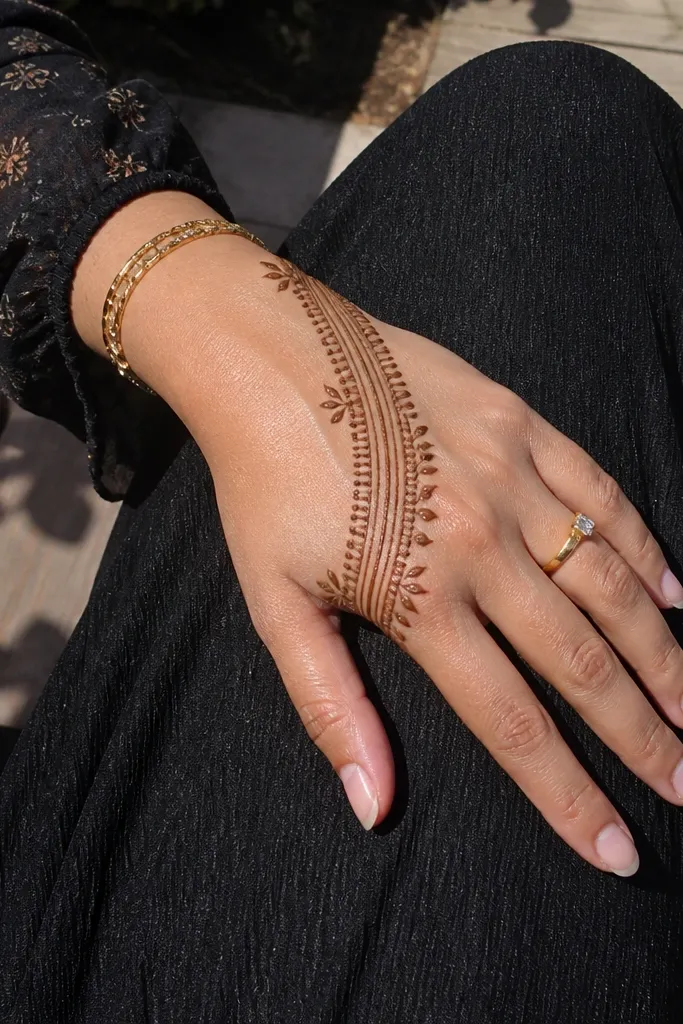
Three-layer arches look crisp because they create depth without heavy filling. This design runs from the wrist toward the thumb web, with three parallel arch lines that taper as they climb. Add tiny dot fillers between the layers and a few leaf commas along the outer arch. It’s clean, photogenic, and it corrects the common thumb-side issue where designs get uneven and too thin.
Start with a wrist bracelet line, then draw three parallel arch lines from the outer wrist toward the thumb web. Keep each arch the same curvature but reduce the thickness slightly for the inner arches. Between the arches, add dot fillers in small clusters, then add leaf commas on the outer arch only. Finish by adding a small connector vine from the inner arch to the knuckle base area.
Pro tipIf your arches don’t match, redraw the outer arch first. Everything else should copy its curve.
AvoidAvoid making the inner arch too close to the outer arch — the dots won’t show and the layers merge.
23. Arabesque Corner Triangle Pattern
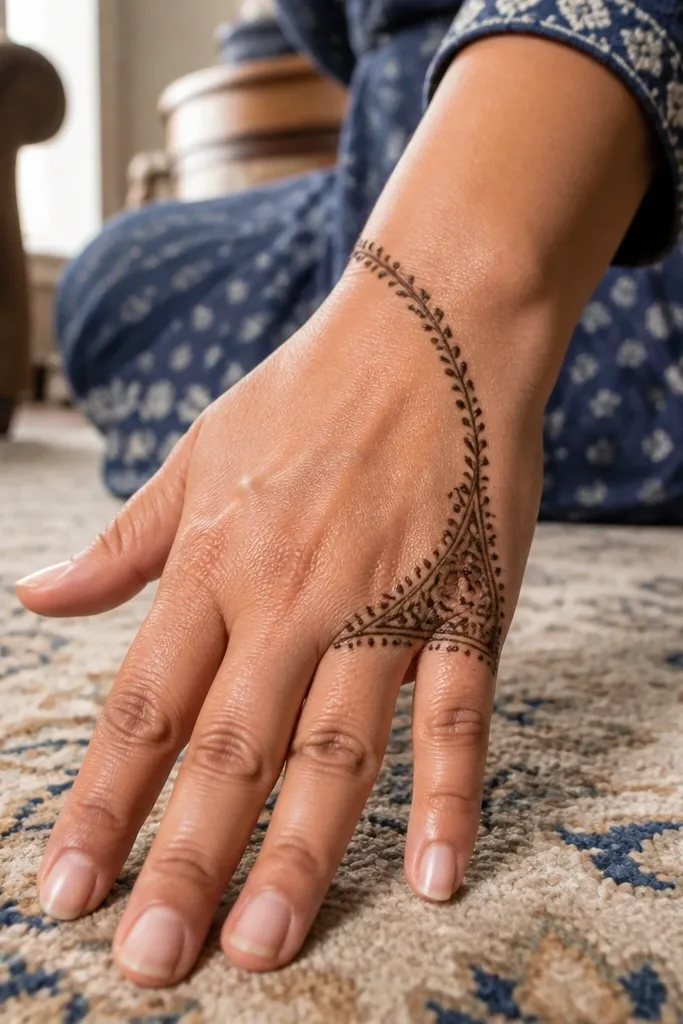
Corner triangle patterns look bold because they concentrate detail in one spot. Place the triangle cluster on the outer back hand corner near the pinky side, then run a thin vine runner from the wrist band up to that corner. Inside the triangle, use arabesque curls and dots that follow the triangle edges. The rest of the hand stays mostly open, so the triangle looks intentional and high-contrast, even when you take photos at different angles.
Draw a thin wrist band and a vine runner that curves toward the outer corner. Outline a triangle cluster near the outer corner, then fill it with small arabesque curls that follow each side of the triangle. Keep the triangle edges outlined thicker than the inner curls. Finish by adding a few dot seeds along the vine runner so the transition from wrist to corner feels smooth.
Use a slightly larger triangle outline than you think, then fill only the inside — the empty border helps the shape read.
Avoid filling the entire runner — keep it thin so the triangle remains the focus.
24. Knuckle Medallion Chain Across Index And Middle
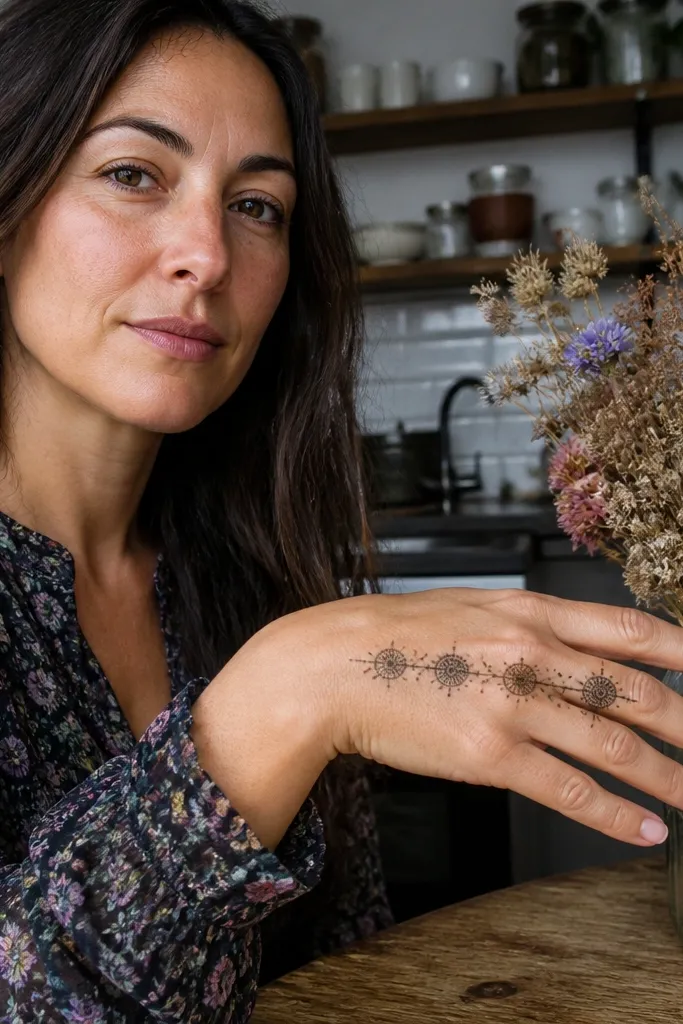
This design stuns because it turns knuckles into a clean “chain” line. Small medallions sit across the index and middle knuckle area, connected by thin vines and dot bridges. The chain keeps the design from spreading randomly, and the medallions keep it from looking plain. It’s a great option for events where you want your mehndi to look neat even after you wash your hands and the stain fades unevenly.
Start with a wrist band, then draw a thin vine line across the back hand from the index knuckle toward the middle knuckle. On top of that vine, add small oval or teardrop medallions at even intervals, each with a thin inner geometric fill. Connect medallion edges using tiny dot bridges and short leaf commas. Finish by outlining the medallion chain with a slightly thicker line so it stands out after drying.
Space medallions about a thumb-width apart on the back hand so each one stays distinct.
Avoid making medallions too close — they merge into one dark line.
25. Wrist Rose With Side Petals

A wrist rose gives you a romantic Arabic look without heavy coverage. The center flower is compact, and the side petals curl outward toward the index and pinky sides. Because the rose is at the wrist, it stays visible in most hand poses, and the petal curls create motion across the back hand. This is a good choice for seasonal looks because it pairs well with simple finger patterns or even minimal rings.
Draw a wrist bracelet line, then sketch a rose center using a small circle with a dot in the middle. Add 8-10 petal loops around the center, keeping the petal outlines thin and consistent. From two opposite petal tips, draw side petal curls that arc upward toward the index and pinky knuckles. Finish by adding tiny dots at petal base points to connect the rose to the wrist band.
Pro tipKeep the rose diameter smaller than your palm crease; oversized roses blur into thick stains.
AvoidAvoid thick filling in the rose center — it darkens too much and flattens the petal definition.
26. Arabic Netting With Thumb-Curve Border
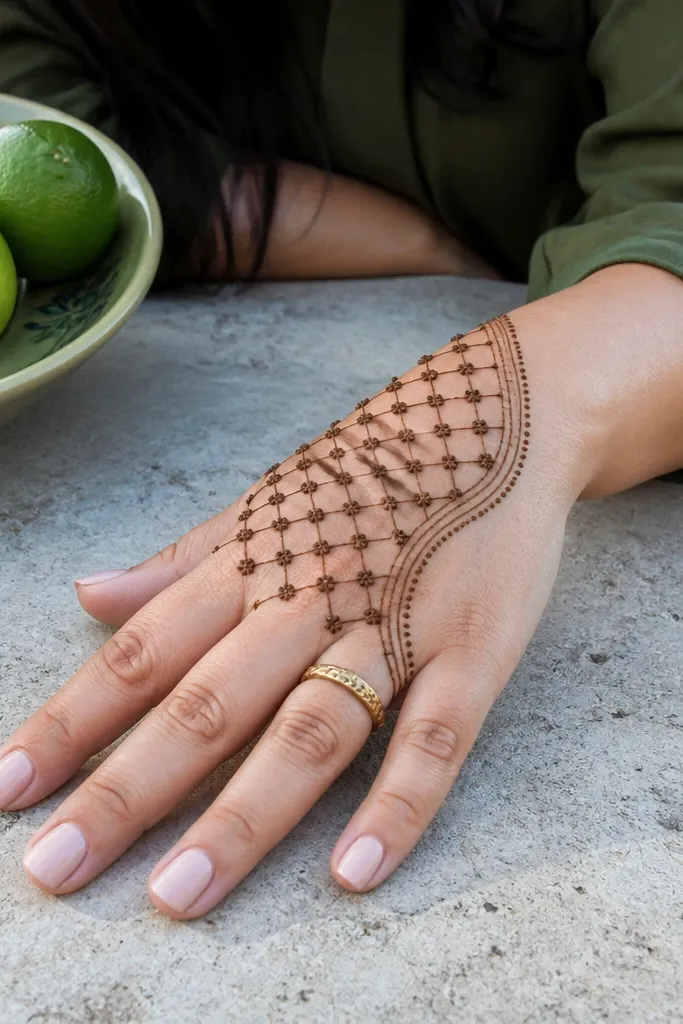
Netting designs look stunning when the net is controlled and the thumb side has a clear border. This layout draws net cells mostly around the knuckle area, then adds a curved border line near the thumb web to prevent the net from looking like it spilled. The border gives the design a clean edge, and the net gives it detail. It’s a strong pick for people who want a fuller back-hand look but still want it to read Arabic, not messy.
Start with a wrist band and a curved border line near the thumb web that marks the inner edge of the netting. Draw vertical net lines across the knuckle area, then connect with horizontal lines to form cells. Outline the net region with a thicker line so it stays visible after drying. Add a few leaf commas where the net touches the border line, then keep the center mostly open.
If your cone clogs, stop and reload. Restarting mid-net makes uneven cell sizes.
Avoid netting all the way to the finger tips — it makes fingers look stained, not designed.
27. Outer Border Vine With Inner Dot Columns
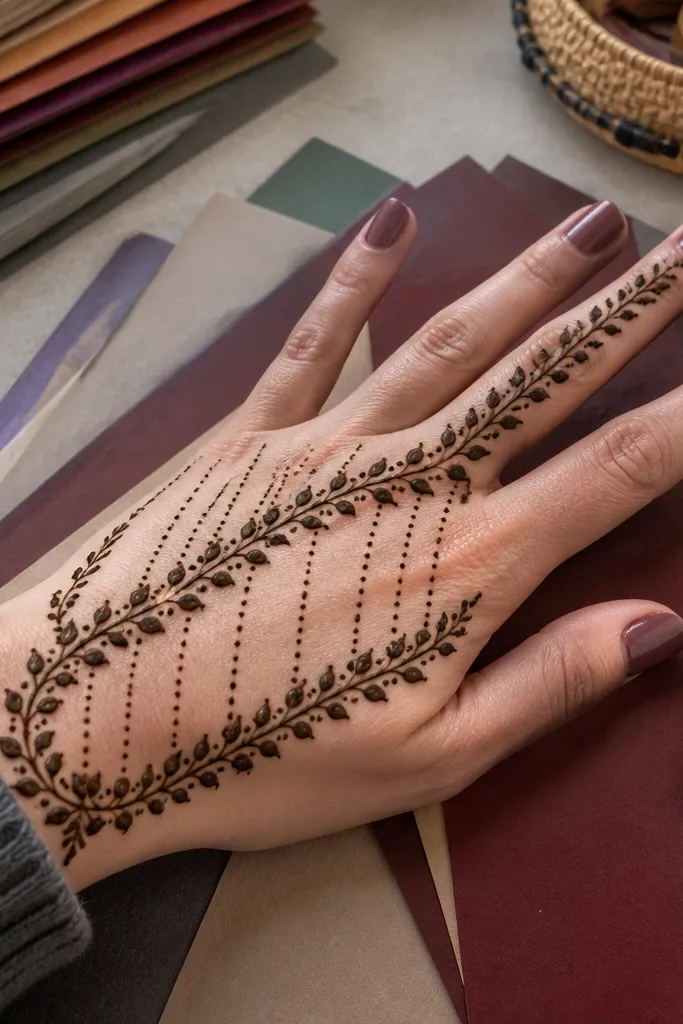
This is a clean way to add detail without drawing lots of dense lines. The outer border vine outlines the design shape, while inner dot columns create texture that stays crisp even when stain fades. Arabic look comes from the vine’s comma leaves and the dot rhythm. It’s great for people who want a photogenic back hand that doesn’t take forever to draw.
Outline an outer border vine around the back hand area above the wrist band, leaving a clear center gap. Inside, draw 3-4 vertical dot columns that run down toward the wrist band, with consistent dot size. Connect the dot columns to the border using short comma leaves on the outer side only. Finish by adding a thin bracelet line at the wrist and two tiny dot clusters near the thumb web for balance.
Keep dot columns straight by resting your pinky finger lightly on your skin as you draw.
Avoid dot columns that curve — they look unplanned and lose the Arabic grid feel.
28. Geometric Fan Medallion Near Thumb Web
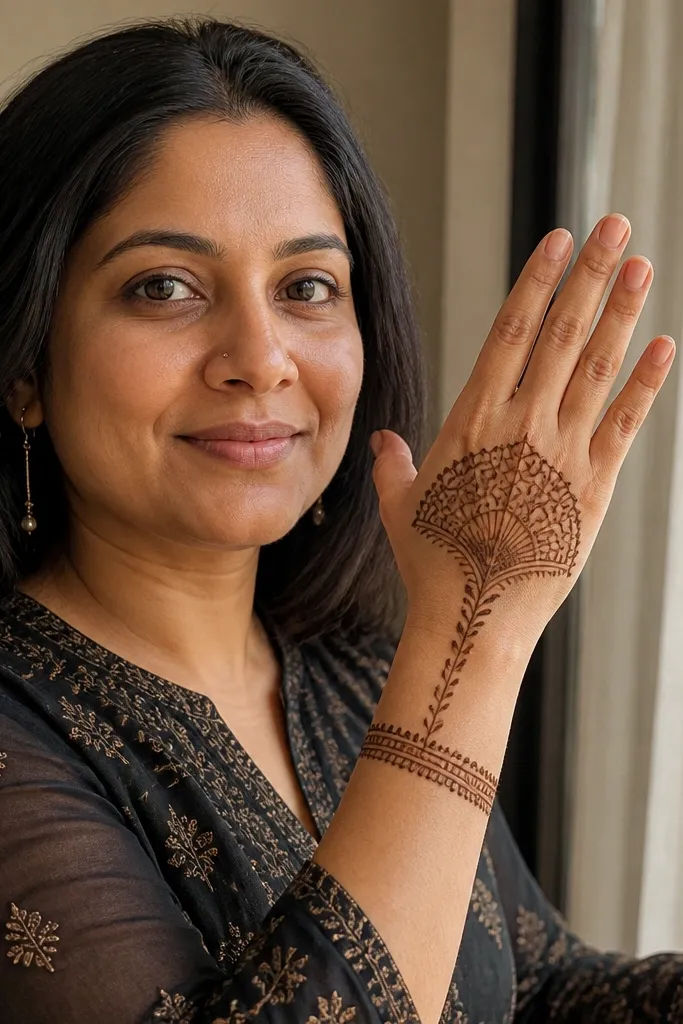
Geometric fan medallions are made for back hands because they sit in the thumb web area where the design naturally needs structure. This one uses a fan shape with small geometric cells, then anchors it with a thin vine that runs down to the wrist band. The medallion edges are crisp, so the pattern looks clean in photos even with uneven drying. It suits short sleeves looks too, because the thumb web detail pops.
Start with a thin wrist bracelet line. Draw a fan outline in the thumb web area, with the widest side toward the back-hand edge and the narrow side toward the center. Fill the fan with small geometric cells like triangles and diamonds using thin lines. Add a thin vine runner from the fan base down to the wrist band and finish with micro dots at cell corners to sharpen the Arabic feel.
Pro tipUse small cell sizes near the fan edge — it keeps the outline sharp and prevents blobbing.
AvoidAvoid filling the fan with thick solid blocks — geometric cells need thin lines to stay defined.
29. Wrist-To-Knuckle Triangle Ladder
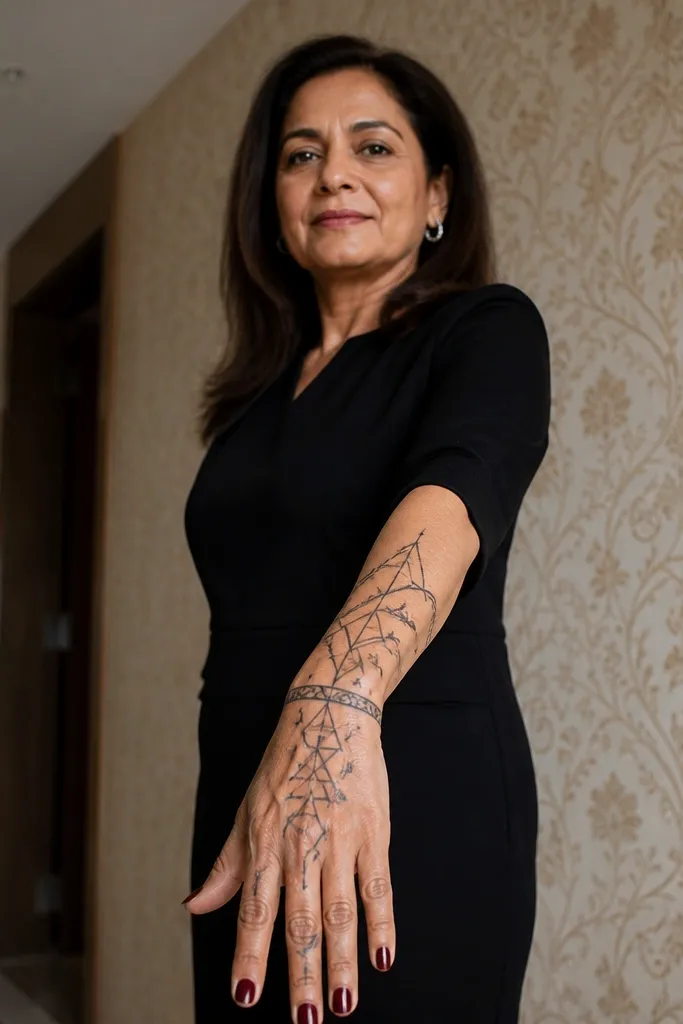
Triangle ladder motifs are bold and easy to read. This design creates a ladder effect that runs from the wrist upward in diagonals, giving the back hand a lifted look. Because triangles naturally create negative space between them, the design stays light and not swampy. It’s a good pick when you want something Arabic and structured but you don’t want the complexity of full medallions.
Draw a wrist band, then add diagonal guide lines toward the knuckle area. Build a ladder using repeating triangles along each diagonal, keeping triangle sizes consistent. Outline each triangle with a slightly thicker line than the inner fills, then connect triangle peaks with tiny dots. Finish by adding a thin vine border around the outer edge of the triangle ladder so it looks framed.
Pro tipKeep the triangle points sharp by dragging the cone slowly at the tip, then lifting cleanly.
AvoidAvoid making the ladder too dense — spacing between triangle rows is what keeps it photogenic.
30. Minimal Arabic Frame With One Big Leaf
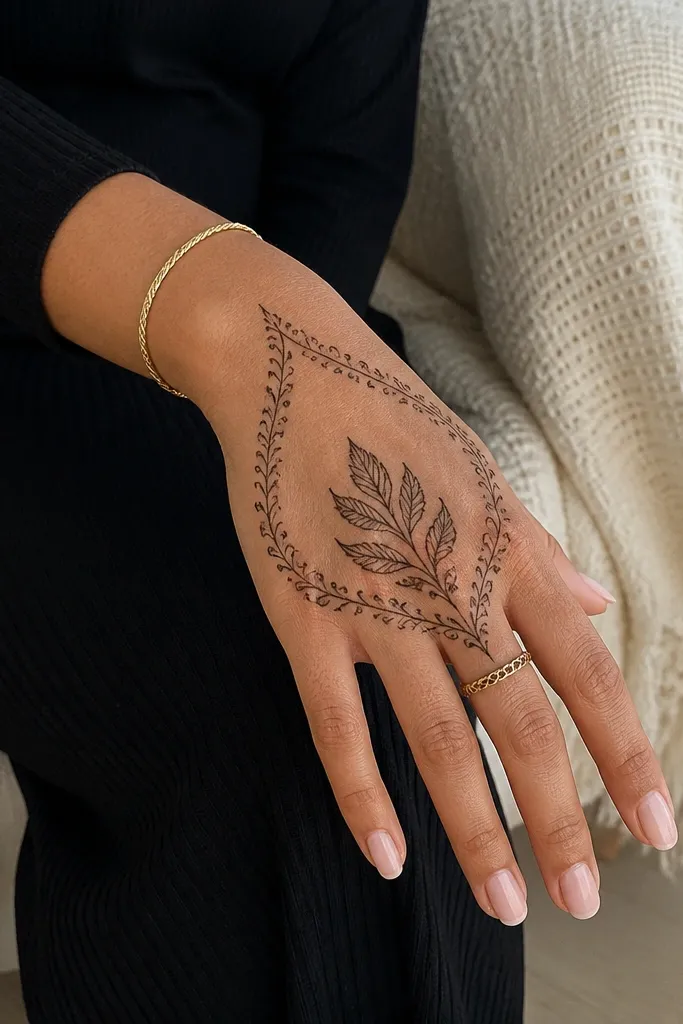
Minimal designs stun when they have one clear hero element. This one uses a thin Arabic vine frame around the back hand, then places a single large leaf motif near the center. The leaf adds movement and fullness, while the frame keeps everything crisp and intentional. It’s ideal for people who want their mehndi to look clean for longer events because fewer dense areas mean less uneven fading.
Start with a thin wrist bracelet line. Outline a simple vine frame around the back hand area, leaving a large open center. Draw one large leaf motif near the center using a thick outline and thin inner veins, then add 1-2 small comma leaves around it. Finish by connecting the leaf to the frame with a couple of micro dots so it feels anchored.
Use a slightly wider cone tip for the leaf outline, then switch to a finer line for the inner veins.
Avoid adding extra small fillers everywhere — minimal needs restraint to look expensive.



