
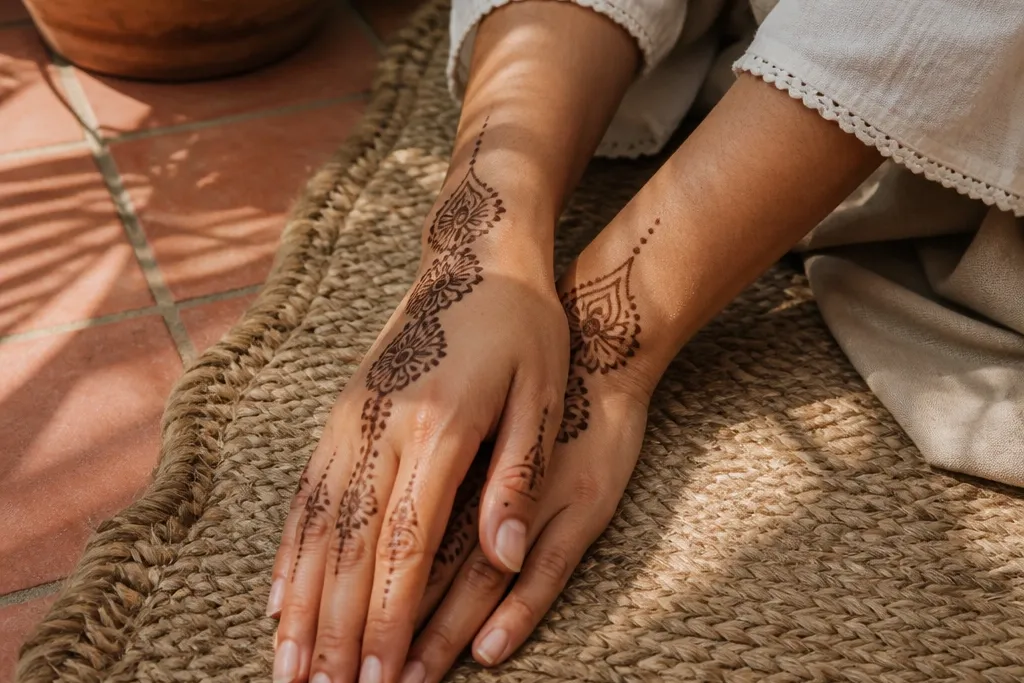
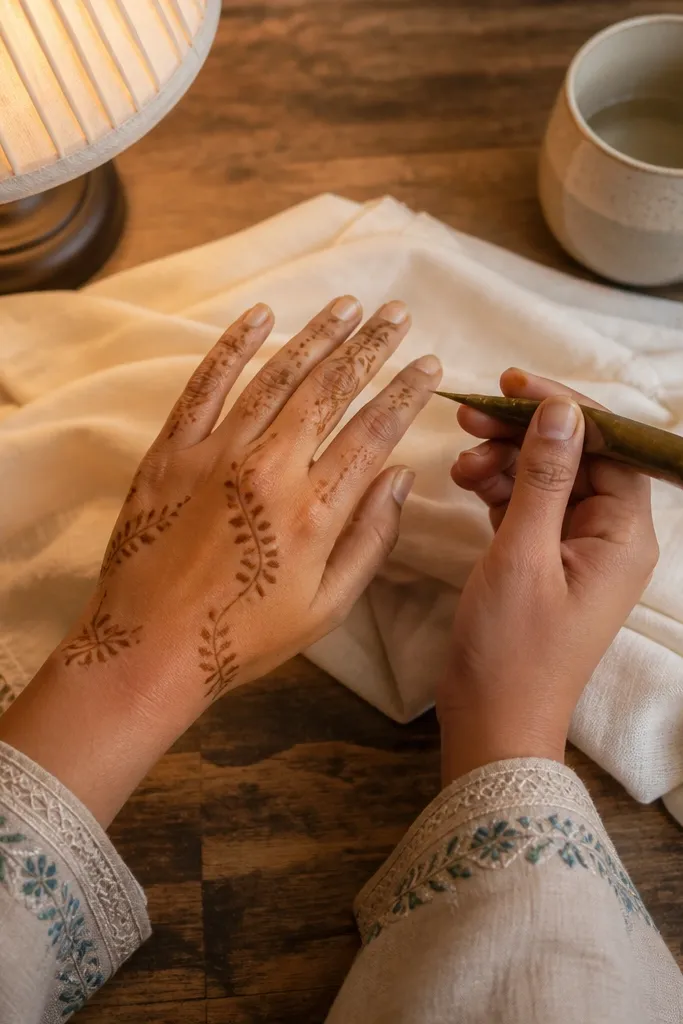
1. Wrist Ring With 3 Teardrop Fingers
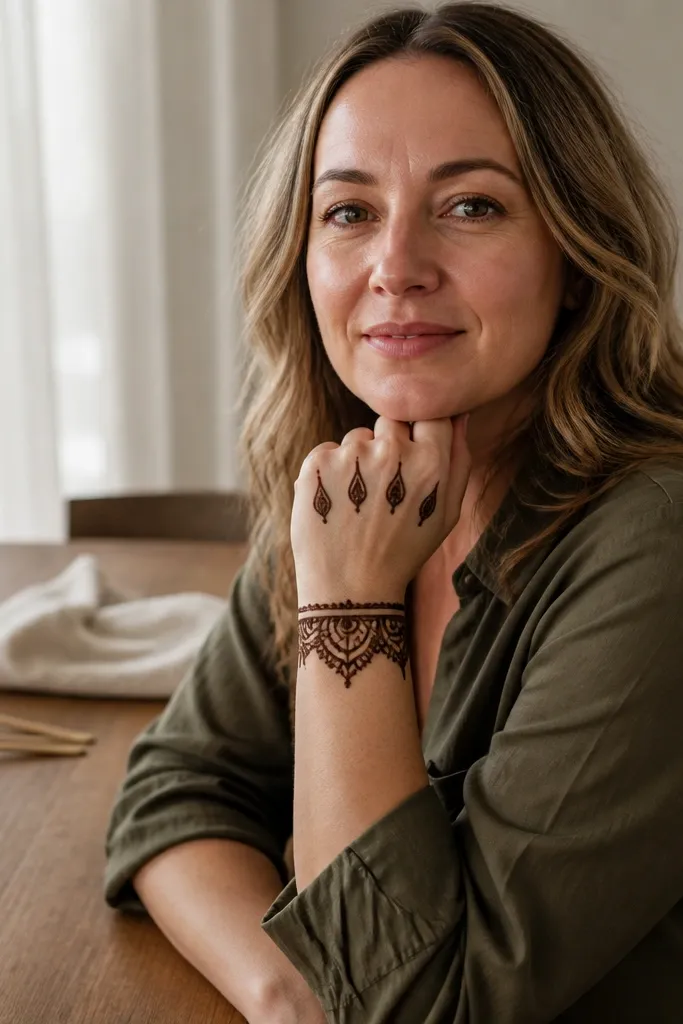
This layout is the fastest way to make your front hand look styled even if you’re new to mehndi. It starts with a clean wrist ring, then places three matching teardrop clusters across the finger area. The teardrops give you that warm, cozy softness, while the ring keeps everything from looking scattered. You’ll get a balanced look because each finger gets the same “weight” — one cluster instead of random lines. It’s photo-friendly because the main shapes sit clearly on the back of the hand and don’t disappear into heavy filling.
Start by drawing a tight bracelet ring around the wrist, using a single continuous line. Next, from the ring, place three teardrop clusters on the back of the hand — one near the index-finger base, one near the middle, and one near the ring-finger base. Add a few tiny dots inside each teardrop cluster and outline the teardrop edges so they read crisp. Finally, connect the bottom of each teardrop cluster with a short curved line that lightly points toward the wrist ring.
Pro tipUse dots of the same size — if your dot sizes vary, the design looks rushed.
AvoidDon’t fill the teardrops completely; leave small gaps so the pattern stays airy.
2. Half-Moon Paisley Band Across the Back
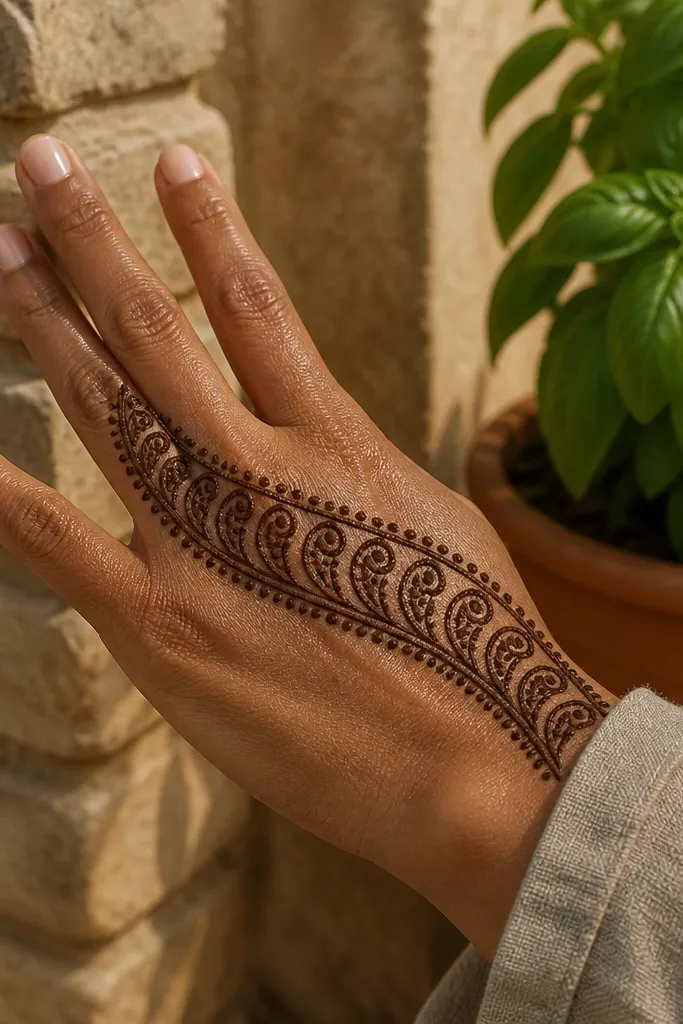
A paisley band looks more complex than it is, and it’s perfect when you want a “front hand statement” without doing full finger lace. This design uses a half-moon arc across the back of your hand, with small paisley mini-forms repeating along the curve. The arc structure makes your hand look longer, and it frames your fingers nicely. Keep the paisleys small and spaced so your knuckles don’t get buried in paste. The result reads elegant in daylight and still feels simple because the pattern repeats in a controlled way.
Draw a gentle half-moon arc starting from the outer edge of the hand and ending near the inner edge, just below the finger bases. Along that arc, place repeating mini paisleys facing the same direction, leaving a clear gap between each one. On each side of the arc, add two tiny leaf shapes as end caps so the band looks intentional. Finish by adding short vertical dot-lines down each finger base — only 1 to 2 strokes per finger.
Lightly sketch the arc positions with a thin henna pencil or soap line before you commit with paste.
Avoid placing paisleys too close; crowding makes the arc look like one dark patch.
3. Dot Ladder Finger Tips With Leaf Bases
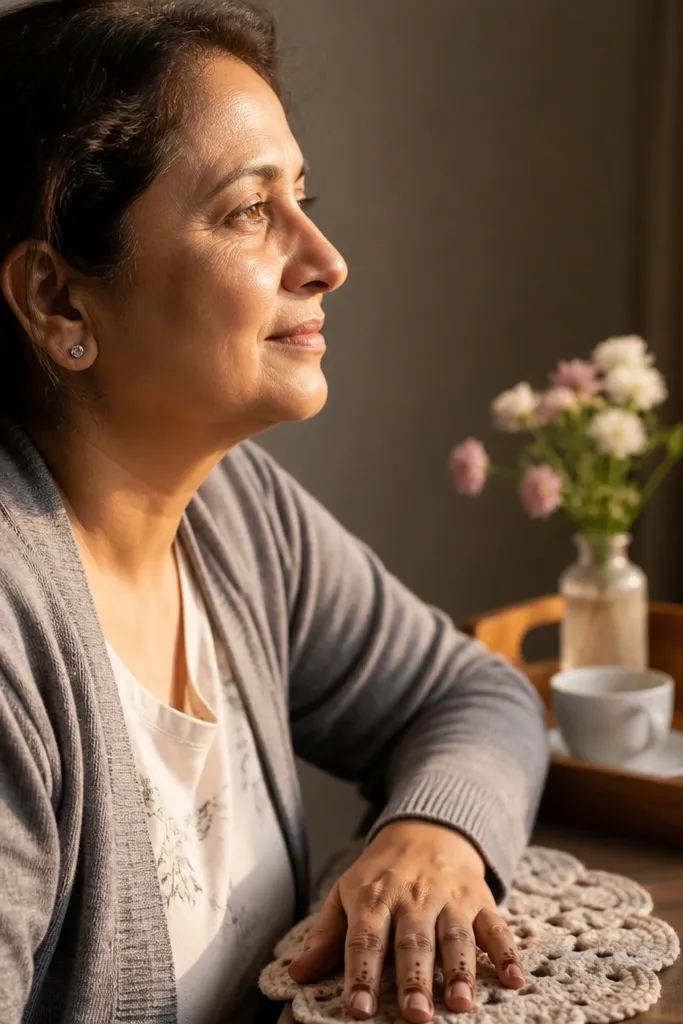
If your fingers look bare after you draw one motif, this design fixes that with a simple “ladder” rhythm. You’ll create dot ladders at the finger tips, then connect them to small leaf bases on the finger joints. It’s cozy because dot patterns look warm and soft, not harsh. The leaf bases anchor each finger, so the design doesn’t float only near the tips. This one is also beginner-friendly because you repeat the same dot spacing on every finger.
Start at the finger bases on the back of the hand with a small leaf on each finger — keep leaf size consistent, about the same height as your first finger joint. Then draw a thin vertical line from each leaf toward the fingertip, and place dots along that line in equal spacing like rungs. Repeat the dot ladder on all visible fingers, but keep only 2 to 4 dots per finger so it stays light. Finish by outlining the leaf edges with a second pass and adding one tiny dot at the center of each leaf.
Make your dot spacing match your line thickness; if your dots look fatter than your lines, slow down and squeeze less.
Don’t extend the dot ladders past the fingertip; it pulls attention away from the main pattern.
4. Wrist Vines With 5 Micro Flowers
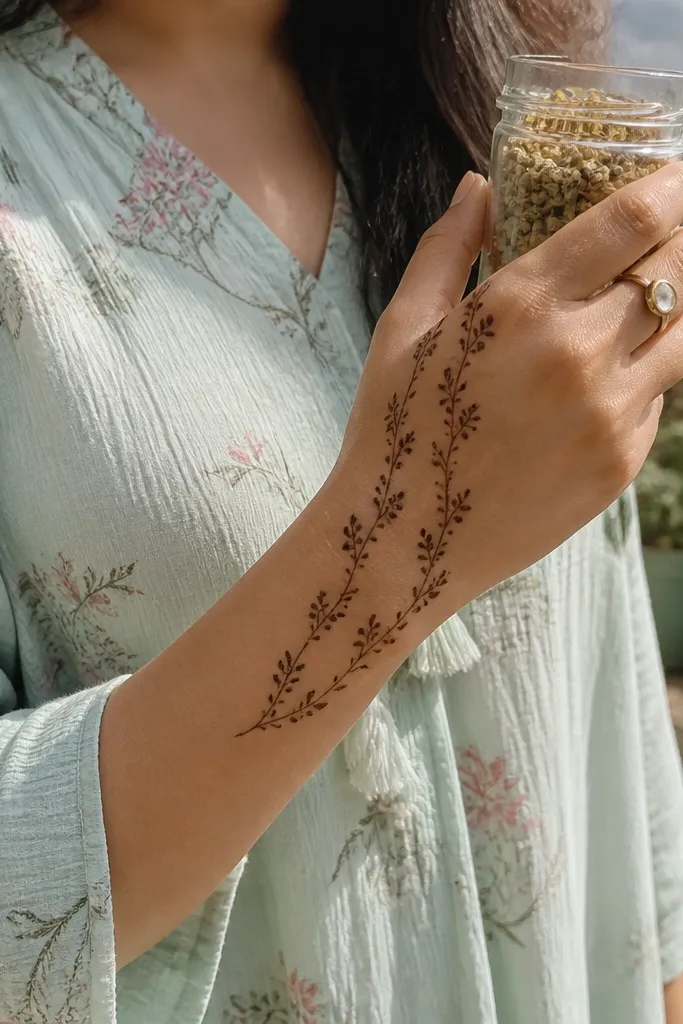
This is a clean, airy design that still fills the front hand. Thin vine lines start at the wrist and run upward, and each vine segment holds a micro flower. The micro flowers keep the look aesthetic without heavy filling — they’re small enough to stay simple but clear enough to pop in photos. It’s ideal when you want a warm vibe but your event has bright lighting or you’ll be wearing a bracelet that draws attention to your wrist. The vines also make your hand feel “finished” because they guide the eye from wrist to fingers.
Draw two thin vine lines from the wrist, one slightly toward the thumb side and one toward the pinky side, leaving a small open center. Along each vine, place alternating micro flowers — each flower is 5 petals around one dot center. Add tiny connector dots between flowers so the vine looks continuous. Finish by adding small leaf strokes where the vine meets the finger bases, then lightly outline the outer edges of the vines for clarity.
Keep vines thin and consistent; thick vines flatten the micro flowers.
Don’t add extra filler between flowers; the gaps are what keep it cozy.
5. Outer Edge Lace With Open Center
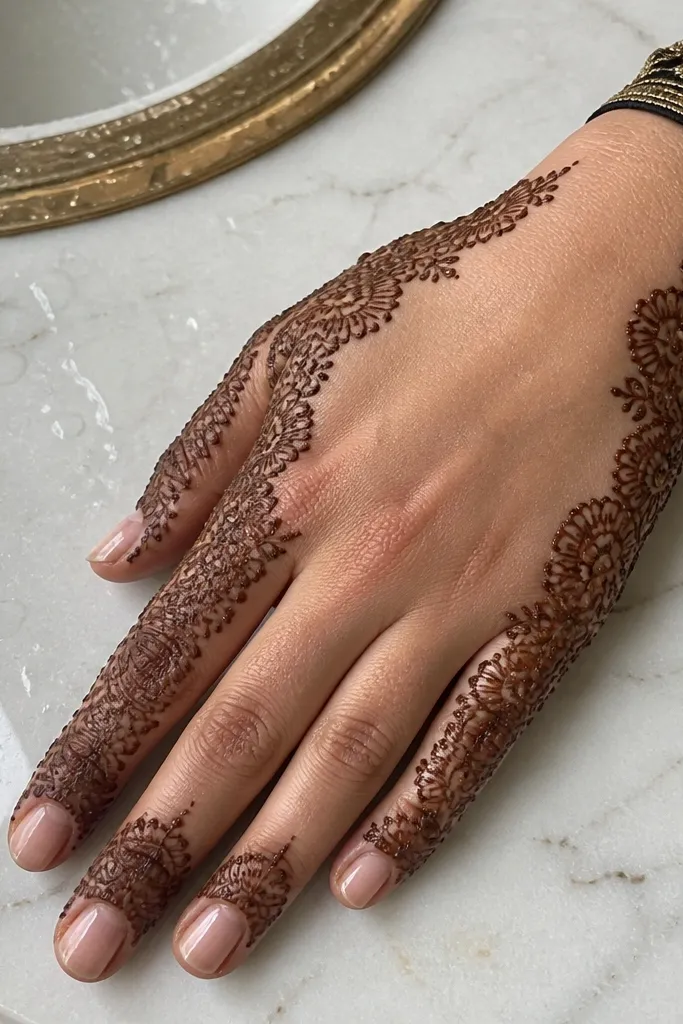
This design gives you that “mehndi lace” look without covering the whole hand. You build a lace frame only on the outer edge and around the finger sides, while the center stays lighter. That open center makes the pattern look breathable and photogenic, especially if you like a warm, soft look rather than heavy darkness. It’s also a good fix if you tend to over-fill — this layout forces you to stop at the frame. The fingers still look decorated because the lace follows their contours.
Start with a curved outline line along the outer edge of the back of the hand from wrist to the base of the pinky. Add repeating small loops like mini scallops along this edge, spacing them evenly. Then add matching loop lines along the outer sides of each finger, but stop at the first joint. Leave the middle of the hand mostly blank. Finish by drawing a thin bracelet line at the wrist and connecting it to the outer lace with two short diagonal strokes.
Pro tipUse the same loop size on every finger side so the lace looks intentional.
AvoidDon’t fill the center — if you cover it all, the lace effect disappears.
6. Simple Corner Mandala on the Back of Hand
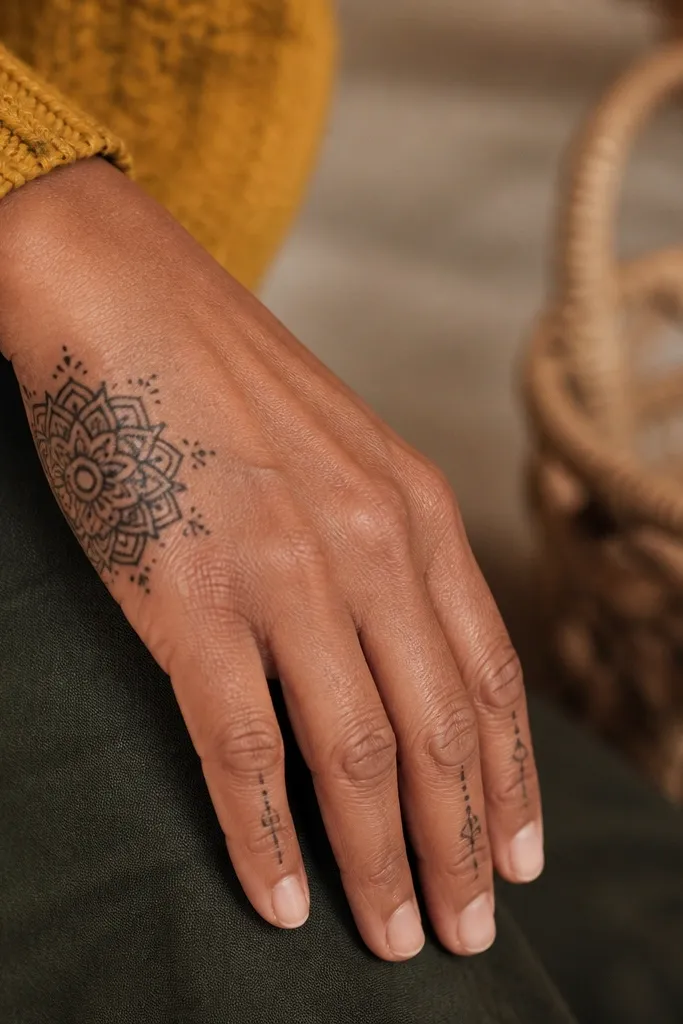
Corner mandalas look stylish because they feel placed, not random. This one sits on the outer back of the hand, with a small mandala center and a few surrounding petals. Because it stays in one corner, it’s easy to keep the rest of the hand simple — just finger lines and dots. It’s perfect for small mehndi events where you want an aesthetic focal point without spending hours. The mandala’s symmetry gives the design structure, and the finger details keep it complete from wrist to tips.
Draw a small circle or oval in the outer back of your hand, near the midpoint between wrist and finger bases. Inside, create a simple mandala: a central dot, then 6 to 8 petal shapes around it. Add one thin outer ring around the petal shapes, leaving space between petals. For the fingers, draw a thin vertical line down each finger with 2 to 3 dots spaced along it. Finish by adding a light curved line along the wrist that points toward the mandala.
Pro tipChoose one mandala petal shape and repeat it exactly; consistency makes it look “designed.”
AvoidDon’t make the mandala too big — it will crowd the finger area.
7. Thumb-Center Focus With Two Side Lines
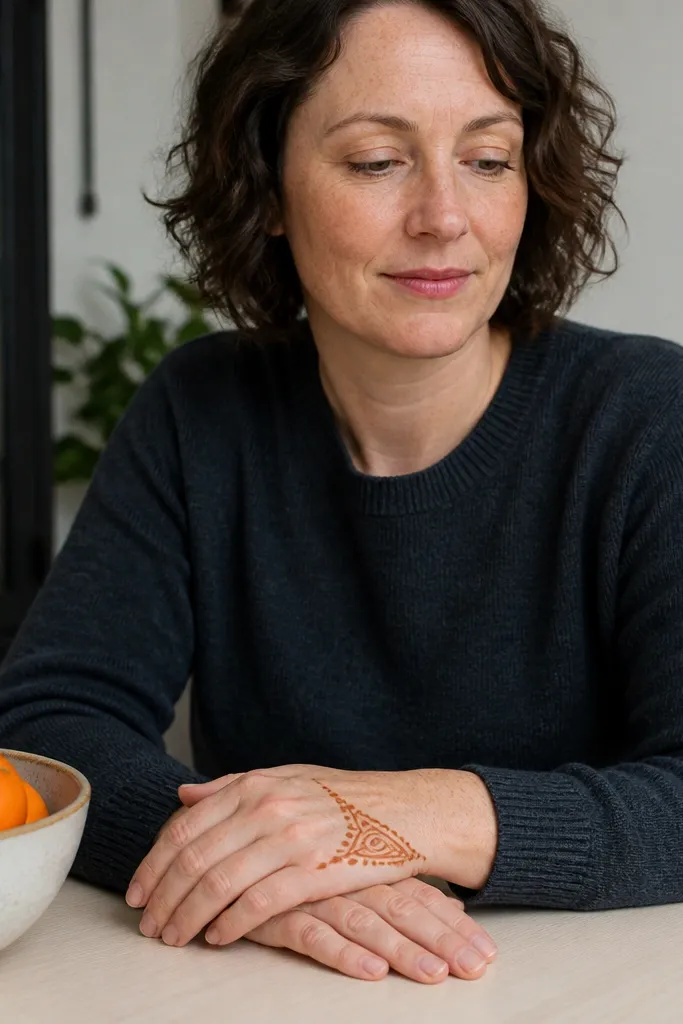
If you want your front hand to look cohesive even when your thumb is the most visible part, this layout centers the design around the thumb area. You place a small teardrop cluster near the thumb base, then add two matching side lines that run upward toward the index and ring finger bases. This creates balance because the thumb motif anchors the composition. It’s also warm and flattering because the teardrops and curved lines soften the hand shape. The rest of the fingers get light dot work so the design doesn’t look incomplete.
Start with a teardrop cluster on the thumb base on the back of the hand — 3 teardrops arranged like a small fan, with a dot center. Then draw two thin curved lines from that cluster upward, one toward the index finger side and one toward the ring finger side. Add tiny leaf marks along those lines at the finger base level. For each finger, add a short vertical line with two dots near the base and one dot near the mid. Finish with a simple bracelet line around the wrist that connects to the side lines.
Keep the thumb cluster slightly larger than the finger motifs; it reads as the focal point in photos.
Avoid placing a heavy pattern on the thumb and leaving the wrist blank.
8. Wrist Bracelet + Finger Cross Hatches
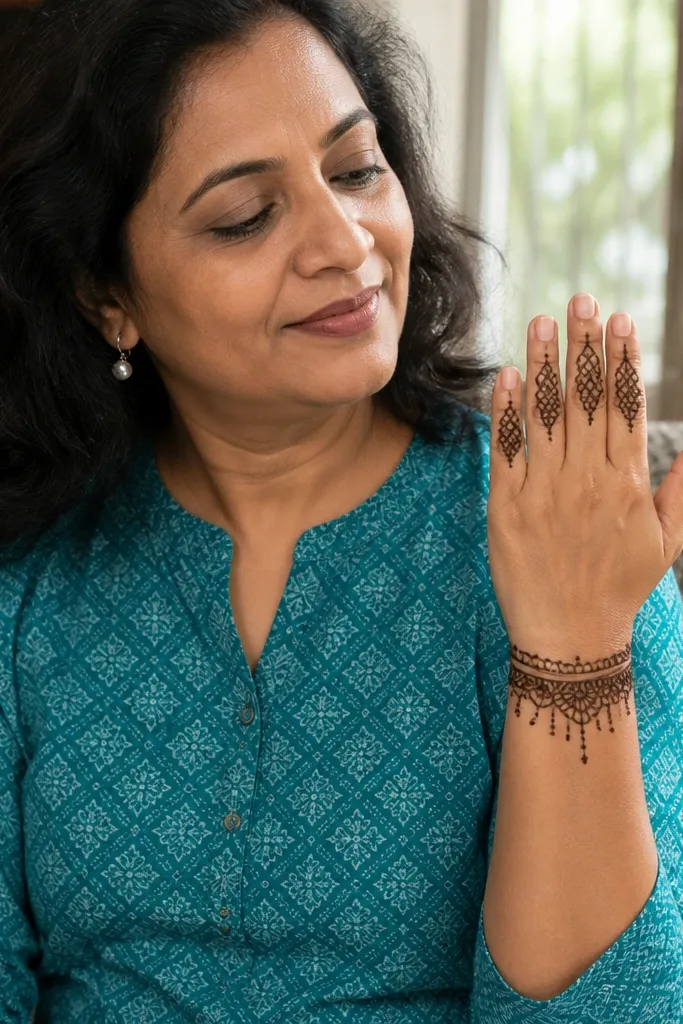
Cross hatches make a simple design look intentional fast. This one pairs a neat wrist bracelet with finger cross-hatching that fills only the finger center area, not the whole finger. The cross pattern adds texture, so even minimal lines look rich on camera. It’s a great option for parties where you want a tidy, geometric vibe while still keeping the shapes soft enough for a warm look. You get clean edges because the bracelet frames the work and the cross hatches stay controlled.
Draw a bracelet line around the wrist, then add 1 to 2 small dot accents on the bracelet so it doesn’t look flat. On the back of each finger, draw a vertical line down the center from the base to near the middle. Then add diagonal hatch lines crossing the center line, making small X shapes spaced evenly. Keep the hatch area about the length of one finger joint. Finish by outlining the top and bottom edges of the hatch block with a thin continuous line.
Use light pressure for the hatch lines so your finger shapes don’t get too dark before the henna dries.
Don’t cross-hatch all the way to the fingertips; it makes fingers look bulky.
9. Scallop Border Frame With Tiny Stars
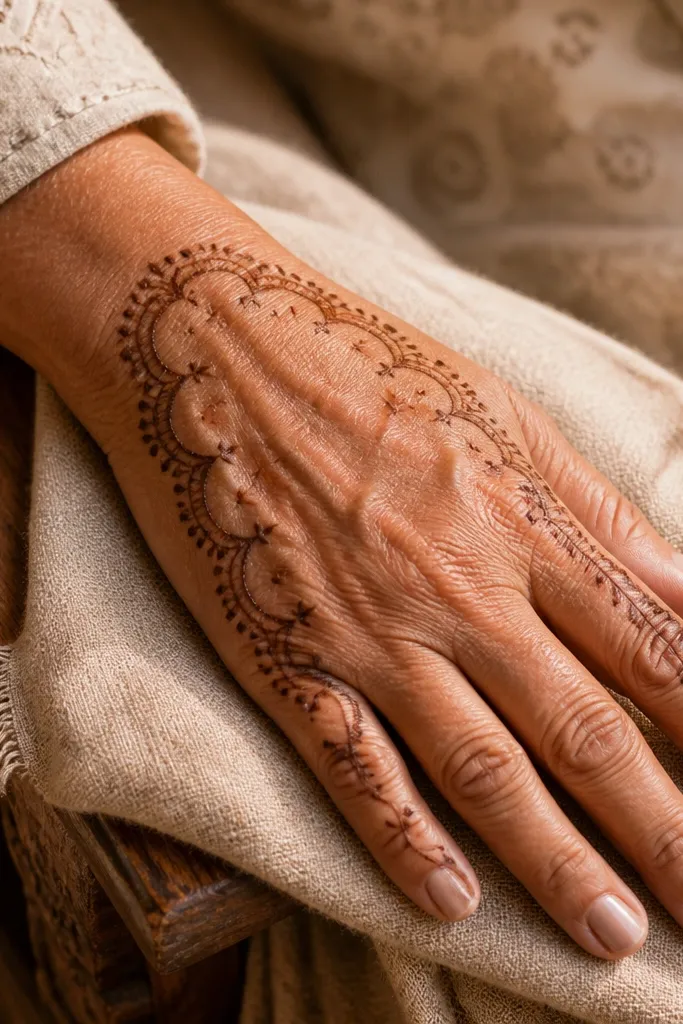
This design is like a frame for your hand. You draw a scallop border around the back of the hand and finger sides, then sprinkle tiny star-like shapes inside. The stars give you that cozy, playful feel without needing huge motifs. Because it’s framed, the design looks neat even if you’re working quickly. It’s also a good choice when you want something that looks balanced on both small and medium hands. The border lines make the mehndi look crisp and photo-ready.
Start at the wrist and draw a curved line that follows the back of the hand upward toward the outer edge. Add scallops along that line — each scallop is a rounded U shape. Connect the scallops to the finger sides with a few short lines so the frame looks continuous. Inside the frame, add tiny star-like shapes near the finger bases and one or two near the center of the back of the hand. Finish with a thin outline pass around the scallop border.
Make your stars using 4 short lines from a dot center; keep them all the same size.
Don’t over-sprinkle stars; too many makes the frame look messy.
10. Minimal Floral Row on the Back
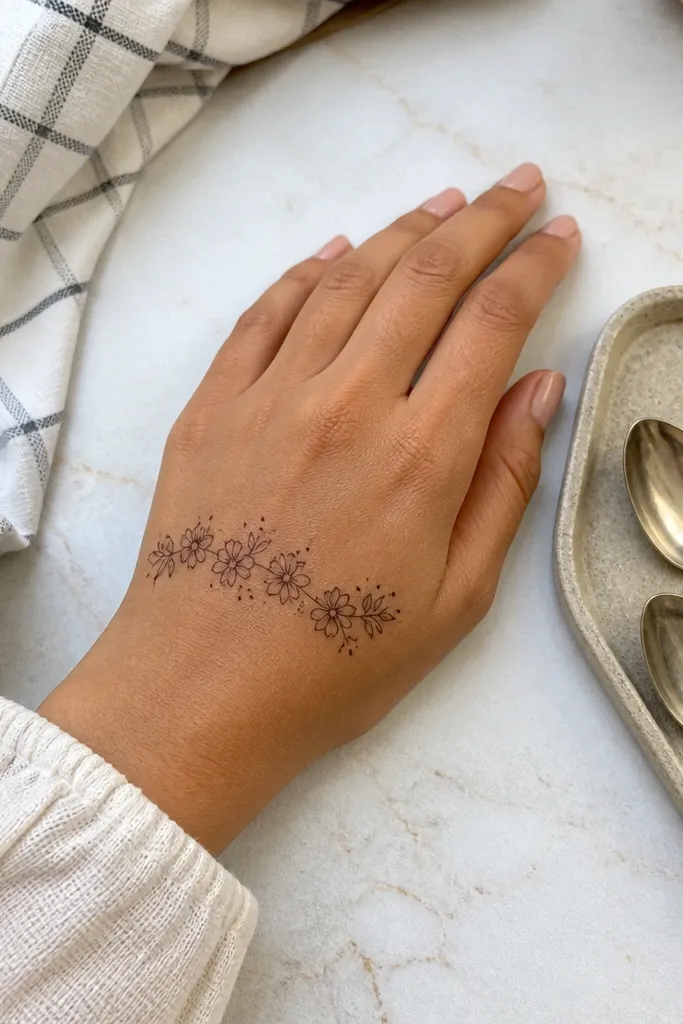
A single row of flowers looks clean and modern, which is exactly why it works for simple front-hand mehndi. You place small flowers in a line across the back, then add light filler dots around them. The flowers create a clear focal path, so the hand looks decorated without heavy coverage. This is especially photogenic when you’re wearing a sleeveless dress or exposing your forearm — the back of the hand catches light and the row reads sharp. It’s also easy to scale: add fewer flowers for smaller hands.
Draw a horizontal line across the back of the hand from the outer side toward the inner side, staying below the finger bases. Place small five-petal flowers along this line, each flower touching the line lightly but not overlapping. Add a dot center to each flower, then add 3 to 4 dots around each flower to create gentle spacing. On the finger bases, add short comma-shaped leaves pointing outward. Finish by adding a thin wrist bracelet line that aligns with the row’s start and end points.
Keep the spacing between flowers consistent — it’s what makes the row look designed.
Avoid making the flowers too big; the row will crowd the fingers.
11. Ring of Dots Around the Finger Base
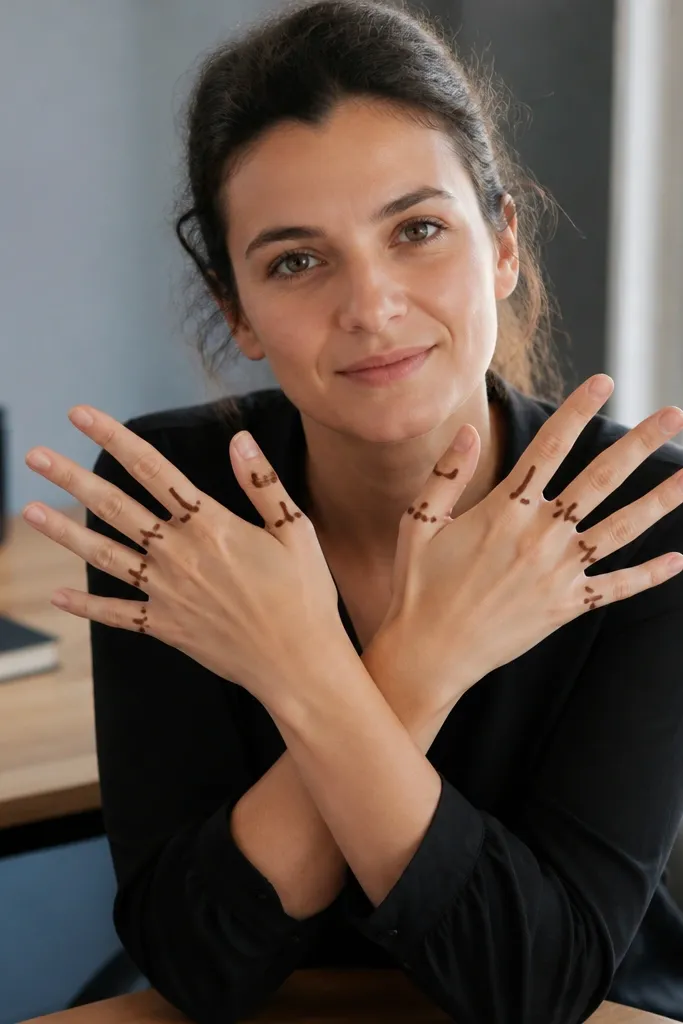
This is the simplest way to make fingers look dressed without drawing full finger patterns. You create a dotted ring around the base of each finger, then add one short curved line upward. The dotted rings add texture, and the consistent placement makes it look intentional. It’s cozy because dots soften the look and keep it airy. This design also dries evenly since you’re not doing thick fills. If you’re worried about uneven paste coverage, this one is forgiving because the dots hide minor line imperfections.
Start with a thin bracelet line around the wrist. Then for each visible finger on the back of the hand, draw a curved dotted ring around the base — think of it like a tiny crown. Add one short curved line from the ring toward the finger center, stopping at the first joint. Repeat the dotted ring size on every finger so the pattern reads uniform. Finish by adding a few tiny dots in the gaps between adjacent fingers.
Use a steady cone squeeze and keep your dot rhythm consistent; rushing makes dots uneven.
Don’t draw rings too high; they should sit near the finger base to look balanced.
12. Vine and Leaf Corner With Open Wrist Gap
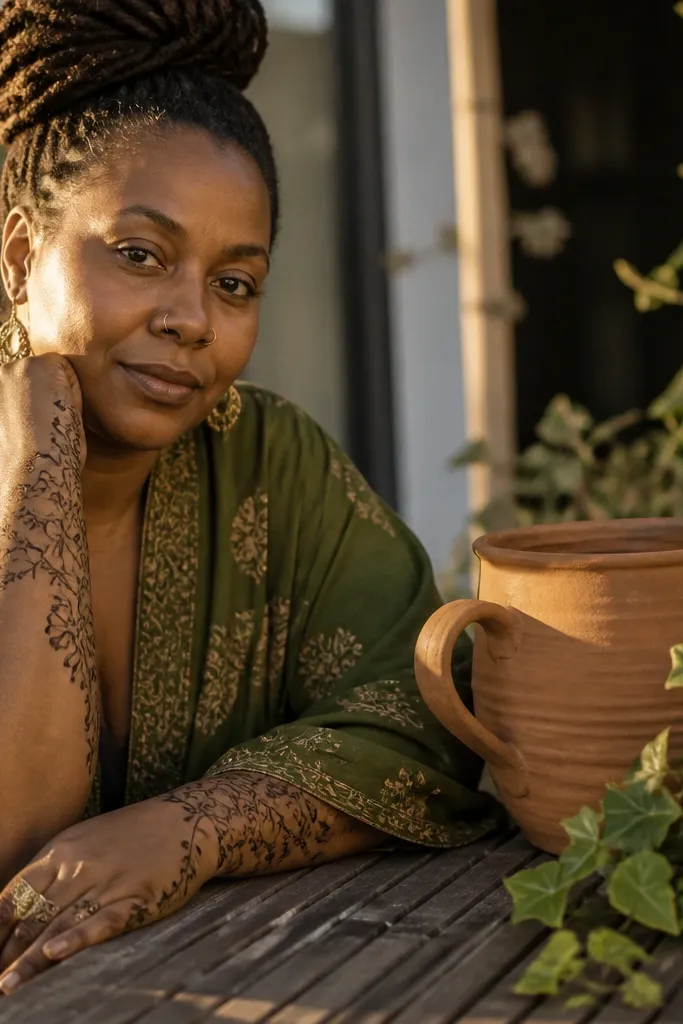
This one looks artsy because it intentionally leaves a small open gap near the wrist. The vine and leaves sit in the outer corner, then taper toward the center with light dot fillers. That open space keeps the design from turning heavy and makes it feel warm and breathable. It’s ideal when you want a front-hand design that looks “styled” without filling every inch. The vine direction guides the eye, so even a simple set of leaves looks like a complete composition.
Start on the outer corner of the back of the hand with a thin vine line that curves upward toward the finger base. Add small leaf pairs along the vine — two leaves facing outward with a dot at the center where they meet. Leave the wrist bracelet area with a small gap on purpose, then draw a partial bracelet line on the inner wrist side only. Add 2 to 3 dots near the vine ends to finish the tapered look. Finish by outlining the outer leaf edges with a second thin pass.
Keep leaf pairs mirrored left and right; that symmetry makes the design look polished.
Don’t fill the open wrist gap with random dots — keep it clean.
13. Front Hand Triangle Motif With Side Dots
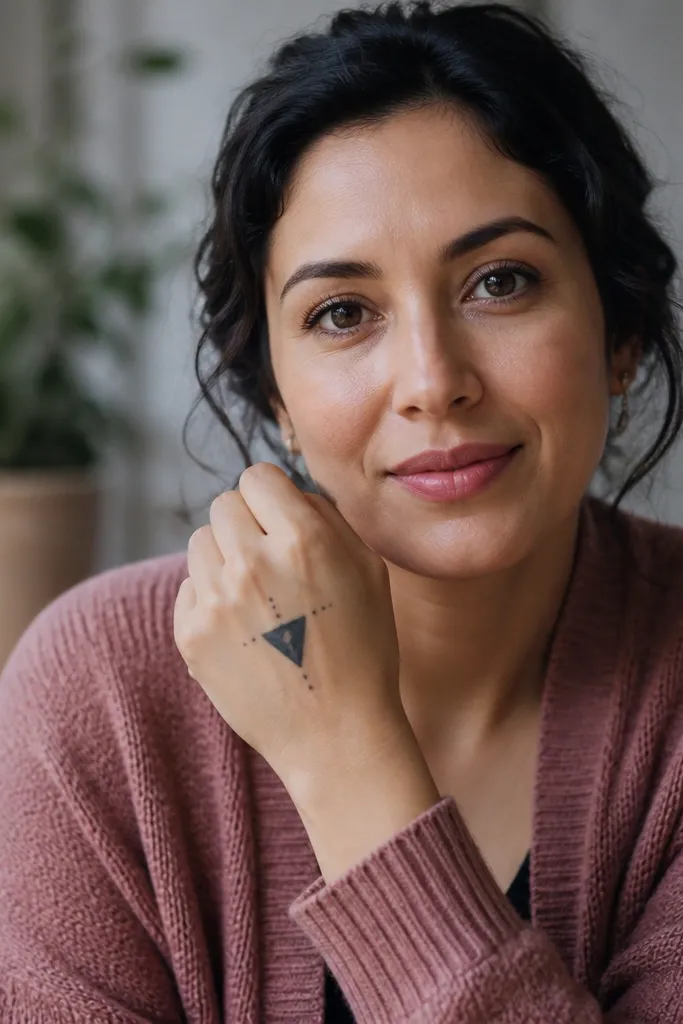
Triangles make simple mehndi look structured and modern. This design places one triangle motif on the back of the hand, with rounded fill inside and dot accents on both sides. The shape gives you a clear “frame” for everything else, so your finger work doesn’t look like separate doodles. It’s warm because the triangle edges are outlined gently and the inside uses soft petal or teardrop fill rather than sharp lines. Great for people who want a clean aesthetic that still feels feminine.
Draw an inverted triangle on the back of the hand, starting near the wrist center and pointing toward the finger base area. Outline the triangle with a thin line, then fill the inside with small teardrops or petal shapes arranged in rows. On both sides of the triangle, add a vertical line with 3 to 4 dots spaced along it, aligned with the triangle corners. For the fingers, add a tiny dot cluster at each finger base and stop. Finish by drawing a thin wrist bracelet line that runs under the triangle base.
If your triangle looks uneven, adjust the outline first — filling will follow the outline.
Don’t overfill the triangle; leave gaps so the petal shapes stay readable.
14. Palm-Top Crescent With Finger Half Bands
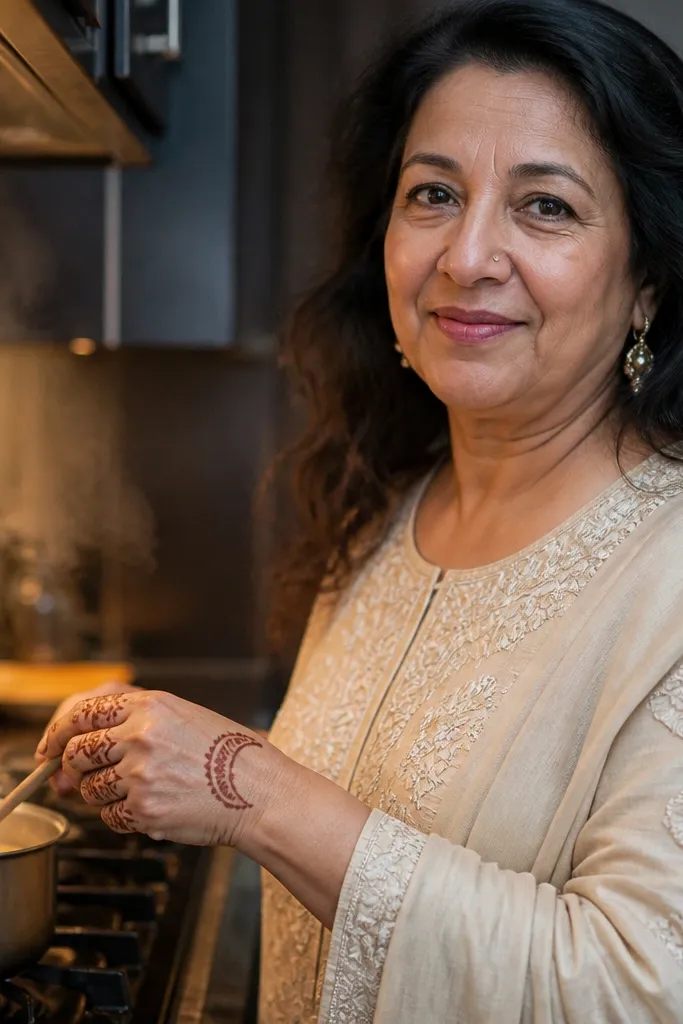
This design uses a crescent shape near the palm top edge, then repeats half bands on each finger. The crescent gives you a smooth, cozy curve, and the half bands make each finger look decorated without full coverage. It’s a smart pick for front-hand mehndi because the back of the hand stays open but still looks complete. You’ll also get a nice photo effect when your hand is slightly flexed — the crescent catches light and the half bands line up nicely. It’s simple but not bland because the crescent is your hero shape.
Start with a crescent line on the back of the hand near the palm edge, curving outward toward the thumb side. Add small dot fillers along the crescent ends, then outline the crescent with a second line for clarity. For each finger, draw a half band that wraps from the finger base along one side up to the first joint, leaving the other side mostly blank. Add 2 to 3 tiny dots inside each half band near the top. Finish with a thin bracelet line around the wrist connecting to the crescent ends.
Keep all half bands the same height; uneven heights make simple designs look accidental.
Avoid covering the full finger circumference — half bands are what keep it airy.
15. Thumb-Arch Frame With Tiny Dot Burst

This design fixes the most common front-hand problem: the thumb area looks empty or lopsided. The thumb-arch frame pulls attention to the most visible part of your hand, while the tiny dot burst adds texture without making the whole thing heavy. It also balances well with short designs because you’re not filling the entire palm — you’re building a clean “window” shape around the thumb. It photographs well because the arch lines catch contrast and the dot burst reads instantly even from a distance. It’s beginner-friendly but still looks intentional, taking about 20 to 30 minutes.
Start with a light guide line. Draw a thin vertical line from the base of the thumb up toward the outer crease, then sketch an arch that curves from just above the thumb base to the outer edge of the hand near the first finger gap. Keep the arch height about 1.5 to 2 cm and the arch width about 2.5 to 3 cm, so it stays front-facing and doesn’t spill onto the wrist. Next, add the dot burst. Place 10 to 14 tiny dots inside the arch, clustered toward the top of the arch, then connect 3 to 4 short dot-to-dot strokes like little spokes. Finish by outlining the arch with a slightly thicker line and adding one small comma-shaped leaf at the arch bottom on the thumb side.
Pro tipUse a henna cone with a fine tip and practice the dot size on scrap paper first — consistent dots make the burst look crisp. Let the first thin arch dry 3 to 5 minutes before tracing over it for a cleaner, darker outline.
AvoidAvoid drawing the arch too wide — if it hits the side of the index finger, the design stops reading as a thumb frame.



