
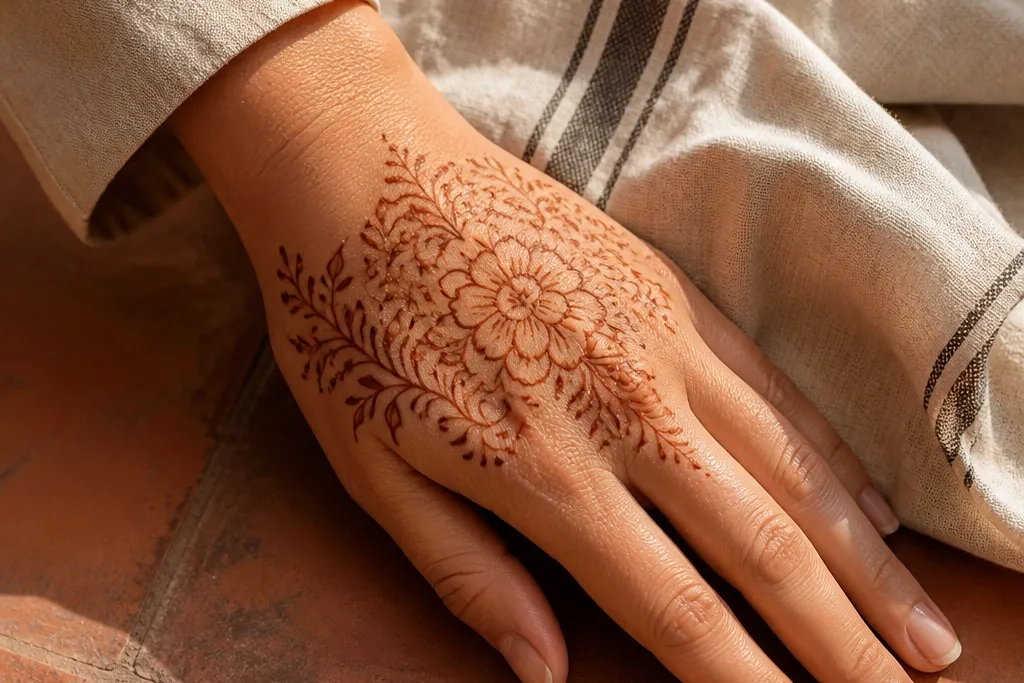
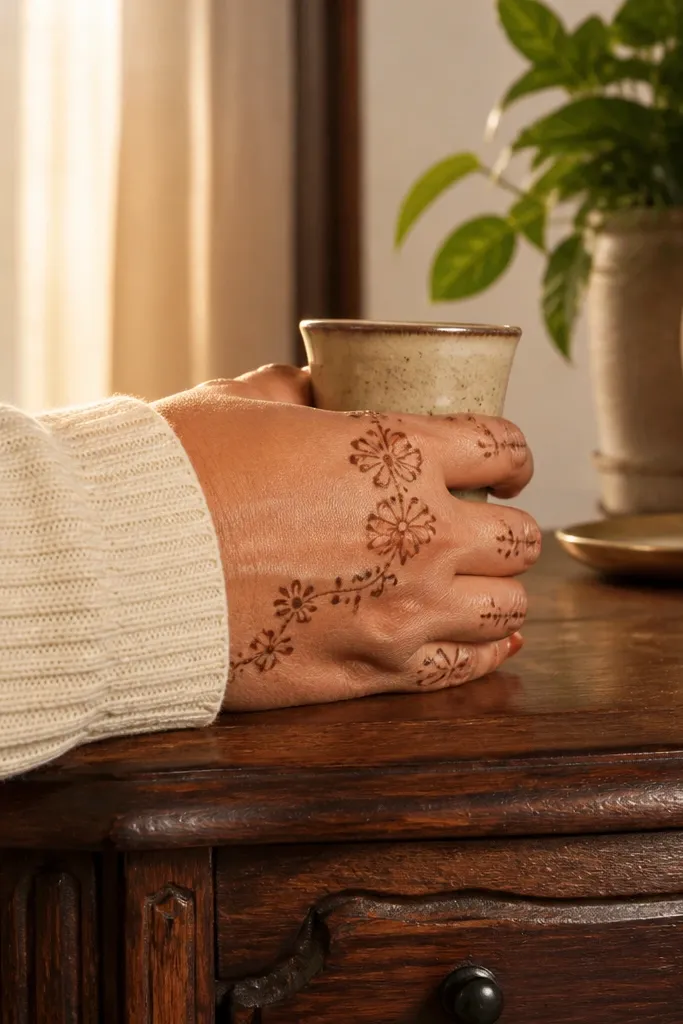
1. Marigold Knuckle Flower with Side Buds
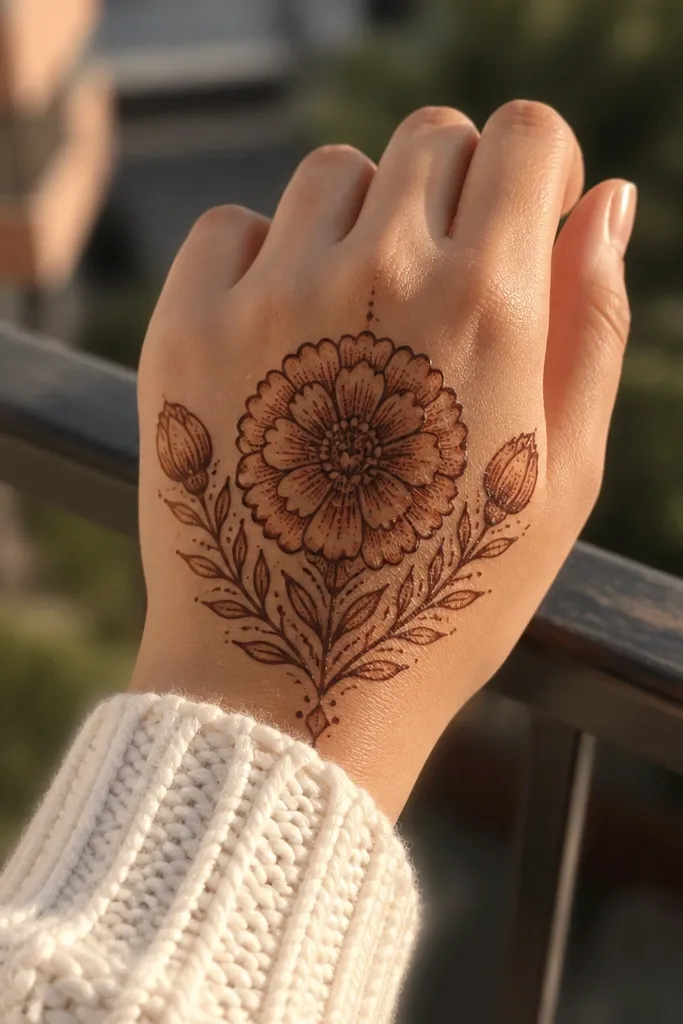
This design is a clean fix for the “too empty” back hand. The main marigold flower sits over the knuckles, so the pattern catches attention without swallowing the whole hand. Side buds repeat the warm floral theme and keep the edges from looking unfinished. The center petals get thickened so the henna stain looks bold, while the buds stay lighter for depth. It’s beginner-friendly because you’re repeating one petal shape and placing buds symmetrically.
Step 1: Pipe a big marigold flower in the center of the back hand, starting with a small circle, then adding 8-10 teardrop petals around it. Step 2: Add two small bud flowers on each side along the outer edges of the hand, keeping them slightly lower than the main bloom. Step 3: Connect buds to the center with short curved vine lines and finish with tiny dots inside the petal gaps. Let the lines dry fully before you add any extra thickening on the petals.
Pro tipTo make petals look crisp, squeeze a steady paste bead and keep your hand moving in one smooth arc per petal.
AvoidDon’t place the main flower too high on the back hand — it should sit over the knuckles for the best balance.
2. Wrist Band Floral Frame with Open Center
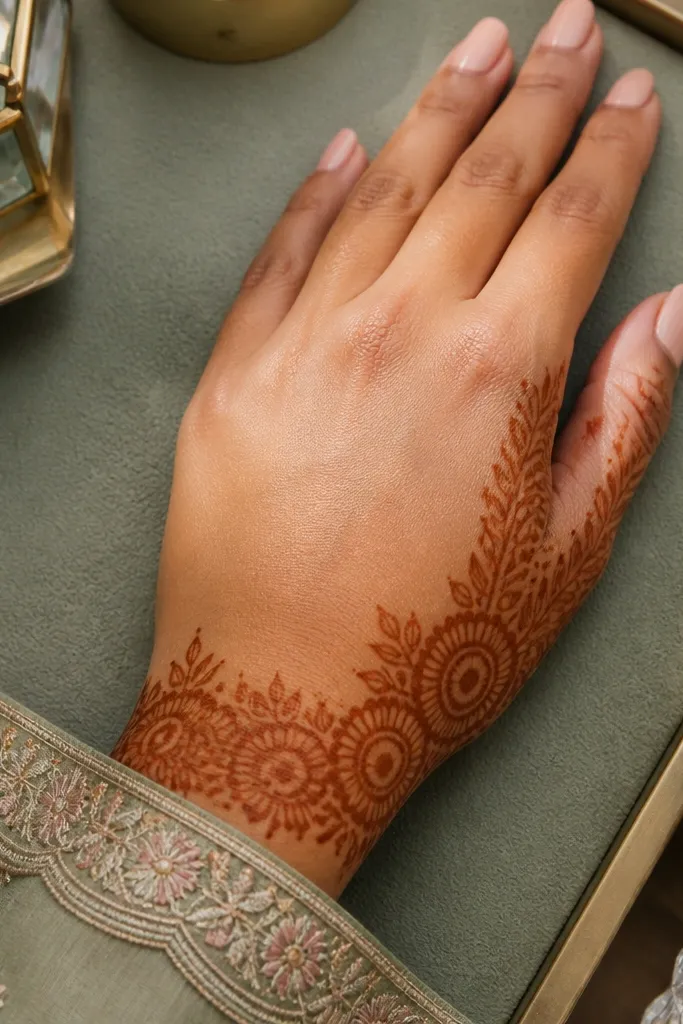
If your back hand patterns usually blur into one block, this one gives you structure. A floral wrist band anchors the design at the base, while the center stays open so your skin shows through and the stain looks lighter and warmer. The frame idea makes the design look intentional even when henna fades unevenly. Use small petals and micro dots to fill only the frame areas, not the center. It’s great for people who want a visible pattern but still want a clean, airy look.
Step 1: Draw a thin vine line around the wrist crease area, then add small 5-petal flowers spaced evenly across it. Step 2: From the top of the wrist band, draw two curved vertical vines that arc toward the center of the back hand, leaving the middle open. Step 3: Place one medium flower at the center between the vines and connect it with a few tiny dot clusters. Finally, add a light petal border only along the frame edges.
Use a slightly thicker cone only for the wrist band flowers so the base looks strong in photos.
Skip full-center filling — if you cover the open area, you lose the frame effect.
3. Side Vine Roses with One Big Bloom
This is the “pretty but not busy” option. One big bloom in the middle gives a focal point, while side vines carry smaller rose-like petals up toward the knuckles. The curled vine motion follows the hand’s shape and makes the design look cozy instead of rigid. It photographs well because the thick flower lines stand out and the vines create a warm diagonal rhythm. It’s a strong pick when you want floral charm without filling every gap.
Step 1: Outline a medium rose in the center using layered teardrop petals around a small dot center. Step 2: Draw two parallel curved vines — one from the thumb-side edge and one from the pinky-side edge — tapering them as they go upward. Step 3: Place small rose buds along each vine at 2-3 points, then add tiny dot clusters between buds. Finish by connecting the vines to the center rose with short petal arcs.
Keep vine lines thin and consistent thickness; thick vines will crowd the roses.
Don’t put the side vines straight up and down — the curves are what make it look warm.
4. Three-Flower Vertical Ladder
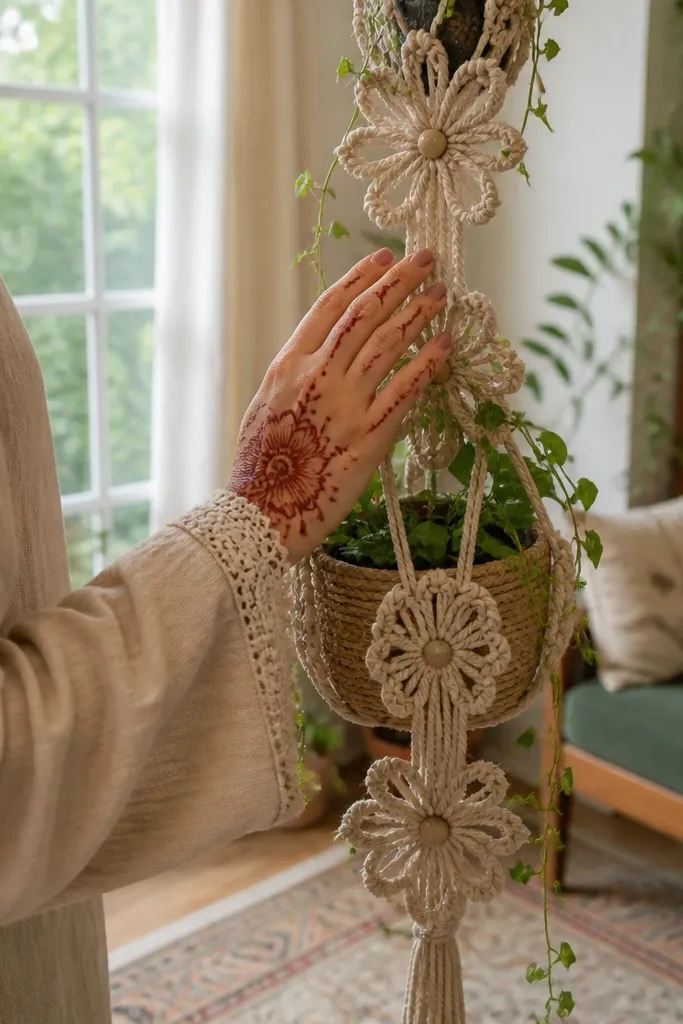
This one is for back hands that need a clear, easy layout. Three flowers stacked like a ladder create a neat vertical flow that looks intentional in any lighting. The petals can be thick for a bold center and thinner for the upper and lower blooms. Add light vine curls between flowers so the spacing looks decorative, not empty. It’s fast to draw and still looks like “real mehndi,” not a sketch.
Step 1: Draw a faint vertical guideline from the knuckle area down toward the wrist crease. Step 2: Place three flowers along that line: one large over the knuckles, one medium mid-way, and one smaller near the wrist. Step 3: Connect flowers with short curved vines and add micro dots at the corners of each flower. Let each flower line set before adding extra dots to avoid smudges.
Pro tipIf you want a stronger stain, outline each flower twice — once for shape and a second time for thicker lines.
AvoidDon’t overfill between flowers; the negative space is part of the ladder look.
5. Paisley Teardrop Floral Cluster
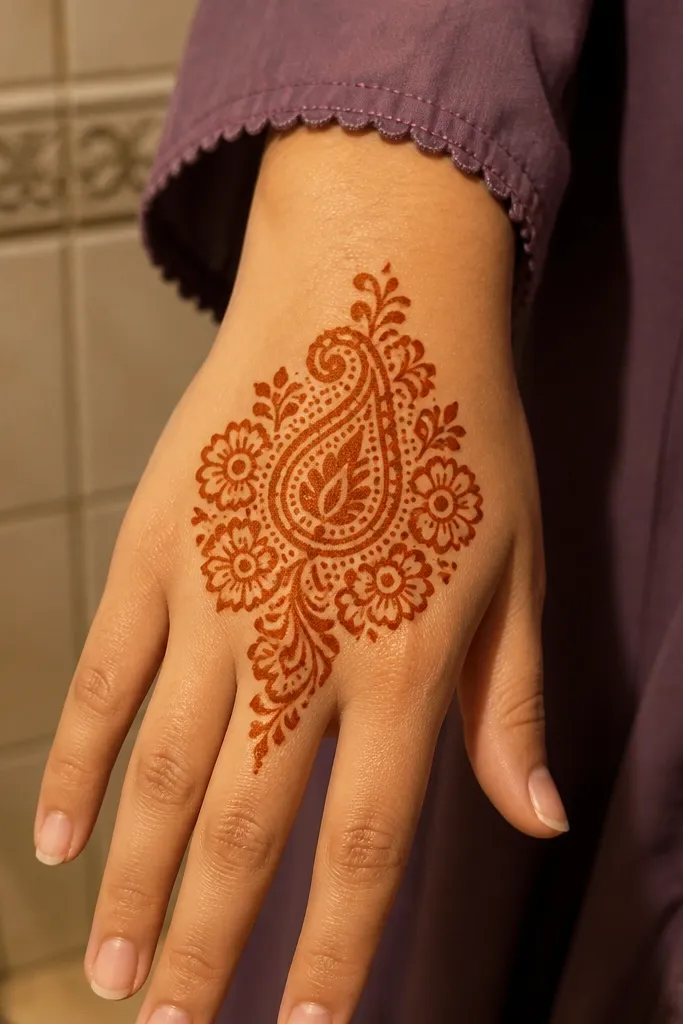
Paisley teardrops make floral designs look warm and traditional without turning into heavy lace. This cluster sits over the knuckles so your back hand looks styled even when your fingers are relaxed. The teardrops create natural variation in line thickness, especially if you slightly widen the middle of each teardrop. Add tiny dots inside the teardrop curls to keep it photogenic. It’s best for people who like curvy shapes more than straight borders.
Step 1: Draw one large paisley teardrop at the center of the back hand, with a small spiral curl at the top. Step 2: Surround it with 4-6 smaller teardrops, alternating directions so they fan outward. Step 3: Add two mini flowers at the base of the cluster and connect everything with thin vine lines. Finish by placing tiny dot clusters in the negative spaces between teardrops.
Widen the henna line slightly at the center of each teardrop for a stained “glow” effect.
Avoid sharp corners — keep teardrops smoothly rounded so the cluster looks soft.
6. Knuckle Flower Medallion with Dots
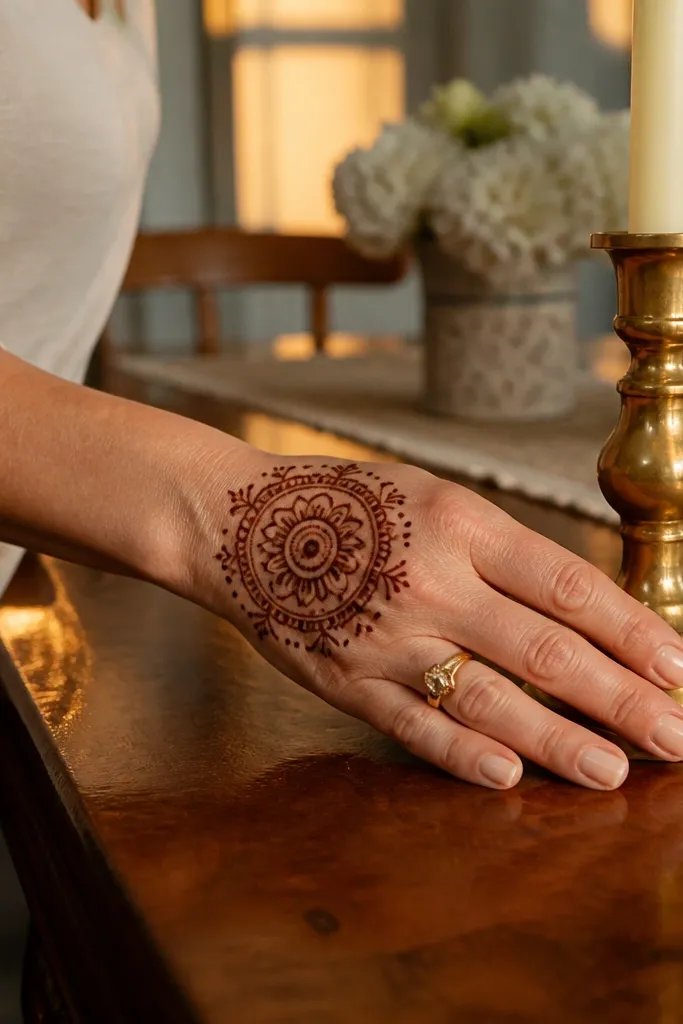
A medallion is the easiest way to make the back hand look complete. This one uses a circular floral core over the knuckles, then adds dot texture in a ring around it so the design has depth. The warm look comes from marigold-like petals and rounded dot trails. It’s also forgiving when your henna isn’t perfectly even — dots hide minor unevenness. Great for medium coverage when you want a strong focal point.
Step 1: Draw a circular base over the knuckles, then place 8-12 marigold petals around it. Step 2: Add a second inner ring of small petals or a thin scallop border. Step 3: Sprinkle dot clusters around the outer edge like a halo, then connect the halo to the center with 4-6 short vine strokes. Finish with a few tiny dots on the finger-side edges of the medallion.
Pro tipDot work looks clean when you keep each dot separate — don’t smear dots into lines.
AvoidDon’t make the medallion too large — if it covers the whole back hand, it stops looking like a medallion.
7. Sunburst Floral with Center Bloom
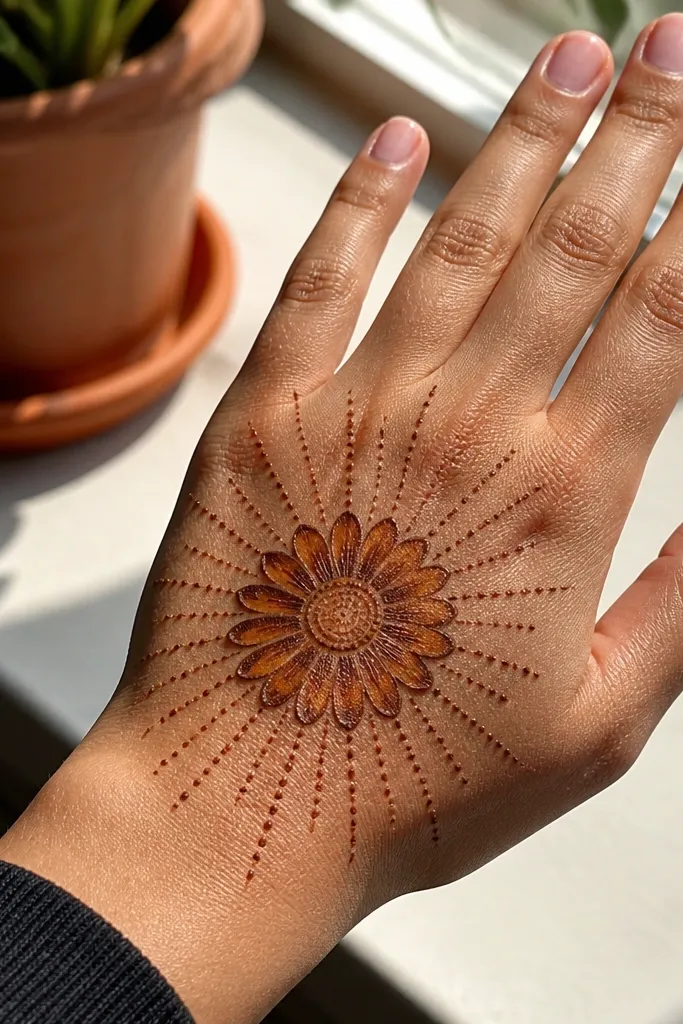
Sunburst designs look cozy because they feel like warm light spreading. Start with one centered flower, then add radiating petal rays that stop before the wrist. The rays create structure and make the back hand look fuller without heavy filling. Use thin lines for the rays and thicker petals for the center bloom. This is a great choice when you want a design that reads clearly from a distance in photos.
Step 1: Place a medium flower in the center of the back hand and outline its petals thick. Step 2: Add 10-14 radiating petal rays from the center, spacing them evenly and tapering the ends. Step 3: Fill the base of a few rays with tiny dots, not all of them, to keep it warm and airy. Finish by adding one curved vine line from the outer rays toward the wrist edge.
Keep ray ends pointed but not sharp; slightly rounded tips look better after drying.
Don’t crowd the rays too tightly — spacing is what makes the sunburst look intentional.
8. Half-Moon Floral Corner on Back Hand
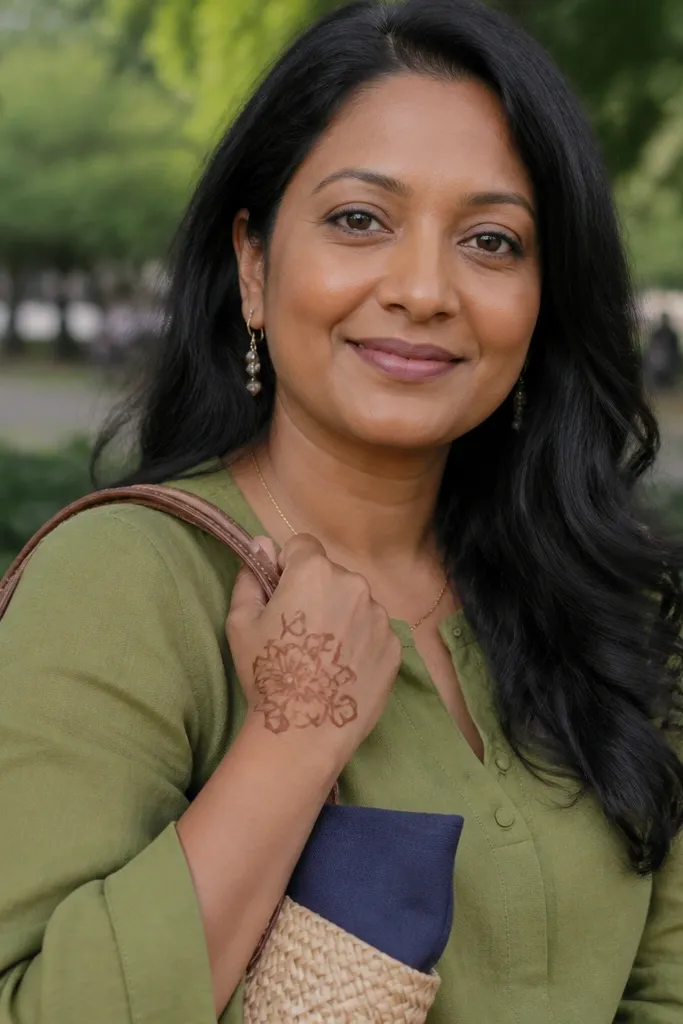
This design works for asymmetry without looking messy. A half-moon floral corner sits on one side of the back hand, usually the thumb side, then small vines curl toward the center. It looks cozy because the shapes are rounded and the negative space keeps it light. Pair it with a tiny center bloom so the layout still feels balanced. It’s a strong option when you want something different from full center patterns.
Step 1: Draw a half-moon outline starting near the thumb-side knuckle and curving toward the wrist crease. Step 2: Fill the half-moon with 6-8 small flowers or stacked teardrop petals. Step 3: Add a small center bloom inside the open area near the middle and connect it with 2-3 short vine curls. Finish with dot clusters at the half-moon edges.
If your hand smudges easily, draw the half-moon outline first, then fill — outline sets faster.
Skip long straight borders — half-moon shapes need curves to look warm.
9. Rose Bud Border Across Knuckles
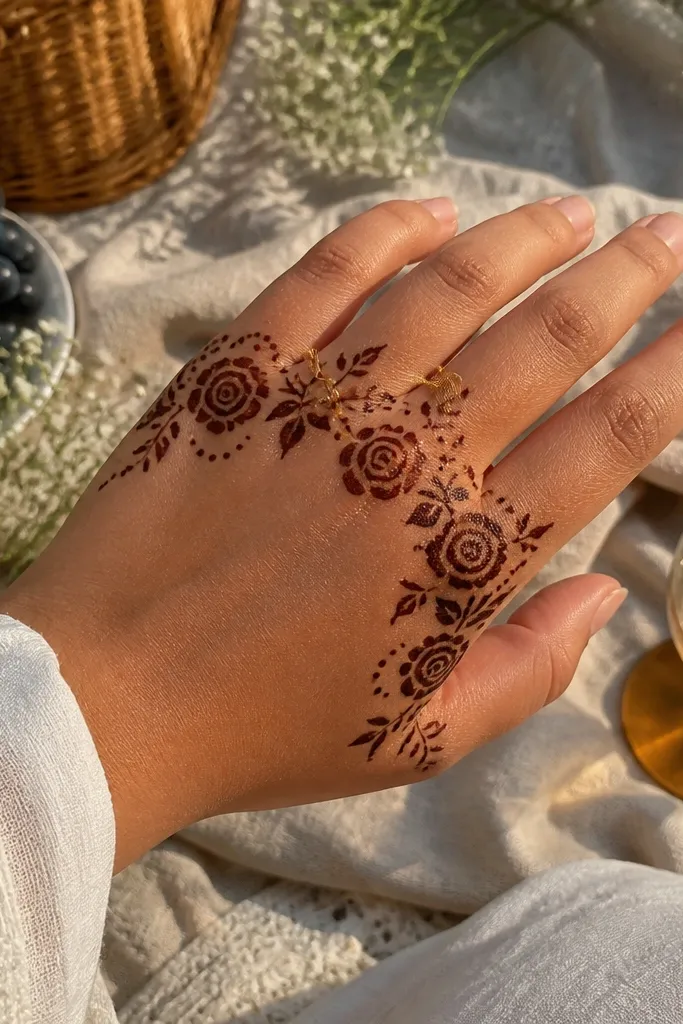
A border across the knuckles instantly frames your hand and makes it look styled. This design uses rose buds lined in a gentle arc, then fills the spaces with tiny dots and short vine curls. It gives you that cozy floral look while keeping the center relatively clean. The effect is especially flattering on hands with prominent knuckles because the border follows the natural structure. It also works if you want to keep fingers free for typing or wearing bangles.
Step 1: Draw an arc line across the knuckles from thumb side to pinky side, slightly higher in the middle. Step 2: Place small rose buds along the arc at even intervals, each bud made with a teardrop stack around a dot. Step 3: Add short vine curls between buds and sprinkle tiny dots in the gaps. Finish by adding two small corner flowers at the ends of the arc.
Use the same bud size across the arc — consistency makes it look like one deliberate pattern.
Don’t extend the border onto the palm — it makes the design feel stretched and less neat.
10. Vine + Flower Mesh for Back Hand
This is for people who want floral coverage but still want it to look airy. The “mesh” is made by weaving thin vine lines into small diamond-like spaces, then placing tiny flowers at key intersections. It reads as cozy warm because the flowers are rounded and the vines are delicate. The trick is to keep the mesh lines thin and let the flowers carry the visual weight. It’s a bit more work than a single medallion, but it looks gorgeous in full photos.
Step 1: Draw a loose grid of curved lines across the back hand, forming small diamond spaces. Step 2: At each third intersection, add a tiny 5-petal flower with a dot center. Step 3: Connect some flowers with short vine curls so the mesh feels continuous. Finally, outline the main vine path around the grid with a slightly thicker line for definition.
Pro tipIf you’re worried about smudging, keep the mesh lines lighter and thicker only around the flowers.
AvoidDon’t fill every diamond — too much filling turns mesh into a solid block.
11. Wrist to Knuckles Garland Bloom
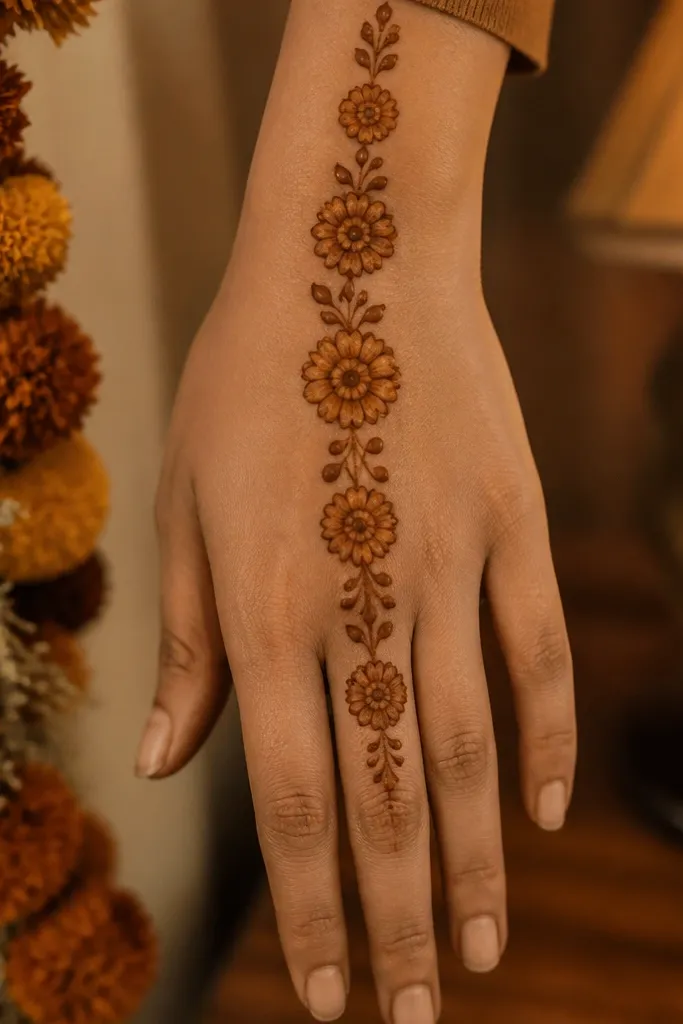
Garlands look cozy because they move. This design runs like a floral ribbon from the wrist upward, with blooms that get slightly larger as they approach the knuckles. The warm effect comes from marigold petals and small teardrop fillers between flowers. It’s excellent for events because it looks complete even if your fingers don’t have extra mehndi. The layout is simple: one main garland line plus 2 support vines that frame it.
Step 1: Draw a main curved vine line starting at the wrist crease and ending at the knuckle center. Step 2: Add flowers along the vine, increasing size every 1-2 blooms, and insert teardrop fillers between them. Step 3: Add two thinner vines on either side that start near the wrist and stop before the wrist band ends. Finish with tiny dots along the vine line where the petals meet.
Pro tipMake your vine line slightly thicker where flowers attach; it makes the garland look stitched.
AvoidDon’t let the garland wander off-center — keep it following the back hand curve.
12. Single Big Flower with Feathered Petal Trail
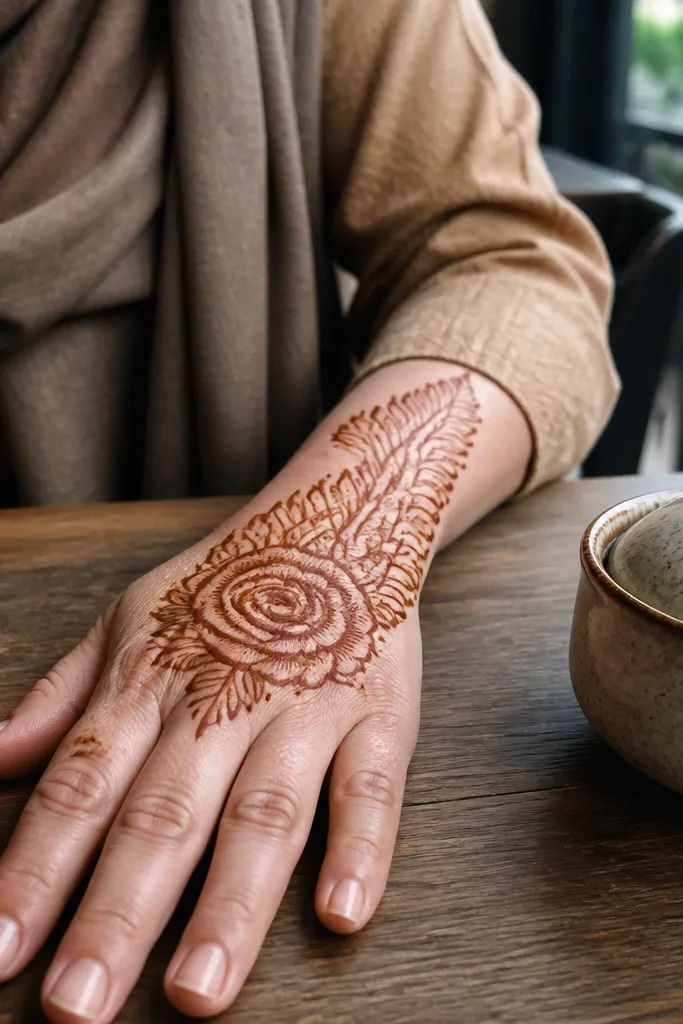
If you want maximum wow with less filling, this one is it. One big flower anchors the back hand, and a feathered petal trail extends toward the wrist like soft marigold wings. It looks warm because the petals are layered and slightly tapered. This also hides uneven henna fade because the trail creates movement across the surface. It’s a great choice when you want a clean center but still want a design that feels full.
Step 1: Draw a large flower over the knuckles with thick petals and a small dot center. Step 2: Create a feathered trail by drawing 6-10 small petal groups in a diagonal line toward the wrist. Step 3: Add tiny dot separators between petal groups and connect the trail to the main flower with a thin vine. Finish with a light wrist curl line at the end of the trail.
Use a slightly tighter hand for the first 3 petal groups so they look denser near the flower.
Avoid straight-line trails — feathering needs a curved diagonal.
13. Two-Tier Floral Corner with Tiny Buds
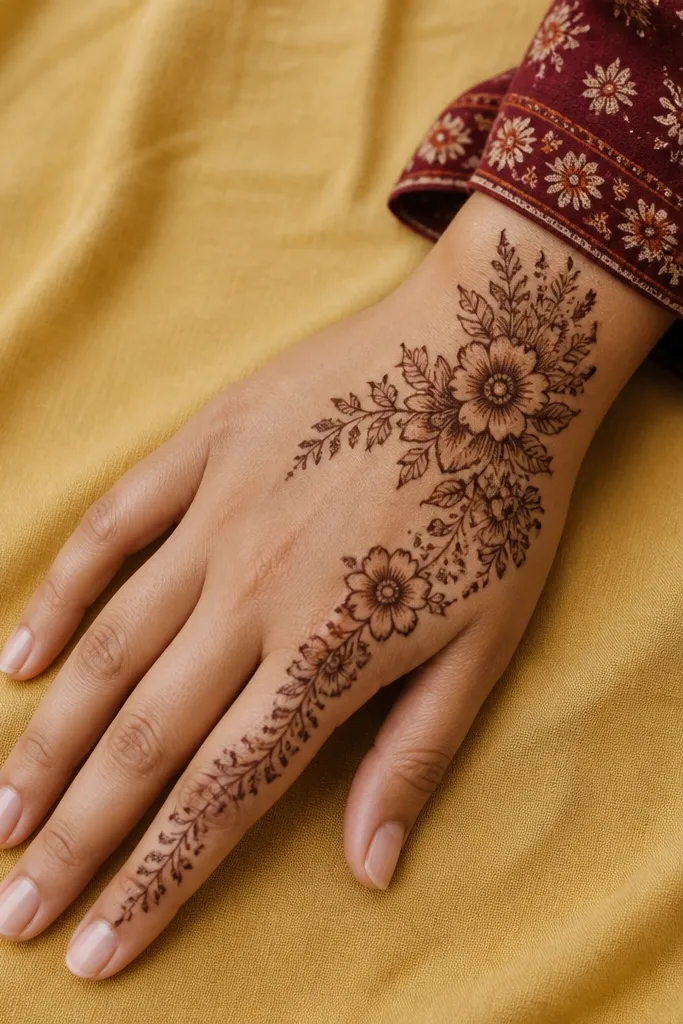
Two-tier corners are flattering because they frame the hand without covering it completely. This design has a larger corner floral cluster near the wrist side, then a second smaller tier that creeps inward toward the knuckles. Tiny buds fill the path so it looks warm and connected. It’s a good pick for people who want a neat shape that stays photogenic as henna fades. The corner placement also makes your back hand look more “designed” even if you skip finger mehndi.
Step 1: Draw a corner floral cluster near the wrist crease, using 2-3 larger flowers and a few teardrop fillers. Step 2: Add a second tier of 3-5 smaller flowers slightly above and toward the center, keeping spacing even. Step 3: Connect both tiers with thin vine lines and add tiny bud shapes along the vines. Finish with dot clusters at the corners of the tier shapes.
Outline the larger tier flowers thicker than the smaller tier so the design has a clear hierarchy.
Don’t make both tiers the same size — it loses the tier effect.
14. Lattice Vine with Floral Knuckle Corner
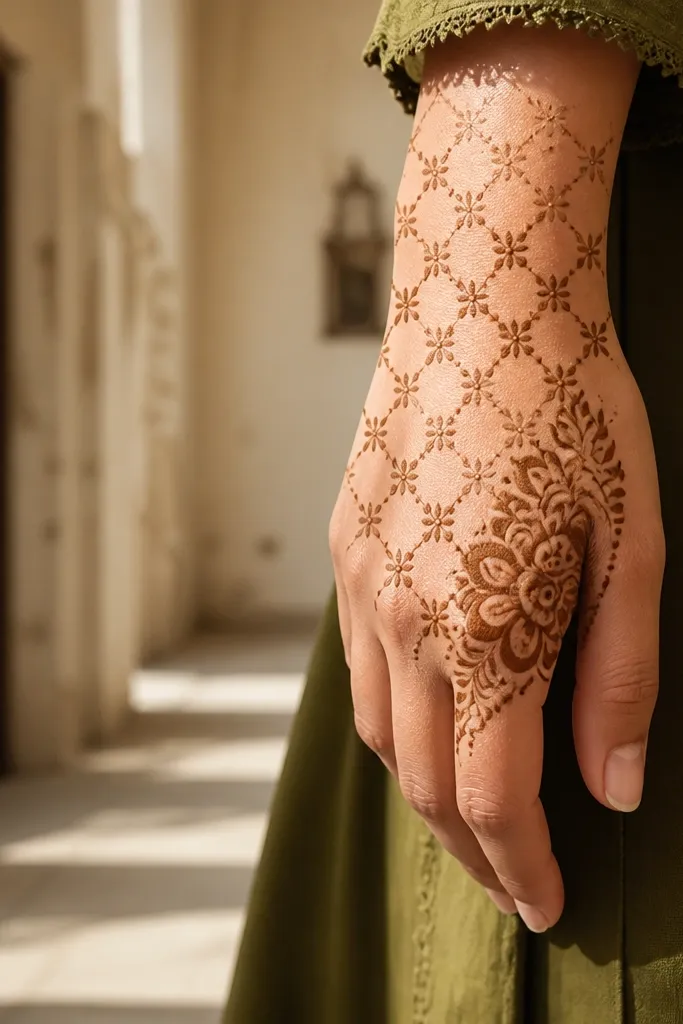
This is the cozy warm design for people who like structure. A light lattice vine pattern fills most of the back hand area, but the real focus is a floral cluster tucked into the knuckle corner. That combination creates a balanced look: decorative background, clear focal point. It also looks good in photos because the lattice lines catch light and the cluster pops. You’ll spend more time on lines, but the final look is worth it.
Step 1: Draw thin curved lattice lines across the back hand, forming small diamond gaps. Step 2: At one knuckle corner, place a 5-6 petal floral cluster with a dot center and one teardrop accent. Step 3: Reinforce the lattice around the cluster with slightly thicker vine lines so the cluster looks framed. Finish by adding tiny dots at a few lattice intersections near the center.
Keep lattice lines consistent thickness; thick-thin-thick will look uneven after drying.
Don’t overfill the lattice with dots — keep dots sparse so the pattern stays breathable.
15. Warming Marigold Trio Across Back Hand
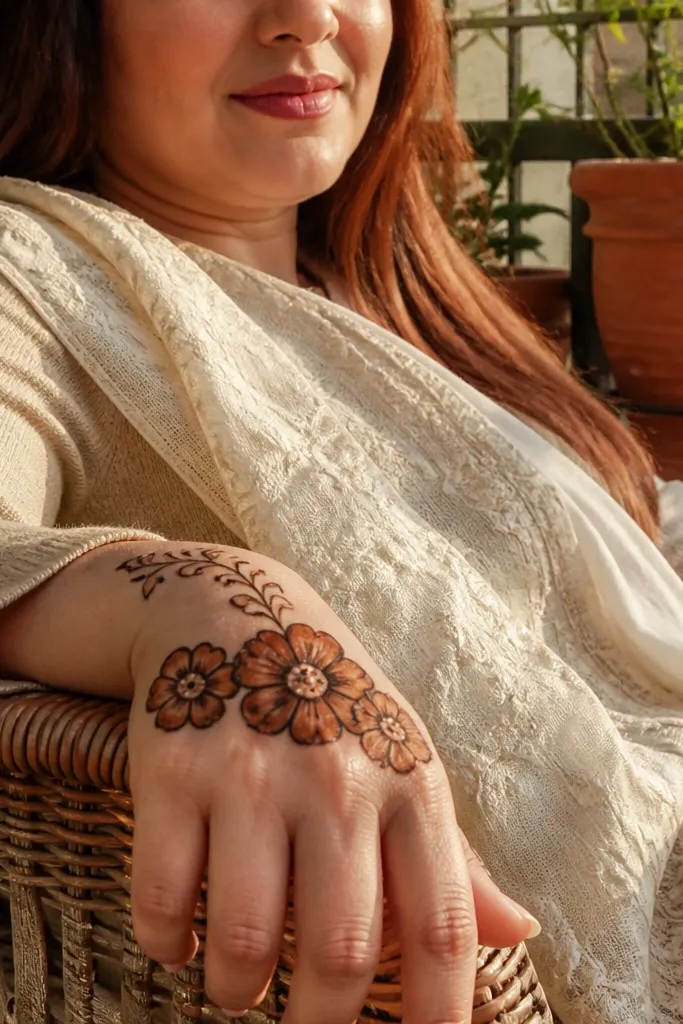
Three marigolds spaced across the hand look cohesive and warm. This design starts with one main flower at the knuckles, then adds two smaller marigolds on either side with a wrist hint vine. The warm vibe comes from thick petal outlines and a dot center in each bloom. It’s a smart choice when you want a symmetrical look without doing a full border. The petals also give you natural thickness variation, which helps the stain look richer.
Step 1: Draw the main marigold over the knuckles, with 10-12 rounded teardrop petals around a dot center. Step 2: Add two smaller marigolds near the outer edges of the back hand, aligning them with the main flower’s height. Step 3: Connect each marigold to the center using thin vine arcs, then add a short vine line toward the wrist on both sides. Finish with a few dot clusters between the vines and flowers.
If your cone tip is thick, outline the petals first, then re-pipe the petal edges only once more for crispness.
Don’t push all three flowers too close — spacing keeps it elegant and readable.
16. Rose Vine with Bow-Like Petal Loops
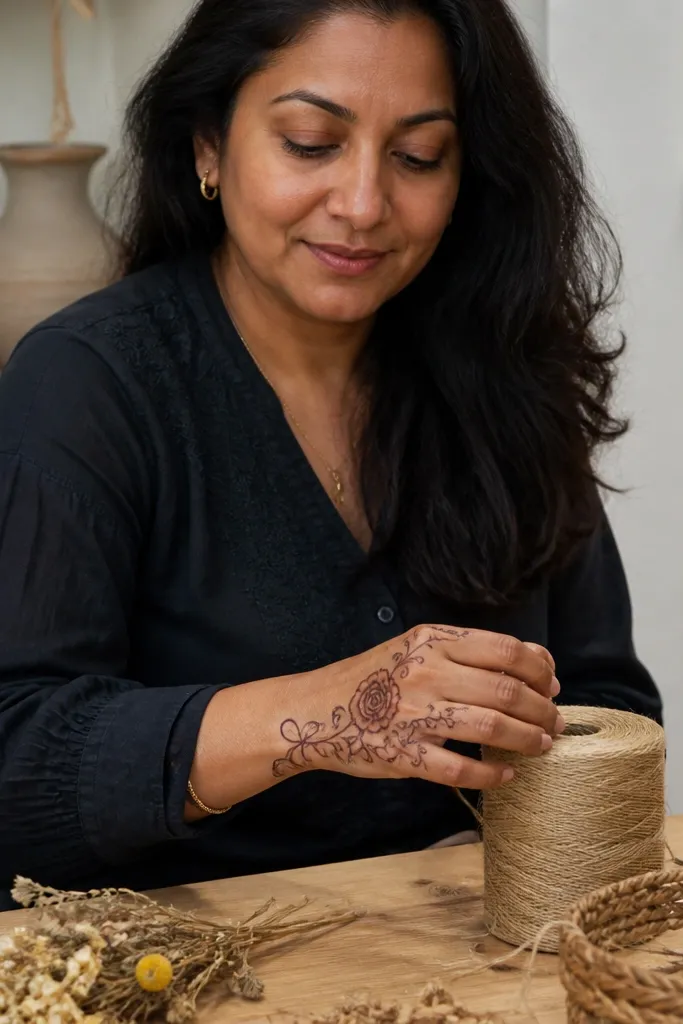
This design makes the back hand look playful and cozy. Instead of simple straight petals, you use bow-like loops that sit along a vine line near the knuckles. The main rose bloom can be medium-sized, then the loop details bring texture and softness. It photographs well because the loops create tiny highlights in the henna lines. It’s a great option when you want a floral pattern that feels more “soft and girly” than heavy.
Step 1: Draw a center vine curve from the wrist toward the knuckle area. Step 2: Add one medium rose bloom at the top of the vine, then pipe 4-6 bow-like loops along the vine sides using two mirrored teardrops. Step 3: Fill loop centers with a tiny dot and connect loops with short micro lines. Finish with a thin border vine around the top bloom so it looks framed.
Practice one loop shape on paper first — symmetry makes it look intentional on the hand.
Avoid making loops too big — small loops look more delicate and cozy.
17. Wrist Band + Knuckle Flower Burst
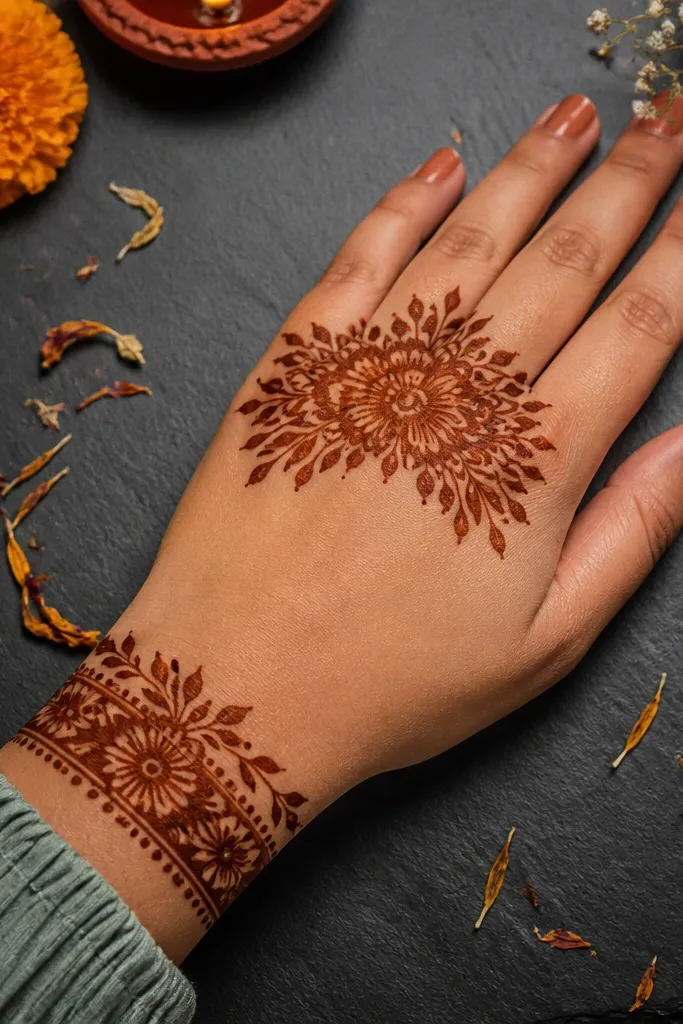
This is the go-to for a back hand that needs drama without clutter. A floral wrist band anchors everything, and the knuckles get a burst pattern made from overlapping petals. The burst looks warm because it uses marigold-like petals and rounded teardrops as accents. Keep the burst slightly higher than the center of the hand so it frames the knuckle area. It’s perfect for parties, festive evenings, and hands that need a strong focal point.
Step 1: Create a wrist band with small flowers and a thin vine line running between them. Step 2: Over the knuckles, draw a burst by layering 3-4 flower shapes that overlap slightly, with thick outlines on the outer petals. Step 3: Add teardrop accents between overlapping petals and finish with tiny dots along the burst edges. Finally, connect the burst to the wrist band with two short curved vine lines.
Overlap petals by a small amount only — too much overlap turns it into a blob.
Don’t let the wrist band expand too wide up the hand — keep it near the wrist crease.
18. Petal Fan with Micro Dots
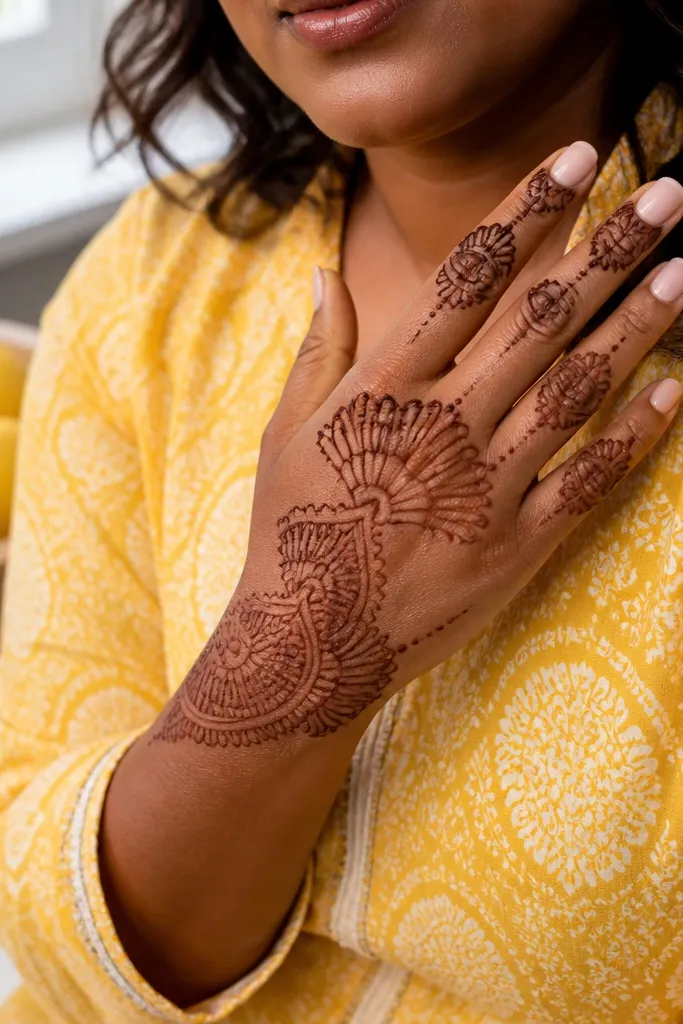
Fans are clean and photogenic. This design places a fan of petals starting near the knuckle center and spreading outward toward the thumb side, then balances it with a smaller fan on the pinky side. Micro dots fill the gaps so the pattern looks detailed without getting heavy. The warm floral feel comes from marigold petal shapes and rounded dot texture. It’s a smart choice if you want something that looks neat even when your fingers move.
Step 1: Draw a center point on the back hand where the petal fans begin. Step 2: Pipe a fan of 7-9 marigold petals spreading toward the thumb side, then repeat a smaller fan of 4-6 petals toward the pinky side. Step 3: Fill the space between fans with micro dots arranged in small clusters. Finish by adding a thin vine line that curves under the fans toward the wrist.
Use dots in clusters of 3-5, not random single dots — it looks more intentional.
Skip long continuous dot lines — they look messy after drying.
19. Floral Drop Chain Along the Side
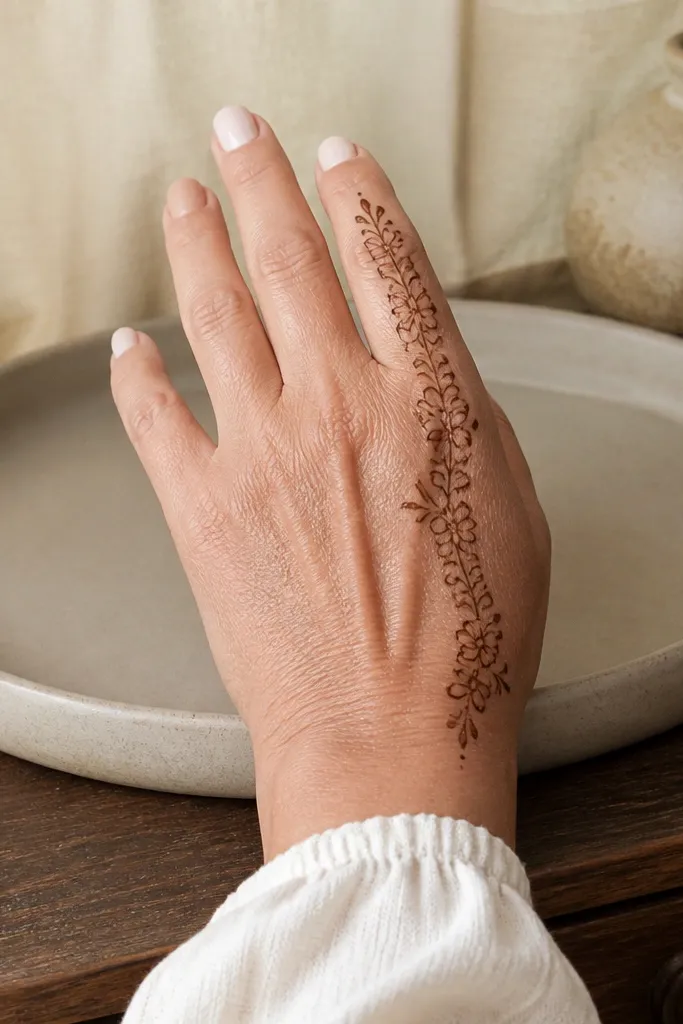
Side chain designs give you that cozy warm look with minimal coverage. A chain of floral drops runs along one side of the back hand, usually from the wrist up toward the knuckles, with small connecting vines. Each drop has a flower or teardrop inside, so it reads as floral even from a distance. The center stays lighter, which makes the design feel airy and flattering. It’s also easier to keep clean if you have a busy day and don’t want thick-heavy coverage.
Step 1: Draw a thin curved vine line along the chosen side edge of the back hand. Step 2: Along that vine, pipe floral drops at 4-6 points, each made with a teardrop outer shape and a small petal cluster inside. Step 3: Add tiny connecting dots between drops and finish with one small flower near the knuckle end. Keep the chain slightly angled so it follows your hand curve.
Pro tipMake the top drop slightly larger than the rest — it creates a natural focal point.
AvoidDon’t place drops in a straight line across the hand — the curve is what makes it look soft.
20. Center Bloom with Two Curved Border Vines
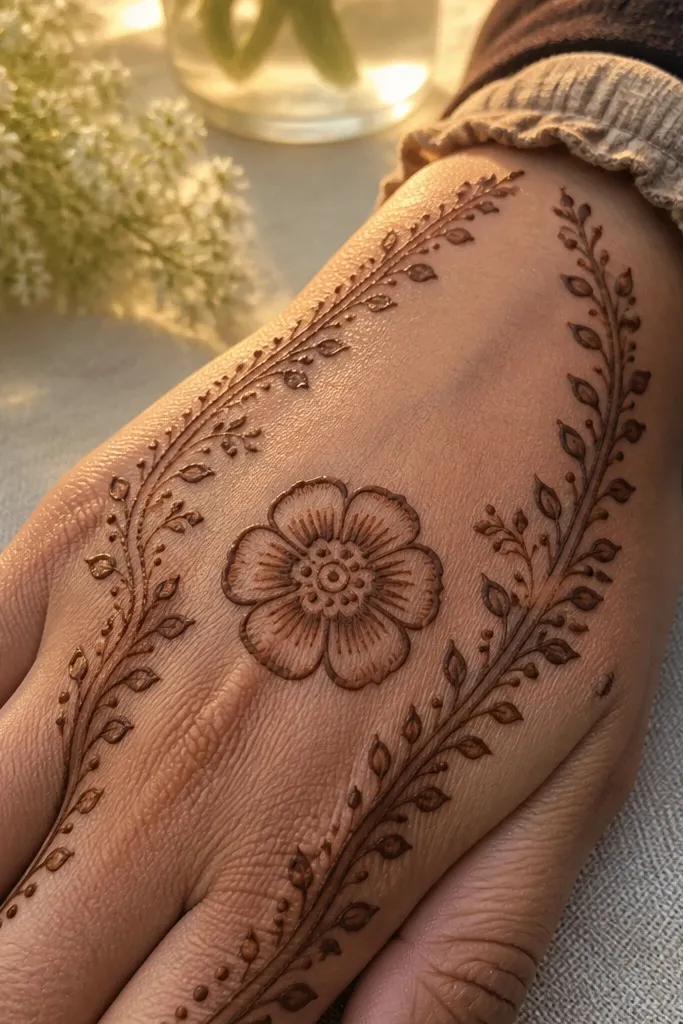
This is a clean framing design that makes your back hand look “finished” without covering everything. You get one center bloom, then two curved border vines that trace the shape of the hand. The vines create a warm floral outline, and the center bloom adds the main focus. Add small dot textures on the vines for interest. It’s a great option when you want to copy a design that looks good at any density level — you can keep it light or add more petals on the center bloom.
Step 1: Draw one medium flower over the knuckles with thick petal outlines and a dot center. Step 2: Pipe two curved border vines — one on each side of the flower — that arc toward the wrist and stop before the wrist crease. Step 3: Add tiny dot clusters along the border vines at 2-3 points and connect dots to the center bloom with short petal strokes. Finish with a small teardrop accent at the bottom of the center flower.
Keep border vines thin; thickness belongs to the center bloom petals.
Avoid thick border vines — they steal attention from the center.
21. Warm Floral Spiral over Knuckles

Spirals are cozy because they feel like movement. This design places a floral spiral over the knuckles, starting with a small center bud and wrapping outward with teardrop petals. It looks warm because each petal is rounded and the spiral keeps the coverage balanced. Add micro dots along the spiral path so the design looks textured, not empty. It’s a solid choice for someone who wants a unique look but still wants a clear, repeatable pattern.
Step 1: Place a small dot center on the knuckle area, then pipe a tight spiral line around it. Step 2: Along the spiral turns, add teardrop petals that follow the spiral curve, one petal per turn or every other turn. Step 3: Add tiny dot clusters between petal bases and finish with two larger petal clusters at the outer spiral edge. Keep the spiral contained so it doesn’t spill down the back of the fingers.
Pro tipMake the first spiral turn slightly thicker so the center looks anchored in photos.
AvoidDon’t let the spiral loosen too much — a tight spiral reads cleaner after drying.
22. Teardrop Flower Garland with Wrist Accent
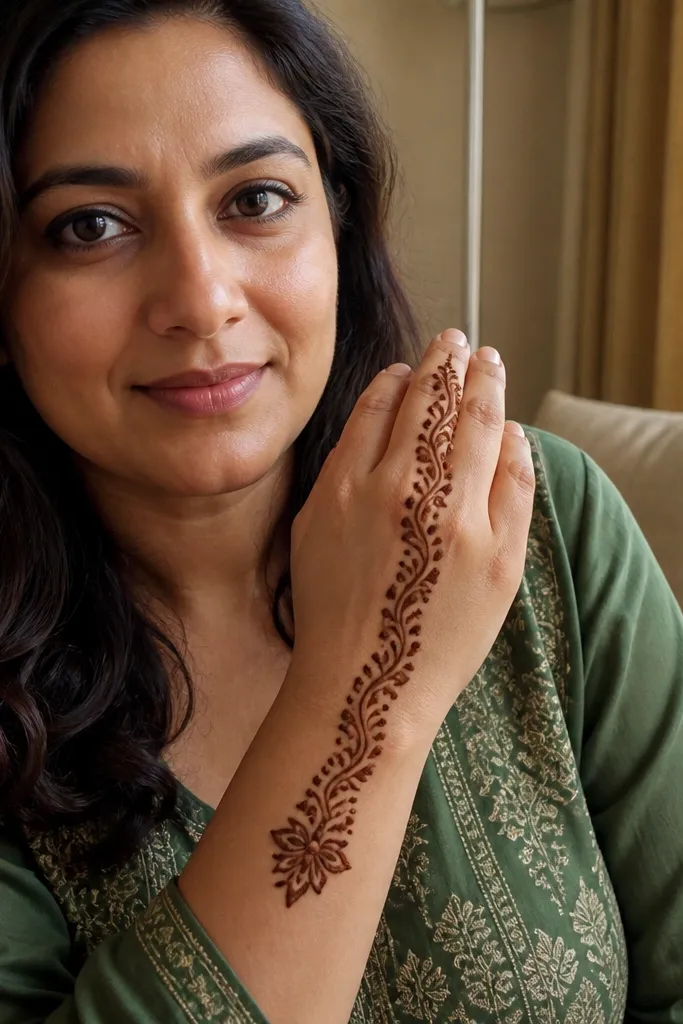
This is a warm floral option that uses teardrops as the main language. A garland of teardrop flowers runs from the wrist toward the knuckles, with one extra accent bloom at the wrist end. The teardrop shapes create a cozy, slightly traditional feel, and the garland layout keeps it neat. It’s also easier than full lace because you’re repeating one teardrop-flower unit. Great for people who want a back hand design that still looks good when it fades.
Step 1: Draw a curved vine line from wrist crease to knuckle center. Step 2: Pipe teardrop flower units along the vine, each with a teardrop outer shape and 3-4 small inner petals or dots. Step 3: Add a single small accent flower near the wrist end and connect it with a short vine curl. Finish by adding tiny dot separators between teardrops.
Pro tipIf your cone tip is too narrow, widen teardrops by pressing a little longer at the bottom point.
AvoidDon’t make teardrops identical sizes — slight variation looks more organic.
23. Floral Corner + Center Medallion Combo
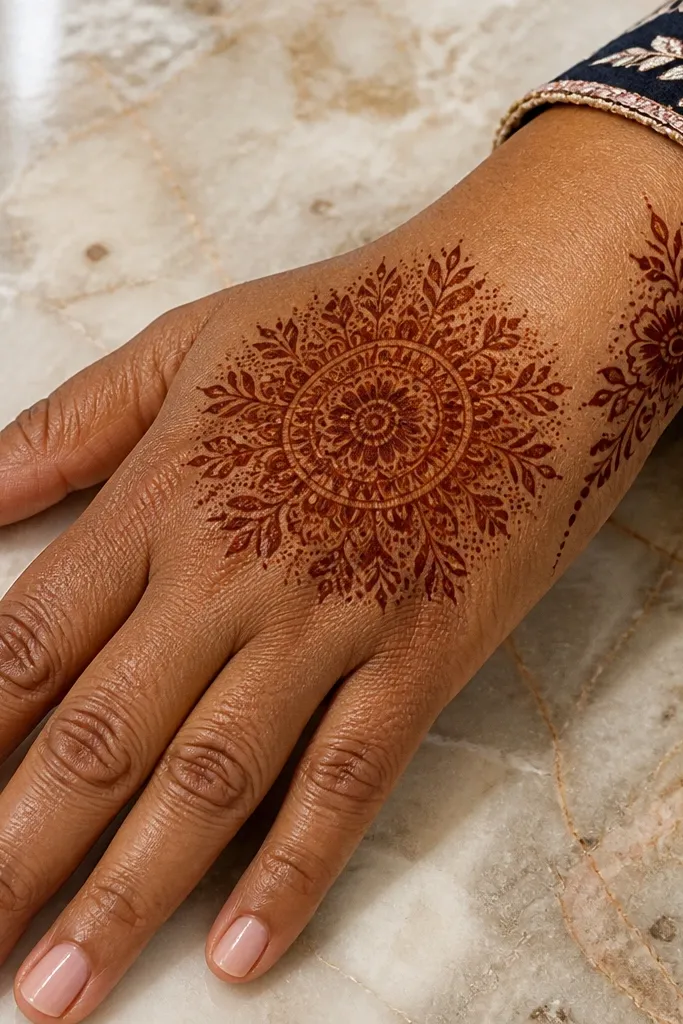
This combo gives you two focal points without looking crowded. A center medallion sits over the knuckles, while a smaller floral corner sits near the wrist side. The corner adds warmth and frames the medallion so the whole back hand looks styled. Use dot texture around the medallion to create depth, and keep the corner floral shapes slightly smaller. It’s a strong choice for someone who wants a “mehndi look” that feels complete even without finger coverage.
Step 1: Create a center medallion using a circular outline and 8-12 rounded petals around a dot center. Step 2: On one wrist corner, add a small cluster of 2-3 flowers and one teardrop accent, connected with a thin vine line. Step 3: Add tiny dot clusters around the medallion outer ring and connect one vine from the medallion toward the wrist corner. Let lines dry before adding extra dots.
Pro tipUse fewer vines connecting the two focal points; 1-2 clean connections look better than many small links.
AvoidAvoid placing the corner too close to the medallion — keep a small breathing gap.
24. Rose Buds in a Horizontal Arc
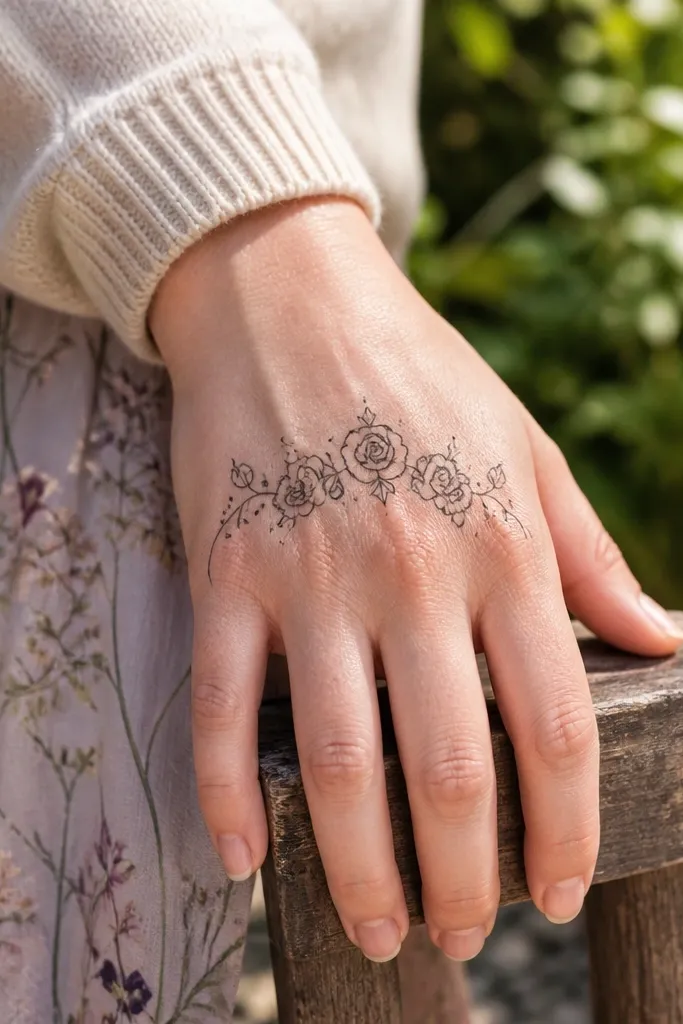
This is a photogenic back hand layout with a gentle horizontal rhythm. Rose buds line up across the knuckles in a soft arc, and the gaps get filled with tiny dots and short curl lines. It looks cozy warm because buds are rounded and the arc frames the hand. This design is great if you like symmetry and want a pattern that stays neat even when henna fades. It also works as a base if you later add finger mehndi.
Step 1: Draw a curved arc line from thumb-side knuckle to pinky-side knuckle. Step 2: Place rose bud units along the arc, each bud made with 5-6 teardrop petals around a dot. Step 3: Fill the arc gaps with small dot clusters and add two small vine curls at the arc ends. Finish with a thin wrist vine that touches the lowest bud point.
Pro tipKeep bud spacing even by marking 6-7 points on the arc before piping petals.
AvoidDon’t add extra flowers in the center gap — it should stay airy under the arc.
25. Floral Triangle on Back Hand with Curves
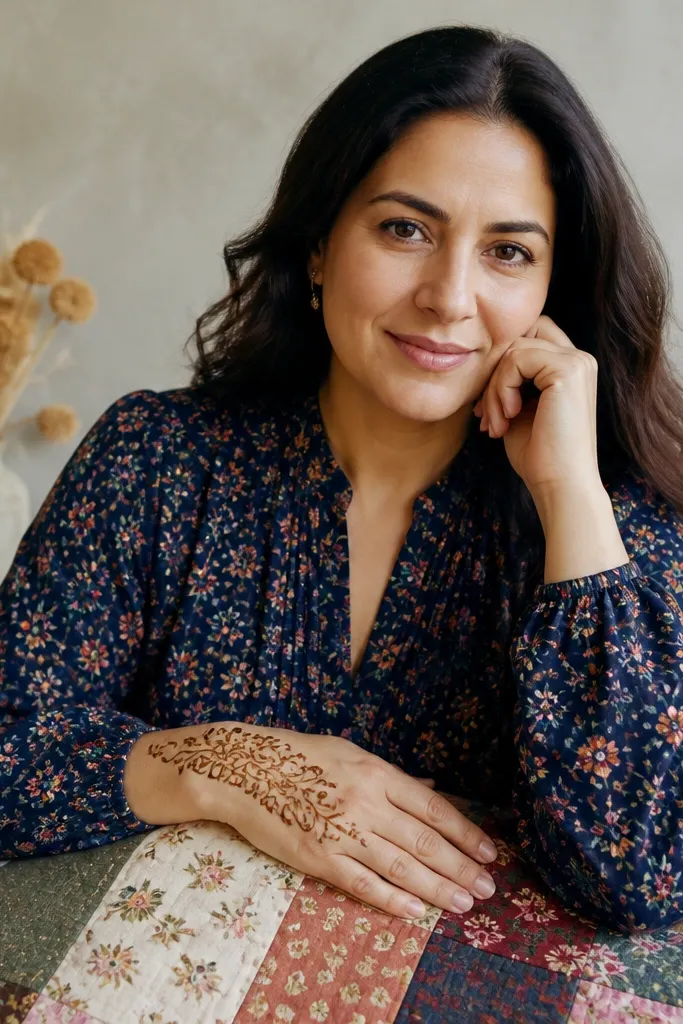
Triangles make designs look organized, and they photograph well because they create clear boundaries. This one places a floral triangle on the back hand, with curved vine edges instead of straight lines so it still looks cozy. The triangle points toward the wrist, and the base sits near the knuckles. Inside, use small marigold petals and dot clusters for warmth. It’s a good pick if you want a design that looks structured but still soft.
Step 1: Draw a triangle outline with curved edges — base near knuckles, point toward wrist. Step 2: Fill the triangle with small marigold petals arranged in rows, leaving tiny gaps for skin. Step 3: Add dot clusters between rows and finish by adding a small vine curl along the triangle edges. Keep the top center slightly thicker with a bigger petal cluster for focus.
Pro tipIf your triangle edges shake, trace the outline lightly first, then pipe over it once.
AvoidAvoid straight, sharp triangle corners; curved edges are what keep it cozy.
26. Wrist Vine with Knuckle Flower Ladder
This design feels like a warm floral staircase. A wrist vine runs upward, and small flowers step along it until they reach a larger bloom at the knuckles. The stepped placement makes it look intentional and avoids the “random scattered flowers” look. It’s also practical: it takes less time than full lace but still looks full when photographed. Choose this if you want a back hand pattern that looks neat from every angle.
Step 1: Draw a vertical vine line from wrist crease toward knuckles, slightly curved to match your hand. Step 2: Add small flowers at intervals along the vine, increasing size as they approach the knuckles. Step 3: At the top, place one larger bloom and connect it back down with two short side vines. Finish with tiny dots around the base of each flower on the vine.
Keep the vine line smooth and continuous; bumps make the whole ladder look uneven.
Don’t overcrowd flowers on the lower wrist section — leave breathing space.
27. Floral Medallion with Side Teardrop Dangles
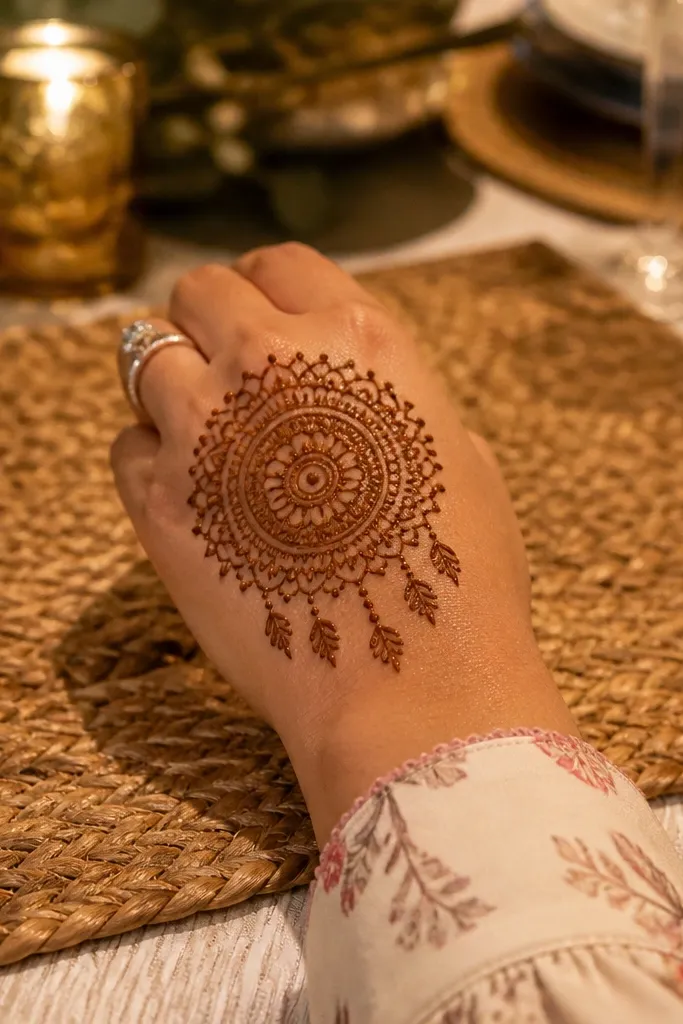
Medallions plus dangles is a warm, feminine combo that fills the back hand without going heavy. The center medallion sits over the knuckles, while teardrop dangles hang from its sides like gentle ornaments. The teardrops can be plain or filled with micro dots to add texture. This design is great if you want a statement look but still want a clear focal point. It also helps hide small gaps because the dangles cover uneven areas.
Step 1: Draw a circular medallion over the knuckles using a flower ring of 9-12 petals around a dot center. Step 2: On both sides of the medallion, add 2-3 teardrop dangles, each starting from the outer ring and tapering downward. Step 3: Fill teardrops with 2-3 tiny dot clusters or a small inner petal. Finish by connecting dangles back to the medallion with thin vine lines.
Keep dangles slightly different lengths; exact symmetry looks stiff.
Avoid making teardrops too wide at the top — they should feel like ornaments, not blocks.
28. Cozy Rose Swirl with Tiny Buds
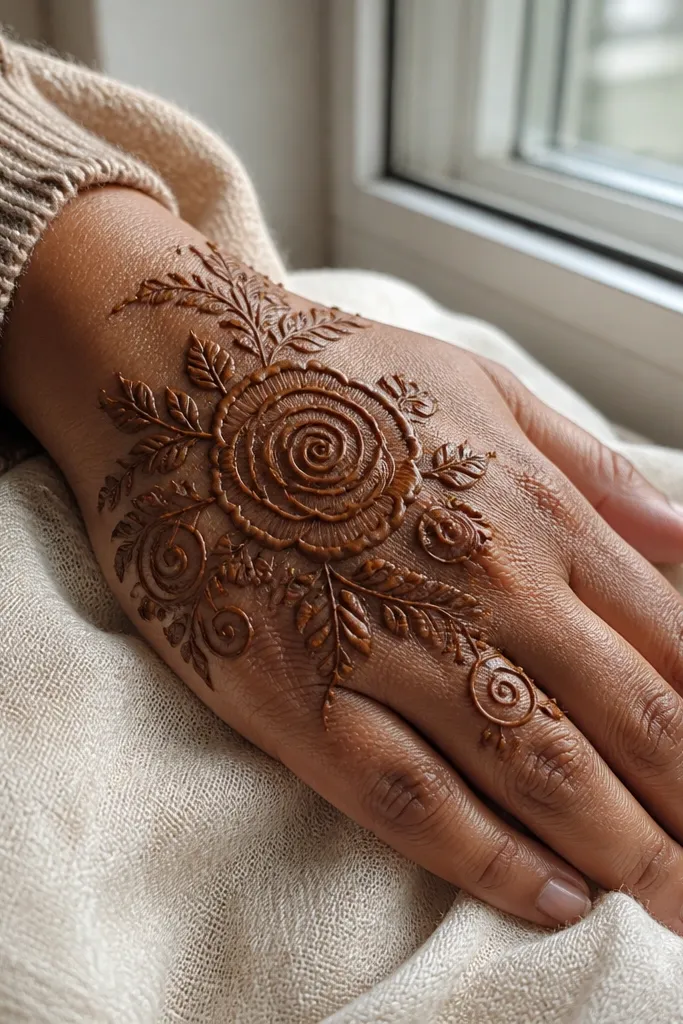
A swirl gives the design that cozy, wrapped feeling. Place a rose swirl near the knuckles, then add tiny buds around the spiral turns so the pattern looks full without filling every space. The warm floral look comes from rounded petals and dot centers. This is a good choice when you want something that feels decorative but still easy to adjust if your hand size is different. It’s also forgiving if your cone line breaks — the swirl hides small imperfections.
Step 1: Draw a gentle spiral starting from the knuckle center and end toward the wrist side. Step 2: At each spiral turn, pipe a tiny rose bud with 5 petals around a dot. Step 3: Add one larger rose at the top of the spiral for focus, then connect the spiral with thin vine lines. Finish with micro dots between buds and along the outer spiral edge.
Pro tipUse a slightly thicker line only on the top rose; the rest should stay delicate.
AvoidDon’t overfill the spiral with large petals — tiny buds keep it cozy and airy.
29. Lace-Like Floral Border with Center Space
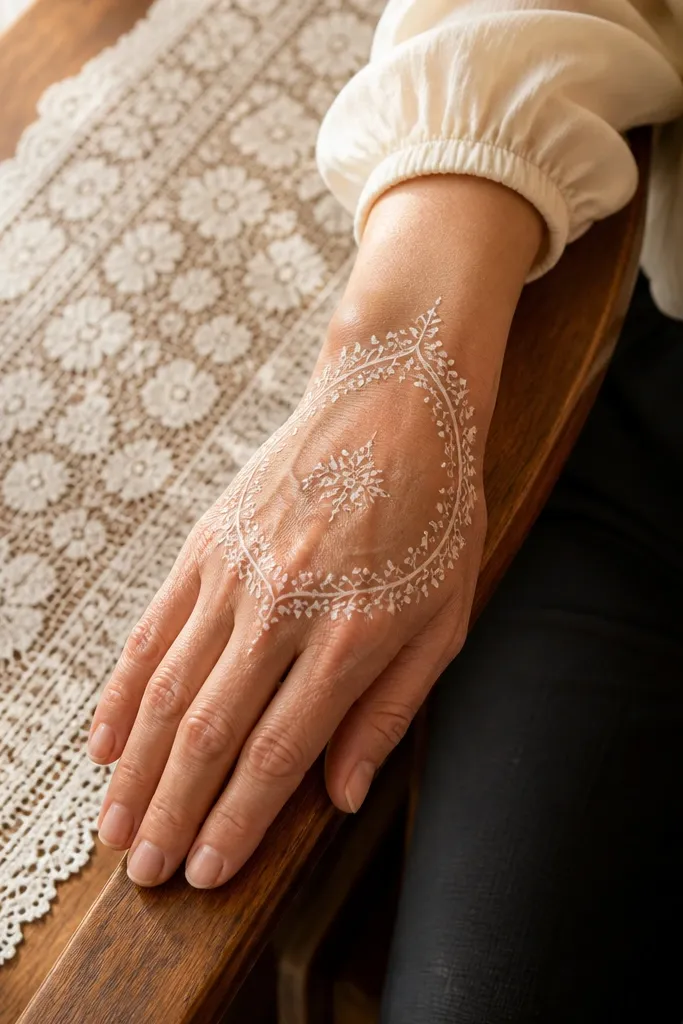
This design gives you the “lace” look without going full coverage. A floral border wraps around the back hand near the knuckles, and the center stays open with a small flower cluster. The border is made of small petals, dots, and short vine loops, which makes it look detailed in photos. It’s cozy warm because the border uses rounded marigold shapes and teardrop accents. Best for events where you want your back hand to look patterned but not heavy.
Step 1: Draw a border outline around the knuckle area, leaving the center space open. Step 2: Fill the border with small flower units and connect them with thin vine loops and dot clusters. Step 3: Place one small flower cluster in the center, then add 2-3 tiny teardrops near the base of the cluster. Finish by thickening only the outer border lines for definition.
Outline the border first, then fill inside — you’ll keep the shape cleaner.
Avoid filling the open center — lace borders need negative space to look good.
30. Wrist Bouquet with Two Side Blooms
A bouquet at the wrist makes the whole back hand look styled from the start. This design places a dense floral bouquet near the wrist crease, then two smaller side blooms rise toward the knuckles. The center between them stays lighter, so the pattern doesn’t feel crowded. Warmth comes from marigold petals and teardrop fillers in the bouquet. It’s a good choice when you want the design to look complete even if you don’t apply henna on fingers.
Step 1: Create a wrist bouquet by piping 4-6 small flowers tightly around a curved vine base at the wrist crease. Step 2: Add two side blooms above the bouquet, one on each side, aligned toward the knuckles. Step 3: Connect the side blooms to the bouquet with thin vine arcs and sprinkle tiny dots in the gaps. Finish with a small teardrop accent at the bottom edge of each side bloom.
Pro tipKeep bouquet petals slightly thicker than the side blooms so the wrist reads as the anchor.
AvoidDon’t spread the bouquet too far up the hand — keep it mainly at the wrist crease.



