
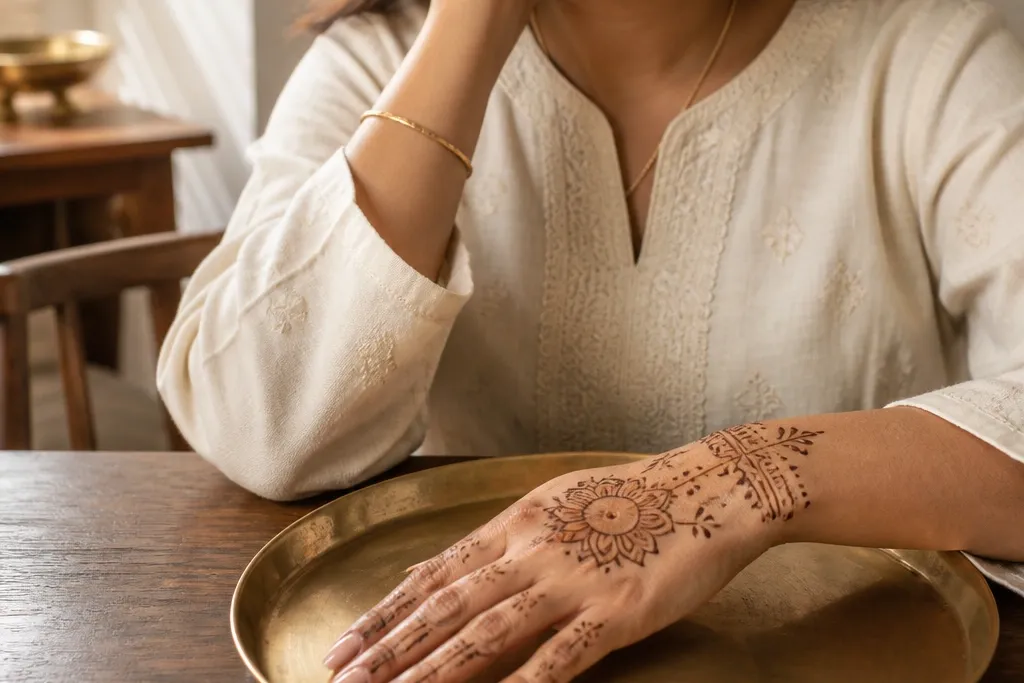

1. Wrist Fan Cuff with Center Spine
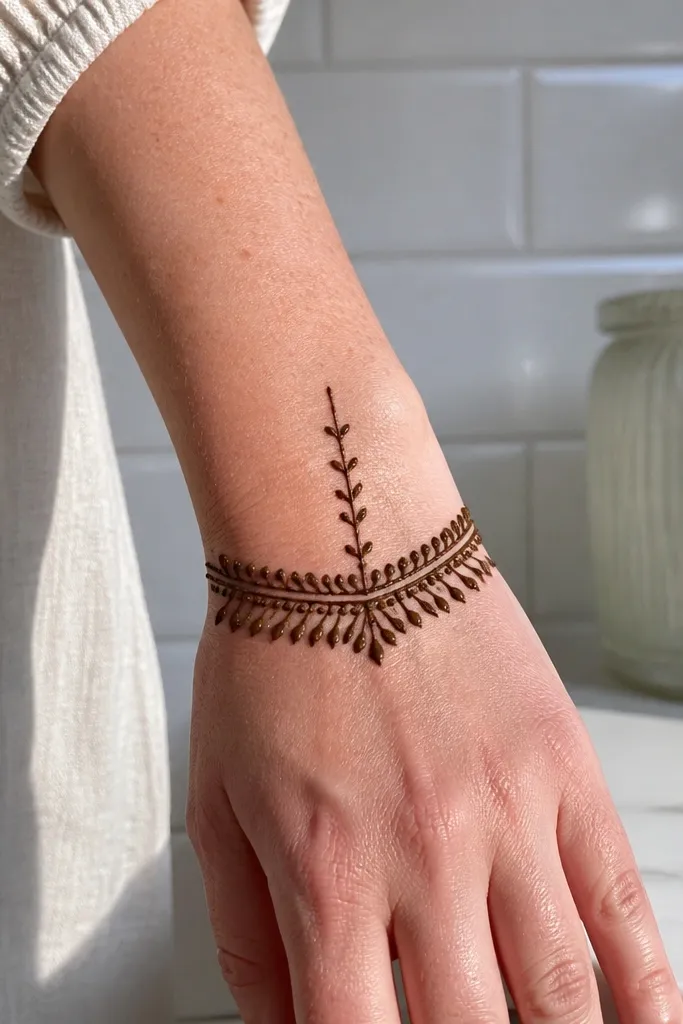
This is the cleanest “luxury minimal” structure because the wrist does the heavy lifting. Start with a tight fan cuff made of repeated leaf slivers on the wrist edge, then send one smooth spine upward toward the center of the back of the hand. The spine should have tiny side flicks only halfway up, so the middle stays airy. The result looks high-end because it reads like calligraphy — one flowing line, one controlled accent, and lots of skin showing through.
Step 1: Draw the wrist cuff first — a crescent at the wrist with 8-10 narrow leaf segments pointing upward. Step 2: From the cuff center, draw a single curved spine that reaches the midpoint of the back hand, then add 4-5 tiny side flicks on alternate sides. Step 3: Fill the cuff leaves with light internal dots, but keep the central area blank. Let the design dry fully before you clean edges with a cotton swab dipped in dry paste residue.
If your cone line gets thick, squeeze lighter and slow down only on the cuff leaves, not on the spine.
Don’t add extra branches above the midpoint — that’s where minimal turns messy.
2. Double Arc Ring with Micro Dots

A ring layout looks premium because it creates a boundary — like jewelry — without filling the whole back hand. Use two arcs: one closer to the wrist and one slightly higher, both following the natural curve of the hand. Between the arcs, add micro dot clusters at even intervals so the spacing stays intentional. This design photographs clean because the arcs are thin and the dots are tiny, so nothing smears into a dark mass.
Step 1: Outline the lower arc starting at one side of the wrist and ending at the other, keeping it thin and smooth. Step 2: Add the second arc parallel to the first, leaving a consistent gap of about 6-8 mm. Step 3: Place micro dots between arcs at regular spacing (aim for 10-14 dots total), then connect a few dots to the arcs with 1-2 mm short dashes. Finish by keeping the center of the hand completely empty.
Use a ruler or tape strip under your wrist to keep arc curvature even across both sides.
Don’t turn dots into blobs — if dots merge, the whole ring loses its luxury crispness.
3. Side Vine Ribbon Across the Back Hand
This one looks modern because it uses a diagonal motion instead of a full symmetrical spread. Draw a slim vine ribbon that runs diagonally from the wrist toward the back-hand center, then let it split into two tiny tendrils near the top. Small leaf pairs sit only along the ribbon — nothing sprawling into the knuckles area. The luxury feel comes from restraint: the ribbon has movement, while the negative space keeps it light and expensive-looking.
Step 1: Sketch the vine path lightly with your cone tip — start near the wrist outer edge and angle toward the center. Step 2: Build the ribbon by drawing a single stem line, then add leaf pairs on alternating sides spaced about 1-1.5 cm apart. Step 3: At the top, split into two short tendrils and end with a tiny dot tassel. Keep the rest of the back hand blank to preserve the airy look.
Make the ribbon line slightly thicker than the leaf outline for a layered, jewelry-like effect.
Don’t add a second diagonal vine — two ribbons make it look busy fast.
4. Geometric Cuff Grid with One Leaf Column
Geometric work reads high-end because it’s structured, not decorative chaos. Use a small grid or lattice inside the wrist cuff — think skinny squares and short connecting lines. Then add exactly one vertical leaf column rising from the cuff center toward the middle of the back hand. This gives contrast: hard geometry at the wrist and soft organic leaf shapes above. The look is minimal, clean, and very photogenic because the pattern edges stay crisp.
Step 1: Draw a wrist cuff band, then divide it into a lattice with 8-10 vertical lines and short horizontal connectors. Step 2: From the cuff center, draw a straight stem up about half the back hand length and add 5-7 leaf pairs on both sides of the stem. Step 3: Add tiny dots only at the leaf bases and where the lattice corners meet. Avoid filling any empty squares; keep them open.
Press the cone tip lightly on the lattice intersections so the line stays sharp instead of smudged.
Don’t extend the grid past the wrist — keep it contained.
5. Crescent Knot Wrist with Center Negative Space
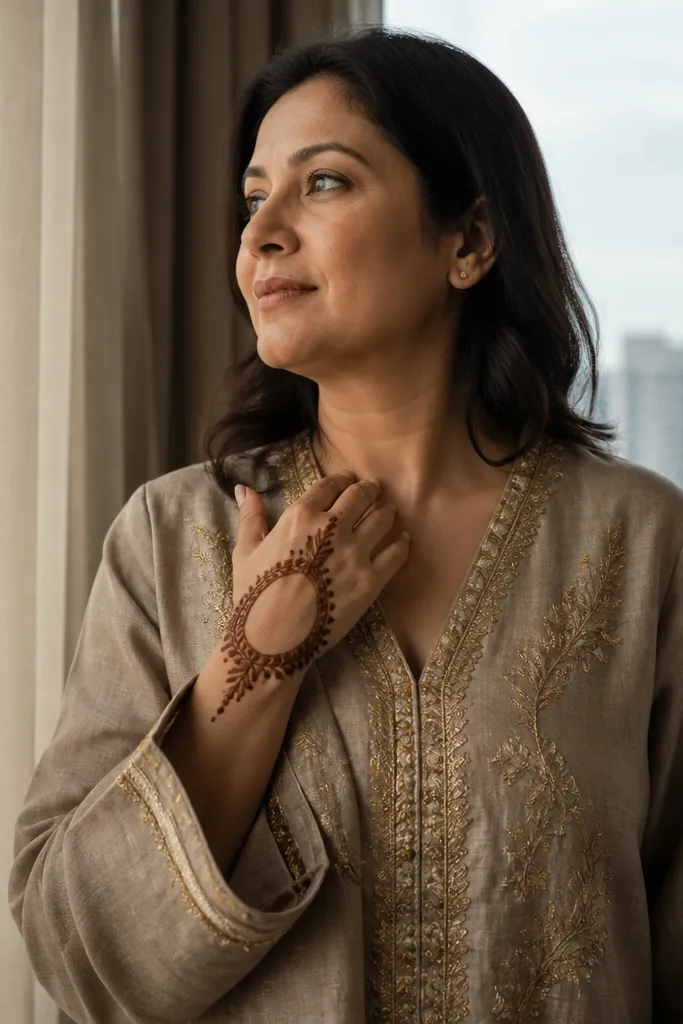
This design looks like luxury jewelry because it uses a knot-like crescent at the wrist and then refuses to overfill the center. The crescent should look braided or looped — two crossing arcs with small dot anchors. From the knot area, send only two short curved branches into the back hand, stopping well before the knuckles. The center stays mostly blank, which makes the darker mehndi stain look intentional and clean.
Step 1: Draw a crescent at the wrist like a bracelet, then add a crossing braid effect by layering one arc over another with 6-8 small loop turns. Step 2: From the crescent ends, draw two short curved branches toward the back-hand center and end them with tiny dot tips. Step 3: Place 1-2 dots inside the crescent loops for balance. Keep the back of the hand center completely open.
If your loops blur, make the braid arcs slightly thinner and let them dry before adding dots.
Don’t add extra leaves near the knuckles; they ruin the negative-space luxury.
6. Minimal Feathery Frond with Wrist Half-Moon
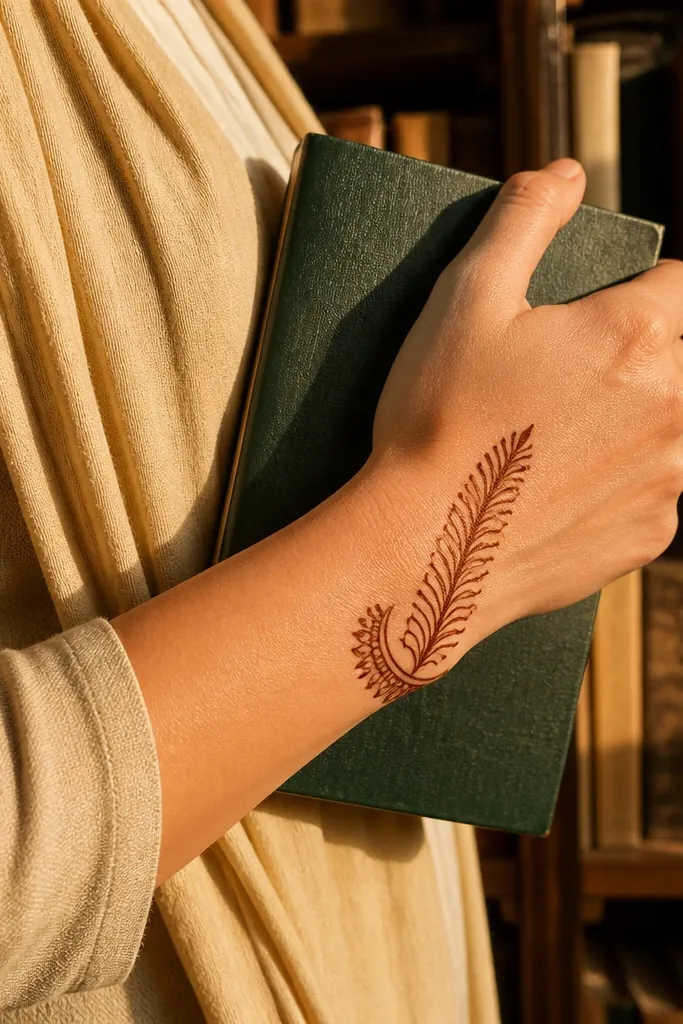
A feathery frond gives that high-end look because it creates texture without heavy filling. Start with a half-moon wrist motif made of short curved strokes, then grow one main frond upward from the center. Each frond segment is a thin leaf feather — drawn as a line with a slight hook at the end. The back hand stays mostly empty, so the frond reads as the statement piece.
Step 1: Draw a half-moon cuff at the wrist with 10-12 short curved strokes facing upward. Step 2: From the cuff center, draw a straight stem and attach 7-9 feathery segments on both sides, each segment about 1 cm long. Step 3: Keep the top of the frond tapered — fewer segments as you reach the end. Leave the rest of the back hand blank.
Pro tipUse consistent segment length by counting strokes — 7-9 looks balanced and modern.
AvoidDon’t thicken the frond stem too much or it will overpower the minimal design.
7. Pearl Chain Outline with Tiny Drops
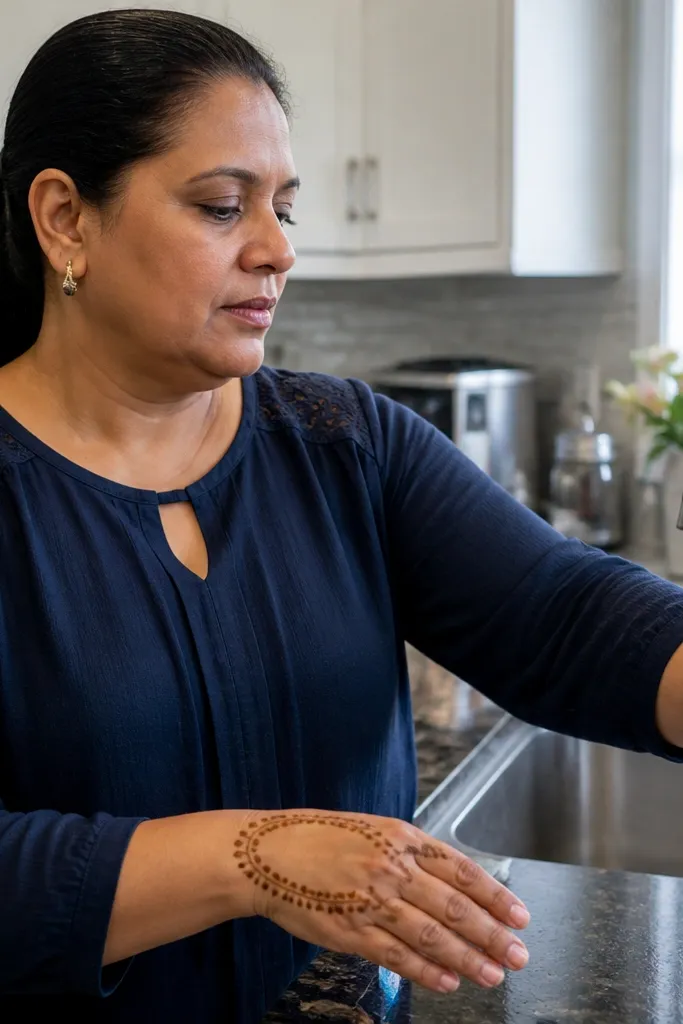
This design mimics jewelry chainwork. It uses an outline path made from small oval loops (pearls), then adds tiny drop dots hanging from select points. The luxury feel comes from the consistent loop size and the fact that the pattern sits mostly on the perimeter of the back hand, leaving a clean central window. It’s minimal, but it still looks complete because the chain path guides the eye.
Step 1: Outline a loose oval or teardrop path on the back hand starting near the wrist and curving toward the center. Step 2: Build the chain by drawing small oval loops touching each other — aim for 18-22 loops total. Step 3: Add tiny drop dots under 6-8 loop points and stop there. Keep the center empty so the chain stands out.
Let the outline path dry 5-10 minutes before adding drops to prevent smearing.
Don’t add filler inside the oval — the chain outline is the whole point.
8. Two-Tier Wrist Bracelet with Center Stem
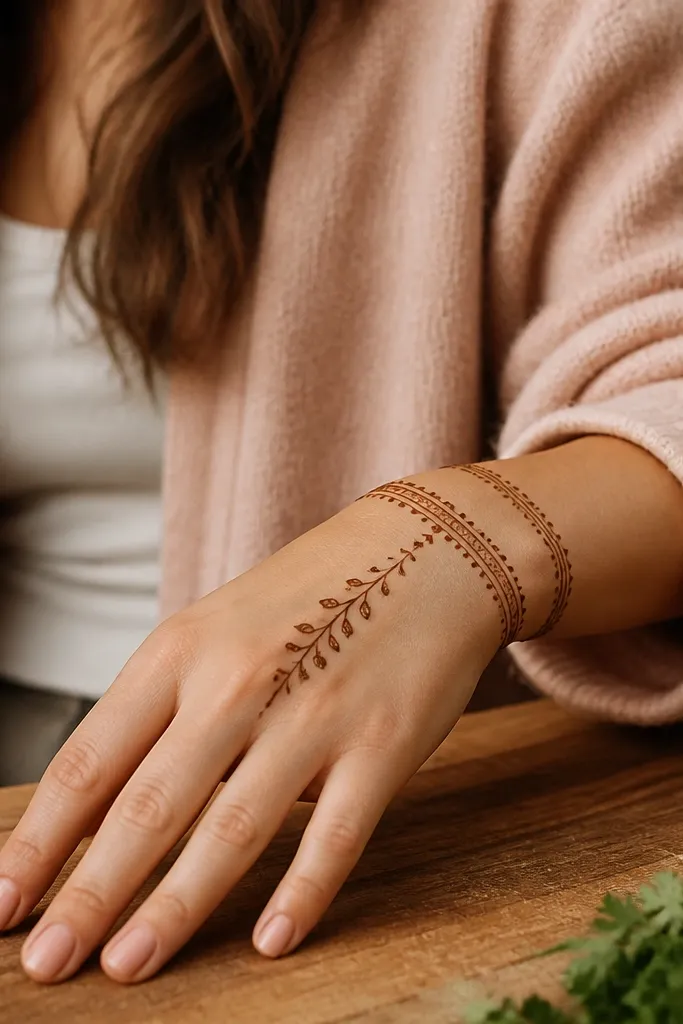
Two-tier cuffs look expensive because they create depth with minimal effort. Draw a lower bracelet cuff with leaf tips pointing up, then add a second thinner cuff above it with small dot separators. From the middle of the upper cuff, draw a single center stem that ends around the midpoint of the back hand. Tiny side branches can appear only near the top of the stem. This structure gives you a complete look even if you keep the rest of the hand blank.
Step 1: Create the lower cuff first — a bracelet band with 10-12 leaf tips. Step 2: Add the upper cuff as a thinner band with dots between segments (about 8-10 dot separators). Step 3: Draw a center stem from the upper cuff center and add two short side branches near the top. Stop the stem before knuckles and keep the rest empty.
Keep both cuffs the same width ratio — about 2:1 (lower wider than upper).
Don’t let the stem reach the knuckles; it makes the design look heavy.
9. Minimal Lotus Bud at the Center
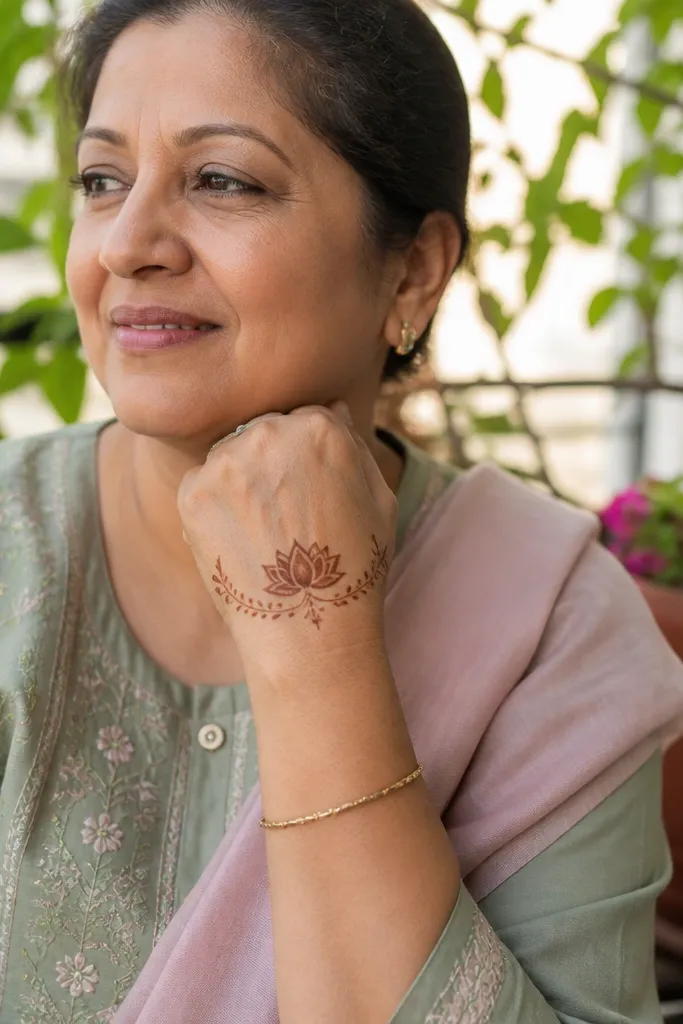
A single center lotus bud is a luxury trick because it gives focus without crowding. Keep the lotus small and crisp — 6-8 tight petals — and let only a thin wrist filigree support it. The wrist filigree should be a light arc with 2-3 leaf clusters on each side. This design works when you want something modern and feminine but still photo-ready. The center bud acts like a focal gem.
Step 1: Draw a small lotus bud center using 6-8 narrow petals around a tiny dot center. Step 2: Add a light wrist arc on both sides of the bud with 2-3 leaf clusters per side, keeping the arc thin. Step 3: Connect the wrist arc to the center bud using one or two short curved stems, no extra branches. Leave the middle otherwise blank.
Pro tipMake the petals slightly pointed and keep gaps between petals — that negative space reads as luxury.
AvoidDon’t enlarge the lotus too much; big lotus buds turn into a thick paste blob.
10. U-Shaped Wrist Ladder with Floating Dots
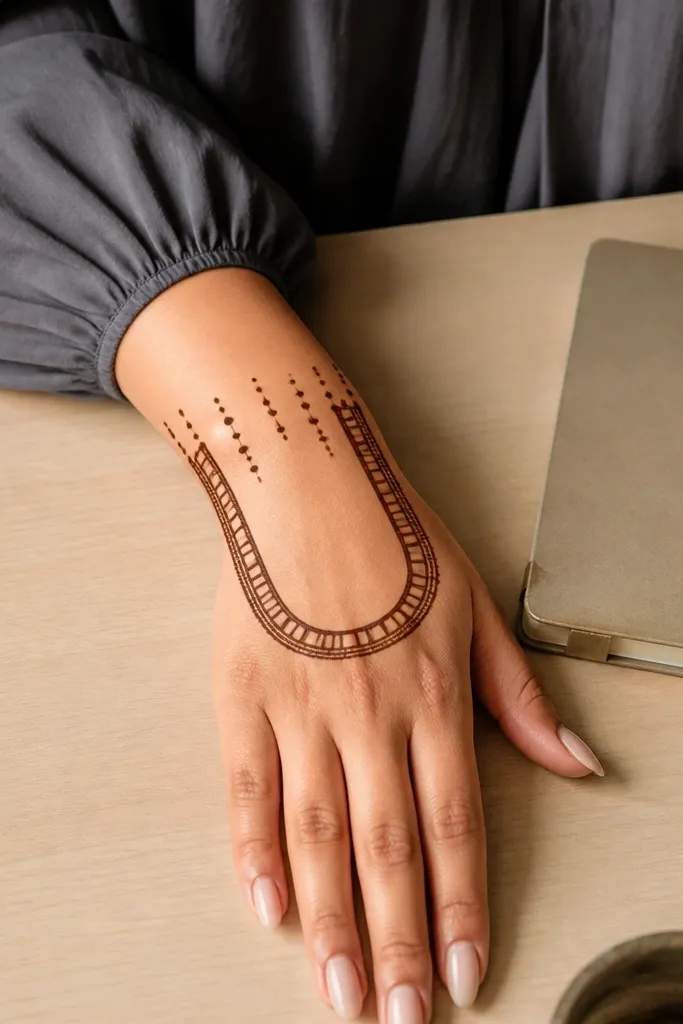
This looks high-end because it’s structured like a cuff but airy like a stencil. The U-shaped ladder sits at the wrist — vertical lines connected by short horizontals — then a few floating dot groups hang above it like pearls. The back hand center stays clean. It’s a great choice if you want minimal mehndi that still feels “done” in photos, because the ladder reads clearly even from a distance.
Step 1: Draw a U shape at the wrist, then add 6-8 vertical ladder lines inside the U connected with 3-4 short horizontal bars. Step 2: Place three dot clusters above the center of the U, each cluster with 4-6 micro dots. Step 3: Add two short curved connector lines from the ladder corners to the outer dot clusters. Keep everything else blank.
Count ladder lines and keep them even width; uneven lines make it look DIY messy.
Don’t add leaves or vines on top — the floating dots are the design.
11. Minimal Paisley Drop with Side Micro Leaves
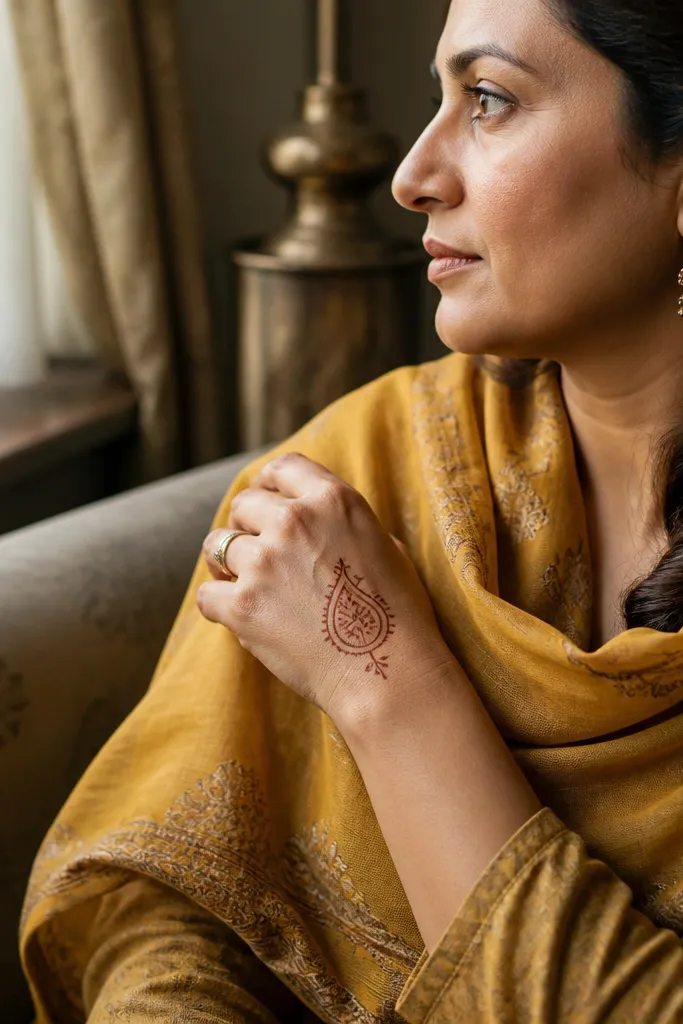
A single paisley drop looks luxe when it’s scaled down and kept clean. Position the paisley slightly above the wrist center so it doesn’t crowd the knuckles. Add only 3-4 micro leaves on each side near the base of the paisley, and stop there. The luxury look comes from the paisley outline and internal curl — you’re not filling the paisley with heavy dots, just defining the shape.
Step 1: Draw a small paisley outline on the back hand, about the size of two stacked coins, with a pointed top and rounded base. Step 2: Inside the paisley, add one thin inner curl line and a tiny dot at the base. Step 3: Near the paisley base, add 6-8 micro leaves total (short teardrops) on both sides, then keep the rest blank. Finish with a few micro dots along the paisley outline.
Keep internal curl line thin and continuous so it doesn’t look like scribble.
Don’t fill the paisley body with dense dots; it kills the minimal luxury look.
12. Feather-Edge Cuff with Two Slim Branches
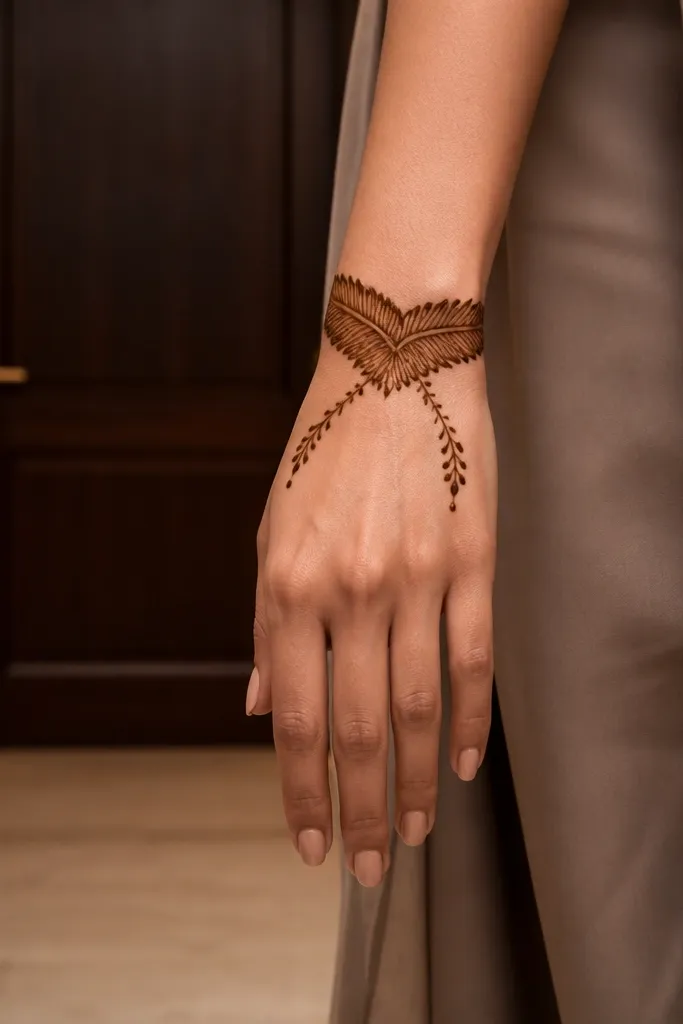
This design works because it creates a soft border at the wrist and then uses two clean branches as the rest of the composition. The feather-edge cuff is made of short angled strokes that look like layered feathers. From the cuff center, draw two slim branches that curve outward, each ending with a tiny leaf and a dot tip. It’s minimal but still decorative, and the soft edge makes the whole hand look styled, not sparse.
Step 1: Create the wrist cuff as a band with 12-15 feather strokes along the top edge, each stroke angled upward. Step 2: Draw two slim branches from the cuff center, curving slightly to opposite sides and stopping before knuckles. Step 3: On each branch, add one tiny leaf near the end and one dot tip. Keep the central back hand empty.
Angle the feather strokes the same direction so the cuff reads intentional, not random.
Don’t add extra branch offshoots — two branches is the luxury limit.
13. Micro Mandala Corner Frame
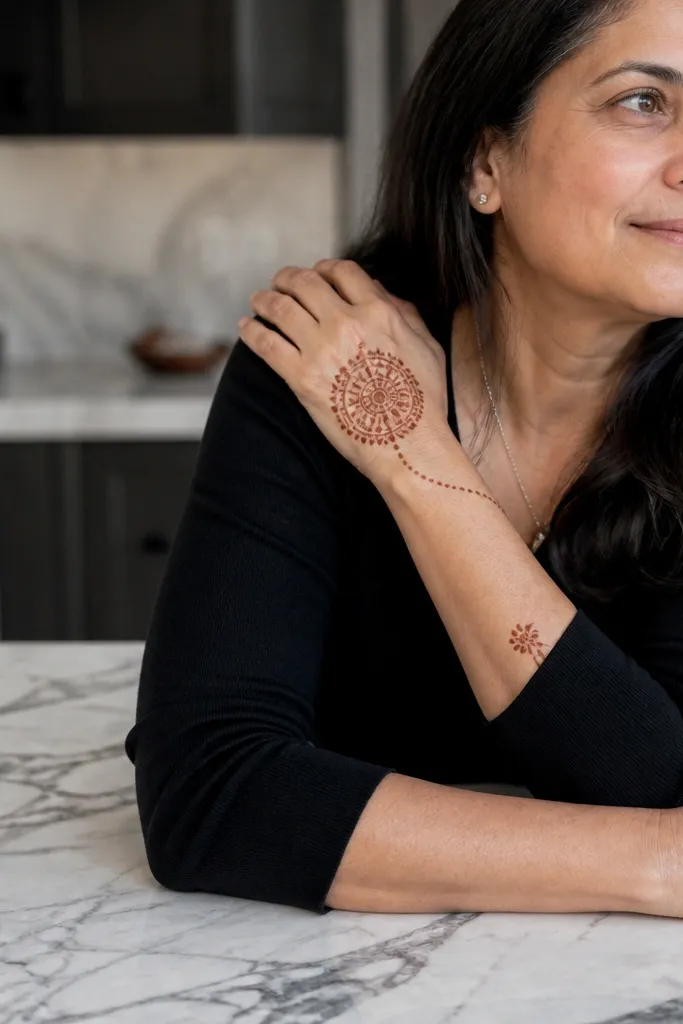
Corner framing is a modern trick: instead of filling the entire back hand, you place a micro mandala cluster off-center. Use a small mandala made of 1-2 concentric rings and 6-8 petals, then anchor it with a thin curved line that starts at the wrist edge. Add a tiny wrist mark on the opposite side for balance. This design reads high-end because it’s graphic and spaced, and the off-center placement looks editorial in photos.
Step 1: Draw a small mandala cluster in one corner of the back hand (near the outer edge), using one outer ring and 6-8 evenly spaced petal shapes. Step 2: Add a thin curved line from the wrist to the mandala base, like a frame hook. Step 3: On the opposite side of the wrist, add one small dot-and-stem mark. Leave the center blank for that luxury breathing room.
Pro tipKeep the mandala petals uniform in size and spacing; inconsistency makes it look rushed.
AvoidDon’t add a full border around the hand — corner framing is what keeps it minimal.
14. Center Dot Star with Wrist Crescent
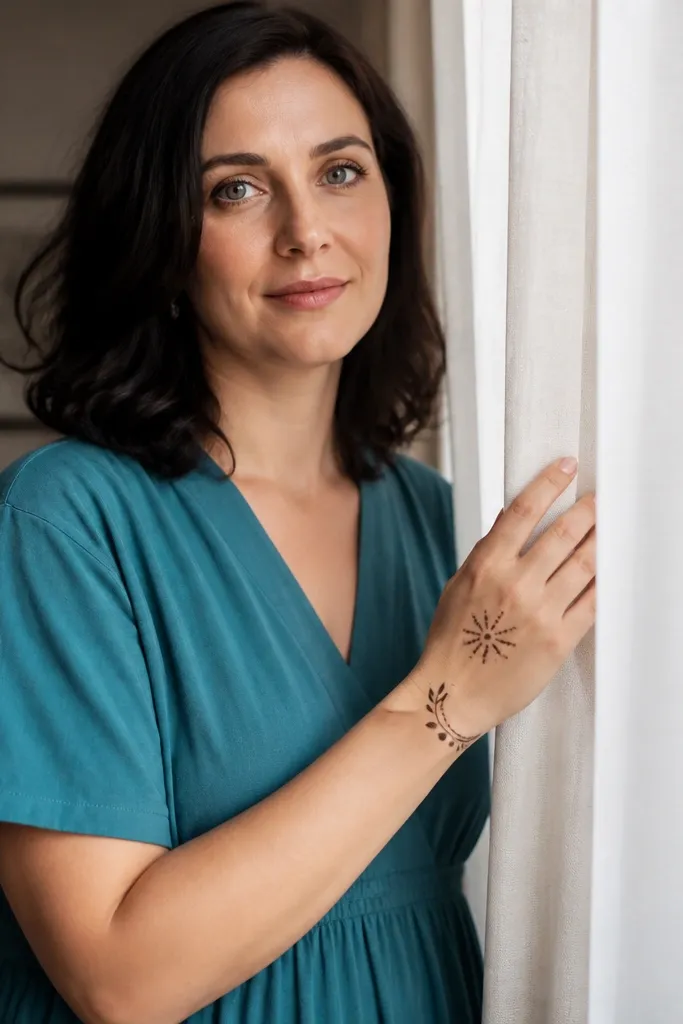
This is minimal with a crisp focal point. A center dot star is created with one central dot and 6-8 short dot rays, like a tiny sunburst. Pair it with a simple wrist crescent that has only a few spaced leaf accents. The look is luxe because it’s graphic and clean — the design is readable from far away and doesn’t rely on heavy filling. It’s also fast to execute if you keep the geometry tight.
Step 1: Draw a wrist crescent band with 3-5 small leaf accents spaced evenly along the top curve. Step 2: Place the center dot star in the middle of the back hand: one central dot, then 6-8 dot rays made from 2-3 micro dots each. Step 3: Add two thin curved connector lines from the crescent ends toward the star, stopping short of touching the star. Keep the rest blank.
Pro tipUse a consistent dot size by squeezing the cone lightly and keeping a steady height above the skin.
AvoidDon’t turn the rays into lines; dots keep the minimal luxury look.
15. Single-Line Calligraphy Vine with Leaf Caps
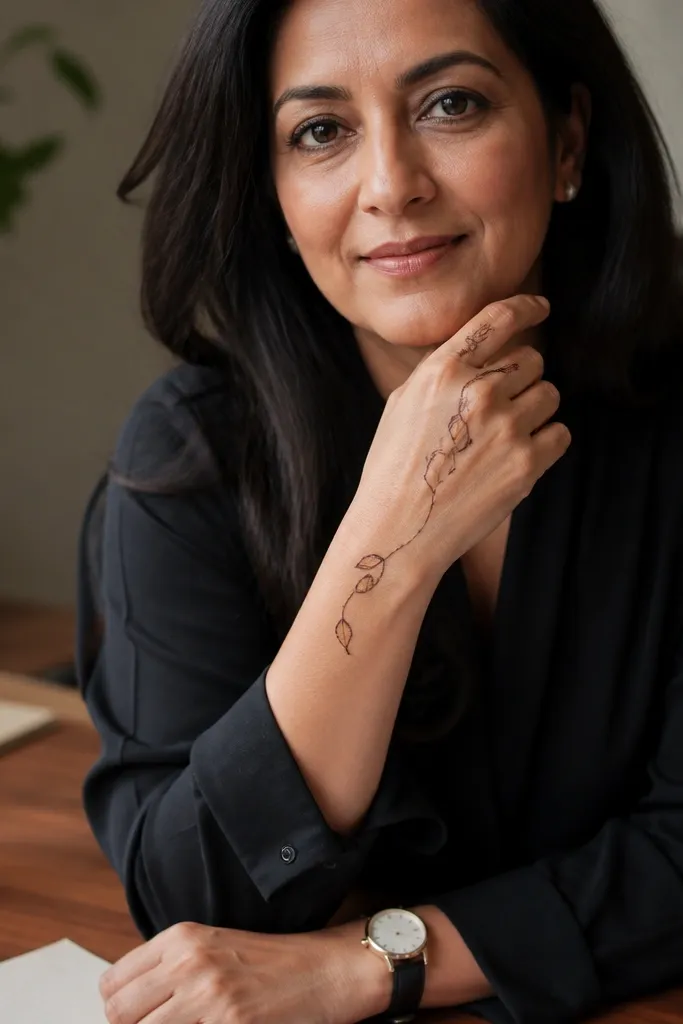
Single-line calligraphy designs look high-end because they rely on flow, not coverage. Draw one continuous vine line that curves from the wrist to the back-hand center, then ends with leaf caps — small teardrop leaves that sit at the ends of short offshoots. Keep the line thin and smooth, and use only 2-3 leaf caps total. This makes the mehndi look like ink artwork, which photographs clean and feels modern even for a holiday event.
Step 1: Start at the wrist and draw one continuous vine line that curves upward in a gentle S shape. Step 2: Add 2-3 leaf caps by extending short offshoots and closing each leaf with a pointed tip. Step 3: Finish with a tiny dot at the final vine end, then add one micro dot cluster near the wrist base. Do not fill the vine body.
If your line breaks, stop and restart cleanly; patched lines show up on camera.
Don’t add background dots around the vine — keep it as a single statement line.



