
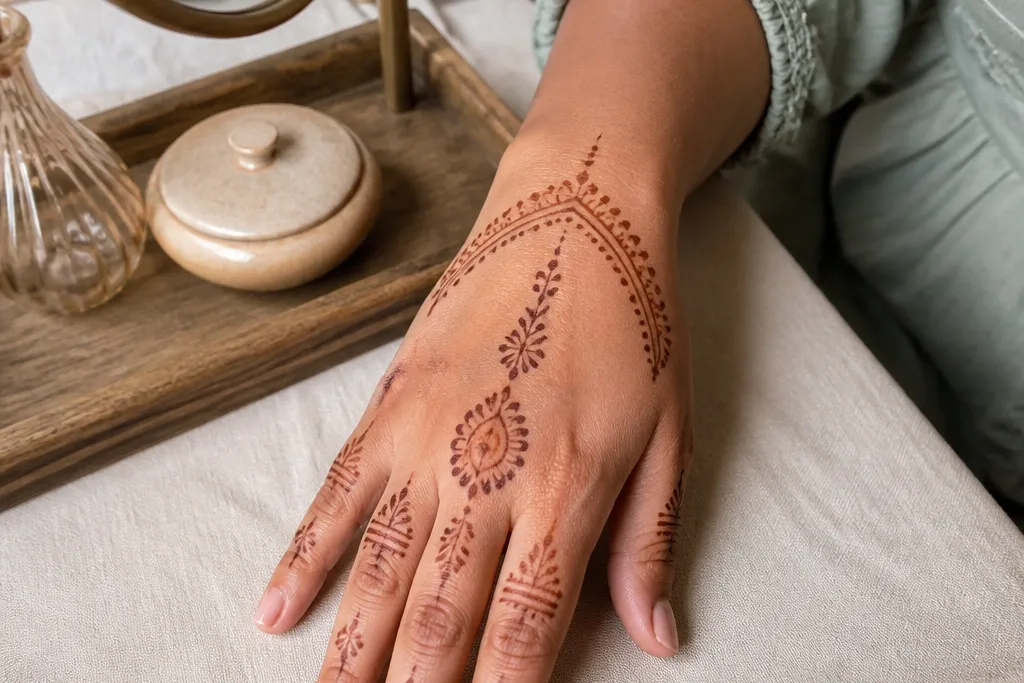
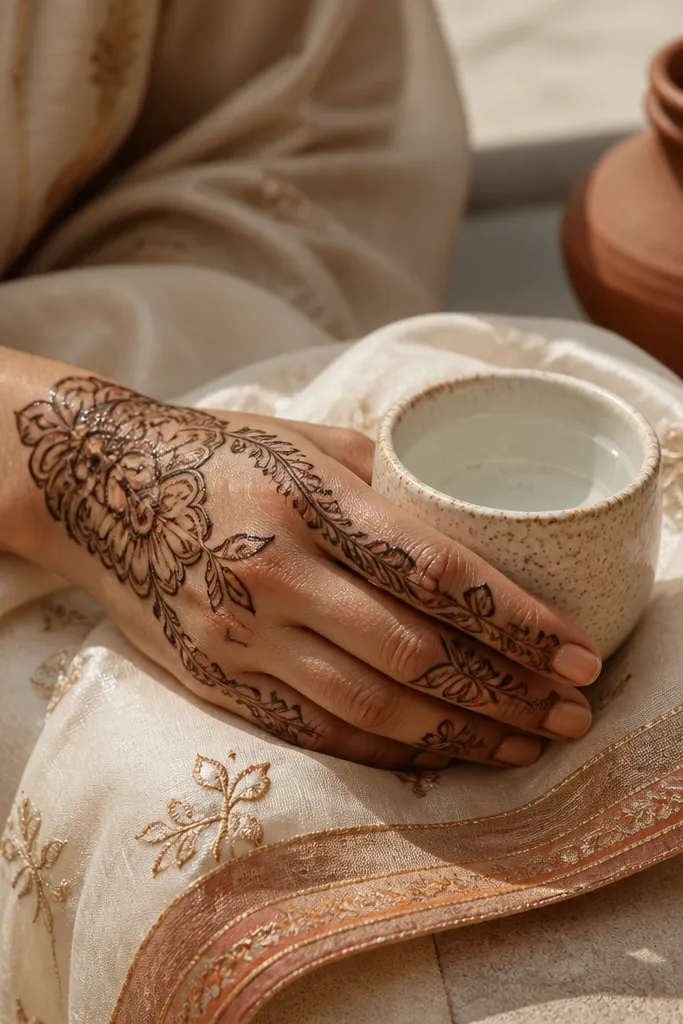
1. Wrist Band + Palm Diamond Ladder
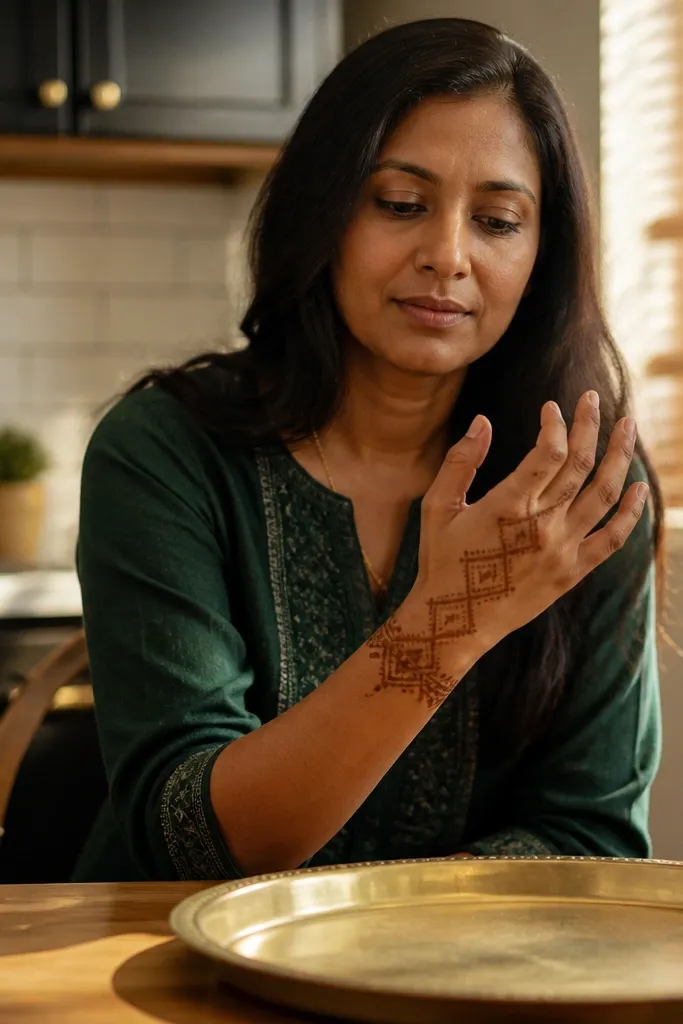
This layout looks high-end because it guides the eye in a clean vertical line. The wrist band is a simple base — then the diamond ladder takes over as the main “jewelry” element. Keep the diamonds evenly sized and slightly tilted; that tiny angle makes it look intentional, not basic. It also works for short sessions because you’re not filling the entire palm, just building one controlled structure.
Step 1: Draw a curved wrist band in two thin lines with a small gap between them, then add a row of tiny dots along the outer edge. Step 2: Center a vertical line from the wrist crease to the palm center, then place 6-8 diamonds on it, each diamond outlined only (no heavy fill). Step 3: Frame the side edges of the palm with two thin arcs that stop before the finger bases, then finish with 10-14 scattered micro dots around the ladder.
If your diamonds wobble, lightly mark the center with a pencil or liner before henna touches the skin.
Don’t fill every diamond — heavy fill makes the ladder look like one dark column.
2. Peacock Feather Front Frame
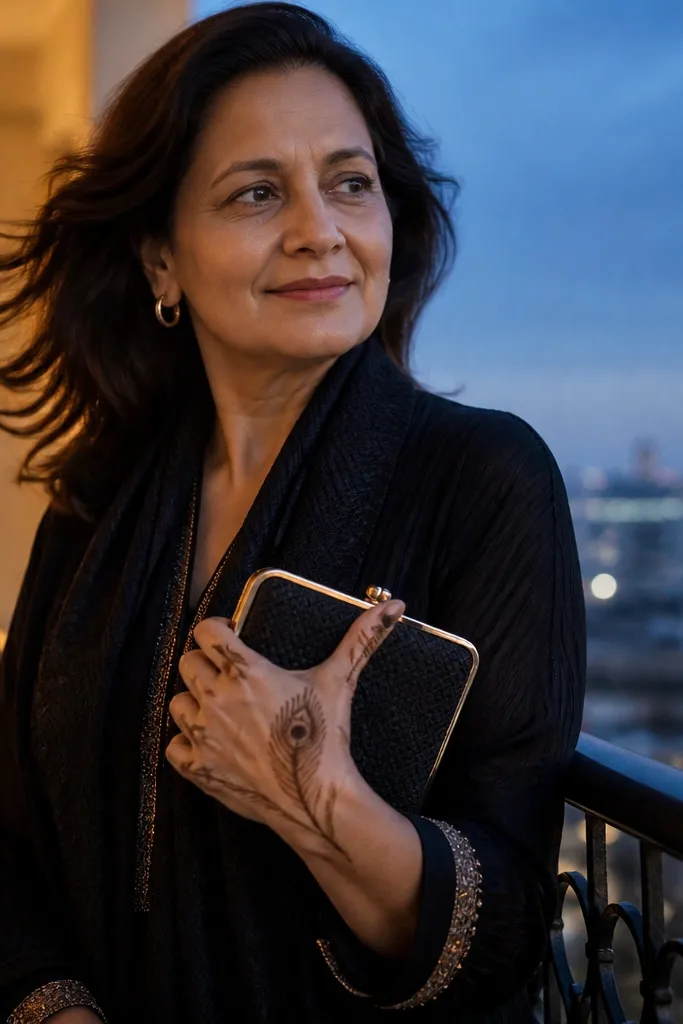
A single peacock feather reads instantly “festival-ready” while staying simple. The feather shape is easy to repeat: one spine line, then evenly spaced leaf-like arcs that don’t need full shading. The front-hand framing keeps it elegant — you outline the fingers with thin bands instead of covering them completely. This is a great pick when you want something special but you don’t want to spend hours filling.
Step 1: Draw a central feather spine from mid-palm toward the base of the index finger, then add 7-9 leaf arcs on each side, each arc outlined and lightly dotted at the center. Step 2: Add a thin palm border around the feather base using two curved lines, leaving open space between them. Step 3: Outline each finger with one thin arc from the base to just below the mid-finger, then place tiny dots in the gaps near the fingertips.
Keep leaf arcs short near the top and longer near the base to make the feather feel dimensional.
Avoid thick paste on the feather arcs — it smudges the leaf edges and kills the crisp look.
3. Two-Arc Finger Bands with Center Paisley
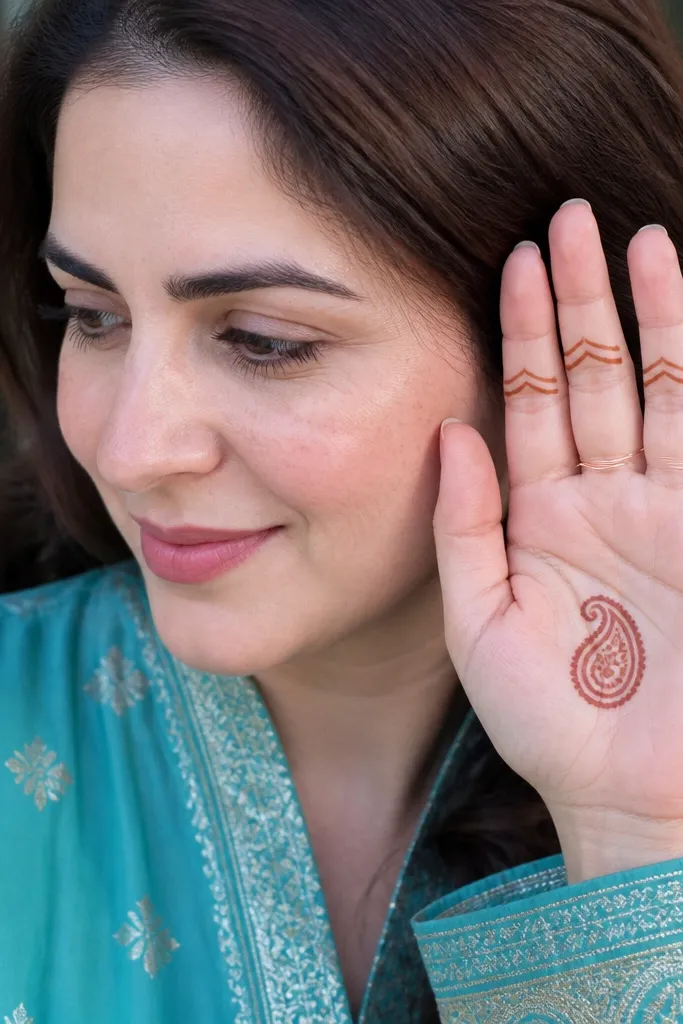
Step 1: Draw a medium paisley in the palm center, with an outline only and a few internal dots along the curve. Step 2: For each finger, draw two parallel thin arcs starting from the base and stopping about 1 cm before the finger tip. Step 3: Add a small wrist band with tiny leaf curls on the outer edge, then sprinkle micro dots between paisley and finger arcs.
This design is clean, modern, and photo-friendly because the fingers look like they’re wearing delicate bangles. The center paisley gives you one strong focal point, while the rest stays light. The two-arc rule is the secret: each finger gets two thin curves, with a small gap so you can see skin through the design. It’s simple enough for beginners but looks polished when you keep the paisley symmetrical.
AvoidDon’t extend the finger arcs to the tips — it makes the pattern feel cramped.
Pro tipUse the same starting height for all finger arcs so the hand looks balanced.
4. Sunburst Thumb-to-Index Fan
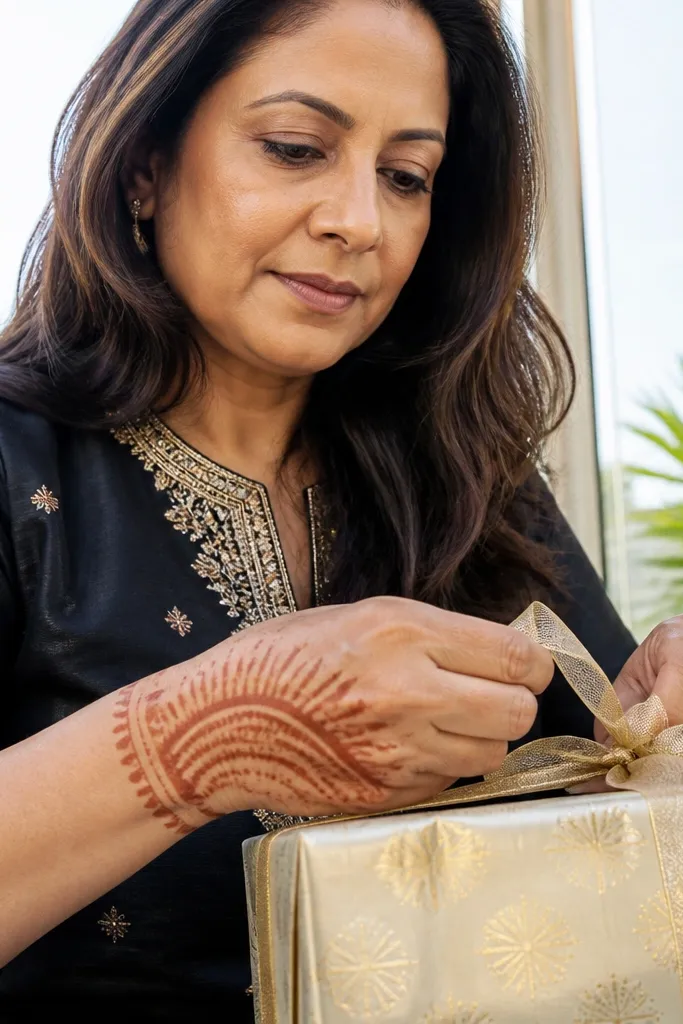
Step 1: Draw a curved base line across the thumb-web area, then mark 9-11 rays from that base up toward the index finger base. Step 2: Outline each ray with a thin line, and add a tiny teardrop dot at the midpoint of every other ray. Step 3: Add a simple wrist band and connect it to the fan with two short curved lines, leaving the palm center mostly open.
This one looks expensive because of the fan geometry. You create a sunburst pattern from the thumb side of the palm toward the index finger, then keep everything else minimal. The fan shape makes the hand look structured and “designed,” even if the rest is just light dots and a wrist band. It’s also perfect for holiday photos where you want a distinct motif that shows clearly when the hand is angled.
AvoidDon’t fill the rays heavily — the open skin is what makes it look high-end.
Pro tipKeep rays evenly spaced; use consistent cone pressure so line thickness stays uniform.
5. Lace Border Palm Frame
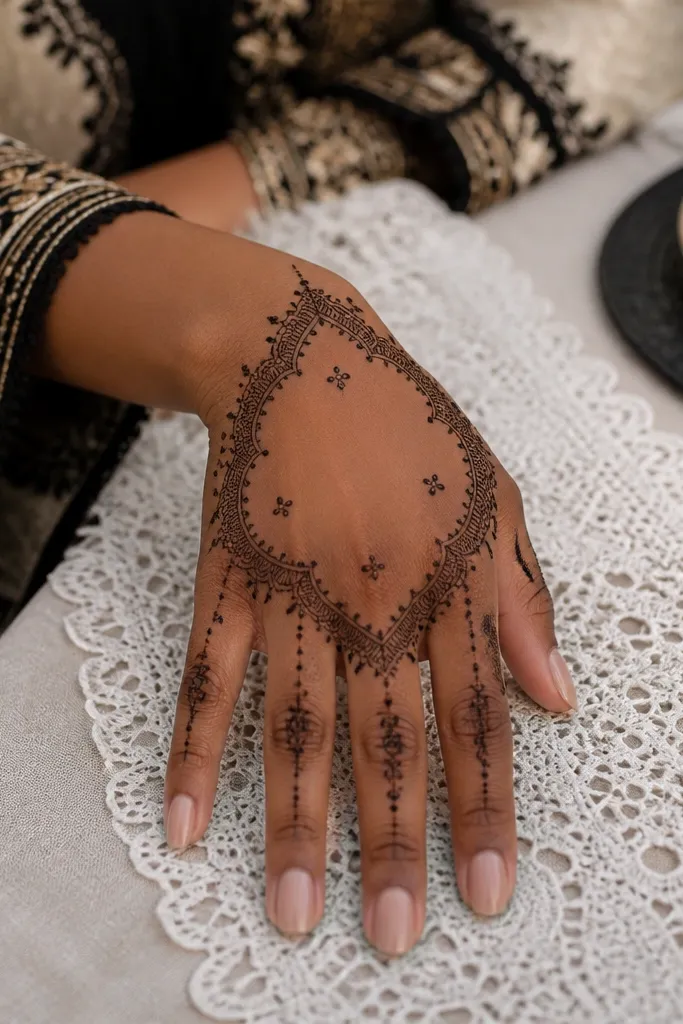
Step 1: Draw a border rectangle-like curve around the palm — not too tight — leaving a clear center. Step 2: Along the border, add tiny curls or scallops every 4-5 mm, and place a dot at the end of every second curl. Step 3: Outline each finger with a single thin band from base to mid-finger, then add two dot clusters near the finger gaps.
Lace borders read delicate and luxury-like because they create a “frame” instead of full coverage. The trick is to draw a continuous border around the palm area, then decorate inside with tiny dots and minimal curls. This design flatters most hand shapes because it respects finger spacing. You’ll also avoid the common beginner problem where the palm gets too dark.
AvoidAvoid thick outlines — lace looks best when the border stays thin and crisp.
Pro tipIf your border line breaks, trace over only the broken segment — don’t redraw the whole frame.
6. Stacked Triangle Palm Steps
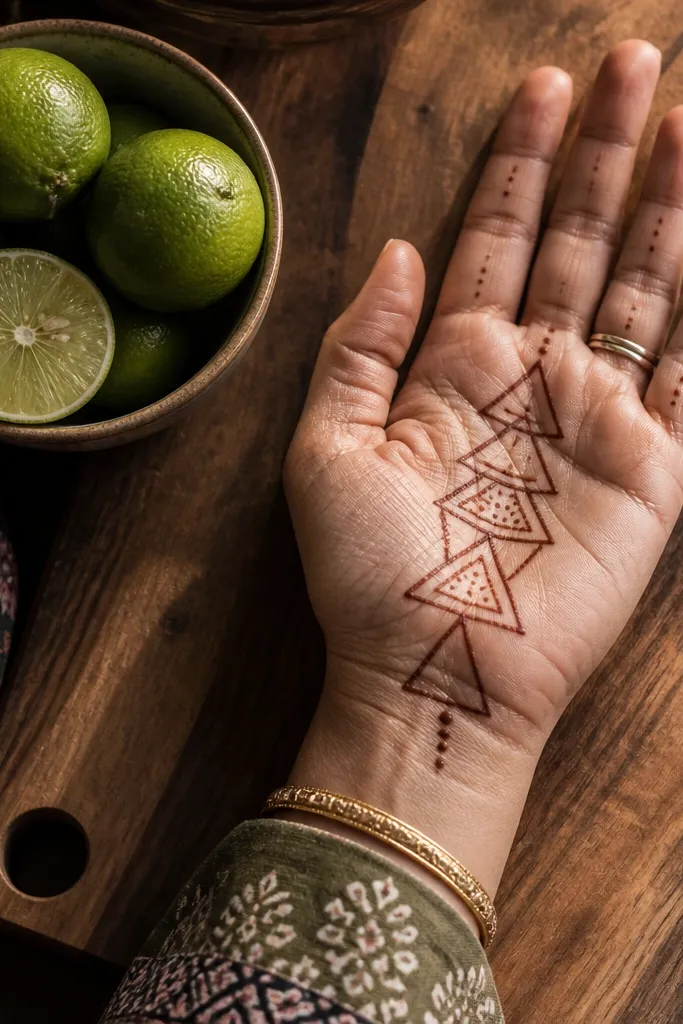
Step 1: Draw a vertical center line in the palm, then sketch 7-9 stacked triangles along it, each triangle pointing up and outlined only. Step 2: Add a thin wrist band with one row of dots and a small curved vine on the outer edge. Step 3: Outline the fingers with short side borders that align with the triangle height, then finish with a few tiny dots between finger outlines and palm steps.
Stacked triangles look modern and high-end without needing heavy filling. Each triangle acts like a step, creating rhythm across the palm. Keep the triangles outlined and add light dot shading inside only one or two triangles — that contrast makes the design pop. It’s a great “simple but not boring” option for weddings, engagement parties, and festival evenings.
AvoidDon’t make triangles all the same size — slight variation makes the pattern look handcrafted.
Pro tipUse a ruler or straight edge lightly under the phone screen to keep your center alignment straight while sketching the first triangle.
7. Minimal Floral Sprig Across the Palm
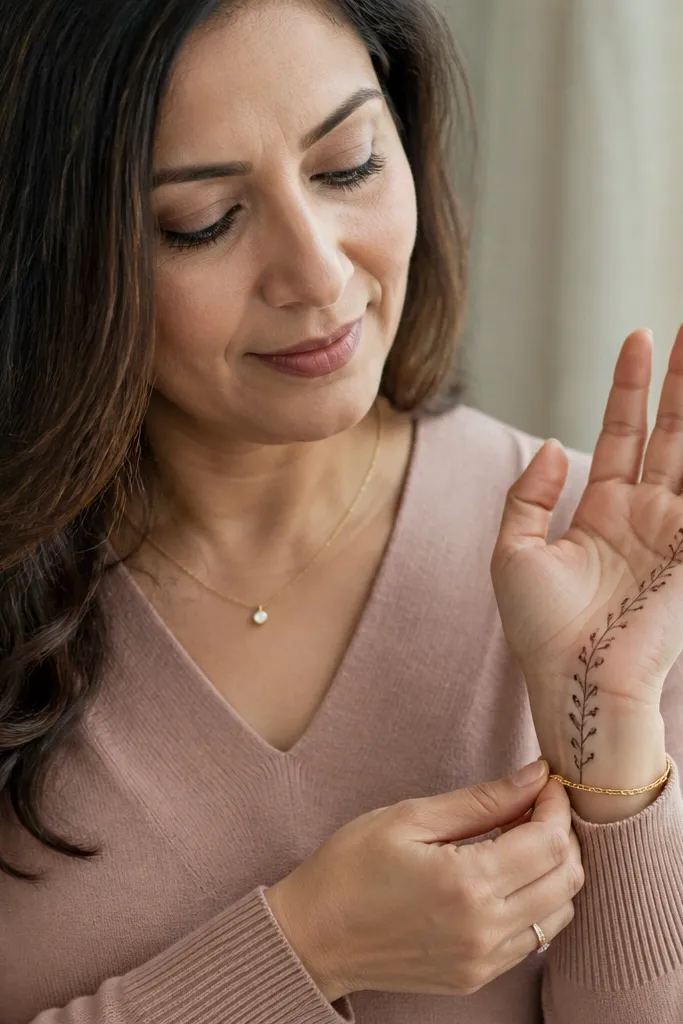
A minimal sprig looks luxe because it uses negative space and tiny details instead of big fillings. You draw one flowing line across the palm with small buds, then let the fingers stay mostly open except for light framing. This is ideal when you want something elegant under jewelry sleeves or bangles. The buds and dots catch light in photos and look crisp even on hands that move a lot.
Step 1: Draw a curved vine line from thumb-web area to the ring finger base, then add 5-7 small buds along it as teardrops with one dot inside. Step 2: Add two thin arcs as finger frames, one on each side of the hand, stopping around the mid-finger. Step 3: Create a wrist band with a single scallop line and sprinkle 12-18 micro dots near the vine endpoints.
Keep bud sizes consistent: about the width of your pinky nail tip for a balanced look.
Avoid filling the vine solid — it turns delicate sprigs into a dark scribble.
8. Circular Motif with Open Center
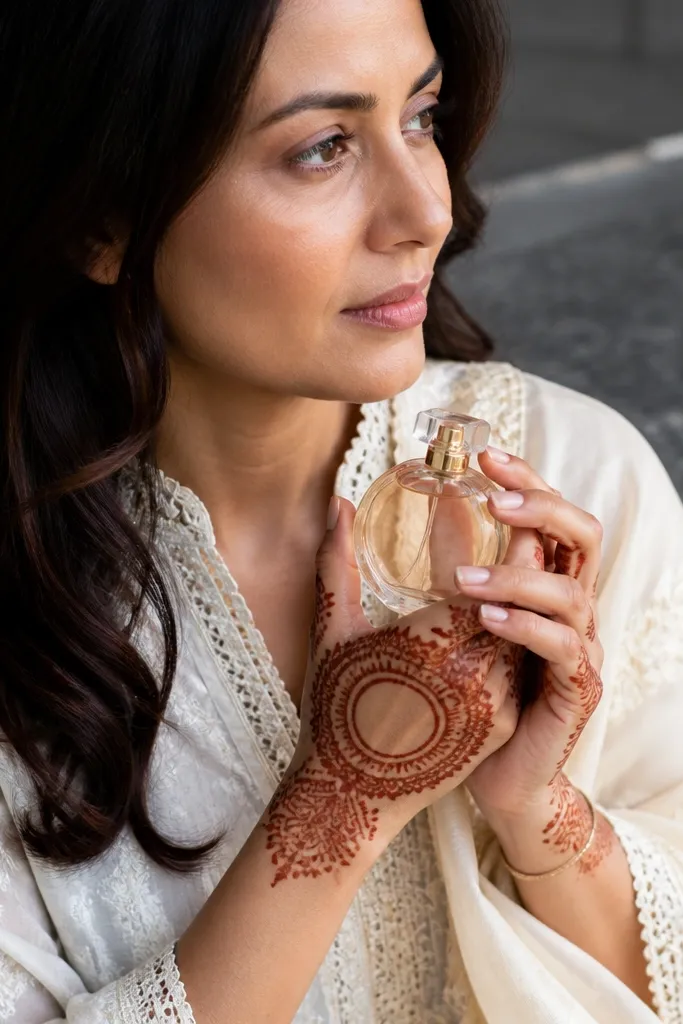
Step 1: Draw a large circle on the palm center, but keep the inside mostly open; outline the circle as a thin line. Step 2: Add 10-12 short dot rays around the circle edge like tiny sparks, spacing them evenly. Step 3: Outline fingers with one thin line on the outer side of each finger, then add a thin wrist band connected with two curved lines from the circle base.
This design uses a big circle concept to look “high-end” even when it’s simple. The open center keeps the palm airy, and the outer ring gives structure. Add small dot rays to make it feel like a decorative ornament. It’s a strong choice for front-hand mehndi because the circle reads clearly from multiple angles.
AvoidDon’t close the center with extra fills — open space is what makes it look refined.
Pro tipMark the circle center first. A slightly off center circle makes the whole hand look uneven.
9. Bracelet-Style Wrist Cuff with Finger Tips
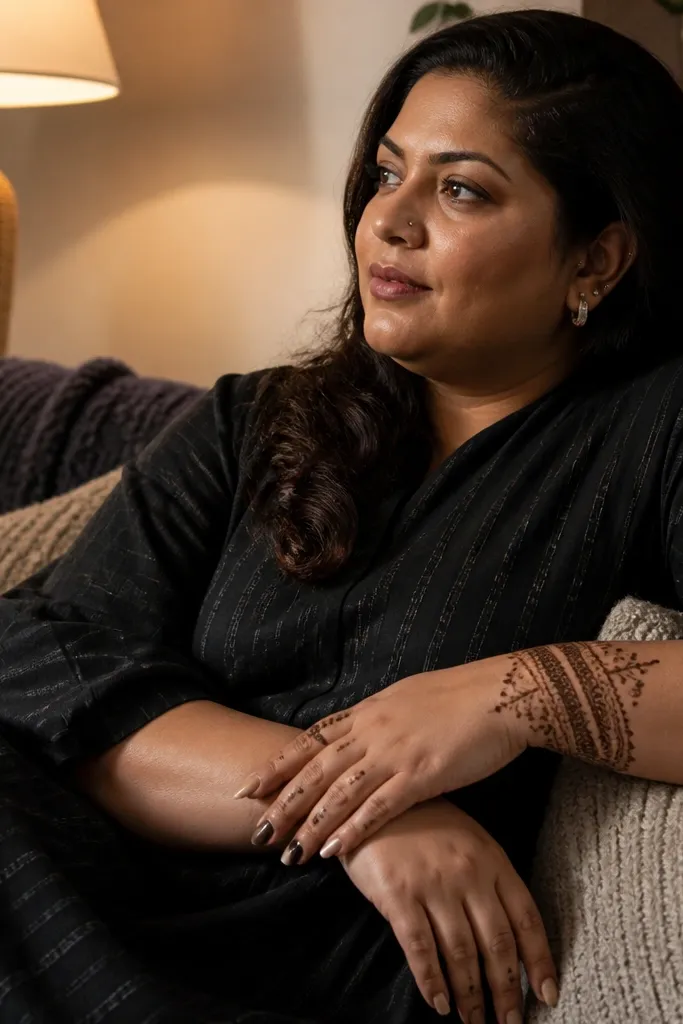
When you want a clean holiday look that still feels premium, build the design like jewelry: a bracelet cuff at the wrist and light detail at the finger tips. The cuff is the only heavy element, so your fingers stay elegant and not overworked. This works well for short wear times because the design is concentrated and easy to do neatly.
Step 1: Draw a thick-thin cuff effect at the wrist using two parallel lines, then fill only the outer section with small geometric blocks (tiny rectangles). Step 2: On each finger, draw a small cap at the tip as an upside-down U, then connect it to a thin mid-finger line. Step 3: Add dots along the cuff inner edge and a small vine curl at the outer wrist corner.
Keep the finger caps the same size across all fingers for a balanced, “set” look.
Avoid covering the whole finger length — the tip caps are the point.
10. Chevron Palm Spine with Side Arcs
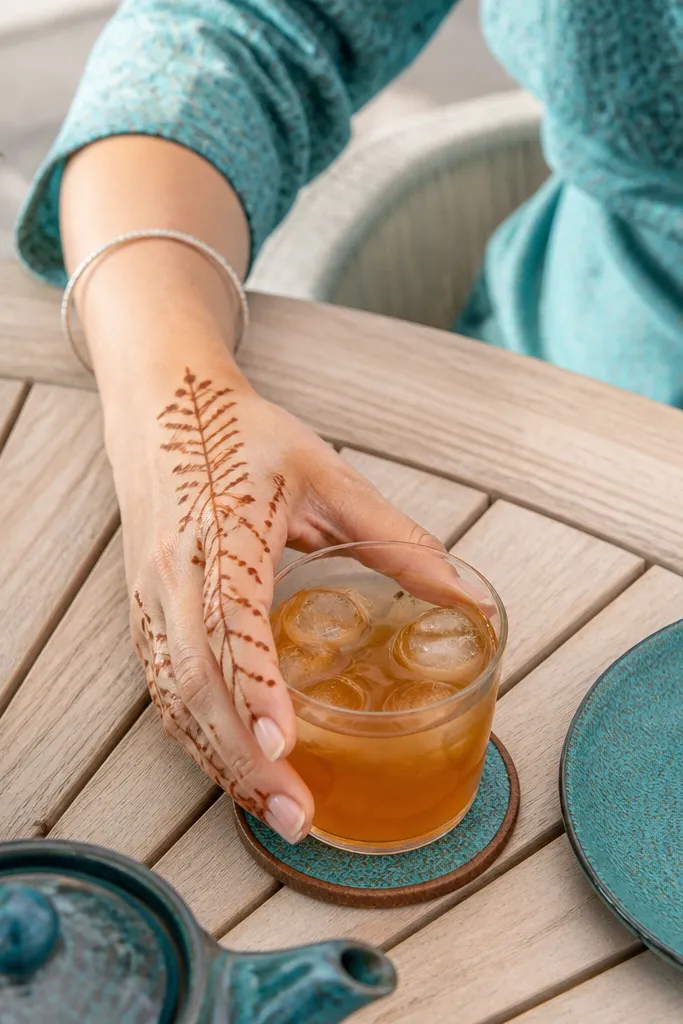
Step 1: Draw a vertical chevron spine from palm center down toward the wrist, using 6-8 peaks. Step 2: Add two thin side arcs on each side of the spine, with the arcs stopping around the mid-palm. Step 3: Outline fingers with short curved lines on the outer edges only, then place tiny dots at every second chevron peak.
Chevrons create instant order. A central chevron spine gives you a strong structure, while side arcs add softness. This design looks high-end because it mixes geometry with light curves, and it stays simple enough for beginners. It also flatters hands with longer fingers since the chevron spine naturally elongates the layout.
AvoidDon’t overfill the chevrons — keep them outline-only with dots for contrast.
Pro tipMake chevrons slightly taller at the bottom and shorter toward the top to feel balanced.
11. Rosebud Center with Micro Vines
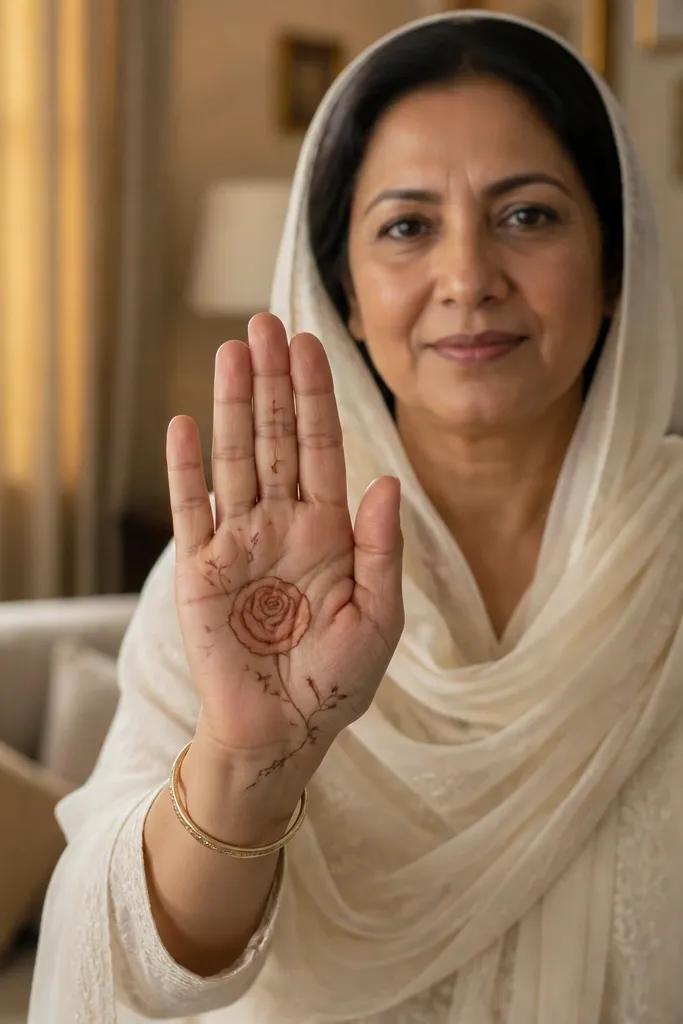
Step 1: Draw a small rosebud in the palm center using 6-8 teardrop petals around a dot center, outline only. Step 2: From the rosebud, draw two micro vine lines toward the index and ring finger bases, adding tiny leaf dots along the way. Step 3: Outline finger bases with one thin band and add a wrist band with tiny scallops on the inner edge.
A rosebud center makes front-hand mehndi look romantic without needing big floral fills. Micro vines around it give texture, but they stay thin so the palm doesn’t go dark. This is a great seasonal pick for festive events where you want something feminine and clean. The rosebud also acts like a guide — once it’s placed right, everything else falls into a neat layout.
AvoidAvoid making the rosebud too large — it will crowd the finger framing.
Pro tipUse a lighter hand on the vine lines. The rosebud should look darker than the vines.
12. Festival Mandala Corner Triangle
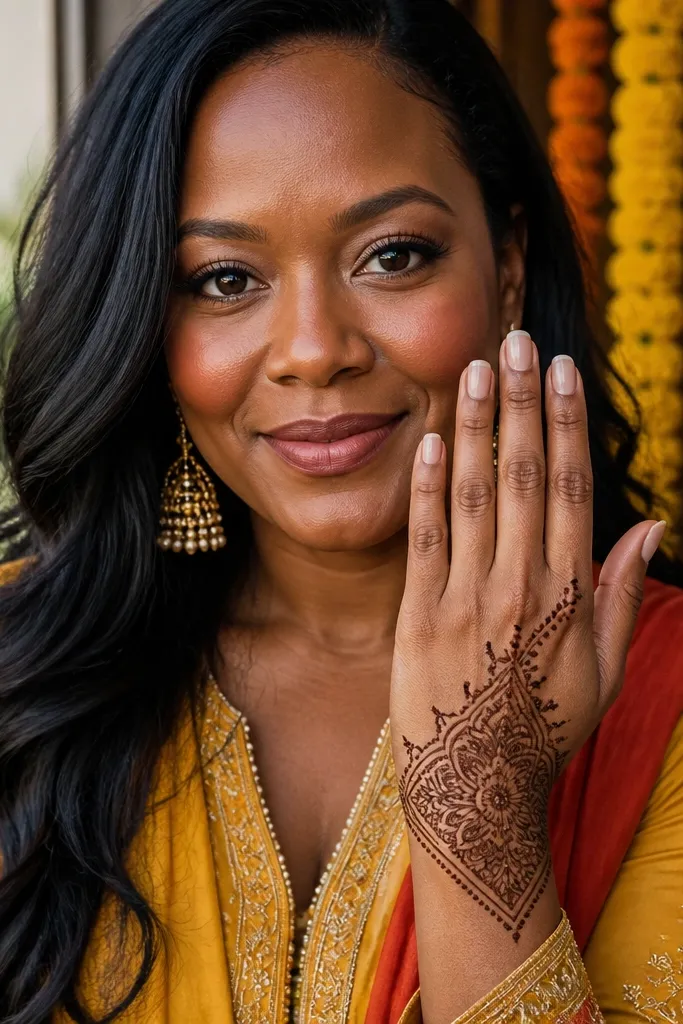
Step 1: Pick a palm corner near the index finger base and draw a triangle outline pointing upward. Step 2: Inside the triangle, draw a small mandala: a center dot, 4 petal teardrops, then 6-8 tiny dot rings around it. Step 3: Add thin finger outlines only on the index and middle fingers, plus a simple wrist band connected to the triangle with two short lines.
This design uses a mandala cluster but keeps it limited to one corner, so it stays simple and photogenic. The triangle placement makes it look intentional and modern, not like a full mehndi panel. Keep the cluster detailed enough to read “high-end,” then let the rest of the palm stay light with dots and thin borders. It’s perfect for people who want impact without full coverage.
AvoidDon’t add mandala details across the whole palm — the corner focus is the trick.
Pro tipMake the triangle edges thin and steady; that crisp triangle is what makes the design look expensive.
13. Half-Moon Palm Border with Dotted Net
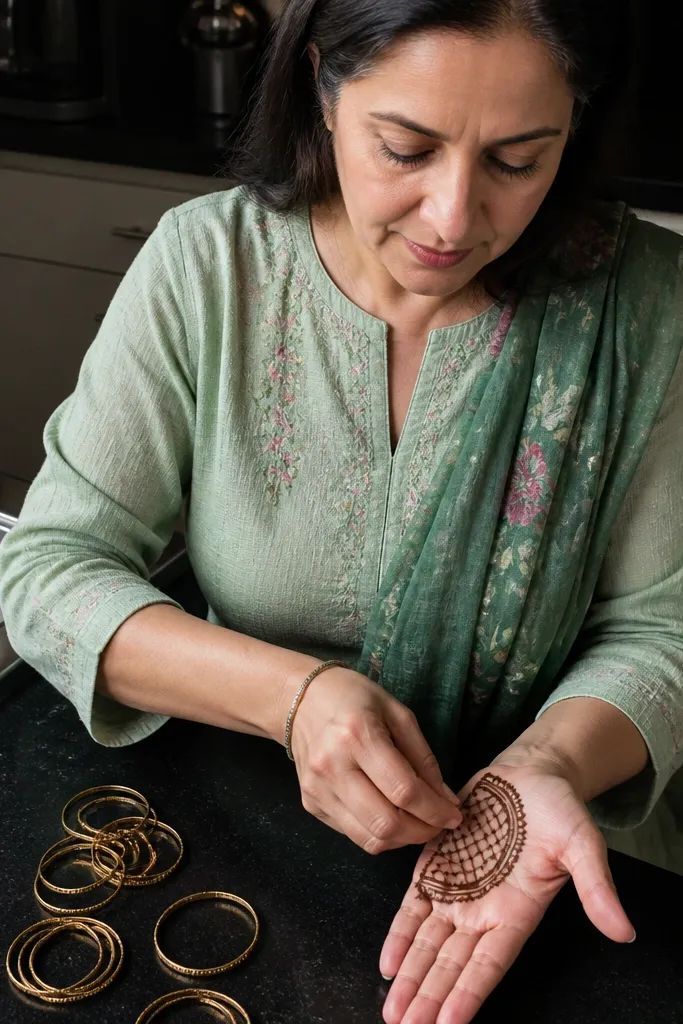
Step 1: Draw a half-moon border across the palm center, with the curve facing the fingers. Step 2: Inside the half-moon, place dots in a grid pattern (like 6 by 5 points), then connect only a few dots with short straight lines to suggest a net. Step 3: Outline fingers with thin bands from base to mid, and add a wrist band with a row of small dots.
A half-moon border gives a classy, architectural look. Then you add a dotted net inside — not a full lace fill, just a light grid of dots that spark in photos. This stays simple because you’re repeating one dot rule, not drawing lots of separate motifs. It’s a strong option for holiday dinners when you want something that looks neat even in low light.
AvoidAvoid drawing thick connecting lines — it turns the net into a solid fill.
Pro tipKeep the dot grid spacing consistent. Uneven spacing makes the net look accidental.
14. Thin Vine Border with Tiny Heart Tips
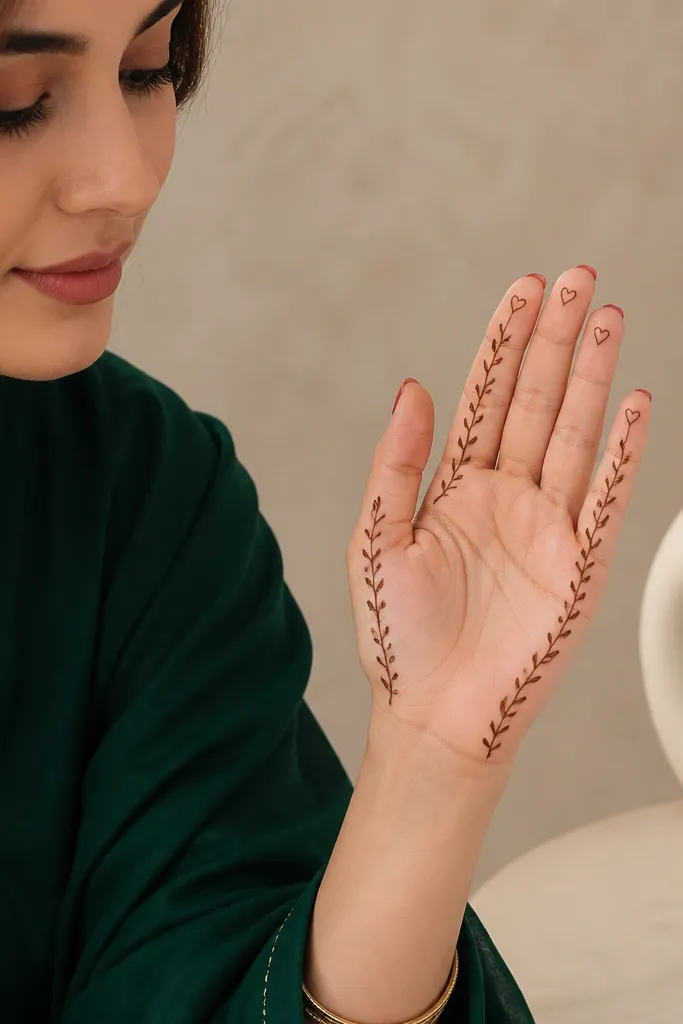
Step 1: Draw a thin vine line tracing the outer edge of the palm, then mirror it on the other side with a second vine line. Step 2: At each finger tip, draw a tiny heart outline using two curves that meet at a point, then add one dot in the center. Step 3: Add a wrist band with scallops and sprinkle small dots along the vine where it bends.
This one looks sweet and high-end because the vine border is thin and controlled, and the heart tips are a clean seasonal twist. The hearts at the finger tips are small, so they don’t clutter. You get a cohesive look across the hand because the same vine pattern repeats from wrist to finger bases. It’s ideal for festive gatherings where you want the mehndi to look pretty up close.
AvoidDon’t overfill the hearts — outline only keeps them crisp.
Pro tipKeep heart tips aligned: same height on each finger looks instantly more “designed.”
15. Geometric Kandi Bands on Fingers
If you like a modern mehndi look, this one nails it. The focus is on geometric bands across the fingers, like jewelry beads turned into lines. You keep the palm simple with a light center dot and a small curved border, then let the finger work do the heavy lifting. It reads high-end because the finger bands are consistent and spaced, not random.
Step 1: Draw a thin wrist band with one row of dots, then place a single center dot on the palm. Step 2: For each finger, draw two horizontal bands made of small rectangles or tiny triangles, leaving a clear gap between bands. Step 3: Add a thin vertical connector line from the palm to the first band on each finger, then finish with micro dots at the band corners.
Use the same rectangle size across all fingers. Consistency is what makes it look premium.
Avoid mixing shapes mid-finger — stick to one geometric unit per finger.
16. Open Palm Lotus at Center
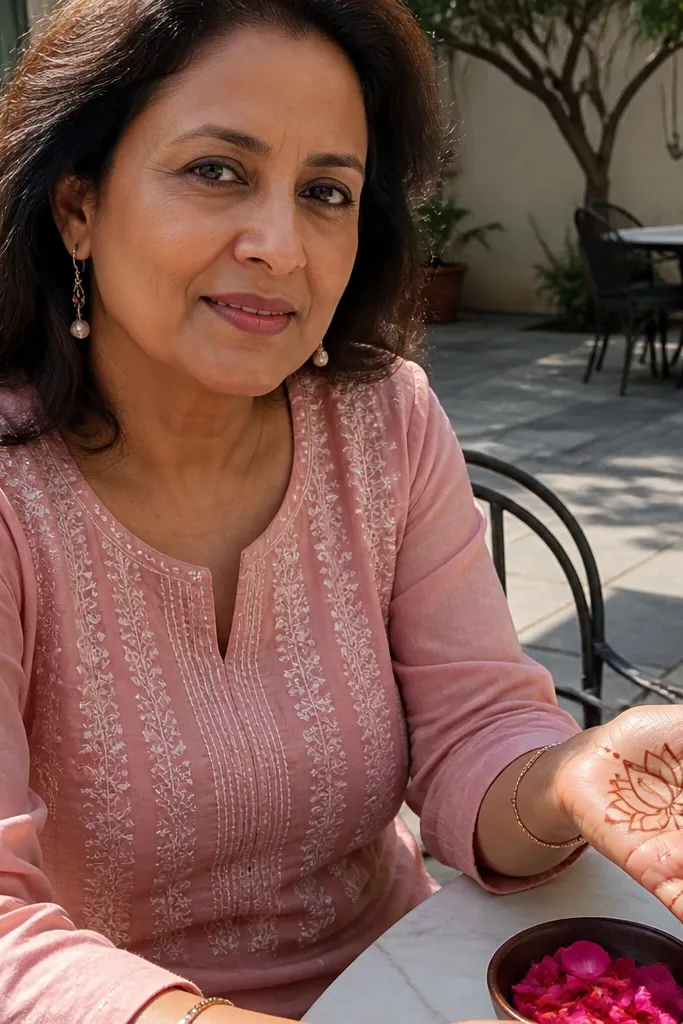
Step 1: Draw a lotus in the palm center with 6-8 petals using teardrop outlines, leaving the center open. Step 2: Add a ring of small dots around the base of the lotus and two tiny leaf curls near the wrist side. Step 3: Outline each finger with one thin arc up to mid-finger, then place a single dot cluster at the gap between fingers.
A lotus center looks polished even when it’s simple because the petal structure is naturally symmetrical. Keep it open — outline the petals and add dots at petal tips. Then frame the lotus with thin finger lines, not full finger coverage. This is a strong choice for festive holidays because it feels traditional but still clean and modern.
AvoidDon’t fill every petal — open petals keep it elegant.
Pro tipMake the outer petals slightly larger than the inner ones for a clear lotus shape.
17. Wrist-to-Finger Ladder with Dots
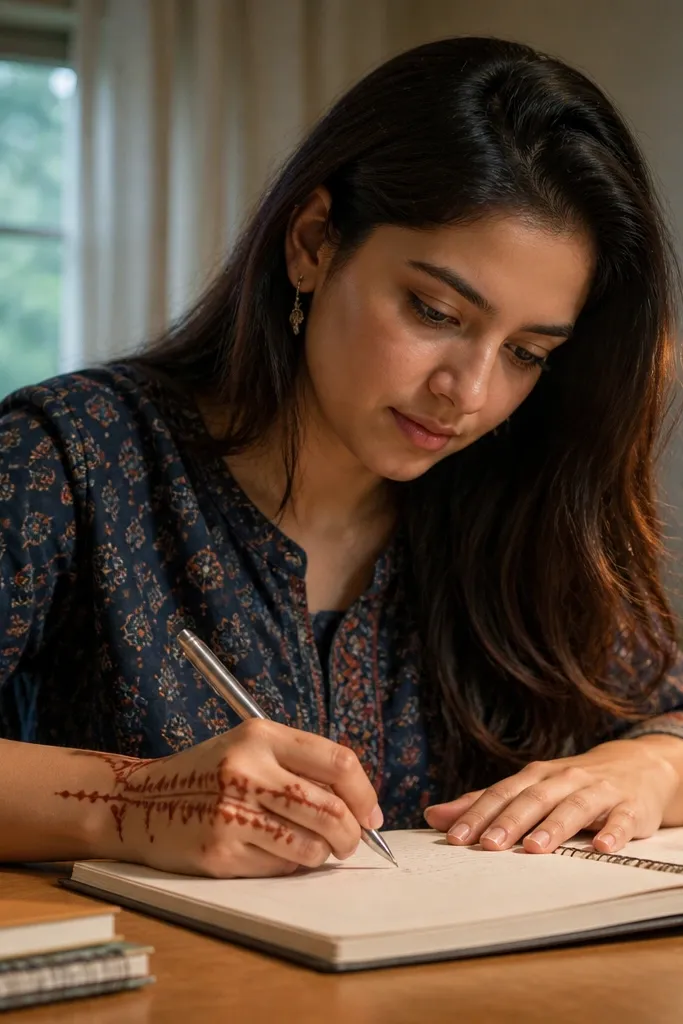
This is the “work fast, still look fancy” design. The ladder pattern gives structure, and the dots do the decoration work without needing lots of filling. Because the ladder runs from wrist toward the finger bases, it elongates the hand and makes the mehndi look intentional. It also works well for beginners because the repetition is simple.
Step 1: Draw a vertical ladder line from wrist crease toward palm center, then add 5-7 rungs as short horizontal marks. Step 2: Outline the palm with a thin curved border line that follows the hand shape, leaving the center open. Step 3: Add dotted fillers near the finger bases: place 3-4 dots in a small triangle under each finger outline, then finish with a thin wrist band.
Keep rung spacing even. Even spacing is the difference between “ladder” and “mess.”
Avoid large dot clusters — tiny groups look more premium.
18. Paisley Chain Across Index and Middle
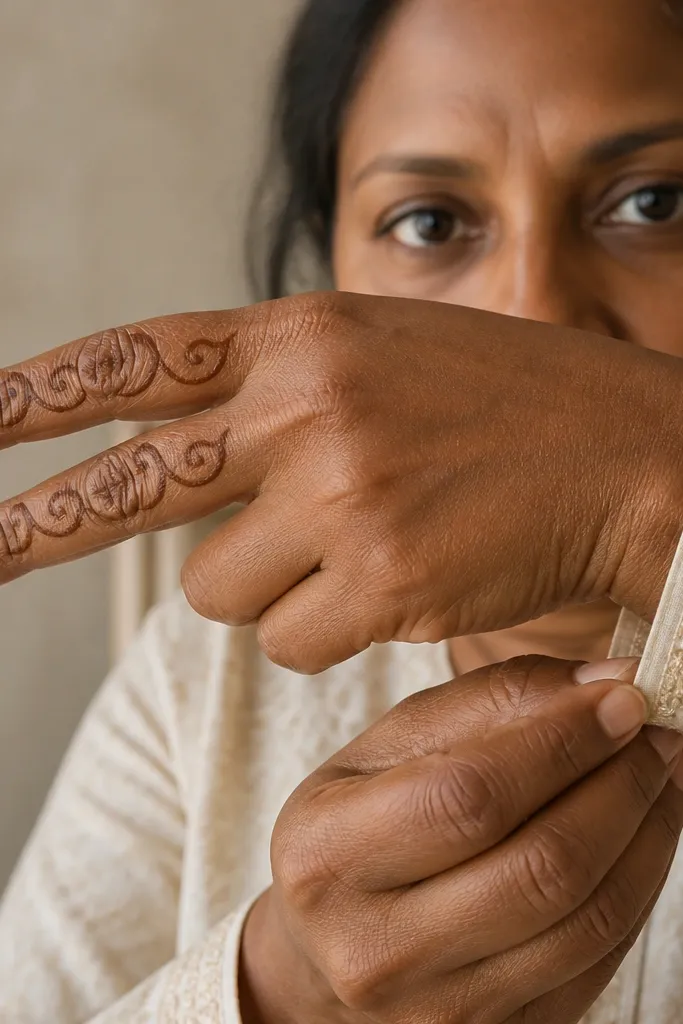
This design looks like a chain of ornaments, and it stays simple by repeating one paisley unit. The paisley chain on the index and middle fingers gives a high-end look without needing heavy palm filling. Keep the paisley outlines light, add one dot inside each paisley, then connect them with thin curves. It’s great for people who want their front-hand mehndi to read clearly from a distance.
Step 1: Draw a thin wrist band and a small central palm dot. Step 2: On the index finger, draw 3 connected paisleys from base to mid-finger, outline only, with one dot inside each paisley. Step 3: Mirror the same chain on the middle finger and connect both fingers to the palm with a thin curved line at the base.
Use the same paisley size on both fingers. That match makes it look expensive.
Don’t add extra fillers everywhere. The chain already provides the decoration.
19. Thin Border with Micro Starburst Filler
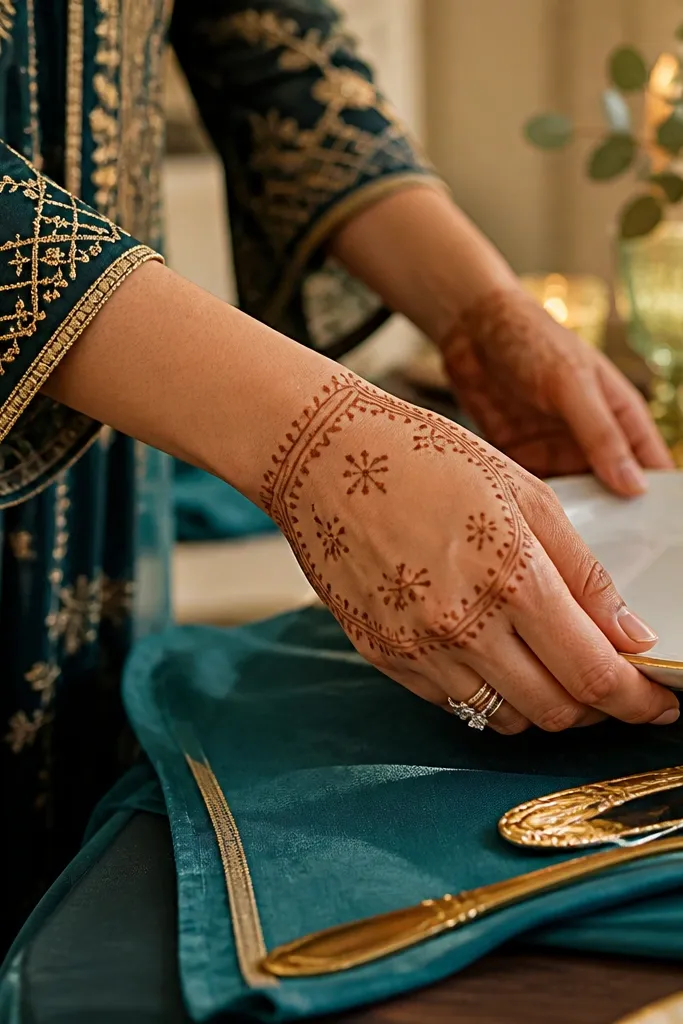
Micro starbursts make mehndi look sparkly in photos, but you don’t need big motifs. This design uses a thin border frame and then sprinkles tiny starburst clusters in the open areas between finger outlines. It’s simple to execute because you repeat one starburst shape — a small center dot with 6-7 short rays. The result feels high-end without the time cost of full filling.
Step 1: Draw a thin border around the palm, leaving the center open. Step 2: Outline fingers with one thin arc per finger, stopping around mid-finger. Step 3: Add starburst clusters (each 1 center dot + 6-7 short rays) in the gaps near finger bases and along the border corners, then finish with a thin wrist band.
Keep starburst rays short. Long rays make it look busy.
Avoid thick borders — thin lines keep the starbursts as the focal point.
20. Corner Paisley with Side Dots and Wrist Cuff
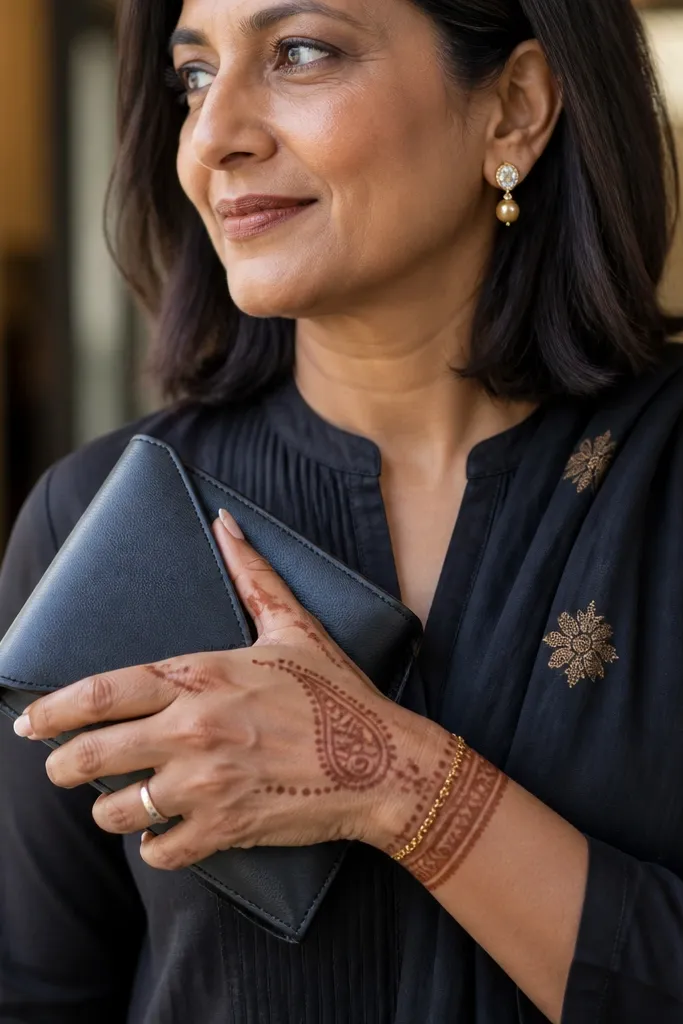
Corner placement makes the design look intentional and less crowded than a center-heavy layout. The paisley near the thumb side gives you a focal point, while side dots and a wrist cuff keep the rest neat. This is a good seasonal choice for holiday outfits because it looks cute in close-ups and still reads elegant when your hand is relaxed. It’s also beginner-friendly because you only focus on one main paisley.
Step 1: Draw a wrist cuff using two parallel lines and fill only the outer edge with small dots. Step 2: Place one paisley in the thumb-side palm corner, outline only with two internal teardrop curls and 3-4 dots. Step 3: Add thin finger outlines on thumb, index, and middle fingers only, then sprinkle side dots between the outlined fingers.
If your paisley looks lopsided, rotate your palm slightly and redraw only the top curl — don’t redo the whole motif.
Avoid extending finger outlines to all five fingers. The corner focus is what keeps it chic.
21. Double Teardrop Palm Center with Finger Arcs
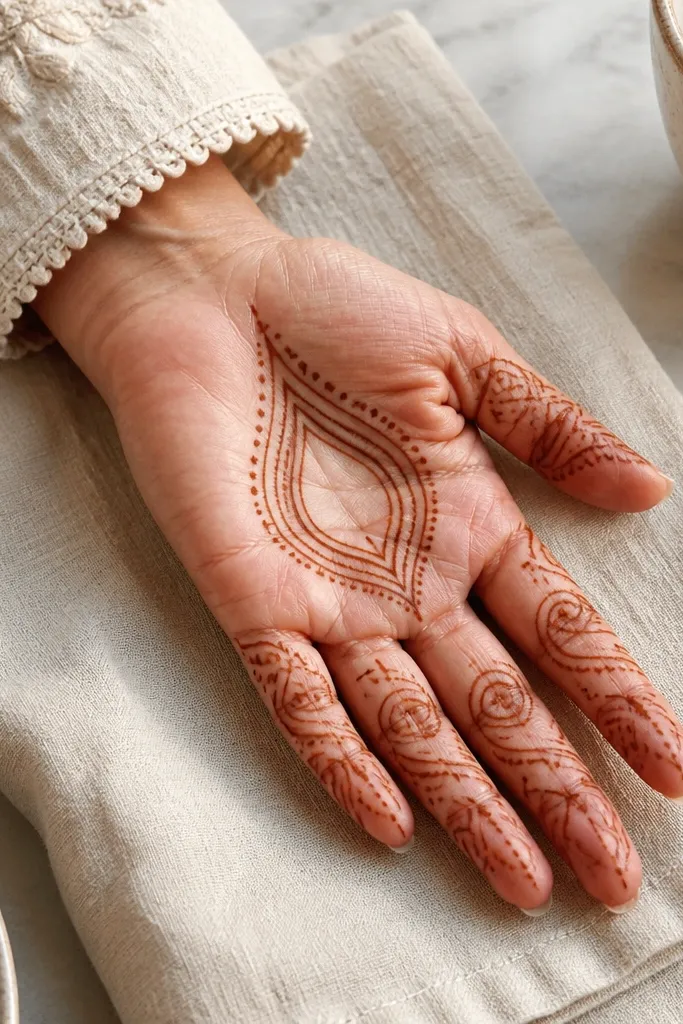
Stacked teardrops give a clean, high-end look because the shapes are simple and symmetrical. You get a strong palm center without filling big areas. Then you add finger arcs that echo the teardrop curves, tying everything together. This is a fast design that still feels “done,” because the center motif is bold and the finger work is light.
Step 1: Draw two teardrops stacked vertically in the palm center, outlined only, with a dot at the center of each teardrop. Step 2: Add a thin curved border around the palm center and place tiny dots at the border corners. Step 3: Outline each finger with one thin arc from base to just below mid-finger, then add 2-3 dots along each arc’s inner edge.
Keep teardrop tips aligned. Small alignment errors show up fast on front-hand designs.
Don’t thicken the teardrop outlines. Thick lines make the design look heavy.
22. Mango-Shaped Palm Center with Outline Fill
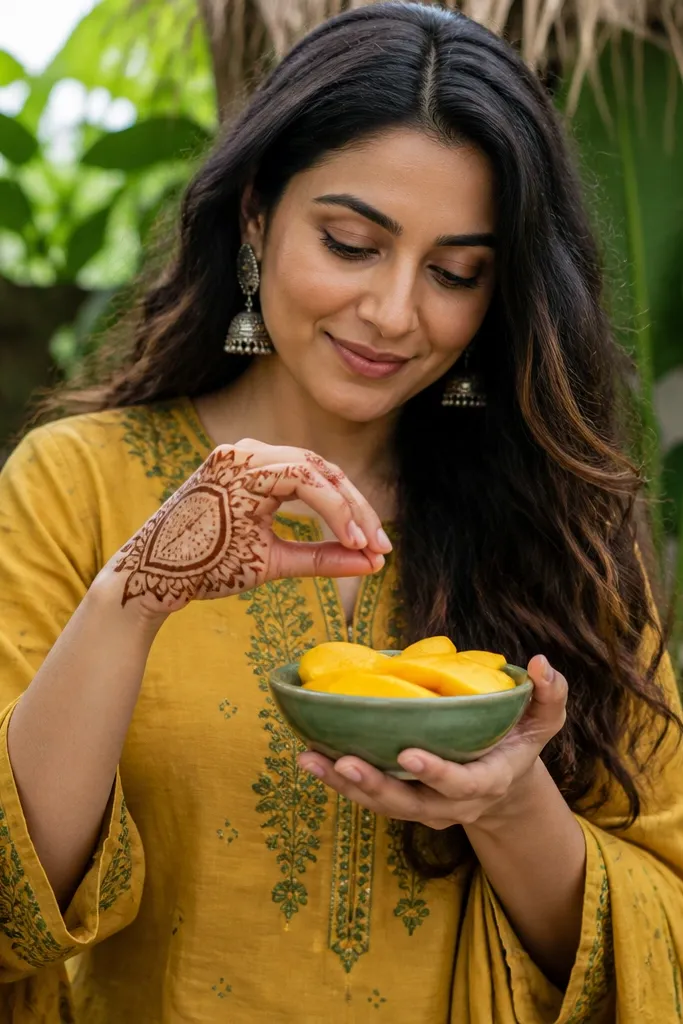
Step 1: Draw a mango outline in the palm center, pointing upward toward the index finger base. Step 2: Add a center vein line inside the mango and place small dot clusters on each side, leaving the outer border clean. Step 3: Outline finger bases with thin arcs and add a wrist band with a scallop pattern on the inner edge.
Mango-shaped motifs look festive and premium, but you can keep them simple by using outline fill instead of full shading. The mango shape naturally divides into sections, so your design stays organized. Add internal dots and a light border to keep it crisp. It’s a solid pick for holiday events because it reads traditional while still staying clean and photogenic.
AvoidAvoid filling the mango with solid blocks. Outline fill looks more expensive.
Pro tipUse dot clusters instead of long lines inside the mango — dots dry darker and look sharper.
23. Bracelet Palm with Side Vines and Dotted Fill
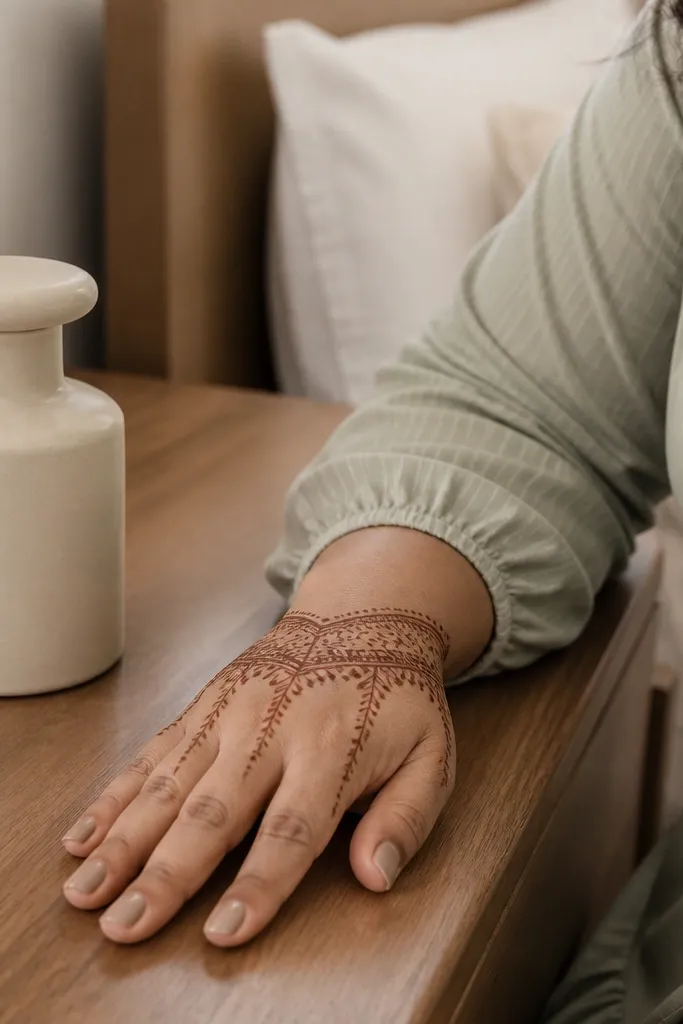
Step 1: Draw a horizontal band across the palm center using two thin parallel lines with a small gap. Step 2: Fill the band lightly with repeating micro shapes like tiny circles or short teardrops, spaced evenly. Step 3: Add two thin vines on the left and right sides that reach toward the index and ring finger bases, then outline fingers with short side arcs and add micro dots near the band edges.
This design looks like a bracelet laid across the palm. You draw a horizontal band that runs across the palm center, then decorate it with small repeating shapes. Side vines connect the band to finger bases so the hand looks cohesive. It’s simple because the band is your main work and the vines are thin. The dotted fill accents make it look high-end in photos without heavy time.
AvoidAvoid adding extra motifs in the open palm center — keep the band as the hero.
Pro tipKeep the band thickness consistent across the hand to avoid a “wavy” look.
24. Minimal Star Medallion at Palm Center
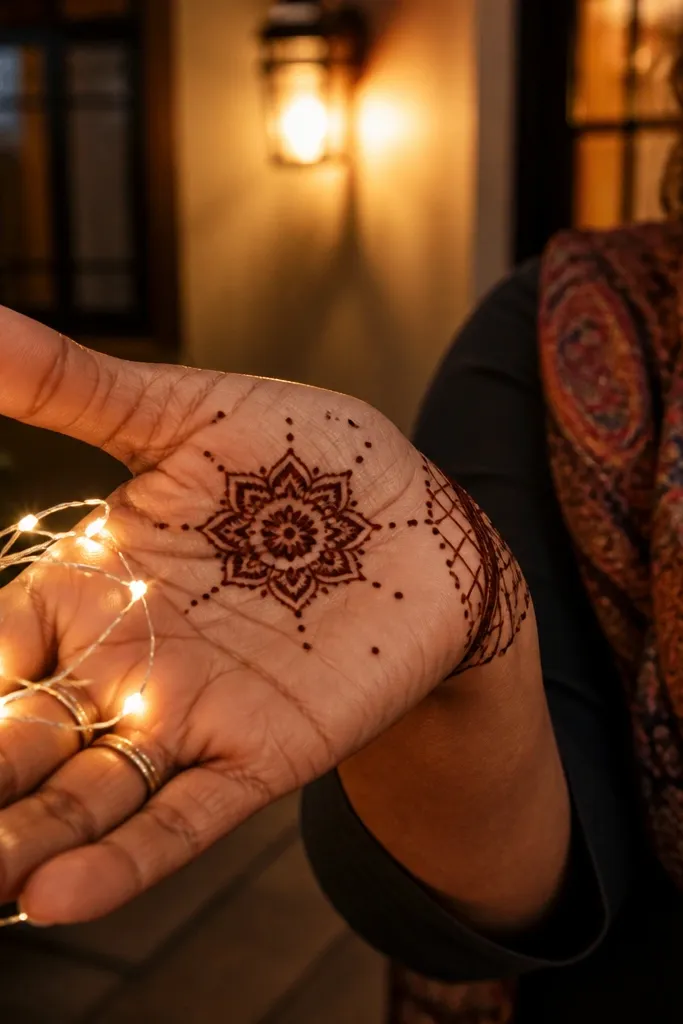
A star medallion looks crisp and festive, especially for holiday nights where you want something that feels celebratory but not heavy. The medallion is small and centered, and the rest of the hand stays airy. You add a thin border around it and scatter dots so the design looks intentional from different angles. This is one of the best options when you want “high-end” without filling half your palm.
Step 1: Draw a small star in the palm center using one clean outline (5 points) and place a dot at the center. Step 2: Surround it with a thin circular ring and add 10-12 dots evenly spaced around the ring. Step 3: Outline fingers with one thin arc per finger and add a wrist band with a simple dot row.
If your star tips blur, outline the star slowly, then add dots only after the outline is set.
Don’t thicken the star outline — a thin star reads more “jewelry-like.”
25. Thin Arc Palm with Three Stacked Rings
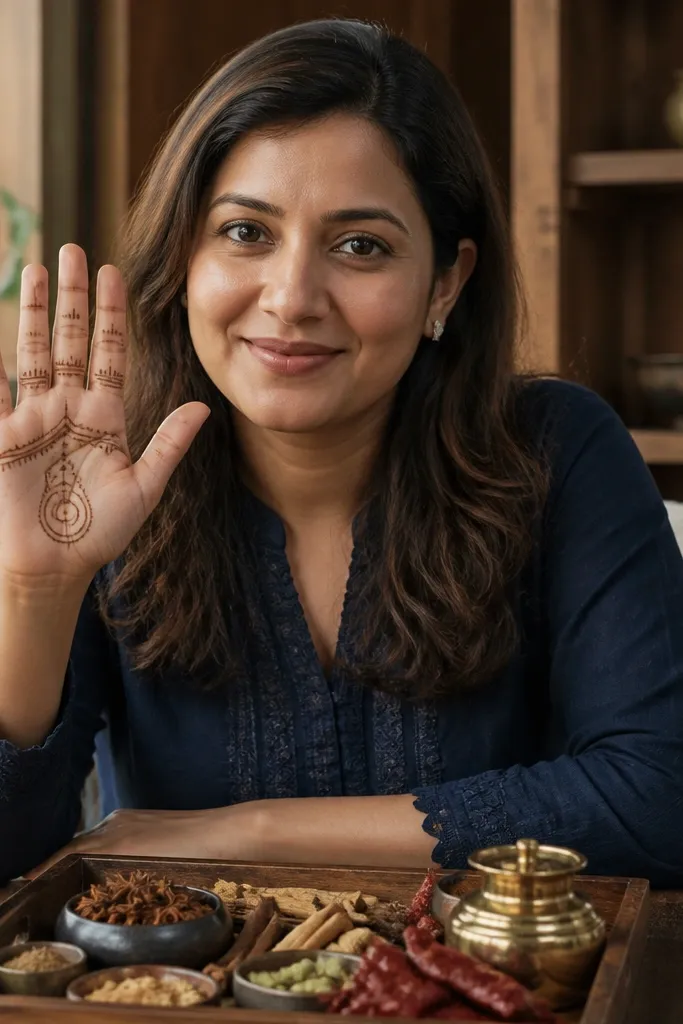
Three stacked rings look like luxury accessories. The rings give a structured, geometric center, and the thin arc border keeps the hand elegant instead of cluttered. Because rings are outline-only, the design stays simple and dries lighter — which makes it look cleaner on skin. Pair this with thin finger framing and you get a front-hand mehndi that looks premium even if you don’t fill much.
Step 1: Draw a curved arc border across the palm center using a single thin line. Step 2: Inside the arc, draw three stacked rings (like 3 circles vertically), each ring outlined only and centered. Step 3: Outline fingers with short vertical lines at the base and add tiny dots between the rings and finger outlines.
Keep ring sizes proportional: top ring smallest, middle medium, bottom largest for a balanced look.
Avoid uneven ring spacing — it ruins the clean, high-end geometry.



