
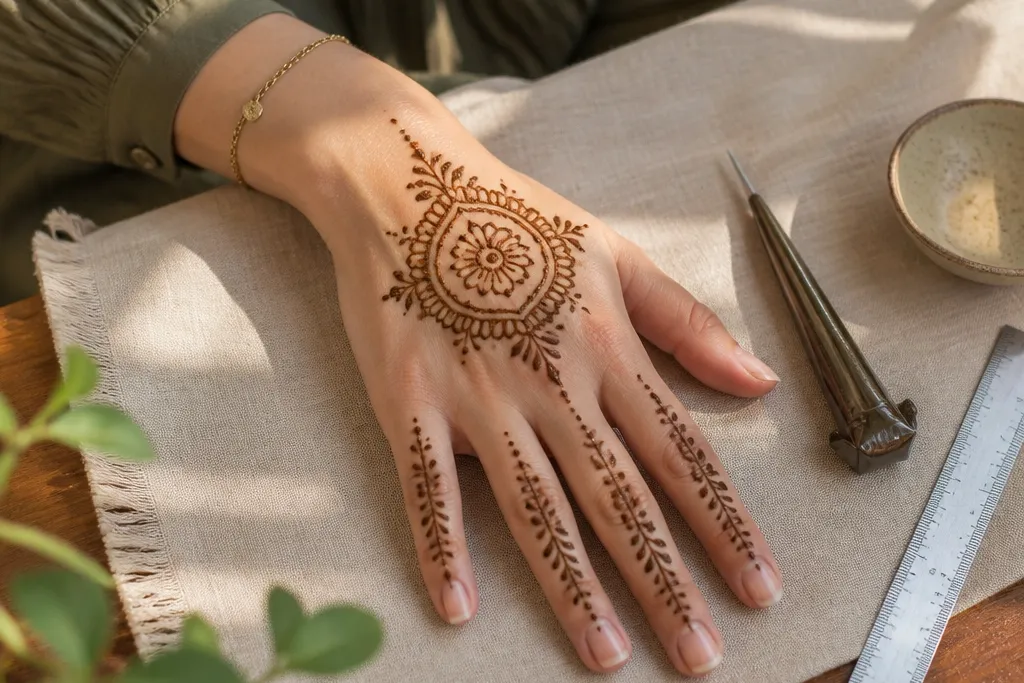

1. Wrist Cuff + Thumb-Base Teardrop
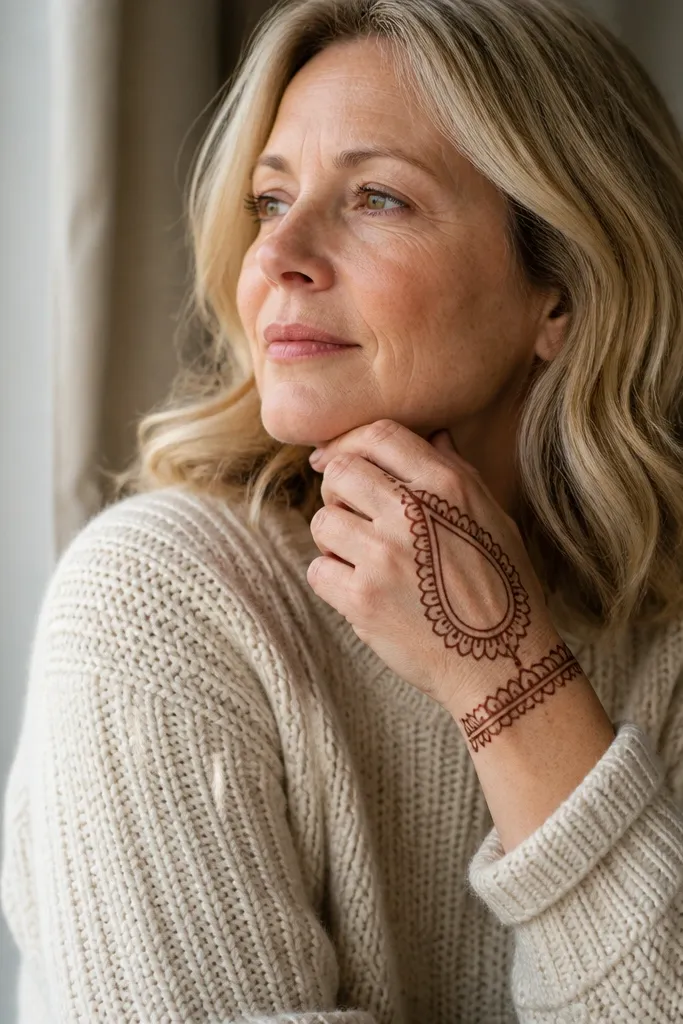
This is one of the easiest low-maintenance back hand mehndi designs because it has exactly two jobs: a crisp cuff at the wrist and one clear teardrop that frames the thumb area. The cuff band gives you structure even if your linework isn’t perfect, and the teardrop creates a focal point that reads well in photos. Keep the finger area open so the back of your hand doesn’t look busy. It looks especially good with short nails and bracelets because the cuff mirrors jewelry placement.
Start by drawing a smooth cuff band around the wrist, about 1 to 1.5 cm wide, using a steady medium-thick line. From the inner edge of that band, draw one teardrop shape pointing upward toward the thumb base, then add 4-6 tiny dots along the teardrop outline. Finish by adding 2 short curved lines connecting the teardrop to the cuff so it looks like one unit, not two separate shapes. Let it dry fully before you wipe off any excess paste.
Pro tipIf your cone lines break, pause and re-start with a fresh tip right on the last line end — don’t try to bridge a gap.
AvoidAvoid filling the teardrop heavily; too much paste makes it take longer to dry and can blur at the edges.
2. Two-Loop Ladder Across the Center
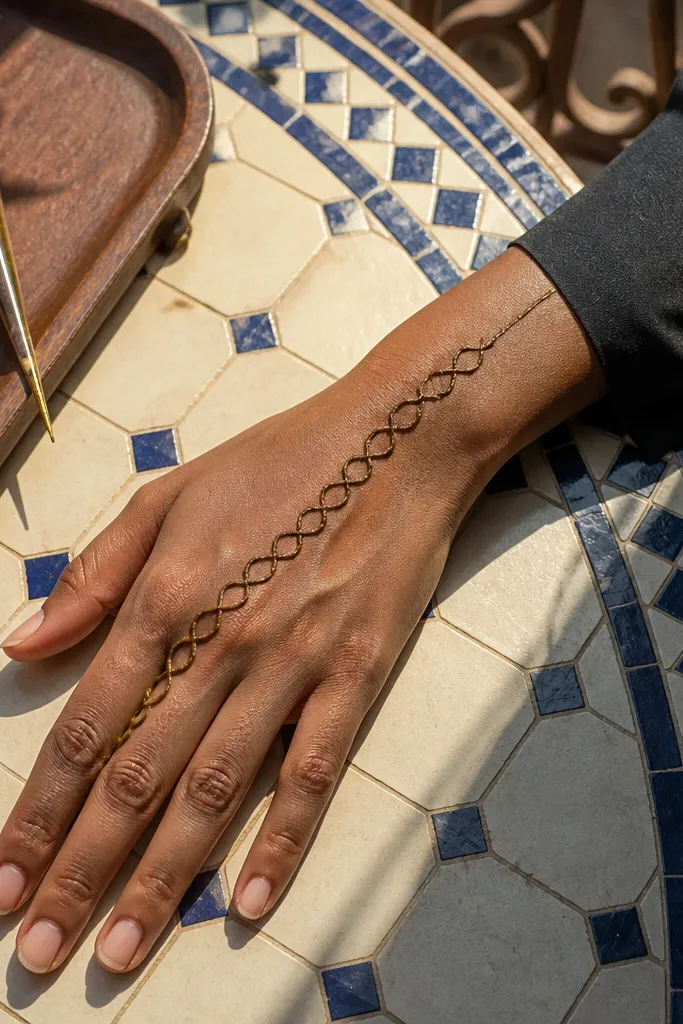
This design looks more complex than it is because it uses repeating loops instead of lots of separate motifs. The “ladder” runs down the center of the back hand, while small loop connectors keep it airy. It’s low-maintenance because you’re repeating one motion — draw a loop, then connect to the next — instead of doing many different elements. It also flatters different hand sizes since the ladder can be scaled wider or narrower.
Sketch a faint guideline down the center from just above the wrist to the gap between thumb and index knuckle. Draw the first loop band with 3-4 loops clustered, then connect each loop to the next using short curved bridges. Add a second ladder line parallel to the first, leaving 4-6 mm space between them for clean negative space. Finish with a tiny crown of 3 dots at the top end where the ladder stops.
Use a ruler or straight edge under your paper to keep the center guideline straight, then follow it lightly with the cone.
Don’t put loops directly over knuckle ridges; leave a small gap so the pattern doesn’t smear when fingers bend.
3. Minimal Floral Corner Cluster
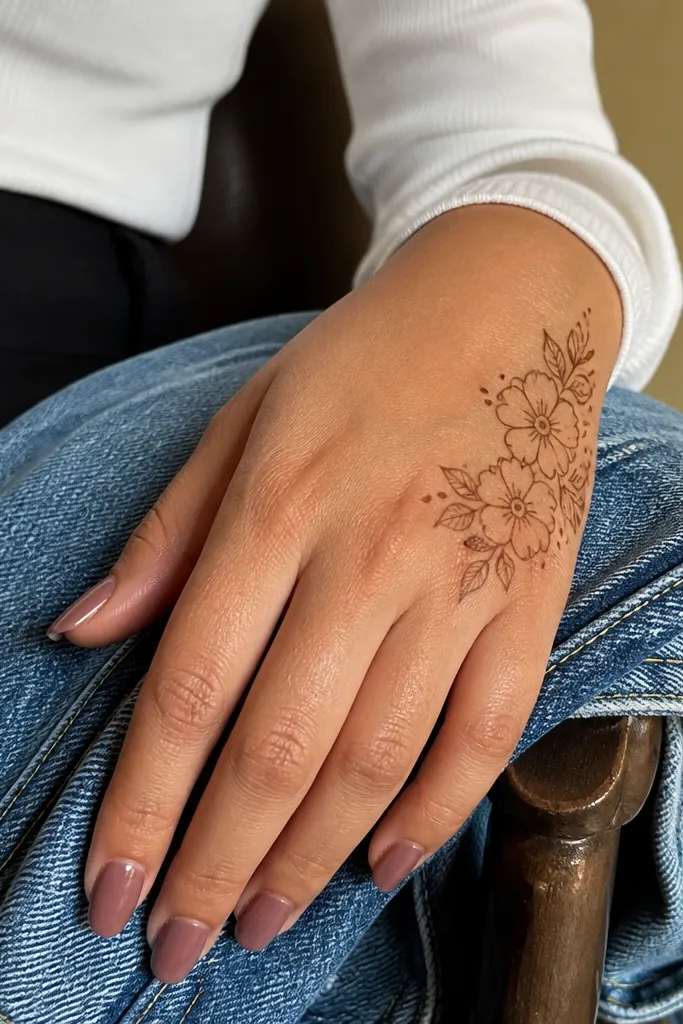
If you want something photogenic without spending time filling petals, this corner cluster is the play. It uses a few open petals drawn with thin lines and leaves the rest of the hand clean. The cluster sits toward the outer upper back hand, so it looks like a deliberate accent rather than a scattered doodle. It works great for everyday events, especially when you’re wearing a ring stack and don’t want heavy coverage.
Start near the outer edge of the back hand, about 2 cm below the knuckle line, and draw one small flower with 5 petals. Add two tiny buds beside it using simple teardrop shapes. Connect everything with 2 short curved vines that taper down toward the wrist but stop before the cuff area. Keep petal interiors mostly empty — add only 1-2 dots inside each petal tip.
Thin lines for petals and slightly thicker lines for the outer vine make the cluster look intentional in photos.
Avoid adding too many extra flowers; one main flower plus two buds looks clean, three or four starts to look messy fast.
4. Bracelet-Style Side Cuff with Dots
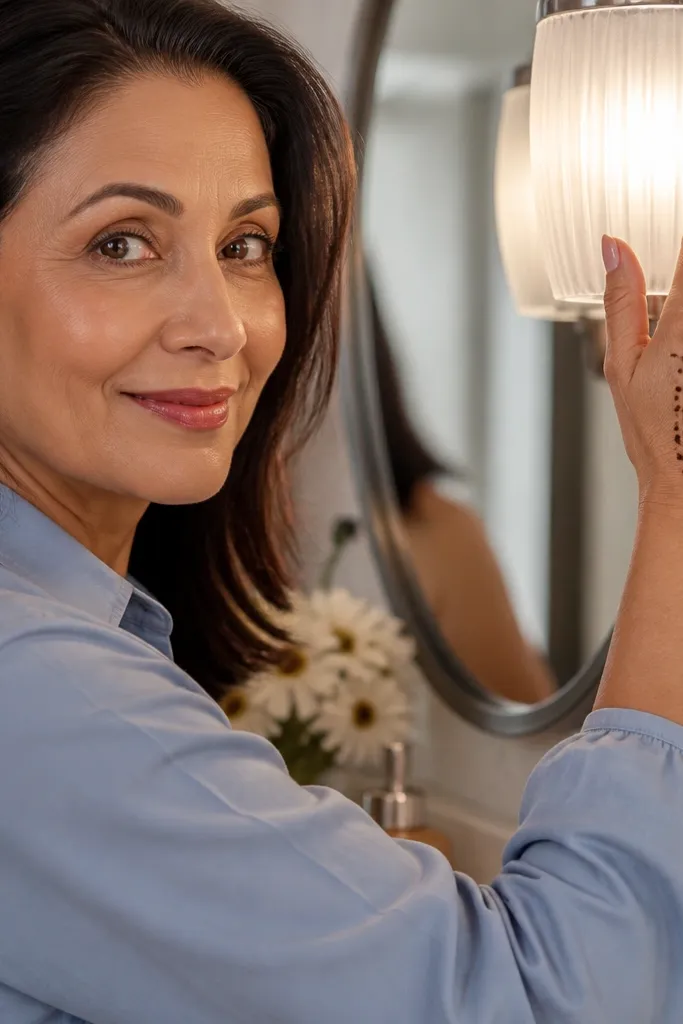
This one is a lifesaver when you want a polished look but hate filling. The side cuff sits diagonally like a bracelet, and the dot accents do the decorative work for you. Because it’s concentrated on one side, it hides small unevenness in your paste application. It’s also easy to match with bangles since the diagonal cuff mimics jewelry angle.
Draw a diagonal cuff band starting near the outer wrist and ending toward the inner wrist edge, about 1 cm wide. On the outside edge of the band, place a row of evenly spaced dots, then add two short diagonal lines crossing the band at the center. Finish by adding 3 tiny dot groups along the diagonal line above the cuff — keep them small and consistent. Let the dots dry until they look matte.
Pro tipUse the cone tip to place dots by touching and lifting straight up, not dragging — dragging smears the dot edges.
AvoidDon’t extend the diagonal too far into the finger area; it should read as a cuff accent, not full coverage.
5. Finger Frame with One Central Leaf
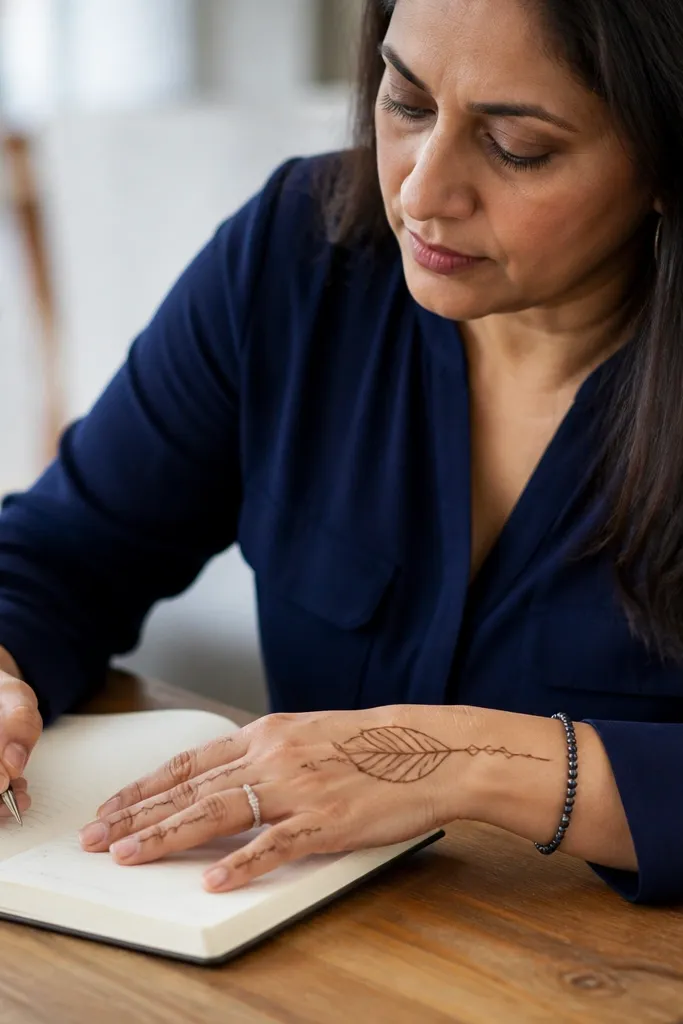
This design frames the fingers lightly without turning into a time-consuming finger lattice. You get structure from thin “frames” between knuckles and one central leaf that pulls the whole look together. It’s low-maintenance because it uses linework, not dense fill. The central leaf is also forgiving — even if your leaf isn’t perfectly symmetrical, it still looks like a planned motif.
Start with a central leaf shape in the middle of the back hand, about 3-4 cm tall, using one clean outline and minimal inner dots. Then draw thin curved lines that arc around the finger base area, leaving the top halves open. Add a small dot at the start and end of each arc so the line doesn’t look unfinished. Finish with a tiny leaf vein line down the center of the big leaf.
Make the leaf slightly thicker at the base and thinner at the tip; it looks more natural and hides minor cone wobble.
Avoid thick shading inside the leaf — it takes longer to dry and can crack on the back hand.
6. Half-Moon Wrist Net
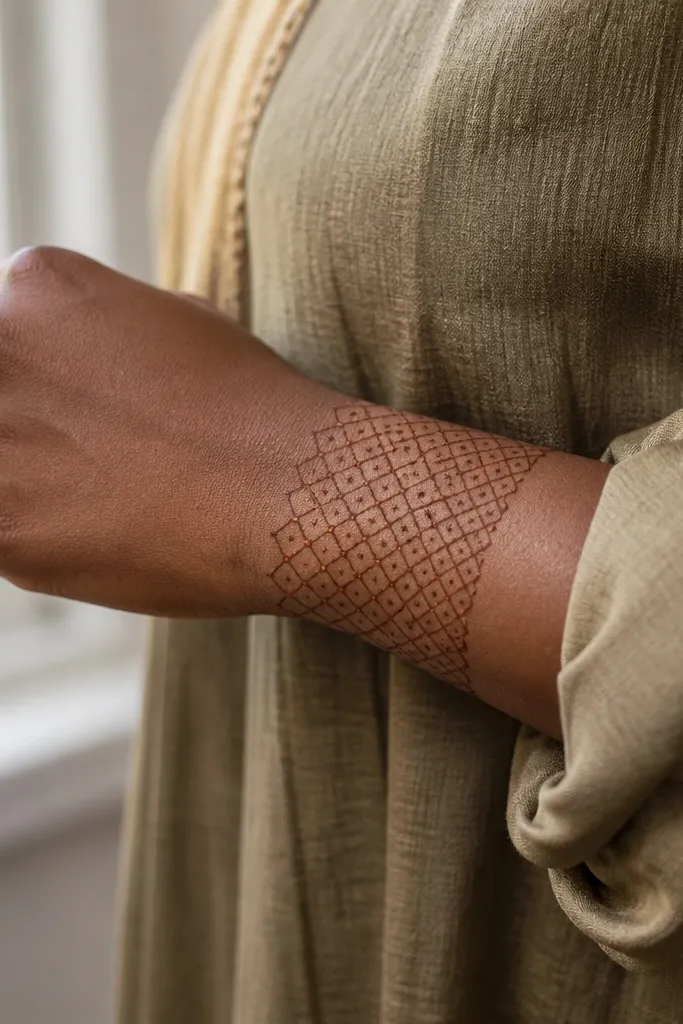
A half-moon net is one of the easiest ways to create “mehndi lace” without actually filling lace. The net pattern is built from repeated cross lines, so it’s fast and looks detailed. It’s also a great low-maintenance design because the pattern stays in one zone — the wrist area — while the rest of the hand stays clean. When you wear it with a bracelet, the half-moon shape looks like it’s wrapping the wrist.
Draw a half-moon arc around the wrist, open toward the top of the hand, about 2.5-3 cm wide. Inside the arc, draw vertical lines spaced 6-8 mm apart, then connect them with short horizontal strokes to form a simple net. Add 1-2 thicker border lines around the arc so the net looks framed. Finish by placing tiny dots at the corners of the half-moon.
Pro tipDo the border first. It makes the net spacing look even even if your inner lines vary slightly.
AvoidDon’t try to extend the net onto every finger; keep it contained so it stays airy.
7. Diagonal Vine with Three Buds

This design is all about a single moving line. A diagonal vine across the back hand plus three buds gives you a sweet, classy look without heavy work. The vine line is quick to draw, and the buds are just teardrops. It photographs well because your eye follows the diagonal — even minimal coverage reads intentional. It also looks good on hands with rings since the vine can sit between ring placements.
Start at the inner wrist edge and draw a diagonal vine line upward across the center, stopping before the outer knuckle area. Add three buds along the vine using teardrop shapes pointing outward — space them about 1.5 cm apart. Add small leaf marks next to each bud by drawing two short angled lines from the vine. Finish with a few tiny dots between buds to break up the negative space.
Pro tipKeep the vine line slightly thicker than the leaves. It helps the design read clearly even after henna fades.
AvoidAvoid making every bud the same size — one slightly smaller bud looks more natural and less “stamped.”
8. Geometric Arrow to Wrist
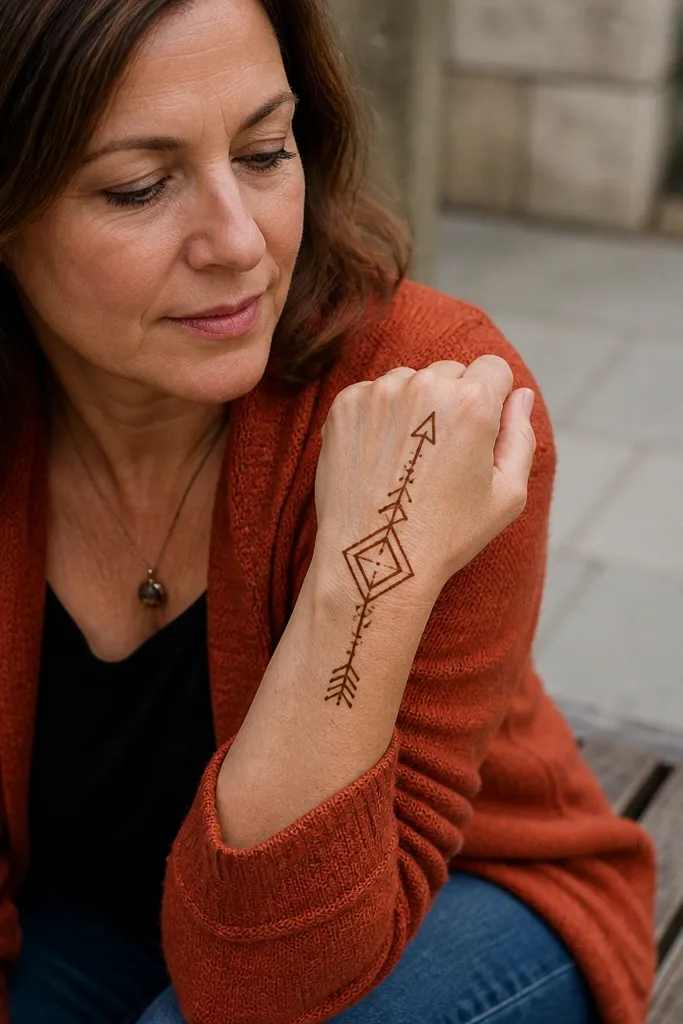
Geometric designs look crisp even when they’re low-maintenance. This arrow-to-wrist layout uses straight segments and clean angles so you don’t need to perfect curves. It’s fast because you’re repeating a simple triangle-and-line structure. The arrow also makes the hand look longer, which is why it’s a great choice for photos where you want your hand to look neat and stylized.
Draw an arrow shaft down the center using two parallel lines, about 3-4 mm apart. Build an arrowhead at the top with two triangles that meet in the middle. Add a small chevron row just above the wrist cuff area, then connect it to the arrow shaft with one short diagonal line. Keep the sides open — no fill, just outline and a couple of dots near the chevron.
Use a steady hand and draw angles in one motion. Stop mid-stroke and you’ll get a jagged corner that looks messy.
Don’t add extra zigzags around the arrow; it stops looking intentional and starts looking like doodles.
9. Cuff + Lace Corner Triangle
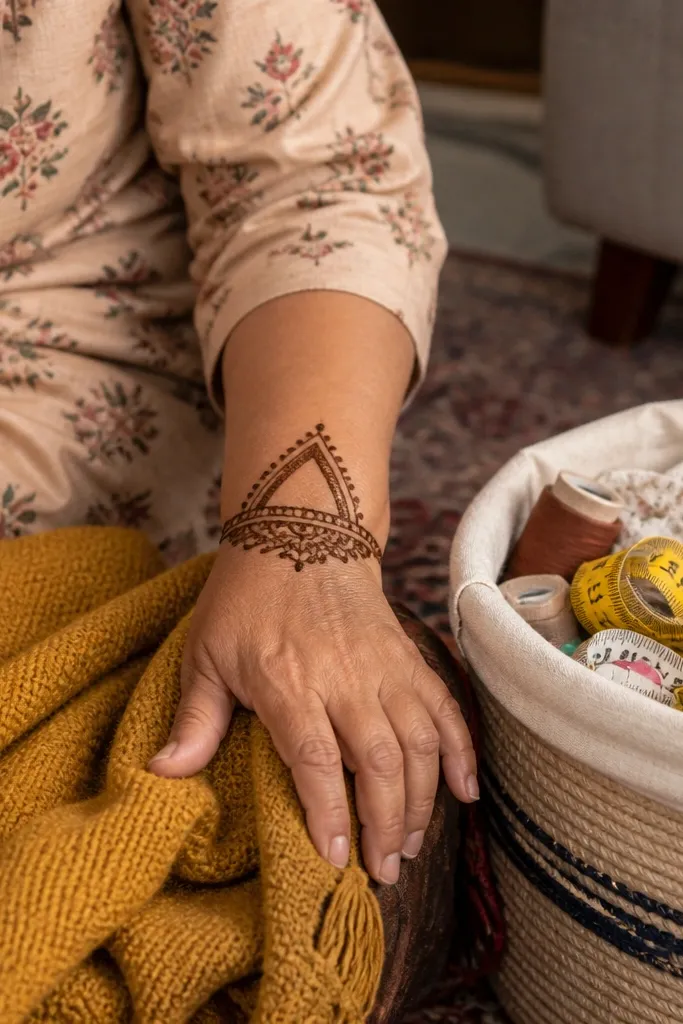
This is a smart look when you want one “wow” area but still keep the project short. The wrist cuff gives you the base, and the lace triangle adds detail without requiring full back-hand coverage. The triangle shape is photogenic because it sits in the path of light and gives a clear silhouette. You get a clean, modern vibe compared to fully floral patterns.
Draw a wrist cuff band about 1.2 cm wide with a thick border line on the outer edge. From the top edge of the cuff, draw a small triangle pointing upward, around 3-4 cm tall. Inside the triangle, draw a lace pattern using alternating diagonal lines and tiny dot nodes at each intersection. Finish with two curved lines that connect the triangle base to the cuff corners.
Pro tipKeep the triangle edges crisp and the inside lattice lighter; the contrast makes it look more detailed than it is.
AvoidAvoid overfilling the triangle — dense lattice takes longer to dry and can turn muddy on the back hand.
10. Single Mandala Dot Row
If you want the fastest “looks done” design, this is it. It uses one small mandala circle built from dot rings and short line sparks. The minimal approach keeps your paste time low, but the dot work still looks intricate in photos. Place it slightly above the center of the back hand so it shows clearly when your hand is relaxed.
Mark a point about 3-4 cm above the wrist center. Draw a small circle using dots, then add a second circle around it with a slightly larger radius. Connect a few dots with short curved arcs to hint at mandala petals. Add 4 tiny dot clusters at the cardinal directions to make the circle look intentional rather than random.
Pro tipSqueeze the cone gently so dots are consistent size. Big dot variation makes the circle look uneven.
AvoidDon’t spread the dots too far apart — tight spacing reads cleaner and looks more “mehndi” on skin.
11. Thumb Loop + Micro-Cuff
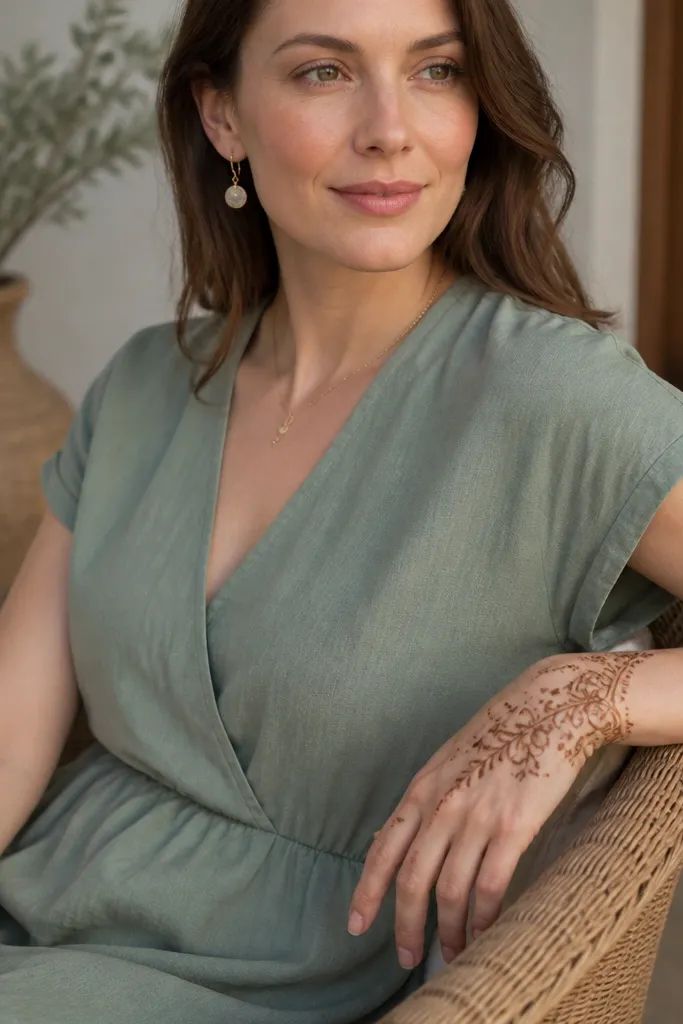
This design is ideal when you have limited time and want the back of your hand to look neat, not heavy. A micro-cuff at the wrist is quick to draw, and the thumb loop adds a strong focal curve. It stays photogenic because the loop sits where fingers naturally frame the thumb base. It also works well with short sleeves and bracelets since the cuff is small and tidy.
Draw a micro-cuff band around the wrist, about 6-8 mm wide, with a simple border line. From the inner edge of the cuff, draw one large loop that curves toward the thumb base and ends near the outer wrist edge. Add 3 small teardrops along the loop line like beads. Finish by adding 1-2 small dots on the cuff border to anchor the design.
Pro tipMake the loop slightly thicker at the start and taper at the end — it looks more hand-drawn and less stamped.
AvoidAvoid adding extra loops. One loop plus three teardrops is the right level for low-maintenance.
12. Knuckle Ring Lines with Open Center

This one makes the back hand look styled without doing full finger coverage. You draw thin ring lines around the knuckles and keep the center open, so it doesn’t feel like you’re painting your whole hand. The rings look clean in motion and still photograph well when your fingers are slightly curled. It’s also great for days when you want mehndi that won’t get too dark on every patch of skin.
Start with two thin curved lines across the top of the hand, one near the lower knuckle area and one higher up toward the mid-back hand. Connect each ring line with small vertical strokes at the gaps between fingers, leaving the exact finger centers open. Add a tiny dot at each connection point. Finish by drawing a short vertical line down from the top ring toward the wrist but stop before the cuff area.
Keep your ring lines equal thickness. Uneven thickness makes the rings look accidental instead of designed.
Don’t cross the ring lines over the hardest knuckle ridge; leave a small gap so it doesn’t smear when you move.
13. Wrist Fan + Two Sparkle Dots
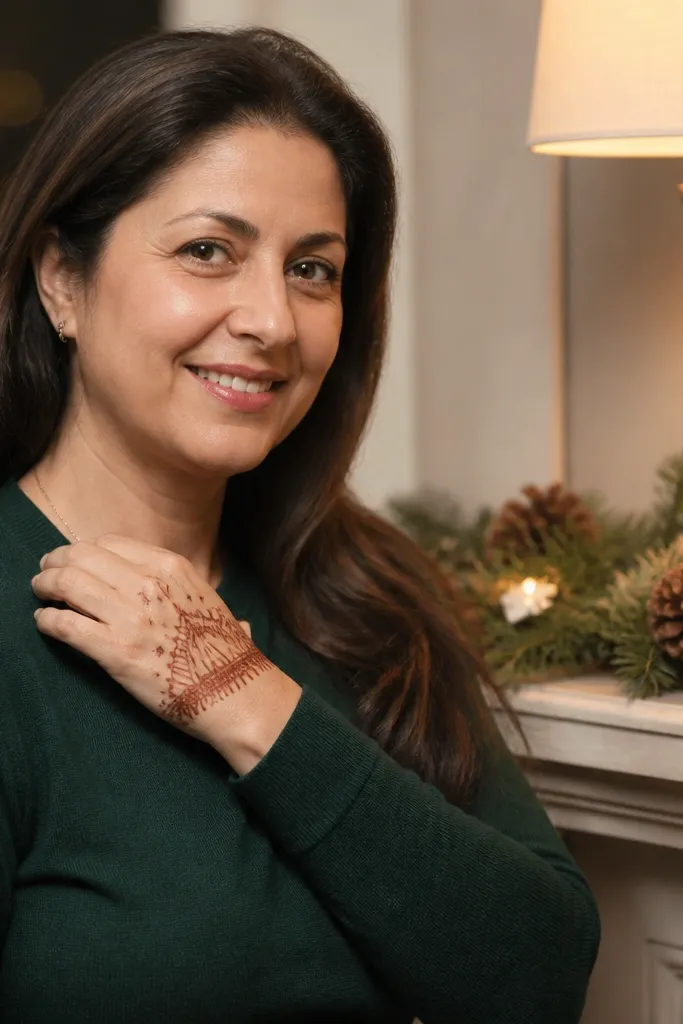
Fans look fancy, but this one is low-maintenance because it’s built from repeated short strokes. You draw a fan at the wrist, then add two sparkle dots above to pull attention upward. The negative space stays clean, so it’s still flattering even if your lines aren’t ultra-fine. This design is great for holiday parties because it reads like a decorative motif rather than a full mehndi sheet.
Draw a wrist cuff border line first. Inside the cuff, draw a fan made of 7-9 short curved lines starting near the outer wrist edge and fanning toward the center. Add a thin inner line to frame the fan so it looks intentional. Place two dots above the fan, about 1 cm apart, and connect them to the fan with two tiny comma marks.
Pro tipIf your fan lines crack, slightly reduce paste thickness and keep the cone angle steady.
AvoidAvoid making the fan too wide. A wide fan takes longer to dry and can blur into the cuff.
14. Side Swirl with Dot Trail
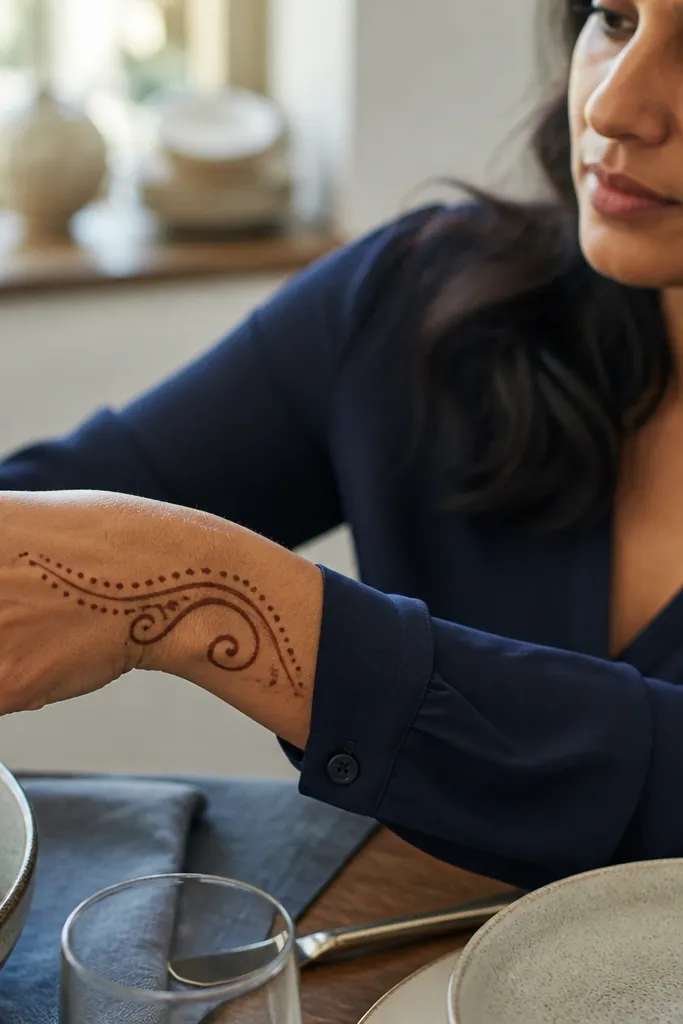
This is a clean, modern design that looks like henna jewelry. One side swirl takes minutes, and the dot trail adds texture without fill work. It’s photogenic because the swirl creates a strong curve that catches light, and the dots add sparkle-like detail. Keep it mostly to one side so it stays low-maintenance and doesn’t compete with bracelets or rings.
Start with a small swirl near the outer mid-back hand, about 2-3 cm above the wrist. Draw the swirl outline and add one inner curve so it looks like a filled outline but stays open inside. From the swirl tail, draw a dotted trail that curves downward toward the wrist, spacing dots about 6-8 mm apart. Finish with one small hook mark at the end of the trail near the cuff area.
Use lighter pressure for the swirl tail so it tapers naturally.
Don’t overdraw the swirl. One clean outline reads better than two messy passes.
15. U-Shaped Cuff with Central Mini Leaf
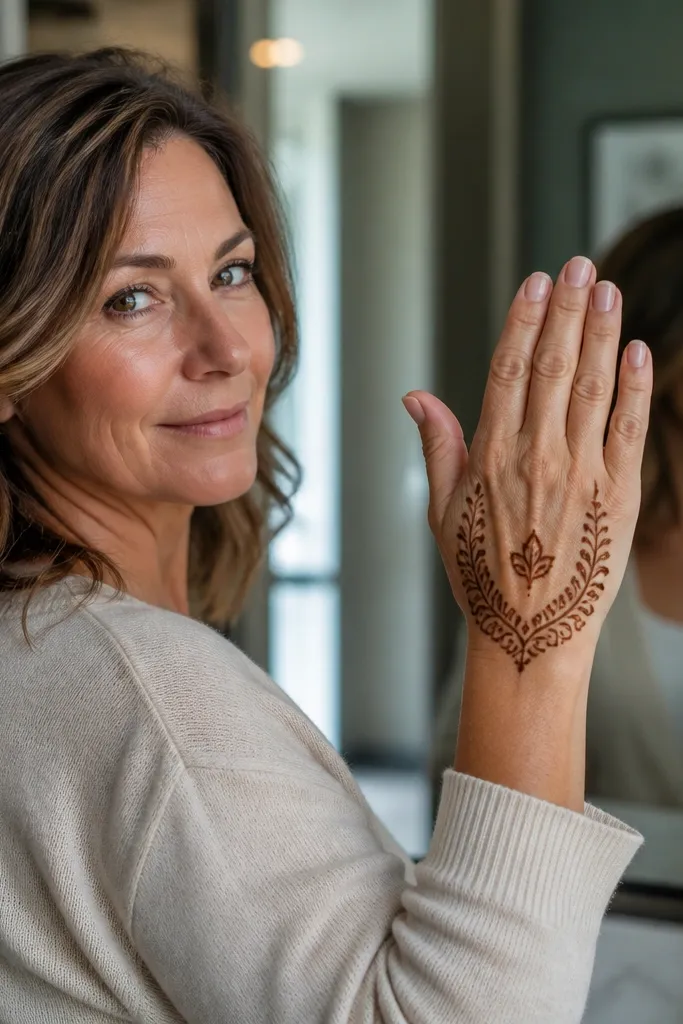
U-shaped cuffs look neat because the shape is easy to keep symmetrical. This design gives you a defined wrist frame and a mini leaf in the center that keeps the look from feeling too plain. It’s low-maintenance because the leaf is small and the cuff is outline-heavy instead of fill-heavy. Perfect for people who want mehndi that looks tidy even as it fades over days.
Draw a U-shaped band around the wrist, open toward the top of the hand, about 1 cm wide. Add a thin inner line parallel to the U border to create a clean frame. Place one mini leaf in the center of the U, about 1.5-2 cm tall, and add 3 tiny dots along the leaf midline for texture. Add two small curved connectors from the leaf base to the U inner border.
Pro tipLet the U borders dry slightly before adding connectors. It reduces smudging at the junctions.
AvoidAvoid thick filling inside the U frame; it makes the cuff look heavy and slows drying.
16. Lattice Strip with Two Side Arcs
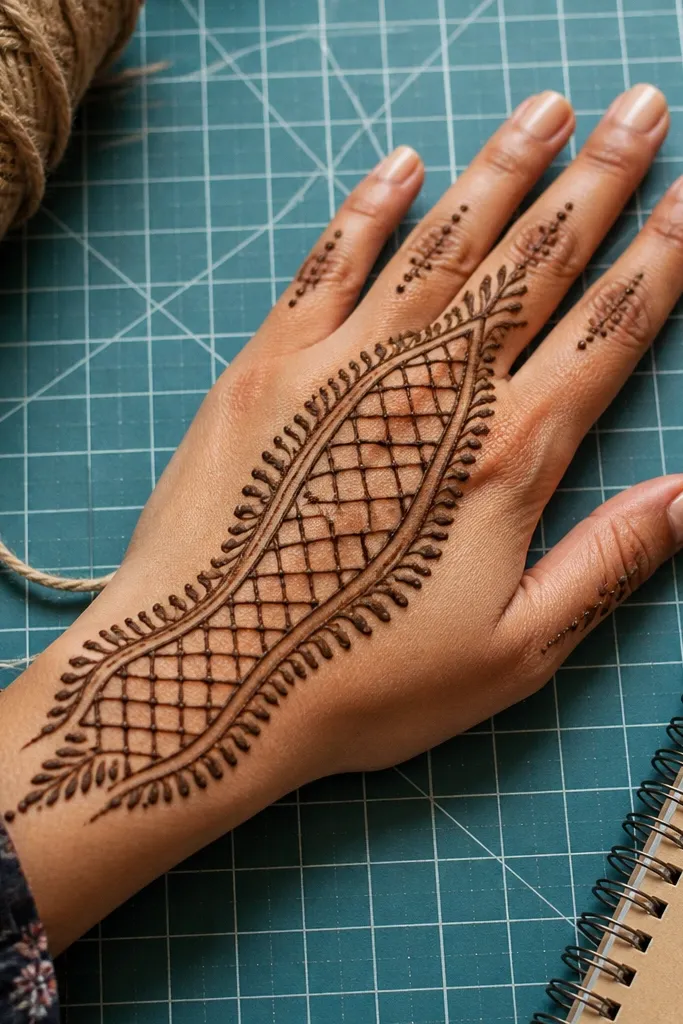
This design is a cheat code for “mehndi lace” without the marathon. You create one vertical lattice strip in the center and two side arcs that frame it. The lattice strip looks detailed, but it’s just repeated cross lines in a small area. It’s low-maintenance because most of the hand stays open, and the shape is easy to keep consistent across different hand sizes.
Draw a vertical strip in the center from just above the wrist to the mid-back hand, about 2-2.5 cm tall and 6-8 mm wide. Add short vertical lines down the strip, then connect with horizontal strokes to make a basic lattice. Place two side arcs that curve outward from the lattice strip ends toward the finger base area, stopping short of the knuckles. Finish by adding a tiny dot at the top and bottom of the lattice strip.
Pro tipUse consistent spacing for the lattice lines so it looks like lace, not random grid marks.
AvoidDon’t extend the lattice strip into finger joints; the back-of-knuckle movement smears it.
17. Holiday Starburst at the Upper Back Hand

Starbursts read instantly festive and still work as low-maintenance because they’re line-based. You draw one central starburst near the upper back hand, then add a few short rays and dots. The design looks intentional even with minimal coverage, and it’s great for holiday photos where you want something that stands out without full hand coverage. Keep the rest of the hand open so the starburst stays the hero.
Mark a point near the upper outer back hand, about 2-3 cm below the knuckle line. Draw a small circle of dots, then add 8-10 short rays radiating outward like a starburst, each ray about 8-12 mm. Add tiny dot nodes at the ends of the rays. Finish with one thin curved line that follows the starburst circle edge to make it look framed.
Pro tipMake rays slightly uneven in length. Perfect symmetry looks mechanical in henna.
AvoidAvoid shading inside the rays. Rays should be outlined and dotted, not filled.
18. Two-Point Heart Teardrops
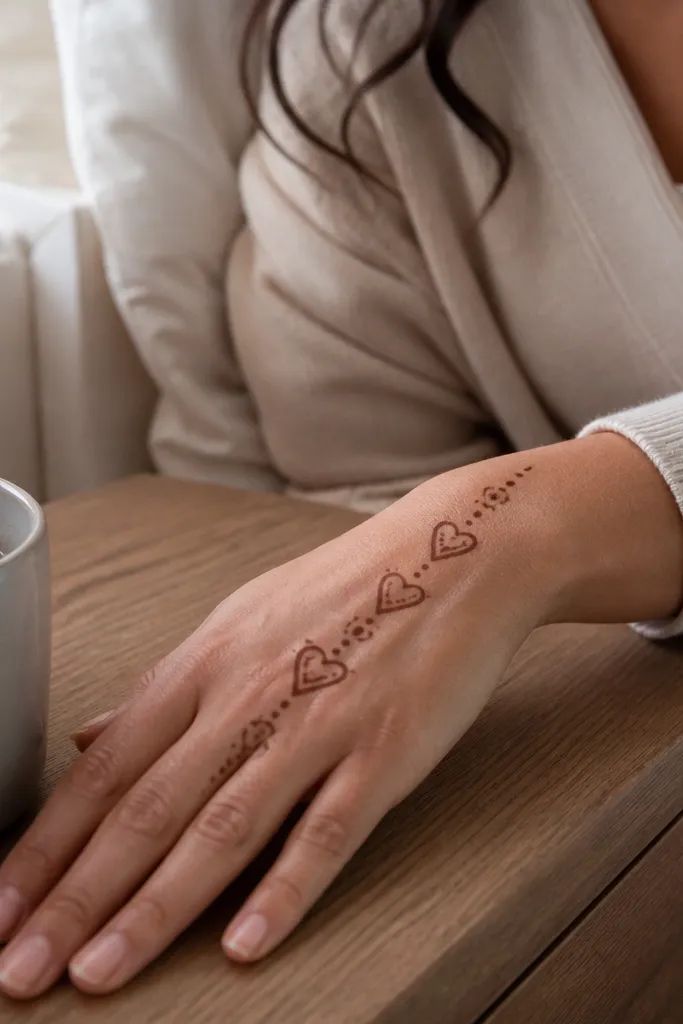
This is a sweet holiday-friendly look that doesn’t require full floral work. The design uses two heart-like teardrops placed diagonally, with a few connecting dots. It’s low-maintenance because you draw two repeating shapes and stop. The open center keeps it airy, and the diagonal placement makes it look modern instead of childish. It’s also easy to scale smaller if you want it subtle.
Draw two heart-like teardrops diagonally across the back hand, starting near the inner wrist edge and pointing toward the outer knuckle area. Keep each teardrop about 2-2.5 cm tall and leave the inner space mostly open. Connect the two teardrops with one short curved line. Add 3-5 tiny dots between them to fill the gap without heavy paste.
Pro tipTrace the teardrop outline first, then go back for a single inner contour line. It makes the shape read clearly even when henna fades.
AvoidDon’t make the hearts too close together. Spacing keeps the pattern elegant and readable.
19. Wrist Border + Three Vertical Dashes
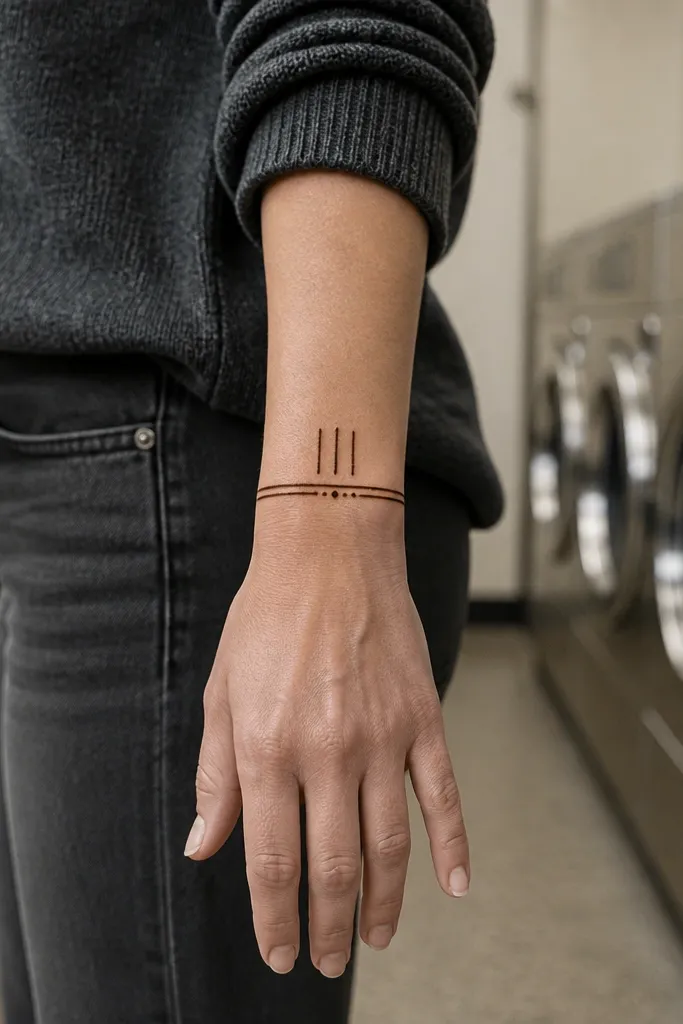
This is for people who want mehndi that looks styled in five minutes. The wrist border gives you a clean base, and the three vertical dashes add just enough detail to look like a deliberate design. It’s low-maintenance because there’s no fill, no lattice, and no finger work. The result is minimalist but still photogenic, especially when your hand is near jewelry or a holiday outfit sleeve.
Draw a thin border line around the wrist, about 3-5 mm thick. From the center of that border, draw three vertical dashes up the back hand, each dash about 1.5-2 cm tall and 2-3 mm wide. Add tiny dot caps at the top of each dash. Finish by adding two small comma marks on either side of the middle dash to balance the look.
Pro tipKeep dash heights consistent. One tall dash breaks the clean “designed” feel.
AvoidAvoid thick borders. Thick paste can crack and look messy on the wrist curve.
20. Diagonal Chevron Band with Micro Dots

Chevrons look sharp and holiday-ready without needing detailed florals. This design places a diagonal chevron band across the back hand and uses micro dots to soften the geometry. It’s low-maintenance because you’re repeating one chevron unit and finishing quickly. The diagonal angle also makes the hand look longer and more structured in photos.
Draw a diagonal band from the outer wrist to the inner mid-back hand, about 1 cm wide. Within the band, draw repeating chevrons using two angled lines that meet in the center — do 4-6 chevrons depending on your hand size. Place a tiny dot at each chevron peak and a slightly larger dot at every other valley. Finish by adding a thin border line around the band edges.
Pro tipMark your chevron spacing with 4 light pencil dots first, then place the cone lines between them.
AvoidDon’t pack chevrons too tight. Leave a small gap so the band looks crisp, not clogged.



