
1. Single Rose Medallion with Wrist Chain
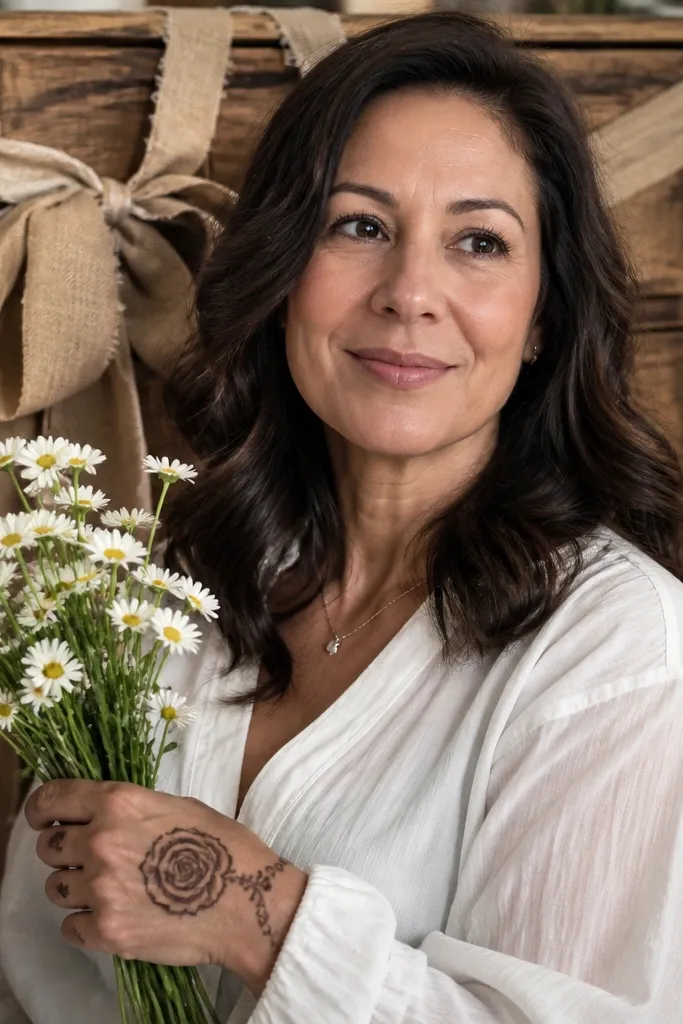
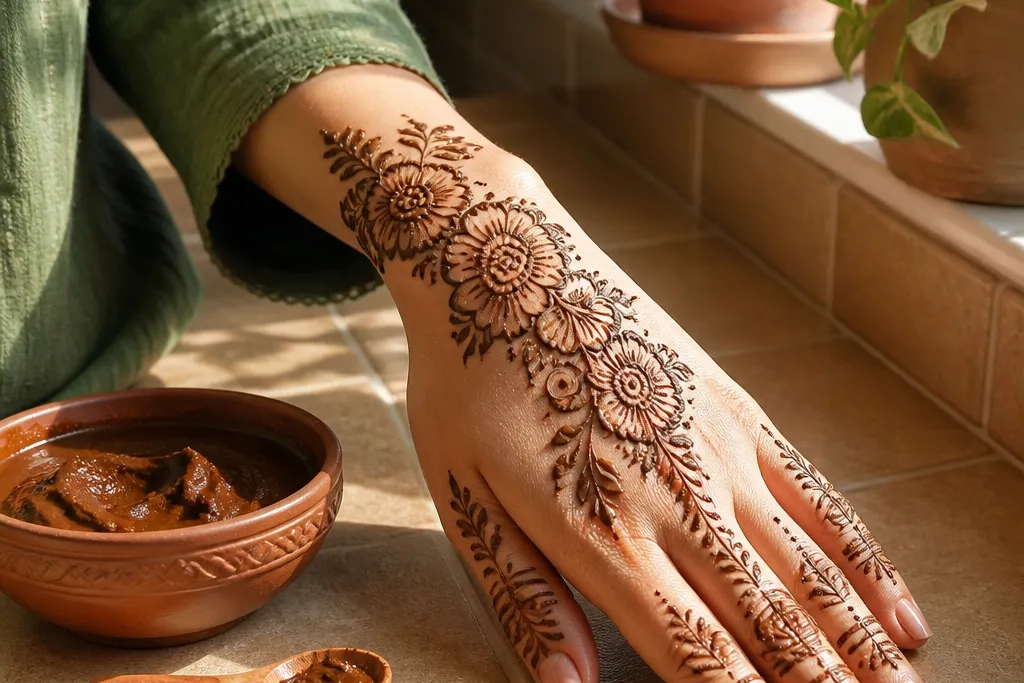
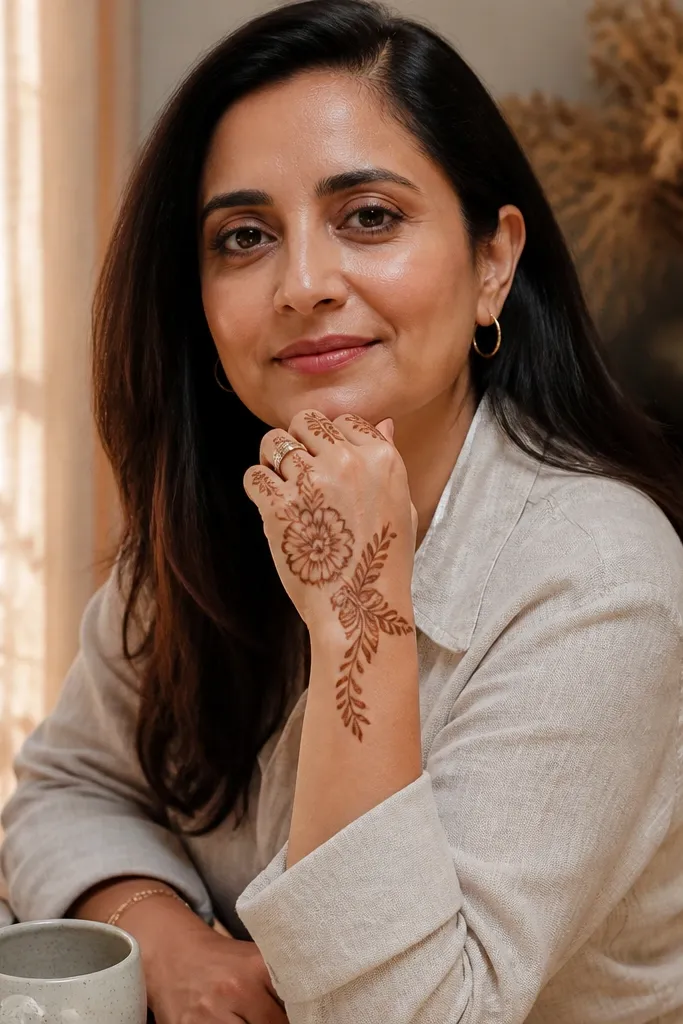
This one is for people who want a floral back hand that looks styled without feeling overworked. You place a clean rose-like flower in the center and let it anchor the whole layout. The wrist chain border pulls the eye down, so the design still looks complete even if your fingers have lighter detail. It also ages well because the rose outline stays bold while the wrist chain fades more gently. Skill level is beginner-friendly since you’re repeating one flower shape instead of juggling multiple mini motifs.
Step 1: Draw a thin guide line across the back of the hand and place one central flower. Outline 5-7 petals with a pointed tip, then add a small circular center with a few tiny dots around it. Step 2: Add a simple chain border from the wrist up the side of the hand using small loop shapes spaced evenly. Step 3: Finish with two small leaf sprigs near the rose base, keeping them thicker at the stem and lighter at the tips.
Keep petal outlines slightly thicker at the base so the stain reads even when it fades.
Don’t fill every petal heavily — dense fill turns fuzzy on the back of the hand.
2. Two-Sided Daisy Sprigs with Minimal Fill
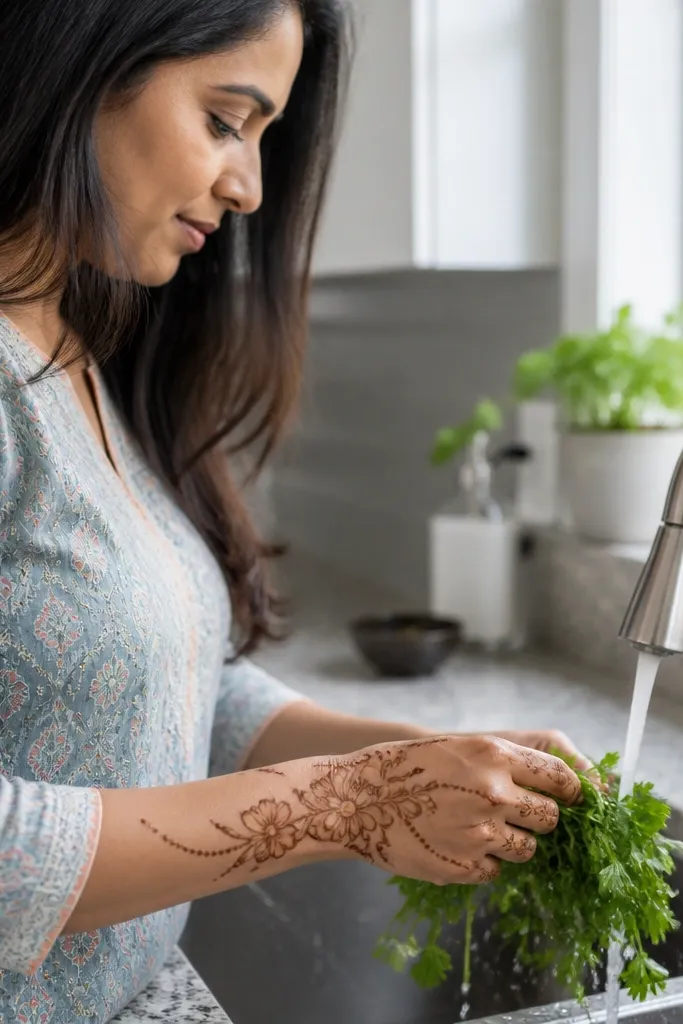
This design looks airy and fresh because it’s built from two daisy clusters placed on either side of the back hand. The petals are simple, rounded, and consistent, so your lines stay even. There’s no need for heavy internal filling, which is exactly why it feels low-maintenance. The small dot accents help it look festive without adding extra drying time. It suits casual festive wear and also works well for first-timers who want a clean floral look.
Step 1: Place one daisy near the knuckle area on the left side and a matching daisy on the right, keeping them at the same height. Outline 8 petals per daisy and add a tight dot center. Step 2: Connect each daisy to the wrist with one leaf sprig — draw a short stem line and add 3 leaf shapes along it. Step 3: Add a few scattered dots between the sprigs, but keep them sparse so the hand doesn’t look crowded.
Pro tipUse the same petal size for both daisies; symmetry is what makes this look “finished.”
AvoidAvoid random dot storms across the back — it blurs and looks messy as it fades.
3. Peony Petals with Side Vines
A peony-inspired flower gives you big floral impact with fewer elements. The petals are layered in a way that reads as lush even when you’re not filling everything. Side vines frame the center and create structure, so the design doesn’t look like it’s floating. This is a great option when you want the back hand to look decorated but still easy to apply within 30-45 minutes. The thicker petal outlines help it hold up through wear and washing.
Step 1: Draw a central peony with 6-9 large petals using a scalloped outer edge. Inside each petal, add light outline lines rather than full fill. Step 2: On both sides, draw a vine line that curves from wrist to mid-hand, and attach 2-3 small leaves along each vine. Step 3: Add a few tiny bud dots at the vine bends so the line looks intentional, not empty.
Keep inner petal lines thin and spaced — they add texture without making the paste too thick.
Don’t overstuff the center — a heavy middle makes the edges blur first.
4. Lotus Bloom with Half-Moon Border
Lotus designs look elegant fast because the petals naturally create symmetry. This version uses a single lotus bloom in the center with a half-moon border near the wrist. The border gives you that “frame” effect, so even if your staining is uneven, the overall shape still reads clean. It’s low-maintenance because lotus petals can be outlined without dense shading. It’s also photogenic from both sides of the hand since the border arcs clearly.
Step 1: Place a lotus bloom in the middle of the back hand. Draw 8 outer petals first, then add 3-4 inner petals slightly smaller, and finish with a small dot cluster center. Step 2: Create a half-moon border at the wrist by drawing a thick curved line that runs from one side of the hand to the other. Step 3: Add two short leaf strokes at the ends of the half-moon so it connects cleanly to the lotus.
Make the half-moon border slightly thicker than the lotus outline for better stain contrast.
Skip tiny filler between the border and lotus — it makes the fade zone look muddy.
5. Floral Frame with Three Corner Flowers
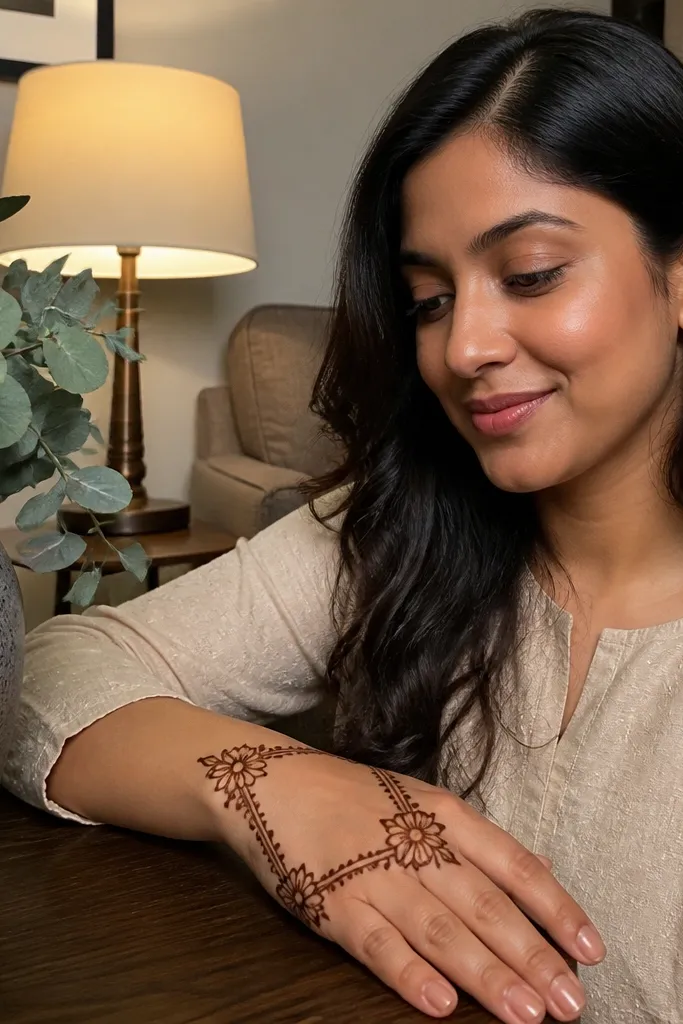
If you want floral coverage that still feels easy care, this frame style is a smart choice. Three corner flowers create a full look without you having to fill the entire back of the hand. The frame lines act like a guide for your spacing and keep the design from looking chaotic. This is also one of the best picks for people who hate micro-detail — the main work is outlines and flower shapes. It looks neat in photos because the frame gives clear edges.
Step 1: Draw a light rectangular frame across the back of the hand, leaving the center mostly open. Keep the top and side sections slightly curved to match the hand shape. Step 2: Place one small flower at each corner of the frame (three total), using 6-7 petals each with a dot center. Step 3: Add a thin vine line connecting the flowers along the frame edges, and finish with a few leaf marks at the vine bends.
Pro tipUse a consistent frame thickness — thin borders fade fast and make the corners look disconnected.
AvoidDon’t try to fill the entire frame area; leave negative space for stain clarity.
6. Mehndi Cherry Blossom Cluster
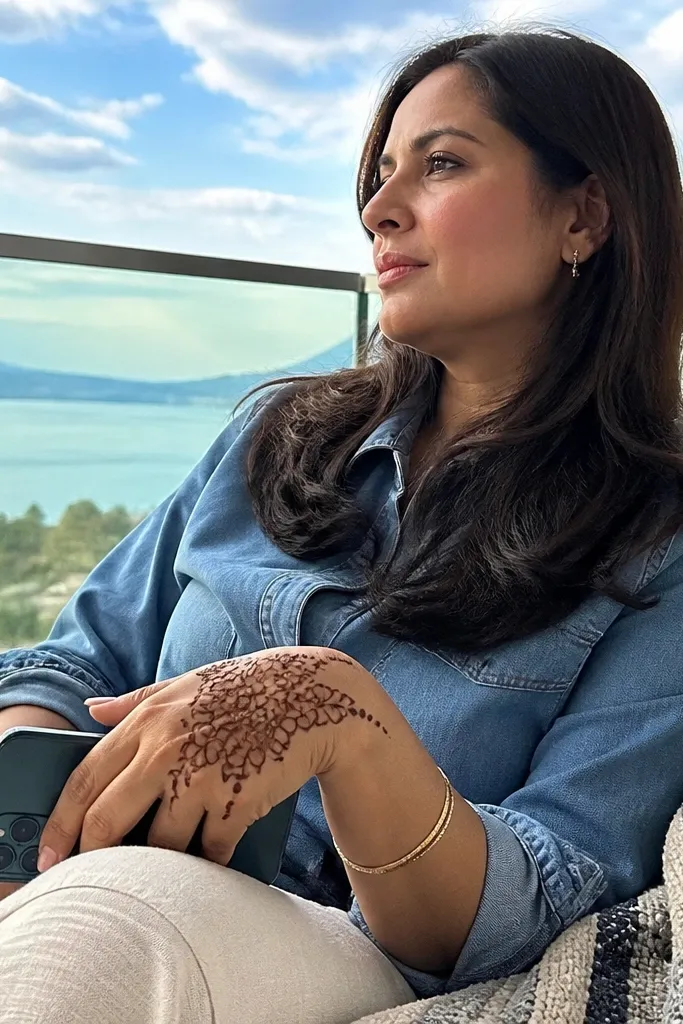
Cherry blossom style gives you a delicate floral look without the time sink of lacework. This cluster places multiple small blossoms in one corner-to-center area, so you get lots of “flower points” while still keeping the lines simple. The petals are small ovals with a tiny notch, which is easy to repeat. It’s low-maintenance because the blossoms can be outlined with minimal inner work, and the dots help the design look intentional even as it fades.
Step 1: Choose one side of the back hand and cluster 6-8 small blossoms in a loose diagonal. Outline 5 petals per blossom, each petal small and slightly curved inward. Step 2: Add a dot center for each blossom, and then place a few tiny dots around the cluster like pollen. Step 3: Add one simple connecting twig line from the wrist up to the cluster, with two leaf marks near the bottom.
Pro tipKeep blossoms the same size and spacing; the cluster looks designed, not random.
AvoidAvoid filling each blossom with heavy texture — it clumps and blurs on skin movement.
7. Sunflower with Two Leaf Fans
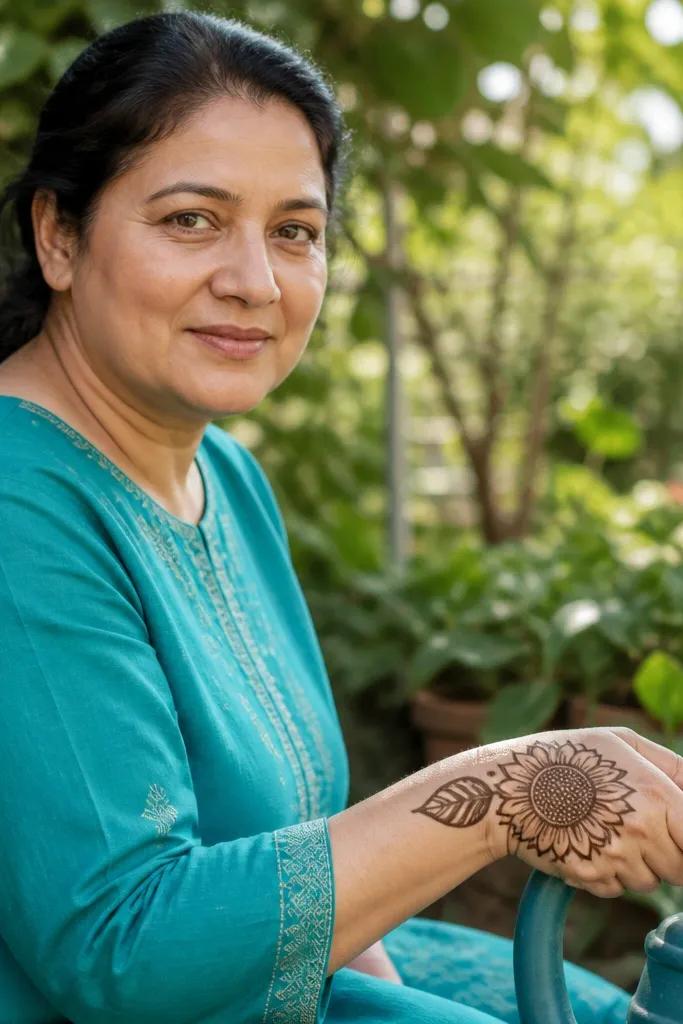
Sunflower designs read instantly from a distance, which is perfect for a back hand that needs to look good even in bright light. The petals are bold and easy to outline, while the center can be done with a controlled dot pattern instead of full fill. Two leaf fans on either side make the whole thing feel balanced. This is easy care because you’re not covering every inch with tiny details. It also works well for people who want something floral but not delicate.
Step 1: Draw a large circular center and fill it with tight dots in a spiral, leaving a small gap in the middle for clarity. Step 2: Add 10-12 sunflower petals around the circle, each petal outlined with a rounded tip. Step 3: On both sides of the sunflower, draw two leaf fan groups — 3 leaves per fan attached to a curved stem that points toward the wrist.
Do the center dot spiral last so you can adjust spacing without smearing the petals.
Don’t make the center too wide — if it overgrows, petals shrink and the design looks cramped.
8. Orchid Stem with Three Blooms
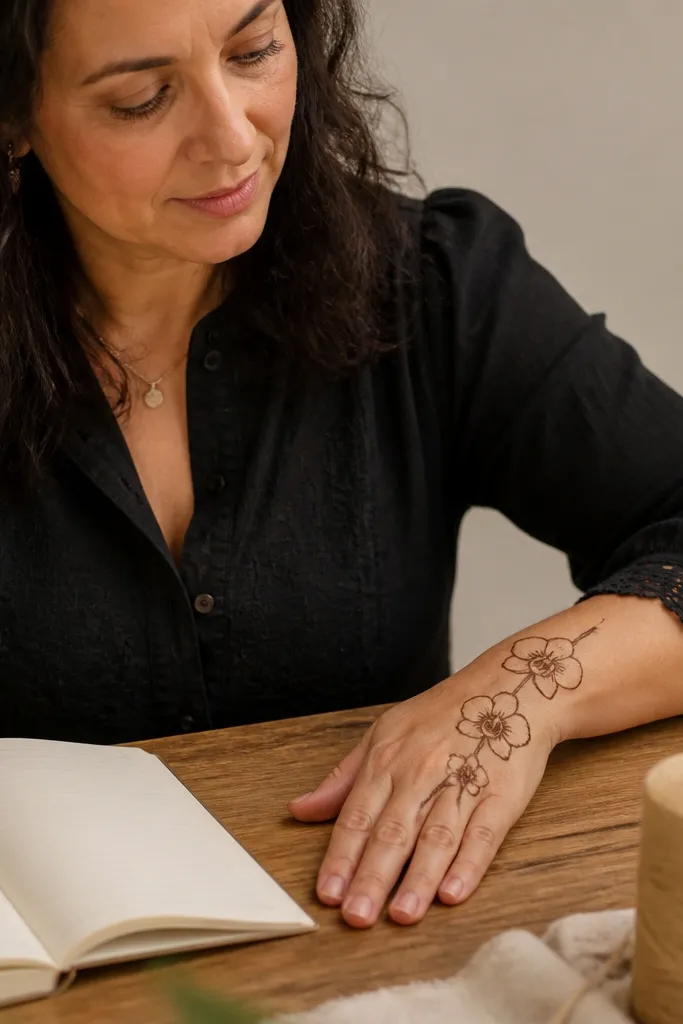
Orchid-style florals look modern and neat because each bloom has a defined shape. This design uses one vertical stem line with three blooms along it, so your work stays organized. The blooms are outlined with a few internal lines, not full fill, which keeps drying time manageable. The stem makes the design feel structured as it fades, so the back hand still looks intentional. Great for people who want floral elegance without the chaotic scatter of tiny motifs.
Step 1: Draw a straight-ish stem line from the wrist toward the middle of the back hand. Step 2: Add three orchid blooms along the stem — each bloom has two side petals and one center petal outlined with a small notch at the tip. Add a small dot in the center of each bloom. Step 3: Attach 2-3 leaf shapes to the stem, keeping them slightly staggered left and right so it doesn’t look flat.
Keep the stem line slightly thicker than the leaf outlines for a cleaner fade.
Don’t add extra mini flowers around the stem; it ruins the clean orchid line.
9. Vine Border with Single Big Flower
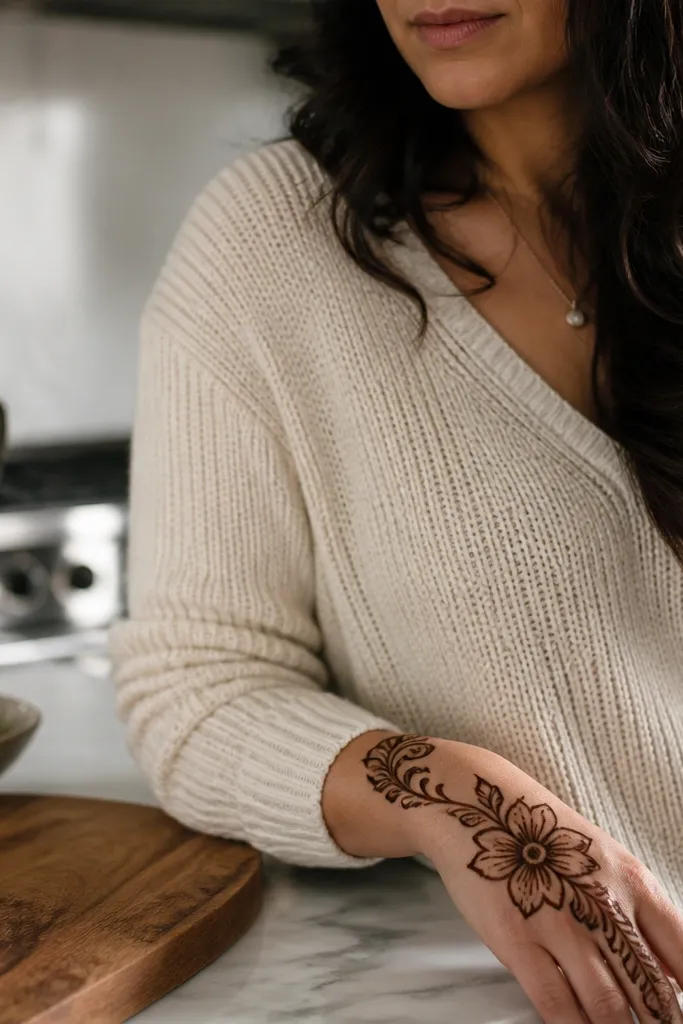
This is the floral layout I recommend when you want one statement flower but still want full back-hand charm. The vine border frames the bloom and creates a continuous flow toward the wrist. Because the vine is thin and the flower is bold, the design stays readable as the thin parts fade first. It’s low-maintenance because most of the time goes into outlining one big flower rather than filling multiple areas. It also photographs well since the big bloom gives you a focal point.
Step 1: Place one big flower slightly above the center of the back hand. Outline 7-9 petals with rounded tips and add a simple dot center. Step 2: Draw a vine border around the flower using a single looping line that wraps from wrist up one side and returns down the other. Step 3: Add two leaf clusters at the points where the vine changes direction, then stop — leave the rest open for negative space.
Pro tipUse fewer vine loops than you think — clean spacing makes the stain look sharper.
AvoidAvoid thickening the vine border too much; it can turn heavy and blur.
10. Rosebuds and Dots Trail
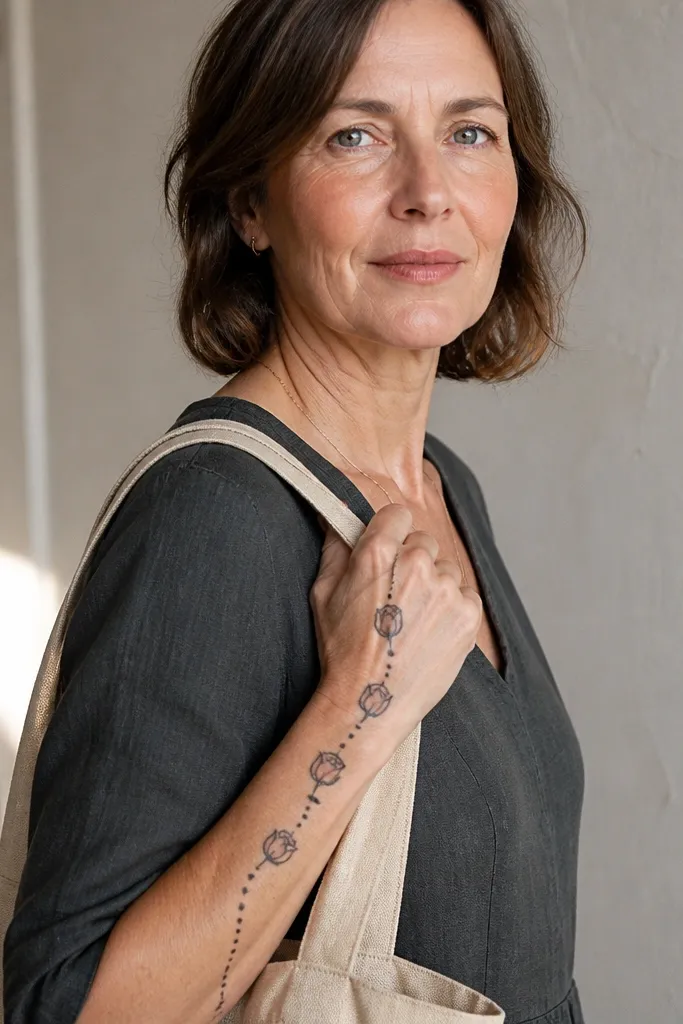
For a back hand that needs to look cute without hours of work, a rosebud-and-dots trail is one of the easiest wins. You get a floral look through repeated buds and a dot trail that fills space without micro-detail. The buds are small, so you can keep lines consistent and the design stays tidy even if your paste isn’t perfect. This also ages well because the dot trail is spaced and doesn’t turn into a solid dark patch. It suits day events, brunch functions, and quick DIY sessions.
Step 1: Draw a gentle diagonal line from the wrist to mid-hand. Step 2: Place rosebuds along the line every 1-1.5 cm, each bud outlined like a teardrop with a small notch at the top. Step 3: Add a dotted trail along one side of the diagonal line so it looks like it’s guiding the buds. Finish with 2 tiny leaves near the bottom of the trail.
Pro tipMake the buds slightly larger at the wrist end — it balances the fade across the hand.
AvoidDon’t connect every bud with thick paste lines — it makes a heavy streak.
11. Floral Band Across the Back Hand
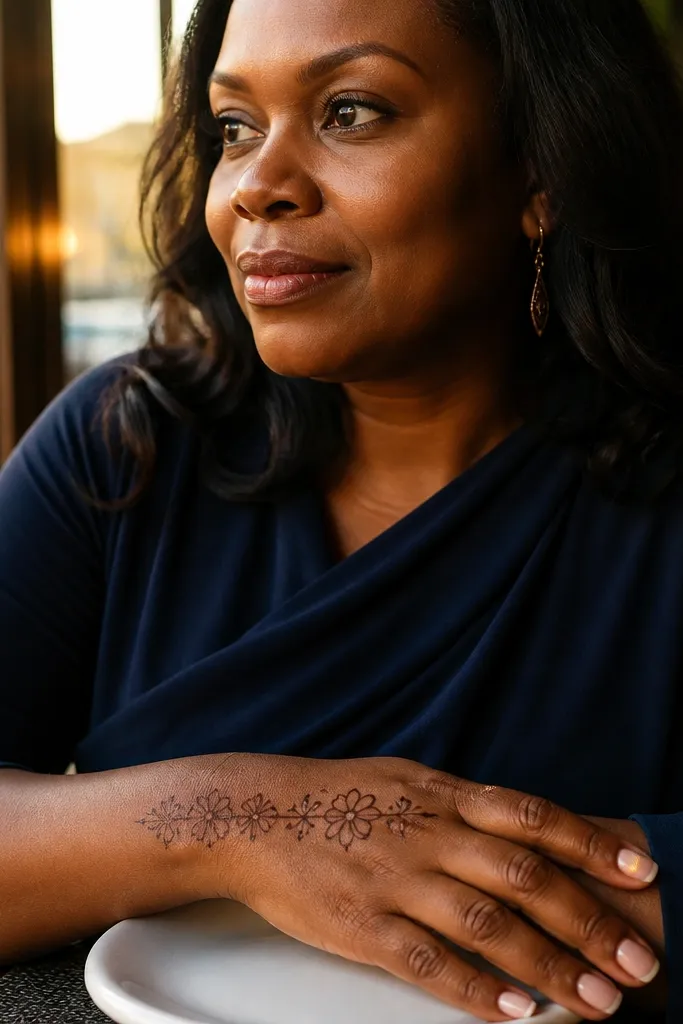
A horizontal floral band gives you a strong, graphic look. It’s low-maintenance because you’re focusing on one band area instead of filling the whole hand. Small flowers along the band look cohesive when you keep the spacing even and the petals consistent. This design is also forgiving during DIY because the band hides small asymmetries — your eye reads the line first. It’s ideal for festive days when you want a polished look fast.
Step 1: Mark a horizontal guide line across the back of the hand about halfway between knuckles and wrist. Step 2: Place small flowers along the line — 5 petals each, with a dot center, spaced evenly. Step 3: Add a thin vine border above and below the band using a single looping line, then connect the band ends with two tiny leaf marks.
Pro tipUse a consistent petal angle across all flowers; that’s what keeps the band looking crisp.
AvoidSkip extra fillers above the band — it breaks the clean horizontal structure.
12. Hibiscus Blossom with Side Dot Lace
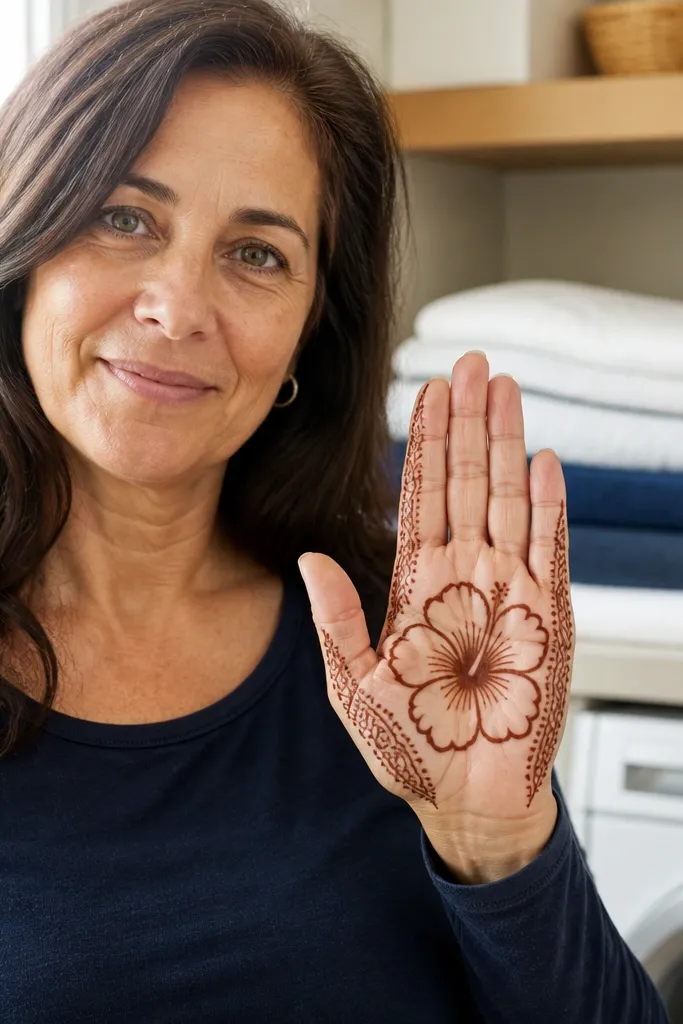
Hibiscus style is bold and photogenic, and you can keep it low-maintenance by doing outlined petals with light internal lines. This design places one hibiscus bloom as the centerpiece and adds dot lace only on the sides, not throughout the hand. The contrast between bold petals and minimal dot work keeps it tidy as it fades. It’s great when you want something floral that still looks modern and not too busy. The side dots also help fill the space where skin shows movement.
Step 1: Draw a hibiscus bloom with 6-7 large petals in the center of the back hand. Add a center shape with a few thin lines and 5-7 dots to suggest stamen. Step 2: On the left and right sides of the bloom, add dot clusters in 2-3 groups each, spaced vertically. Step 3: Connect the side dot clusters to the bloom with one thin curved line and two small leaf tips near the wrist.
Pro tipKeep dot clusters in groups of 5-7; scattered single dots look patchy as they fade.
AvoidDon’t try to lace the whole back hand with dots — it turns into a gray blur.
13. Marigold Corner Bouquet
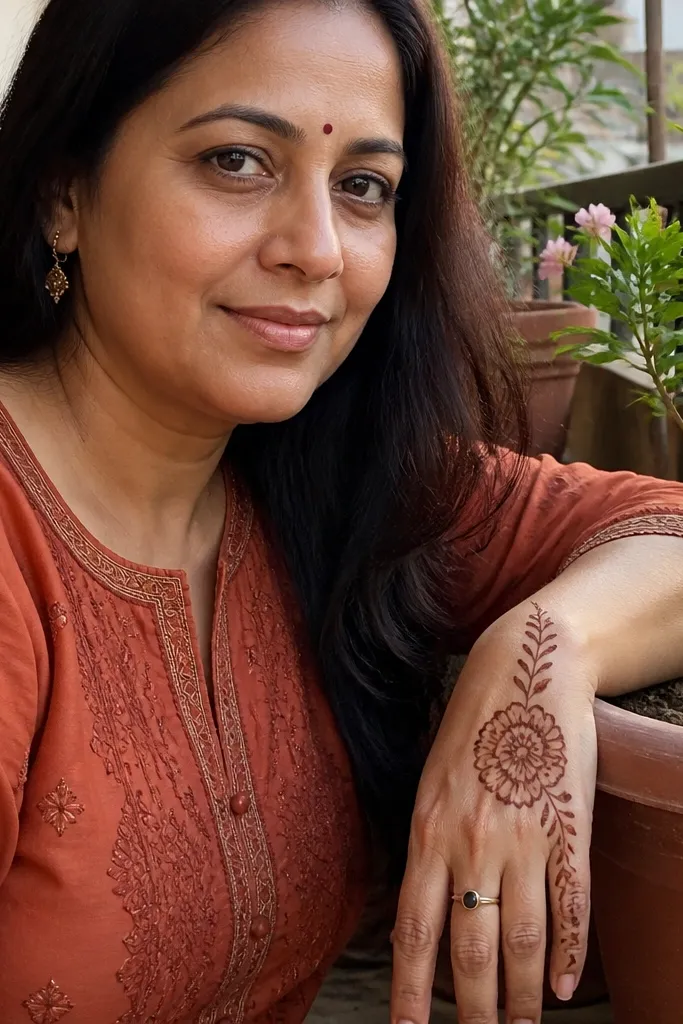
Marigold corner bouquets look festive instantly because the petal shapes stack and radiate outward. This design works well for low-maintenance because it uses one main bloom in a corner position, plus small leaf sprigs that frame it. You don’t need to cover the entire back of the hand for it to look decorated; the corner placement creates a strong visual punch. As it fades, the bold petal outlines still read as marigold-like. It’s a solid choice for short events and quick DIY.
Step 1: Place the main marigold bloom in the upper corner of the back hand (near the knuckle side). Outline 10-12 petals with a slightly jagged edge to mimic marigold layers. Step 2: Add a small dot center and then add 2 leaf sprigs that curve toward the wrist. Step 3: Finish with a short border line at the edge of the corner bloom, keeping it thin and stopping before the wrist.
Pro tipStack petals unevenly by a millimeter or two — perfect symmetry can look too flat for marigold style.
AvoidAvoid overfilling the petals — heavy fill makes the edges bleed together.
14. Peach Blossom with Tiny Buds

This one is for the “light but pretty” look. Peach blossom style uses slightly rounded petals and a minimal center, then you add tiny buds to fill the space around the main flower. The design stays low-maintenance because you focus on one main bloom and a controlled set of buds rather than dense micro-fill. It’s photogenic because the main blossom sits cleanly and the buds create texture without clutter. Works well for smaller hands and for anyone who wants a delicate floral without the mess.
Step 1: Draw one main blossom in the center with 5-6 rounded petals and a small dot center. Add a few thin internal lines on only two of the petals for texture. Step 2: Place 6-10 tiny bud dots around the blossom in a loose circle, leaving gaps so the stain can set evenly. Step 3: Add a thin leaf line near the wrist with 2 small leaves and stop there.
Pro tipLet the bud dots be lighter than the main outline; it creates a natural hierarchy in photos.
AvoidDon’t make the tiny buds too large — they start looking like extra flowers and ruin the airy vibe.
15. Floral Ladder Border with Two Blooms
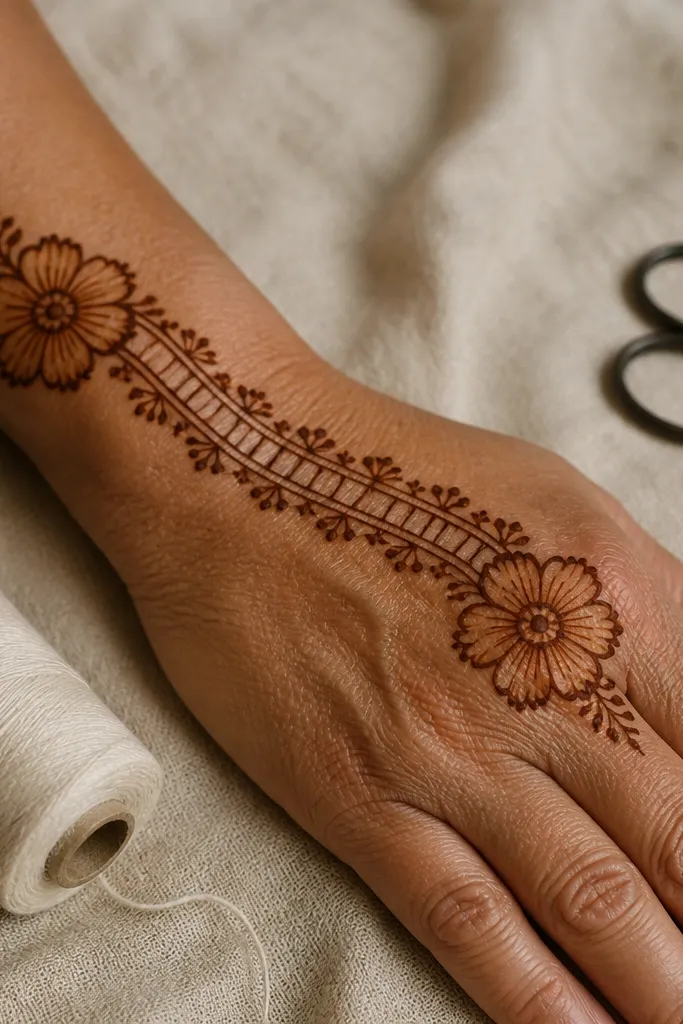
This design looks neatly engineered. It uses two main blooms and a ladder border that runs between them, giving structure without filling the entire hand. The ladder pattern creates clear lines that stay visible even when the stain fades. It’s low-maintenance because the border is repeatable and the blooms are simple outlines with minimal infill. If you’re the type who wants floral but hates clutter, this is a strong pick for a clean back-hand look.
Step 1: Place one bloom near the knuckle area and the second bloom slightly closer to the wrist, keeping them aligned. Outline 6-8 petals on each bloom and add dot centers. Step 2: Draw a ladder border connecting the two blooms using small horizontal bars connected by a vertical line on each side of the hand. Step 3: Add one leaf sprig at the top and one at the bottom where the ladder meets the blooms.
Pro tipKeep the ladder bars uniform width; that’s what makes it look crisp rather than messy.
AvoidAvoid thickening the ladder border — thick bars take longer to dry and smear.



