
1. Thumb-Loop Vine with 3 Leaf Drops
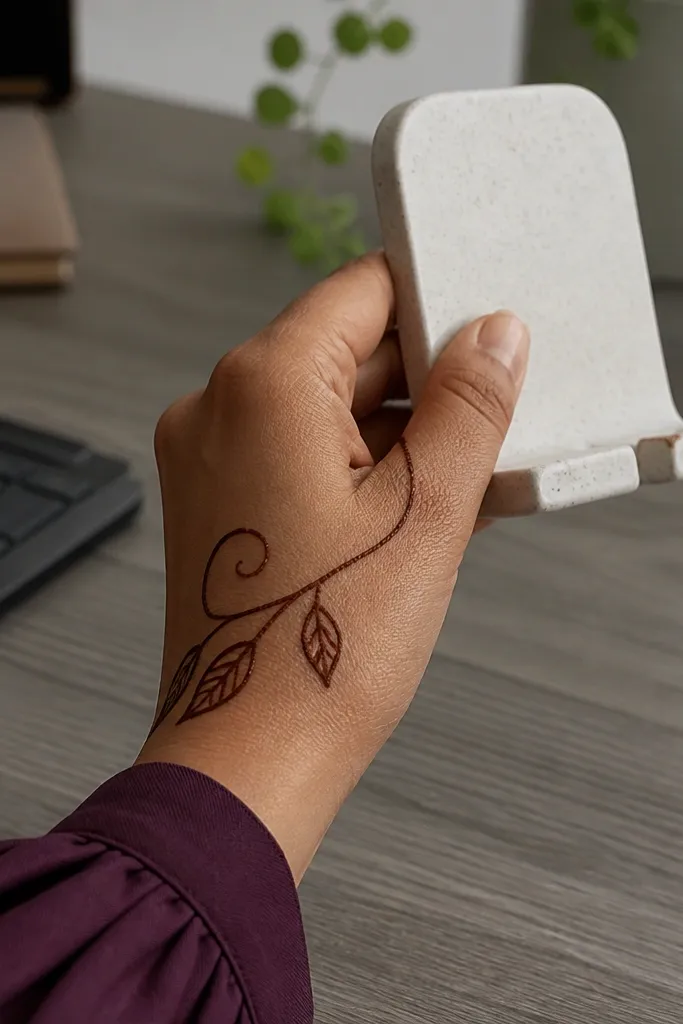
Start by drawing a thin guideline from the thumb web area toward the center of the back of your hand, then form a loop at the top like a gentle “C.” Add three leaf drops along the loop — one above, one centered, one slightly lower — keeping each leaf the same height. Connect the bottom leaf back into the main vine with a short curved stroke. Finish by adding a tiny dot at the base of each leaf to make the spacing look crisp. Let the outline dry before you add any shading.
This design looks classy because it uses one continuous vine line that frames the thumb-side back of your hand. The three leaf drops give you a focal point without needing heavy background filling. It also scales well — you can make the vine longer or shorter depending on your hand size and still keep it balanced. For a busy day, it’s forgiving: if one leaf is slightly uneven, the overall line still looks intentional. It’s great for casual mehndi, quick pre-event touch-ups, and photos where the thumb area is visible.
AvoidDon’t try to fill the whole vine — open lines are what keep it low-maintenance and clean.
Pro tipUse a slightly thicker cone for the main vine so it stays dark even if you don’t do filling.
2. Knuckle Fan with Two Micro Paisleys
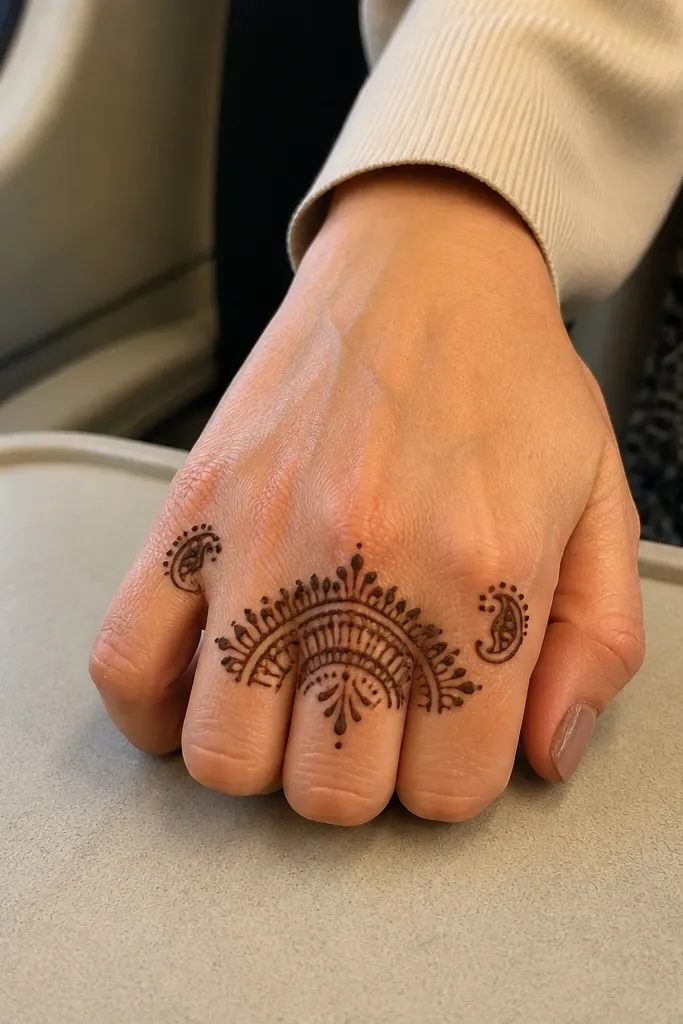
Draw a curved baseline across the knuckle area, then build 5-7 short “leaf ribs” from that baseline upward like a handheld fan. Add two tiny paisleys — one near the index knuckle side and one near the ring knuckle side — keeping them small enough to stay sharp. Outline each paisley and leave the inside mostly open. Add a few dots around the paisleys to make the design look intentional rather than empty. Finish with a thin wrist line if you want a complete look.
This one flatters the natural shape of your knuckles. A fan motif across the knuckle line creates instant structure, and two micro paisleys break the symmetry in a pretty way. Because the pattern sits in a compact zone, it’s fast and you won’t smear it by moving your hand around too much. It also photographs well because the fan creates a clear silhouette from different angles. It suits parties where you want mehndi that looks neat but doesn’t take over your whole hand.
AvoidSkip deep shading inside the paisleys — it slows drying and can blur the edges.
Pro tipKeep the fan ribs short; long ribs look messy when drying unevenly.
3. Finger-Band Half-Flowers on the Back
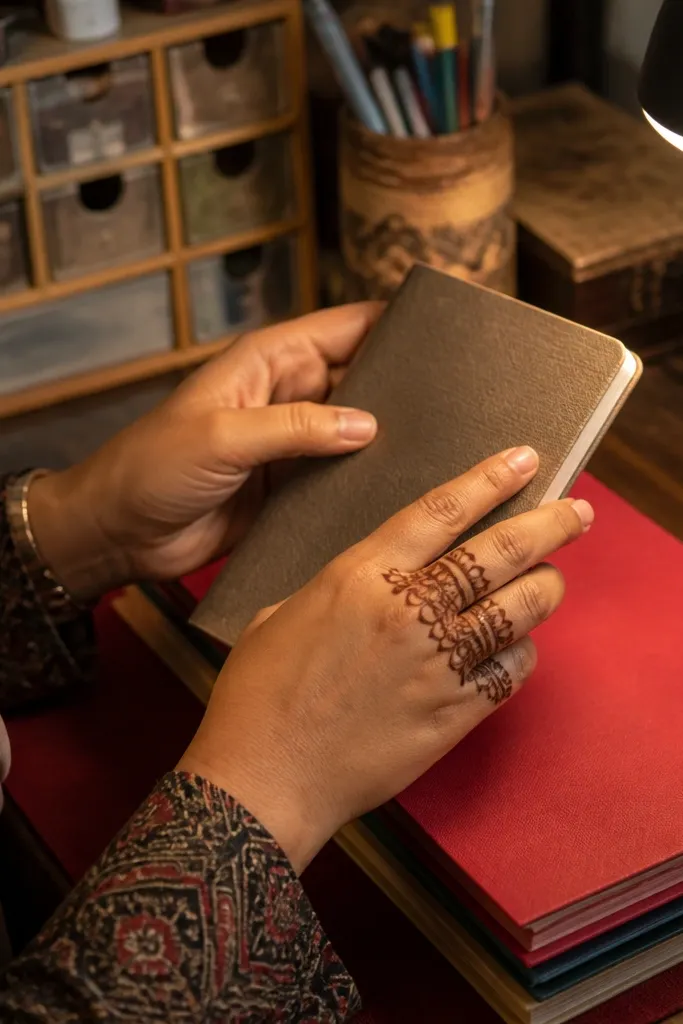
This design is all about rhythm. You place half-flowers near the bases of your fingers, then keep the center of the back of your hand open so the pattern doesn’t feel crowded. It looks modern because it’s geometric in spacing, not heavy in filling. The half-flower shape is also easy to draw quickly: a curved petal outline with a small center dot. It’s ideal for short sessions and for people who want their mehndi to look neat even from far away.
Start by drawing a thin curved line across the finger base zone, following the natural arc where fingers meet the back of the hand. Add half-flowers on top of that line for 3-4 fingers, leaving one finger gap if you want it to breathe. For each half-flower, draw two overlapping curved petals and a small center dot. Connect the outer edges with tiny strokes so the band looks continuous. Wait for the outline to set before adding any dots near the knuckles.
Use a reference point: place the first half-flower under the index finger knuckle so the rest line up naturally.
Don’t add flowers on every single finger unless you’re committing to longer filling time.
4. Center Dotted Leaf Column
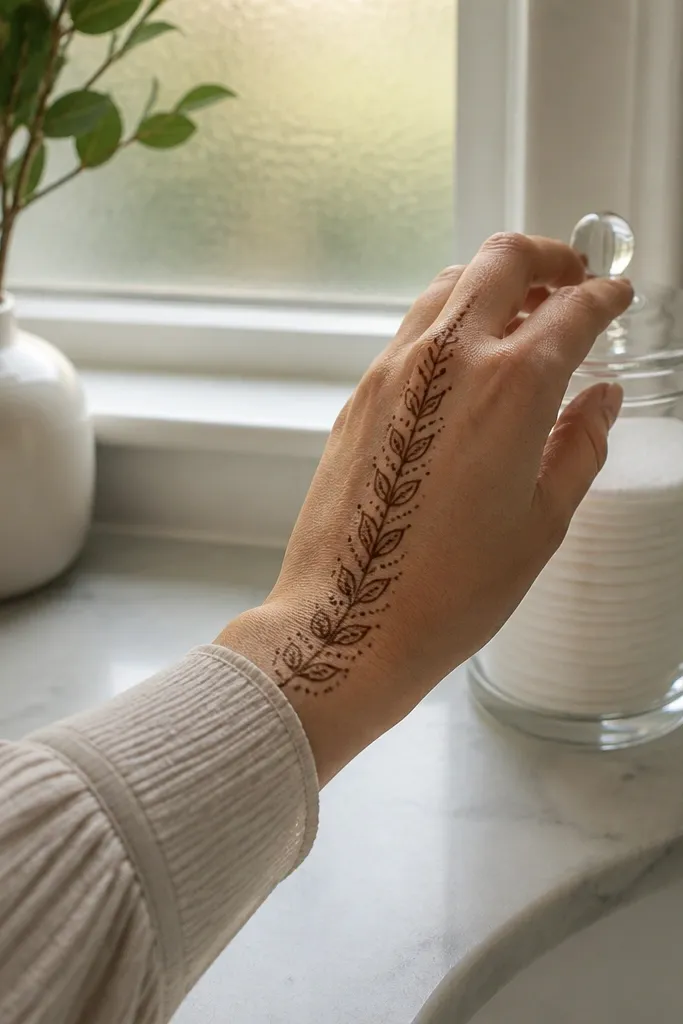
Mark the center of the back of your hand lightly with a dot, then draw a straight guideline from the knuckle area to the middle of the hand. Add 3-5 leaves along the guideline, each leaf facing outward — left, right, left, right pattern. Add a dotted line between leaves by placing 2-4 dots along the guideline. Keep leaf interiors open; only outline the leaves. Finish with a small wrist curve line to anchor the design.
A vertical column is one of the easiest ways to make simple mehndi look elegant. You keep it narrow, so it’s quick to execute, and the dotted details give it texture without taking forever. This design also hides small hand-movement mistakes because the column reads as a single line. It’s perfect if you want something minimal for weekdays or a subtle look under a bracelet. The best part: it doesn’t need background shading to look finished.
AvoidAvoid drawing a wide column — narrow lines dry faster and look sharper.
Pro tipIf your cone is thick, don’t overpress. Light pressure keeps leaf edges cleaner.
5. Wrist Chain + Back Hand Geometric Dots
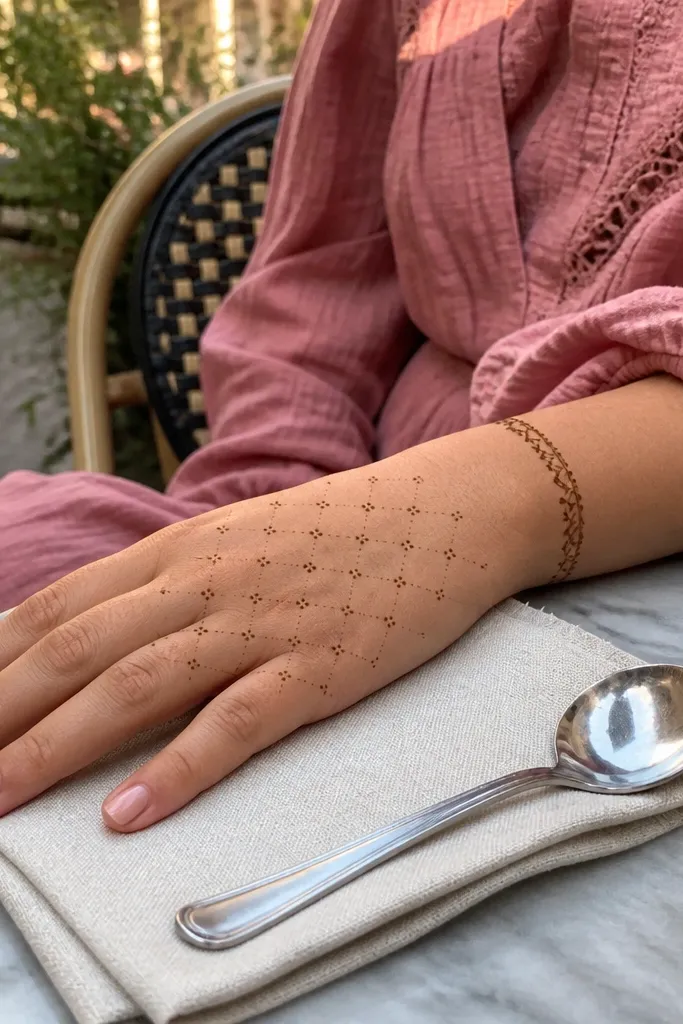
This is the “I’m running late” design that still looks planned. The wrist chain gives you instant polish, while a simple dot grid on the back keeps the look light and modern. You’re not trying to fill big areas, so it dries quickly and avoids smudges. The geometric dot placement also makes it photogenic because it creates contrast against your skin. It suits daily wear, small events, and anyone who hates thick, heavy mehndi.
Draw a wrist chain first: parallel horizontal line with small repeating loops spaced evenly. Then move to the back hand and place a loose cluster of dots in a triangle or diamond shape from the center toward the knuckle area. Add 1-2 short connector lines between dots so it doesn’t look random. Keep the cluster compact so your hand doesn’t look overworked. Let the dots set before you step away from your hand position.
Use consistent dot size by practicing one dot size on a paper strip first.
Don’t make the dot cluster too large — big clusters need more drying time and blur.
6. Paisley Corner Frame on the Back

Start with the thumb-side paisley: draw an outline paisley shape and keep the inside mostly open with just 2-3 small dots. Mirror the same idea on the pinky side, but slightly smaller so the frame feels airy. Connect both paisleys with a thin curved line across the upper back-hand zone, stopping short of the center. Add two short leaf strokes near the middle to guide the eye. Finish with a thin wrist line if you want a complete border feel.
Corner frames look intentional because they create a border without covering the whole hand. Two paisleys — one near the thumb side and one near the pinky side — frame the back-hand space and make the center look clean. This design is perfect for people who want a statement without filling every inch. It also works with rings and bracelets because the focus sits where jewelry naturally draws attention. You get a balanced look even if your line thickness varies slightly.
AvoidAvoid filling paisleys heavily — corner frames should stay light to stay crisp.
Pro tipLeave a clear gap in the center. It makes the paisleys look sharper in photos.
7. Double Arch with Leaf Tips
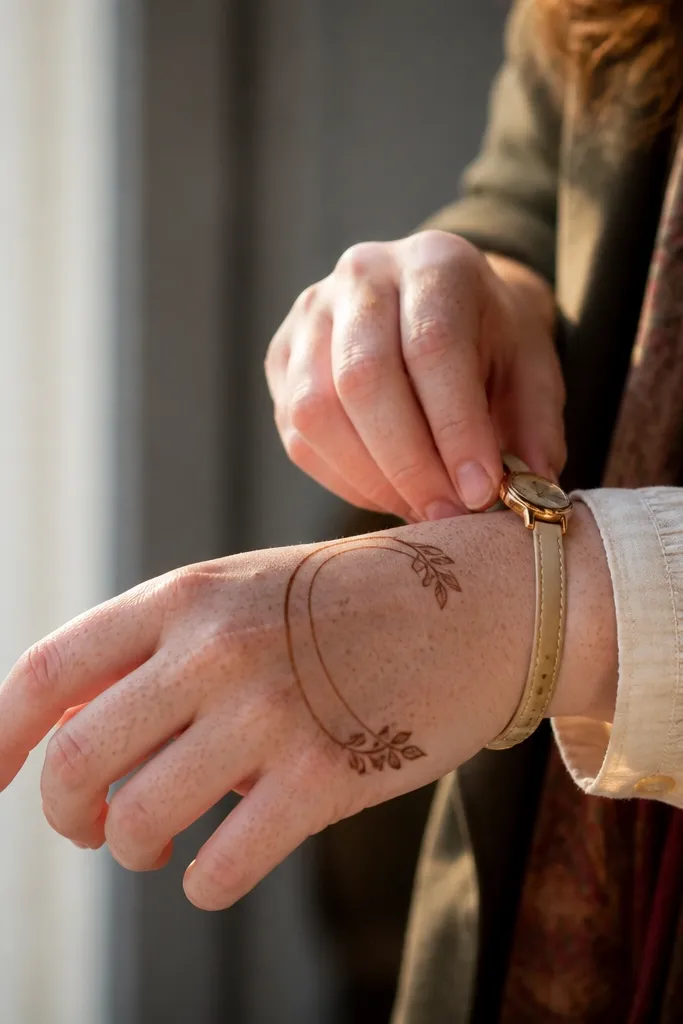
Draw an upper arch line from near the thumb-side knuckle toward the center and down toward the pinky-side knuckle. Add a second parallel arch below it, leaving a small gap between the arches. At each arch end, add a leaf tip: a teardrop outline with a pointed end. Add 1-2 tiny dots between arch sections so the design looks connected. Finish by lightly outlining the wrist curve with a single line.
Two arches create a clean, symmetrical structure that looks more complex than it really is. The leaf tips add softness while keeping the structure geometric. This design is easy to map: you draw the arches first, then you decorate the ends. It’s a great option when you want mehndi that matches a bracelet or watch because it sits neatly along the back-hand curve. It also dries fast since it’s mostly outlined.
AvoidDon’t thicken the arches too much — heavy lines can crack as they dry.
Pro tipKeep arch curves consistent by using a single sweeping wrist motion, not short choppy strokes.
8. Back-Hand Lattice Stripe (Open Squares)
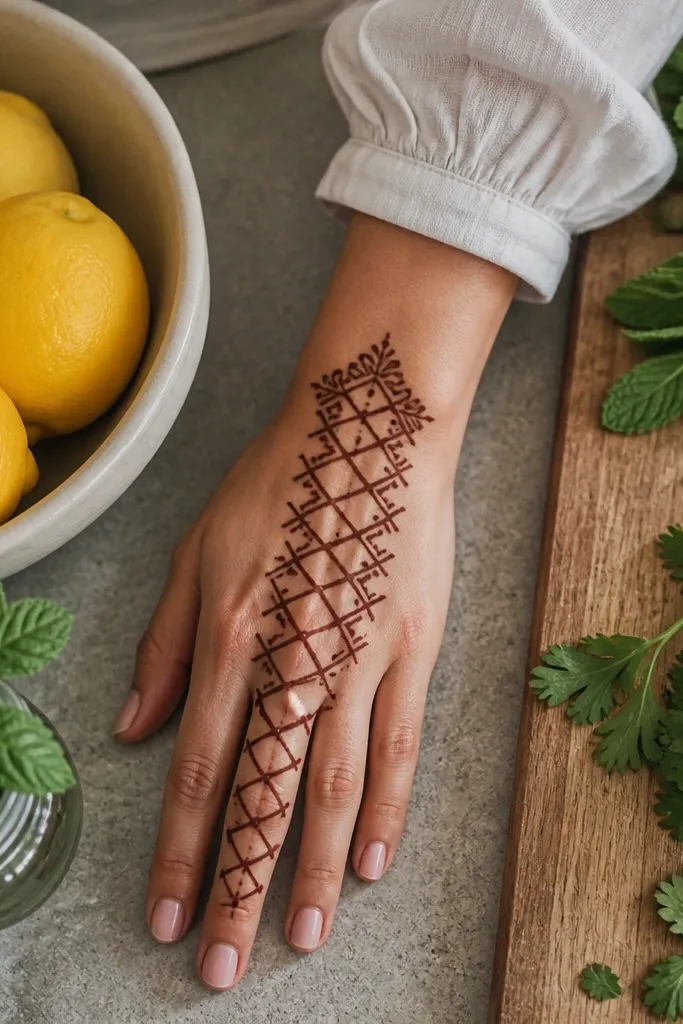
Draw a vertical rectangle outline in the center of the back hand, sized about 2-3 inches tall depending on your hand. Inside, draw horizontal lines across it at 3-4 intervals, then add vertical lines to form open squares. Add dots at the intersection corners instead of shading inside the squares. Keep the grid clean and evenly spaced. Finish by adding a short curved line at the top and bottom of the rectangle to connect it to the wrist zone.
A lattice stripe gives you that “patterned” look without the time cost of full coverage. By keeping the squares open, you avoid heavy filling and you reduce drying problems. This design is photogenic because the grid creates crisp edges and a strong texture. It also works well for people who like modern mehndi instead of floral-only styles. Place it in the center so it reads as the main feature.
AvoidAvoid filling any square — open lattice is the whole low-maintenance point.
Pro tipIf your grid lines look wobbly, slow down for the first two horizontal lines, then keep pace for the rest.
9. Half-Flower Row with Thumb Accent
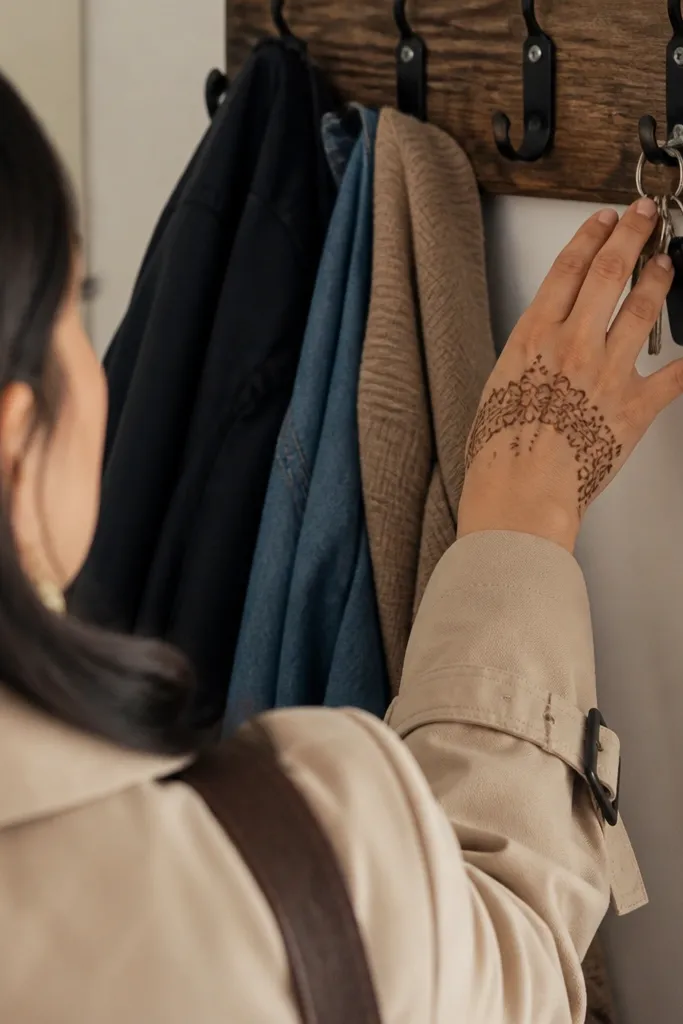
Draw a thin horizontal line across the back-hand base under the fingers. Add half-flowers evenly spaced along that line — 4-5 petals each, but keep them small. On the thumb side, add one compact motif: a tiny paisley or a leaf fan that points inward. Connect the thumb accent to the row with a short curved stroke. Let everything dry before adding small dots near knuckles.
This one is a clean compromise between “too simple” and “too much.” A row of half-flowers sits across the back-hand base near the finger roots, and a small thumb-side accent adds balance. It looks good even when you keep the center empty because the row creates a strong horizontal line. It’s also quick: half-flowers are fast, and you only need one small extra motif to make it feel designed. Great for everyday events and when you want mehndi to look neat on camera.
AvoidDon’t add extra motifs in the empty center — it ruins the clean look.
Pro tipMake the half-flowers identical size. Consistency is what makes simple designs look high-effort.
10. Minimal Triangle Mehndi with Dotted Edges

A triangle is a cheat code for structure. You get a bold shape without needing complex florals, and the dotted edges create texture so it doesn’t look empty. This design is perfect when you want something that looks intentional under a bracelet or watch and doesn’t drag on in time. It also handles uneven drying well because dots and outlines are forgiving. If you want a simple back-hand mehndi that still reads “pretty,” this is it.
Mark the center of the back hand and draw a triangle outline with one side near the knuckle line and the apex pointing toward the center. Outline the triangle edges with a slightly thicker line for definition. Inside, add a dotted pattern along one diagonal line only, not across the whole triangle. Add two tiny leaf tips at the triangle corners to soften the geometry. Finish with a small wrist line that mirrors the triangle’s base.
Keep the triangle narrow. Wide triangles need more filling and take longer to dry.
11. Leafy "S" Curve from Wrist to Middle Finger
Start at the wrist with a curved line that rises toward the middle finger area. Shape it into a smooth S by changing direction once in the middle of the back hand. Along the curve, add 4-6 small leaves spaced evenly, alternating left and right. Keep each leaf outline crisp and leave the inside mostly open with a few dots. Finish by adding a tiny dot at the end of the S where it reaches the finger base.
An S curve looks elegant because it follows the natural flow of the back of the hand. You get movement without crowding, and leaf placements give you the “mehndi” look without background filling. This design is great for busy schedules because it’s a single path you build on, not a full-hand patchwork. It also looks good on camera because the S shape catches light and shows clean line work. If you want one statement element with minimal effort, choose this.
AvoidDon’t add too many leaves. If you overfill, it stops being low-maintenance.
Pro tipSketch the S lightly with a dot guideline first. Your final line will look steadier.
12. Knuckle Dots + Skinny Vine Across the Back
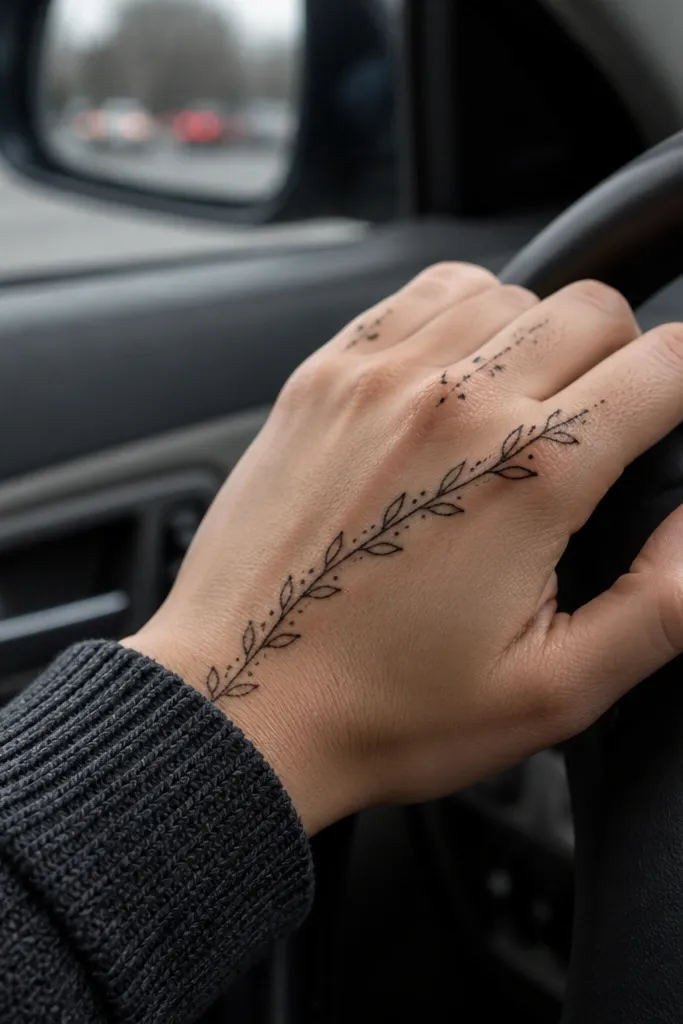
Place small dot clusters on the knuckle line: one cluster of 3-4 dots under index, another under middle, and a smaller one under ring. Then draw a skinny vine line starting near the thumb side and sweeping diagonally toward the center. Add 2-3 small leaf points along the vine, spaced far enough apart to keep it airy. Add one small dot near each leaf base to connect the pattern visually. Finish with a short straight line at the wrist to frame it.
This design is clean and fast because it uses two simple components: dot clusters and one skinny vine. The dots create texture right on the knuckles, where your hand naturally shows movement. The vine across the back adds direction and keeps the look from feeling empty. It’s perfect for people who get bored with heavy florals but still want a feminine mehndi pattern. It also works well as a base design if you want to add tiny extras later.
Pro tipKeep the vine line thin. A thick vine makes the whole design feel rushed.
13. Thumb Web Fan with Tiny Dot Fill
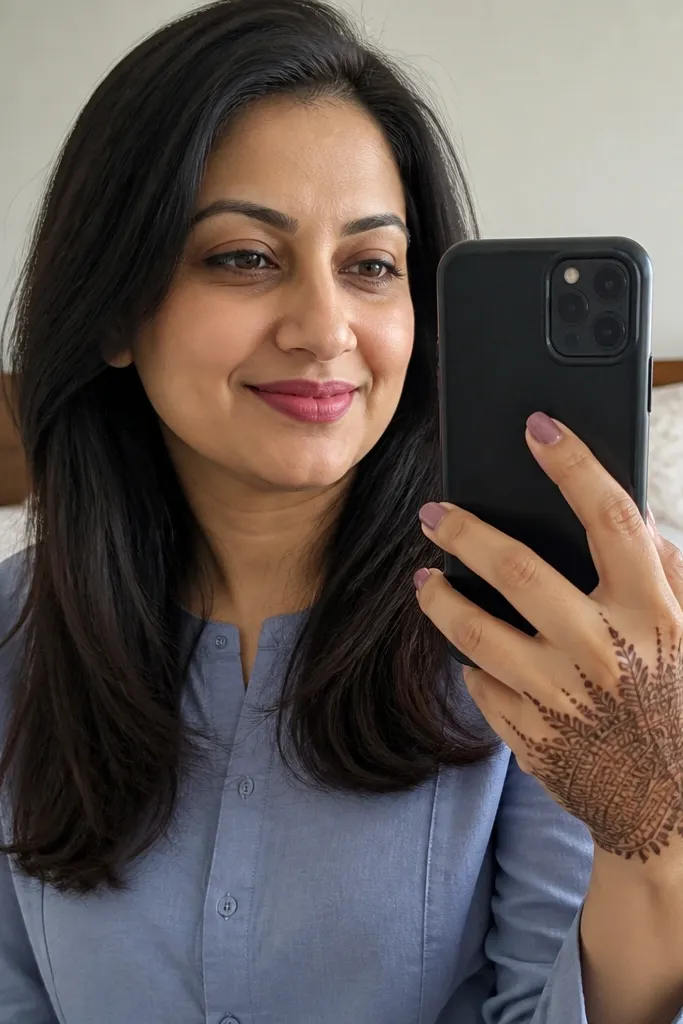
Start by drawing a curved fan outline in the thumb web area, shaped like a shallow bowl. Add 6-8 fan ribs from the bottom curve outward, each rib ending in a tiny leaf tip. Fill only the fan interior with a light scatter of dots — no big filled blocks. Add a small leaf paisley near the base of the fan to tie it into the rest of your hand. Finish with 1-2 dots along the wrist line for balance.
The thumb web area is the most visible part of back-hand mehndi in real life, especially when you hold your hand up for photos. A fan motif there looks polished and takes very little time. Instead of heavy shading, you use tiny dots to fill the fan — it darkens nicely as it dries and stays neat. This design is also great for uneven hand stability because you work in a small zone. If you want a cute, photogenic result without spending hours, this hits the mark.
Pro tipDot fill looks best when dots are consistent size. Use steady pressure and don’t overfill the center.
14. Open Lotus Linework on Back Center
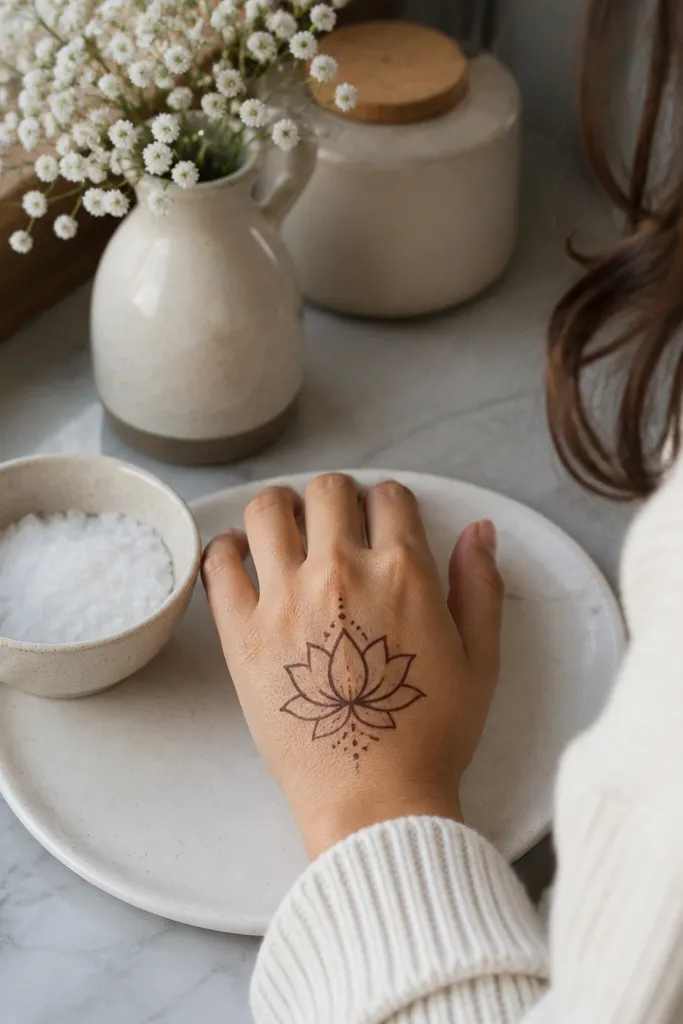
A lotus outline gives you that classic mehndi look without requiring full petal filling. The “open” approach keeps it light and fast, and it still looks special because lotus shapes read clearly even from a distance. You place it in the center of the back hand so it becomes the main feature. Tiny dot clusters around the lotus give depth without extra time. This is a strong choice for holiday wear when you want something more traditional but still low-maintenance.
Draw a small center circle or seed shape in the middle of the back hand. Around it, outline 6-8 lotus petals using only the petal edges — keep the inside open. Add two curved guide lines from the center to the petal bases so the lotus looks structured. Place small dots between petals to create a soft texture. Finish by adding a thin wrist curve line that points toward the lotus.
Keep petals slightly spaced instead of touching. Open spacing makes linework look cleaner as it dries.
15. Wrist Bracelet + Two Vertical Flower Sprigs
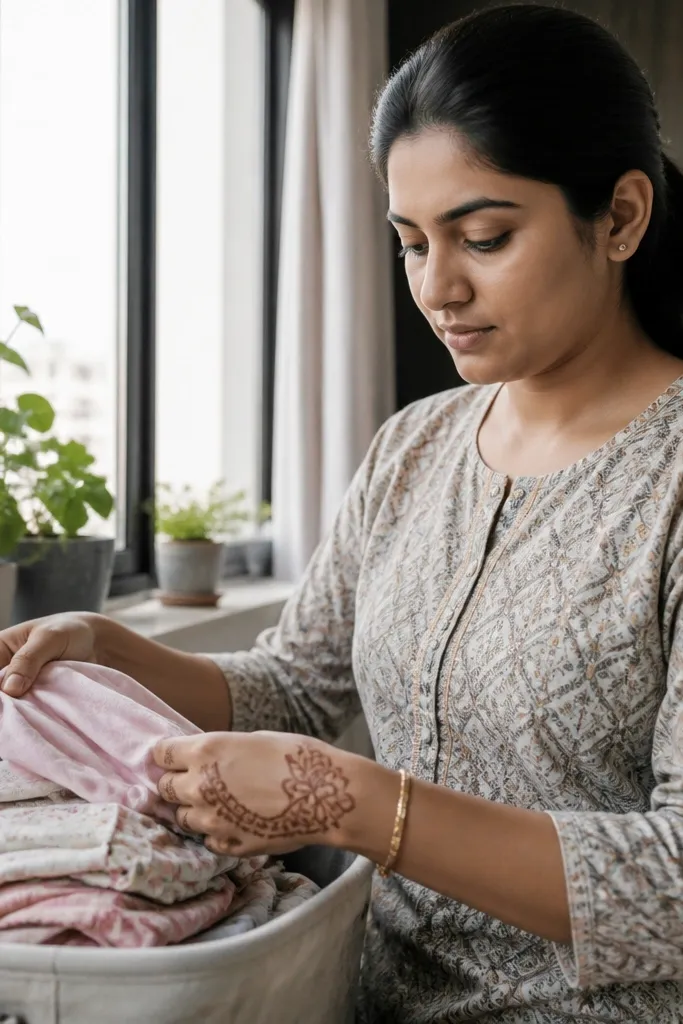
Draw a wrist bracelet using repeating loop links along the wrist line. Then draw two vertical sprigs starting from the bracelet edge up toward the knuckle area, one slightly thicker than the other. Each sprig should have 3-4 small petals or leaf shapes spaced along a thin vine. Add a few dots near each petal base for texture. Keep the center between sprigs empty so the design stays low-maintenance.
This design looks complete because the wrist bracelet ties the back-hand pattern together. Two vertical sprigs on the back hand look balanced and take less time than a full floral spread. You get a nice “upward” look that frames the hand and works with bangles. It’s photogenic because the sprigs create a clear vertical rhythm, and the bracelet line gives you a defined base. Great for festive days when you want traditional vibes but not heavy coverage.
AvoidDon’t overconnect the sprigs across the center. Separate lines look cleaner.
Pro tipMake the bracelet line slightly darker than the sprigs so the whole look reads crisp.



