
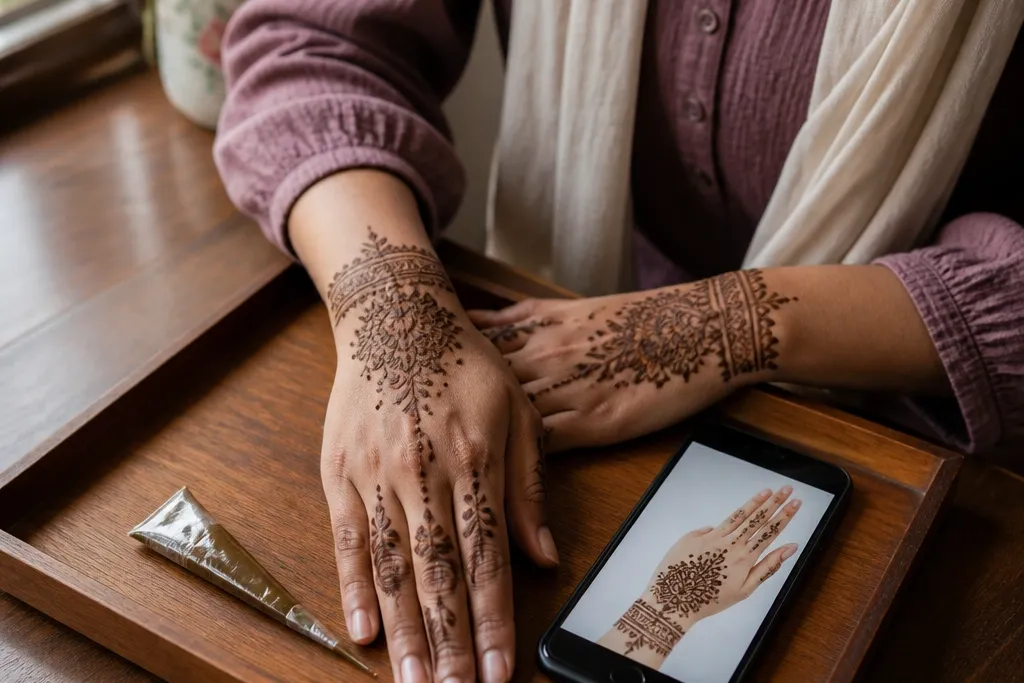
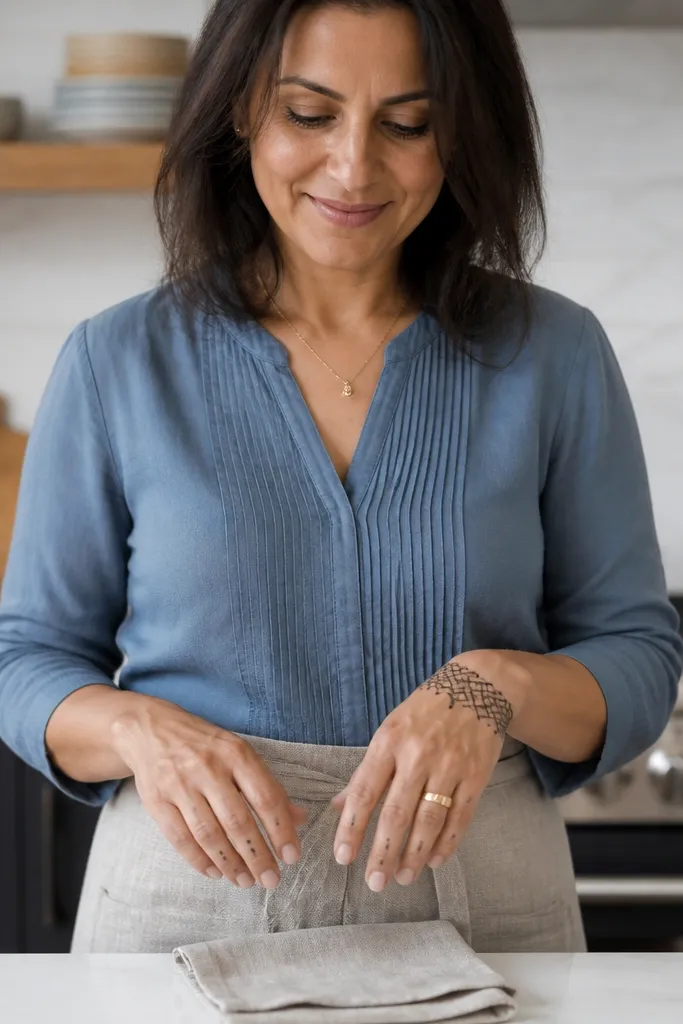
1. Wrist Band + Three Finger Buds
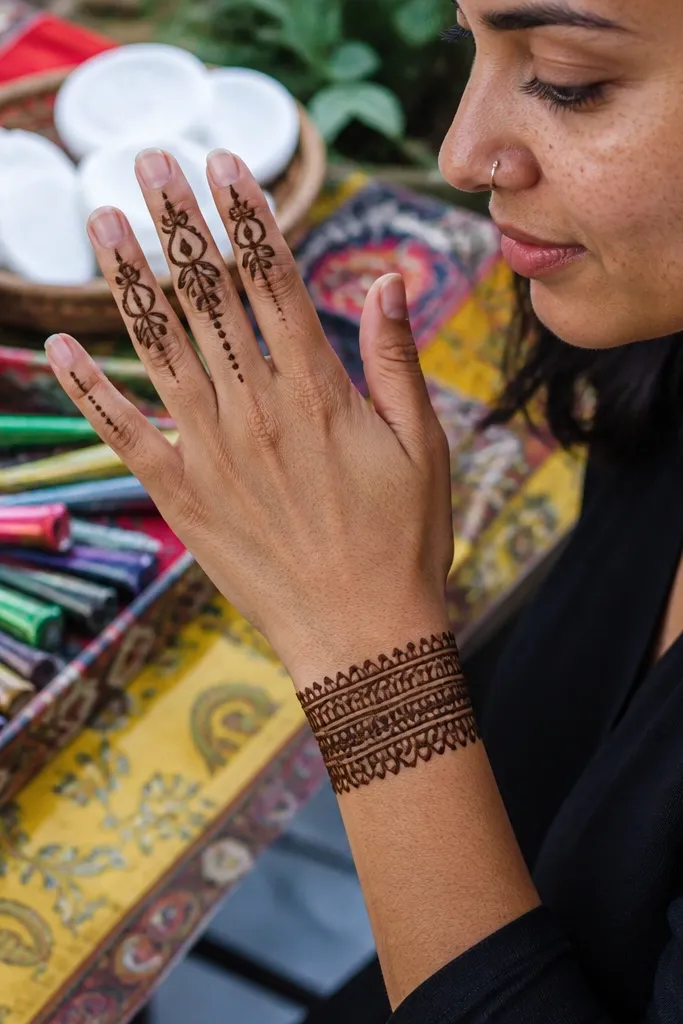
This design is simple but reads as “full” because the wrist band gives a strong anchor and the three buds create height up the fingers. It’s perfect for kids who wiggle, since you can finish the main structure fast and then add tiny fills only inside the buds. The negative space between the buds keeps it airy, which looks good even if the paste is a little lighter in spots. It also photographs well because the wrist band frames the hand and the finger motifs stand out.
Start by drawing a smooth wrist band — two parallel lines with a small scallop edge on the outer line. Then place three identical bud motifs on three fingers (index, middle, ring) using a teardrop center and a few short curved petals around it. Finally, add 2-3 dot accents inside each bud and let the lines dry before adding any extra fill.
Use a slightly thicker outline for the wrist band so it stays dark after the first dry phase.
Don’t fill the whole finger — tiny gaps make the design look cleaner and easier to touch up later.
2. Palm Dot Grid with Side Vine
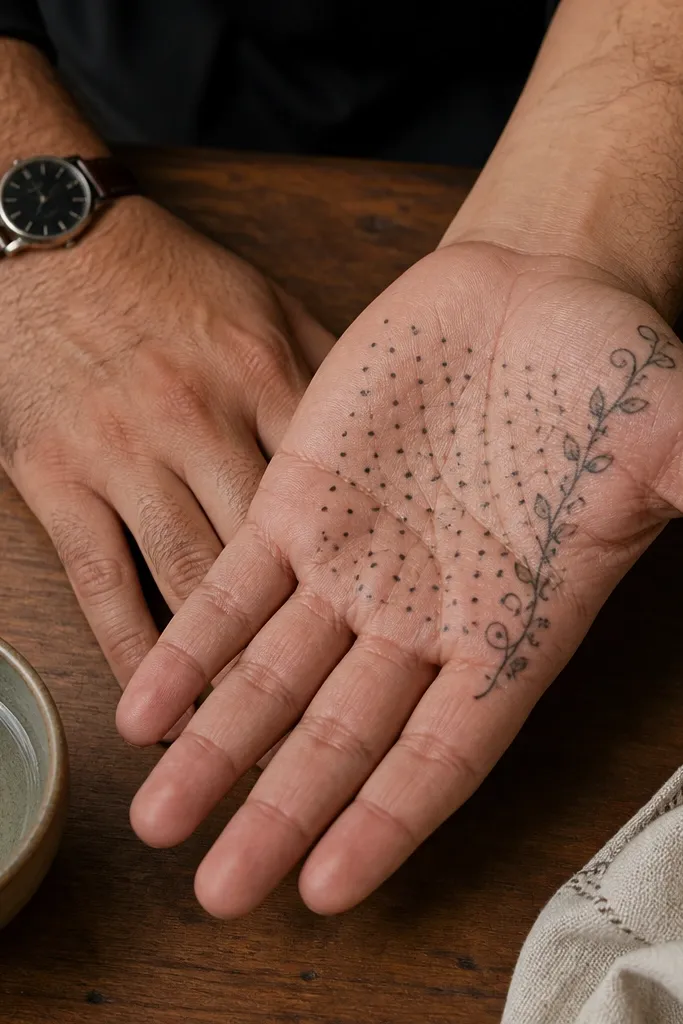
A dot grid looks neat fast and doesn’t demand steady hand pressure across long strokes. The side vine adds movement so it doesn’t look like plain dots — it gives the eye a path along the hand. This is a great touch-up design because even if a few dots fade, the overall pattern still reads as intentional. For kids, it feels less “heavy” than big fills, and it’s comfortable on the palm where they can’t stand too much paste buildup.
Outline the palm area with a light curved line near the base of the fingers, then fill inside with a grid of evenly spaced small dots. Add a thin vine line along the outer side of the hand from wrist toward the little finger, using 3-4 small leaf curls. Finish by placing one slightly larger dot cluster near the wrist to balance the top.
Pro tipKeep dot size consistent by squeezing the cone just long enough to form a uniform bead.
AvoidSkip thick dot clusters — they crack faster on the palm where kids move a lot.
3. Single Finger Mehndi Garland
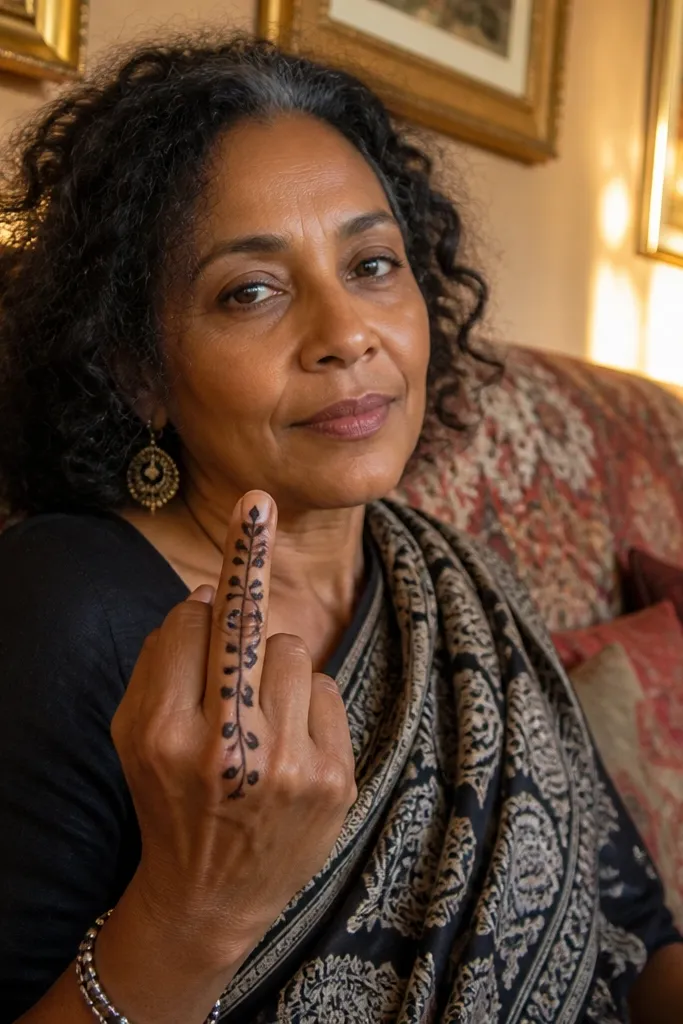
This one-finger design is a lifesaver when you only have a few minutes or when the kid refuses full-hand work. The garland pattern looks like jewelry because it repeats leaf curls down a single finger, usually the middle finger. It’s photogenic because it creates a vertical line that stands out against skin and captures light cleanly. Touch-ups are easy since you can re-line the garland without rebuilding the whole hand.
Pick one finger and mark a top starting point near the knuckle with a tiny dot. Draw a thin curved line down the center of the finger, then add alternating leaf curls to left and right like a chain. Finish at the base of the finger with a small semicircle band and 3 tiny dots inside.
Use the finger ridge as your guide — following it makes your line look straighter without extra effort.
Don’t make the leaves too wide — cramped leaves look messy when paste spreads.
4. Butterfly Wing on Back of Hand
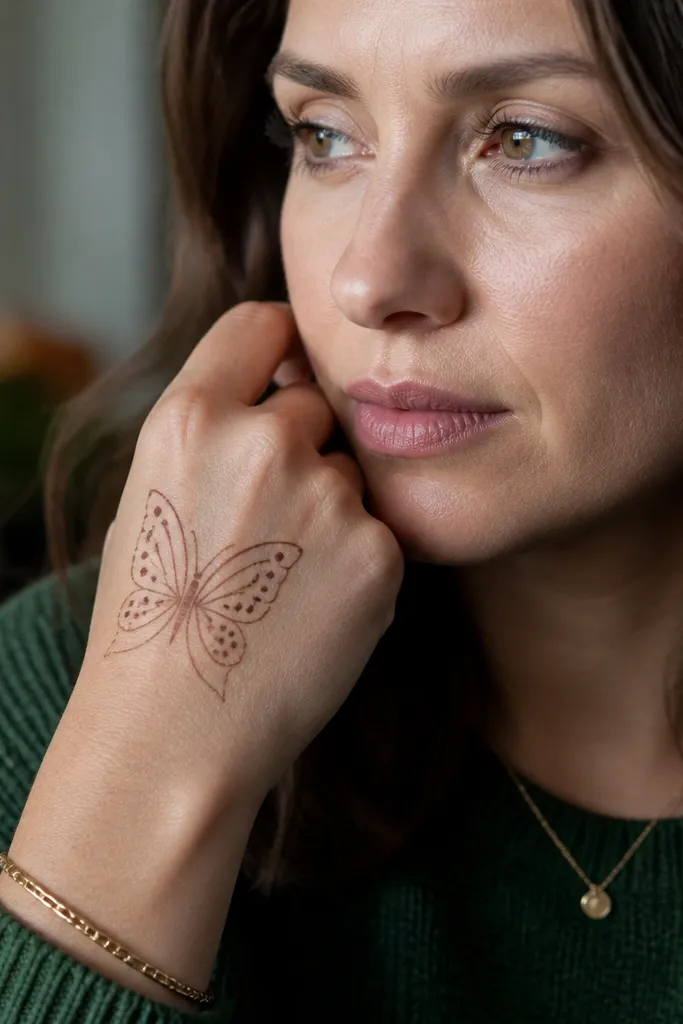
Butterfly wings look adorable on kids and still count as “simple” because you’re drawing two large shapes, not dozens of micro motifs. Place the wings on the back of the hand so the center body sits near the thumb side, giving a clear focal point. The wings can be filled lightly with dot rows or tiny arcs, which makes it forgiving for touch-ups. Photos come out cute because the design has a recognizable silhouette.
Draw a small butterfly body line in the center — a short vertical with 3-4 dots along it. Sketch the left and right wing outlines using two large teardrop curves each, then connect them at the bottom with a gentle curve. Fill inside each wing with 4-6 curved arc lines or a single row of dots, then add one or two star dots near the outer wing edges.
Pro tipKeep wing outlines slightly thicker than the fill so the shape stays readable after drying.
AvoidDon’t overfill the wings — heavy paste makes kids' hands look blotchy and it cracks.
5. Thumb-Base Crescent + Dot Stars
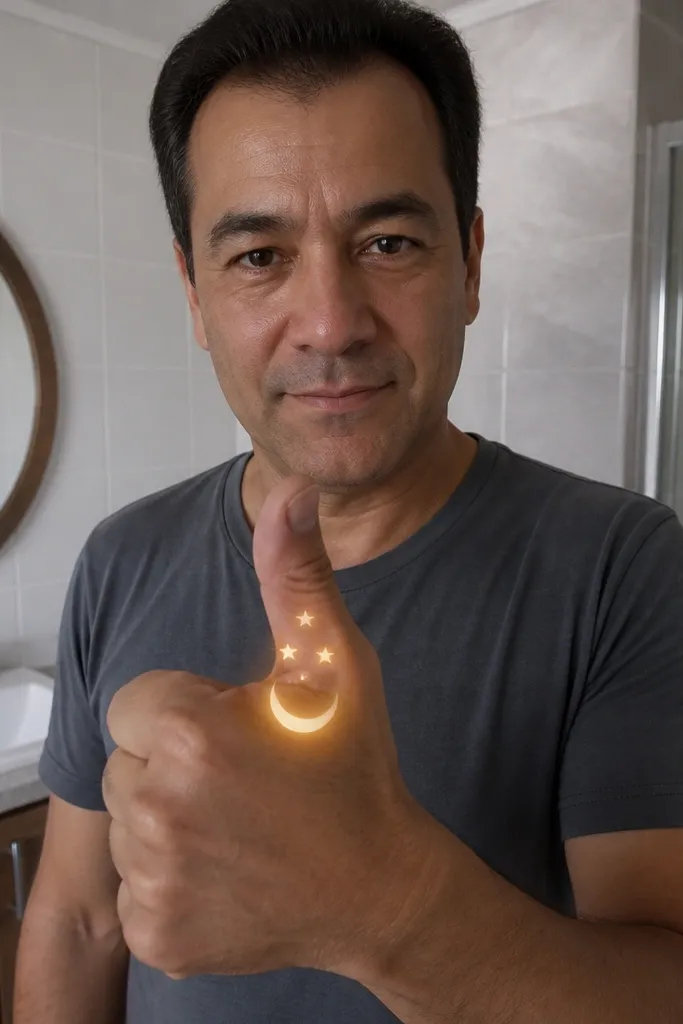
This is a quick, clean design that looks intentional because it uses one strong crescent and a few star dots. It’s perfect for kids because it avoids long lines across the wrist and keeps the paste mostly in one area. The crescent frames the thumb, which is where photos naturally focus when kids pose with their hands. If some dots fade, the crescent still holds the whole look together.
Start at the thumb base and draw a crescent outline with a thicker outer edge and a thinner inner edge. Add 5-7 star dots around the crescent — each star can be 4 short lines meeting at a center dot. Finish with a tiny dot chain along the lower curve of the crescent to give it direction.
Pro tipUse a pinhead dot for the star centers so the stars don’t turn into blobs.
AvoidSkip long vine lines — they drag paste when kids move their thumbs.
6. Half-Mandala on Back Fingers
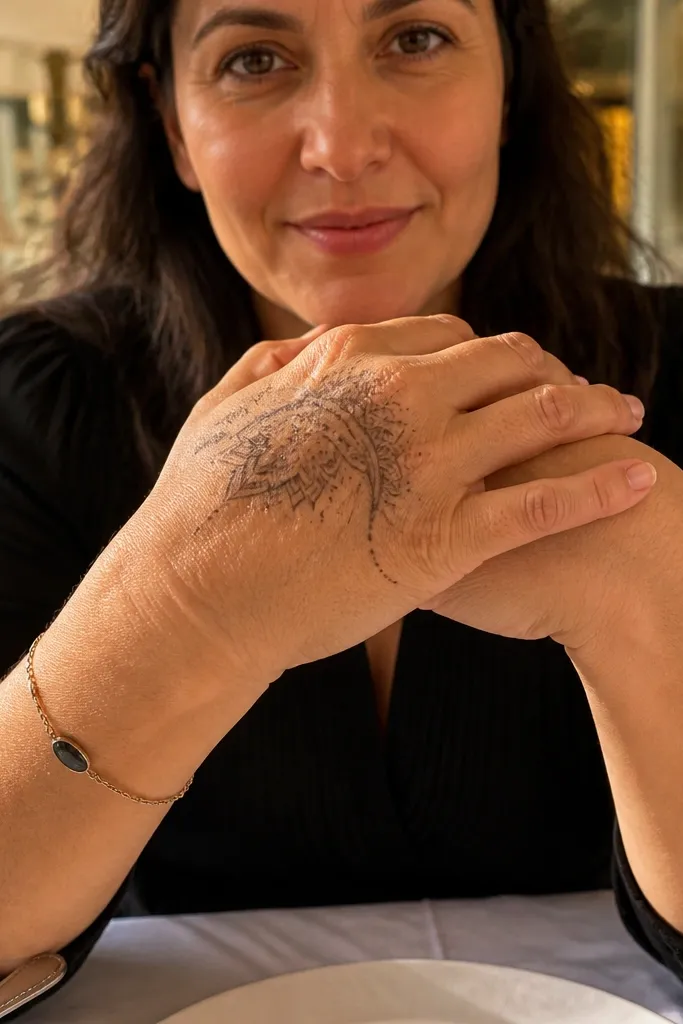
A half mandala looks “festival-ready” without needing full-arm detail. You’re placing a partial circle on the back of the hand near the knuckles, then letting the motif fade into smaller dotwork toward the fingers. This design is ideal for kids because it’s compact, and it still looks complete from the front of the hand. Touch-ups are easy: you can darken the outline and re-add the center circle without touching every line.
Draw a small circle at the back of the hand near the knuckles and add 6-8 short petal lines around it, like a mini flower. Extend only half of the circle outward with a curved band, leaving the other half open for negative space. Fill the petal interiors with 2-3 tiny dots or short arc lines, then add a simple wrist-side dot row to anchor the design.
Pro tipStop the mandala band before it reaches the wrist — kids' wrists get rubbed and can blur the edges.
AvoidDon’t try to fill every petal — sparse fill looks cleaner and dries darker.
7. Row of Three Paisleys on Fingers
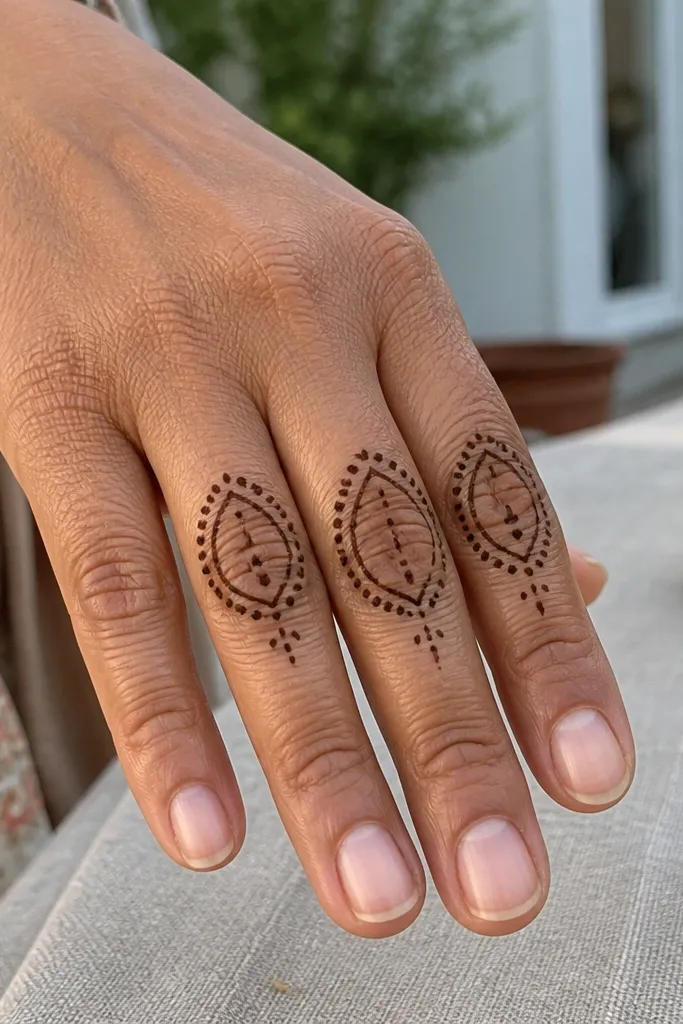
Paisleys give a classic mehndi look with very little work because each paisley is one repeatable shape. Place a row across three fingers so the pattern feels like jewelry and not random doodling. The teardrop outline is bold, and the inside fill can be minimal — dots and short dashes are enough to make it look decorative. This is one of the easiest designs to touch up because you can re-outline each paisley separately.
Pick three adjacent fingers and mark a starting dot near the knuckle on each. Draw a paisley teardrop starting at the dot and tapering downward, then add a small curved horn at the top for the paisley look. Inside each paisley, add 2-3 short vertical dashes and one dot near the center, then connect the three fingers with a thin line at the base only if you want a unified look.
Pro tipKeep the paisley bottoms aligned so the row looks tidy in photos.
AvoidAvoid tiny, tight paisley fills — they blur on kids' fingers.
8. Wrist Lattice with One Heart
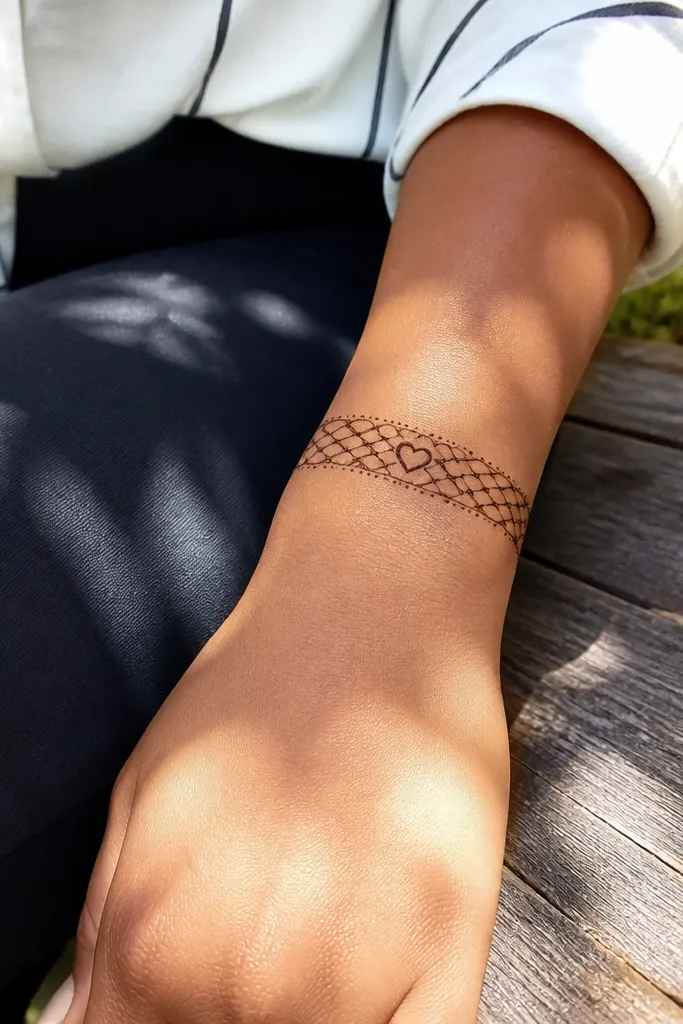
This design uses a simple lattice band to cover a nice amount of area quickly, then adds one heart to make it look playful. The lattice gives structure and makes the wrist area look “done” even if the rest of the hand is light. Kids love the heart, and it photographs well because it sits at the center of the wrist curve. It’s also forgiving: the lattice can be slightly uneven and still look intentional.
Draw a thick wrist band outline using two parallel curves. Inside, create a lattice by drawing short diagonals that meet into small X shapes, keeping the squares about the width of a pencil eraser. Place one heart in the center of the band — start with two curved lobes, then connect at the point with a clean outline. Add 3-4 tiny dots around the heart for sparkle.
Press the cone gently on the lattice crossings so lines bond and don’t crack apart.
Don’t make the lattice too dense — it dries rough and can flake.
9. Finger Caps with Dot Fringe
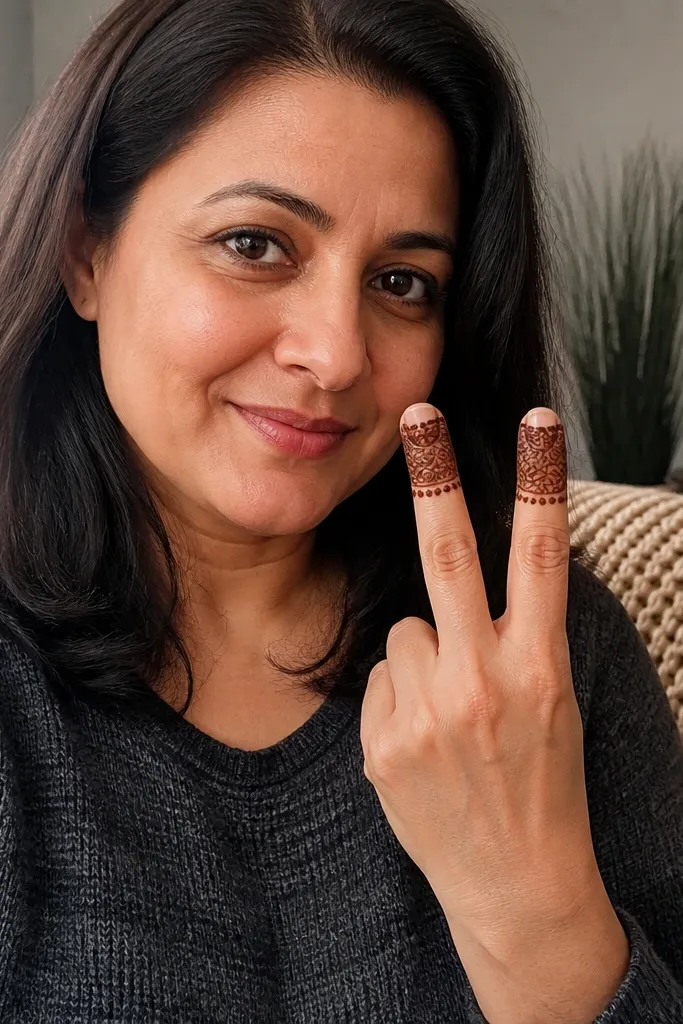
Finger caps look cute because they mimic rings without covering the whole finger. You get a polished look from the front of the hand, and kids don’t have to sit through a full-hand paste job. The dot fringe is fast and photogenic since it creates a soft edge that catches light. Touch-ups are easy because each finger cap is its own unit.
Start at the tips of two or three fingers and draw a small semicircle cap — thicker outline, slightly thinner inner line. Add 4-6 dots under the cap like a fringe, spaced evenly. Connect the cap to the upper finger with a single short curve line so it looks anchored, not floating.
Pro tipUse fewer dots than you think — a clean fringe looks better than a messy blob.
AvoidSkip full fingertip filling — it smears when kids bend their fingers.
10. Back-Hand Starburst Corner
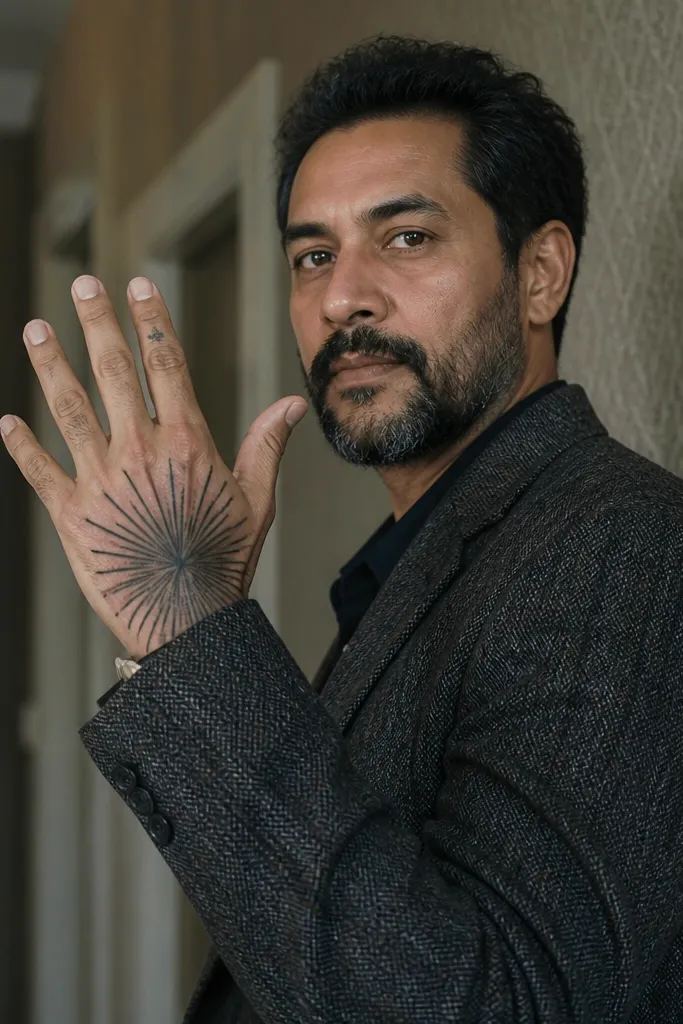
This is a bold corner motif that fills the back of the hand without requiring full coverage. Put it on the corner near the index finger side so the starburst points toward the knuckles. It’s photogenic because radiating lines look sharp and symmetrical even when a few lines are lighter. Kids usually tolerate this because it stays compact and doesn’t run across the whole hand.
Draw a small circle near the corner of the back of the hand. From the circle, add 8-10 straight radiating lines outward, then draw 2-3 curved arcs between alternating lines for softness. Add tiny dots at the ends of the longest rays, and finish with a short curved band line under the starburst to frame it.
Make the center circle slightly thicker — it helps the whole starburst read clearly after drying.
Don’t overcrowd rays — 8-10 is enough for a clean starburst.
11. Simple Leaf Vine Across Fingers
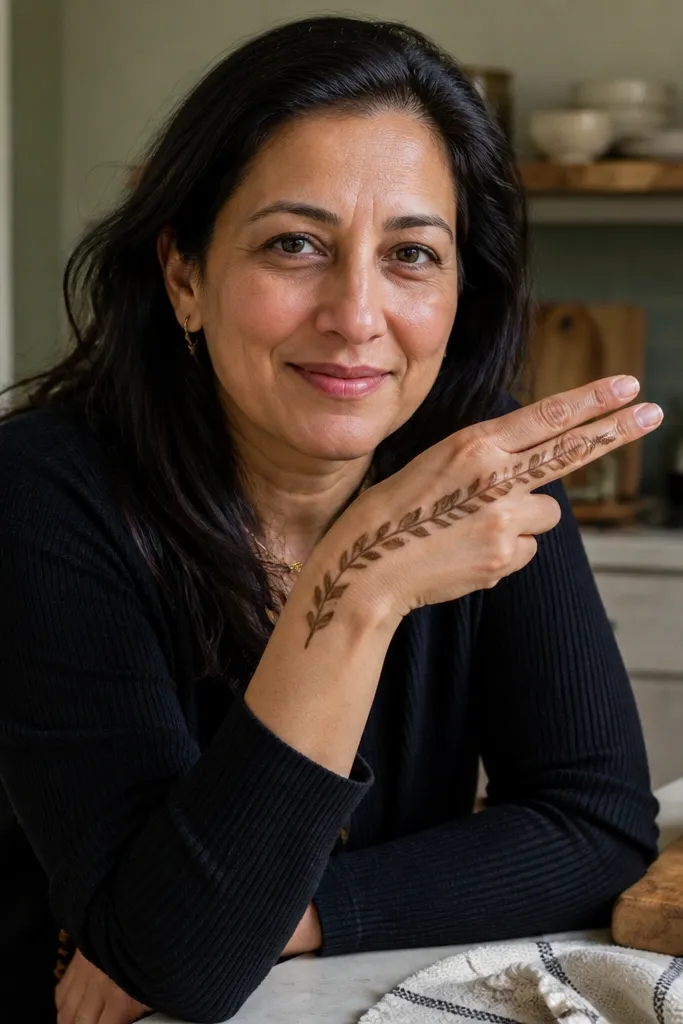
A leaf vine looks lively and neat because it has movement but still uses repeatable shapes. Place it across two fingers so it looks like a bracelet draped over the hand. It’s great for kids because the vine line is thin and doesn’t feel heavy. For photos, the leaf curls create texture while the negative space keeps it airy and easy to read.
Draw a thin vine line starting at the wrist and traveling diagonally toward the gap between two fingers. Along the line, add small leaf curls on both sides, each leaf made from a curved line with a short inner line. At the end near the knuckle, add a tiny dot cluster and stop — don’t continue into the palm.
Pro tipKeep leaf spacing consistent by counting leaves: 5 on one side and 5 on the other looks balanced fast.
AvoidAvoid thick vine lines — they crack and look muddy on kids' skin.
12. Three-Step Mehndi Flower Ladder
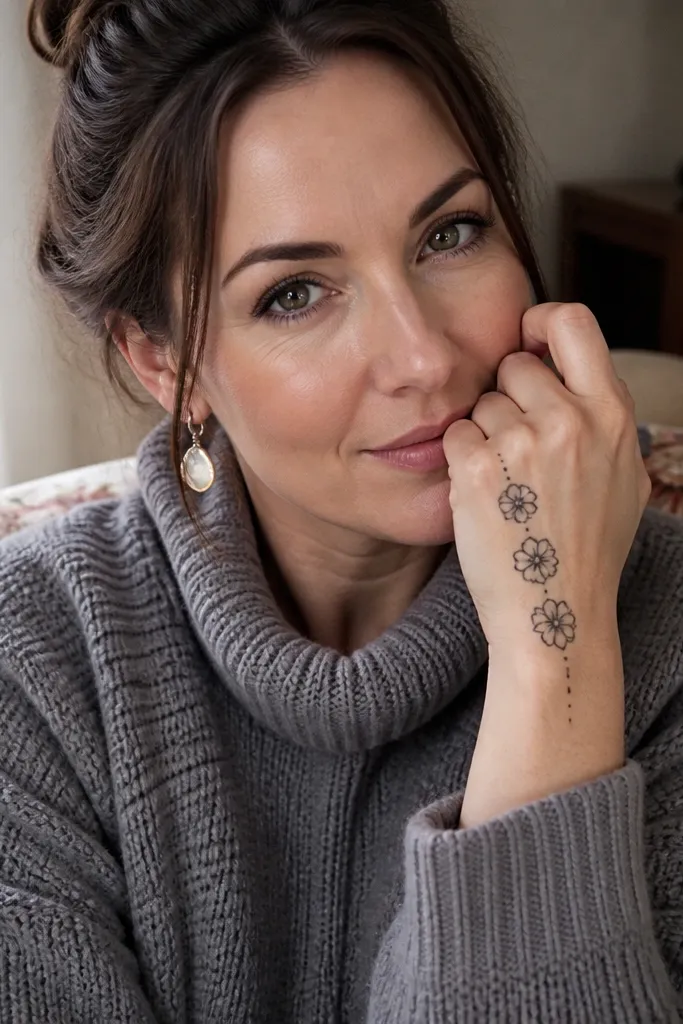
This design gives you a vertical ladder effect that looks charming and structured. It’s made from three small flowers placed from near the wrist up toward the finger gap, so you get a clear progression in the photo. The flowers are simple — outline petals and minimal fill — which keeps it low-maintenance. Touch-ups work because you can darken just the flower outlines and leave the dot fill lighter.
Draw a straight diagonal guide line from wrist to the area between index and middle fingers. Add the first small flower near the wrist: a circle center with 5-6 petal teardrops around it. Place two more flowers higher up, smaller by about 20% each, then connect them with tiny curved arcs between petals to look cohesive.
Use a consistent petal count across all three flowers so it looks intentional.
Don’t make the guide line too thick — it should disappear under the flower outlines.
13. Palm Triangle Frame
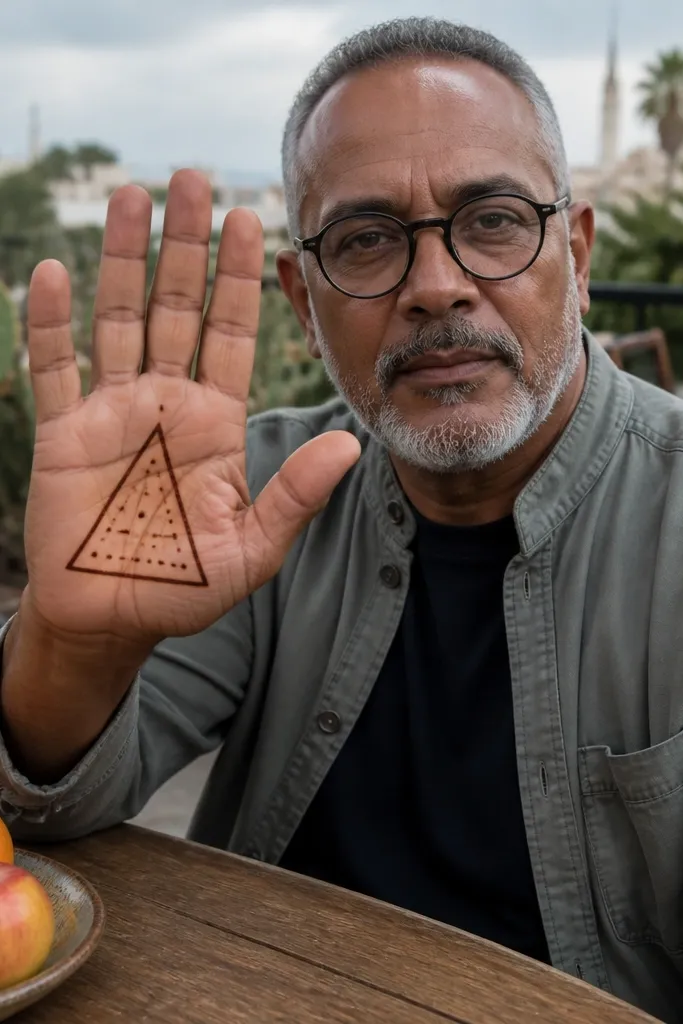
A triangle frame is a clean geometric choice that looks modern and sweet for kids. It keeps most paste inside one shape, so drying is more even and touch-ups are simpler. The triangle also photographs well because it creates a strong border and a clear focal point on the palm. Keep the inside minimal with dots or short dashes so the design stays breathable.
Draw an inverted triangle on the palm, starting with the top corners near the base of two fingers and meeting at the palm center. Outline it with a thicker border line and a slightly thinner inner line. Fill the triangle interior with a staggered row of dots and a few short arc lines near the center. Add one small dot at each corner of the triangle to finish the frame.
Pro tipLightly sketch the triangle first with the cone tip touching down lightly, then go over with real pressure.
AvoidSkip full dense fill — palms crack and flake when paste is too heavy.
14. Ring-Style Loop Lines on Fingers
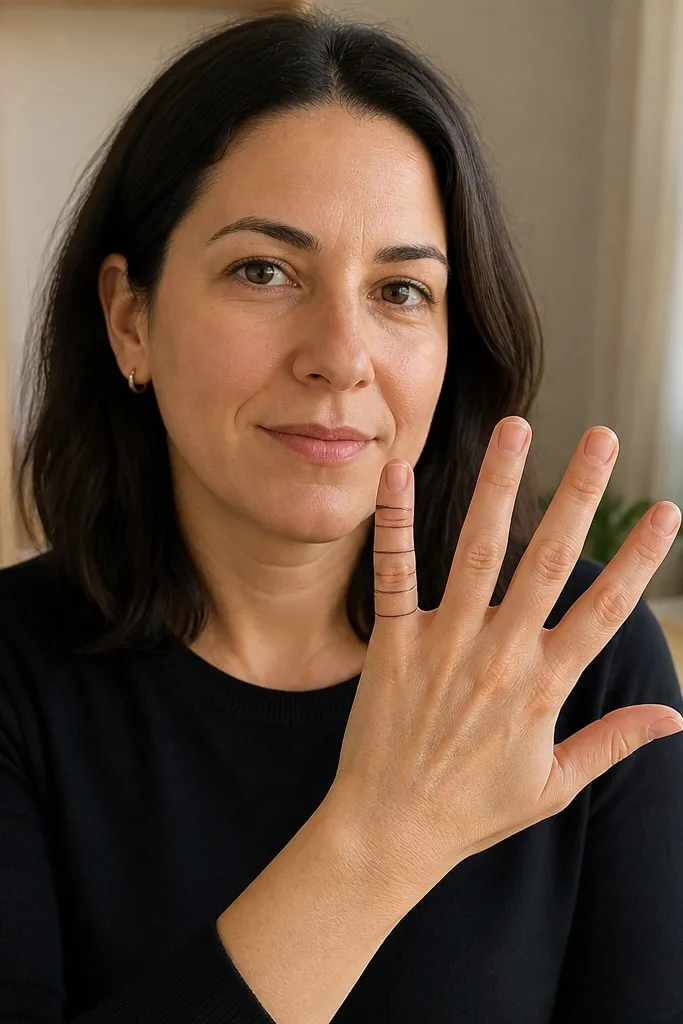
Loop rings create a jewelry look without covering much skin. This design uses repeated U-shaped loops around one or two fingers, with tiny dots to separate each loop. It’s low-maintenance because each loop is quick and you can stop after 6-8 loops and still look complete. It also stays photogenic since loops catch light and show contrast against the skin.
Choose one finger and mark two points around the middle — where the top and bottom loops start. Draw the first U-shaped loop around the finger, then repeat the U shape 5-7 more times upward in a neat stack. Add one tiny dot between each loop to keep spacing crisp, and finish with a short curved band at the base of the finger.
Keep loops the same width by using your cone tip as a measuring reference for consistent spacing.
Don’t cross loops too much — overlapping loops look tangled on kids' fingers.
15. Back-Hand Dot Flower Chain
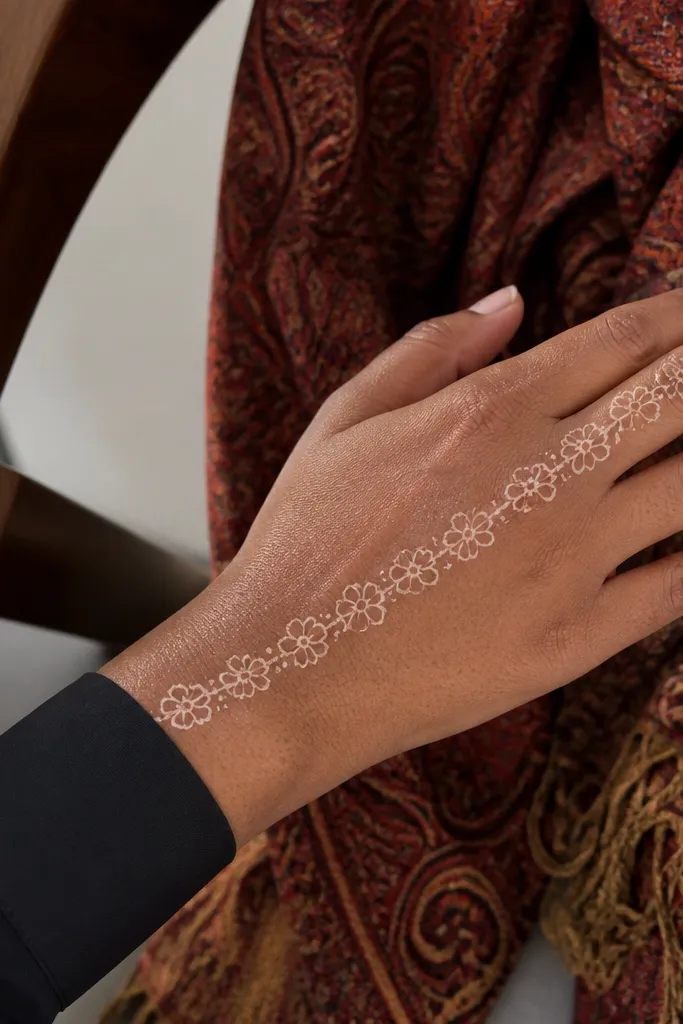
This is a kid-friendly pattern that looks like a tiny floral necklace across the back of the hand. You get visual interest from the repeating dot flowers without the need for heavy fill. The chain direction guides the eye, making the hand look longer and more “styled” in photos. It’s also easy to touch up because you can redraw just one flower unit if it fades.
Draw a gentle curved guide line from the wrist toward the outer back of the hand. Create a dot flower at regular intervals: a center dot with 5-6 surrounding petal dots or small teardrop dabs. Repeat 5-7 flowers along the guide line. Finish by adding a small crescent arc at the last flower to balance the composition.
Use the same dot size for centers and petals — inconsistent dots make the chain look messy.
Avoid long gaps between flowers — the design looks incomplete when spaced too far apart.
16. Wrist Bow Tie Mini Pattern
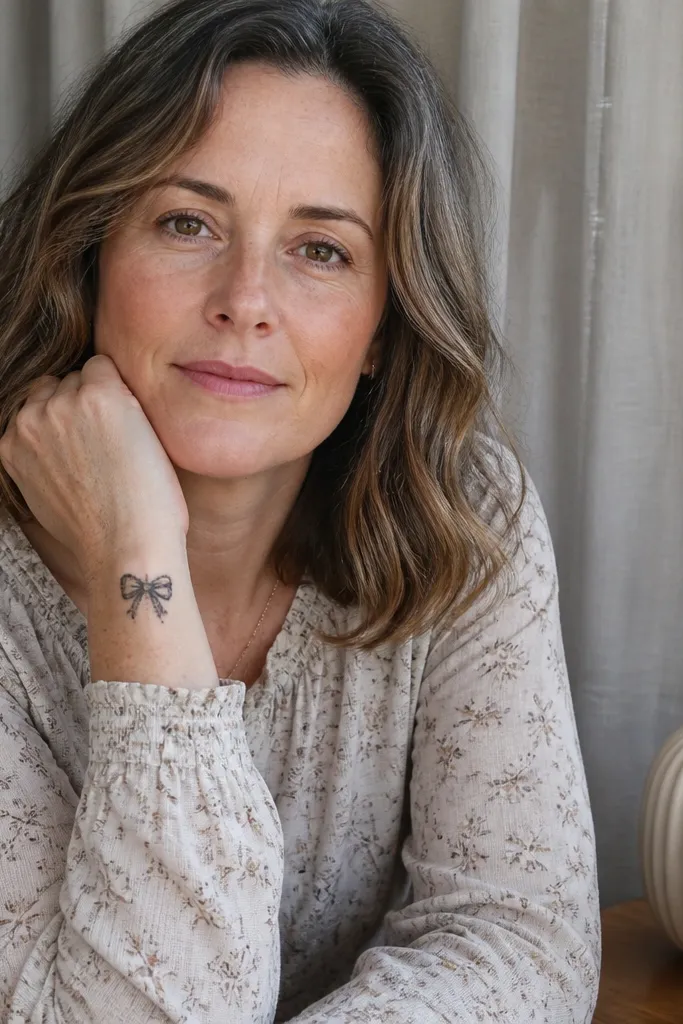
Bow ties are cute and surprisingly flattering on kids because they sit neatly on the wrist curve. This design is small but bold, and it reads instantly as a theme. You only need a few lines and dots, so it works for last-minute touch-ups before a function. The symmetry is simple, and even if one side is slightly off, the bow still looks like a bow.
Draw a small horizontal bow outline on the wrist: two loops on left and right with a pinch in the center. Add a tiny knot line in the middle — a short rectangle or diamond shape. Then place two dot corners at the outer ends of the bow loops and draw a thin curved line under the bow for a base line.
Pro tipUse a slightly thicker knot outline so it stays the darkest part after drying.
AvoidDon’t make the loops too large — big loops take longer to dry and smear during movement.
17. Finger Web Minimal Net
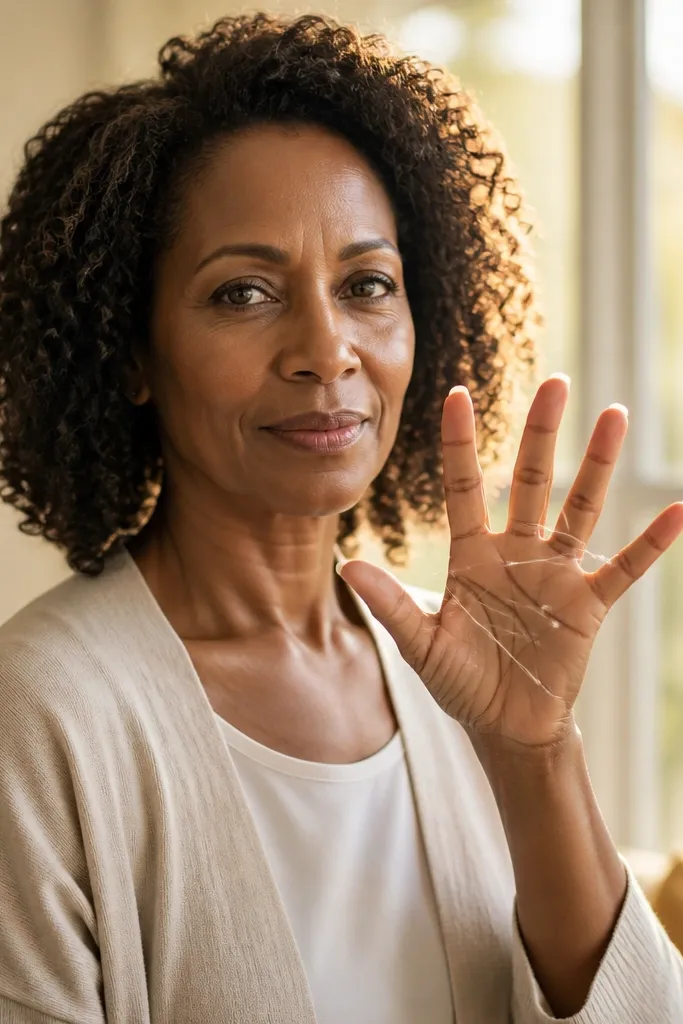
A minimal finger web looks stylish without requiring full webbing coverage. You draw a few connecting lines between finger bases, then add small dots at the intersections. The result looks like delicate lace and photographs well because the hand shape creates contrast. Touch-ups are easy since you can re-line only the intersections if the lines fade.
Start by drawing a thin outline around the base area between two or three fingers, staying at the top of the hand near knuckles. Add 3-4 diagonal connectors across the gap, then place a dot at each connector meeting point. Finish with a small curved border line near the wrist to tie the net together.
Pro tipKeep connectors short; long lines pull and smear when kids bend their fingers.
AvoidAvoid drawing the net across the whole finger length — it cracks and looks heavy.
18. Single Palm Rose Outline
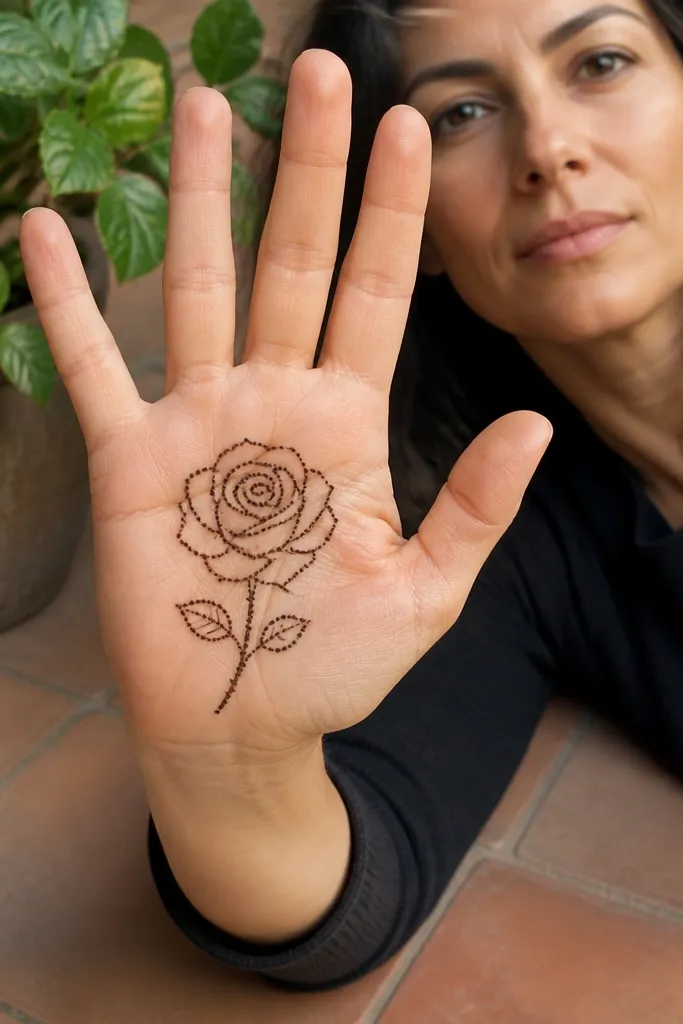
A single rose outline on the palm looks sweet and grown-up, but it’s still low-maintenance because you’re only drawing the flower silhouette. The petals can be filled with tiny dot dabs instead of heavy shading. This gives a clean, photo-ready look while keeping drying even on the palm. Touch-ups are straightforward: re-outline the rose and re-add a few dot petals to bring it back to dark.
Sketch a small circular center in the palm, then add 8-10 petal outlines around it using curved teardrop shapes. Connect a few petals with short arc lines to suggest layers. Fill inside each petal with 2-3 dots rather than full paste. Add 3 tiny leaves at the bottom edge of the rose using short curved lines with a point.
Pro tipKeep petals evenly sized; uneven petals make the rose look lopsided fast in photos.
AvoidSkip full petal fill — it makes palm designs crack and flake sooner.
19. Side Wrist Spark Strip
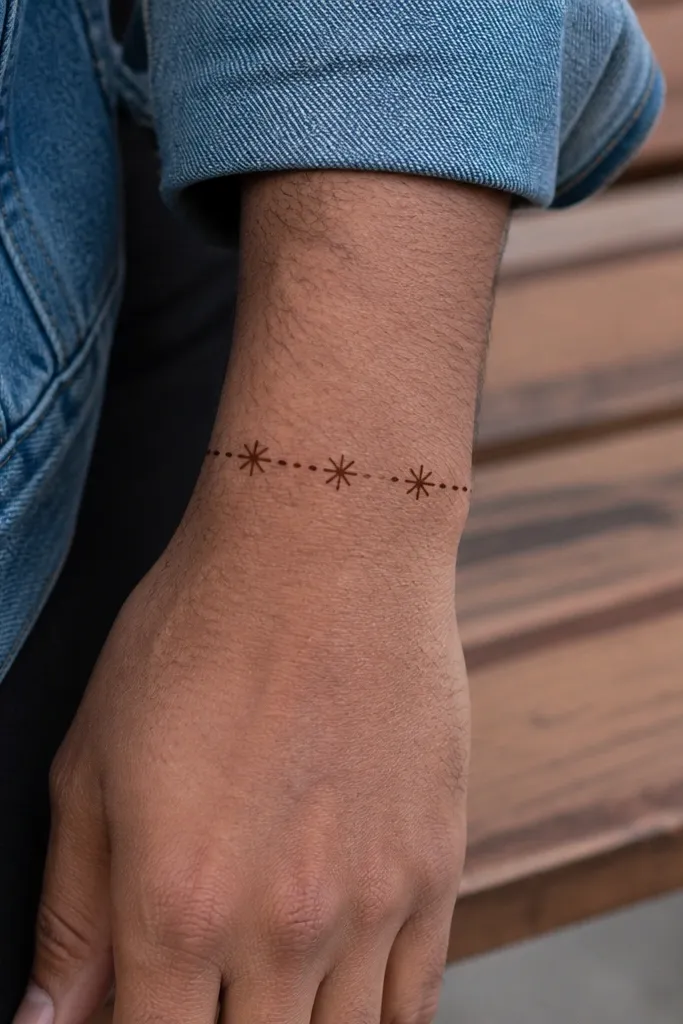
This is the quickest “finished” look for kids who only want a small amount of mehndi. It runs along the side of the wrist and uses star dots and short dash marks to create sparkle. Because it’s narrow, it dries fast and is less likely to smear while kids are moving. In photos, it looks like a bracelet of mehndi, which is exactly what you want when you don’t have time for full coverage.
Draw a thin curved strip along the side of the wrist, from about two finger widths above the wrist crease down toward the outer edge. Add star dots along the strip: each star is a small center dot with 4 short lines. Place 2-3 tiny dash marks between stars so the strip looks textured. Finish with one slightly larger star at the lower end.
Make the strip line continuous before adding stars so the base looks smooth even if stars dry lighter.
Don’t place stars too close together — the paste piles and cracks.
20. Tiny Sunburst + Smile Line on the Back of Hand
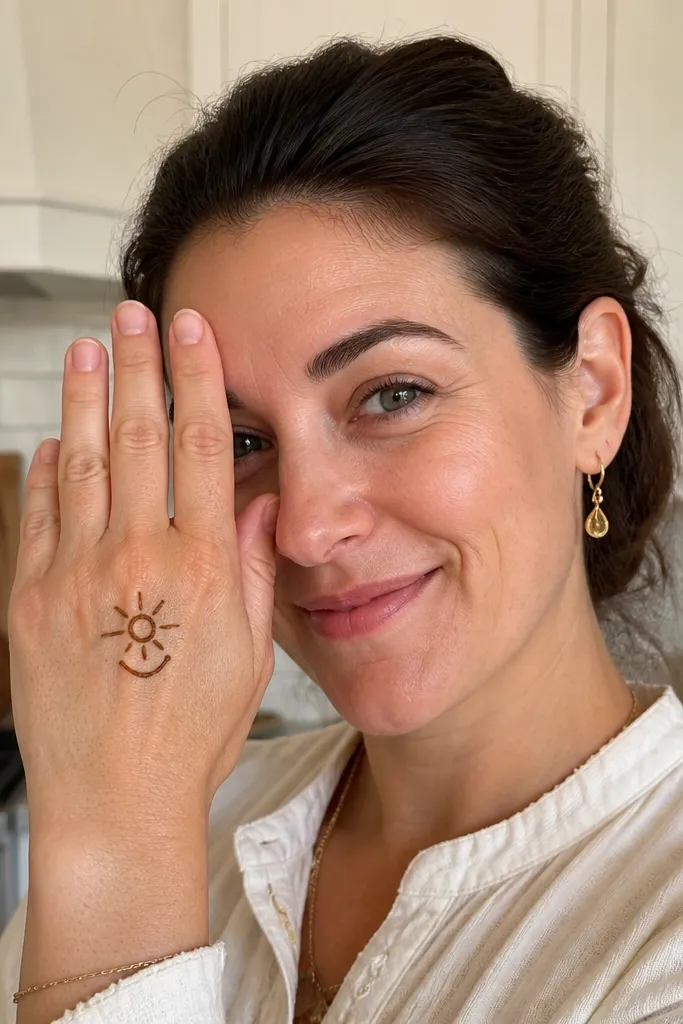
This design is made for kids who like cute faces and fast results. It looks like a little character without needing full mandala work, so it stays simple and still looks bold in photos. You get one clean focal point — the sunburst — plus a simple curved line that makes the hand look lively. It works great with glitter paste too, because the rays catch light even when the rest stays minimal. Skill level is easy, and it takes about 10-15 minutes to finish cleanly.
Start with the placement. Mark a light dot on the back of the hand near the knuckles of the index and middle finger area, then place a second dot slightly lower for the “smile” line. Pipe 8-10 short rays from the top dot — each ray is a tiny curved teardrop pointing outward — then add a small dot in the center of the sun. For the smile, draw a smooth arc from the lower dot toward the ring-finger side, then add two tiny dots at each end of the arc like “cheeks.” Let it dry fully before wiping off so the rays stay crisp and not smeared.
Pro tipUse a thicker cone tip for the sun rays so they don’t break into skinny lines, then switch to a slightly finer tip for the smile arc for a clean curve.
AvoidDon’t draw the sunburst too close to the wrist — it gets crowded and the rays blur when the paste spreads.



