
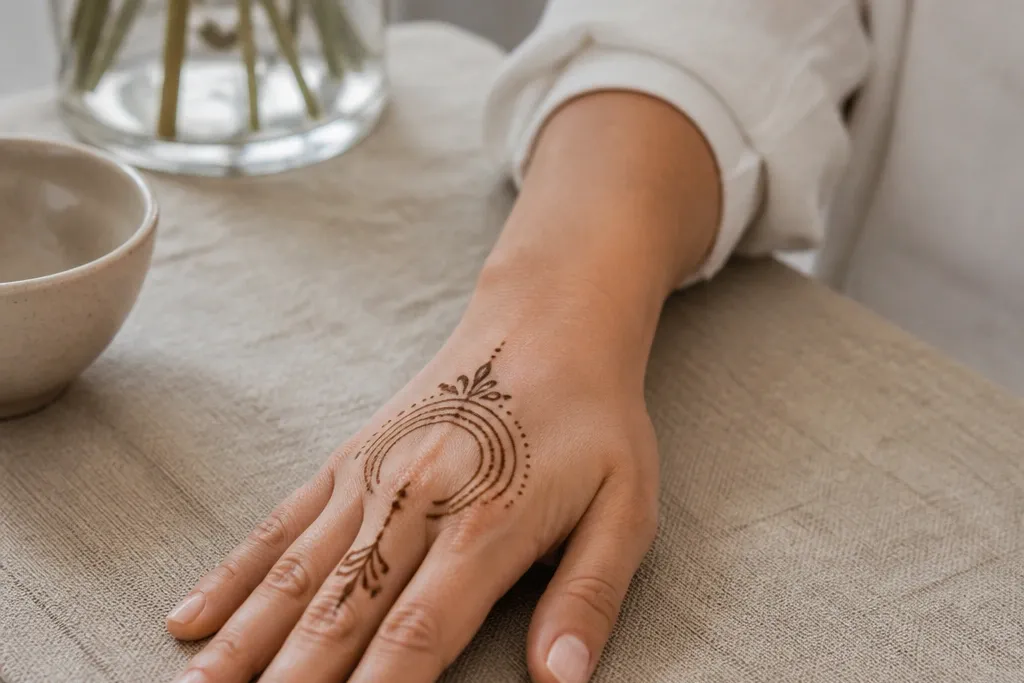

1. Two-Arc Thumb-to-Wrist Ladder
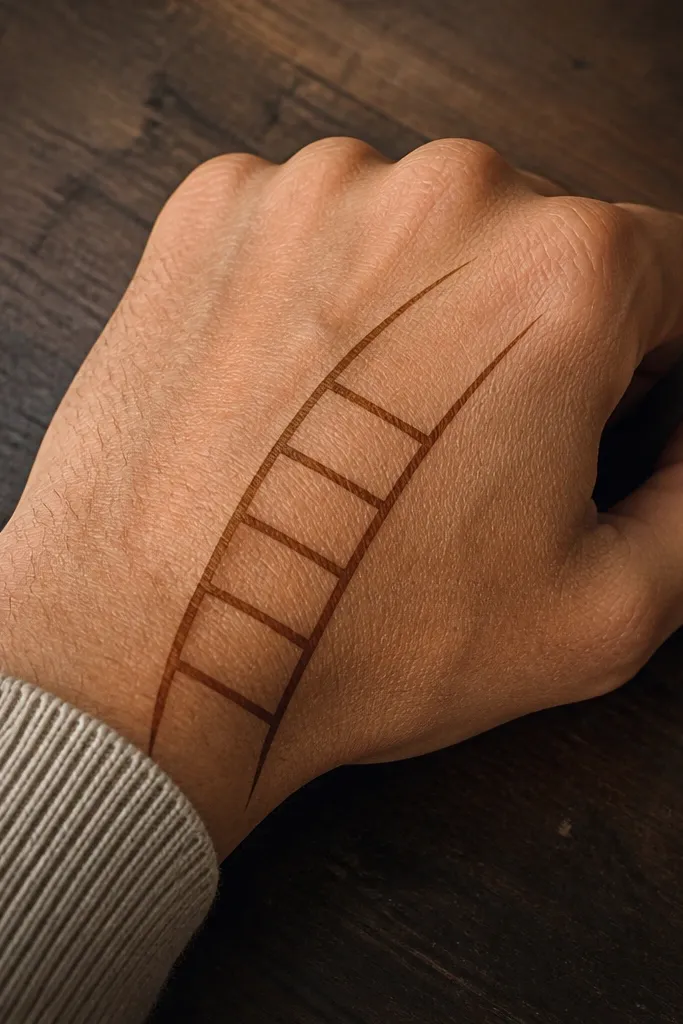
This is the kind of back hand mehndi that looks modern even when it’s simple. Two long arcs create a clean “ladder” feel, and the tiny rungs keep it playful without turning into a full fill. It flatters the back of the hand because the arcs follow the natural curve from thumb base toward the wrist. Use it for casual holidays, office parties, or any event where you want your hand to look styled, not covered. The pattern stays light and photogenic because the open center keeps contrast sharp.
Start by drawing a thin arc from the thumb base toward the wrist, stopping about 1 cm above the wrist crease. Add a second parallel arc about 1 cm away. Connect the arcs with 3-5 tiny vertical “rungs” made of short lines or stacked dots, spacing them evenly from mid-hand to wrist. Finally, place one small dot cluster (3 dots) at the center of the arcs to anchor the design.
Pro tipKeep your rungs under 6 mm so they look intentional, not like accidental smudges.
AvoidDon’t thicken the arcs midway — uneven line weight ruins the minimalist look.
2. Single Paisley Centerline with Two Dots
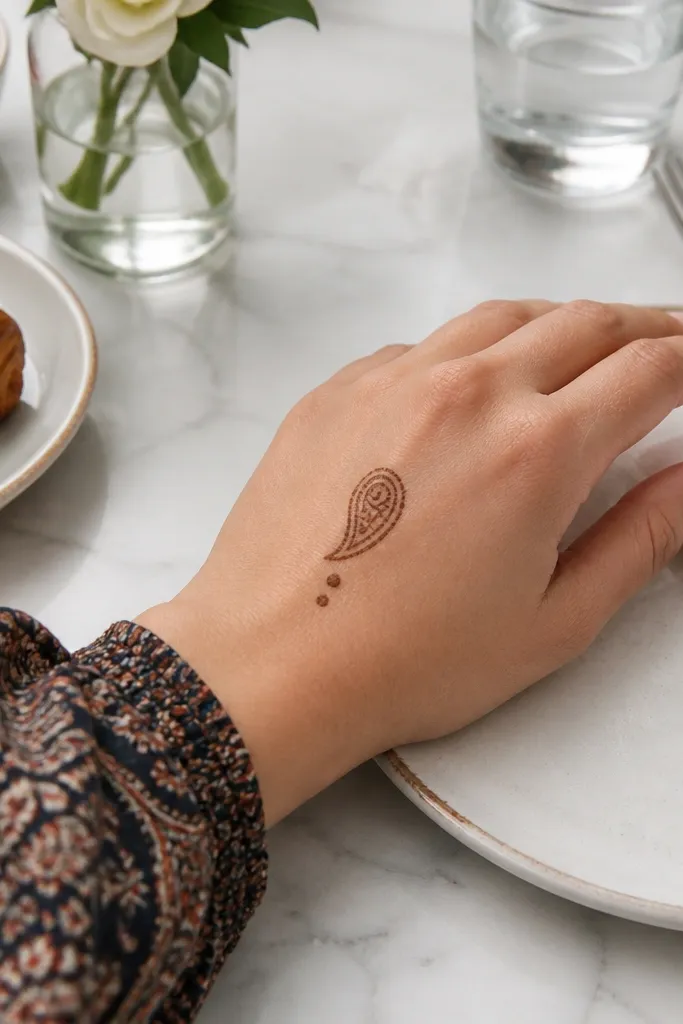
A single paisley on the back of the hand reads elegant because it gives you a clear focal point. The trick is keeping it small and centered on the long back-of-hand channel, then supporting it with two dot accents. This design works when you want something bridal-adjacent but still modern and airy. It’s also fast: you get a finished look without spending time filling multiple sections. In photos, your hand still shows through, so the mehndi looks crisp rather than heavy.
Outline a small paisley (about 2 cm tall) centered between the thumb base and wrist. Add two dots — one on each side — aligned with the paisley’s widest point. Connect the paisley tip to a thin vertical guide line that stops before the wrist border. Finish with a tiny comma-shaped hook at the top of the paisley so it looks like it’s “floating.”
Pro tipUse a slightly tapered paisley — the pointy end should be sharper than the rounded end.
AvoidAvoid adding extra scrolls around it; one focal paisley is the whole point.
3. Wrist Border + Micro Vine Across Index Side
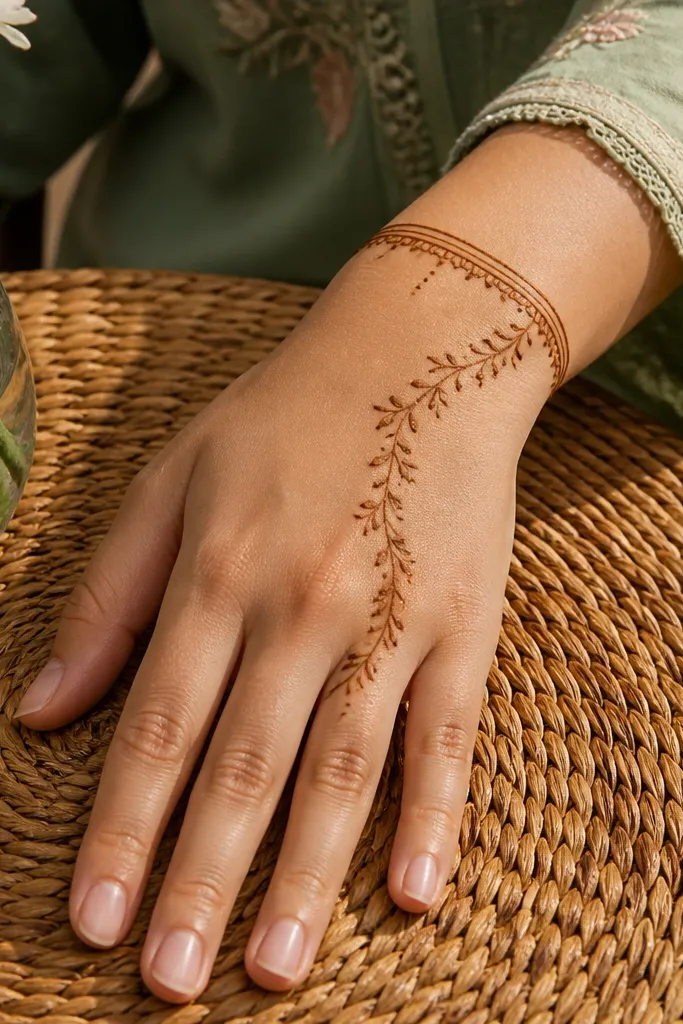
This one looks clean because it uses a crisp wrist border and then lets a micro vine travel upward in a controlled line. It’s a great choice when you want modern minimalist back hand mehndi designs that still feel feminine. The vine shape creates direction, so your eye moves from wrist to index finger without clutter. The minimal fill keeps the pattern light, and the wrist border makes it look designed rather than random. It’s also a good base if you want to add a holiday accent later.
Draw a thin border band along the wrist, about 1.5-2 cm wide. From the center of that band, pipe a vine line upward toward the index finger with spaced leaf tips (just small teardrops, not filled petals). Place 3-4 leaf teardrops total, each about 4-6 mm long. End the vine with a tiny loop near the index base and add a single dot at the loop’s tip.
Keep leaf teardrops consistent size; variation reads messy in minimalist designs.
Don’t run the vine too wide across the hand — the border should frame it, not compete with it.
4. Diagonal Chain of Tiny Stars
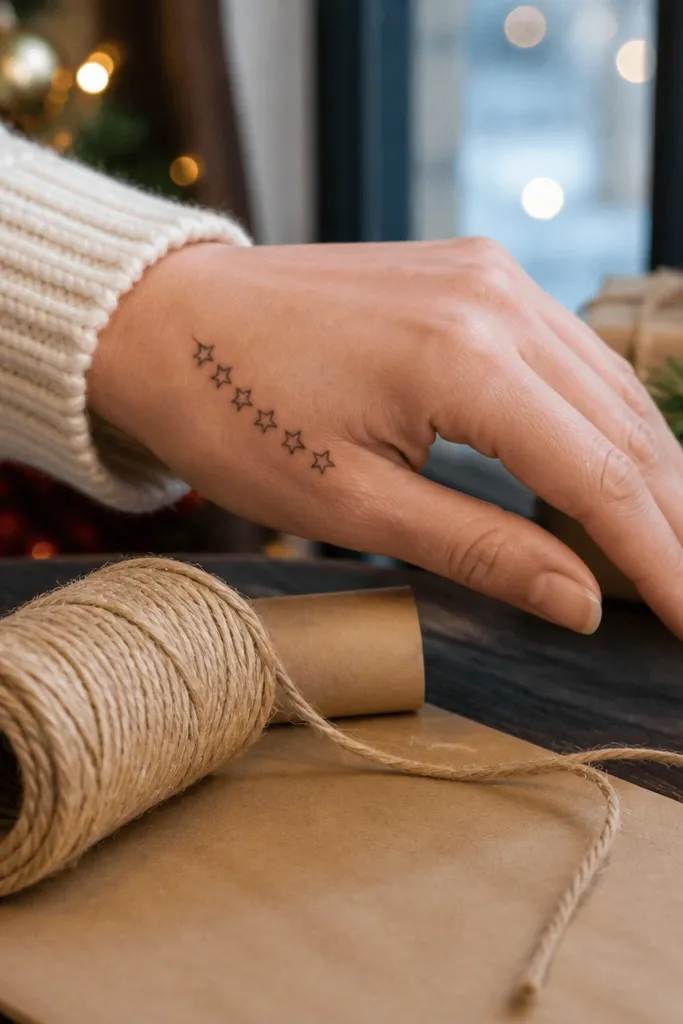
Stars make holiday mehndi feel festive without turning heavy. This design uses a diagonal chain of tiny five-point stars, each outlined thin and kept separate. The negative space between stars keeps it modern and prevents the “busy” look. It’s also easy to scale — you can fit 6-10 stars depending on your hand size. In photos, the diagonal line makes the hand look longer and more styled.
Mark a diagonal guideline from thumb base to outer edge near the little finger side. Pipe 6-9 tiny five-point star outlines along the guideline, spacing each star about 8-10 mm apart. Keep star interiors empty and only outline the points. Add one small crescent dot near the middle star to break symmetry slightly, then finish with a thin border line near the wrist edge.
Pro tipPractice one star outline on paper so your points land the same length every time.
AvoidDon’t fill stars — solid fill makes them look like stickers, not minimalist mehndi.
5. Three Vertical Dot Columns
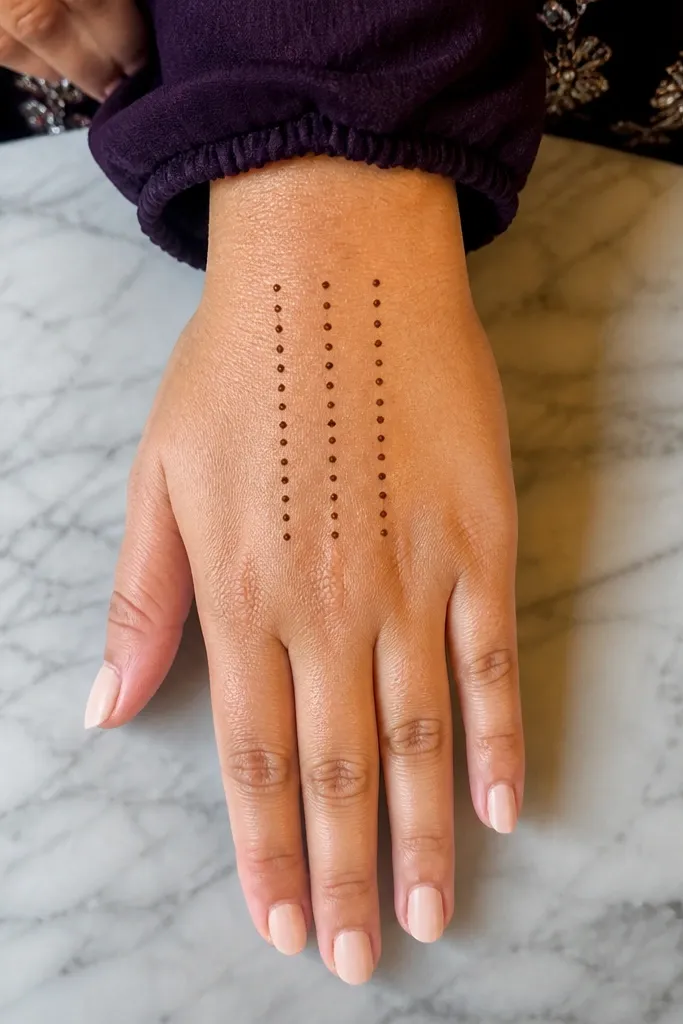
If you want the cleanest modern minimalist back hand mehndi designs, dot columns are your friend. They look graphic, controlled, and very “intentional” in photos. This layout keeps your hand mostly bare, so the mehndi reads crisp even if your paste dries slightly uneven. It also takes less time than most floral motifs. The columns create structure, and small cross-bridges near the top add a subtle finish.
Draw three slim vertical lines as guides, spaced about 1 cm apart. On each guide, pipe 7-10 dots stacked from mid-hand to wrist, keeping dot size consistent. At the top of the middle column, add two small dots side-by-side and connect them to the top dots of the left and right columns with short horizontal lines. Add a thin wrist line under the bottom dots to ground the design.
Pro tipUse dot size like a measurement — aim for dots around 1.5-2 mm so columns look uniform.
AvoidDon’t let dots smear into each other; space them enough that each dot stays distinct.
6. Minimal Palm-Style Half Mandala on Back
This is a mandala idea that stays modern because it uses a half shape and lots of negative space. The design sits closer to the wrist, so it looks like a neat “cap” instead of a full hand pattern. You get the aesthetic of mandalas without the time sink of full fill. It’s great for seasonal looks because the center can take a holiday accent like a tiny star. The overall effect is balanced, geometric, and photogenic.
Start by drawing a curved semicircle near the wrist, about 4-5 cm wide. Inside that half circle, add 6-8 thin petal outlines pointing outward, leaving the center open. Add a small circle in the center outline only — no fill. Connect the petal bases to the semicircle border with short lines. Finish with one thin band across the outer edge of the semicircle.
Pro tipKeep petal outlines symmetrical by counting them before you pipe the first one.
AvoidDon’t overfill the petals; open outlines keep the minimalist look.
7. Thumb Base Crescent with Micro Dots
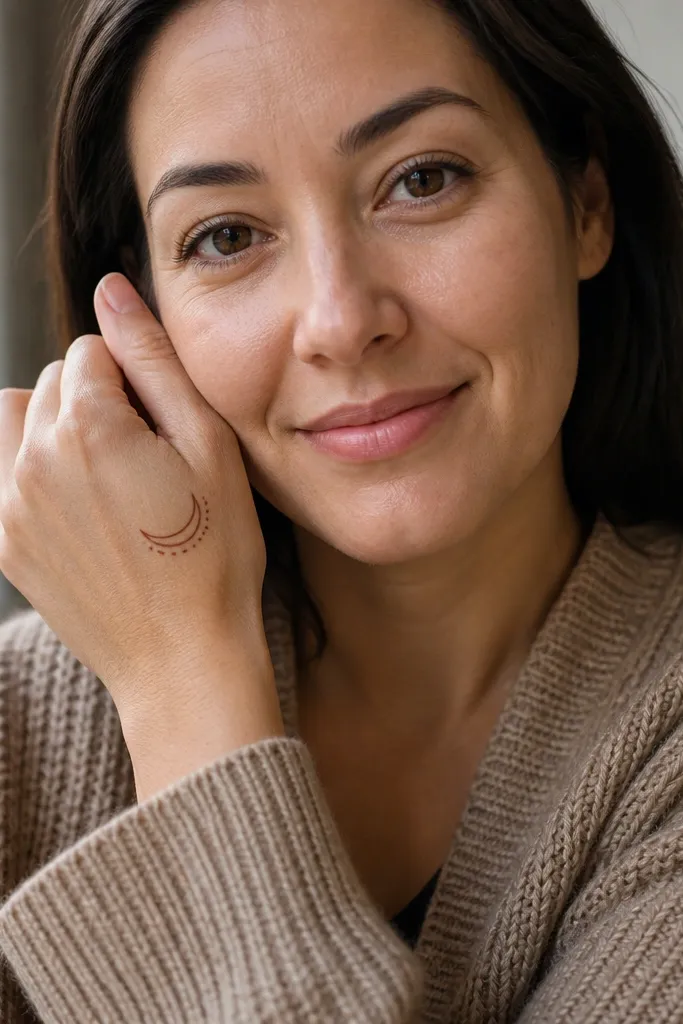
This design is subtle but looks polished because the crescent shape is clean and the dot sprinkling adds texture. Place it at the thumb base so it frames the hand naturally. It’s modern minimalist because it uses one strong curve and then tiny accents instead of full motifs. It also works for short sessions since you only need one focal area. The result looks intentional in close-ups and still reads cute from a distance.
Pipe a thin crescent curve starting near the thumb base and curving toward the center of the hand, about 2.5-3 cm long. Add 6-10 micro dots around the crescent — place more dots on the outer edge and fewer on the inner edge. Draw one short hook line at the crescent ends to make it look connected, not floating. Optional: add a single tiny teardrop outline at the crescent’s highest point.
Pro tipUse micro dots only; if they get bigger than 2 mm, the design stops looking minimalist.
AvoidAvoid drawing a wide crescent — keep it narrow so it stays elegant.
8. Index Finger Ladder with Corner Border
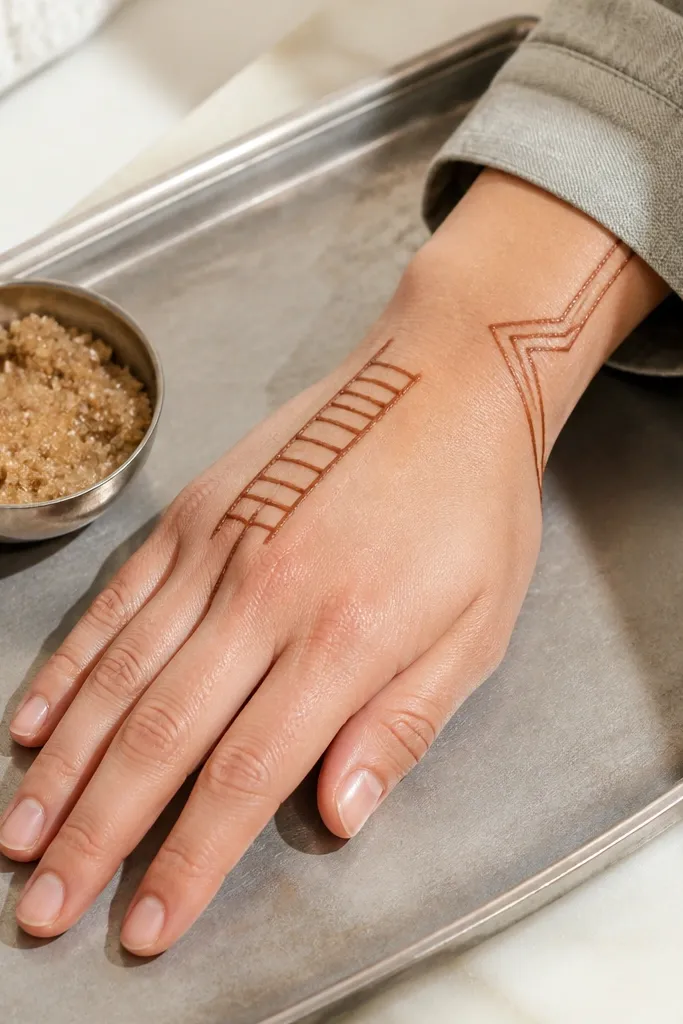
This one is graphic and modern because it uses a ladder of short bars near the index finger side. The corner border near the wrist makes it look like a frame. It’s ideal if you want back hand mehndi that looks neat even when you don’t cover the whole area. The ladder structure also keeps the pattern from looking random. It’s a simple design, but it photographs well because the lines create a strong shape language.
Draw a thin corner border near the wrist, shaped like a right angle, about 2 cm wide and 1.5 cm tall. From the inside corner, pipe a vertical line upward toward the index base. Add 6-8 short horizontal bars crossing the vertical line, each bar about 6-8 mm long, with equal spacing. End the ladder with a tiny dot at the top and a thin outline border around the corner shape.
Keep spacing between bars consistent — count them and mark spacing with light guide dots first.
Don’t add extra flourishes at the top; the frame does the work.
9. Two Thin Rings Around the Back Midline
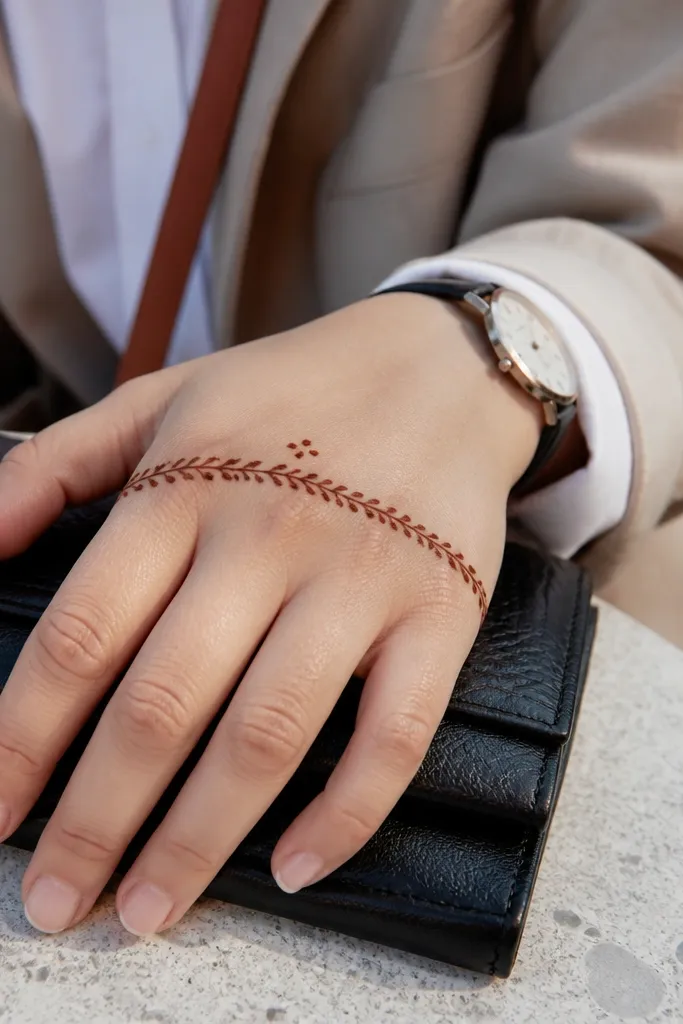
Rings read modern because they’re geometric and clean. This design places two partial rings across the back midline, leaving gaps so your skin stays visible. The rings give structure, while small bridging dots keep it from looking flat. It’s a great option for a minimalist holiday look because you can add one tiny star between the rings. The design takes less time than floral work and still looks styled.
Mark a horizontal midline across the back of the hand, then pipe a thin partial ring around it, about 3-4 cm in length visible on the hand. Repeat with a second ring below it, spaced 8-10 mm apart. Add 4-6 bridging dots connecting the rings at even intervals. Place a tiny star outline in one gap between the rings and finish with a thin wrist line to ground the bottom ring.
Pro tipKeep ring thickness the same as your outlines — thick rings ruin the minimalist feel.
AvoidDon’t close the rings fully; partial rings keep the modern negative-space look.
10. Micro Floral Thread on Outer Edge
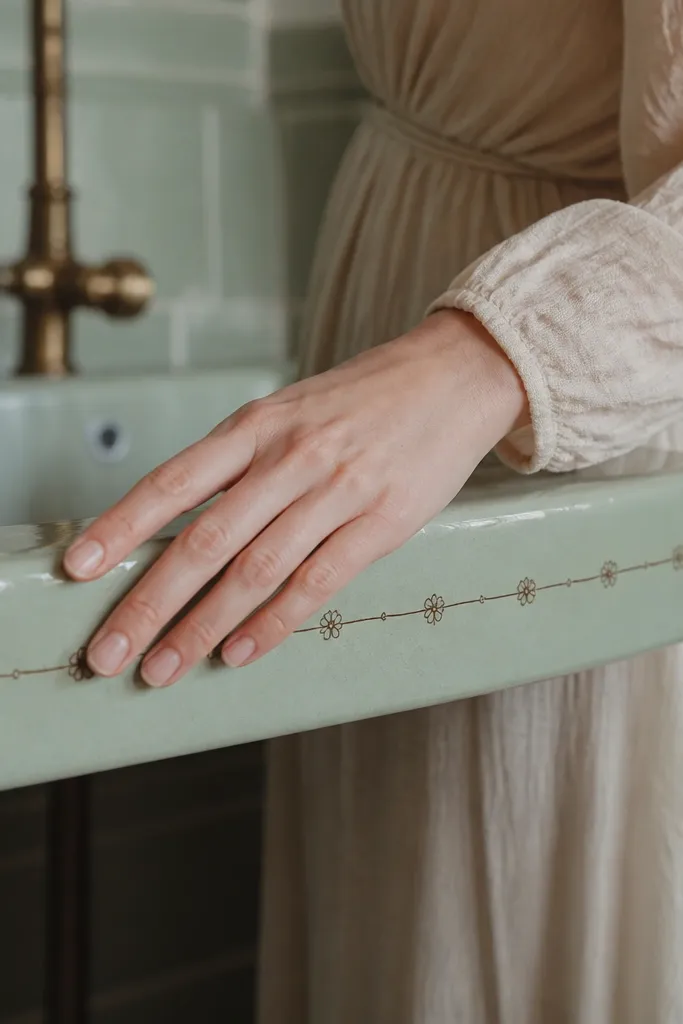
A micro floral thread looks delicate, not messy, when the flowers are tiny and spaced. This design runs along the outer edge of the back hand, which gives it a natural flow. It’s modern minimalist because it uses one line of repetition rather than filling the whole surface. You’ll get a clean, airy look that still feels seasonal when you choose a holiday accent like a tiny star or a teardrop berry. It suits parties, festive dinners, and even everyday events.
Draw a thin curved line from wrist outer edge upward toward the little finger side, keeping it about 4-5 mm away from the edge. At 3-5 points along the line, pipe tiny five-petal outlines (each petal 3-4 mm) without fill. Add one small dot in the center of each mini flower. Finish by adding two tiny leaf teardrops between the flowers and a thin border line at the wrist start.
Pro tipUse the same petal shape each time — tiny consistency is what makes it look “designed.”
AvoidDon’t add extra stems; one thread line keeps it minimalist.
11. Center Dot Bloom with Thin Petal Sides
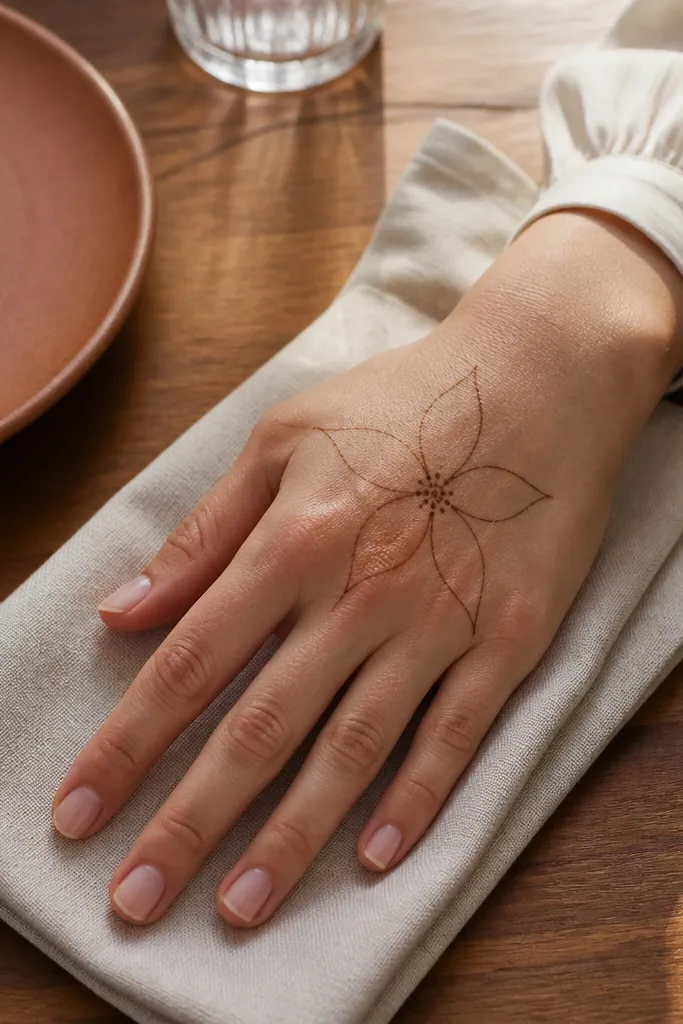
This is a minimal floral that looks airy but still complete. The center dot bloom gives you a focal point, while thin petal sides spread outward without heavy fill. It works especially well on the back of the hand because petals can stretch toward finger bases without covering them. You can keep it simple with 5 petals or add 7 for a slightly fuller look. It’s a strong option for holiday nights when you want something pretty but not busy.
Pipe a small filled dot (or tightly outlined dot) at the center of your design area, about 3-4 mm wide. Add 5 thin petal outlines around it, each petal about 1 cm long, pointing outward. Leave the petal centers empty — only outline them. Add a thin curved border line near the wrist edge and connect two opposite petals to that border with short lines.
Pro tipIf your petals look uneven, redraw using guide dots — five dots around the center tell you where each petal starts.
AvoidDon’t fill the petals; the negative space is what keeps it modern.
12. Chevron Spine with Dot Borders
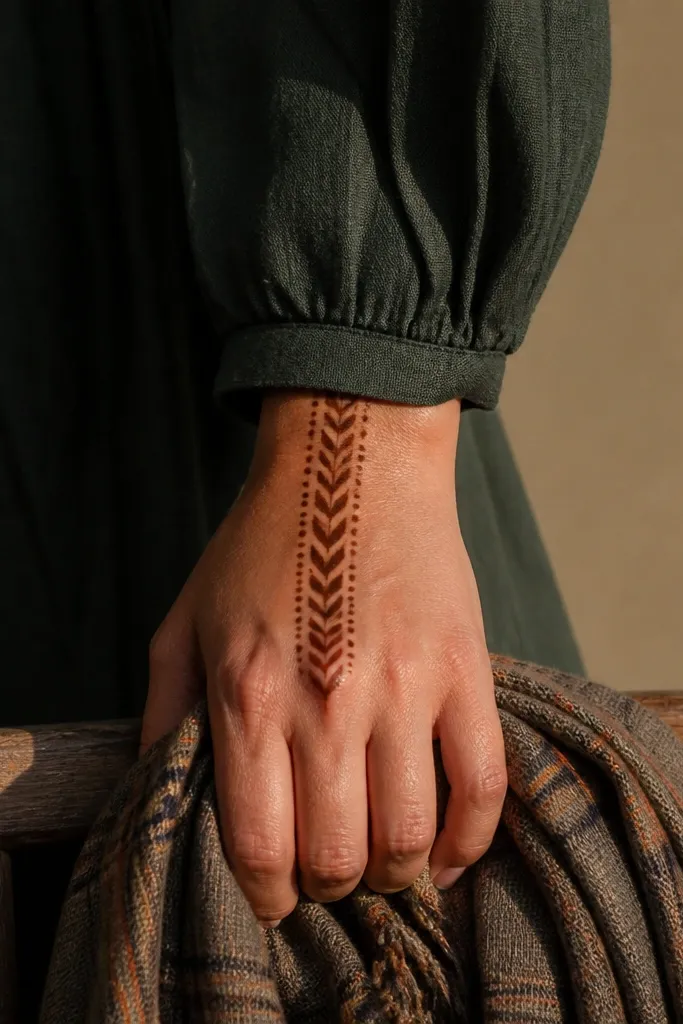
A chevron spine is clean, graphic, and very modern minimalist. This design uses a single zig-zag spine from mid-hand to wrist, then adds tiny dot borders at the sides so it looks framed. It’s photogenic because the angle changes create motion across the hand shape. Keep it thin and you’ll get a crisp look even if you’re not covering much area. It’s also fast enough to do on a busy day.
Draw a vertical guideline from mid-hand down toward the wrist. Pipe a chevron spine along that line with 5-7 V shapes, keeping each V about 8-10 mm wide. On each side of the spine, add small dot borders that follow the chevron angles — 3 dots per V peak/trough. Finish with a thin horizontal border line at the wrist and one dot at the chevron bottom tip.
Pro tipUse the same V width for every segment — that uniformity makes it look “minimal but finished.”
AvoidDon’t add extra swirls; the chevron already carries the design.
13. Openwork Fan Near Wrist
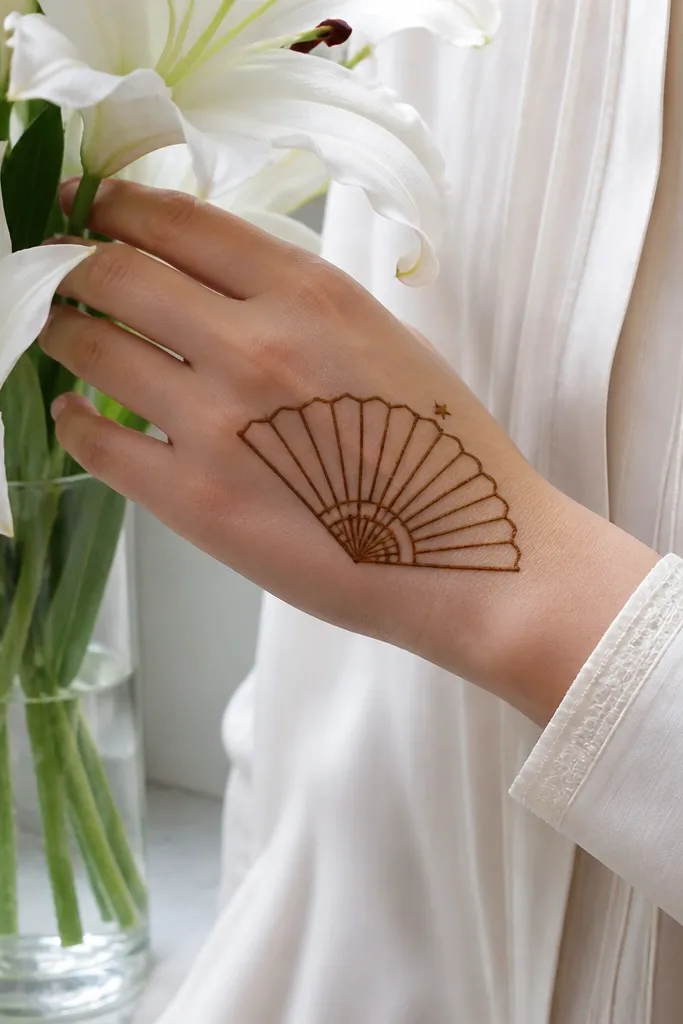
Openwork fans look smart and light because they’re mostly outlines and negative space. Place the fan near the wrist, angled slightly toward the index finger, and it will balance the hand naturally. The thin ribs create a delicate “fan” texture without filling the skin. For seasonal events, you can add a tiny star at the fan center to make it feel festive. This is a strong choice if you want a back hand design that looks intentional even with minimal coverage.
Start with a curved base line near the wrist, 4-5 cm wide. From the base, pipe 7-9 thin ribs radiating upward like a fan, leaving gaps between them. Add a small center oval outline at the fan’s top point. Place 6 tiny dots along the outer edge of the fan ribs. Optional: add one tiny star outline inside the center oval.
Pro tipKeep rib lines straight and even; wobbly ribs look handmade in a bad way for minimalist designs.
AvoidDon’t thicken the ribs — thin lines are the whole point here.
14. Three-Layer Arc Frame
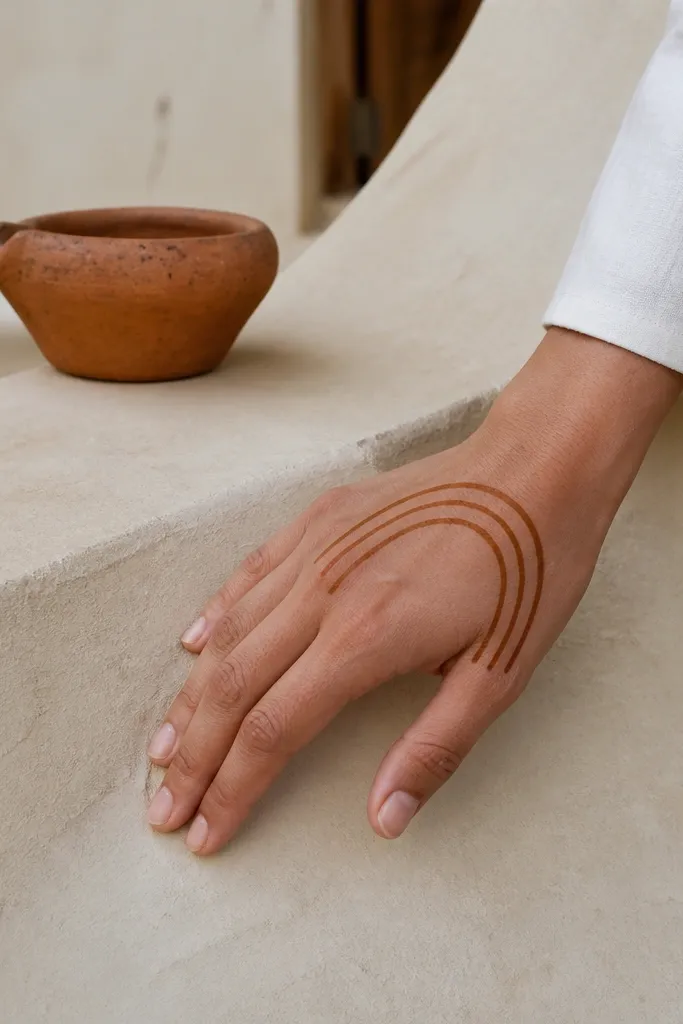
This design is basically a frame, and frames photograph beautifully. Three nested arcs create depth while still staying minimalist because they’re only outlines. The spacing between arcs is what makes it look modern, not the motif itself. It’s a great choice when you want your mehndi to look styled for holiday photos without covering the whole hand. You can place it centrally or shift it slightly toward the ring finger for variety.
Pipe the first thin arc across the back of the hand, about 6 cm long, from near thumb base toward the wrist side. Add a second arc inside it, leaving a 6-8 mm gap. Add a third arc inside the second with the same spacing. Place 2-3 dot anchors along the middle arc — one near the center and one near each end. Finish with a small wrist border line under the outer arc ends.
Pro tipMeasure gaps with a visual rule: if your arcs look too close, the frame turns into one thick line.
AvoidDon’t add floral fill inside the arcs; it cancels the modern “frame” effect.
15. Ring-and-Spoke Minimal Medallion
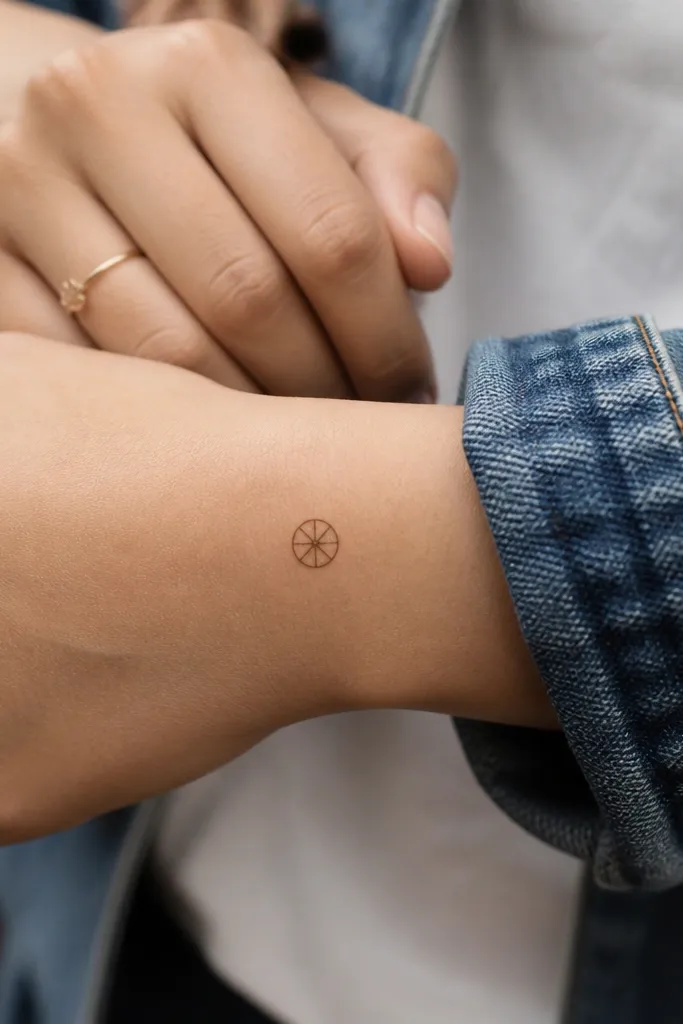
A tiny medallion reads like jewelry. This minimalist version keeps it geometric: one small ring, a few spokes, and a dot center. It’s perfect for modern minimalist back hand mehndi designs because it looks intentional and clean. Place it slightly above the wrist so it looks like a bracelet-to-hand transition. It also takes less than 15 minutes once you’re comfortable with the ring outline. Add a single holiday star inside the ring if you want a festive signal.
Draw a small circle outline (about 2.2-2.5 cm diameter) on the back of the hand near the wrist. Add a second thin ring inside it, spaced about 4-6 mm. Pipe four straight spokes from the center dot to the ring — each spoke stops at the inner ring. Add a center dot and optionally one tiny star outline between two spokes. Finish with a short thin line extending toward the index finger.
Pro tipKeep spokes straight by piping one, then using it as a guide for the next three positions.
AvoidDon’t make the circle too big; big medallions look heavy on minimal designs.
16. Tiny Bow at Wrist with Dots
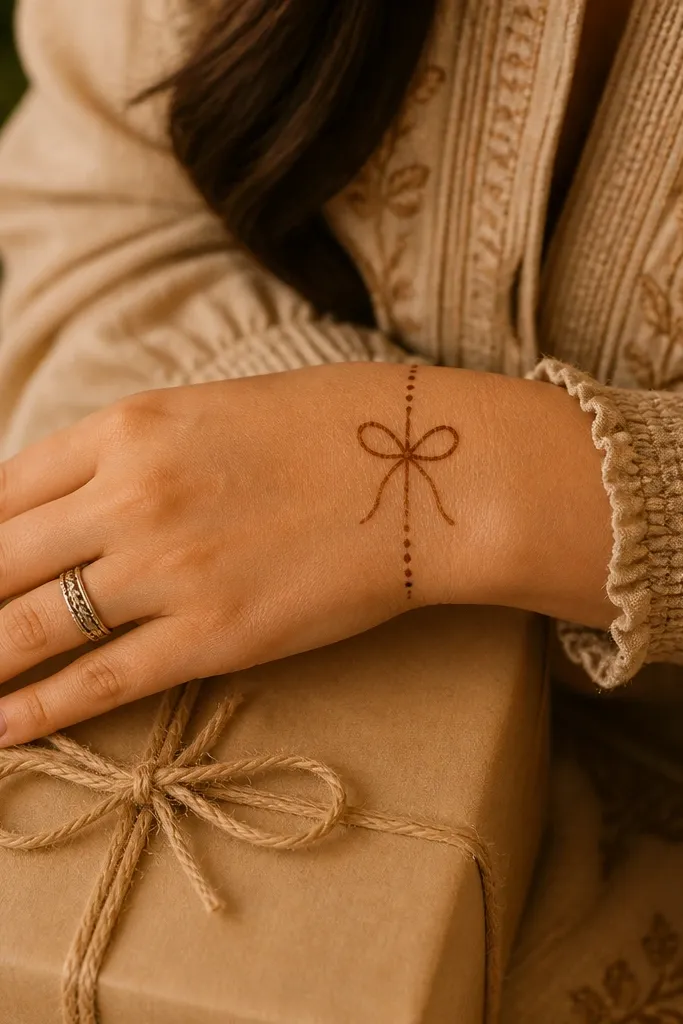
This is a cute holiday-ready design that still stays minimalist because the bow is small and the rest is open. It sits at the wrist, so it looks like a decorative cuff. The bow outline gives you symmetry, and the dots add sparkle without turning into a full floral. It’s also easy to match with bangles and festive outfits because it frames the wrist area. If you want something pretty but not busy, this is a strong pick.
Pipe a small bow outline near the wrist, about 3-3.5 cm wide: two loop teardrops on top with a narrow knot in the middle. Add 6-8 tiny dots in a gentle curve underneath the bow, like a dotted tail. Draw one thin line across the wrist edge to connect the bow ends visually. Optional: add one tiny star in the knot outline.
Pro tipMake the knot narrow so the bow reads clearly even in low-resolution photos.
AvoidDon’t thicken the knot; thick knots make the whole bow look bulky.
17. Feather Line from Wrist to Middle Finger
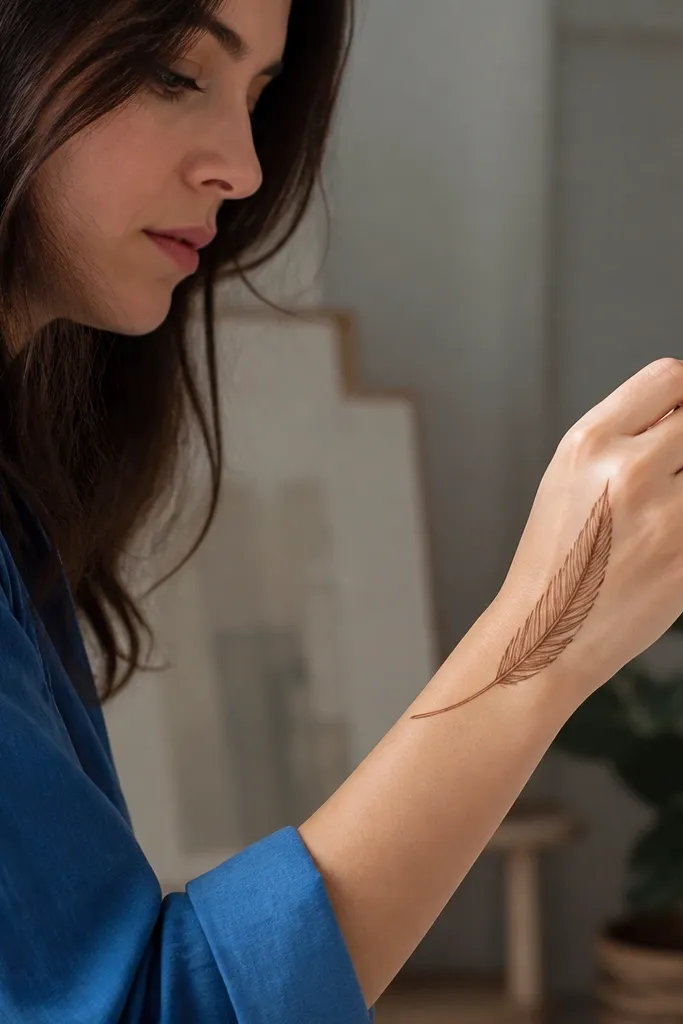
Feather lines look modern because they’re all about rhythm. This design uses a single feather spine with small barbs on both sides, kept thin and mostly outlined. It’s a great back hand choice because the feather shape naturally points upward and follows the hand’s length. Keep the barbs small and empty — that’s what makes it minimalist. You get a long, elegant look with very little fill.
Draw a central spine line from the wrist up toward the base of the middle finger, about 6-7 cm long. Add 10-14 small barbs on alternating sides — each barb is a short curved line or outlined teardrop, about 4-6 mm long. Leave the center of the feather open. Finish with a thin border line near the wrist and a tiny dot at the top end of the spine.
If your barbs look messy, switch to outlined teardrops — they keep shape better than free curved lines.
Don’t add extra leaves or vines; the feather spine is already the whole story.
18. Geometric Lattice Corner on Back Hand
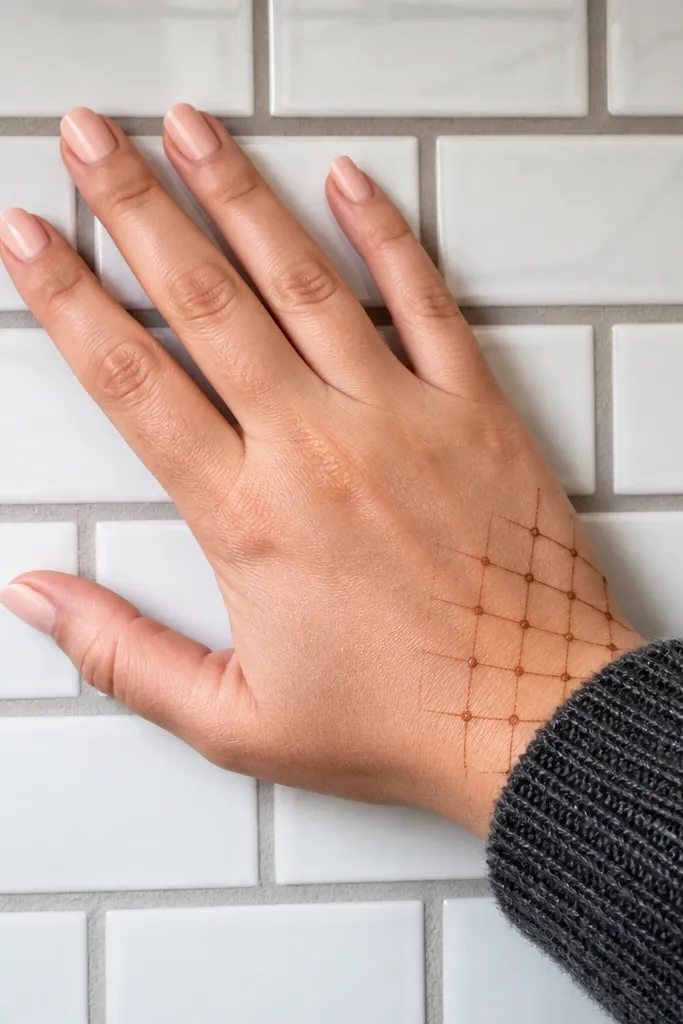
Geometric lattice reads modern and tidy, especially when you keep it in one corner. This design uses a small grid-like area near the outer back hand, with thin lines and dot intersections. It looks structured in photos and doesn’t require complex floral skills. You can treat it like a “feature corner” and leave the rest of the hand bare. It’s also a good choice for holiday photos because geometry looks crisp under bright lighting.
Choose one corner area near the little finger side and draw a small square or rectangle frame, about 3.5 cm wide. Inside, pipe 3-4 horizontal lines and 3 vertical lines, keeping them thin and evenly spaced. At each intersection, add a tiny dot instead of thickening the line. Add two small diagonal lines across two opposite cells for extra interest. Finish by outlining the outer frame with a slightly darker thin line.
Pro tipKeep line spacing even by counting cells — aim for 3x3 grid for simplest symmetry.
AvoidDon’t fill the grid; minimalist lattice needs air between lines.
19. Half-Moon Star Cluster on Outer Side

This is a holiday-feeling design that still looks minimalist. A half-moon outline sits on the outer back hand, and three tiny stars float around it. The shapes are simple, but the clustering makes it look styled rather than random. It’s also balanced because the half-moon creates a strong curve while the stars add sparkle points. This works well for festive evenings because the contrast of outlines and empty space reads clearly.
Pipe a thin half-moon outline starting near the mid outer edge and curving toward the wrist, about 3 cm long. Add three tiny five-point stars: one at the top curve, one near the center gap, and one near the lower curve. Keep star sizes consistent at about 6-7 mm wide. Add 4-6 micro dots around the cluster — place them more densely near the stars. Finish with a thin border line that follows the wrist edge under the half-moon ends.
Pro tipKeep star points sharp by piping in one steady motion per point outline.
AvoidAvoid adding extra moons or extra flowers; three stars is the sweet spot.
20. Two Dot Arrows Pointing to Center
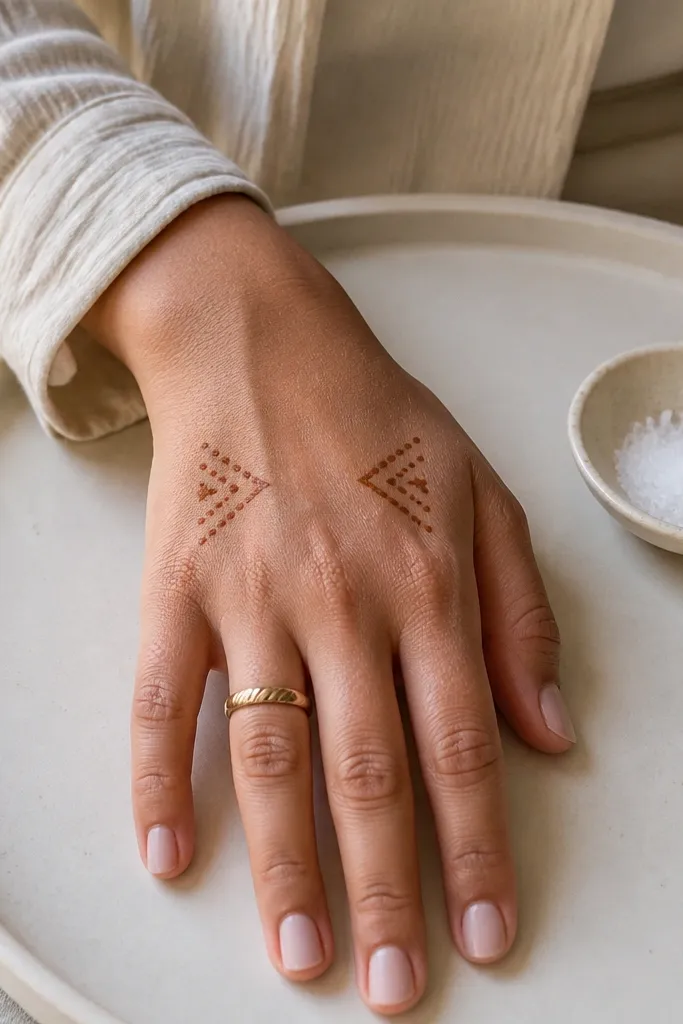
Dot arrows look graphic and modern because they create direction without heavy ornament. This design uses two arrowheads on either side pointing toward the center, where you leave skin bare. That negative space does the aesthetic work. It’s a smart pick for minimalist back hand mehndi designs when you want something that looks deliberate but doesn’t take long. The arrows also make your hand look more elongated in photos.
Draw two thin arrow shafts starting near the outer back hand and pointing toward the center channel. At the end of each shaft, pipe an arrowhead using 3-4 dots arranged like a triangle, with one dot at the tip. Place a small dot cluster (3 dots) on each arrow shaft about halfway up. Add a tiny circular dot at the center of the design area but don’t connect it to the arrows. Finish with a thin wrist line under the arrow bases.
Pro tipKeep arrow shafts straight and thin; dot-only arrowheads look best with minimal line weight.
AvoidDon’t connect everything with thick lines — that kills the minimalist negative space.
21. Minimal Wing Split Near Wrist
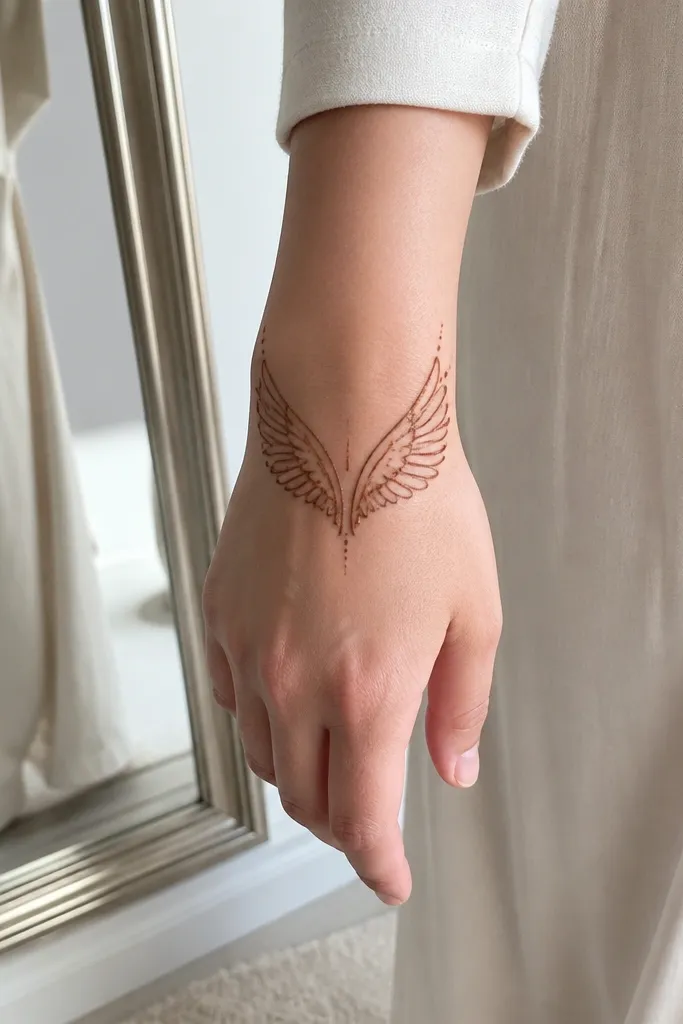
This wing-split design looks like a modern emblem. It uses two mirrored wing outlines that rise from the wrist toward the center of the hand, then stops before the finger bases. The open space inside the wings keeps it light and modern. Add a few dots along the wing edges for texture. It’s a good option for holiday parties because it feels graphic and festive without being loud.
Start by drawing a thin base line near the wrist about 3-4 cm long. From the midpoint of that base, pipe two mirrored curved outlines outward, forming a wing split shape. Keep each wing outline about 4.5-5 cm tall and leave the inside empty. Add 5-7 dots along the outer edges — alternate left and right sides. Finish with a tiny dot cluster at the wing split center.
Pro tipUse symmetry guides: lightly mark the center with a single guide dot so both wings match.
AvoidDon’t extend the wings too far up — wings that reach finger bases look cluttered in minimalist designs.
22. Single Vertical Floral Stem with Three Blooms
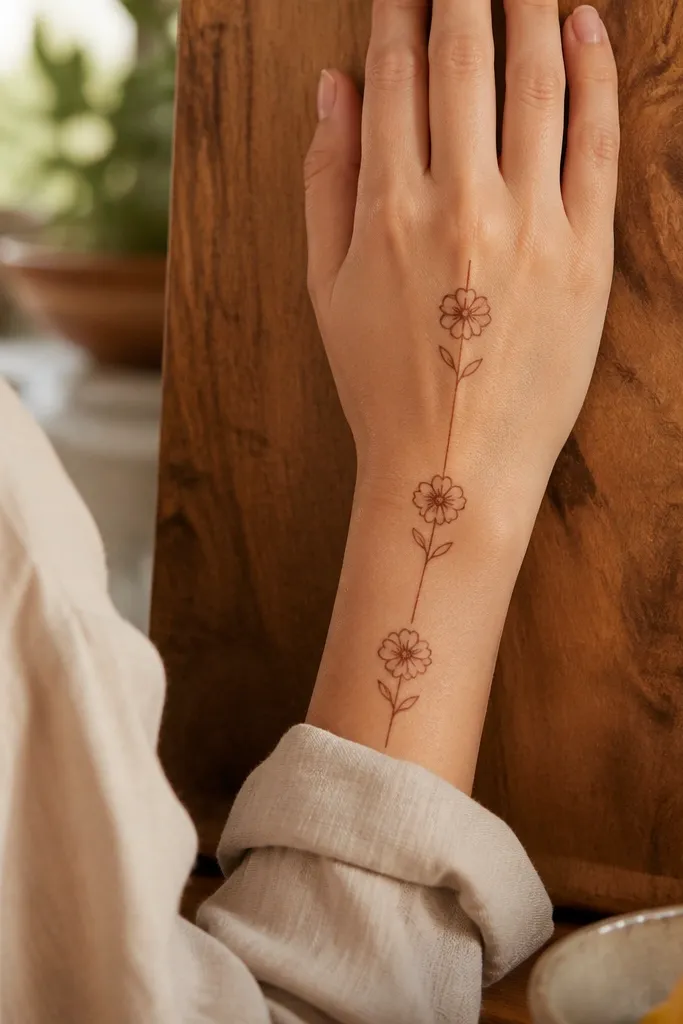
This design is modern minimalist because it uses one vertical stem and only three small blooms. The spacing is what makes it look clean: each bloom sits at a different height with a gap of skin between them. You get a floral feel without the heavy fill that usually makes mehndi look busy. It’s also easy to make holiday-ready by swapping one bloom for a tiny star outline. Great for parties where you want flowers but not a full floral sheet.
Draw a thin vertical stem line from mid-hand down to about 1 cm above the wrist. Add three small outlined blooms along the stem: place one near the thumb side, one in the center, and one closer to the wrist. Each bloom can be a 5-petal outline about 8-10 mm wide with an empty center dot. Connect each bloom to the stem with a short leaf teardrop on one side only. Finish with a thin wrist border line.
Pro tipIf you want the most modern look, keep blooms unfilled and use only one dot in the center of each bloom.
AvoidDon’t add extra leaves around the stem; three blooms is already enough.
23. Micro Cross Bands Between Finger Lines
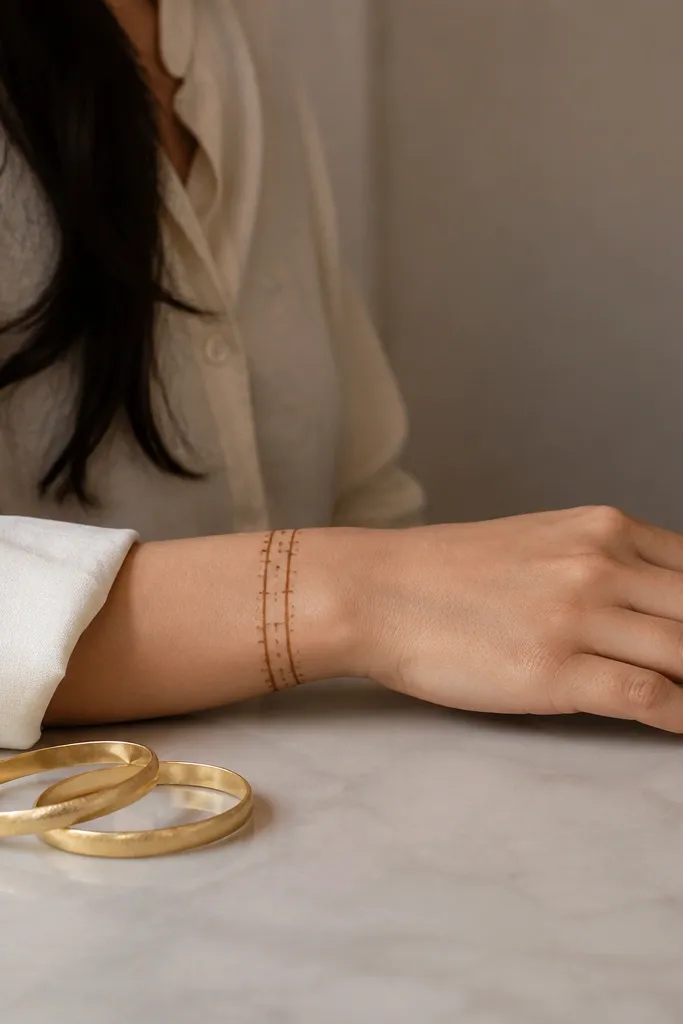
Cross bands look sleek because they create structure across the back hand. This design uses two thin horizontal bands with micro cross marks and dot intersections. It’s perfect for minimalist back hand mehndi designs when you want a modern, almost “bracelet” effect without covering the whole hand. The dots add sparkle and keep it from looking like plain lines. It also works with any seasonal theme because the structure stays the same while you can adjust the accent motif.
Draw two thin horizontal bands across the back hand, one at mid-hand and one closer to the wrist, each about 5-6 cm long. Add a set of 5-7 micro cross marks on each band by piping small plus signs — keep the arms short (3-4 mm). At every other cross mark, add a tiny dot at the center. Connect the ends of the lower band to a thin wrist line. Optional: add a tiny star outline at the center of the upper band.
Pro tipUse short cross arms so the pattern stays delicate, not thick and heavy.
AvoidDon’t make the bands too wide; wide bands turn minimalist into blocky.
24. Wrist Teardrop Chain with Center Dot
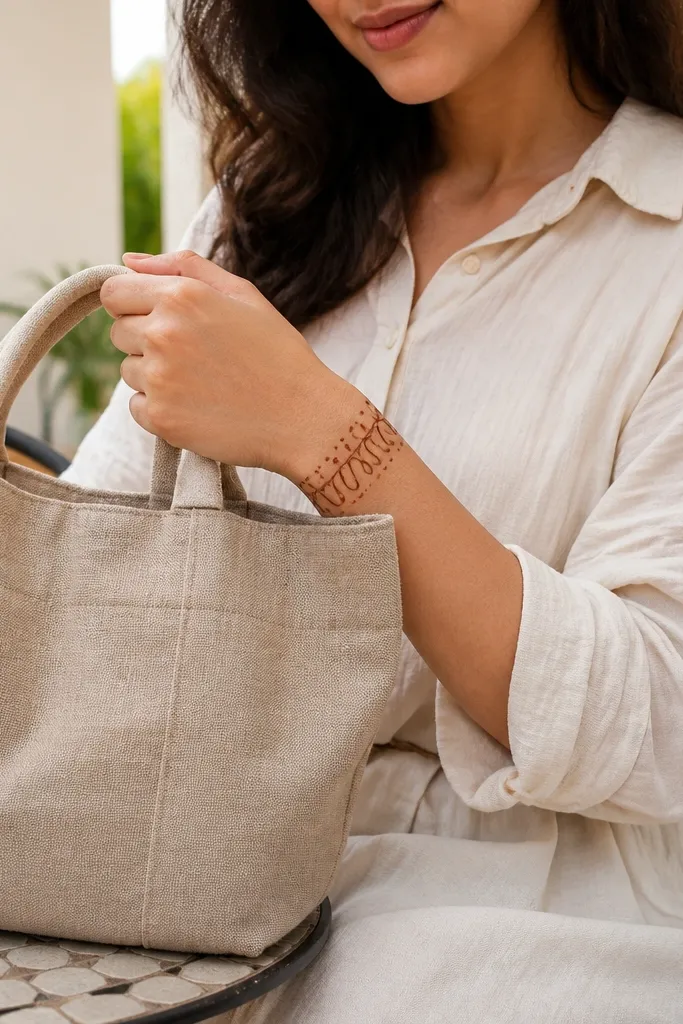
This is a clean “cuff” look that stays minimalist. The teardrop chain gives you a repeating rhythm, and the single center dot above anchors everything. Place it near the wrist so it reads like jewelry, not a full hand pattern. This design is fast, forgiving, and photogenic because teardrops outline well even if your paste line isn’t perfect. It’s a strong choice for seasonal and holiday nights when you want something cute without time pressure.
Pipe a curved line along the wrist edge about 5 cm long. On top of that line, add 7-9 teardrop outlines spaced evenly, each about 6-8 mm tall and pointing upward. Add a single small dot above the center teardrop, aligned with the middle of the chain. Connect the base of the middle teardrop to the wrist line with a short vertical line. Finish by outlining the wrist curve with a thin second pass.
Pro tipKeep teardrops the same height by counting while you pipe — it prevents one random tall teardrop.
AvoidAvoid filling teardrops; outlined teardrops keep the minimalist look crisp.
25. Index-to-Wrist Diagonal Leaf Stripe
A diagonal leaf stripe looks modern because it uses one direction and repeating small shapes. This design stays minimal by keeping leaves outlined and spaced with lots of skin showing. It also frames the hand nicely, especially if you keep the stripe narrow and stop before it reaches the finger tips. For holiday photos, you can add one tiny berry dot at the middle leaf. It’s a simple, clean pattern that looks good even when the mehndi fades a bit.
Draw a diagonal guideline from the base of the index finger toward the wrist, about 6 cm long. Pipe a thin stripe line along the guideline. Add 4-6 leaf teardrops attached to one side of the stripe only, each about 5-7 mm long, with empty centers. Place a tiny dot berry at the center leaf if you want a festive accent. Finish with a small border line near the wrist end of the stripe.
Pro tipAttach leaves on one side only for a sleek look — two-sided leaves tend to look busy fast.
AvoidDon’t make the stripe too thick; thick stripes read heavy on minimal designs.



