
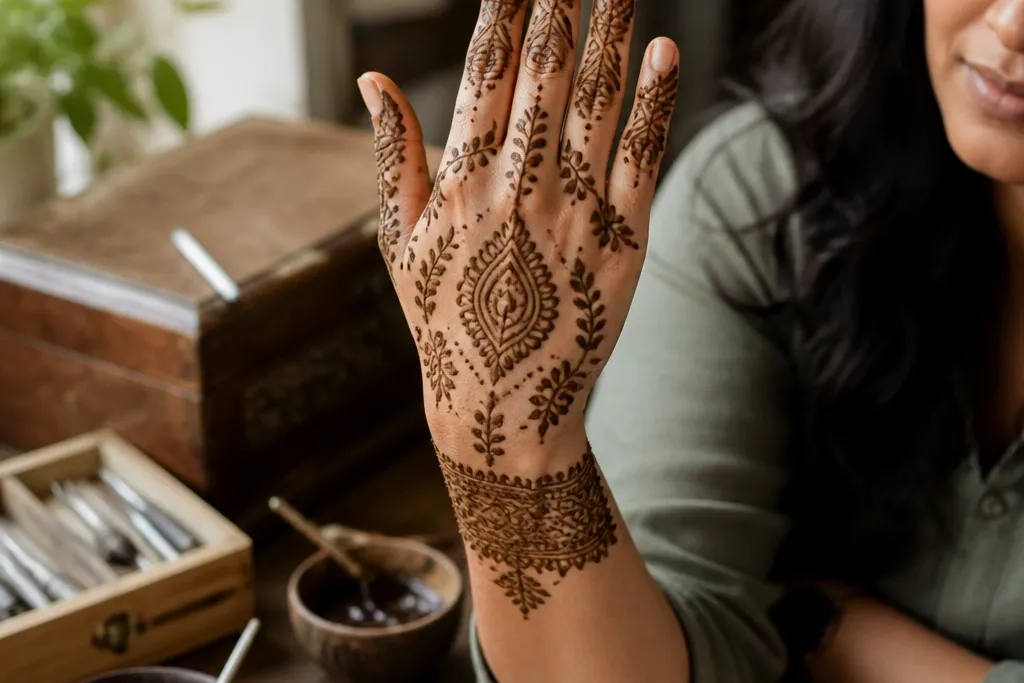
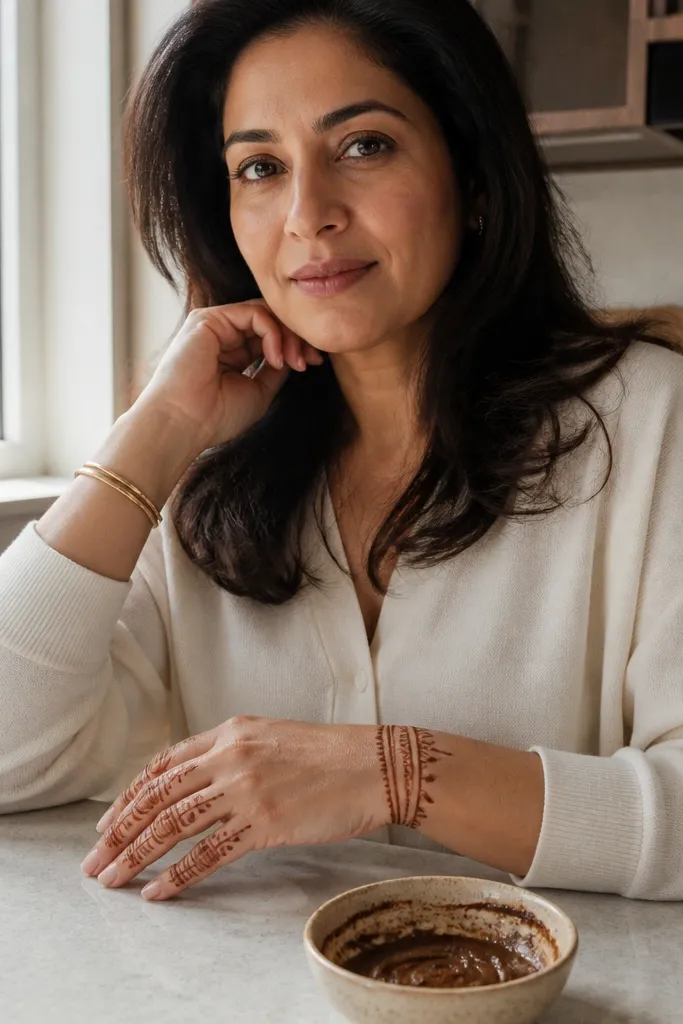
1. Wrist Band + Central Teardrop Window

This design is the cleanest fix for back hands that look empty. The thick wrist band grounds the whole pattern, and the central teardrop gives you one strong focal point that reads well in photos. The “window” negative space in the center keeps it modern instead of crowded. You’ll also get a balanced look on the ring and middle fingers because the side lines naturally guide the eye outward.
Start by drawing a continuous band across the wrist with 2-3 parallel lines, then add 6-8 small leaf ticks along the band edge. Next, place one large teardrop in the middle of the back of the hand, with a thin outline and a few internal dots near the top. Add two thin vine lines from the teardrop base toward the side of the hand, stopping before the knuckles. Finish by adding a small half-moon on the ring finger and a tiny dot cluster at the pinky-side corner.
Pro tipUse a slightly thicker cone for the wrist band so it dries darker than the rest.
AvoidDon’t fill the teardrop completely — leaving the window makes it look modern.
2. Side Vines With Ladder Finger Strips
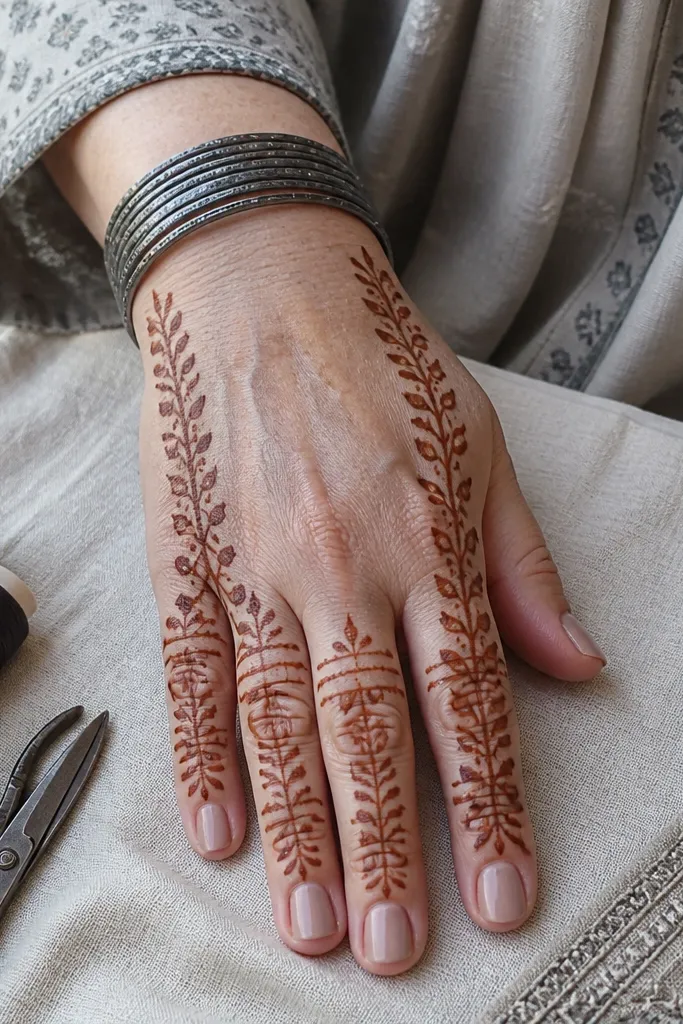
This one looks stylish because it repeats the same rhythm on both sides. Side vines create movement, while ladder finger strips add structure without heavy filling. It’s especially flattering when you’re wearing bangles because the wrist area stays crisp and visible. The finger strips also make the design look intentional even if you only have light time for the center.
Begin with two symmetrical vine stems starting near the wrist and curving toward the knuckle area. Then draw 3 thin horizontal ladder bars on each side of the back of the hand, aligning them with the space between fingers. Place small leaf curls at the top of each vine so the pattern doesn’t look flat. Finish with a narrow strip on the ring finger that mirrors one ladder bar, then add 3-4 tiny dots at the outer corner near the pinky.
Keep ladder bars the same length; uneven bars make it look accidental.
Avoid thick fill inside vines — it turns the design into a single dark block.
3. Geometric Hex Border With Minimal Center
Geometric borders make simple mehndi look “designed” fast. A hex border frames the hand and gives you a modern, holiday-friendly vibe without requiring detailed florals. The center stays minimal so the whole layout looks clean, not crowded. This is a strong choice when you want something photogenic but you’re not confident with heavy paisley work.
Start at the wrist and draw a repeating hex outline that wraps up the outer edges of the back hand, leaving the center open. Add one small hex or star at the center of the open area, then connect it to the border with 3 short lines. Place 2 tiny dot clusters on each side of the center motif to balance the spacing. Finish by drawing a thin arc on the index and middle finger bases, aligned to the border curve.
Make the hex corners sharp by using lighter pressure at the start and end of each side.
Don’t close the entire border over the center — that removes the modern negative space.
4. Omar-Style Paisley Stack on the Back Center
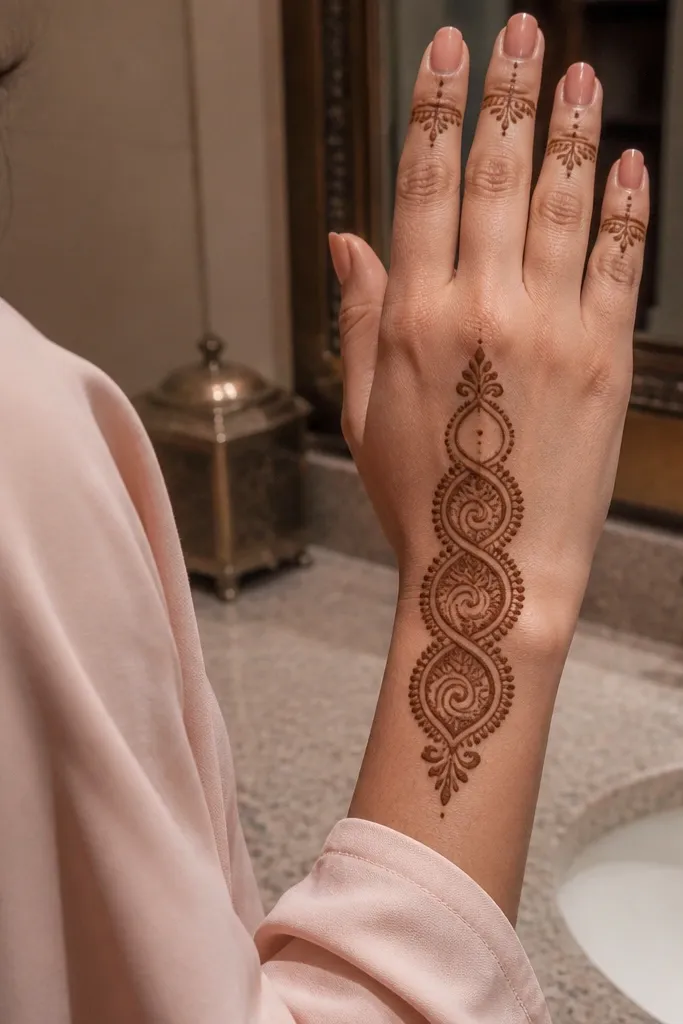
Stacked paisleys give you fullness without making the hand look busy. The trick is to keep each paisley slightly smaller than the one below and use thin side lines to separate them. This design photographs well because the eye reads vertical structure, and the wrist stays simple. It suits mehndi for festivals where you want more impact than a basic vine pattern.
Draw a wrist curve line, then place three vertically stacked paisleys in the center of the back hand. Keep the top paisley small with an open center, then add a medium one beneath and a slightly larger one near the middle finger area. Connect the paisleys with thin stems so they look like one column. Add two thin side vines that start at the top paisley and end near the knuckles, then finish with a small ring finger crescent under the column.
Pro tipLet the paisley tops taper — it keeps the vertical look elegant in photos.
AvoidDon’t add heavy dots inside every paisley; use dots only near tips.
5. Wrist Crown + Ring Finger Halo
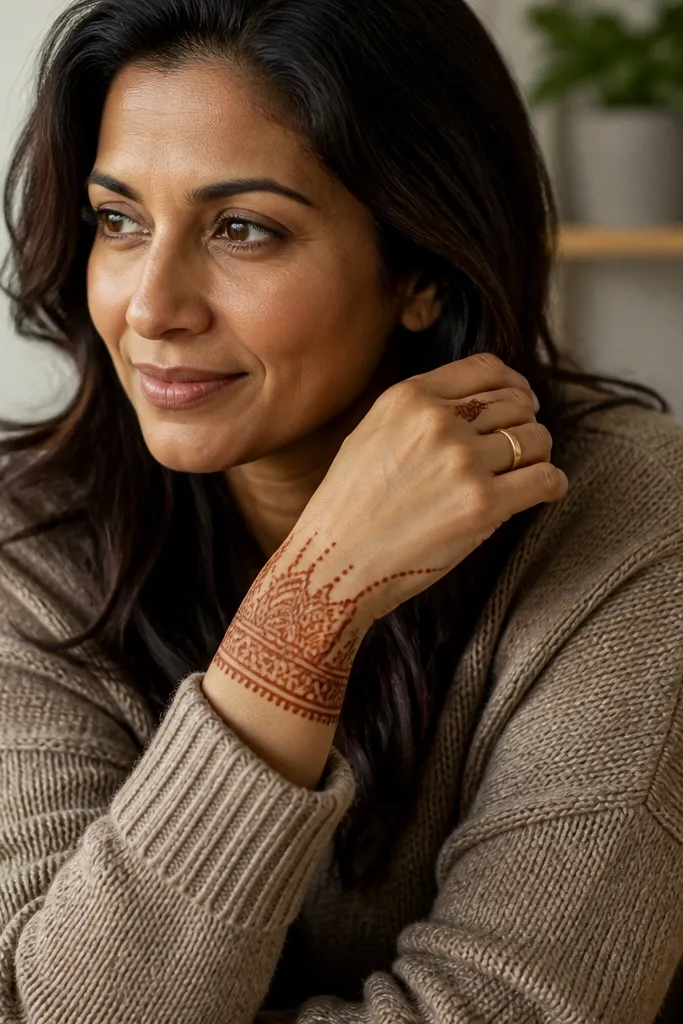
This is a pretty “holiday” layout because it frames the ring finger like jewelry. A crown-like wrist pattern adds sparkle even with simple lines, and a halo around the ring finger base makes the hand look styled. The center of the back hand stays light, so the design doesn’t compete with your outfit or accessories. If you want a modern bridal-adjacent look without full heavy coverage, this is a smart pick.
Start with a crown band along the wrist: 7-9 pointed arches that touch each other. Then draw a halo ring around the ring finger base using a thin oval outline, leaving a small gap at the top for a dot. Add a small teardrop at the center of the back of the hand, aligned with the halo. Finish with two short diagonal lines from the teardrop to the side edges so it looks connected, not floating.
Pro tipUse a steady cone pressure for the crown points so they dry evenly dark.
AvoidAvoid making the halo too thick — it should feel delicate, not blocky.
6. Half-Moon Side Fill With Thin Center Stem
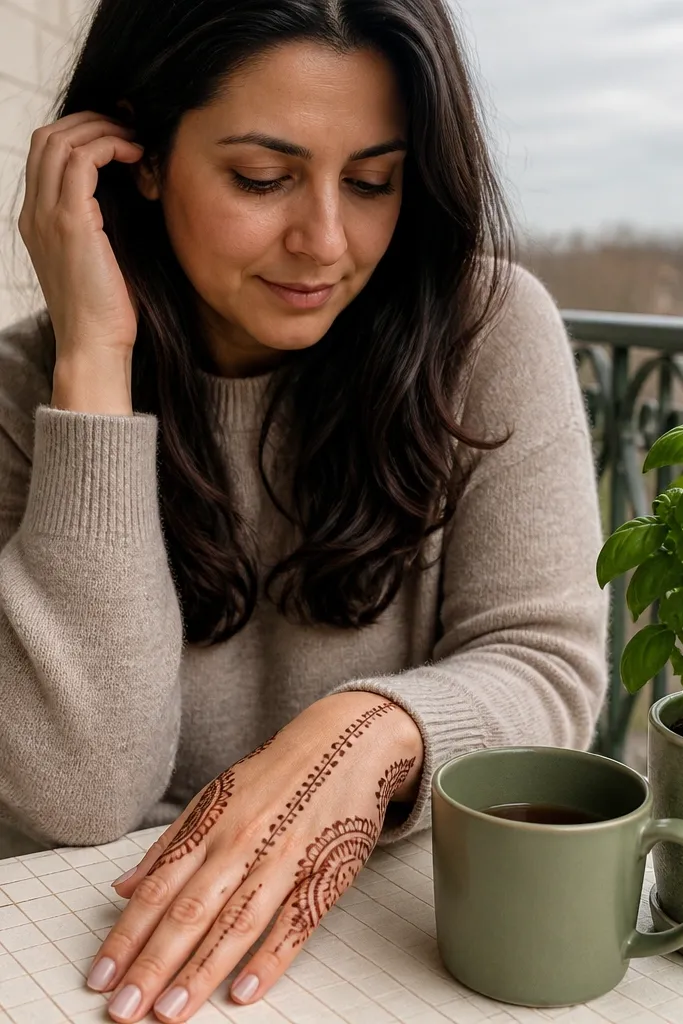
This design is built for a clean, minimal look with strong contrast. The center stem is thin and leaves breathing room, while half-moon side fills create a fuller edge without covering the whole hand. It looks modern because the fills stop at the knuckle line instead of spilling into every finger. Perfect when you want “simple” but still want it to look complete in a close-up.
Draw one thin vertical stem from wrist toward the middle finger area. Add two matching half-moon fills on both sides of the stem, each with 4-5 curved ribs inside. Keep the half-moons the same size and start them at the same height. Finish by adding a tiny dot row at the wrist edge and a small leaf tick at the top of the stem near the knuckles.
Count your half-moon ribs (like 5 each) so both sides match in photos.
Don’t extend half-moons past the knuckle line — that’s where simple turns messy.
7. Minimal Flower Burst at the Knuckle Line
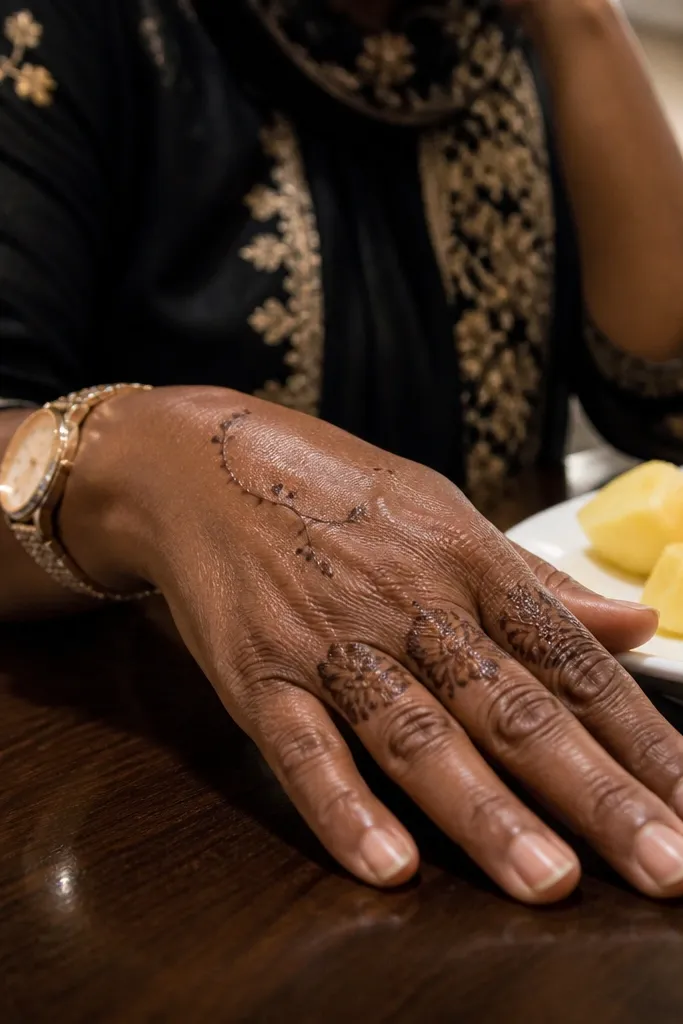
Flower bursts make simple mehndi look intentional fast. Instead of covering the whole back hand, you place a small cluster near the knuckle line and let thin vines do the rest. This keeps the design airy while still giving a focal point that shows up in pictures. It’s a good option for quick holiday prep when you want something pretty but not heavy.
Start with a thin vine line from the wrist up toward the outer edge of the back hand. At the knuckle line, draw a small flower burst with 5 petals around a dot center, then repeat a smaller burst near the middle finger base. Add two tiny leaves between the bursts so the spacing looks planned. Finish with a thin border arc across the lower wrist area and a single dot at the center of the back hand.
Keep petals rounded, not pointy, so the cluster looks soft and modern.
Avoid adding extra bursts on every finger — one or two clusters are enough.
8. Double Arch Wrist Lines With Micro Dots
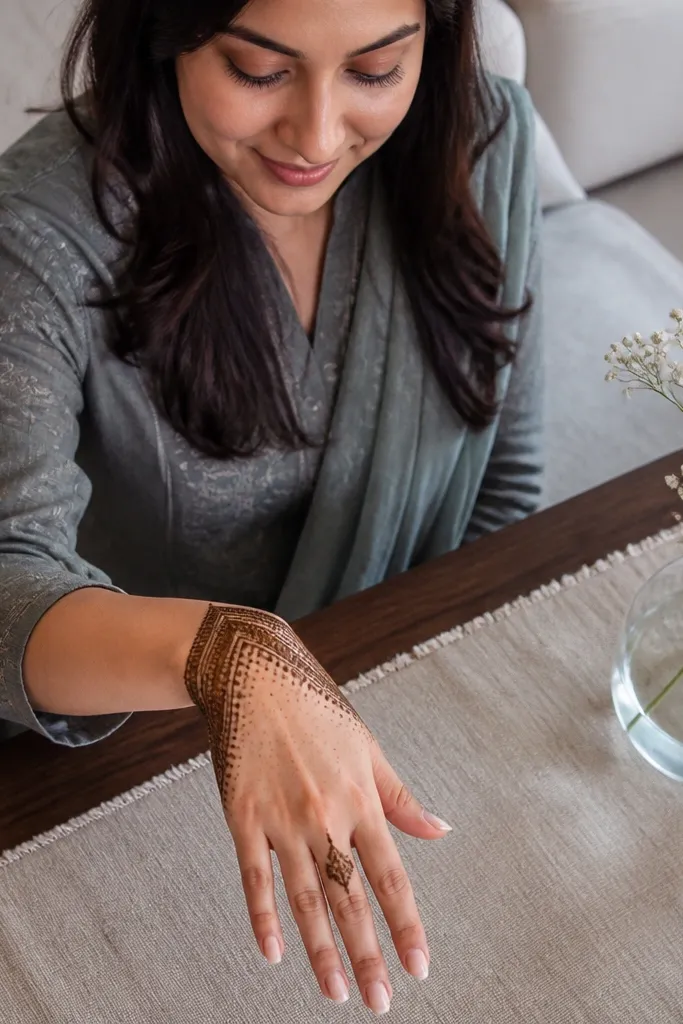
This design wins because it uses micro dots to create texture without heavy filling. The double arch lines at the wrist act like a frame, and the micro dots give you the “busy” look where it matters — near the wrist and center. The back hand stays open in the middle, which keeps it modern and clean. It’s great if you want a simple mehndi that still looks detailed when henna is fully dark.
Draw two parallel arched lines across the wrist, with the top arch slightly shorter. Then place a vertical center line up the middle of the back hand with a small dot at intervals. Add dot clusters in a diagonal pattern on both sides of the center line, keeping them away from the knuckles by a small gap. Finish by adding 3 dot groups along the ring finger base and a tiny leaf tick at the outer corner near the pinky.
Pro tipUse a finer cone for dots so they dry as crisp dots instead of smudges.
AvoidDon’t overfill dots right at the finger joints — it blurs and looks messy.
9. Center Mandala Ring With Side Leaf Steps
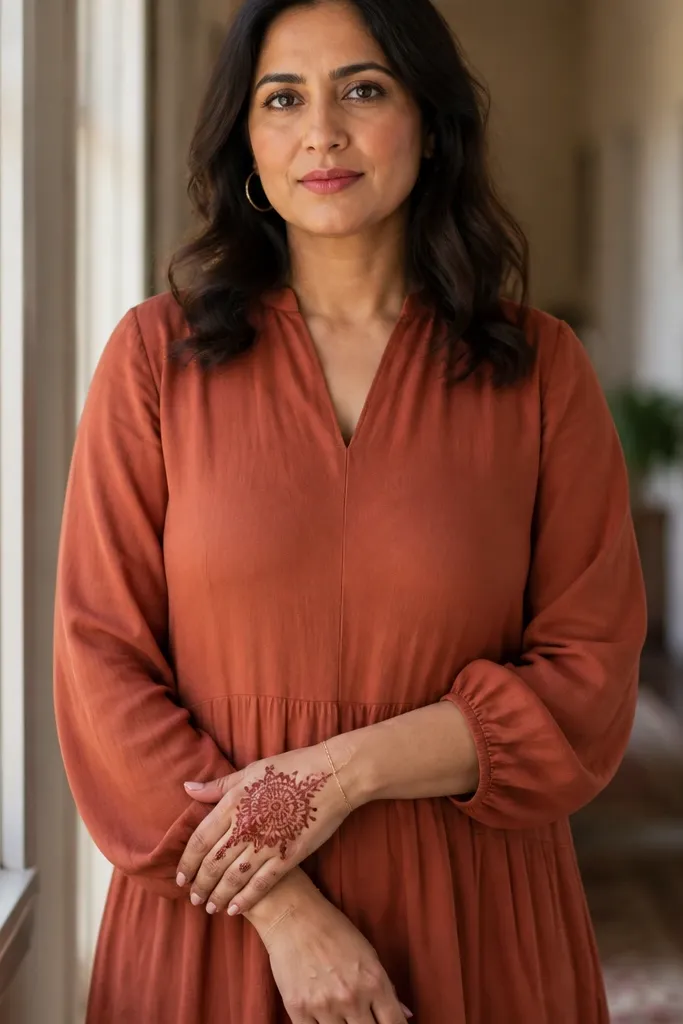
A mandala ring gives you a strong modern focal point without needing a full mandala on the whole back hand. The ring shape reads clean in photos and makes the design feel complete even with limited coverage. Side leaf steps add movement and fill space on the edges so it doesn’t look like a single sticker in the middle. This one is ideal for festive days when you want a little “wow” without committing to heavy work.
Start with a thin circular ring centered on the back of the hand, about the width of two fingertips. Add small spokes inside the ring — 6 spokes is enough — and keep the center mostly open. From the ring edges, draw two stepped leaf lines on each side, moving upward toward the knuckles. Finish with a small crescent at the wrist edge and 2-3 tiny dots at the tips of the leaf steps.
Pro tipKeep the ring thickness consistent; a wobbly ring makes the whole design look rushed.
AvoidAvoid filling the mandala ring completely — open space keeps it modern.
10. Zigzag Ladder Back Hand With Thin Borders
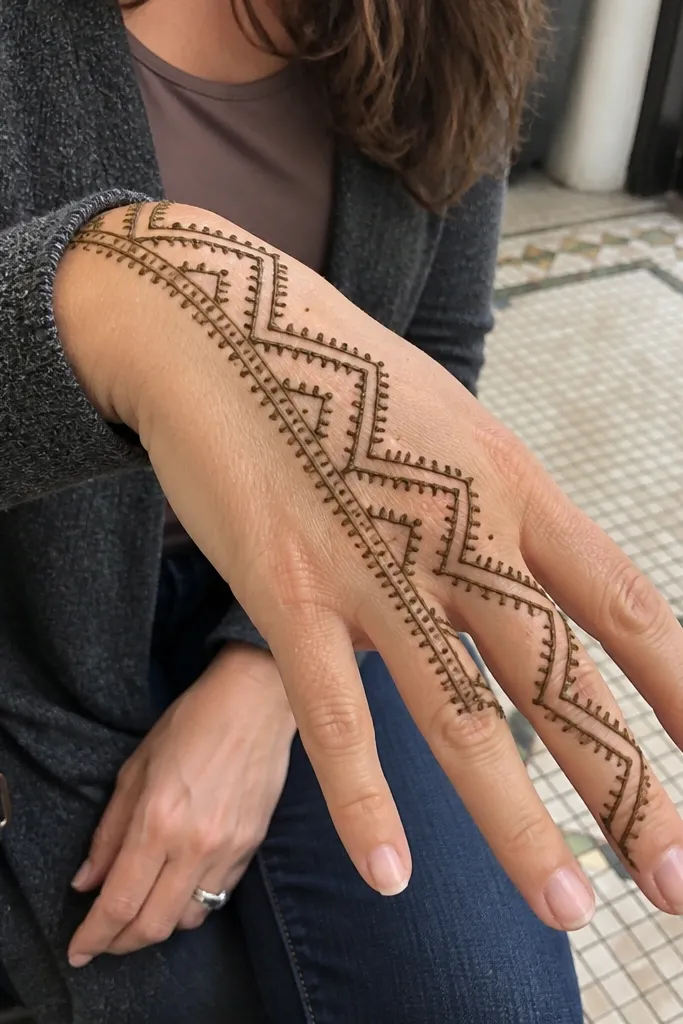
Zigzags look graphic and modern, and they help simple mehndi look intentional. This design uses a zigzag ladder across the back hand, with thin borders to frame it. It’s photogenic because the lines are strong and evenly spaced, and it stays light so it doesn’t blur into dark smears. If you want something that looks like design work rather than random lines, this is a solid choice.
Draw a thin border arc along the wrist and another short arc near the knuckle line. In the open middle area, create a zigzag ladder: connect 10-12 horizontal steps with diagonal lines. Keep the zigzag centered and symmetrical left to right. Add two short vertical segments near the thumb side and pinky side to connect the zigzag to the finger bases. Finish with micro dots at every third step corner for texture.
Pro tipMark the center of your hand first with a tiny dot, then build left and right from it.
AvoidDon’t make the zigzags uneven in height — it kills the graphic look.
11. Rangoli-Inspired Corner Blocks
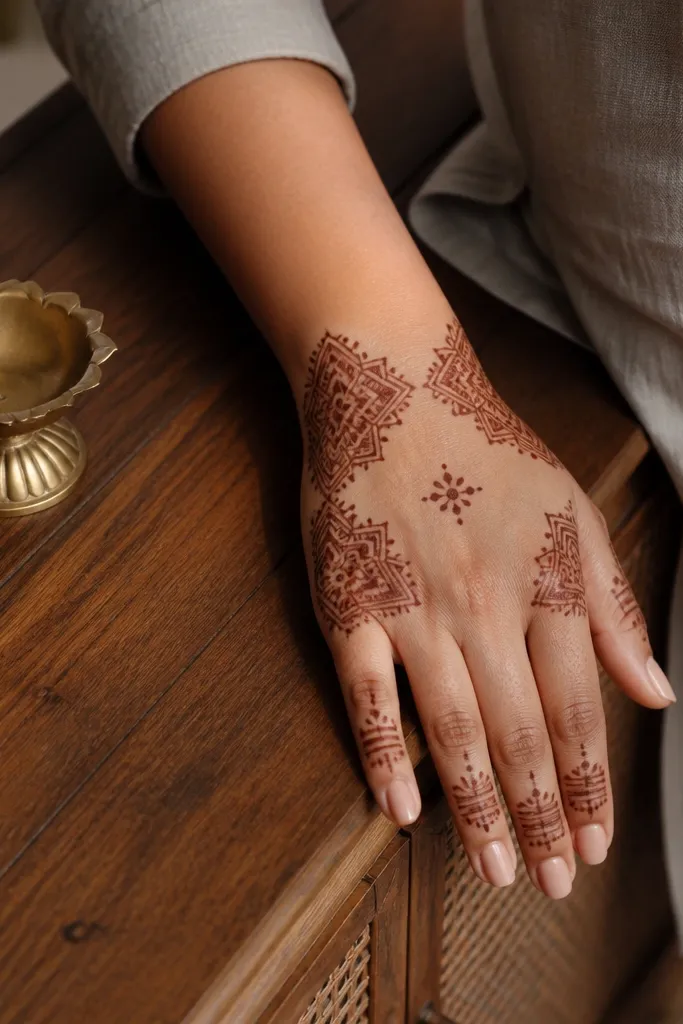
This one looks like a rangoli pattern mapped to the hand — corner energy, clean center. You get a modern festive feel without filling the whole back. Corner blocks create a strong frame around the hand, and a light center motif keeps it from feeling too empty. It’s a great pick for holiday outfits because it looks neat, not heavy.
Start by drawing a small square-like block near the wrist outer edge, then mirror it on the inner edge. Build two more corner blocks up toward the knuckles, each block made of 3-4 small connected diamonds. Leave the center empty. Add one simple teardrop in the middle to tie it together. Finish by connecting inner corner blocks to the teardrop with two short curved lines.
Use consistent diamond size for the blocks so they look like one pattern set.
Avoid adding extra corner blocks in the middle — keep corners only.
12. Ring Finger Focus With Side Lace Vines
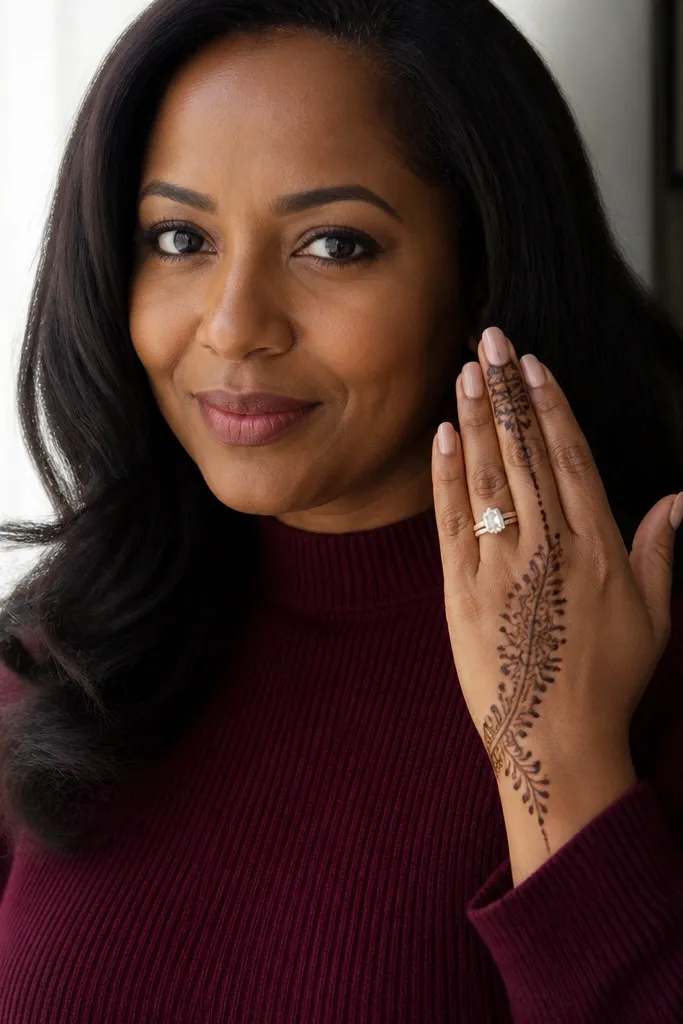
If your goal is “simple but wow,” this design is about focus. The ring finger gets a bold motif band, while the rest of the back hand stays light with lace-like vines. It looks classy because the eye lands on the ring finger first, then reads the airy side vines. This style also works well with shorter mehndi sessions because you’re concentrating effort where it shows most.
Draw a narrow band around the ring finger base using a scalloped edge outline. Connect the band to the back hand with two thin vines that curve outward and upward. Add small lace loops along the vines — 6-8 loops total, not everywhere. In the center of the back hand, add one small leaf cluster near the middle finger base. Finish with a thin wrist line that runs parallel to the wrist crease and a few micro dots at its ends.
Keep lace loops consistent in size; uneven loops look sloppy fast.
Don’t thicken the vines — the lace effect depends on light lines.
13. Three Dot Triangles on Back Hand
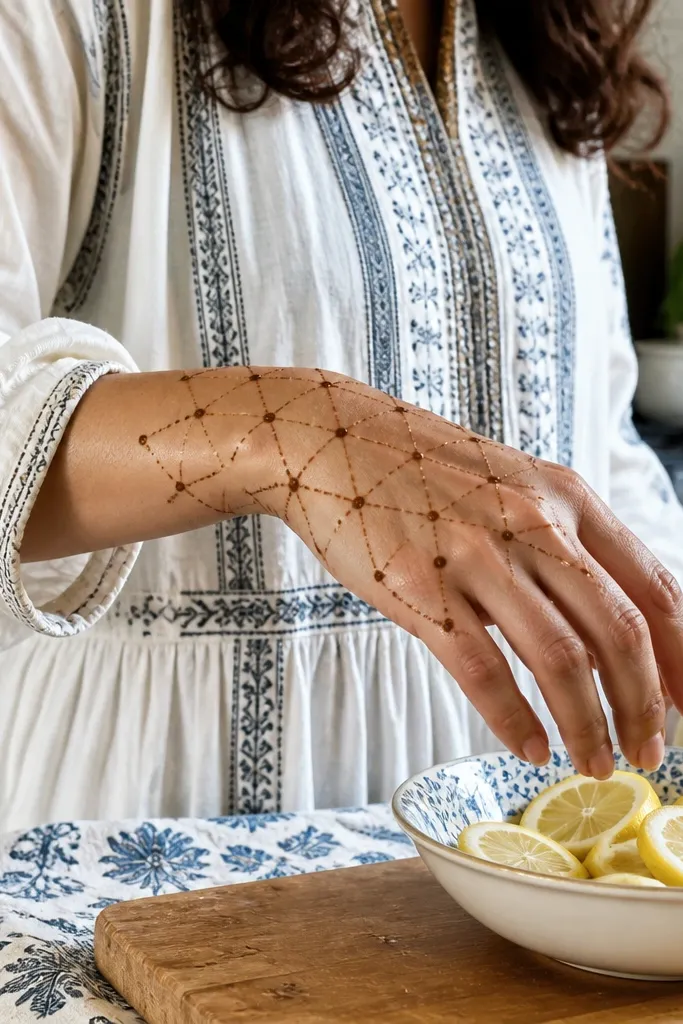
This is minimal without looking childish. The design uses dotted triangle motifs that repeat in a clean pattern across the back hand. Because triangles are structured, even simple spacing looks sharp and modern. It’s a good option for people who struggle with freehand florals but can draw straight-ish diagonal lines. It also looks great with bracelets because the triangles sit neatly in the open space between wrist and knuckles.
Start with a thin wrist line and two small dots at the outer ends. Draw one triangle motif in the center of the back hand using 3 diagonal lines and place a dot at each triangle corner. Repeat the triangle motif twice on each side, slightly smaller as they approach the knuckles. Add a tiny dot chain along the outer edge of each triangle to add texture. Finish with one dot cluster on the ring finger base aligned with the center triangle.
Pro tipUse a ruler for the first triangle. After that, match the angle to keep repetition clean.
AvoidAvoid thick outlines on triangles — they overpower the minimalist look.
14. Paisley Fringe From Wrist to Knuckles
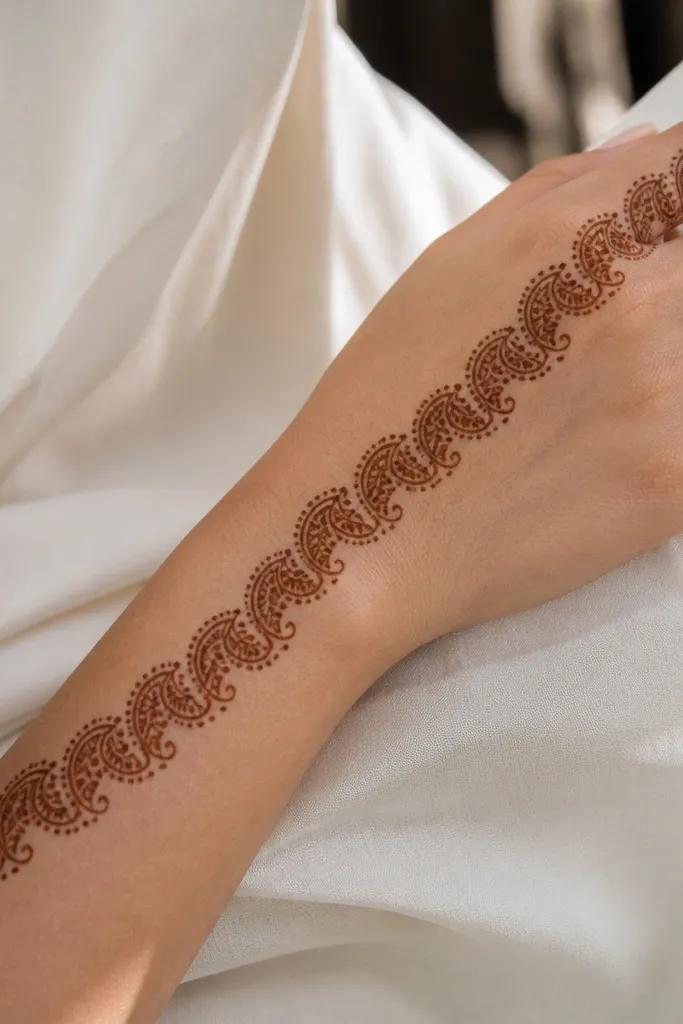
This design makes your back hand look fuller by building a fringe effect. Small paisleys start at the wrist and gradually grow or space out as they reach the knuckles. The center stays mostly open, so it remains modern and not heavy. It’s a strong holiday look because the fringe gives movement and reads like a decorative border in photos.
Draw a thick wrist band first, then add a fringe row of 9-11 tiny paisleys hanging upward from the band. Keep each paisley outline thin and leave a small open center space. As you move upward, space them slightly farther apart so the design breathes. Add a thin center stem from the middle of the wrist band to the gap between the highest paisleys. Finish by adding two small leaf curls near the thumb side and pinky side at the top of the fringe.
Pro tipMake the paisleys all face the same direction; it keeps the fringe tidy.
AvoidDon’t overcrowd paisleys at the top — the fringe should thin out.
15. Negative Space Cross With Side Petals
Cross-shaped negative space creates instant modern contrast. The center cross is formed by leaving space, while side petals fill the edges. It’s a clean way to make a simple mehndi look designed, not sparse. This style is photogenic because the contrast between open skin and dark henna stays crisp as it fades.
Start with a thin wrist band line and then draw two vertical lines from wrist toward knuckles, leaving a gap between them. Add two horizontal lines crossing the vertical lines so you get a cross-shaped open area in the center. Fill only the side zones: draw 4-6 small petal shapes along the outside edges of the cross. Finish with two tiny dot clusters at the ends of the cross near the knuckles and a small leaf tick at the center top.
Pro tipTrace the cross lightly first with a dot guide so your negative space stays symmetrical.
AvoidAvoid filling the center gap — the cross needs to stay open.
16. Minimal Floral Vine With One Bold Leaf
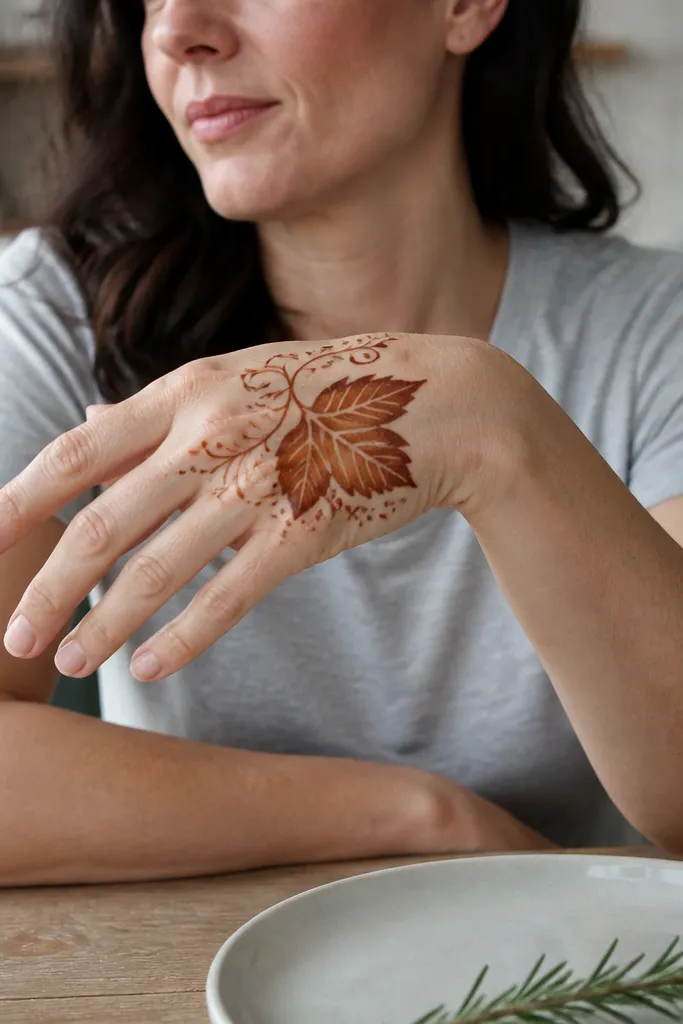
This is the “less work, bigger impact” design. A thin floral vine wraps across the back hand, but you place one bold leaf as the main statement. That contrast keeps the overall look modern and stops it from turning into a tangled mess. It’s a good pick when you want coverage across the back of the hand without committing to filling every petal.
Draw a thin vine line starting at the wrist and curving toward the outer edge of the back hand. Add small alternating flowers or buds along the vine — 6-8 total buds. Place one large leaf motif near the center, with a clear outline and a few inner veins. Add a small vine tail near the ring finger base, then finish with a thin wrist arc and 3-4 micro dots around the bold leaf.
Keep the bold leaf outline thicker than the vine so it reads as the focal point.
Don’t add a second bold leaf — one statement leaf is cleaner.
17. Wrist Mandala Dot Halo With Side Micro Waves
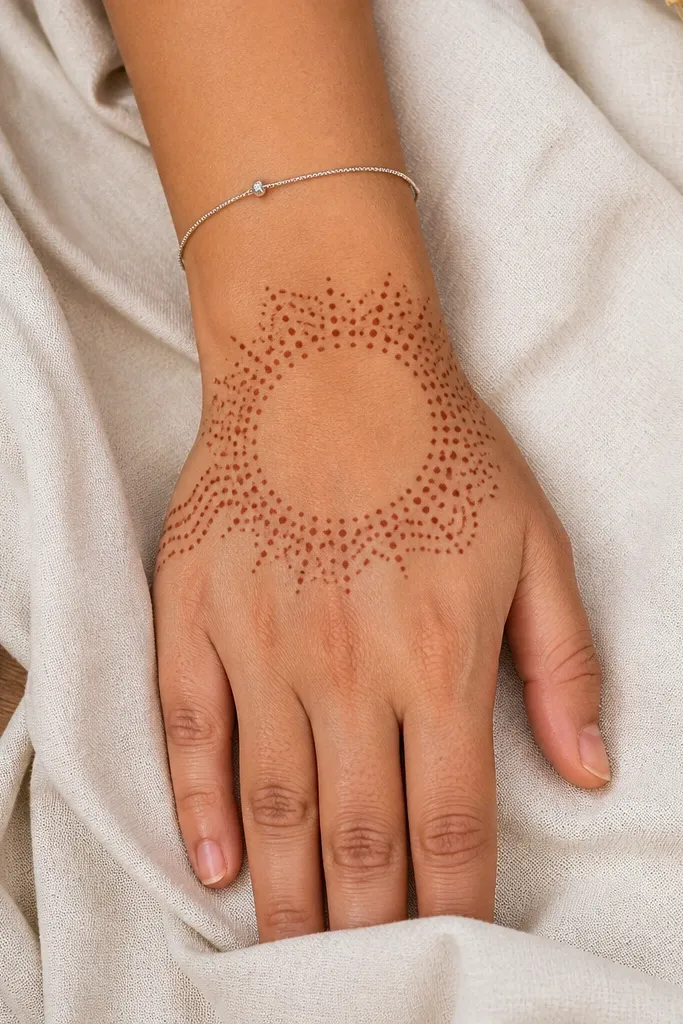
This design uses dots like decoration, not clutter. A dot halo mandala near the wrist creates a jewelry-like effect, while side micro waves add texture without filling the whole back. It looks delicate but still “done,” which is exactly what you want for simple full-hand mehndi that photographs well. It also works for holiday evenings because it’s easy to darken with a steady second pass.
Start with a wrist mandala: draw a small circle outline and fill it with evenly spaced dots, about the size of a coin. Add 2-3 dot arcs around it on the top edge. From the mandala, draw thin micro wave lines on both sides up toward the knuckles, keeping them parallel. Finish with one small leaf at the outer edge and a dot cluster at the ring finger base.
If your dots smear, let the first pass dry 10-15 minutes before adding a second dot layer.
Avoid heavy linework around the dot halo — it turns dot work into a blob.
18. Double Triangle Frame With Center Seed Motif
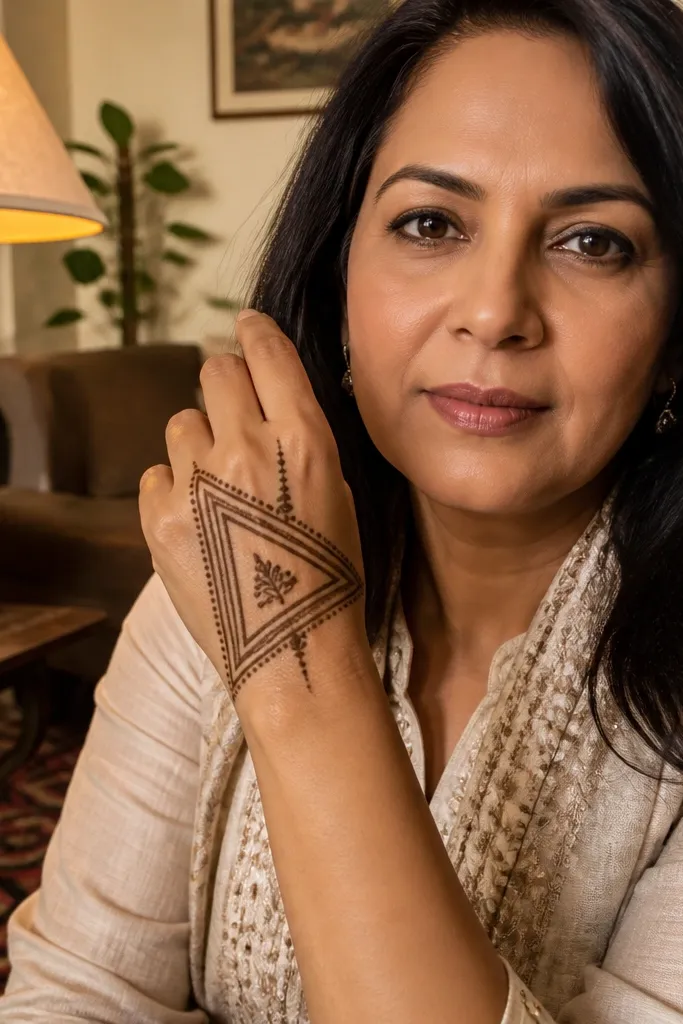
Triangle frames look clean and modern, and they force symmetry even when your hand isn’t perfectly steady. The double triangle frame creates a structured border, and the center seed motif keeps it light but complete. This design is great for simple full-hand mehndi because it gives you a strong shape language without dozens of tiny details. It’s also easy to scale for different hand sizes.
Draw a thin wrist line, then make an inverted triangle in the open center of the back hand. Inside the inverted triangle, draw a second upright triangle smaller than the first, leaving a clear gap between them. Connect the triangle tips to the wrist line with short diagonal lines on both sides. Add a seed motif at the exact center — a small teardrop with 3 inner dots. Finish with two thin arcs at the knuckles that follow the outer triangle edges.
Keep triangle sides consistent in angle. If one is steeper, the whole frame looks off.
Don’t fill the triangles. Leave them mostly outline so the frame stays airy.
19. Finger Base Micro Florals With Central Stem
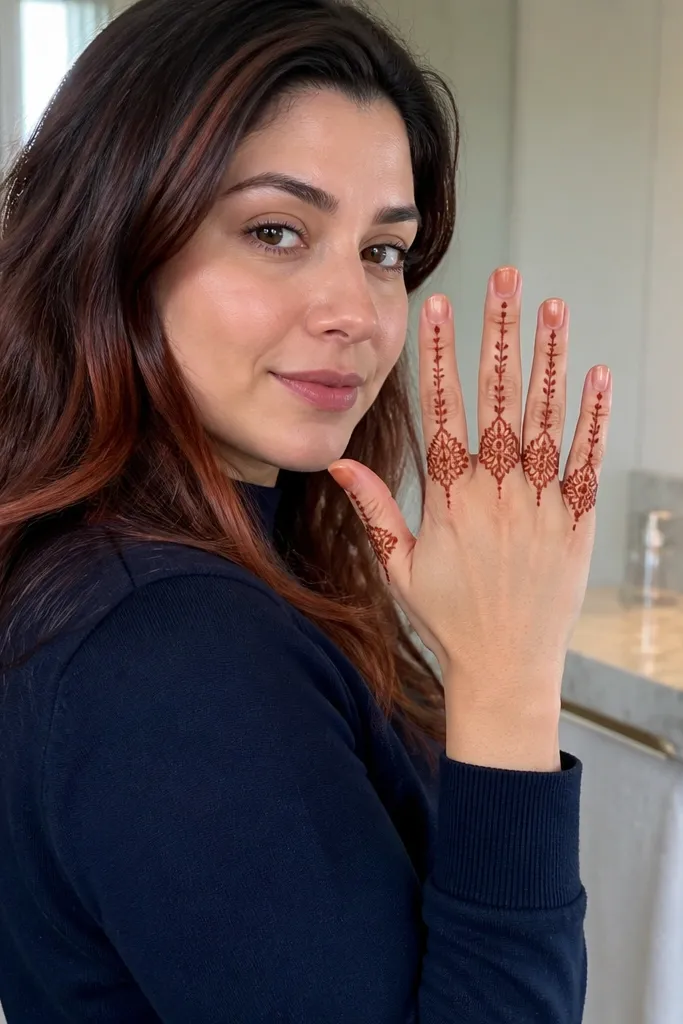
This layout is about clean coverage where it matters most: the finger bases. A central stem gives vertical direction, while micro florals at each finger base make the design look full without heavy filling on the back. It’s photogenic because the finger areas darken well and read like a coordinated set. Great for quick mehndi that still looks intentional and “complete” from wrist to knuckles.
Start with a thin central stem from wrist to the middle finger base. Add a small leaf tick at the top of the stem. For each finger base, draw a micro floral: 4 tiny petals around a dot, repeating across index, middle, ring, and a smaller one near the pinky. Keep petals spaced so the finger bases don’t merge into a dark patch. Finish with a thin wrist line and a few dot clusters along the outer edge of the hand.
Match petal count (like 4 petals) across fingers for a tidy, balanced look.
Avoid making the micro florals too big. Big florals crowd the finger joints.
20. Full Hand "Peacock Feather" Back Hand Fan With Soft Border
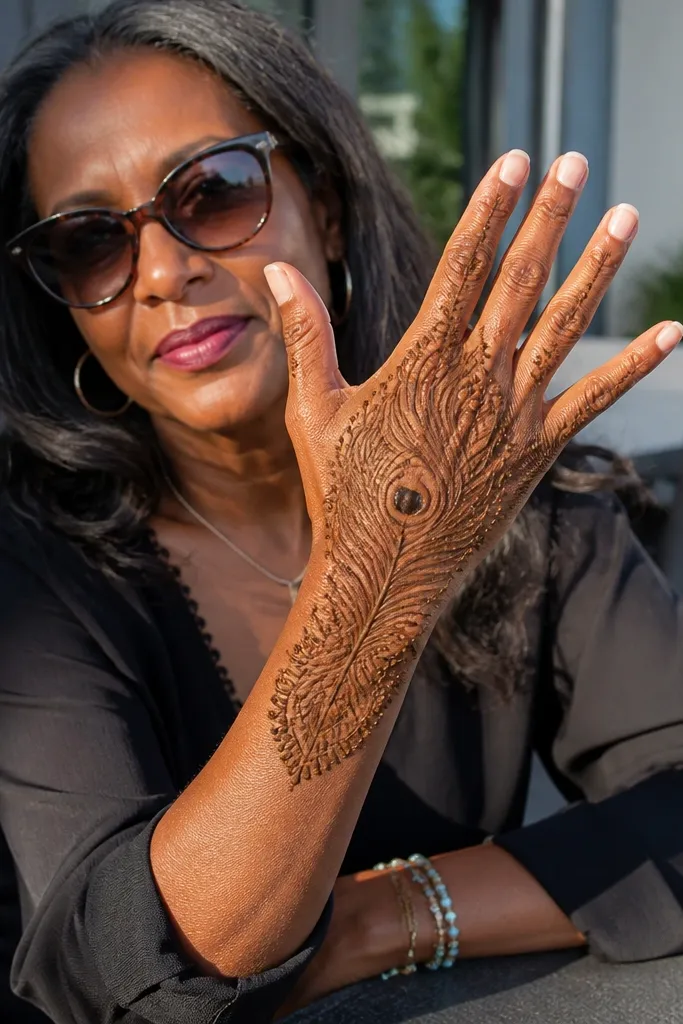
This design gives you a full-hand mehndi look that still reads clean and modern from photos. The feather fan shape pulls attention across the back of the hand, while a light border keeps the edges crisp instead of turning into a messy block of lines. It looks fancy because the feather tips taper — you get that peacock-feather vibe without needing dense filling everywhere. It works great for a mehndi party or a festive day because you get strong visual payoff with simple line work and dot clusters. Skill level is beginner-to-intermediate, and it takes about 45-70 minutes depending on how many feather segments you make.
1) Draw a thin wrist border first: a continuous line starting at the inner wrist, curving over the back of the hand, ending near the pinky side. Add one small teardrop at the center of that border, then place a vertical guideline from that teardrop down the back of the hand to the middle finger base. 2) Build the fan: create 7-9 feather segments that sit side-by-side like shingles, each segment starting at the guideline and fanning outward toward the knuckles. For each segment, make a tapered leaf outline, then fill only the outer half with tiny dots or very light stippling so the center stays open. 3) Finish the full-hand feel: add a simple finger base band at each finger (just 1 short curve per finger) and connect the bands with small dot bridges. Let it dry fully, then wash and apply a thin layer of moisturizer so the paste stays glossy and darkens evenly.
Pro tipUse a slightly thicker cone tip for the feather outlines, then switch to a finer tip for dots so the feather edges look sharp.
AvoidDon’t fill the feather segments completely — heavy filling makes the fan look flat and turns the back of the hand into one dark patch.



