
1. Wrist Chain + Palm Dot Halo
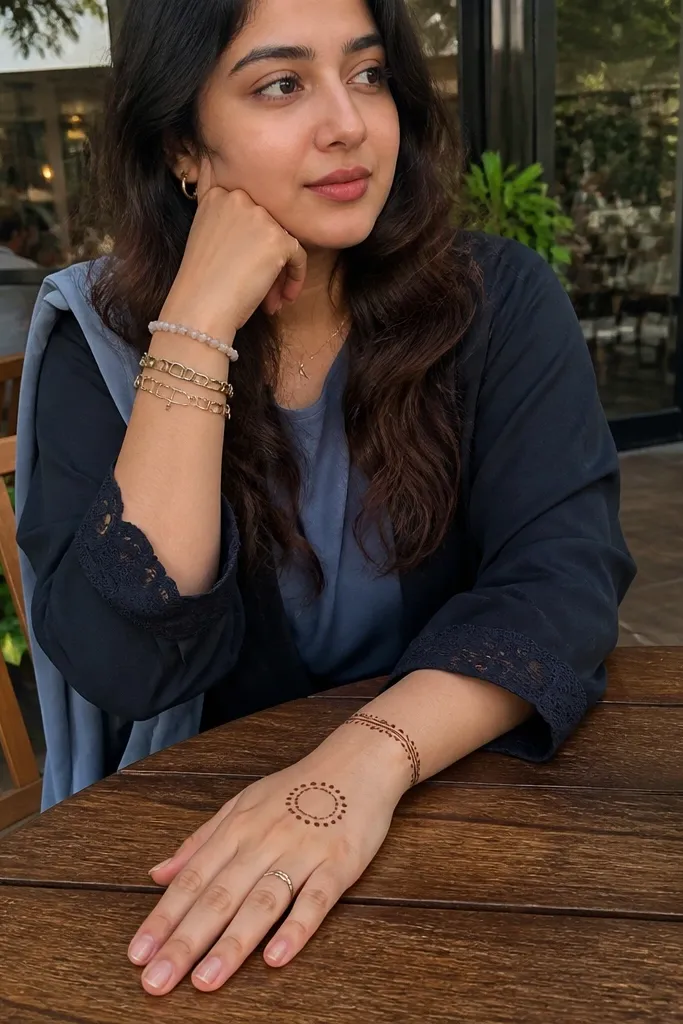
Start by drawing a single continuous thin line across the wrist, then add alternating small loop shapes above it like a chain. Next, place 12 to 16 evenly spaced dots in a circle in the palm center, leaving a tiny gap in the middle. Connect the dots with a faint outline line only if your paste is thin; otherwise keep it dot-only for a cleaner look. Finally, add two short vertical dash lines on the finger sides to frame the design without clutter.
This design is all about a neat rhythm. A thin chain band sits at the wrist, then the palm gets a simple dot halo around the center — small enough to look delicate, bold enough to show up in photos. It’s modern because there’s no heavy leaf fill; everything is outlines and dots. It also works on any hand size since the dot circle scales easily. If you want something that looks intentional even with basic linework, this one delivers fast.
AvoidDon’t overfill the dot halo — if it becomes a solid patch, the look stops reading minimal.
Pro tipUse a ruler or the edge of a phone screen as a straight guide for the wrist band line.
2. Three Finger Ladder Stripes
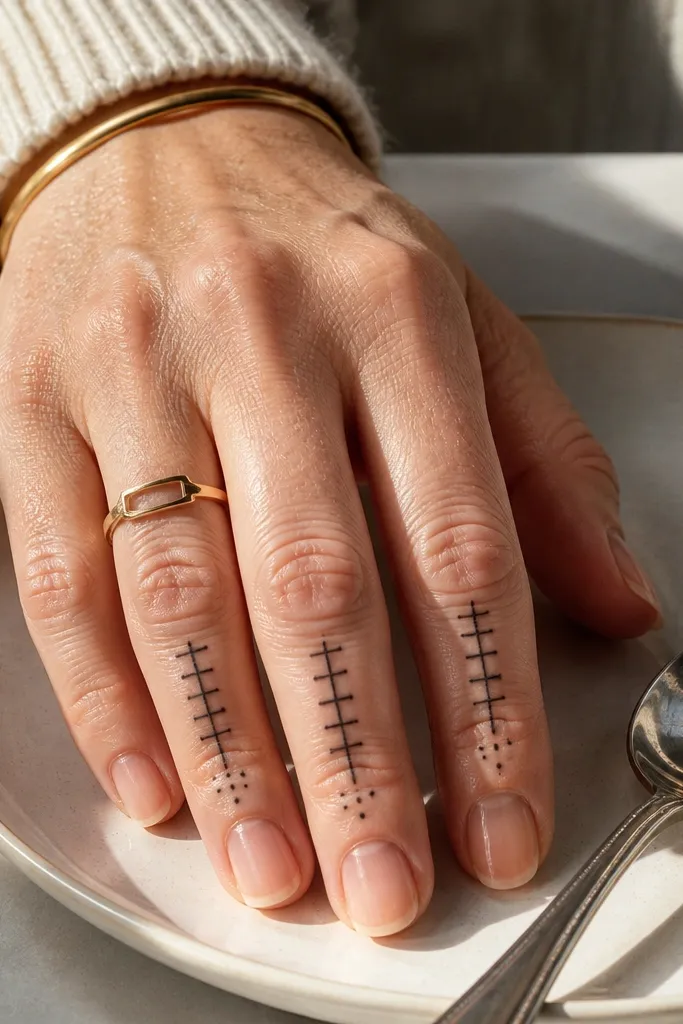
This is a front-hand design that reads modern from across the room. You draw ladder stripes on three fingers (index, middle, ring), using short horizontal bars connected by tiny vertical strokes. The gaps between the bars make it look airy, not crowded. A few dots near the finger base add polish and keep it from looking like simple doodles. It’s beginner-friendly because you repeat the same unit across fingers.
Outline the sides of the three target fingers with a thin line from knuckle area to mid-finger. Then add ladder stripes by drawing 6 to 8 horizontal bars across each finger section, with small vertical connectors at the ends. Place a dot cluster of 4 to 6 dots at the base of each striped finger where the finger meets the palm. Finish by mirroring the last bar with a tiny curved hook near the fingertip.
Keep your ladder bar length consistent — that uniformity is what makes it look “designed,” not random.
Avoid uneven spacing between bars; uneven gaps make the pattern look messy in photos.
3. Geometric Side Vine on Index Finger
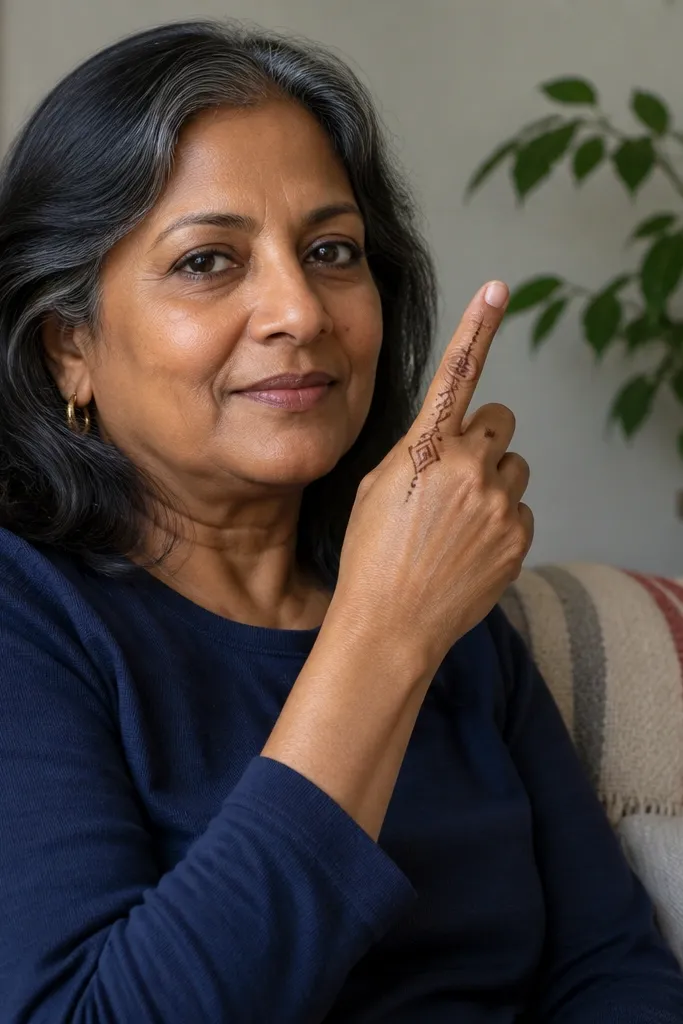
Start at the knuckle of the index finger and draw a thin outline line along one side up toward the middle of the finger. Then build the vine by adding repeating geometric blocks: one small square, then a short triangle, then 2 dots, then another square. Stop the vine about halfway up the finger and leave the top bare for a crisp negative-space finish. Add a single dot at the wrist level on the same side to balance the composition.
A side vine looks sleek because it respects the finger’s natural shape. This one uses geometric steps — tiny squares, short triangles, and dot accents — instead of traditional heavy leaves. The result is clean and slightly edgy, perfect for modern simple mehndi. It also works well when you want the rest of the hand mostly bare. You get a focal detail without the weight of full coverage.
AvoidDon’t extend the vine to the fingertip — it makes the design look heavy and harder to read.
Pro tipIf your paste spreads, make the geometric blocks slightly smaller than you think you need.
4. Palm Center Arch + Micro Dots

This design is minimal but not boring. One centered arch anchors the palm, and micro dot clusters give it texture without turning into a filled pattern. It’s photogenic because your eye goes straight to the center — then catches the dots as a secondary detail. It also suits short sessions because you only need one main shape. The arch is forgiving; even if your line isn’t perfect, the dots make it look intentional.
Draw a smooth arch in the palm center, starting near the lower center and curving up toward the middle. Then add 3 dot clusters: one at the arch top, one on each side of the arch curve. Keep each cluster to 4 to 6 dots so they don’t merge into a blob. Finish by adding two thin vertical lines from the arch ends down toward the palm center for a subtle frame.
Use dot clusters of the same size on both sides — symmetry is the whole look here.
Don’t make the arch too thick; thick arches swallow the negative space.
5. Wrist Band with Alternating Arrows
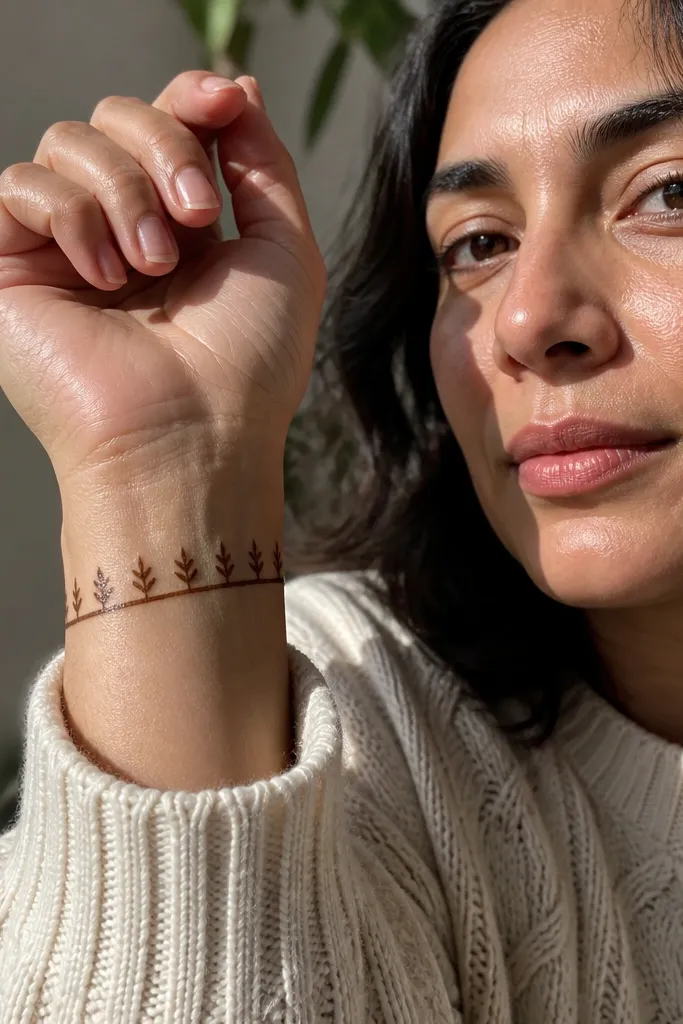
Draw a straight thin line around the wrist area (not too high into the forearm). On top of that line, add arrowheads: a small V shape pointing upward, then a single dash, then another V, repeating across the band. Leave tiny gaps between arrowheads so the pattern stays light. Add one small dot at the center point under the band line to balance the composition.
Arrow patterns look modern because they read like clean graphic shapes. This wrist band uses alternating arrowheads on a thin base line, giving a crisp border effect. The hand stays mostly empty, so the band stands out in photos. It’s great for short events, quick touch-ups, and situations where you want mehndi that doesn’t interfere with rings or bracelets. You can also scale it — wider band for longer nights, narrower for daytime.
AvoidDon’t make the arrowheads identical width if your cone tip is uneven; adjust by eye so spacing stays consistent.
Pro tipPress the cone lightly for arrowheads so the points stay sharp.
6. Finger Tips Confetti Dots
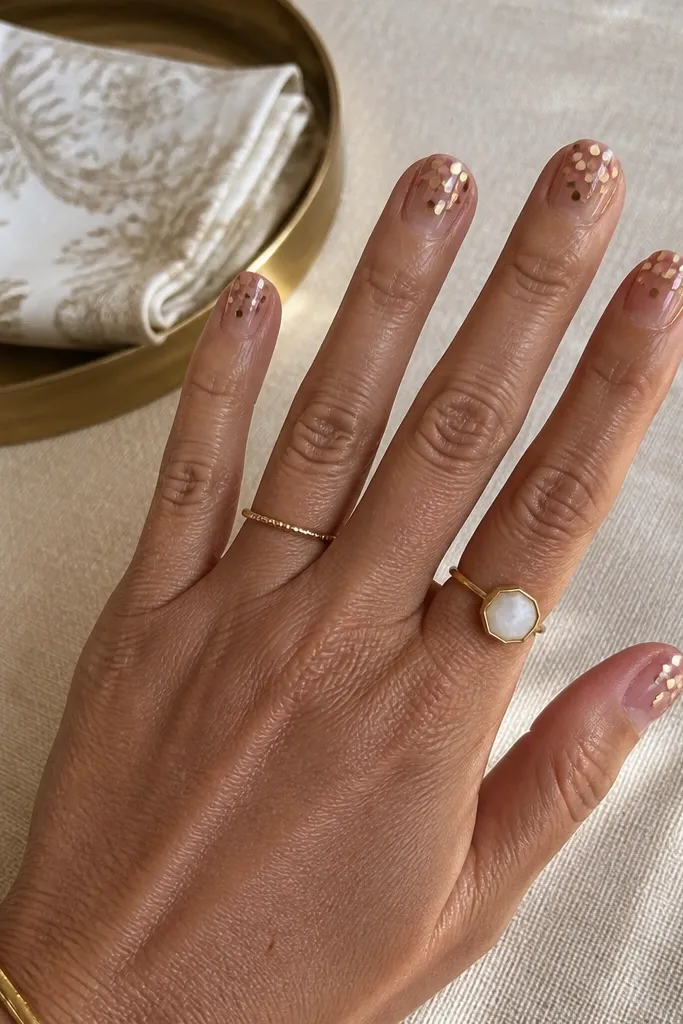
Start by drawing thin lines down both sides of each finger from knuckle to near the fingertip, then stop short of the last 8 to 10 mm. At each fingertip, place a small cluster of dots in a semicircle shape. Keep the clusters slightly different — not random, just natural — so the hand doesn’t look machine-printed. Finally, connect one or two dots from the fingertip cluster down to the side lines with a short dash.
This one is pure minimal charm. You outline each finger side with a thin line, then place a confetti cluster at the fingertip — 6 to 10 dots that vary slightly in size. It looks festive without needing big motifs. The dots catch light in a way that line-only designs don’t. It’s also forgiving because dot placement has more tolerance than detailed leaves.
AvoidAvoid full fingertip frosting (too many dots). When dots merge, it turns into a dark cap.
Pro tipUse fewer dots on the pinky and ring finger so the design doesn’t look crowded.
7. Palm Corner Triangle Frame
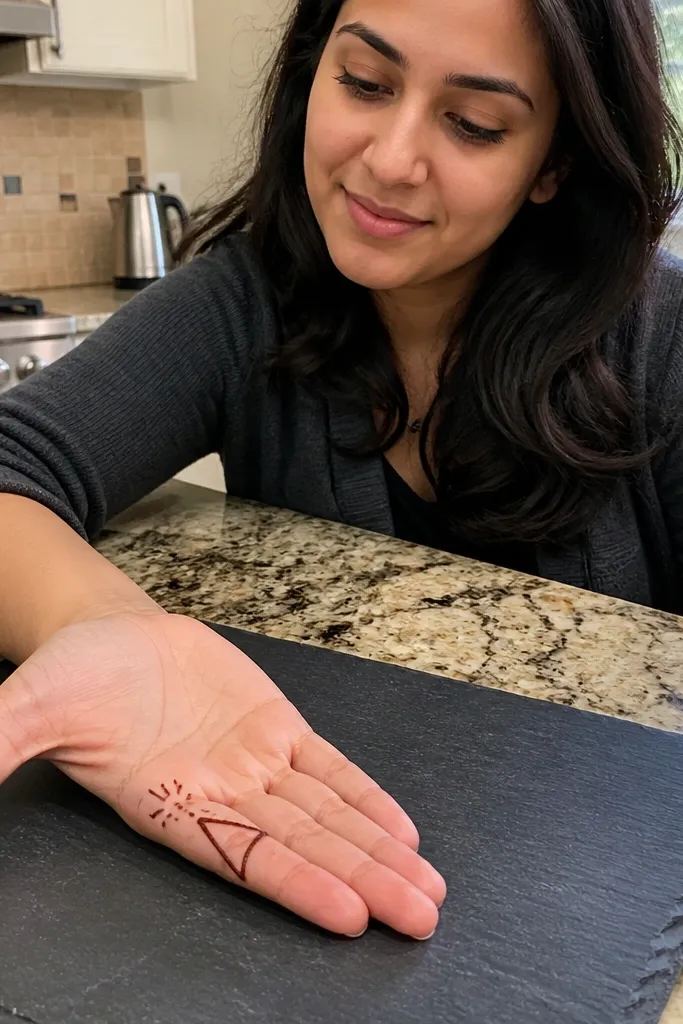
Corner frames look sleek because they use the hand’s shape like a canvas. This design places a thin triangle outline in one palm corner, then adds a few dots and short lines to suggest movement. It feels modern because it’s geometric and doesn’t rely on heavy shading. The empty palm area stays clean, and the triangle gives a clear focal point. It’s also good if you want mehndi that looks stylish even when the paste fades — the outline remains readable.
Choose the lower palm corner near the base of the thumb or toward the pinky side. Draw a thin triangle outline with one side hugging the palm crease area. Then add two short line segments outside the triangle edges, like tiny brackets. Place a dot cluster of 5 to 7 dots along one triangle edge to add depth. Finish by drawing a thin curved line from the triangle corner toward the wrist band area.
Keep triangle lines super thin — thicker outlines look heavy in minimal designs.
Don’t center the triangle; corner placement is what keeps it modern and balanced.
8. Double V Wrist + Side Finger Hooks
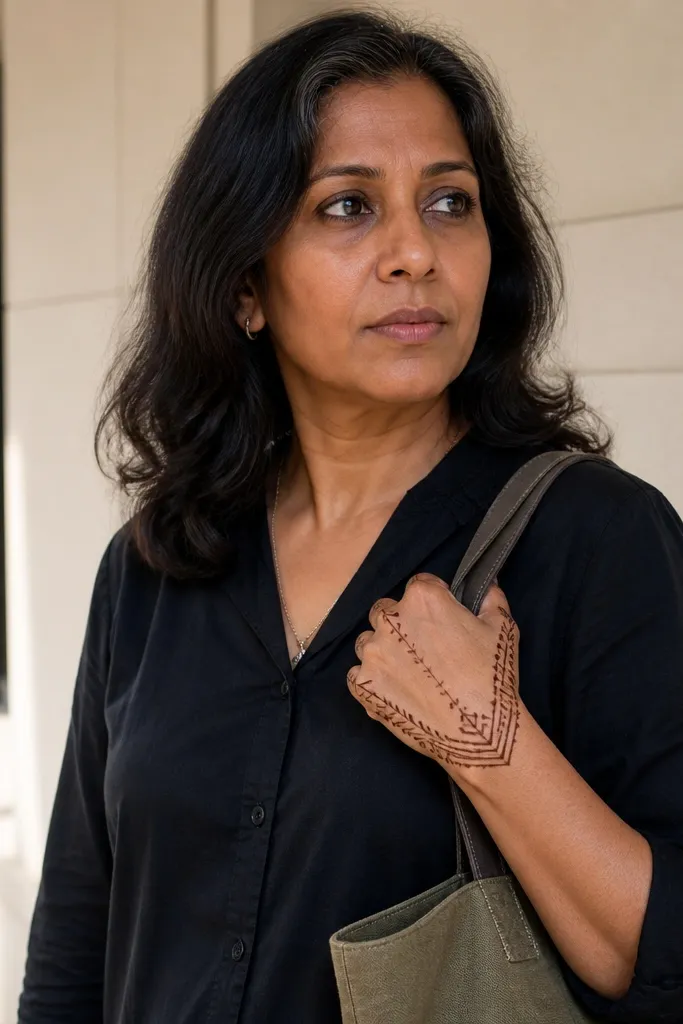
Draw a thin wrist band line, then add two large V shapes sitting on top of the band with a small gap between them. Each V should be about 1 cm tall so it reads clearly. Next, pick two fingers (index and middle) and draw 3 short hook lines down each side from the knuckle area. Add a single dot at the end of each hook to make the hooks look complete. Leave the other fingers bare for a clean minimal finish.
This design is crisp and graphic. You get two V shapes on the wrist band that point upward, then short hook lines drop down along the sides of the fingers. It looks intentional because all shapes point the same direction. There’s no filler work, so it’s fast. It’s also very photogenic because the wrist area becomes the headline and the finger hooks act like subtitles.
AvoidAvoid adding hooks to every finger; minimal means selective.
Pro tipMatch the hook size across both sides of the finger. Same length equals clean symmetry.
9. Palm Oval Frame with Inner Dots
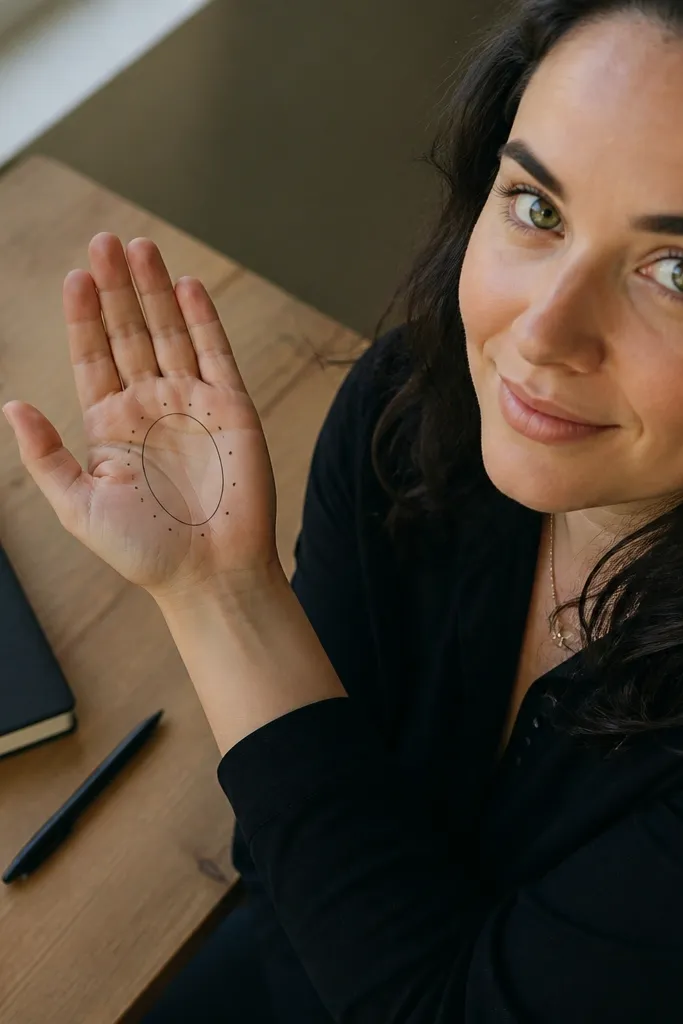
Start with a thin wrist band using a simple line or 5-6 small dashes. Then draw an oval in the palm center, keeping it slightly wider than it is tall. Add inner dots inside the oval — place 18 to 24 dots in a ring, leaving the exact center mostly empty. Add two tiny curved lines at the oval’s lower corners pointing toward the wrist. Finish by outlining the finger sides lightly so the oval doesn’t feel alone.
An oval frame gives you the “center medallion” look without the usual heavy fill. The oval sits in the palm center, outlined thin, with dots inside arranged in a loose ring. This reads modern because it’s controlled and doesn’t sprawl. The oval also gives you a natural border for finger placement later, so the overall hand looks organized. Great for beginners who want a statement piece without learning complex leaf work.
AvoidDon’t fill the oval. Inner dot ring beats solid fill for the minimal look.
Pro tipIf your dots melt together, space them a little further apart and avoid thick paste.
10. Minimal Crosshatch Palm Strip
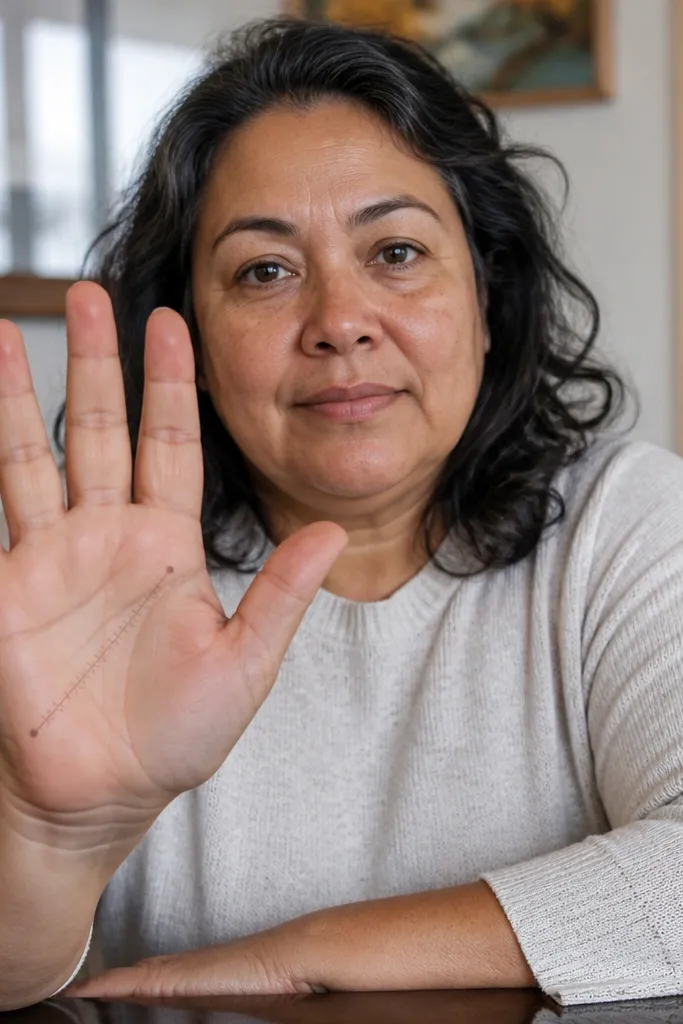
This is the “small but styled” option. A diagonal strip across the palm uses crosshatch lines — short strokes crossing each other — but it stays narrow so it doesn’t turn into a dark patch. Dots at the ends act like anchors. The modern feel comes from the diagonal direction and the restrained width. It works well for people who want mehndi that looks good with both casual and dressy outfits because it doesn’t depend on traditional motifs.
Draw a thin diagonal line from the palm center toward the upper outer palm edge, leaving room on both sides. Build the crosshatch strip by adding short lines perpendicular to the diagonal, then add a second set crossing back to form a grid effect within a strip about 1 cm wide. Place a dot cluster at each end of the strip — 6 to 8 dots each. Outline the finger sides with a single thin line so the diagonal strip looks like it belongs. Keep the rest of the palm empty.
Use light pressure for crosshatch so the strip stays breathable and doesn’t darken into a blob.
Don’t make the strip too wide. Wider crosshatch reads messy fast.
11. Finger Side Beads + Tiny Arc Tops
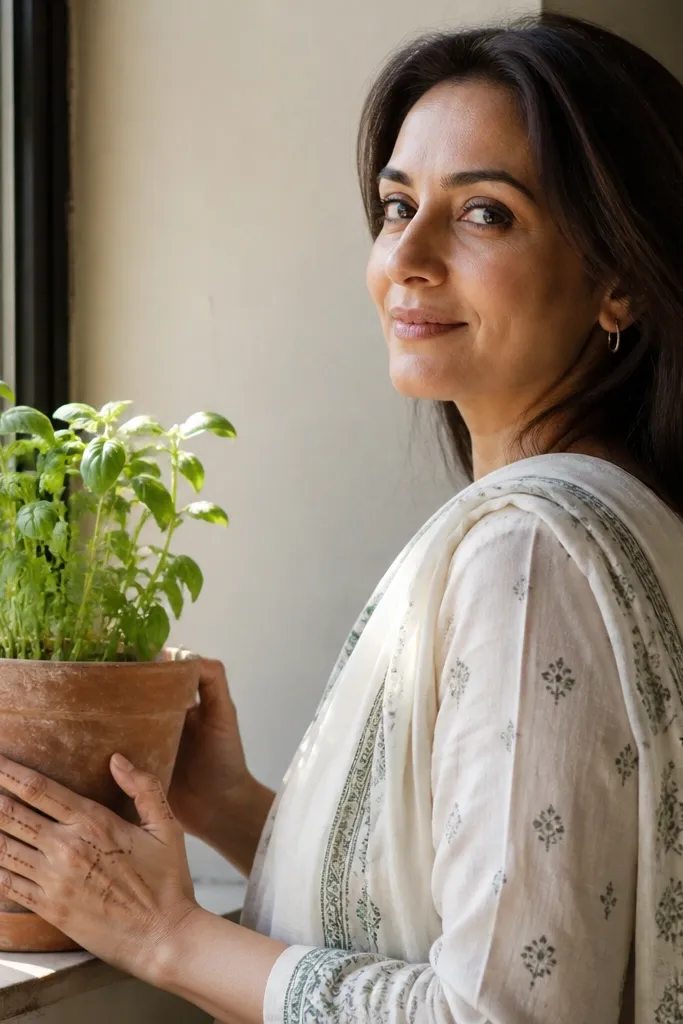
Outline each finger side with a thin line stopping just below the knuckle to tip area. Along the side line, place dot beads at even intervals — aim for 10 to 14 beads per finger side depending on finger length. Near the top third of each finger, add a small arc shape made of 2 to 3 curved lines. Repeat the arc only on two fingers if you want a lighter look. Finish with a tiny dot at the start and end of each finger side line.
Bead-like dots along the finger sides look neat and modern because they mimic a chain. Add small arc tops near the upper finger area and the whole design feels balanced. It’s not heavy, so it looks good even if your mehndi fades — the bead dots remain readable. This is a great pick if you want a front-hand design that frames your fingers without covering the entire nail area. It also suits both short and longer sessions since it’s modular.
AvoidAvoid thick bead lines; bead dots should feel raised and separate.
Pro tipMark dot spacing lightly with a pen dot on the skin first if your hand shakes.
12. Wrist Band + Palm Vertical Dashes

Start with a wrist band of 2 thin parallel lines, with small gaps between them. Then draw 7 to 10 vertical dashes in the palm center — each dash about 5 to 8 mm long. Keep the dashes evenly spaced and aligned. Add two short diagonal dashes near the bottom of the palm to visually connect the center to the wrist. Outline the finger sides with one thin line each, leaving the palm empty around the dashes.
This design is clean, graphic, and easy to repeat. The wrist band gives you structure, and the palm gets vertical dash lines that lead the eye upward. It looks modern because it’s line-only with controlled spacing and no leaf fill. It’s also practical: the dashes are quick, and you can adjust density based on your time. Great when you want your front hand to look done even if you’re skipping complex patterns.
AvoidDon’t crowd the dashes into a solid column.
Pro tipUse a consistent dash angle. Vertical is the look; tilted dashes make it feel accidental.
13. Minimal Leaf Outline on Ring Finger
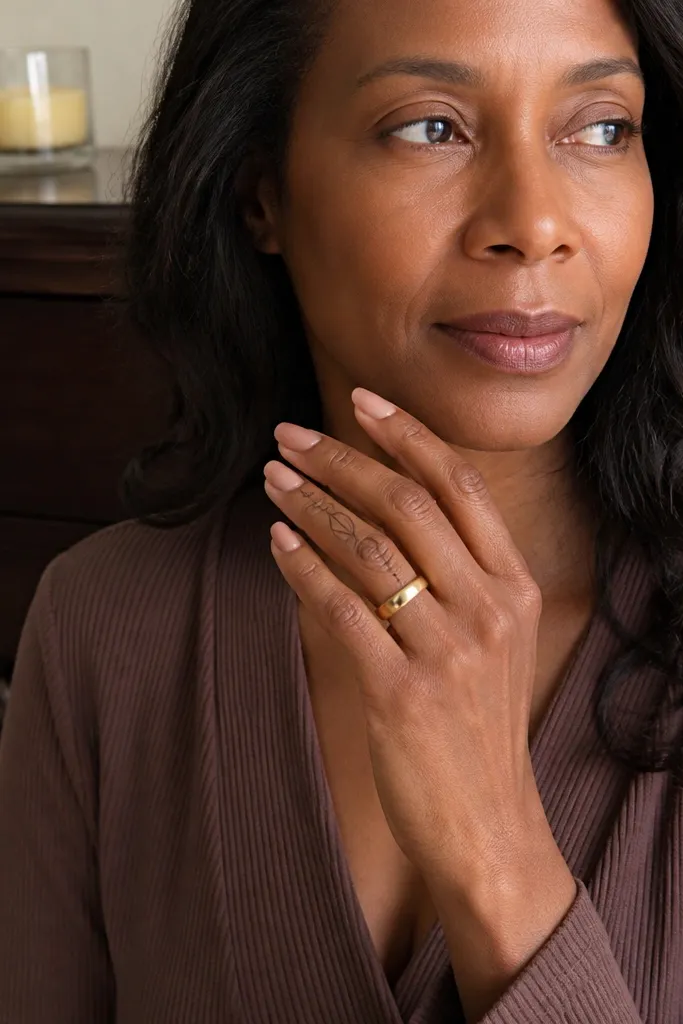
Draw a thin leaf outline starting at mid-knuckle area on the ring finger, with one side slightly curved to follow the finger. Add a second leaf below it that’s about 60% of the first leaf size. Put a single dot at each leaf tip so the shape reads clearly. Add two small dots along the leaf stem line to suggest texture. Keep the rest of the fingers mostly blank except for a light outline on the finger sides.
A minimal leaf outline is traditional, but the execution stays modern when it’s thin and placed on one finger only. You outline one leaf shape — no fill, no shading — then stack a second smaller leaf below it. The dot tip acts like a finishing point. This looks good on hands with rings because it sits on the finger side and doesn’t fight jewelry. It’s also a solid choice if you want one statement detail without covering the whole hand.
AvoidDon’t fill leaf interiors. Minimal leaf outlines are the whole point.
Pro tipIf your cone is thick, stick to one leaf. Two leaves is only worth it when lines stay crisp.
14. Palm Center Diamond + Corner Dots
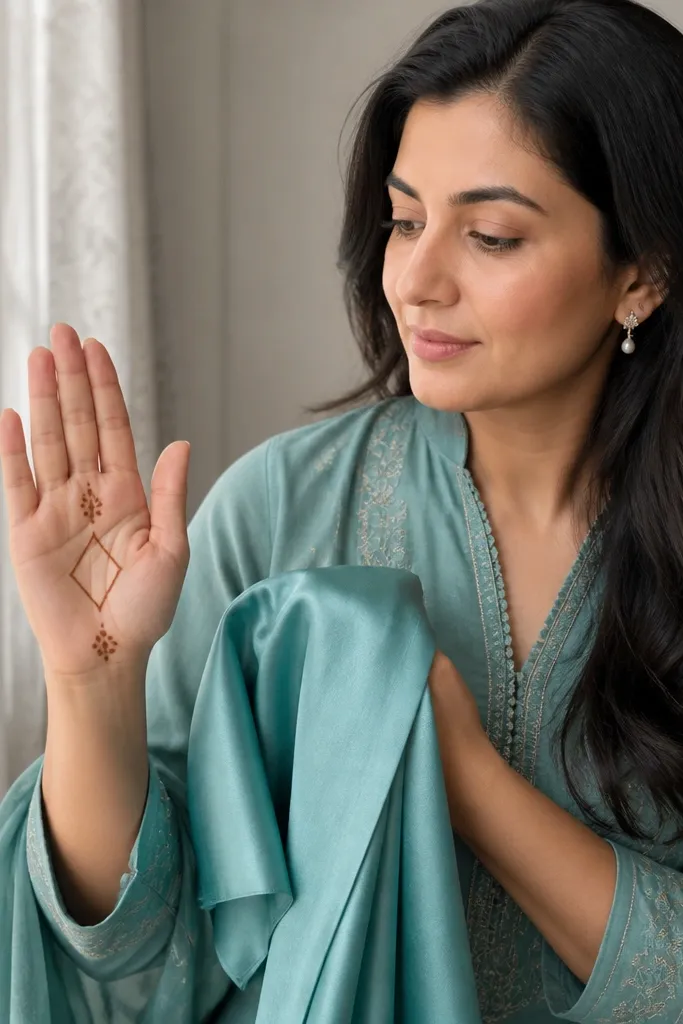
This pattern is geometric and clean, with a strong center focus. The diamond shape is easy to draw and reads clearly in photos because it’s a simple outline. Dot clusters in two opposite corners of the palm add visual balance without adding extra motifs. It feels modern because the diamond sits in negative space like a design element, not a filled ornament. It also works on both small and larger palms because the diamond can scale easily.
Draw a small diamond outline in the palm center, with equal sides and a point facing up and down. Place 4 to 6 dots in two palm corners — one near the lower left of the diamond and one near the upper right. Add a thin diagonal line on each of the diamond’s left and right sides, stopping short of the diamond edges. Finish by drawing thin finger side lines on the index and middle fingers only. Keep the rest bare for a modern, minimal look.
Trace a diamond mentally first, then draw one line at a time. Trying to “sketch” the whole diamond at once makes it wobble.
Don’t add more motifs around it. The diamond needs breathing room.
15. Wrist Triangle Row + Finger Micro Arches

Draw a thin wrist band line. Add 10 to 14 tiny triangle outlines on top of the band, pointing upward, with equal spacing between each triangle. Then choose the index, middle, and ring fingers and add micro arches on the finger sides — each arch is 3 curved lines forming a small U shape. Place one arch at the knuckle area, one at mid-finger, and one near the top third. Finish by dotting the base of each micro arch with a single dot.
Tiny triangles look sharp and modern, especially when they’re all the same size. This design places a row of triangles along the wrist band and echoes that geometry on the finger sides with micro arches. It’s a good pick for front-hand designs because it frames the hand — wrist at the top, fingers as the continuation. The triangle row also helps hide uneven paste placement since the repeating shapes distract the eye. Minimal doesn’t mean plain; this one adds structure.
AvoidDon’t thicken the triangle outlines; thick triangles turn into a dark band.
Pro tipUse the same triangle height for every triangle. That uniformity makes it look like a pattern, not a doodle.
16. Palm Center Dot Compass + Wrist Line
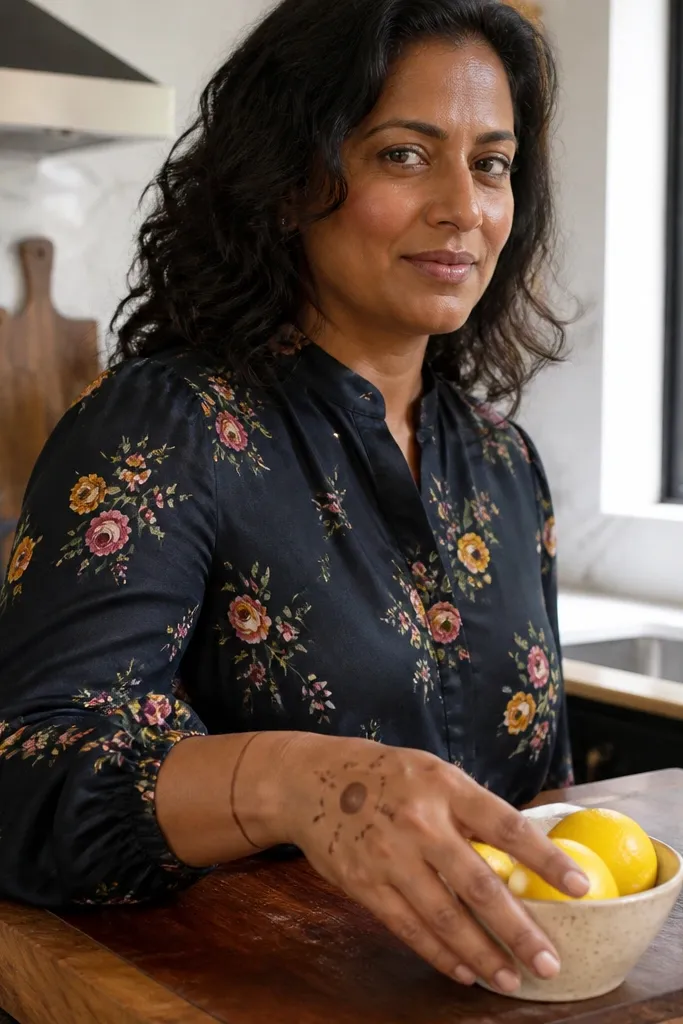
Start with a single thin wrist line across the wrist area. In the palm center, draw a circle of dots — 20 to 26 dots spaced evenly. At four points (top, bottom, left, right), add short curved strokes made of 2 to 3 arcs, each anchored by a dot at the end. Connect the arcs back to the dot circle only with tiny dashes if your paste is thin. Keep the rest of the palm empty and outline finger sides lightly with short segments.
A compass-like dot arrangement gives a modern tech feel without needing any shading. You draw a small circle of dots in the palm center, then add four short lines or arcs at cardinal points using dots as anchors. The wrist gets a single thin line to keep the look clean. This design is photogenic because the dot circle is easy to read even after fading. It’s also quick since you’re repeating one unit: dots around a circle and four short strokes.
AvoidDon’t make the compass too big. Large dot circles look busy in minimal style.
Pro tipCount your dots once before you start the circle so you don’t lose spacing mid-way.
17. Minimal Bow Knot on Palm Side

Bows look cute and modern when they’re drawn as thin ribbon lines with a small knot. This design places the bow on the side of the palm near the thumb base, then balances it with a thin bracelet-like line at the wrist. It’s a great choice for front-hand mehndi because it stays visible even with rings and bracelets. The look is clean because everything is outline — no fill, no heavy shading. It also works for short sessions since the motif is compact.
Draw a thin wrist band line with 4 to 6 spaced dashes. On the side of the palm near the thumb base, draw two curved ribbon loops that cross in the center — like a simple bow. Add a small knot at the crossing point using a tiny diamond outline. Place 3 to 4 dots near the outer edges of the bow loops. Finish with two thin vertical dashes on the nearest finger side to tie the bow to the hand.
Keep ribbon loops symmetrical by drawing left loop first, then copying the right loop using the same curve length.
Avoid thick knot fill. A filled knot turns the bow into a blob.
18. Finger Sides with Single Line Paisley Tiny
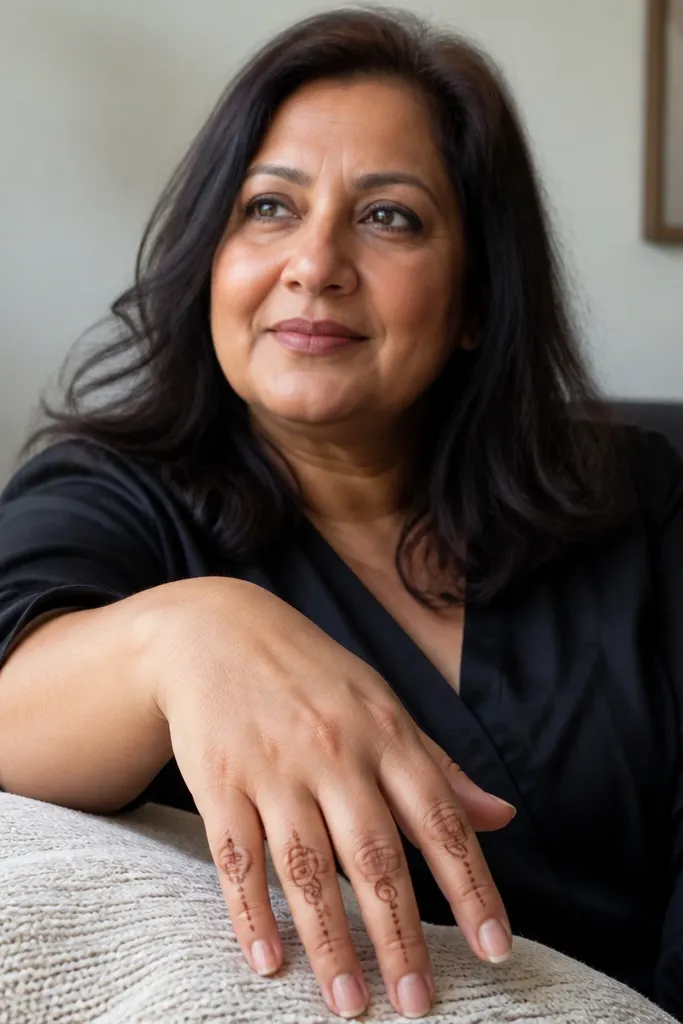
This is a modern take on paisley — tiny, single-line, and placed on finger sides instead of spreading across the palm. You draw small paisley shapes on two fingers, then use dots between them to keep the pattern light. The single-line approach keeps it minimal and makes it look intentional rather than crowded. It’s a good pick if you want a design that feels traditional but still clean and graphic. It also looks good on both short and long fingers because the paisley is compact.
Outline the sides of two fingers (index and ring) with a thin line from knuckle to near the top third. On each finger side, draw 3 tiny paisley outlines stacked vertically, each paisley about 6 to 10 mm tall. Add a small dot at the top of each paisley and a single dot between paisleys. Keep the palm area mostly bare. Finish by adding a thin wrist dash line so the finger detail doesn’t float alone.
If paisley lines wobble, start with a teardrop outline then add the inner curve — it’s faster and cleaner.
Don’t add paisley to all fingers. Two fingers is enough for the modern minimal vibe.
19. Front Hand Lattice Window with Thumb Corner
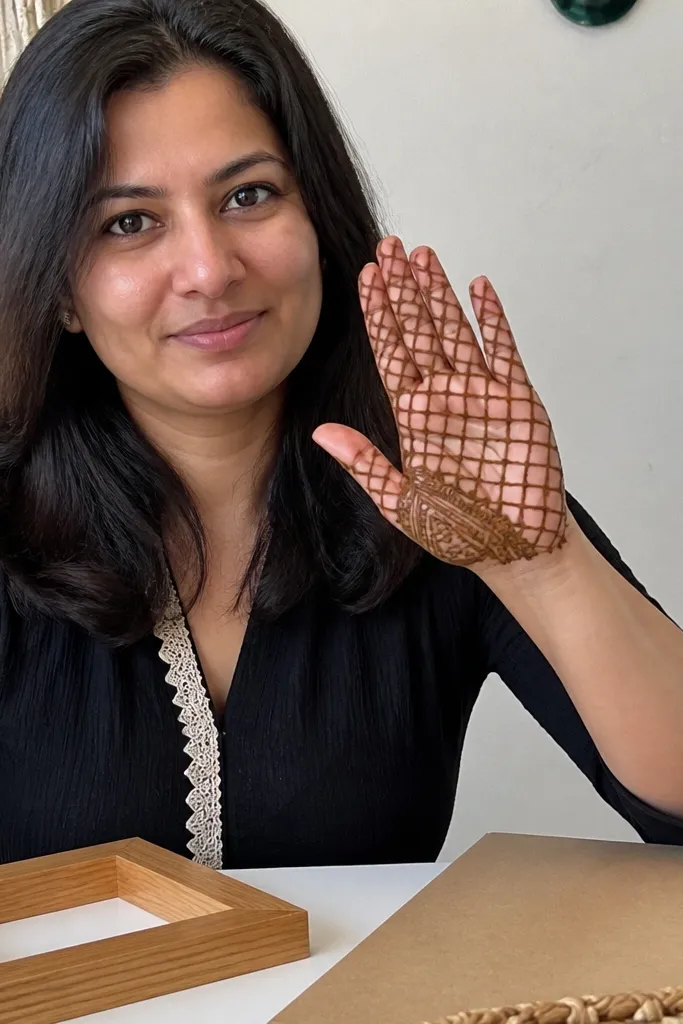
This design gives you that clean, “front hand” look because it frames a window on the palm and keeps the rest airy. The lattice lines catch light beautifully in photos, and the thumb-corner detail makes it look intentional instead of random. It works well for medium-length mehndi because the lines have structure, not heavy fill. You only need a steady hand for the straight diagonals; the rest is simple dots and short connectors. It suits everyday functions, brunch weddings, and even a plain festive outfit where you want mehndi to look neat up close.
Step 1: On the center of the palm, draw a square frame about 3 cm wide. Use a fine cone and place four corner dots first, then connect them with straight lines to complete the square. Step 2: Inside the square, draw diagonal lines from corner to corner to make a lattice grid, leaving small gaps between lines so it stays airy. Add two short vertical dashes on the thumb side edge of the palm, then connect the top dash to the square with a tiny curve. Step 3: Finish with a simple dot row along the wrist band — 5 to 7 dots spaced evenly — and let the lattice stop cleanly at the palm center so it doesn’t turn into a blob.
Mark the square size lightly with a dot guide before you start the lattice, so your diagonals meet at the corners.
Don’t overfill the lattice with too many extra lines — gaps are what make it look modern.
20. Front Hand Crescent Steps Around the Palm Center

Step 1: Place a single bold dot in the exact palm center, about the size of a small pea. From that dot, draw a small crescent that curves upward toward the index finger — keep it 1.5 cm from the center. Step 2: Add three more crescent arcs outside the first one, each slightly larger and higher, like steps. Keep the arcs open on the outer edge so the palm doesn’t look heavy; add one tiny dot at the end of each crescent tip. Step 3: Connect the lowest crescent to the wrist with a thin straight line that breaks into two short dashes near the wrist, then place 3 evenly spaced dots along that dash line.
This one looks striking because it creates movement: stacked crescents guide the eye from the palm center up toward the fingers. The center dot and the step arcs make it feel balanced on a front-hand photo, even if your fingers are bare. It’s also forgiving. If one arc is slightly off, the stepped pattern still reads clean. It suits short mehndi sessions and looks great for parties, engagement days, and any look where you want something graphic rather than flowery.
AvoidSkip thick shading in the crescents; filled arcs turn this design into a smudged block.
Pro tipUse the cone tip to draw the arcs in one smooth pull, then lift — don’t go back and redraw the same crescent.



