
1. Thumb-Anchor Crescent with Double Border
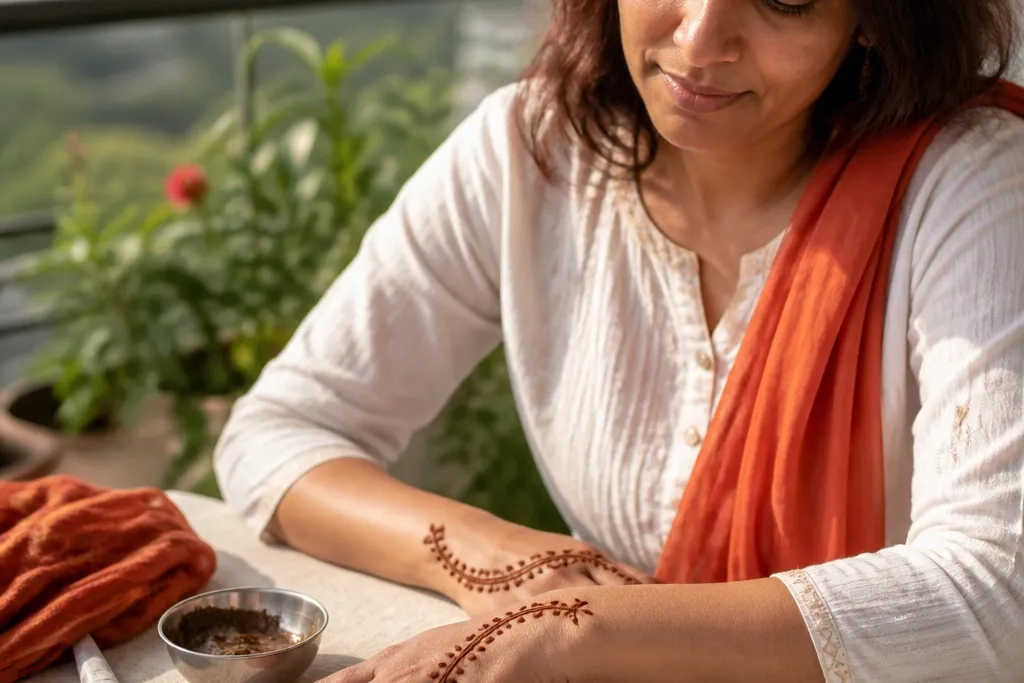
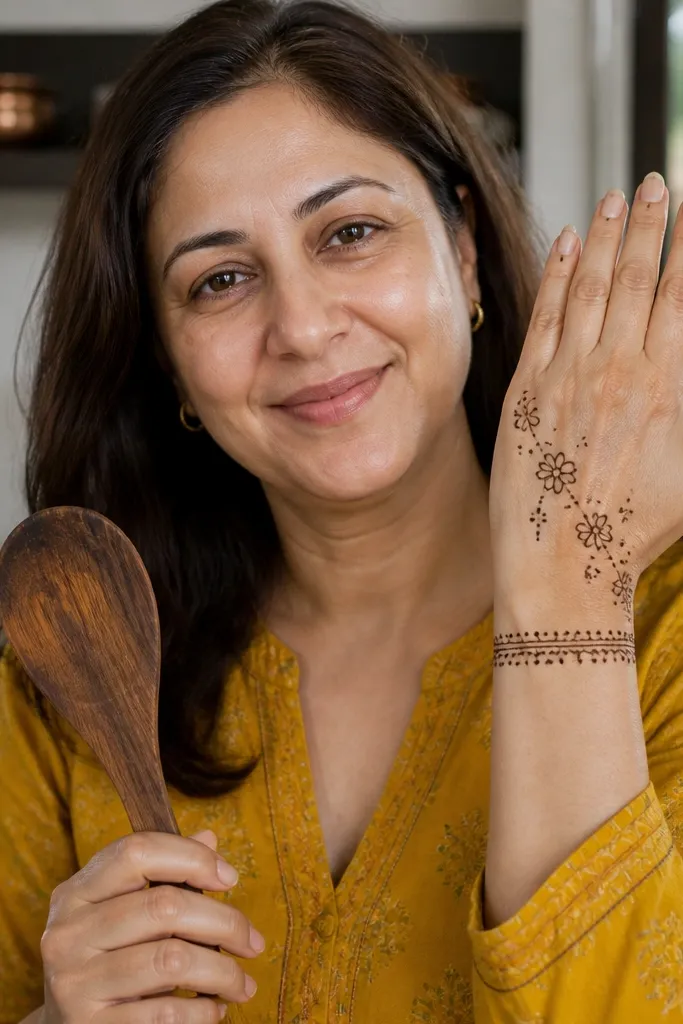
This design is built for speed and photos. A strong crescent starts near the thumb web and curves toward the wrist, then a second thin border runs parallel to it. The back of the hand stays mostly open, so even if your lines are slightly uneven, the overall shape still looks intentional. Add small dot clusters along the border to make it look “finished” without heavy filling. It’s a great pick for casual events where you want visible mehndi but don’t want to spend hours.
Step 1: Draw a wrist-to-thumb crescent arc, then add a second arc just outside it using the same line thickness. Step 2: Create a thin straight border line across the lower back hand and connect it to the crescent ends. Step 3: Place 6-10 tiny dots along the border and between the two arcs, then add 2 short leaf tips near the wrist.
Pro tipKeep the crescent line smooth by resting your pinky on the skin for steady control.
AvoidDon’t start by filling the center — the open negative space is what makes it look clean fast.
2. Lattice Panel with Corner Flourishes

A lattice panel makes your design look structured even when you’re working quickly. The grid creates visual interest, while corner flourishes give the hand a graceful frame. This works especially well if your cone output is a little inconsistent, because the repeating pattern hides small mistakes. Keep the lattice to one main panel in the center and let the sides breathe. It photographs well because the lines catch light and read clearly from a distance.
Step 1: Mark a rectangular panel between knuckles and the wrist band. Step 2: Draw vertical lines first, then horizontal lines to form the grid, leaving small gaps for breath. Step 3: At each corner of the panel, add a small curl leaf and a tiny dot cluster.
Pro tipUse ruler-like spacing by counting equal gaps between vertical lines so the grid looks even.
AvoidAvoid making the lattice cover the whole hand — that turns it into a slow, heavy fill.
3. Peacock Tail Arc with Minimal Fill
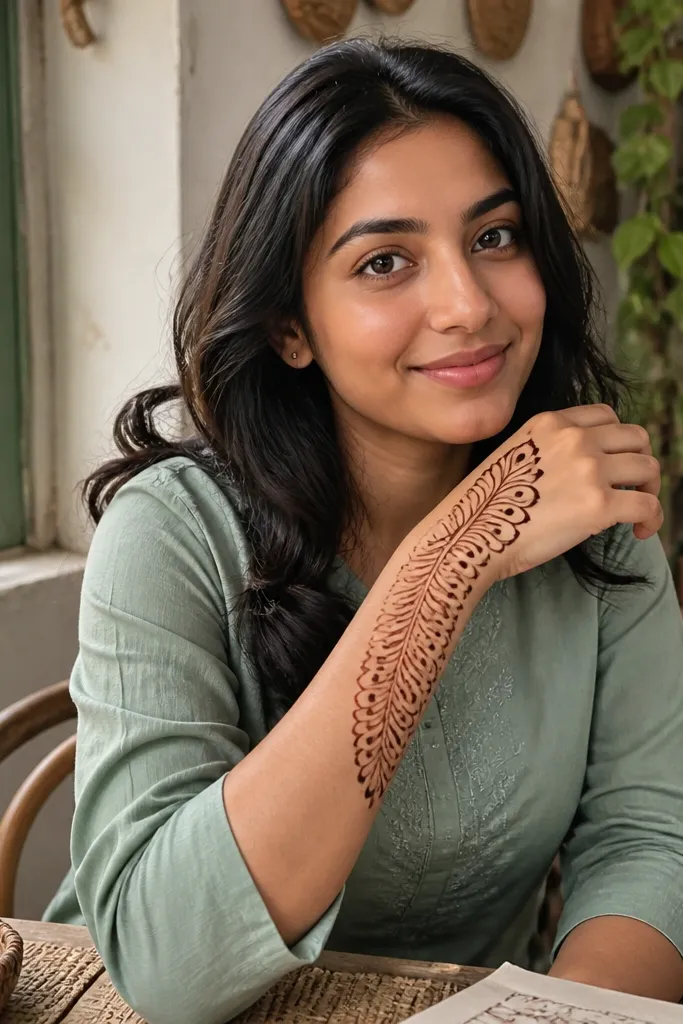
This is the peacock look without the time sink. You draw one sweeping arc from the wrist toward the center, then add feather shapes with tiny dot “eyes” rather than full leaf filling. It stays quick because the feather elements repeat in a short sequence. The back hand looks elegant because the arc guides the eye upward. This is perfect for weddings or festivals when you want a statement but still need a manageable session.
Step 1: Draw an S-curve arc starting at the wrist, thinning slightly as it moves upward. Step 2: Along the arc, add 8-10 feather teardrops with a dot at the tip and a small oval “eye” inside each. Step 3: Add two short side lines near the base and connect them to a simple wrist border.
Keep feather teardrops the same size — that symmetry makes the design look expensive.
Don’t fully fill each feather; outline + dot eyes is what keeps it fast and photogenic.
4. Knuckle Halo with Three Dot Chains
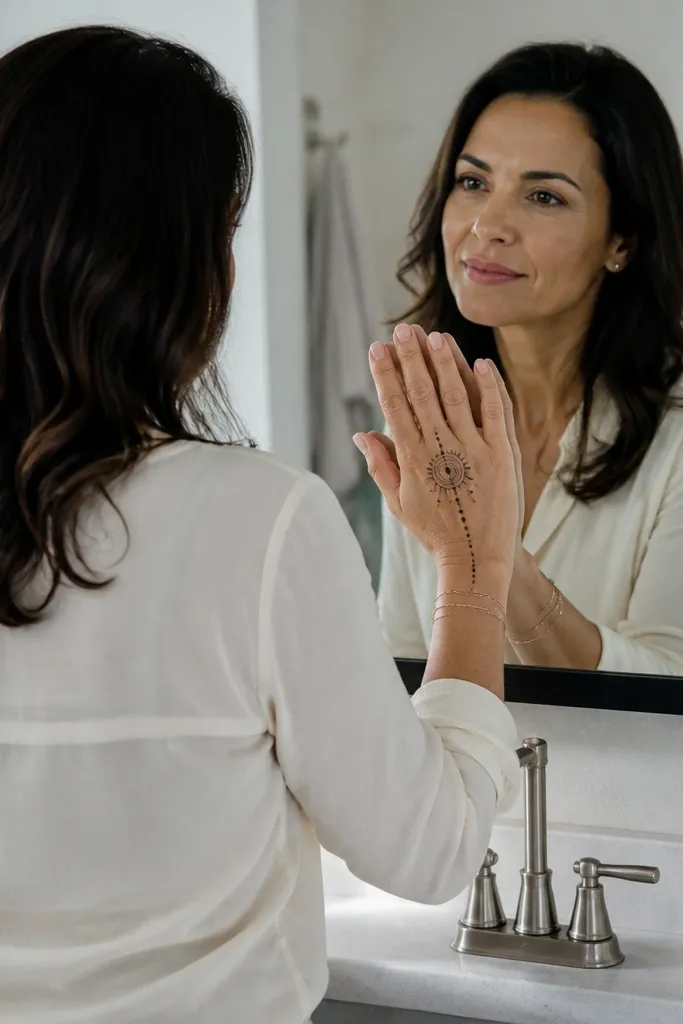
If you want something that looks neat instantly, this one is a winner. A knuckle halo frames the top of the back hand, then three dot chains drop downward like gentle strings. It’s quick because you’re repeating one motif: dots connected with short strokes. The design looks airy and clean, and it’s great for smaller hands where heavy filling can get crowded. It also works well for short events when you can only spare a small amount of time.
Step 1: Draw a curved line around the knuckles, like a partial ring, leaving open space in the center. Step 2: From the ring, draw three vertical dot chains — one toward the thumb side, one center, one toward the pinky side. Step 3: Add tiny leaf tips at the top ends where the chains meet the halo.
Pro tipSpace the three chains evenly by counting knuckle gaps as your measurement.
AvoidDon’t make the halo too thick — a heavy ring can overpower the delicate chains.
5. Wrist Band Blocks with Micro Florals
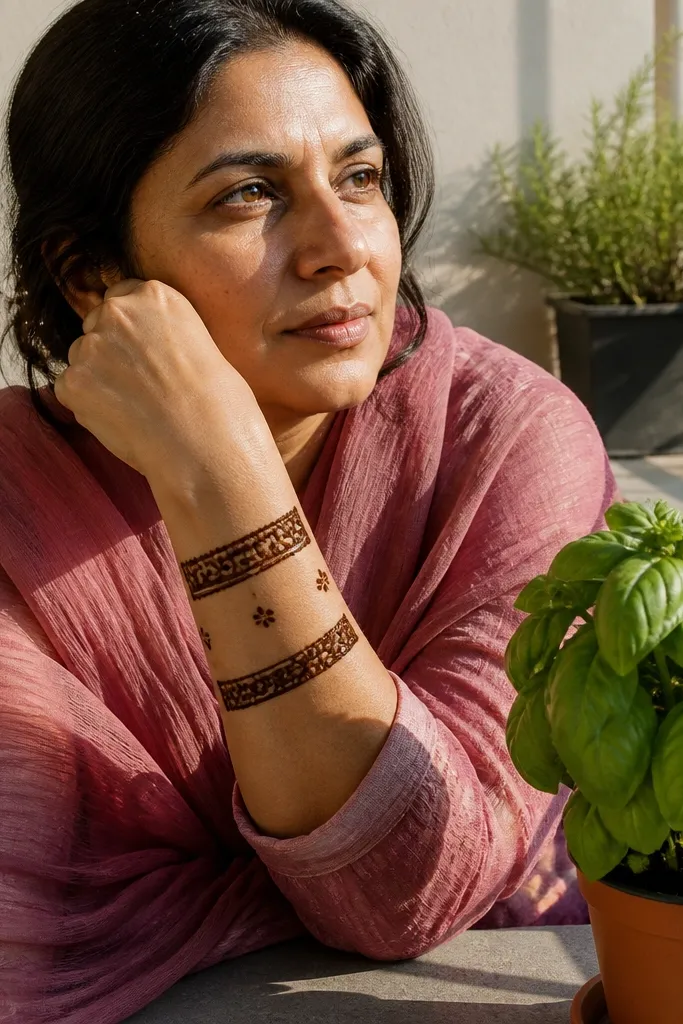
This design uses bold bands to create structure and small micro florals to add detail where it matters. The thick wrist band anchors the look, and the small blossoms make the back hand feel decorated without filling every inch. It’s quick because you repeat the same tiny floral shape multiple times. The overall result reads clearly in photos because the eye has a few focal points, not a blur of lines.
Step 1: Draw a wide wrist band with two parallel lines and a row of short scallops along the top edge. Step 2: Place 4-6 micro florals above the band, each floral made of 5 tiny petals around a dot center. Step 3: Connect the florals using short curved lines so they feel like one unit.
Pro tipMake your micro florals slightly smaller as you go toward the thumb for a natural visual taper.
AvoidAvoid big flowers — micro shapes are what keep the design quick.
6. Geometric Half-Grid with Corner Stars
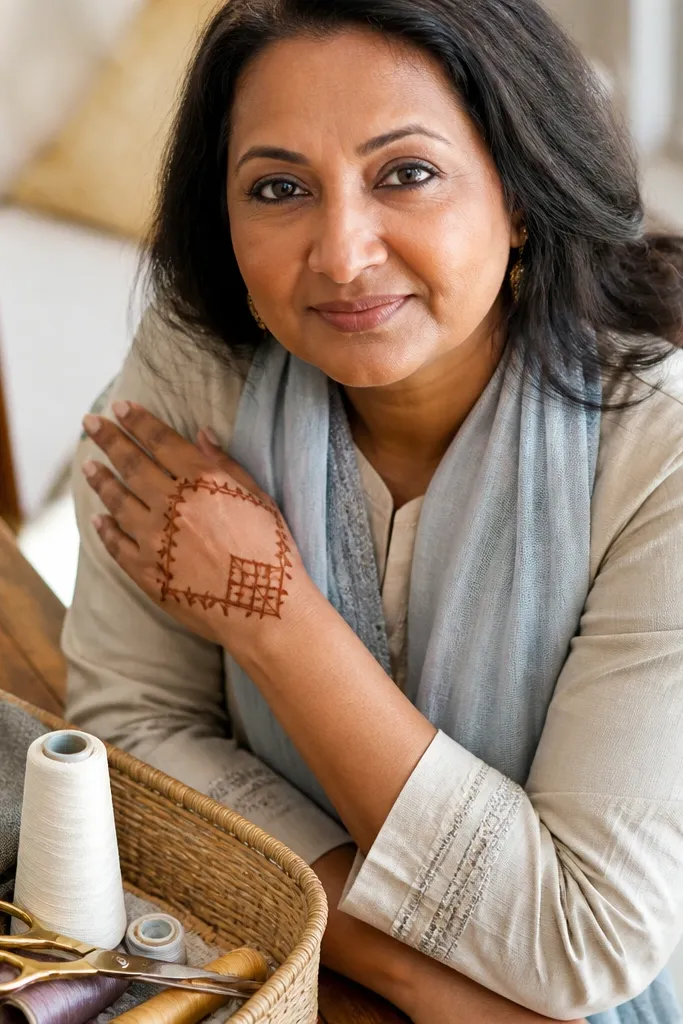
Geometric patterns look sharp and clean, which is exactly what you want for quick and easy back hand mehndi designs. This one uses a half-grid panel in the center with star-shaped corners that add sparkle without much work. It’s photogenic because straight lines and consistent angles catch light and look crisp. Keep the grid to one side-to-side section so it doesn’t become a time-consuming full cover. Great for modern outfits and for people who hate “messy vine” styles.
Step 1: Create a central half-grid using 6-8 vertical lines and 3-4 horizontal lines, leaving margins on both sides. Step 2: In the top-left and top-right corners of the grid area, draw small 5-point stars made with two crossing triangles. Step 3: Add a thin border line around the grid using short arc corners at the wrist and knuckles.
Pro tipIf your cone tip is too wide, draw the grid first, then thicken only the star outlines after drying a bit.
AvoidDon’t fill the grid with dots — that removes the clean geometric read.
7. Vine Loop from Wrist to Middle Finger

This is a clean single-vine style that looks deliberate without needing full-hand coverage. The vine starts at the wrist, curves toward the middle finger area, and loops back down. Along the vine, place leaf teardrops at regular intervals. It looks good because the line has movement and the leaves add texture, not bulk. Ideal for quick sessions because you only concentrate on one main path and a few repeats.
Step 1: Draw a main vine line from the wrist up toward the middle finger joint, then curve it into a loop. Step 2: Add 7-9 leaf teardrops along the vine — each leaf is an outline with a dot in the center. Step 3: Finish with two short vine offshoots on the lower side and a simple wrist border line.
Pro tipKeep leaf teardrops facing the same direction so the design looks “styled,” not random.
AvoidAvoid adding extra vines everywhere — one strong vine reads best fast.
8. Double Feather Lines with Dot Tips
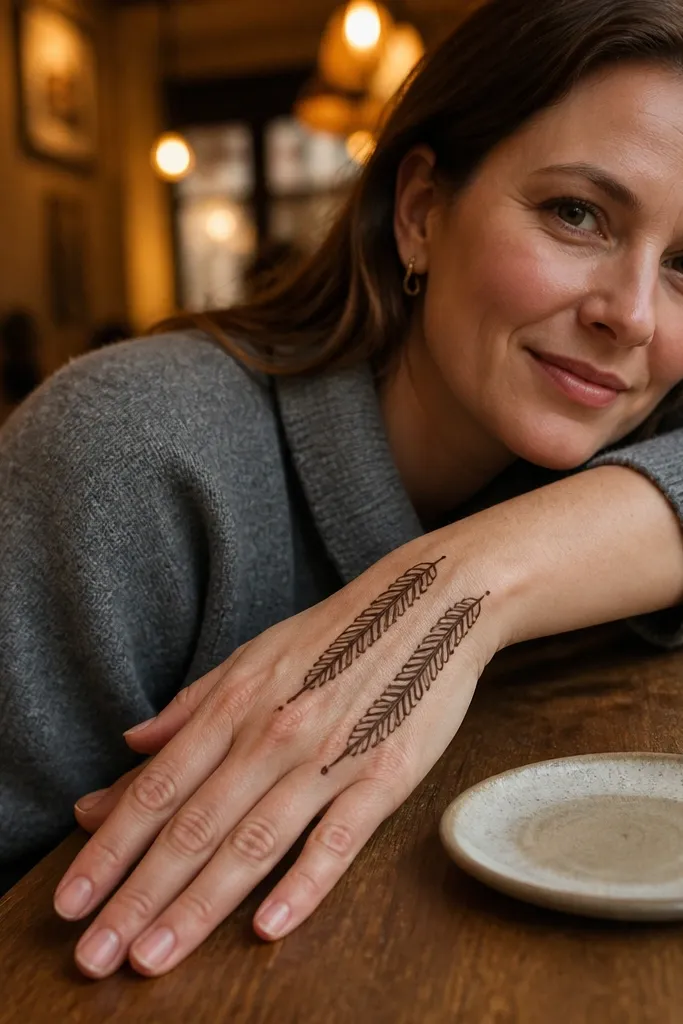
This design is all about rhythm. Two parallel feather lines run diagonally across the back hand, and each feather section ends in a tiny dot tip. It’s fast because you repeat the same feather segment multiple times instead of drawing separate motifs for every area. The diagonal placement makes the hand look longer in photos. Works well for parties where you want visible mehndi that still looks clean and modern.
Step 1: Draw two diagonal parallel lines from wrist toward the index finger side, spacing them 1-1.5 cm apart. Step 2: Between the lines, add feather segments by drawing small V shapes that point outward, then place a dot at each feather tip. Step 3: Add a thin border line near the wrist and connect it to the ends of the diagonal lines.
Pro tipSketch the diagonal direction lightly first so both lines keep the same angle.
AvoidDon’t overcrowd the feather segments — leave small gaps so the diagonal stays readable.
9. Center Medallion with Side Micro Chains

A center medallion is a cheat code for looking complete quickly. You get one main focal point in the middle, then you support it with small side micro chains so the empty space doesn’t look bare. The medallion can be simple — a ring with petal lines — and still looks high-effort because it’s the only detailed zone. This style is flattering on most hand sizes and works great for evening looks.
Step 1: Draw a small circle in the center of the back hand, then add 6-8 petal outlines around it without filling them. Step 2: On both sides of the medallion, draw short vertical micro chains made of 5-7 dots connected by tiny lines. Step 3: Add a thin wrist border and two curved connectors from the medallion to the border.
Make the medallion slightly closer to the knuckles than the wrist so it looks balanced in photos.
Avoid large medallions; big circles take longer and can look heavy on the back hand.
10. Arc Border with Starburst Center
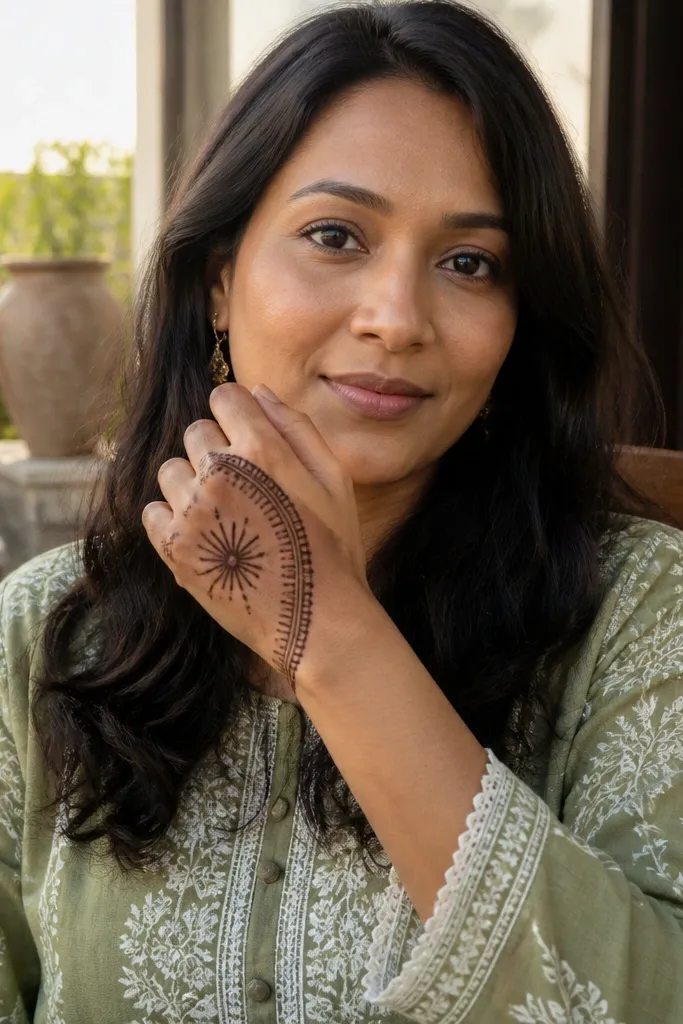
This design mixes a soft frame with a sharp center. An arc border wraps the back hand from wrist to knuckle edges, while a starburst in the center creates that “wow” without long scrolling vines. It’s quick because the starburst is made with straight lines and repeated points. The center reads clearly even with thin paste, so it’s forgiving for beginners. Great for holiday parties when you want a clean festive look.
Step 1: Draw an arc border along the top edge near knuckles and a matching arc near the wrist, connecting them with short side curves. Step 2: In the center, draw a 10-12 point starburst using straight lines from one center dot. Step 3: Add tiny dots at the end of each star line and a few dots inside the star gaps.
Pro tipUse a toothpick or the cone tip to place the center dot — if the center is off, the starburst looks crooked.
AvoidDon’t shade the starburst heavily; outline + dot tips looks sharper and faster.
11. Chain Link Border with Empty Center Panel
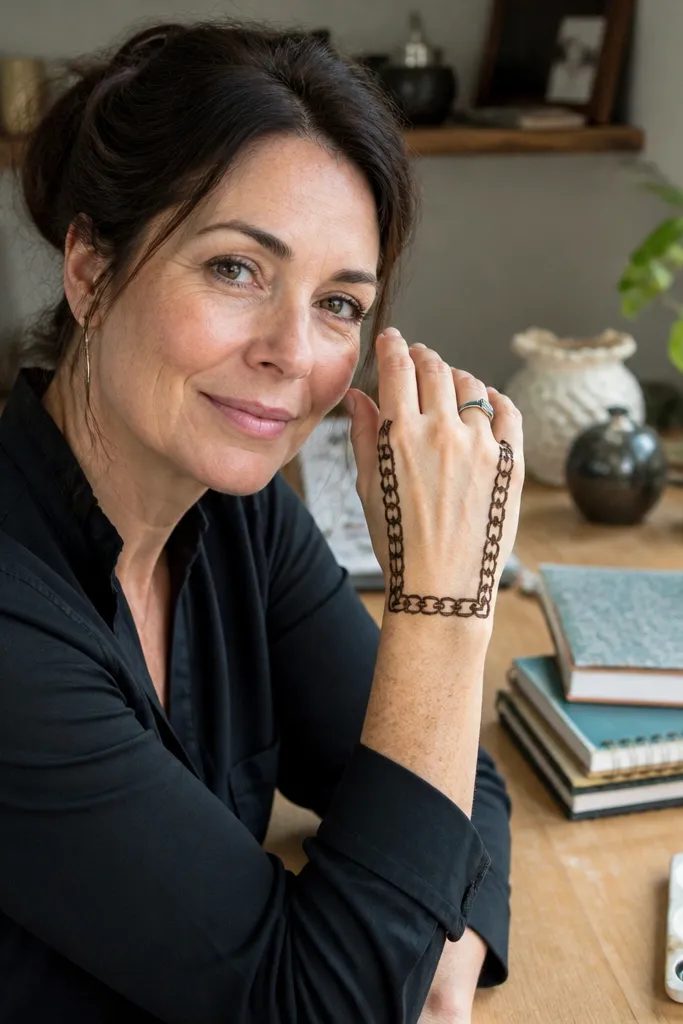
Chain link borders look polished and modern. This design keeps the center mostly empty, which is what makes it quick and easy to finish without overworking. The chain pattern sits along the wrist and side edges, giving a full look while keeping the time low. It also photographs well because the border creates a frame and the empty center keeps everything clean. Perfect for people who want mehndi that doesn’t feel too heavy.
Step 1: Draw a border line around the top half of the back hand near the knuckles, then add a second border line closer to the wrist. Step 2: Connect the two borders with short side chain links — each link is a small oval outline with a gap. Step 3: Leave the center panel blank, then add 3-4 tiny dots near the top border for balance.
Keep the chain link ovals the same width so the border looks even.
Avoid adding extra motifs into the empty center — the blank space is the point.
12. Sunrise Rays from Wrist to Center
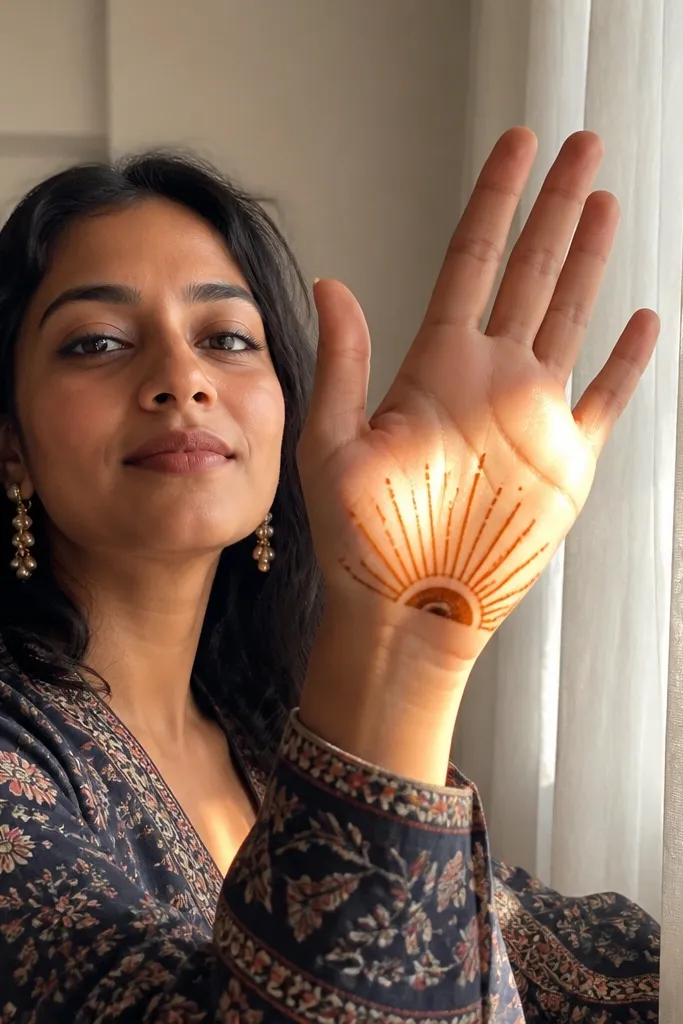
This is a super photogenic pattern because it creates direction. A dot base at the wrist acts like the “sun,” and rays spread upward in a fan toward the center. You can keep rays short and repeat them, which makes it quick. The back hand looks bright even with minimal filling, and it’s easy to adjust if your hand size changes. Great for holiday outfits because it reads festive without being overly traditional.
Step 1: Place a cluster of 12-16 dots along the wrist line, centered on the back hand. Step 2: Draw 10-14 rays upward from the dot cluster using straight lines that slightly curve at the ends. Step 3: Add a thin arc border at the top ends of the rays and connect it to the side lines with two short curls.
Pro tipMake rays longer on the middle and shorter near the sides for a more natural fan shape.
AvoidAvoid drawing too many rays — 10-14 is enough for a clean photo read.
13. Rose Bud Trio at Index, Middle, Ring
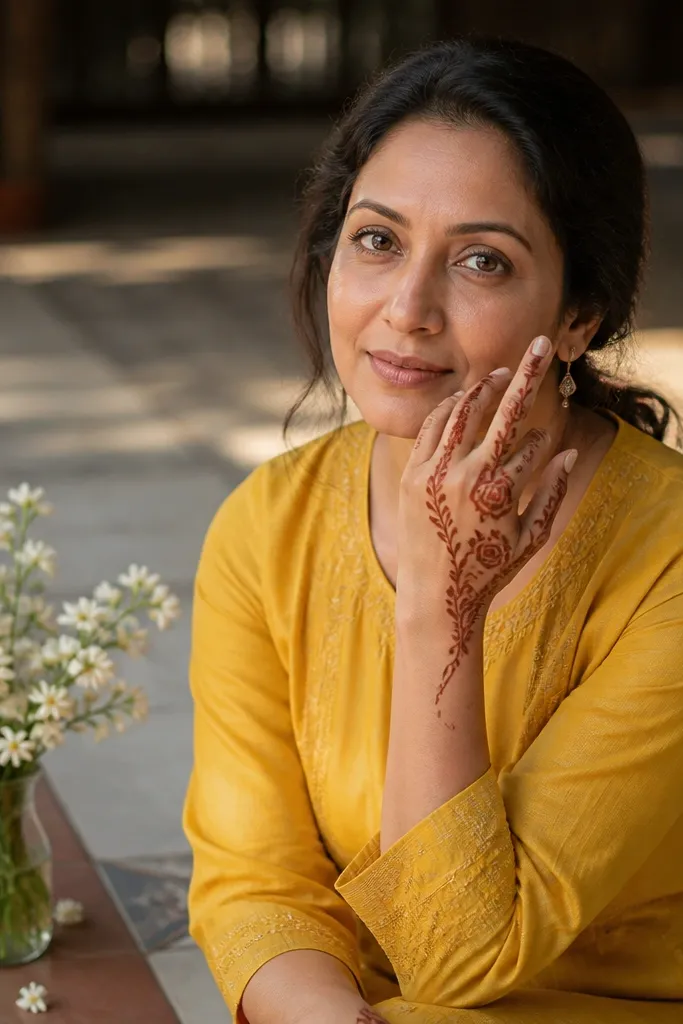
A trio of rose buds looks sweet and intentional without needing heavy shading. Place one bud near the index finger joint, one near the middle, and one near the ring, then connect them with thin leafy stems. The technique creates an organized vertical pattern that fills the back hand nicely but still stays quick. It also looks great in close-ups because each bud has clear petal lines. Choose this when you want something pretty but not complicated.
Step 1: Draw three small bud outlines — each bud is an oval with 5-7 petal arcs inside, centered on each target knuckle area. Step 2: Connect the buds with thin stems made of a single line plus 2-3 small leaf teardrops along each stem. Step 3: Add a simple wrist border and a few dots near the base of the stems.
Pro tipKeep the buds the same size and spacing so the trio looks balanced.
AvoidDon’t overfill petals; outline petals with a dot center is faster and cleaner.
14. Triangle Corner Framework with Dots
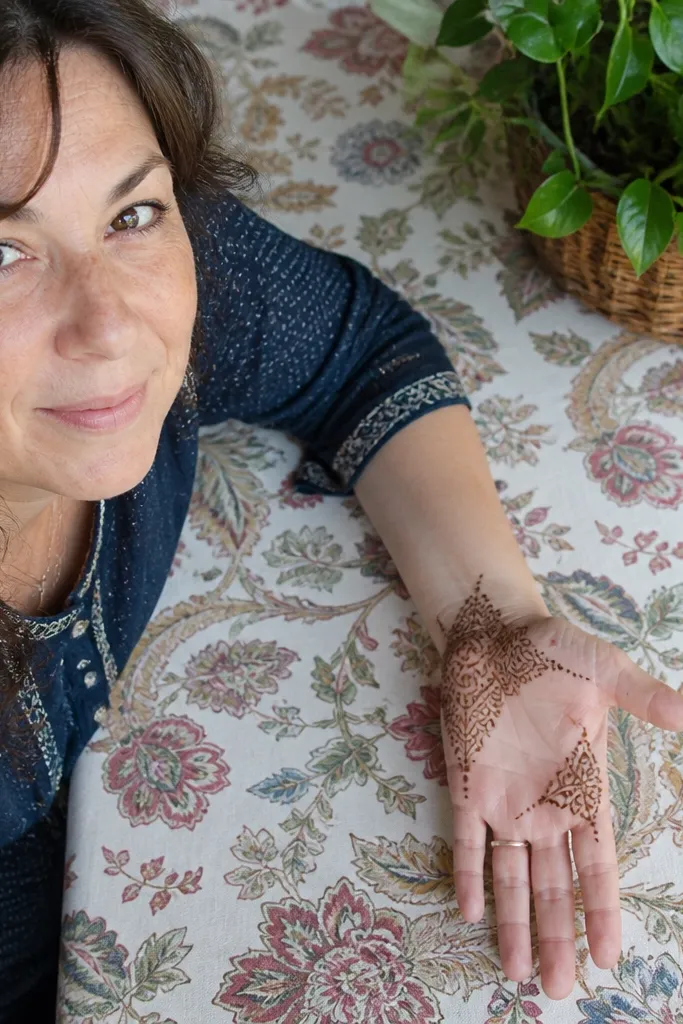
This design is for people who like structure and hate heavy fill. Triangles in the corners create a geometric frame, while dot clusters bring softness. The center stays open so it’s quick and easy, and the triangles guide the eye to the wrist and knuckles. It’s also forgiving if your lines wobble, because the corner shapes still read clearly. This one is perfect for a sleek holiday look with a dress or a festive top.
Step 1: Draw a triangle in the top-left corner area of the back hand and a matching triangle in the top-right corner, each with crisp outlines. Step 2: Add small connector lines from triangle points toward the wrist corners, then place dot clusters at each connector end. Step 3: Finish with a thin border line across the wrist band area and 3 dots in the center for balance.
Pro tipUse fewer triangles but make them sharp. Crisp edges look better than lots of tiny shapes.
AvoidAvoid filling the triangles with dots — the open frame is what keeps it fast.
15. Peony-Style Center Flower with Side Vines
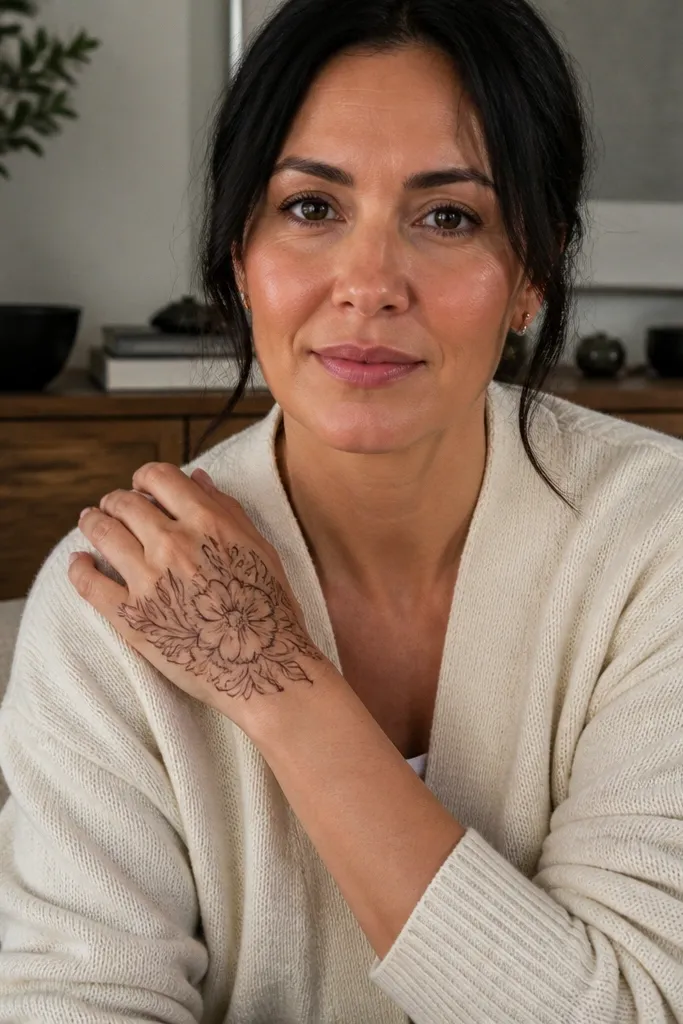
A peony-style center flower gives you the “statement” look while keeping the rest minimal. The center flower is made with layered petal outlines, but you don’t need to shade them — just draw clean petal loops. Two side vines add movement without turning it into a full-hand vine maze. This is one of the best quick and easy back hand mehndi designs when you want something that looks bridal-adjacent but still finishes in under an hour. It also looks great on photos taken from slightly above.
Step 1: Draw a center flower circle, then add 10-12 petal loops around it, each petal shaped like a teardrop with a curved outer line. Step 2: Add 3-4 extra petal loops inside the outer ring to create a layered peony feel. Step 3: On both sides of the flower, draw a short vine line with 3 leaf teardrops, then connect to a thin wrist border.
Pro tipLet your petal outlines overlap slightly at the base. That one overlap makes it look layered without extra work.
AvoidDon’t try to fill the entire back hand with more flowers — keep it to one center focus.
16. Wrist Ribbons with Dot Confetti
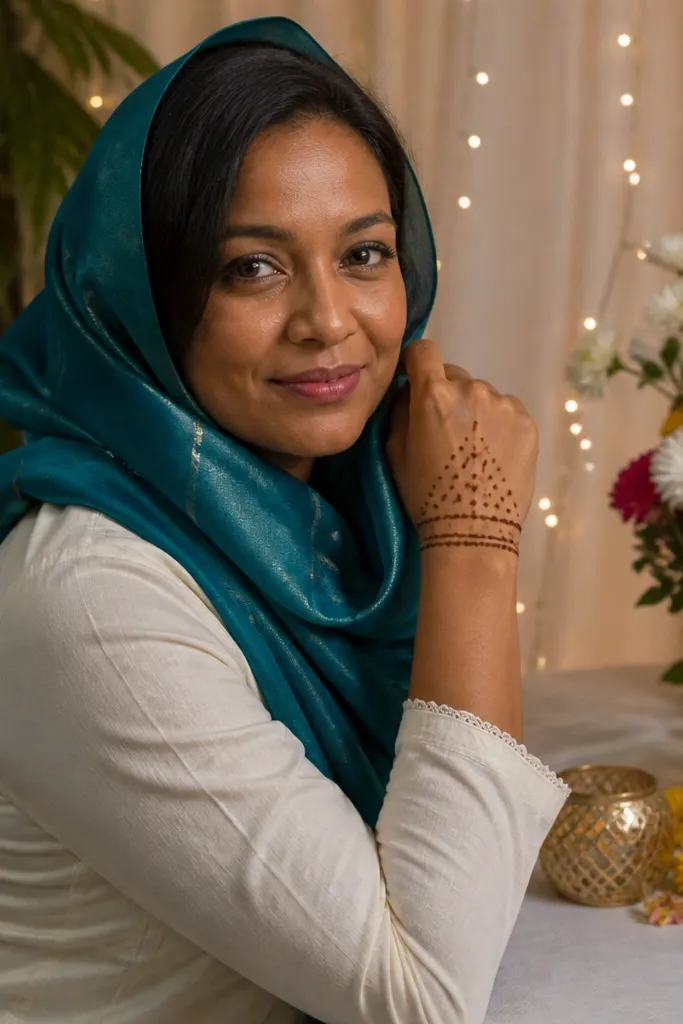
Ribbons are a fast way to make the back hand look decorated without covering every inch. Draw two ribbon bands across the wrist and then send small dot confetti upward in a light scatter pattern. The dots make the design look festive and balanced, and the ribbons give it structure. This is ideal for last-minute holiday prep because it’s forgiving and easy to adjust to your time. It also works well if your cone output is thinner than usual.
Step 1: Draw two parallel ribbon bands on the wrist area, each band outlined with scallops on the outer edge. Step 2: From the top ribbon edge, scatter 20-30 tiny dots upward in a loose triangle shape toward the center. Step 3: Add 6-8 small curved dashes between dot clusters to connect the scatter to the wrist.
Pro tipIf your dots look too dark, space them farther apart and add fewer dashes — it reads cleaner in photos.
AvoidDon’t turn dot confetti into full filling. Keep it light.
17. Arched Window with Side Mehndi Curtains
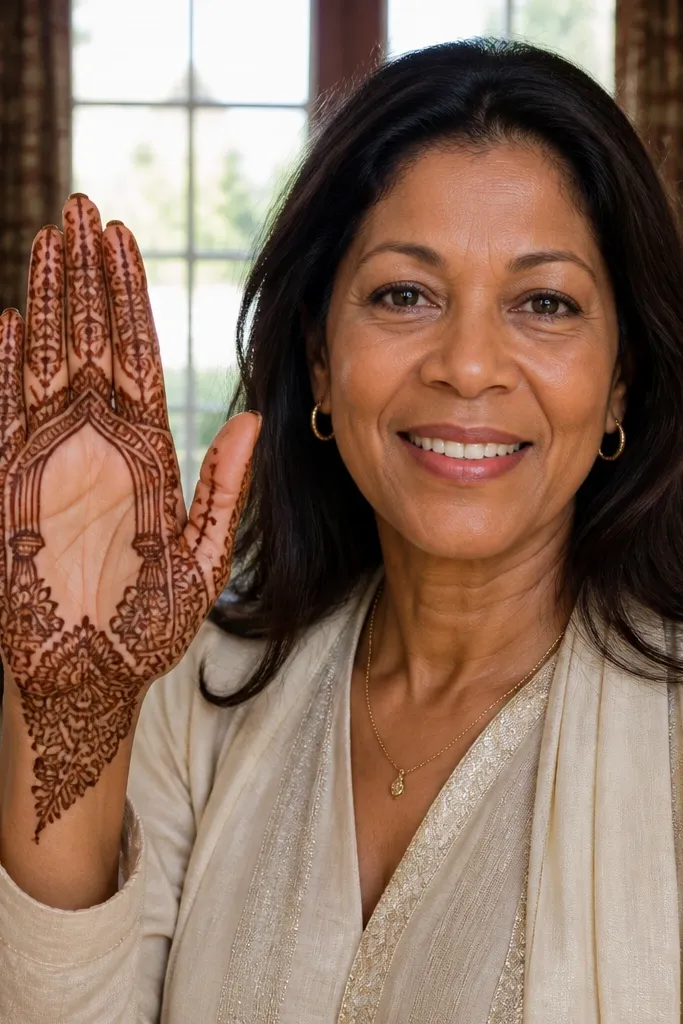
This looks like a framed window, which makes the design feel “finished” even with minimal paste. You draw an arched outline in the center, then add curtain-like side lines that hang down toward the wrist. The center window stays open, so the design is quick and the lines stay crisp. It’s especially flattering for back hands because the arch naturally follows the hand’s curve. Great for holiday dinners when you want something elegant but not heavy.
Step 1: Draw an arched rectangle window in the center — top is an arc, bottom is a short straight line. Step 2: On both sides of the window, draw 4-6 curtain strands, each made of a short line with a tiny dot at the end. Step 3: Add a thin wrist border and two small connector curls from the window corners to the border.
Pro tipKeep the window opening centered. A slightly off-center frame looks lopsided in photos.
AvoidAvoid filling the window. Leave it empty for the clean “frame” look.
18. Chevron Spine with Knuckle Feathers
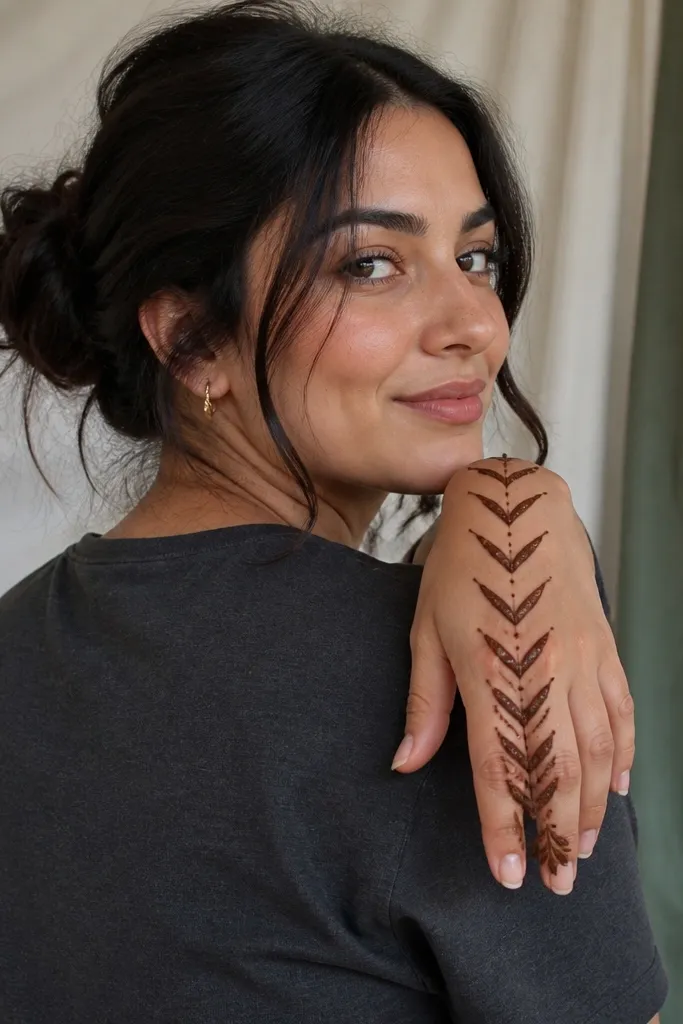
A chevron spine gives you a strong vertical direction, and knuckle feathers add detail where the design is most visible. This is quick because you repeat the chevron pattern in one line and then add small feather points near knuckles. It looks modern and stylish, not traditional clutter. The negative space stays controlled, so it reads clean even on short sessions. Pick this when you want a crisp holiday look that still feels like mehndi.
Step 1: Draw a vertical chevron spine from the wrist toward the center knuckles, using 7-9 V shapes connected in a straight line. Step 2: On both sides of the spine near the knuckles, add 3-4 small feather motifs — each feather is a V with a dot at the tip. Step 3: Add a thin border line at the wrist and connect it to the bottom of the spine with two short arcs.
Make the chevrons consistent by keeping the V angle the same across the whole spine.
Don’t add too many feathers. Three on each side looks intentional; more turns it messy.
19. Two-Row Band with Leaf Tips
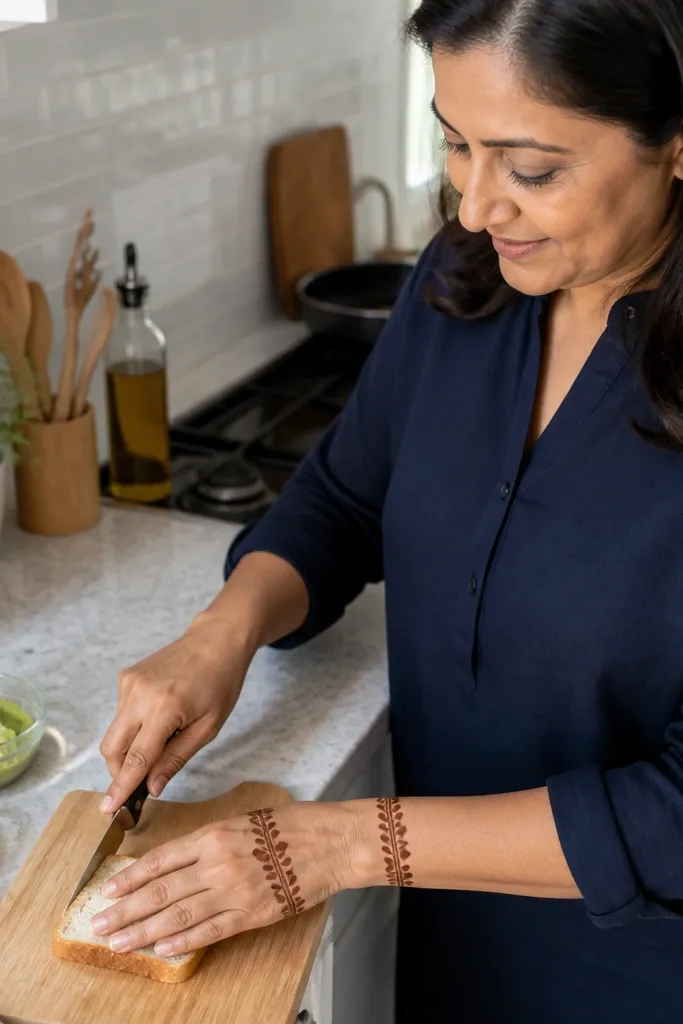
This is one of the fastest full-looking layouts. You draw two horizontal bands across the back hand — one near the knuckles and one near the wrist — then add leaf tips that poke out into the open center. The eye reads it as a complete design because the bands create structure. It’s also beginner-friendly because you’re repeating the same band shape. Great for quick and easy back hand mehndi designs when you want something clean and wearable for everyday holidays.
Step 1: Draw the top band across the back hand near the knuckles using two parallel lines. Step 2: Add leaf tips along the top band edge — each leaf is a teardrop outline with a tiny dot center. Step 3: Repeat the band and leaf tips for the lower band near the wrist, then connect the bands with 3 short curved lines.
Use a slightly lighter line for the inner edge of each band so the outer edge looks crisp.
Avoid making leaves too big. Large leaves steal time and can crowd the center.
20. Knot Motif Center with Side Dots
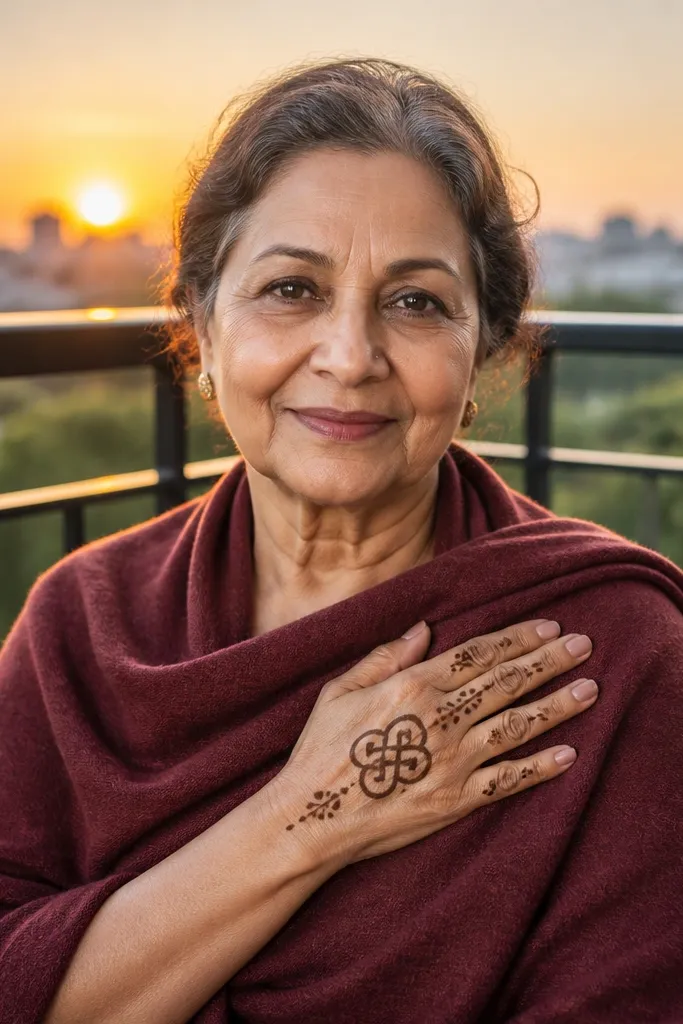
This design is clever because it creates a focal point without filling. A knot motif sits in the center of the back hand — two loops crossing — and that crossing shape reads like a finished centerpiece. Then you add small dot clusters on each side to balance the composition. It’s quick, looks neat, and works well when you want a minimal but stylish mehndi look for holiday events. The center knot also helps hide minor line wobble because the crossing lines draw attention.
Step 1: Draw a center knot using two overlapping loops, each loop outlined and slightly tapered at the ends. Step 2: Add 3 dot clusters on the left side and 3 clusters on the right side, spaced between knuckles and wrist. Step 3: Add a thin wrist border line and two short connector curves from the knot ends to the border.
Pro tipMake the loops overlap a little more than you think. It makes the knot look intentional.
AvoidAvoid adding extra curls around the knot. Keep it clean and centered.



