
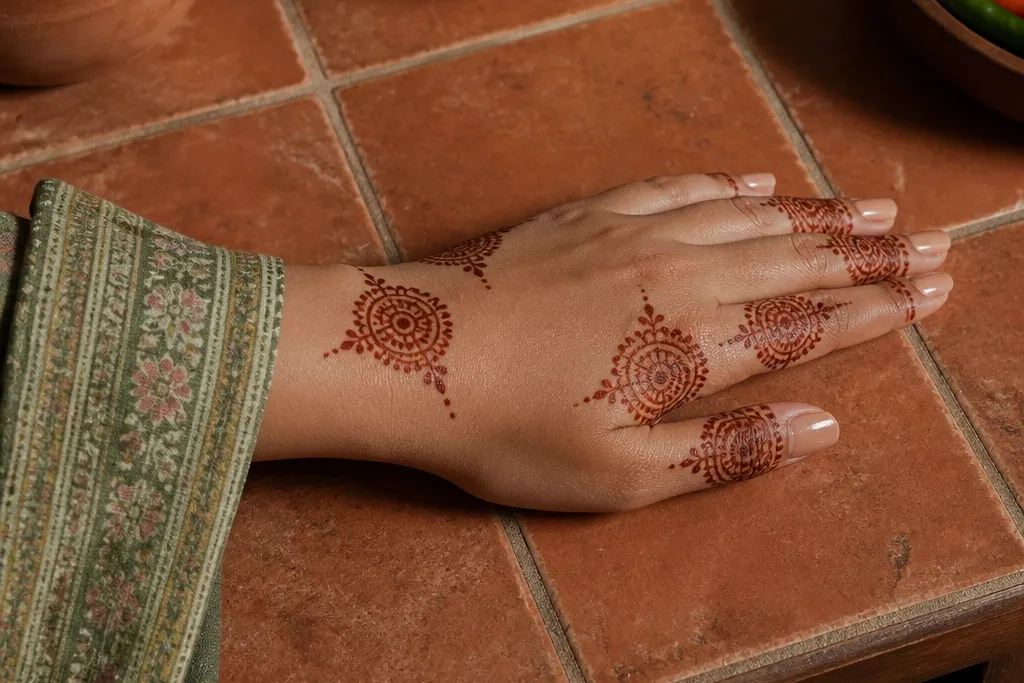

1. Three-Leaf Finger Arch
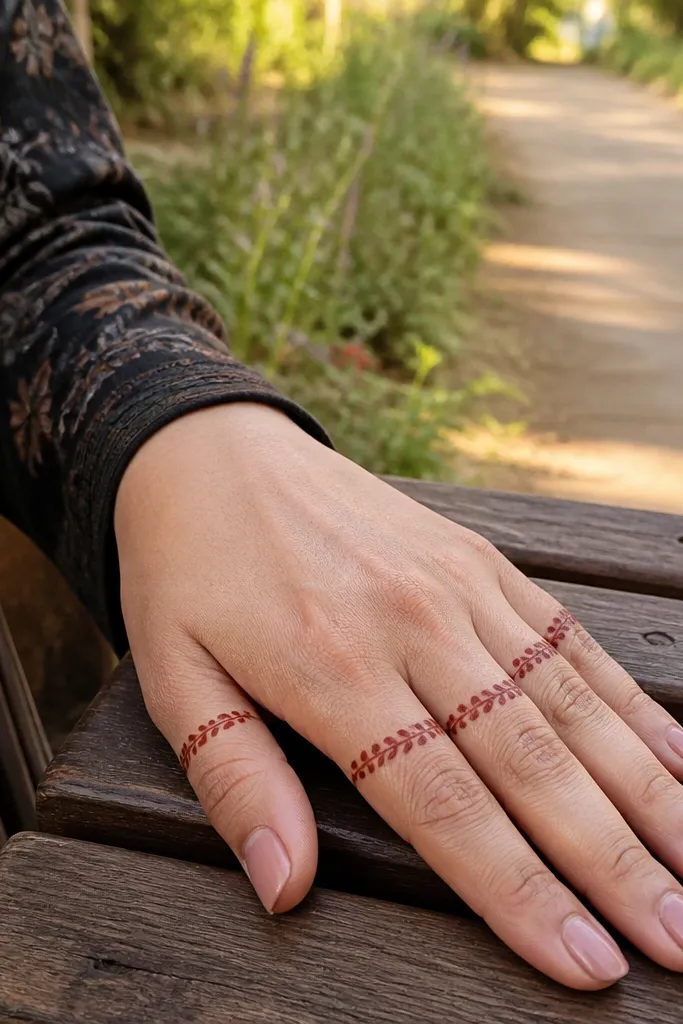
This one looks polished because it reads like a bracelet pattern, not random doodles. You place small leaf hooks across the finger arches and repeat them in a neat rhythm, so the design frames the hand without covering it heavily. It’s photogenic because the leaves catch light at different angles and create a “lifted” texture even when you keep it simple. You’ll also finish fast since each leaf is basically the same shape repeated, not a whole floral scene. It suits daily wear, office parties, and any holiday when you want something pretty but not heavy.
Pro tipKeep your leaf size consistent by tracing one leaf shape slowly, then copying it without changing the tip pressure.
Start by drawing a thin curved line from the base of the index finger toward the base of the little finger, like the top edge of a soft arc. Then add three leaf hooks along that arc, one centered above the middle finger and two spaced on either side, using the same size for a clean look. Finish by adding tiny dots at the leaf tips and one short comma-shaped filler near the wrist line.
AvoidDon’t make the leaves too big — oversized leaf arches crowd the back of the hand and kill the airy look.
2. Minimal Center Line with Dots
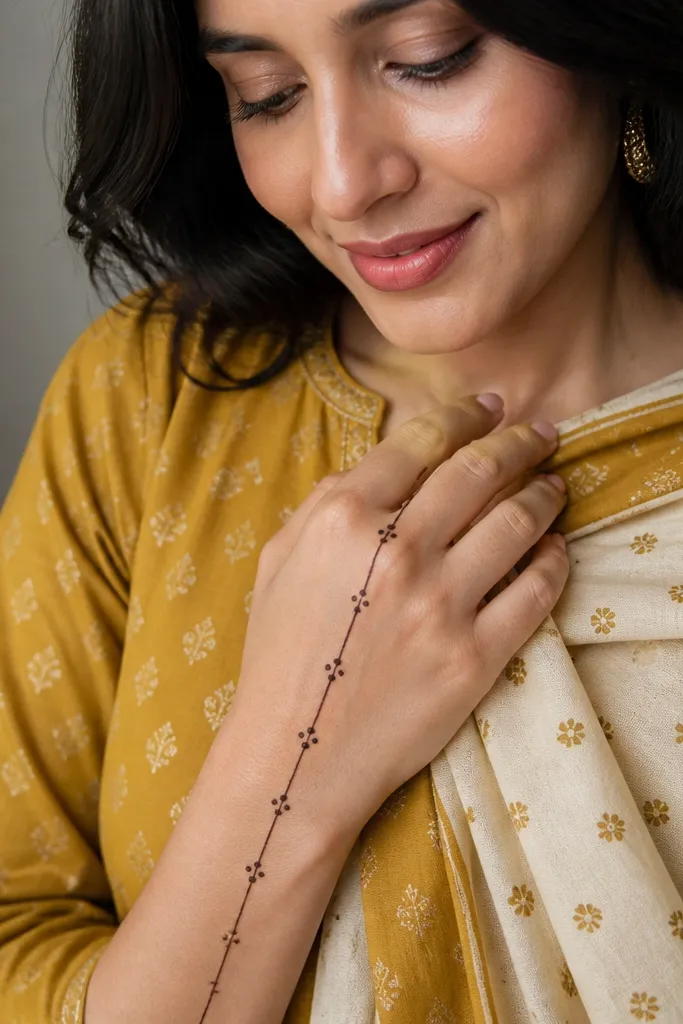
This is the fastest “looks intentional” design because it gives your hand a clear focal point. A single vertical line down the back of the hand makes your placement look planned, and the dots create sparkle without needing shading. It photographs well because the line pulls the eye upward and the dot clusters form a gentle rhythm. You can stop after the first pass and still feel complete, which is exactly what you want for 5-minute mehndi. It also works on short nails or long nails since the pattern doesn’t depend on detailed finger work.
Pro tipIf your paste starts to thicken, use a lighter hand pressure so the line stays smooth and doesn’t widen in the middle.
Draw a straight center line from the wrist crease upward, keeping it pencil-thick. Add small dots on both sides at three heights, spacing them evenly so the clusters look mirrored. Finally, connect two dot pairs with a short curved dash near the top to make it feel like a set, not separate marks.
AvoidAvoid uneven dot spacing — random gaps make the design look hurried instead of styled.
3. Wrist Bracelet with Tiny Spikes
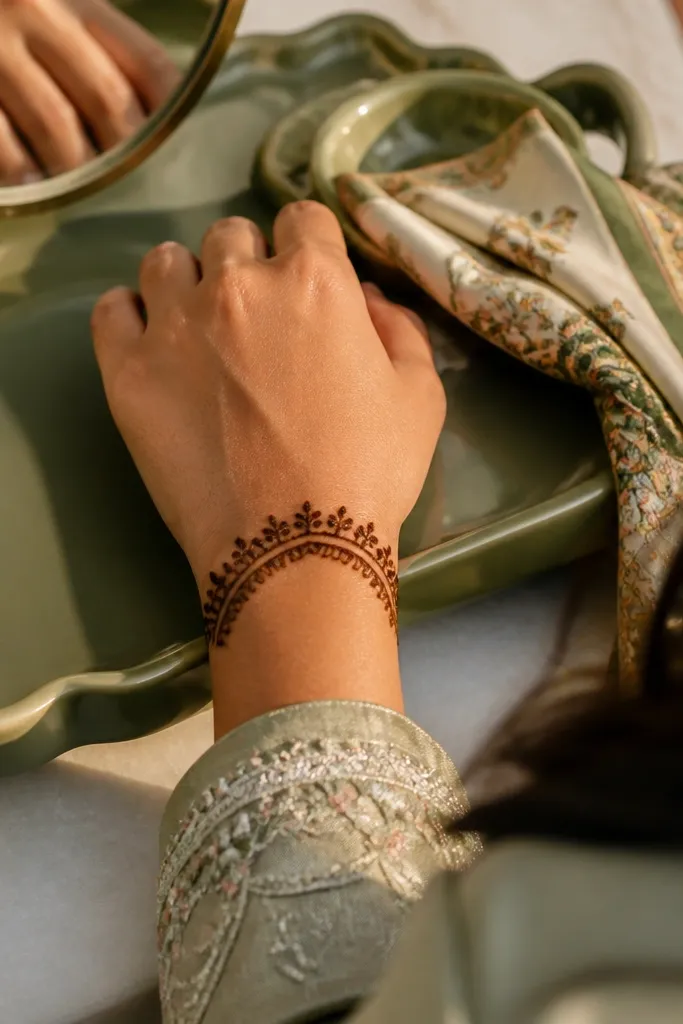
A wrist bracelet design gives you instant impact because it sits where the eye naturally lands first. The tiny spikes along the curve add a lace-like edge without needing big florals. This is a great holiday starter because you can keep it minimal on the back hand and still look dressed up. It’s also forgiving: if one spike is slightly off, the pattern still reads as intentional texture. The result is clean, geometric, and easy to repeat.
Pro tipUse a ruler edge under your wrist (or just guide with a straight finger) to keep the bracelet curve smooth.
Start with a curved band across the wrist area, about 1.5 to 2 inches long on the back side of the hand. Then add tiny spike marks pointing upward along the band edge, one spike per small gap. Finish by placing three small dots in a vertical line above the band, aligned with the center of the wrist curve.
AvoidDon’t overfill the band — if the spikes touch each other, it turns into a dark smear.
4. Butterfly Wing Side Lines
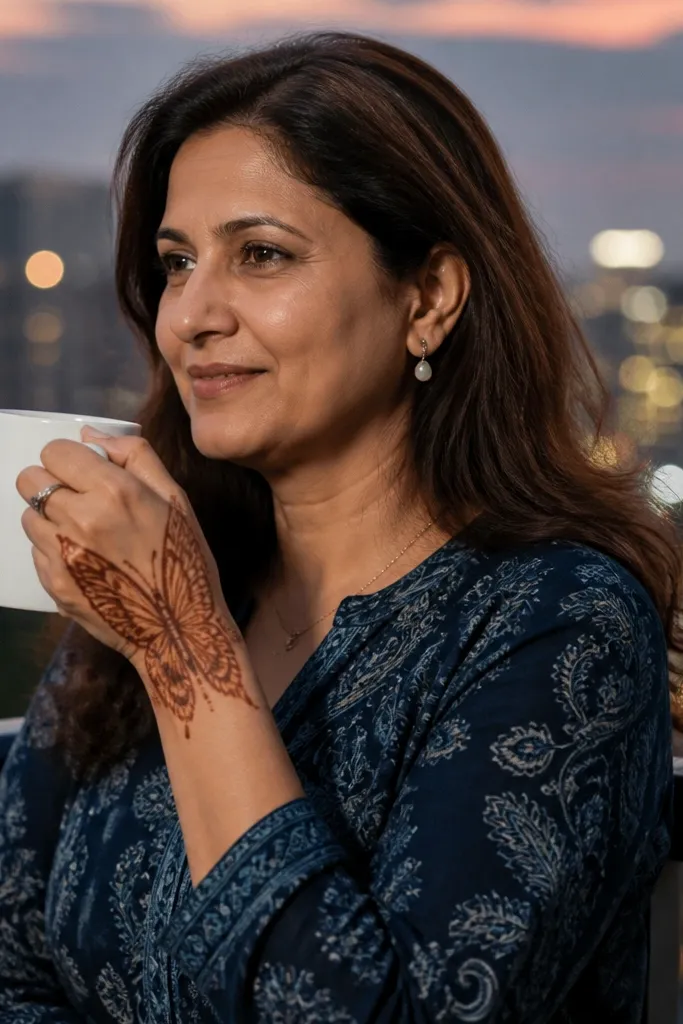
Butterfly-inspired side lines look sweet without being complicated. You get a “wings” effect that frames the center of the hand and makes the back look fuller, even with light coverage. The mirrored curves are very camera-friendly because they create symmetry — the biggest cheat for quick designs. You’ll also spend most of your time drawing two shapes and then repeating dots, which keeps it within 5 minutes. This works for festivals, birthdays, and casual mehndi nights.
Pro tipOutline each wing first, then go back and thicken only the outline lines so your dots don’t look heavier than the main curves.
Draw a faint center guideline from wrist to mid-back hand. On both sides, sketch a wing curve that bulges outward and then tapers back in, stopping around the base of the ring finger. Add a row of tiny dots along each wing curve and place one small dot cluster at the top where the wings feel closest.
AvoidSkip long continuous lines — they crack when paste dries, so keep curves controlled and lift your cone between segments.
5. Fan Shaped Finger Filler
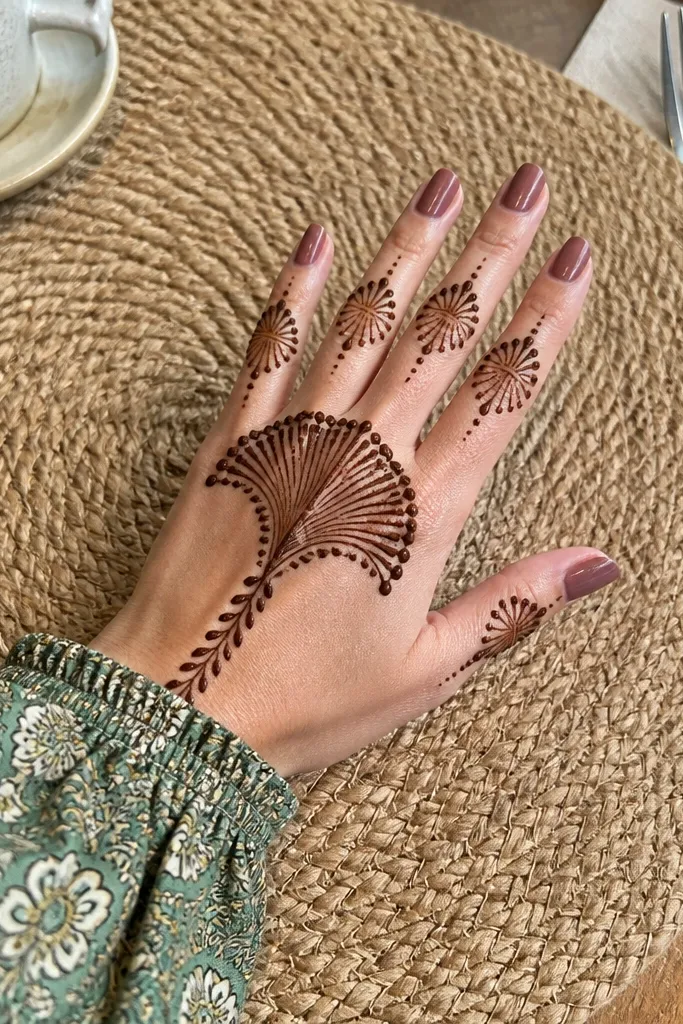
This design looks like you planned it for a ring or bracelet because it sits between the finger arches. The fan shape creates a soft, layered look using just a few repeating strokes. It’s fast because you repeat the same “rake” style lines that flare outward. In photos, it reads as delicate and neat, especially if you keep the spacing airy. It’s perfect if you want back-hand mehndi without covering the whole hand.
Pro tipMake your lines slightly thicker at the base and thinner at the tips for a natural feathered look.
Start by drawing a short arc across the top of the hand between the index and middle finger bases. Then create 6 to 8 thin lines radiating outward like a handheld fan, each line starting at the same arc point and ending at different lengths. Fill the tips of every other line with a tiny dot to give it a finished texture.
AvoidDon’t fill the entire fan — leave visible gaps so it stays airy and photogenic.
6. Single Rose Stem Corner
A corner rose is a smart way to look “designed” in minutes. You place one small rose bud near the side of the back hand, then trail a thin stem with two tiny leaves. The rest stays mostly open, which helps simple work look intentional instead of blank. It’s also easy to photograph because the bud creates a clear focal point. This fits holiday outfits where you want a focal motif rather than full coverage.
Draw a thin diagonal stem from the wrist toward the center edge of the hand. At the top, sketch a small rose bud using 5 to 7 teardrop petals around a center dot. Add two small leaves along the stem, then finish with three tiny dots near the wrist end to balance the weight.
If your rose petals look flat, slightly curve each petal tip upward before the paste sets.
Avoid placing the rose too central — corner placement looks cleaner and takes less time.
7. Sunburst Wrist to Center
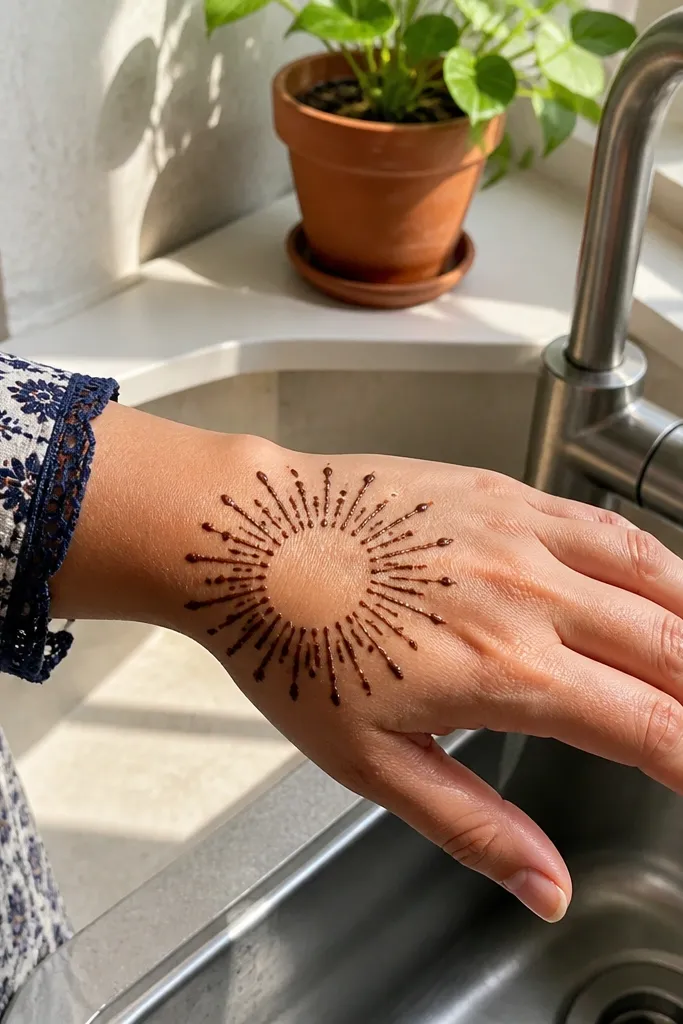
Sunburst designs look festive because the rays create motion even when the pattern is simple. You draw a small cluster at the wrist and radiate short strokes toward the center, so the whole hand looks styled in one direction. It’s quick because you repeat the same ray shape and stop after 8 to 12 rays. The open center prevents the paste from looking heavy. This one fits Diwali, Eid, and any family function where you want something holiday-looking without full floral work.
Mark a small dot at the wrist center, about 1 inch above the wrist crease. From that dot, draw 10 to 12 short rays outward, curving slightly so they look like a halo. Then add one thin vertical line from the center dot upward toward the mid-back hand to connect the rays into a single design.
Keep ray lengths consistent by using your finger as a visual ruler while drawing.
Don’t add extra fillers too early — finish the rays, then stop. Overdoing it makes it look messy.
8. Checker Dots Border
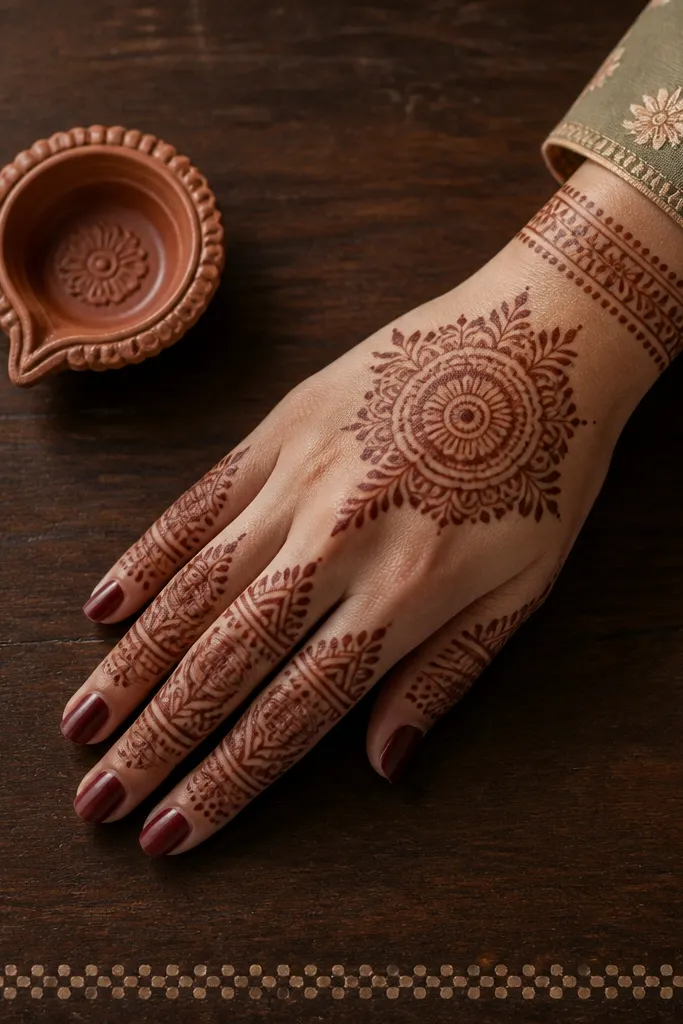
A checker dot border gives you a structured, modern look that still feels traditional. Instead of filling the whole hand, you create a thin outline near the edge and fill it with alternating dot clusters. It photographs sharply because the pattern has rhythm and clear boundaries. This is a good choice when you’re short on time but want something that looks crisp and intentional. It also works great alongside a simple center motif if you want to level it up later.
Pro tipUse the same dot size throughout. If your cone output changes, pause and squeeze the cone gently to re-equalize flow.
Draw a light border line starting near the wrist on one side and curving up toward the outer edge of the hand. Along that border, place dot clusters in an alternating pattern: two dots, then one dot, then two dots again. Finish by adding one small dash between cluster groups to keep the spacing even.
AvoidAvoid thick border lines — they make the dots look squished and uneven.
9. Bow Tie Center Accent

A bow tie accent is a cute, photo-friendly trick for simple mehndi. It gives you a clear center shape that instantly makes the hand look styled. You keep everything else light, so the bow tie stands out. The design is also quick because it’s made of two mirrored loops and a small center knot. It’s ideal for festive evenings when you want something sweet and clean, not heavy coverage.
Pro tipMake the loops slightly wider at the outer edge so the bow tie looks balanced on the hand’s curves.
Draw two mirrored loops in the center of the back hand, like parentheses facing inward. Connect the loops with a small horizontal line, then add a tiny dot in the middle as the knot. Finish by placing three small dots above and two small dots below the bow tie in a slight arc.
AvoidDon’t over-size the bow tie — if it covers too much of the back hand, it looks crowded fast.
10. Leaf Ladder Down the Back
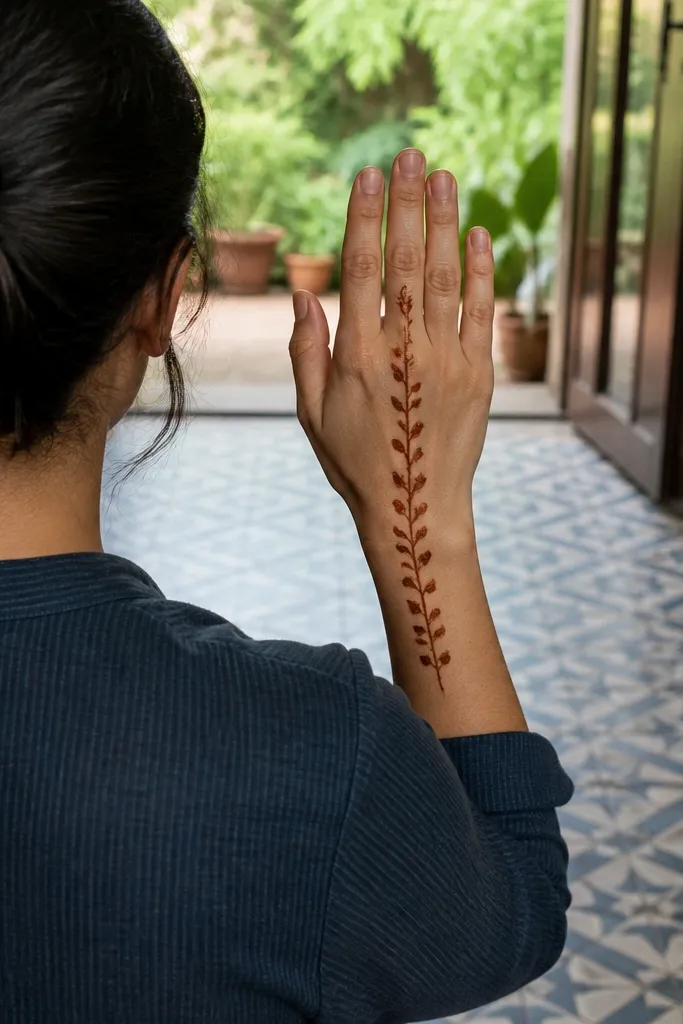
This design looks like a neat vine ladder, and that structure makes it look “done” even when it’s simple. You draw a vertical line down the back and hang small leaf shapes off it at regular intervals. The symmetry is what makes it look high-effort in a short time. It’s also forgiving for beginners because each leaf is a repeatable stamp shape. This works for everyday mehndi and holiday dinners where you want clean coverage without filling everything.
Pro tipUse a light hand for the vertical guideline so it fades into the design instead of standing out like a single thick stroke.
Start with a straight vertical line from wrist crease to mid-back hand. On both sides, add small leaf shapes alternating left-right along the line, each leaf about the same size and angled slightly outward. Connect the leaf bases with tiny dashes so the ladder looks cohesive.
AvoidAvoid uneven leaf heights — keep each leaf aligned to the same “rung” level.
11. Triangle Frame with Dot Corners
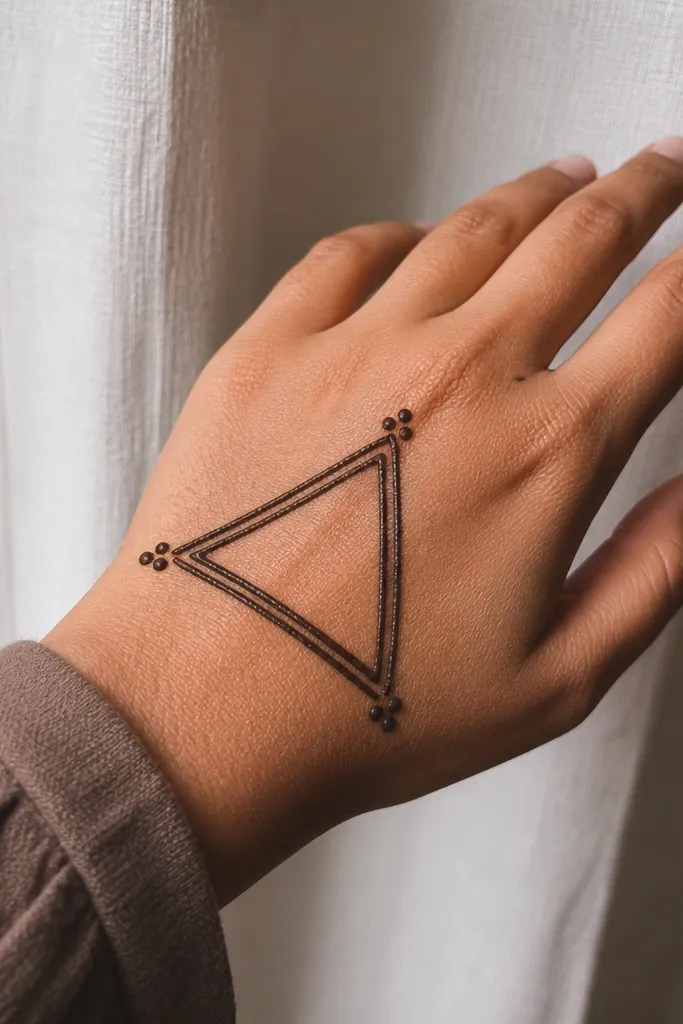
Triangle frames are one of the cleanest ways to make simple mehndi look modern and sharp. You get a clear geometric border that makes the hand look styled and organized. Dot corners add a traditional touch without extra drawing time. This design also hides small mistakes because geometric lines pull everything into a shape. It suits quick holiday styling when you want something photogenic and not too delicate.
Draw an inverted triangle outline on the back hand, starting near the wrist and ending near the finger arches. Add a smaller triangle inside the first one by tracing a lighter outline about 1/4 inch inward. Place one dot at each triangle corner and one dot at the center between the two triangles.
Press the cone slightly lighter on the inner triangle so it looks like a delicate second layer.
Don’t make the triangles too close together — tight spacing turns into a dark block.
12. Ring Line Around Knuckles
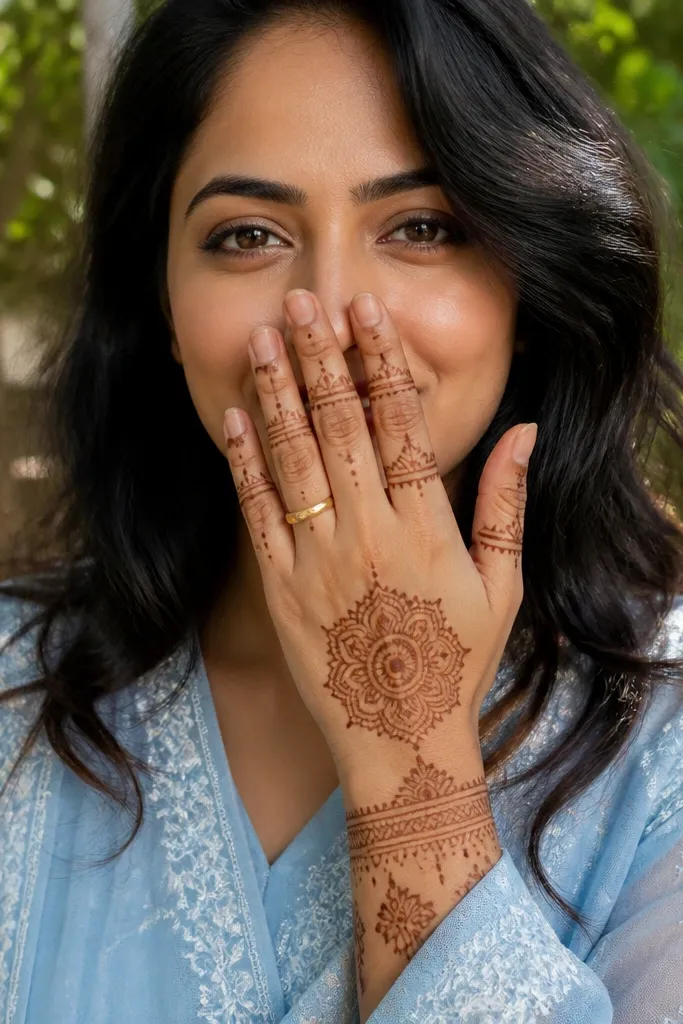
A knuckle ring line gives instant polish because it frames the fingers without covering the whole hand. Keep it thin and add tiny separators so it looks like jewelry. This is fast because you draw one continuous arc and mark small breaks at each finger base. In photos, it reads clearly even if other parts are minimal. It’s a great option when you want back-hand mehndi that looks neat for both casual and formal outfits.
Start at the outer edge near the little finger base and draw a thin arc across the knuckles toward the index finger base. Add small vertical ticks along the arc where each finger meets the hand, using one tick per finger. Finish by adding a tiny dot at the center of the arc to anchor the design.
Check symmetry by holding the hand palm-down and looking straight at the knuckle arc before you add the last ticks.
Avoid thick lines around the knuckles — they look heavy and can blur when the mehndi stains.
13. Two-Column Vertical Vine
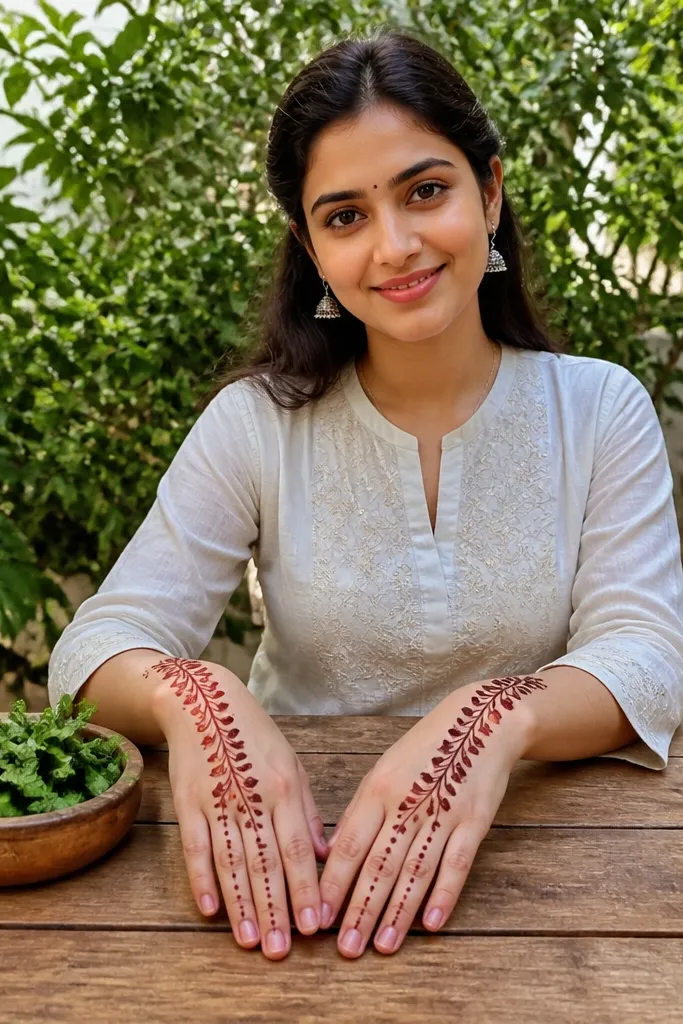
Two-column vine designs look full without being complicated because you repeat the same vine unit twice. You place one vine on each side of the center and keep the middle open. That open middle is what makes it look airy and clean. The vine unit is simple: a line with small leaf dashes and a few dots. It’s a strong choice for 5-minute mehndi because you can stop after one vine pass and still look styled.
Draw a faint center line down the back of the hand. On both sides, create two vertical vine lines about 1/2 inch apart, each with small leaf dashes alternating left-right along it. Add a few dots between the vines at the top and bottom so the spacing looks intentional.
Keep the leaf dashes short. Long dashes turn into scribbles when paste spreads during drying.
Don’t fill the center — leave it open so the design stays photo-clean.
14. Herringbone Side Panel
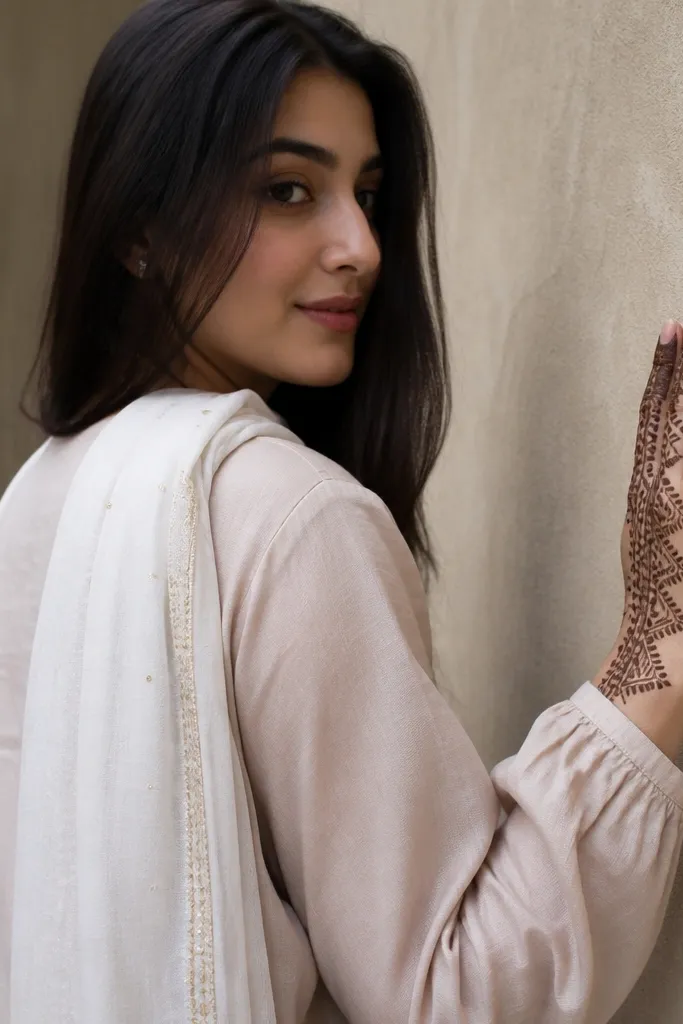
Herringbone looks fancy but it’s built from a repeating stroke you can crank out quickly. You place it along one side panel of the back hand so it looks like a decorative sleeve. The pattern also looks good when the mehndi stain is uneven because the repeating angles create texture. This is a great choice if you want something aesthetic and slightly modern for holidays. It also pairs well with a minimal center line if you want extra framing.
Pro tipUse consistent diagonal angles. If your angles drift, the pattern stops reading as herringbone.
Draw a light border line along the outer edge of the back hand from wrist up to near the ring finger base. Inside that border, draw short diagonal strokes that meet in a zigzag, like a fabric herringbone. Repeat the zigzag pattern for about 3 to 4 rows, then add two tiny dots at the top corner to finish.
AvoidAvoid going too wide — herringbone needs a narrow panel to look clean.
15. Half-Moon Finger Tips
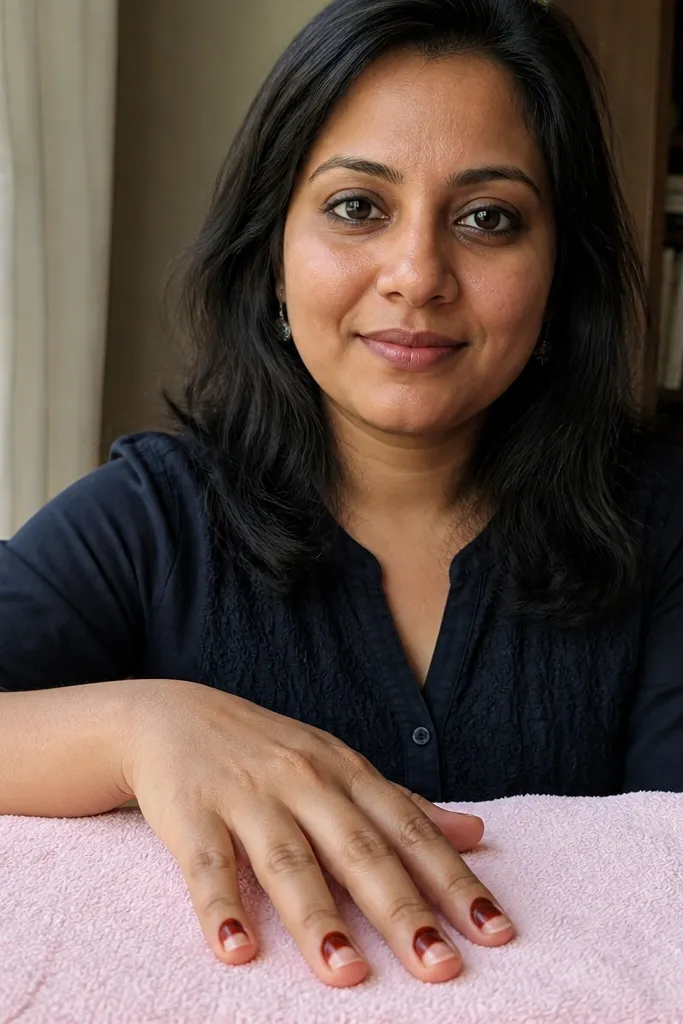
Half-moon finger tips give a delicate, coordinated look without needing finger-by-finger heavy work. You focus on the bases of the fingers and create a soft crescent pattern that frames the nail area. It’s quick because each crescent is the same shape repeated with small spacing. In photos, the crescents read clearly and give a “mehndi set” vibe even when the rest is minimal. It suits festive days where you want neat detail but not full coverage.
Start by drawing a thin crescent at the base of the index finger, open toward the center of the hand. Repeat the same crescent at the base of the middle finger and ring finger, keeping each about the same size. Finish by connecting the three crescents with a thin curved line that hugs the finger arch.
Make the crescents slightly thicker on the outer edge so they stain darker and look crisp.
Don’t overlap crescents — they should sit separate for that airy crescent look.
16. Dot Cluster Ladder
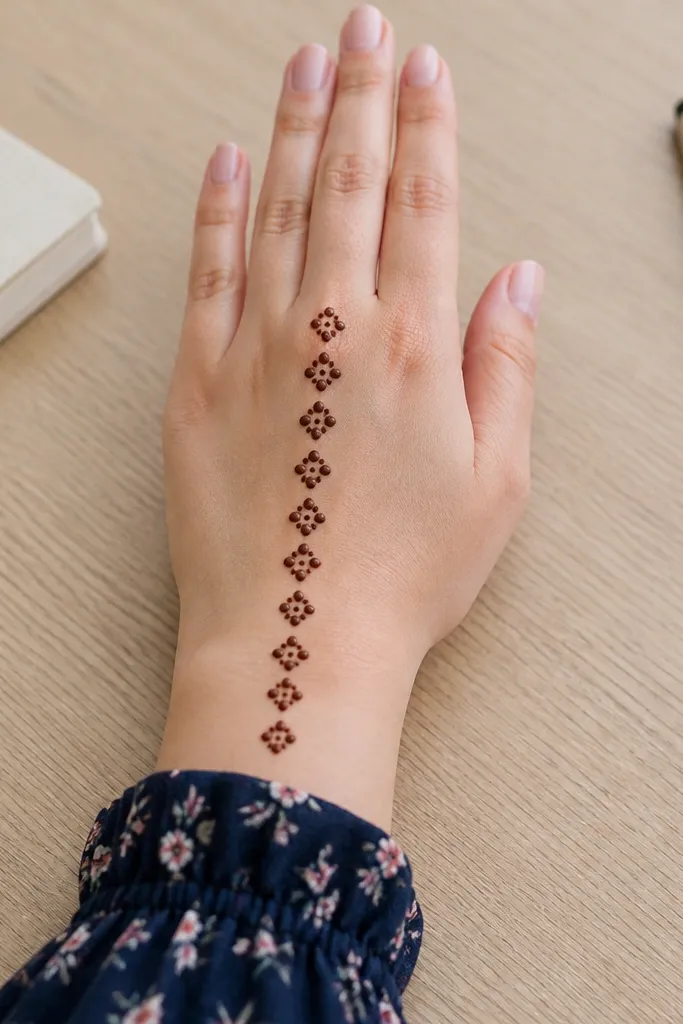
Dot cluster ladders are the easiest way to look intentional when you’re short on time. You build a vertical line of clusters rather than scattered dots, so the design has a rhythm and clear placement. The clusters add texture and make the mehndi look richer even if you only use outlines. It’s photogenic because the dots create a speckled effect that shows well when the stain darkens. Great for quick holiday prep when you want something neat but light.
Pro tipIf your dots smear, stop squeezing for a second between clusters to let the cone line break cleanly.
Draw a straight vertical guideline down the center of the back hand. At four or five points along the line, place a cluster of 4 dots forming a small square or diamond. Add a tiny curved dash between the clusters to connect them visually.
AvoidAvoid single loose dots — clusters look styled, singles look accidental.
17. Side Swirl with Micro Dots
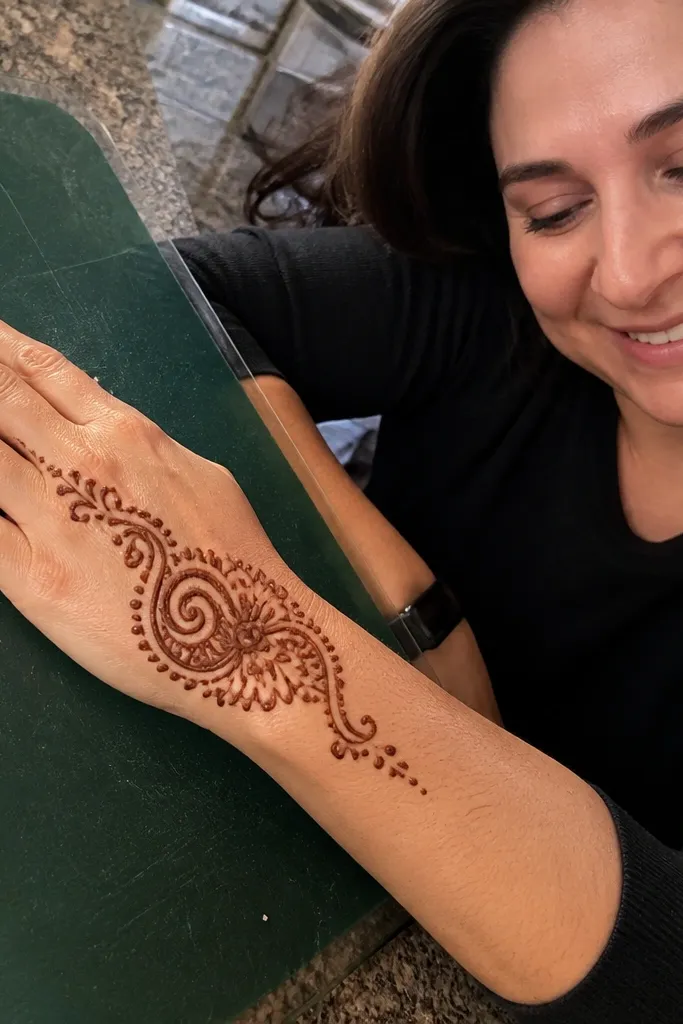
A side swirl is a clean, elegant-looking anchor motif that you can finish quickly. You draw one main swirl on the side of the back hand, then surround it with micro dots and small hook marks. It looks artistic because the swirl has movement, and the dot ring adds a delicate finish. This works especially well on back hands where you don’t want to cover the whole area. It’s a solid choice for holiday dinners, especially if you’re pairing with bangles or a ring-heavy look.
Start the swirl near the wrist on the outer side and curve it upward toward the ring finger base. Create the swirl using two tight loops so it stays compact and doesn’t spread. Then place tiny dots around the outer edge of the swirl and add two short hooks at the top to complete the composition.
Keep micro dots smaller than the swirl line. If dots are too big, the design feels bulky.
Avoid over-adding fillers. One swirl plus a small dot ring is enough.
18. Geometric Chevron Band
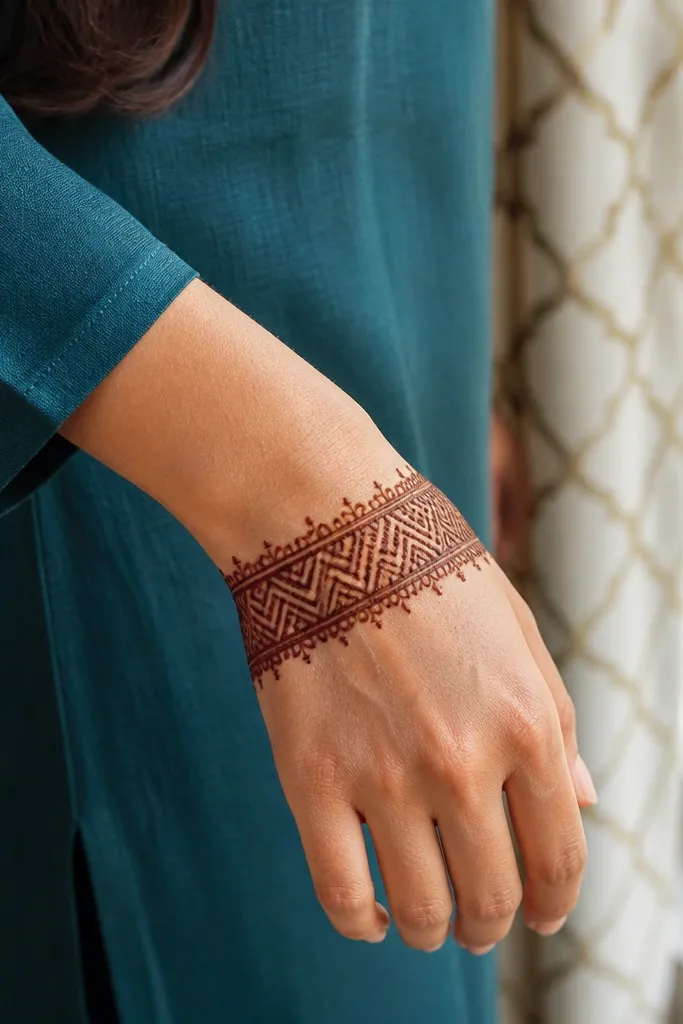
Chevron bands look crisp and festive because they read as geometric lace. You place the band across the upper back of the hand, then keep the rest minimal. It’s quick because the chevron pattern repeats and you only need a short section to look complete. In photos, the chevrons create strong contrast and make your hand look neatly styled. This is a great holiday option when you want something bold but still simple.
Pro tipUse a straight edge under the wrist or your phone screen as a guide to keep the band level.
Draw a horizontal band near the top of the back hand, just below the finger arches. Inside the band, draw chevrons by creating two angled lines meeting in a V, then repeat to form a chain of Vs. Finish by adding small dots at the V tips and one dot in the center of the band.
AvoidDon’t tilt the band — a slanted chevron line makes the whole design look rushed.
19. Petal Dot Center with Side Curves
This design gives you a flower-like center without doing a full rose. You draw a simple petal cluster in the middle, then balance it with two side curves and scattered dots. The center reads as a motif, and the side curves create a frame that makes the hand look fuller. It’s quick because the petal cluster is only 5 shapes and the rest is dot work. Photographs well because the center catches attention immediately.
Pro tipKeep the petals slightly overlapping. That overlap makes the center look darker as it stains.
Draw a small center dot, then add 5 teardrop petals around it in a loose circle. Extend two thin curved lines from the petal cluster downward toward the wrist, one on each side. Fill the spaces near the curves with tiny dots and stop when you have 3 dot clusters per side.
AvoidAvoid wide side curves — narrow curves look cleaner on the back hand.
20. Wrist to Knuckle Ladder Lines
Ladder line designs are a clean trick for making quick mehndi look structured. You draw a few vertical lines from wrist toward knuckles and add small cross marks so it looks like woven bands. The pattern looks good in both daylight and flash because the lines are distinct. It’s also fast because you only need 4 to 6 vertical strokes plus simple ticks. This works well for holidays when you want a neat, modern look that still feels traditional.
Pro tipSpace the vertical lines evenly before you start ticking across them.
Draw 4 vertical lines starting at the wrist crease area and ending around the base of the middle finger. Add small horizontal ticks across the lines at two heights so it looks like ladder rungs. Finish by adding a tiny dot at the top of each vertical line to anchor the ends.
AvoidDon’t make the ladder rungs too thick — thick ticks turn into blobs.
21. Single Starburst on Back Hand
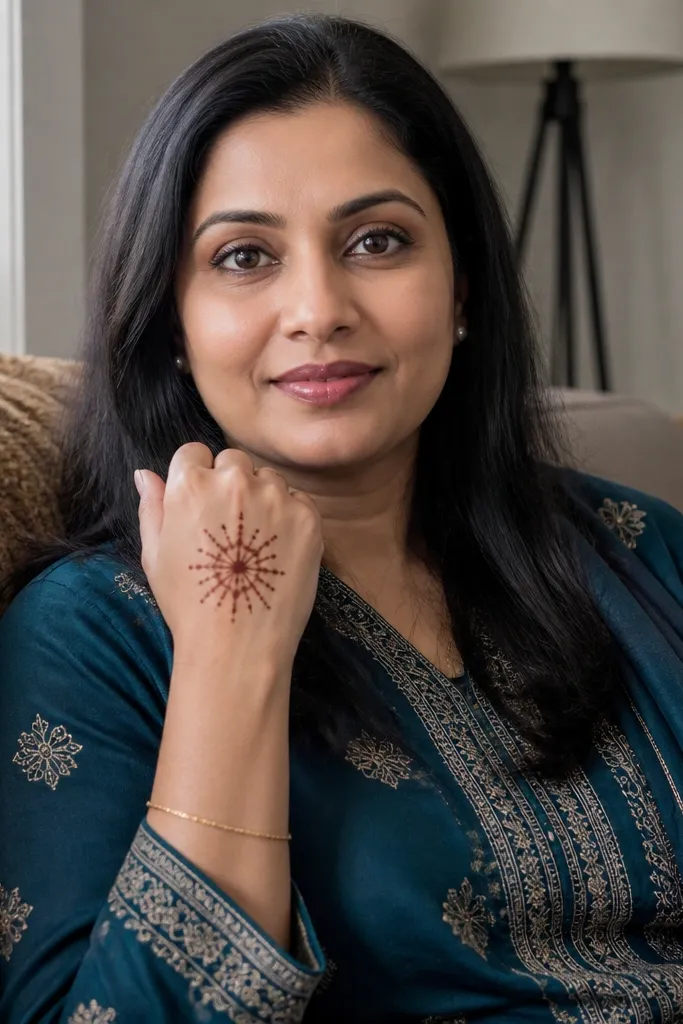
A single starburst is one of the fastest ways to make mehndi look festive without covering much area. You place it in the center back hand so it becomes the focal point for photos. The rays create a celebratory look, while the dot accents keep it delicate. It’s quick because you draw one starburst unit and stop. This suits holiday parties, date nights, and family events where you want something pretty and graphic.
Pro tipMake rays thin and slightly curved so they stain evenly and don’t look heavy.
Draw a small circle or center dot in the middle of the back hand. Add 8 rays around it, each ray a short curved line pointing outward like a little comet. Finish by placing one tiny dot at the end of every other ray and two dots close together under the starburst as a base.
AvoidAvoid too many rays. A messy starburst happens when you exceed 10 rays.
22. Mini Mandala Corner Frame
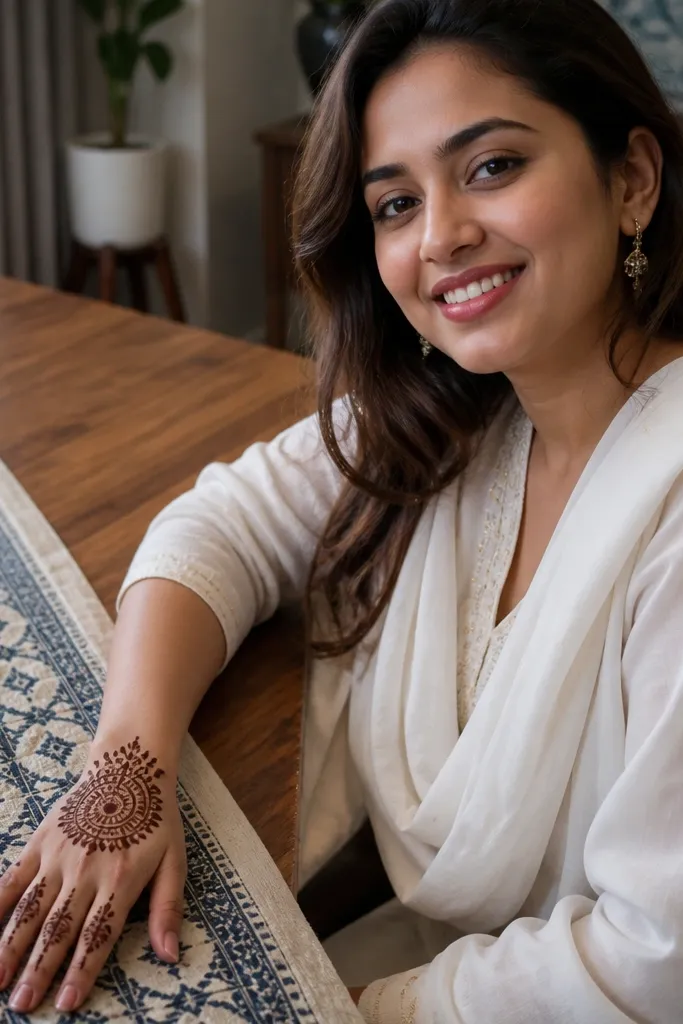
A mini mandala corner frame looks like you did a full pattern, but it’s actually a compact set of repeats. You draw a small circular motif near one corner, then add a few petals around it and dot the gaps. The corner placement makes it feel intentional and keeps the rest of the hand open. It’s photogenic because the circular motif gives contrast and structure, even when the design is simple. Great for holiday dinners when you want one standout element.
Pro tipKeep the mandala diameter under 1.5 inches so it doesn’t feel like it overwhelms the hand.
Place a small center dot near the outer edge of the back hand around the ring finger base. Draw a circle of 6 rounded petals around it, then add a second outer ring of 6 smaller dots. Finish by drawing two short curved lines from the mandala toward the wrist, and add three tiny dots along each curve.
AvoidAvoid filling the entire circle with lines. Keep the petal gaps open for a clean stain.
23. Two Swirls with Central Dot Bridge
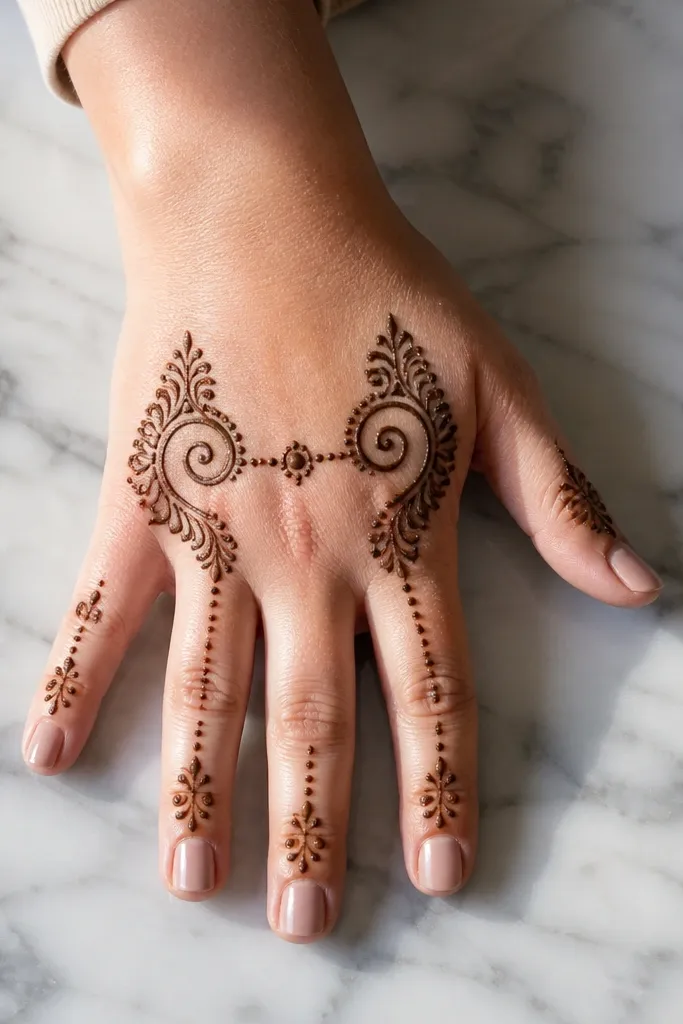
This one gives symmetry without needing a lot of detail. Two mirrored swirls frame the hand, and a central dot bridge ties them together so it looks like one design. The swirls add movement and make the paste look more artistic than plain lines. It’s quick because you repeat the same swirl shape twice, then add minimal dots. It’s perfect for holiday wear when you want something pretty that doesn’t require full back-hand coverage.
Pro tipIf your swirls wobble, outline them slowly first, then retrace only the outer edge once.
Draw a center vertical line lightly and place a dot at the midpoint. On both sides of the dot, draw a compact swirl that curves outward and back in, keeping the top ends near the base of the ring finger. Connect the swirls with a short curved line made of 3 to 4 dots, then add one small hook at the bottom of each swirl near the wrist.
AvoidDon’t make both swirls too large. Big swirls push into the finger area and take longer to fix.
24. Parallel Lines with Leaf Hooks
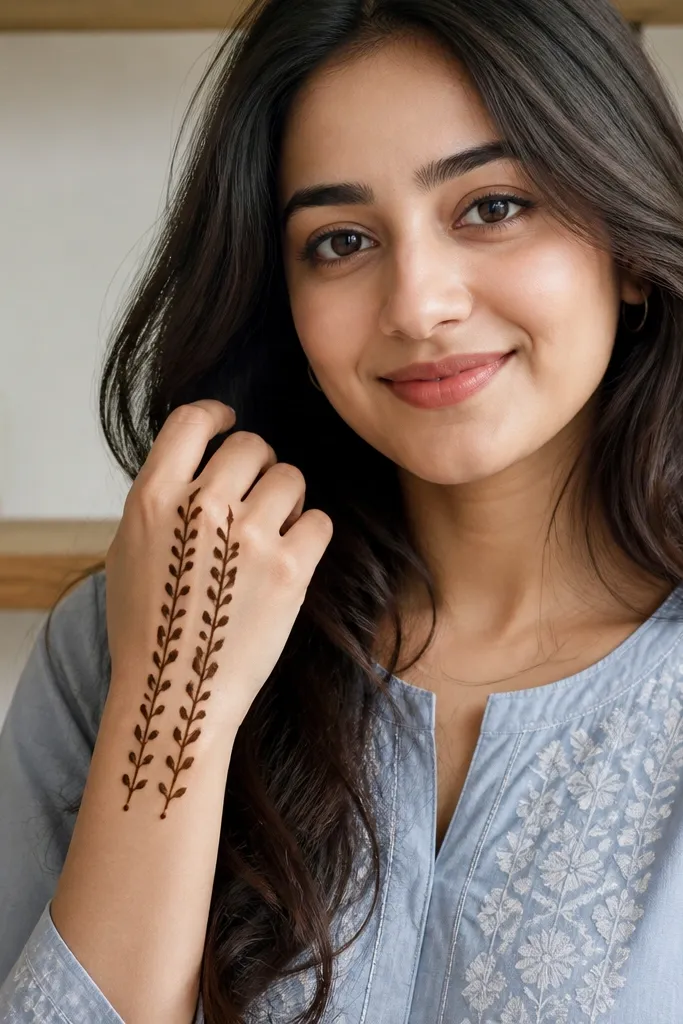
Parallel lines look clean and styled, especially when you add leaf hooks as the only filler. You get a modern, graphic look that still feels mehndi because of the leaf shape. It’s photogenic because the lines create strong structure, and the leaf hooks add a traditional texture. It’s fast too: draw two straight-ish lines, then repeat leaf hooks between them. This is a great holiday design when you want something that looks neat with bracelets and rings.
Draw two parallel vertical lines on the back hand, spaced about 1 inch apart, starting near the wrist and going to the base of the middle finger. Between the lines, add 5 to 7 leaf hooks alternating sides, each hook attached to one line and pointing toward the center. Finish by adding a tiny dot at the end of every third hook.
Keep the leaf hooks consistent by using the same cone tip angle each time.
Avoid crooked parallel lines. If the lines tilt, the whole design looks messy even if the leaves are perfect.
25. Scallop Edge Border with Dots
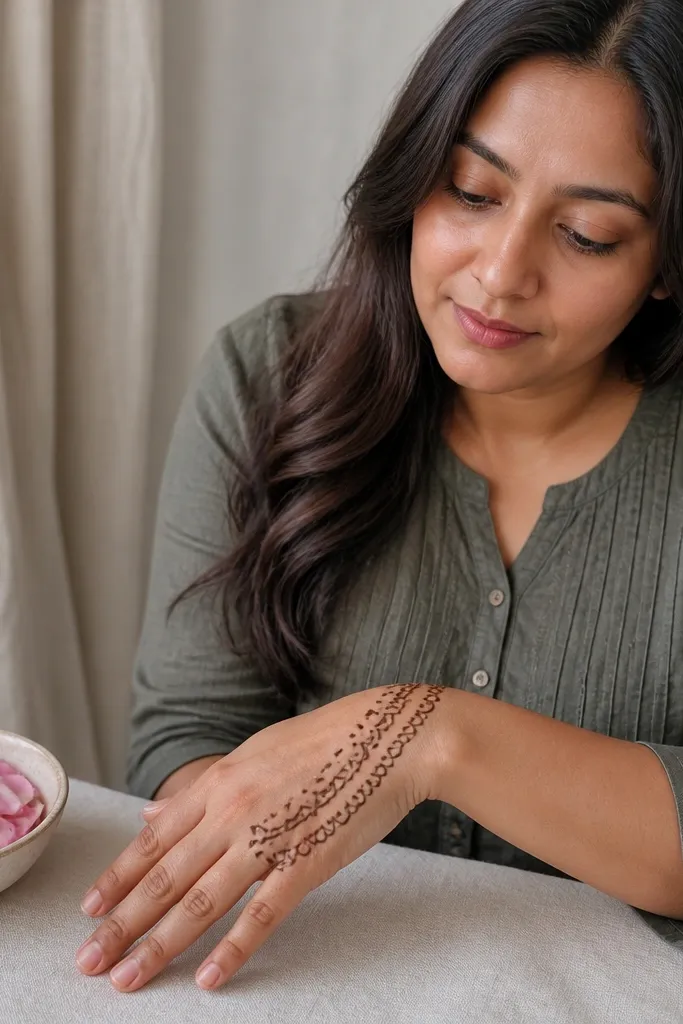
A scallop edge border is one of the prettiest ways to frame the back hand fast. The scallops create a lace-like outline, and dot filling inside makes it look complete without heavy paste. This design is easy to repeat because each scallop is just a small curved U shape. It photographs beautifully because scallops create clear texture and edges. It suits holiday looks when you want something clean, feminine, and not overly dense.
Pro tipIf scallops smear, pause between each U so the paste line breaks cleanly.
Draw a curved border line around the outer edge of the back hand, from wrist up toward the ring finger base. Add scallops by drawing small U shapes touching each other along the border, stopping after 10 to 14 scallops. Fill the space inside the scallop area with tiny dots in 3 lines that follow the curve.
AvoidDon’t fill the scallop inside too much. Too many dots make it look like a solid patch.



